

Page 1
CORRIDOR® 5620
COMPACT BAR
bdiusa.com
customerservice@bdiusa.com
Product Registration
Registering your new BDI product allows us to send you important
product updates, service information and helpful hints related to your
BDI products. Register today, and you will be entered to win free a
BINK table from BDI: www.bdiusa.com/register
Placement and Maintenance
Corridor® furniture is designed for indoor use on level floors. Clean
glass with glass cleaner, and steel parts and wood veneer with a
moist cloth.
®
Your Corridor
furniture is engineered for easy assembly. Carefully
follow this procedure to prevent any damage.
Do not use power tools for assembly of this product.
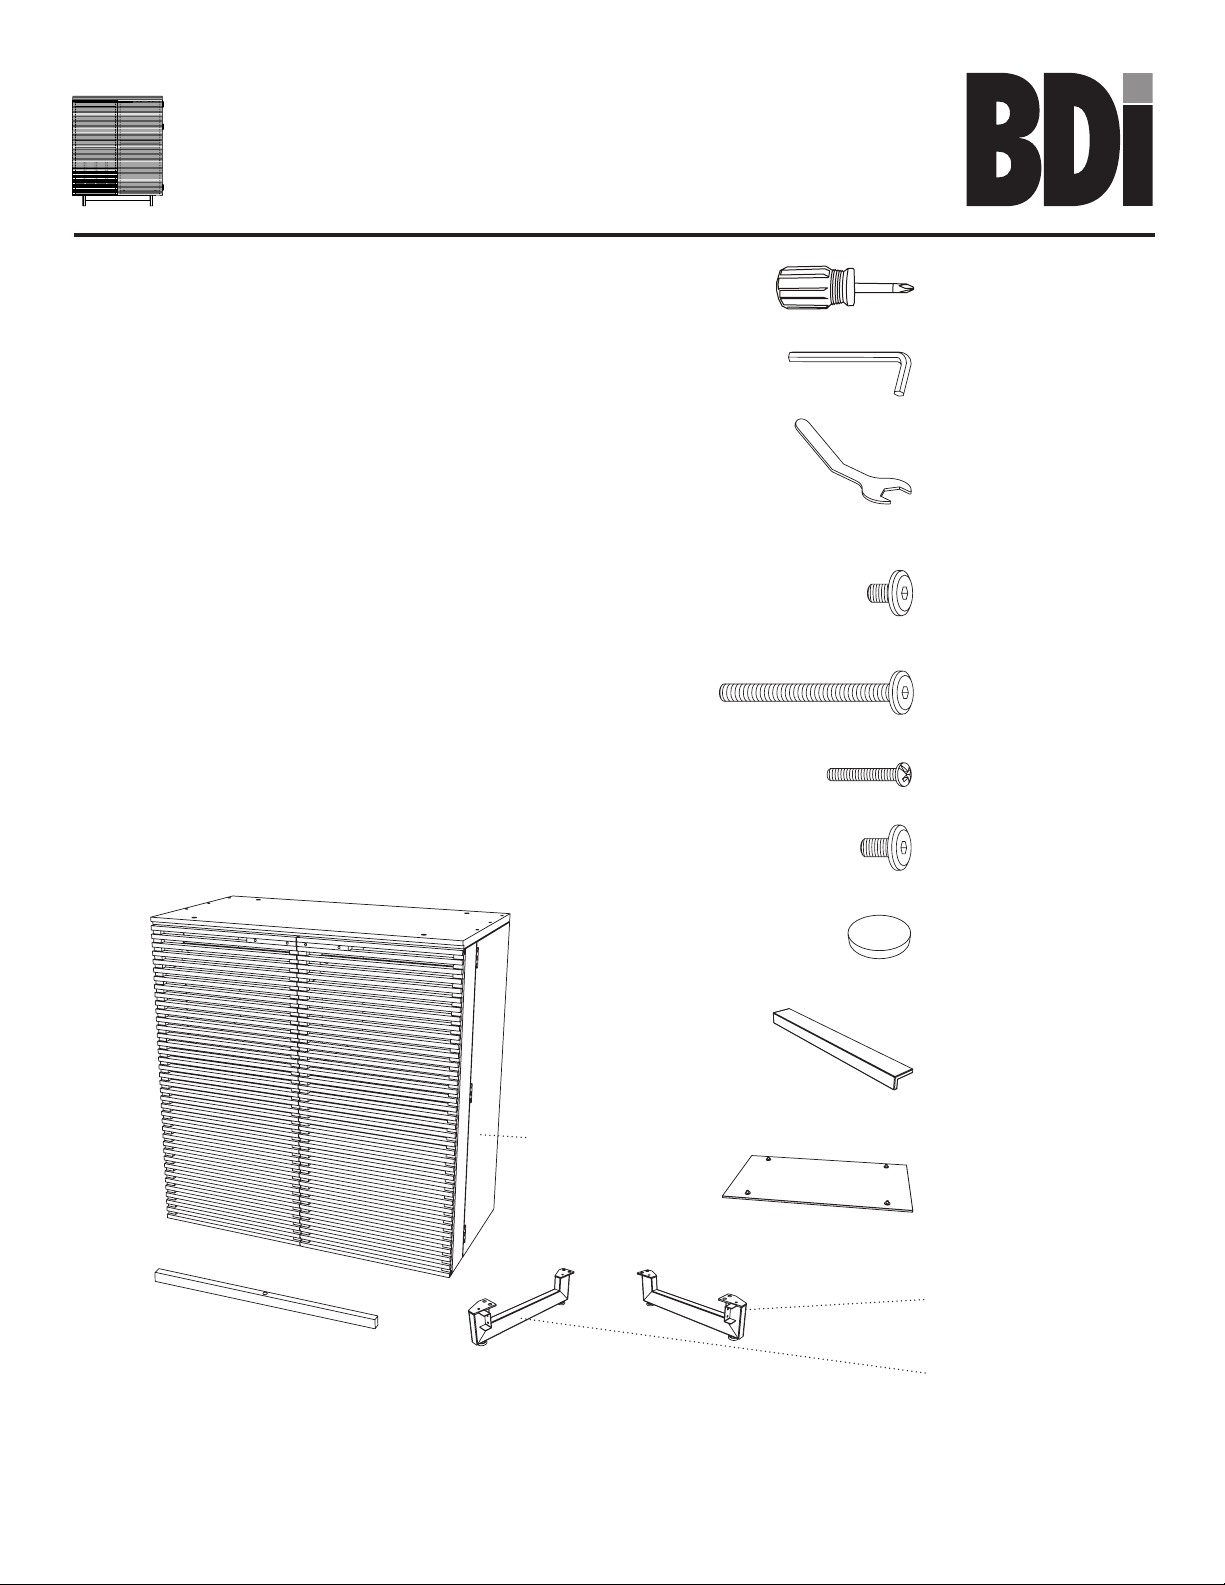
Step 1
Unpack and identify the parts listed below. The assembly
workspace should be a non-marring surface such as carpet. For
missing hardware pieces, please contact BDI Customer Service at
customerservice@bdiusa.com. For all other concerns, please contact
your BDI retailer.
T1 Phillips Screwdriver x 1
T2 Hex Wrench
T3 Leveler Wrench
H1 1/4-20 x 15 mm
Screw x 12
H2 1/4-20 x 60 mm
Screw x 1
H3 M4 x 25 mm
Screw x 4
H4 M6 Screw (Silver)
x 4
A1 - Cabinet
C3 Cross Bar x 1
Designed by Matthew Weatherly.
These distinctive product configurations are protected by US and international patents, trade dress, and/or
copyright laws. Corridor & BDI are trademarks of Becker Designed, Inc. All rights reserved. ©2016, BDI
Made in China. 11.12.2019 V6
H5 Rubber Bumper x 1
H6 Door Pull
C4 Glass Top
C1 Metal Leg, Right
C2 Metal Leg, Left
Page 2
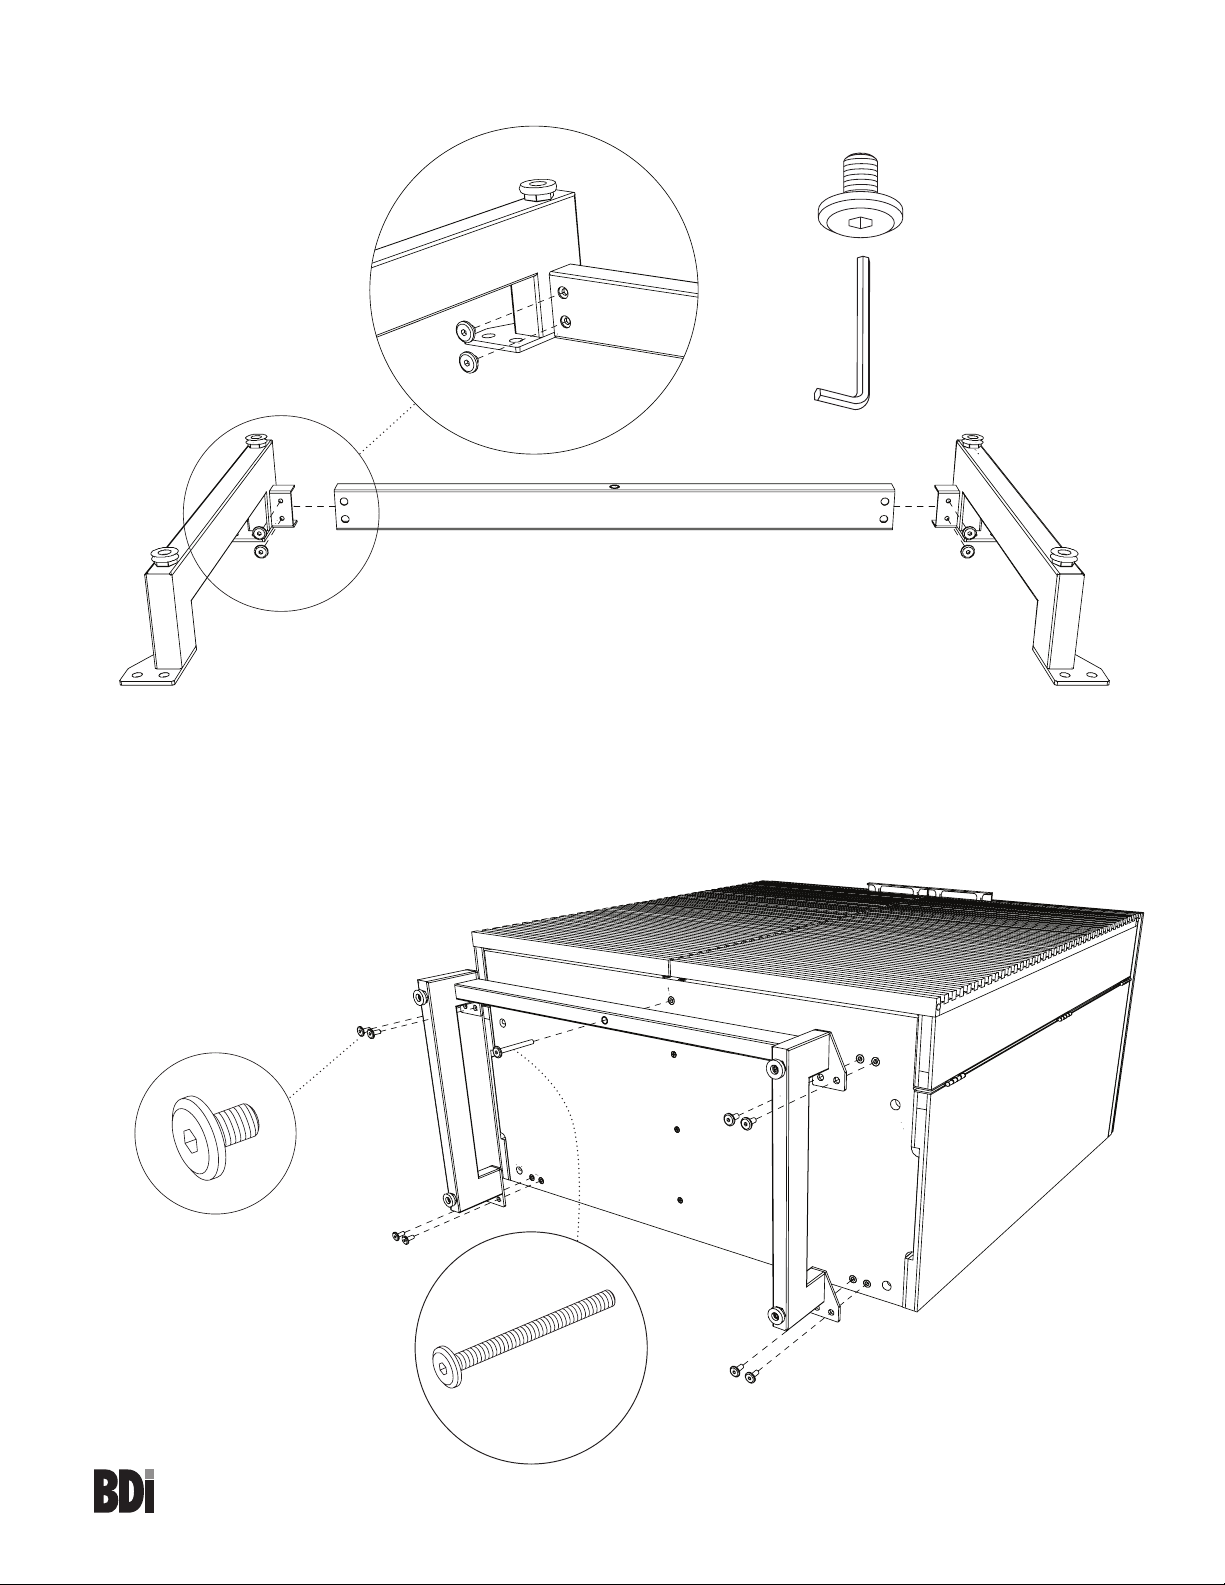
Step 2 - Slide tab of metal legs C1 & C2 into crossbar C3 and attach with screws H1 and tighten with hex
wrench T2.
H1 x 4
T2 Hex Wrench
H1 x 2
C3
H1 x 2
C2 C1
Step 3 - Using 8 screws H1 and 1 screw H2, attach base assembly to Cabinet A1 with Hex Wrench T2.
Start all screws before fully tightening all screws.
H1
H1 x 8
H1
H2 x 1
H1
2
CORRIDOR 5620
COMPACT BAR
customerservice@bdiusa.com
bdiusa.com
Page 3

Step 4 - With help from another person, carefully position Cabinet upright and install door pulls H6 using
screws H3 and Phillips Screwdriver T1. Adhere Rubber Bumper H5 to center of the top of Cabinet A1.
2 Person Ta sk
H5 x 1
A1
H6
I
I
H6 x 2
H3 x 4
T1 Phillips Screwdriver
Step 5 - Attach Glass Top C4 to Cabinet A1 using Screw H4 (silver) and Hex Wrench T1.
Do not overtighten.
C4
A1
H4
H4
H4
H4 x 4
(Silver)
3
CORRIDOR 5620
COMPACT BAR
customerservice@bdiusa.com
bdiusa.com
Page 4

Step 6 - Adjustable Shelf / Levelers
The shelf pins located inside the right compartment may be repositioned using Screwdriver T1, allowing
you to raise or lower the Adjustable Shelf to the desired level.
Dial out
*Note: Once the unit is completely assembled and in its final position, adjust
the levelers using Leveler Wrench T3. To hold the doors in an open position,
partially extend the two (2) front levelers. This action will tilt the cabinet
back slightly, preventing the open doors from swinging towards their closed
position.
4
CORRIDOR 5620
COMPACT BAR
T3 Hex wrench
bdiusa.com
customerservice@bdiusa.com
Page 5

Step 7 - Adjusting the Door Gaps
With both doors closed, check to see if the top corners of the doors align. If not, dial out the corresponding front leveler under the door that is sagging.
Example:
If the door on the right is low, dial out the right front leveler to raise the door back into alignment with the
left door.
To move the right door up, dial
the front, right leveler out.
To move the left door up, dial the
left, front leveler out.
Dial out
 Loading...