

Page 1
M a r i n a
2201 a n d 2223
a s s e m b l y i n s t r u c t i o n s
2223
2201
b d i u s a .c o m c u s t o m e r s e r v i c e @b d i u s a .c o m
Component List
A - Leg x 2
(Left and Right)
B - Bracket x 4
C - Mounting Screw x 16
D - Stretchers x 2
E - Levelers x 4
F - Rubber Bumper
Inserts x 4
Your Marina Furniture is engineered for easy assembly. Carefully follow
this procedure to prevent any damage.
NOTE: This instruction sheet is intended for the 2201 and 2223 of the
Marina Table collection; model 2201 is shown for illustration.
Placement and Maintenance
Marina Furniture is designed for indoor use on level floors. Clean glass
with glass cleaner, and steel parts and wood veneer with a moist cloth.
Step 1
Unpack and identify the parts listed. The assembly workspace should be a
non-marring surface such as carpet. For missing hardware pieces please
contact BDI Customer Service at customerservice@bdiusa.com. For all
other concerns, please contact your BDI Retailer.
Step 2
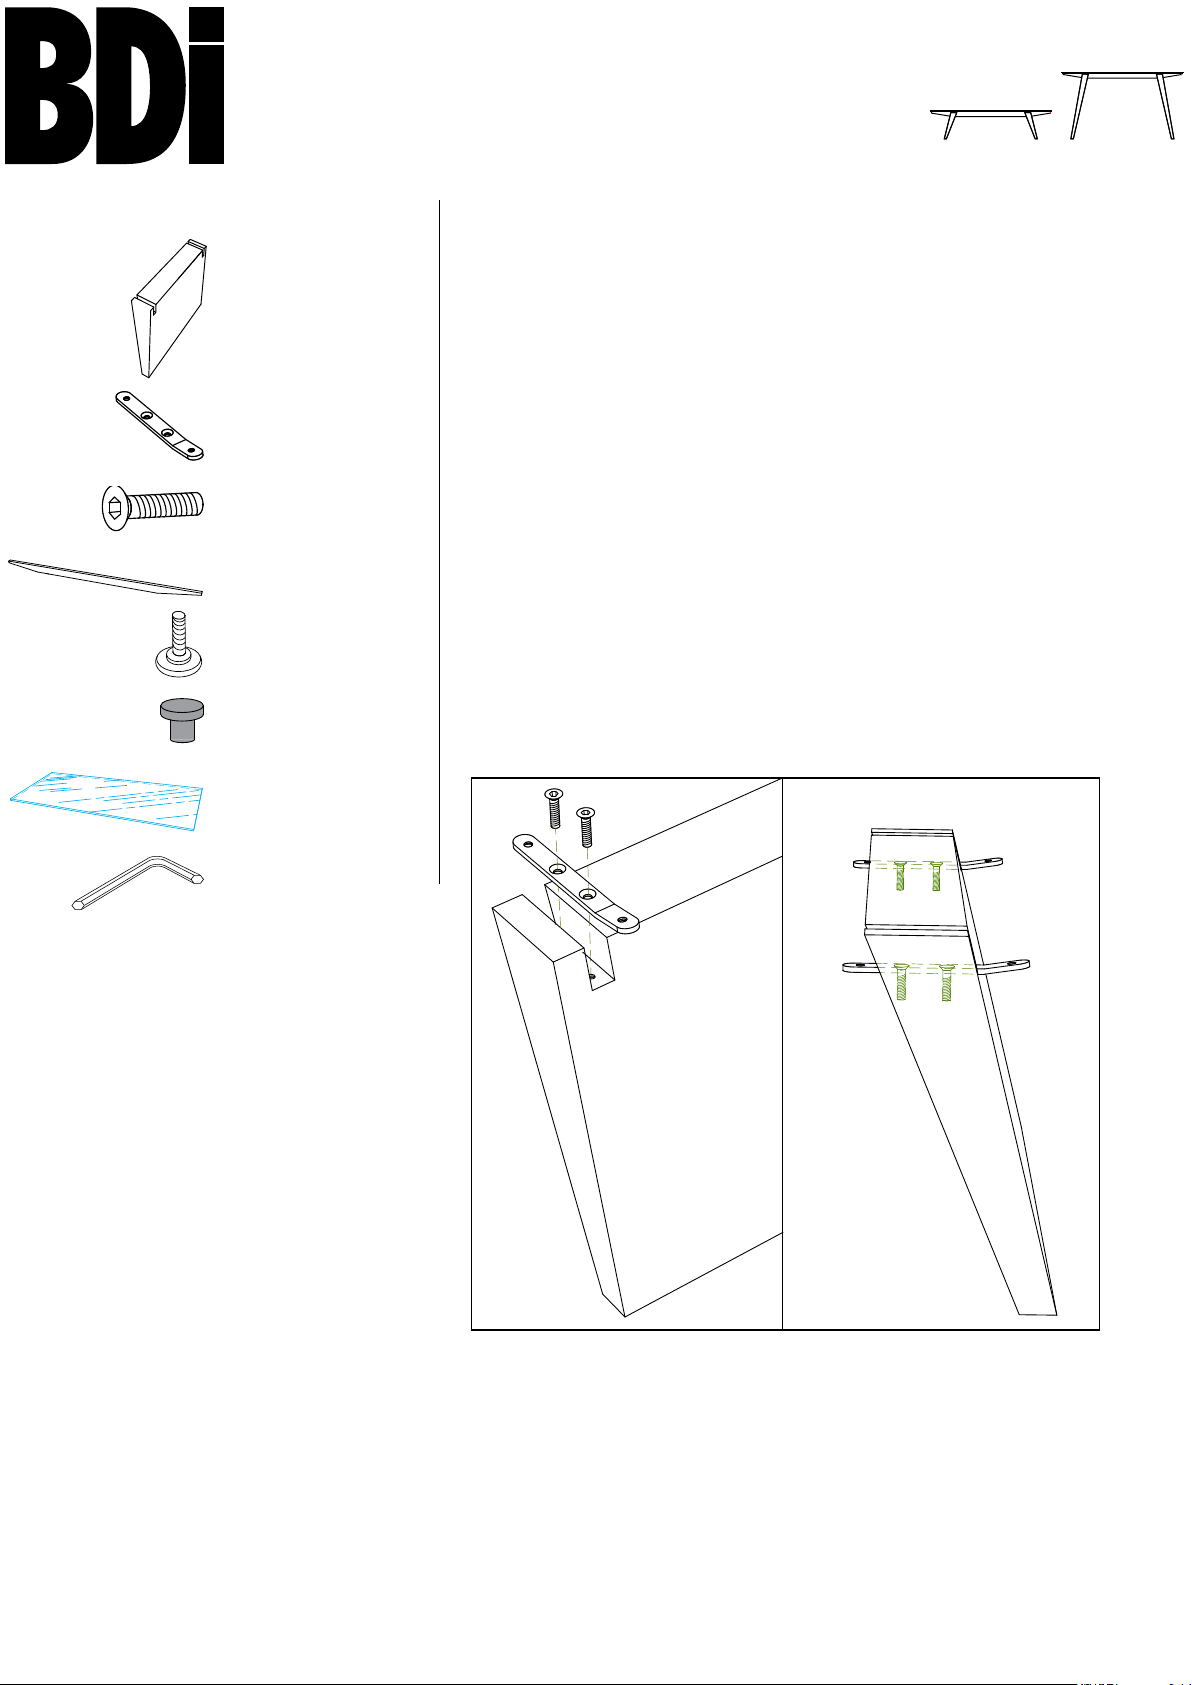
Attach brackets to legs.
Using the Medium Hex Wrench, fasten the Brackets (B) to Leg (A) with
the Mounting Screw (C). Assure correct orientation of bracket.
G - Glass top x 1
Medium Hex Wrench x 1
C x 8
B
B x 4
B
Correct orientation of
bracket and leg.
A x 2
Designed by Cristian Wicha.
‘Marina’ is a trademark of Becker Designed, Inc.
All rights reserved. ©2009 Becker Designed, Inc.
Made in China. 22012223REV102609v3
1
Page 2
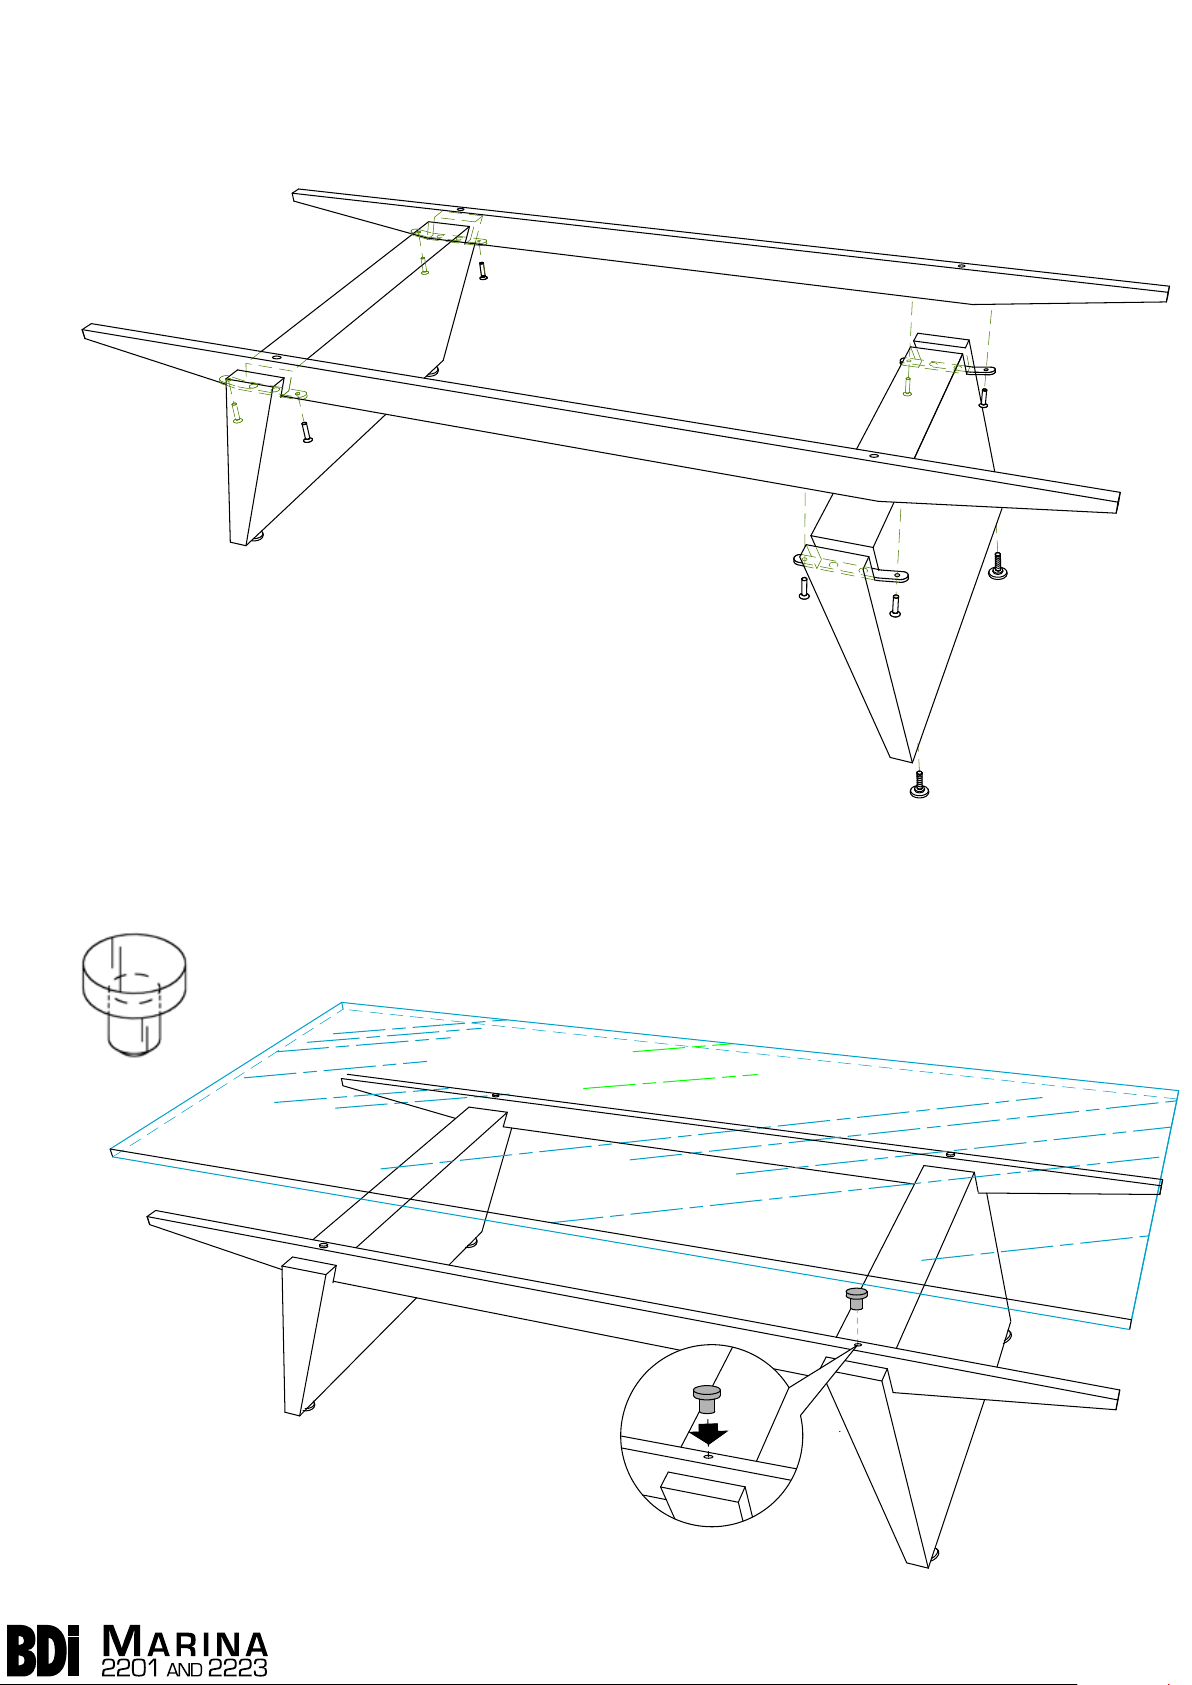
Step 3
Attach Legs to Stretchers.
Using the Medium Hex Wrench, fasten the Legs (A) to the Stretchers
(D) with the Mounting Screw (C). Install Levelers (E) to the bottom of
the Legs (A).
A
D
C x 8
Step 4
Install Rubber Bumper Inserts and Glass Top.
Install Rubber Bumpers (E) to the four holes located in the Stretchers
(D) and then position Glass Top (F).
E x 4
E x 4
E
E
2
a s s e m b l y i n s t r u c t i o n s
b d i u s a .c o m c u s t o m e r s e r v i c e @b d i u s a .c o m
D
Page 3

M a r i n a
2210
a s s e m b l y i n s t r u c t i o n s
b d i u s a .c o m c u s t o m e r s e r v i c e @b d i u s a .c o m
Component List
A - Glass Top x 1
B - Reversible Legs
x 4
C - Shelf x 1
D - Stem Bumper x 4
E - Leveler x 4
F - Stud x 4
G - Nut x 4
Your Marina Furniture is engineered for easy assembly. Carefully follow
this procedure to prevent any damage.
Placement and Maintenance
Marina Furniture is designed for indoor use on level floors. Clean glass with
glass cleaner, and steel parts and wood veneer with a moist cloth.
Step 1
Unpack and identify the parts listed. The assembly workspace should be a
non-marring surface such as carpet. For missing hardware pieces please
contact BDI Customer Service at customerservice@bdiusa.com. For all
other concerns, please contact your BDI Retailer.
Step 2
The Marina End Table can be assembled with either a HIGHER or LOWER
shelf location. Determine which orientation you prefer before completing
remaining steps.
H - Crescent Plate x 4
I - Wrench x 1
G
H
Step 3
Thread one (1) Stud (F) into each Leg (B) at notch in leg and finger-tighten.
Step 4
Fasten each properly-oriented Leg to the
Shelf by inserting the Stud with gentle force
D x 4
into each Shelf corner; then install one (1)
Crescent Plate (H) on inserted end of Stud
(F) with one (1) Nut (G).
NOTE: Round surface of Crescent Plate must
mate flush with curved cut-out area within
shelf.
F
B x 4
Tighten each Nut (G) with supplied Wrench
(I).
Step 5
Invert Leg (B) & Shelf (C) assembly so that
the bottom of each Leg (B) is facing UP; then
thread one (1) Leveler (E) into the bottom of
each Leg.
Step 6
Invert assembly again and insert one (1)
Stem Bumper (D) into the top of each Leg.
E x 4
Designed by Cristian Wicha.
‘Marina’ is a trademark of Becker Designed, Inc.
All rights reserved. ©2009 Becker Designed, Inc.
Made in China. 2210REV102609v2
Step 7
Carefully center and rest Glass Top (A) on
Stem Bumper (D) to complete assembly.
1
a s s e m b l y i n s t r u c t i o n s
b d i u s a .c o m c u s t o m e r s e r v i c e @b d i u s a .c o m
 Loading...