

Page 1
SEMBLANCE
MODULAR SYSTEM
COMPONENT
ASSEMBLY
INSTRUCTIONS
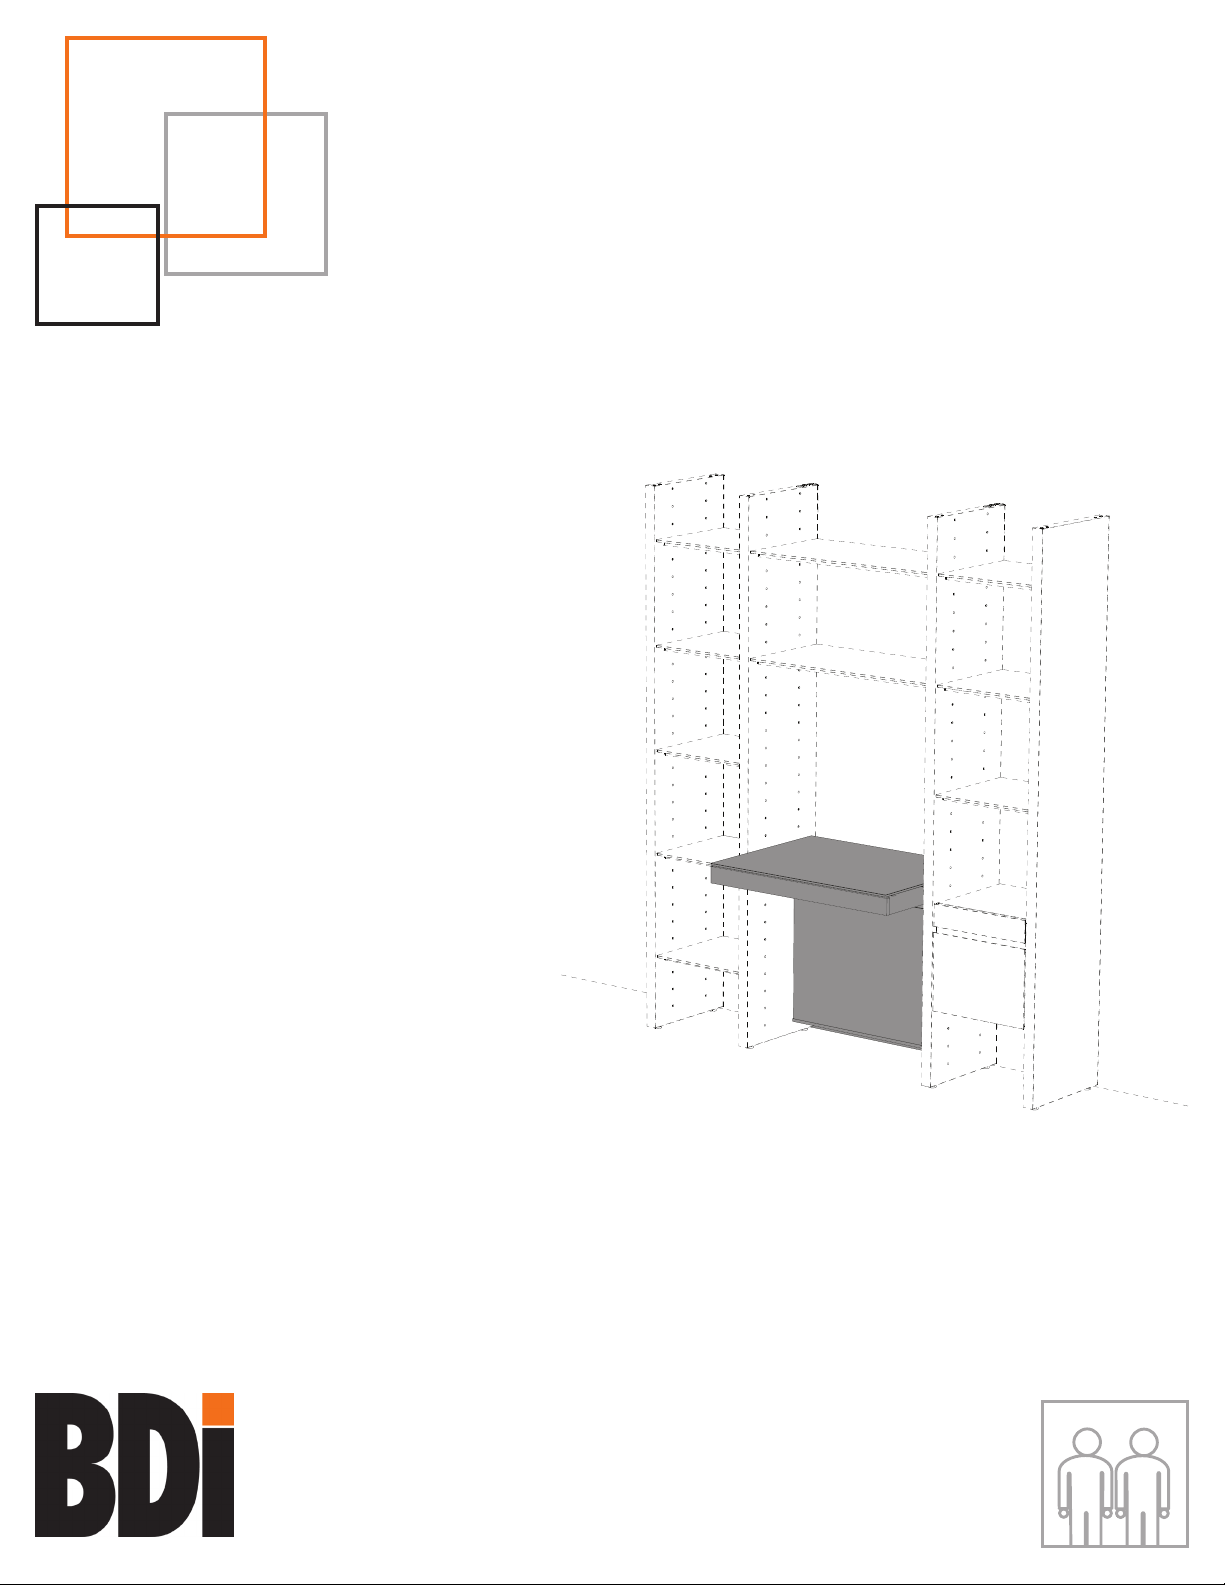
INLINE DESK
15040
TWO PERSON ASSEMBLYBDIUSA.COM
Page 2
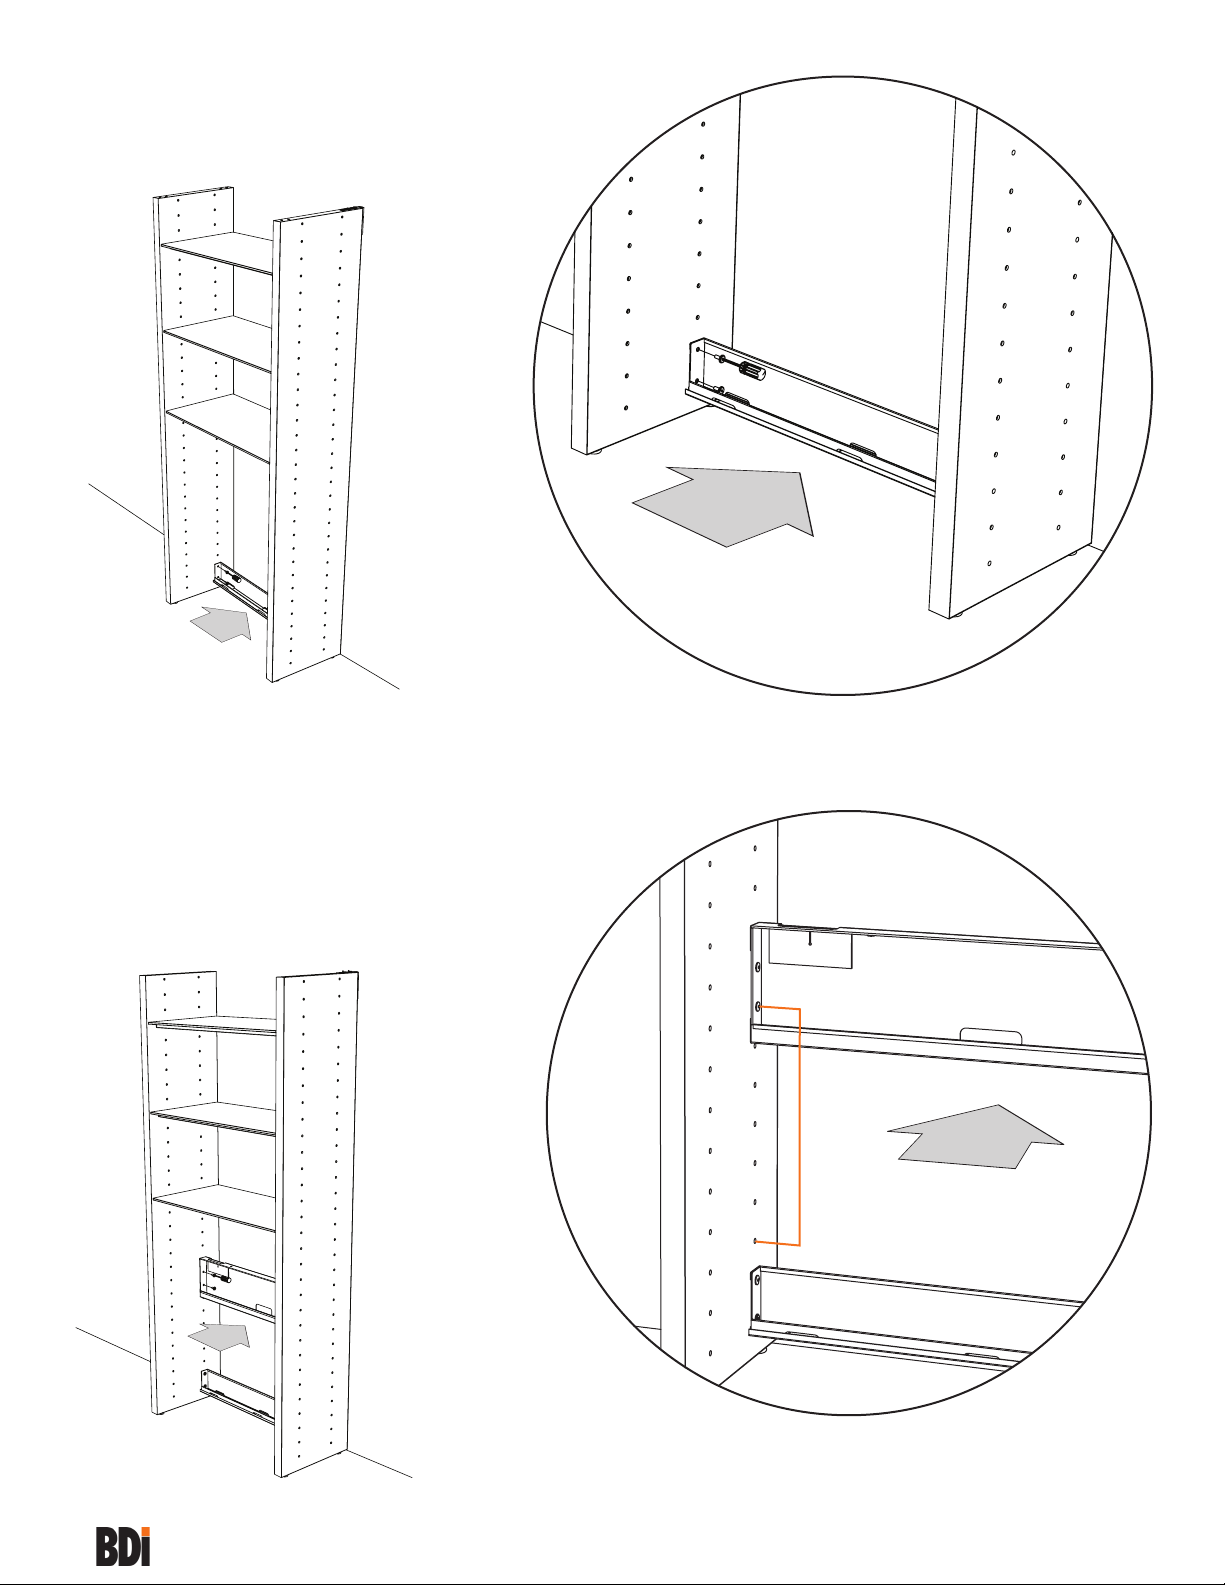
1:
Tighten Screws (E) just enough to hold the
Lower Beam (N) in place.
E
2:
Tighten Upper Beam (M) into position
with Screws (E), and finish tightening the
Lower Beam (N).
E
M
7 inserts
N
2
Page 3

3:
Partially install a Screw (E) on both Panels
aligned with the top hole of the Upper
Beam (M).
PANEL
4:
Slide the Desk Frame (R) in between the
panels and lower it into place, hooking
over the Upper Beam (M) and fitting the
front Screw (E) bodies into the slots of the
Desk Frame (R). Install the two Screws (E)
on top to secure the Desk Frame (R) to the
Upper Beam (M) and tighten the Screws
(E) underneath that fit into the slot of the
Desk Frame (R).
E
E
R
E
3
Page 4

5:
Insert the Glass (Q) at an angle and fit
glass pucks into designated holes on Desk
Frame (R).
Q
6:
FRONT
BACK
O
7:
Remove Adhesive Foam/Magnets from
the Upper Beam (M). Peel film from side
of the Adhesive Foam/Magnets and attach
to clean, dry back side of AC power strip
(not included). Cleaning of power strip
surface with rubbing alcohol will ensure
best adhesive bond. **UNPLUG POWER
STRIP FROM POWER SOURCE BEFORE
CLEANING**Attach AC power strip/surge
protector to inside of Upper Beam (M).
1.
3.
2.
* AC Power Strip Not Included
8:
Use the slot holes provided to run all
wires to and from the desk. Keep all wires
behind folded metal lip—failure to do so
will prevent Kick Panel (P) from attaching
properly. Once all of the electrical wires
are routed, install Kick Panel (P) as shown
below. The rear side of panel has magnets
that will hold the panel in place. Note:
The Inline Desk is designed to permit
placement in front of an electrical outlet
for easier wiring access.
4
P
 Loading...