

Page 1
ERAS
ASSEMBLY INSTRUCTIONS
1441 1446
BDIUSA.COM CUSTOMERSERVICE@BDIUSA.COM
Placement and Maintenance
ERAS tables are designed for indoor use on level floors. Clean wood veneer with a moist cloth.
Eras 1441 Coffee Table
Eras 1446 End Table
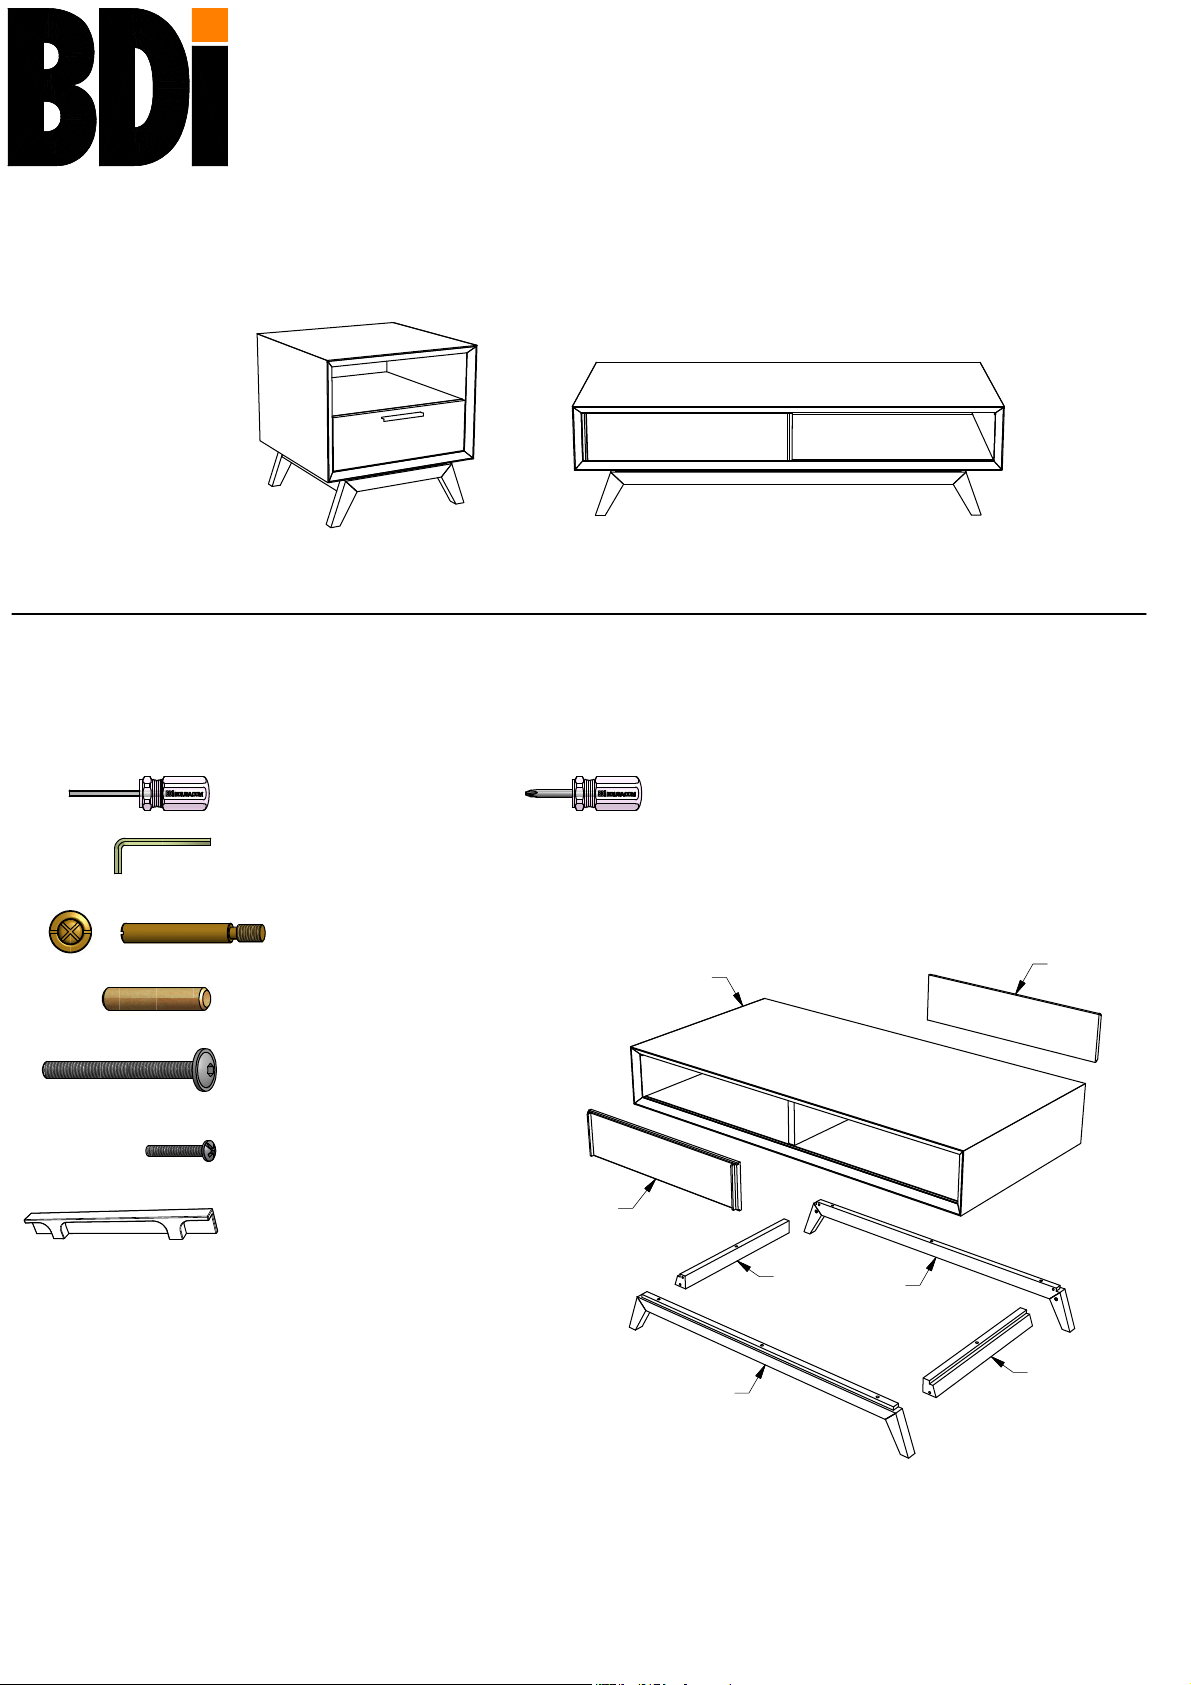
Component List
ERAS tables are engineered for easy assembly. Carefully follow this procedure to prevent any damage.
Unpack and identify the components. The assembl
For missing hardware pieces, please contact BDI Customer Service at customerservice@bdiusa.com.
For all other concerns, please contact your BDI Retailer.
y workspace should be a non-marri
ng surface such as clean carpet.
C1
C2
A - 4mm Hex Driver x 1
For Screws
B - 5mm Hex Wrench x 1
For Cam and Bolt
C1 - Cam and C2 - Cam Bolt x 4
D - 8 x 40mm Dowels x 4
E - 1/4-20 x 63mm Screws
1441 x 8
1446 x 6
F - M4 x 25mm Screws
1446 x 2
G - Handle
1446 x 1
H - Table x 1
I - Long Base Rails x 2
J - Short Base Rails x 2
K - Sliding Doors 1441 x 2
A2 - Phillips
Screwdriver x 1
Please Note:
Eras 1441 Coffee Table illustration shown.
Other Eras model's components will differ in appearance.
H
K
J
I
I
K
J
Designed by: Noah Packard
These distinctive product configurations are protected by US and international
patents, trade dress, and/or copyright laws.
BDI are trademarks of Becker Designed, Inc.
All Rights reserved. © 2012 BDI
1441 1446 Revision: 05-11-12
1
Page 2
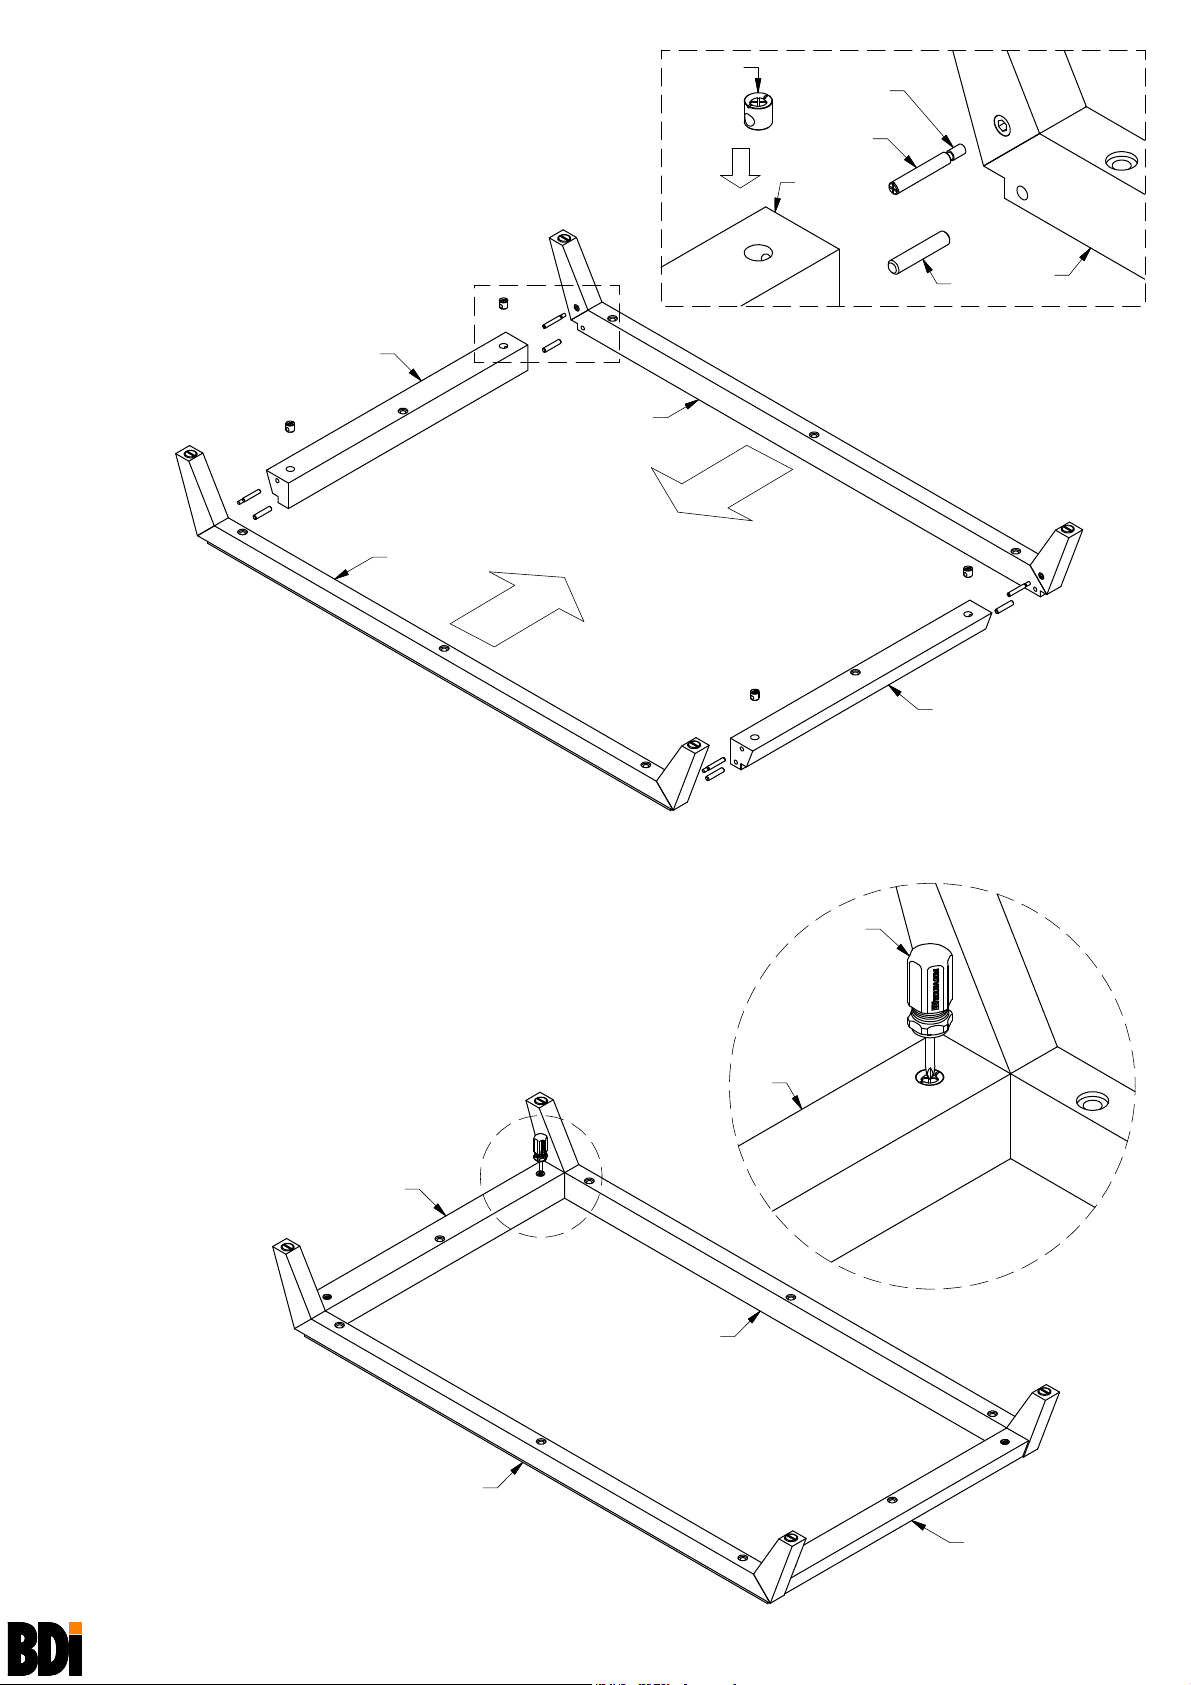
Step 1
Assemble Base
Insert Cams (C1) into Short Base Rails (J) with
the hole opening facing the
Dowels (D) into Long Base Rails (I). Insert
Insert
threads of
Rails (I)
Cam Bolt (C2) into inserts in Long Base
.
Long Base Rail (I).
C1
Threads
C2
J
D
J
I
I
J
I
Step 2
Tighten Cams in Base
Tighten Cams (C1) in Short Base Rails (J)
using
Phillips Screwdriver (A2).
J
A2
J
I
ERAS
1441 1446
I
J
2
ASSEMBLY INSTRUCTIONS
BDIUSA.COM CUSTOMERSERVICE@BDIUSA.COM
Page 3

Step 3
Attach Base to Table Bottom
Place assembled base onto table bottom.
Insert
Screws (E) into Base Rails (I and J)
and tighten using
After all screws are tightened, turn table
over right side up.
A
E
4mm Hex Driver (A).
Recommended
Eras 1446 End Table Only
Step 4
Attach Handle
Attach Handle (G) to Drawer using Screws (F)
and tighten with Phillips Screwdriver (A2).
G
2-person Step
To turn Table over
ERAS
1441 1446
F
F
A2
3
ASSEMBLY INSTRUCTIONS
BDIUSA.COM CUSTOMERSERVICE@BDIUSA.COM
Page 4

ERAS
ASSEMBLY INSTRUCTIONS
1447 1448
BDIUSA.COM CUSTOMERSERVICE@BDIUSA.COM
Placement and Maintenance
ERAS tables are designed for indoor use on level floors. Clean wood veneer with a moist cloth.
Eras 1447 Open End Table
Eras 1448 Console
Component List
ERAS tables are engineered for easy assembly. Carefully follow this procedure to prevent any damage.
Unpack and identify the components. The assembly workspace should be a non-marring surface such as clean carpet.
For missing hardware pieces, please contact BDI Customer Service at customerservice@bdiusa.com.
For all other concerns, please contact your BDI Retailer.
C1
A - 4mm Hex Driver x 1
For Screws
B - 5mm Hex Wrench x 1
For Cam and Bolt
C2
C1 - Cam and C2 - Cam Bolt x 4
D - 8 x 40mm Dowels x 4
E - 1/4-20 x 63mm Screws
1447 x 6
1448 x 10
H - Table x 1
I - Long Base Rails x 2
J - Short Base Rails x 2
K - Sliding Doors 1441 x 2
K
Please Note:
Eras 1441 Coffee Table illustration shown.
Other Eras model's components will differ in appearance.
H
J
I
K
Designed by: Noah Packard
These distinctive product configurations are protected by US and international
patents, trade dress, and/or copyright laws.
BDI are trademarks of Becker Designed, Inc.
All Rights reserved. © 2011 BDI
1447 1448 Revision: 01-17-11
J
I
1
Page 5

Step 1
Assemble Base
Insert short threads of Cam Bolt (C2) into inserts
in
Long Base Rails (I). Turn Cam Bolts (C2) by
hand COUNTERCLOCKWISE to tighten.
Insert
Dowels (D) into Long Base Rails (I).
Insert
Cams (C1) into Short Base Rails (J) with
arrow pointing toward
Long Base Rail (I).
C1
Short Threads
C2
J
D
I
Align Arrow towards
Long Base Rails.
C1 Cam
J
I
I
J
Step 2
Tighten Cams in Base
Tighten Cams (C1) in Short Base Rails (J)
using
5mm Hex Wrench (B).
J
B
J
C1
I
I
ERAS
1447 1448
2
J
ASSEMBLY INSTRUCTIONS
BDIUSA.COM CUSTOMERSERVICE@BDIUSA.COM
Page 6

Step 3
Attach Base to Table Bottom
Place assembled base onto table bottom.
Insert
Screws (E) into Base Rails (I and J)
and tighten using
After all screws are tightened, turn table
over right side up.
A
E
4mm Hex Driver (A).
Recommended
2-person Step
To turn Table over
ERAS
1447 1448
3
ASSEMBLY INSTRUCTIONS
BDIUSA.COM CUSTOMERSERVICE@BDIUSA.COM
 Loading...