

Page 1
Component List
Fi n
1106 a n d 1110
Fin is engineered for easy assembly. Carefully follow this procedure to
A - 4mm Hex Driver
x 1
B - Phillips Screwdriver
x 1
C - 2mm Hex Driver
with Ball End
x 1
D - Wood Base x 1
prevent any damage.
Placement and Maintenance
Fin is designed for indoor use on level floors. Clean glass with glass
cleaner, and steel parts and wood veneer with a moist cloth.
Step 1
Unpack and Identify
Unpack and identify the components at left. The assembly workspace
should be a non-marring surface such as carpet. For missing hardware
pieces, please contact BDI Customer Service at customerservice@
bdiusa.com. For all other concerns, please contact your BDI Retailer.
a s s e m b l y i n s t r u c t i o n s
b d i u s a .c o m c u s t o m e r s e r v i c e @b d i u s a .c o m
E - Cap Screw x 6
F - Leg x 3
G - Glide x 3
H - Glass Support Tube
x 3
Glass Support Tubes
have Set Screw (K)
just below open end.
I - Plastic Set Screw for
Glass Shelf
x 3
J - Glass Shelf x 1
K - Set Screw x 3
Pre-installed
in Glass Support
Tubes (H)
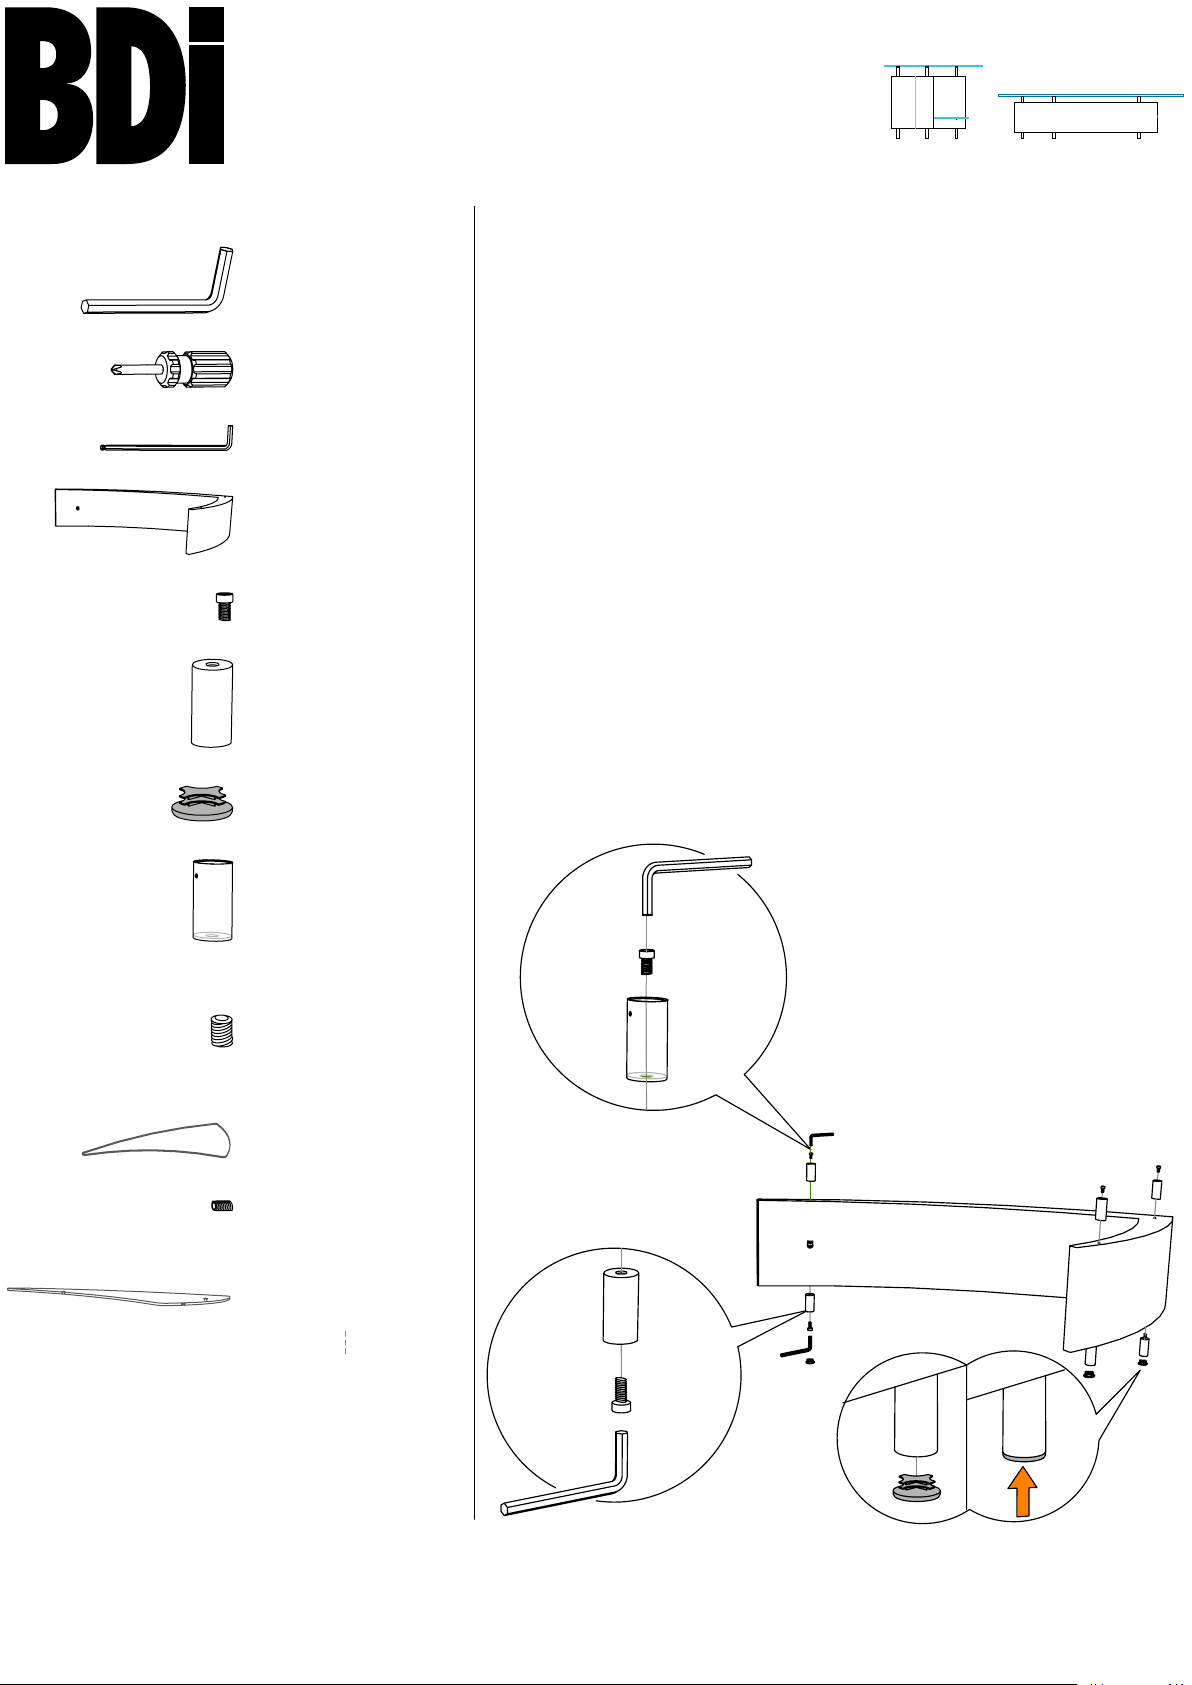
Step 2
Install legs
Wood direction/orientation is critical.
After locating the
bottom side with
snap in
Glides (G). Install Glass Support Tube (H) to top edge of wood
part using the
“BOTTOM SIDE” label on wood base, attach Legs (I) to
Cap Screw (E) using the 4mm Hex Driver (A) and then
4mm Hex Driver (A).
NOTE: The Glass Support Tubes have a small set screw just below the
open end.
A
E
H
M - Glass Top x 1
Designed by Cristian Wicha.
These distinctive product configurations are protected by US and international
patents, trade dress, and/or copyright laws.
BDI is trademark of Becker Designed, Inc.
All rights reserved. ©2010, BDI
Made in China. 11061110REV07012010v4
F
E
F
A
G
F
G
1
Page 2
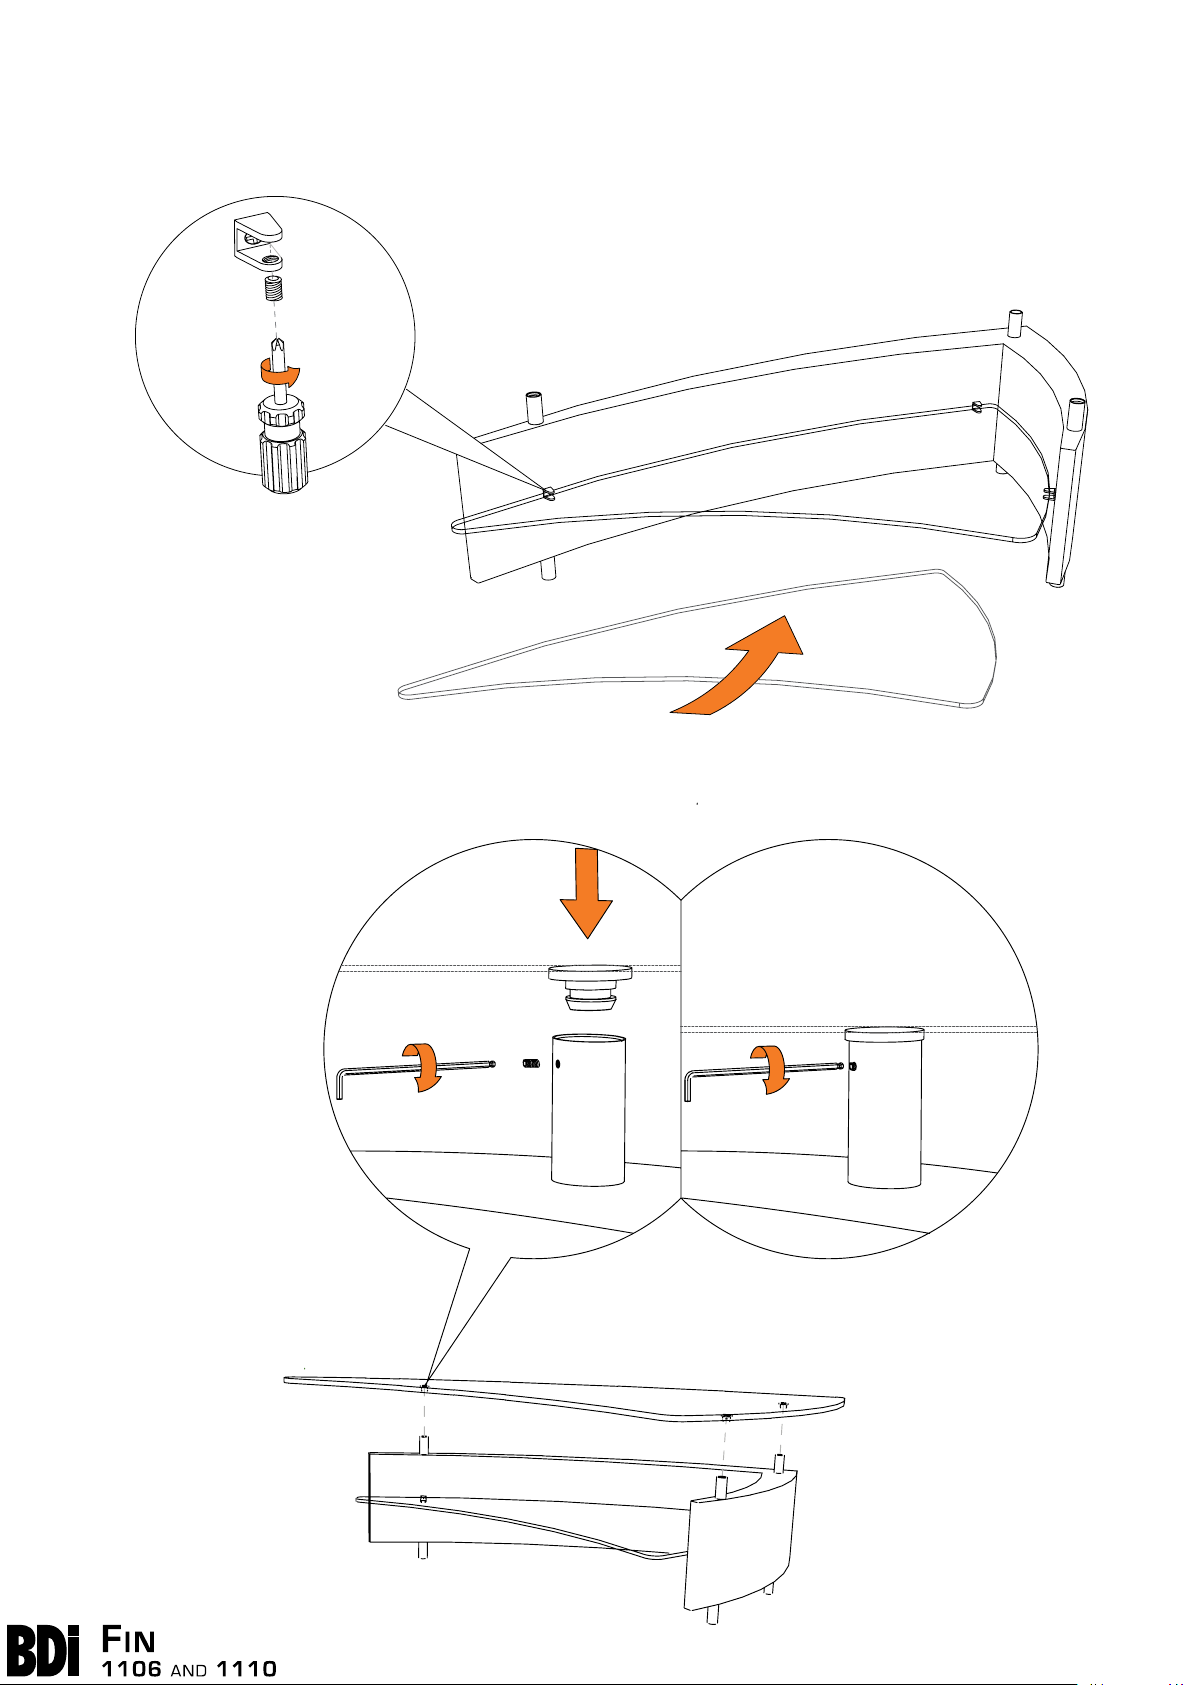
Step 3
Install shelf.
Using the Phillips Screwdriver (B), install Glass Shelf (J) with Plastic
Screws (I) to the pre-installed shelf supports as shown below.
I
B
Step 4
Install table top.
Using the 2mm Hex Driver (C) and Set Screw (K), install Table Top (M)
as shown below.
M
C
K
H
J
2
a s s e m b l y i n s t r u c t i o n s
b d i u s a .c o m c u s t o m e r s e r v i c e @b d i u s a .c o m
 Loading...