

SKY5287Ver. 1
INSTRUCTION
MANUAL
10-foot x 10-foot Pergola
Please retain these instructions for future reference.
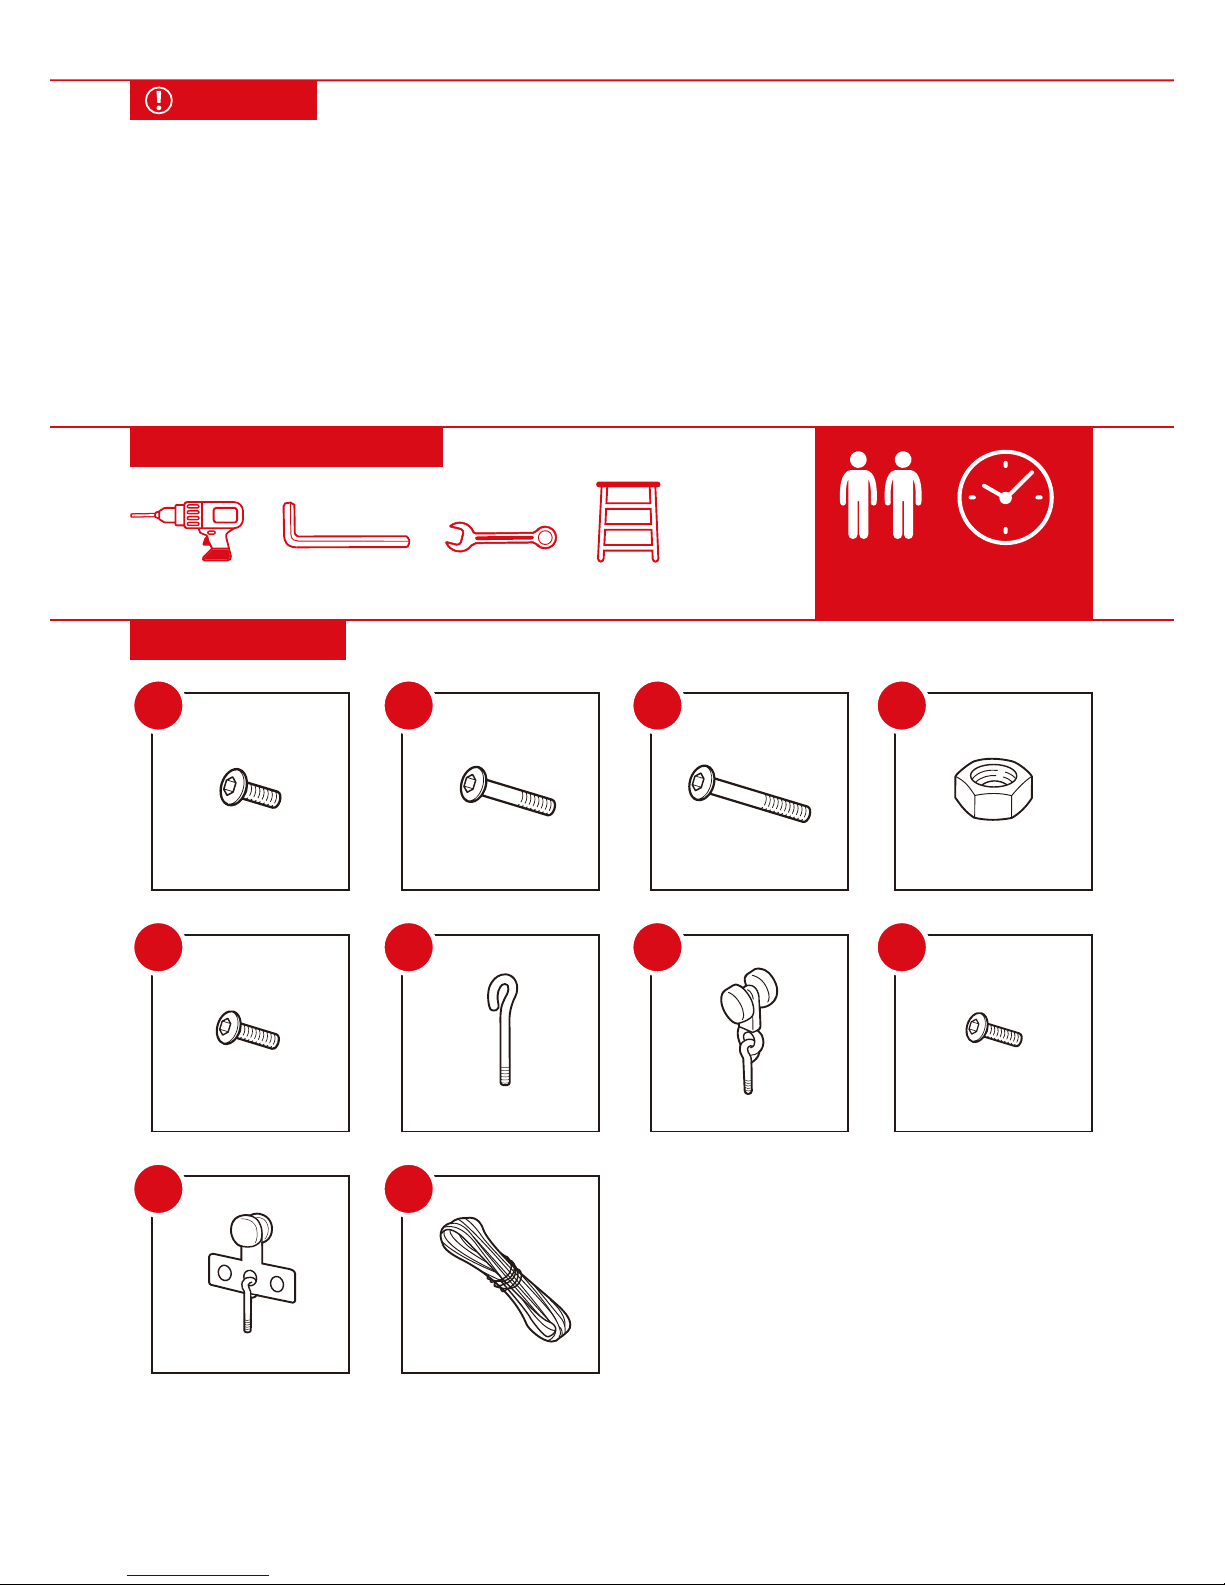
HARDWARE
19
68 PCS
M6 x 15mm SCREW M6 x 45mm SCREW M6 x 65mm SCREW
20
32 PCS
21
6 PCS
M4 NUT
22
30 PCS
23
5 PCS
M4 x 25mm SCREW EYE BOLT EYE BOLT/WHEEL
24
5 PCS
25
19 PCS
M4 x 10mm SCREW
26
30 PCS
27
1 PC
EYE BOLT/PLATE STRING
28
1 PC
TOOLS REQUIRED
APPROXIMATELY
120 MIN.
ASSEMBLY
NOTICE
• Firmly secure all bolts, screws and knobs before use.
• Reconfirm that all bolts, screws, and knobs are secure every 90 days.
• Fasten screws loosely during assembly. Do not firmly tighten screws until item is fully assembled.
• Do not use or store this item in the proximity of open flame or flammable/combustible chemicals.
• Be aware that some parts are heavy and have sharp edges.
• If any parts are missing, broken, damaged, or worn, stop using this product until repairs are made
and/or factory replacement parts are installed.
• Do not use this item in a way inconsistent with the manufacturer’s instructions as this could void the
product warranty.
2 |
ALLEN WRENCH
(2, PROVIDED)
2 PERSON
ASSEMBLY
SMALL
WRENCH
LADDER
DRILL

PARTS
1 PC
SHORT REAR FRAME
3 PCS 3 PCS
1 PC
MIDDLE FRAME I
5
6
MIDDLE FRAME II
7
LEFT FRAME I
8
1 PC
LEFT FRAME II
1 PC 1 PC
5 PCS
RIGHT FRAME I
9 10
RIGHT FRAME II
11
TRACK
12
1 PC
COLUMN WITH HOOK
1 PC 5 PCS
5 PCS
LONG REAR FRAME
13
14
ROOF FRAME I
15
ROOF FRAME II
16
7 PCS
CONNECTING PLATE
17
| 3
1 PC
COLUMN I
2 PCS 1 PC
1 PC
COLUMN II
1
2
LONG FRONT FRAME
3
SHORT FRONT FRAME
4
4 PCS 1 PC
1 PC
FOOT
18
COVER
29
ROOF
30
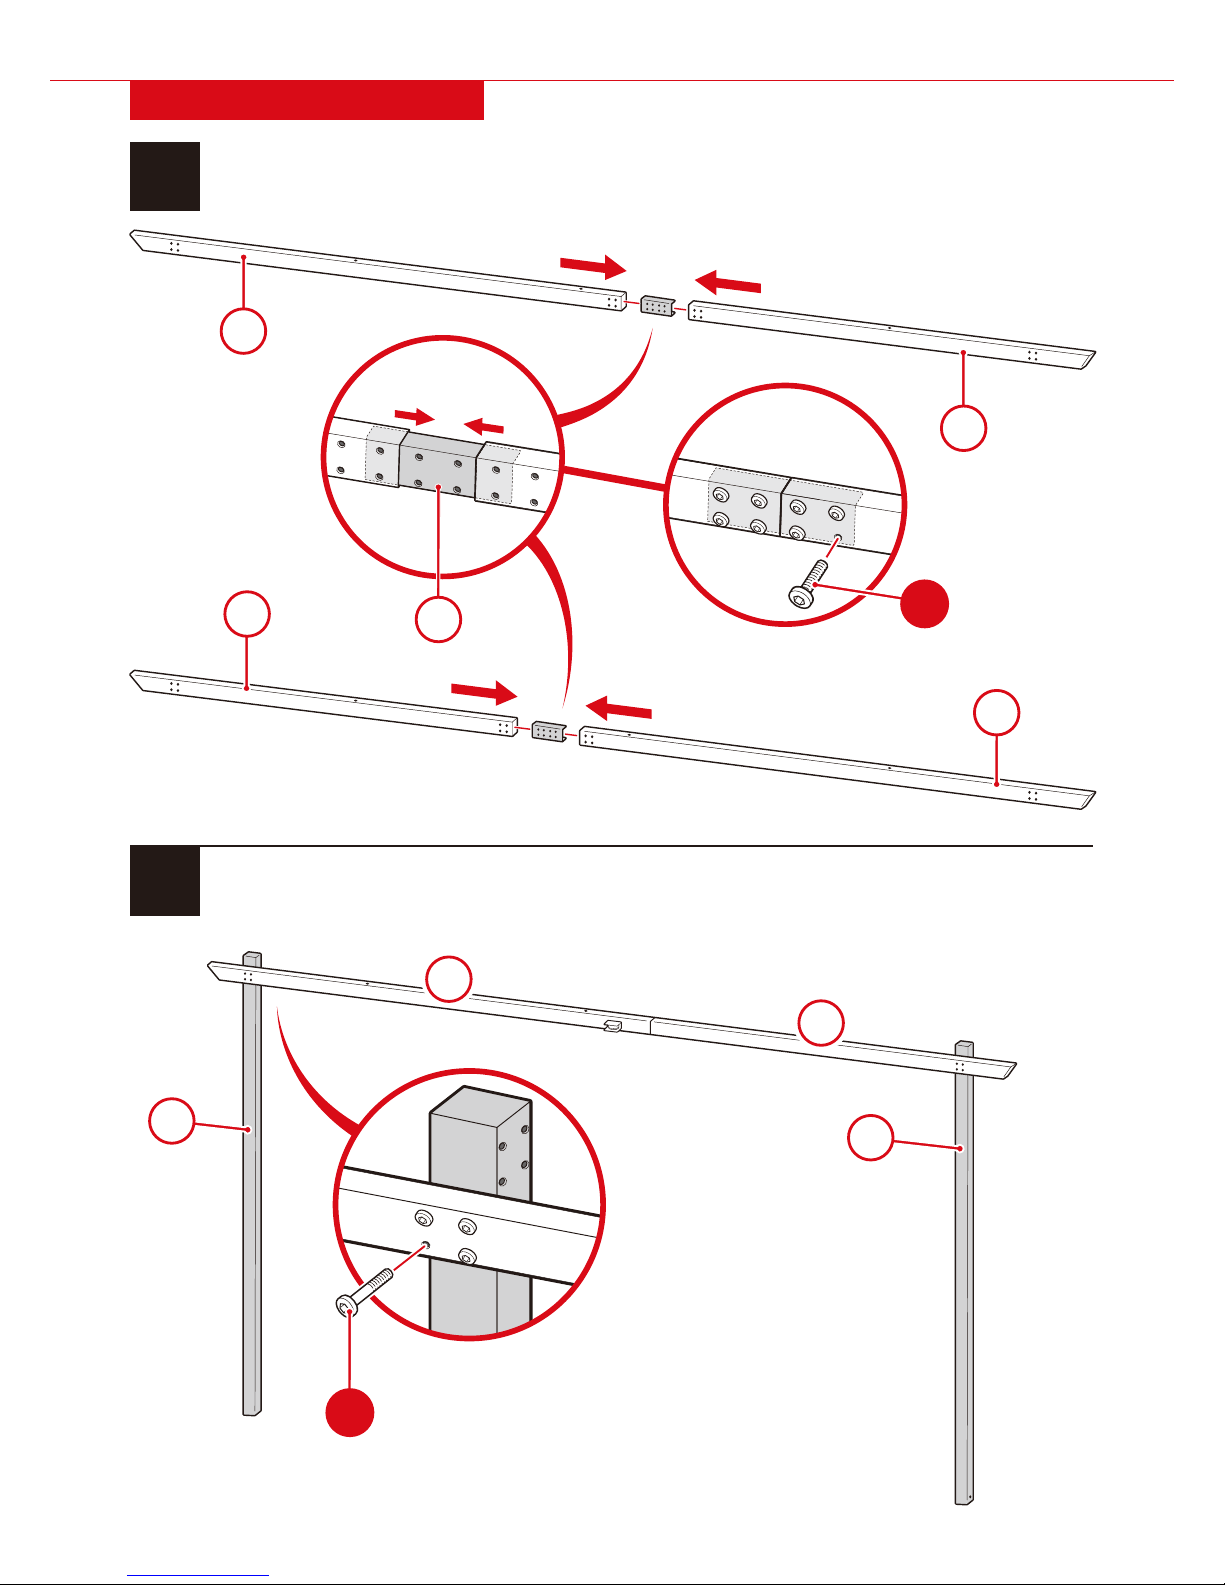
1
Slide a part 17 connecting plate into a part 3 long front frame and part 4 short front frame.
Attach the front frame pieces to the connecting plate with eight part 19 screws.
Repeat with the part 5 short rear frame and part 14 long rear frame.
2
Attach the rear frame to a part 1 column I and part 2 column II with eight part 20 screws.
4 |
PRODUCT ASSEMBLY
17
3
5
1
2
4
14
x16
x2
19
x8
20
5
14

3
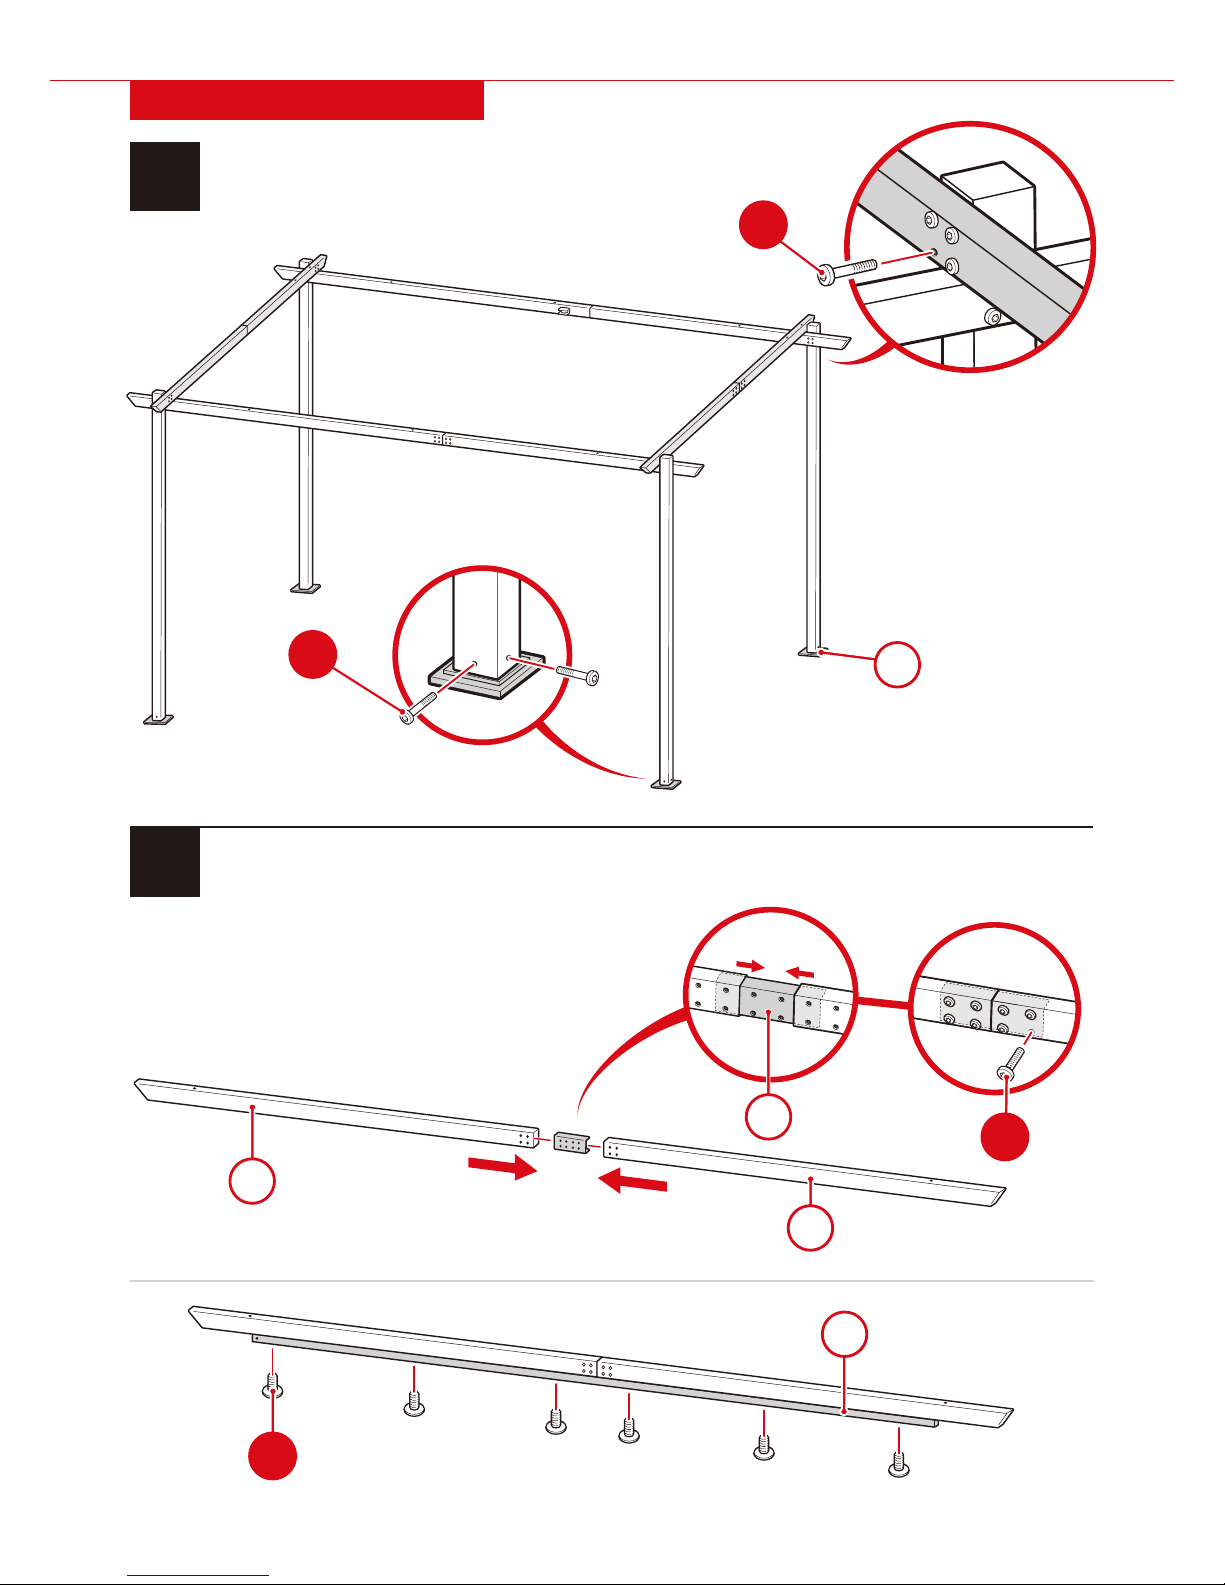
Attach the front frame to a part 2 column II and part 13 column with hook with eight part 20 screws.
PRODUCT ASSEMBLY
4
4
3
2
13
x8
20
| 5
12
9
8
Slide a part 17 connecting plate into a part 8 left frame I and part 9 left frame II.
Attach the left frame pieces to the connecting plate with eight part 19 screws.
Attach a part 12 track with six part 26 screws.
Repeat with the part 10 right frame I and part 11 right frame II.
x12
x2
26
x16
19
17
x2
10
11
6 |
5
PRODUCT ASSEMBLY
Carefully stand the front/rear frames up. Attach the
left frame and right frame with sixteen part 20 screws.
Attach four part 18 feet with eight part 19 screws.
18
x16
20
x8
x4
19
12
x18
26
6
Slide a part 17 connecting plate into a part 6 middle frame I and part 7 middle frame II.
Attach the middle frame pieces to the connecting plate with eight part 19 screws.
Attach a part 12 track with six part 26 screws.
Repeat to build an additional two middle frames.
17
7
6
x24
x3
x3
x3
x3
19
| 7
7
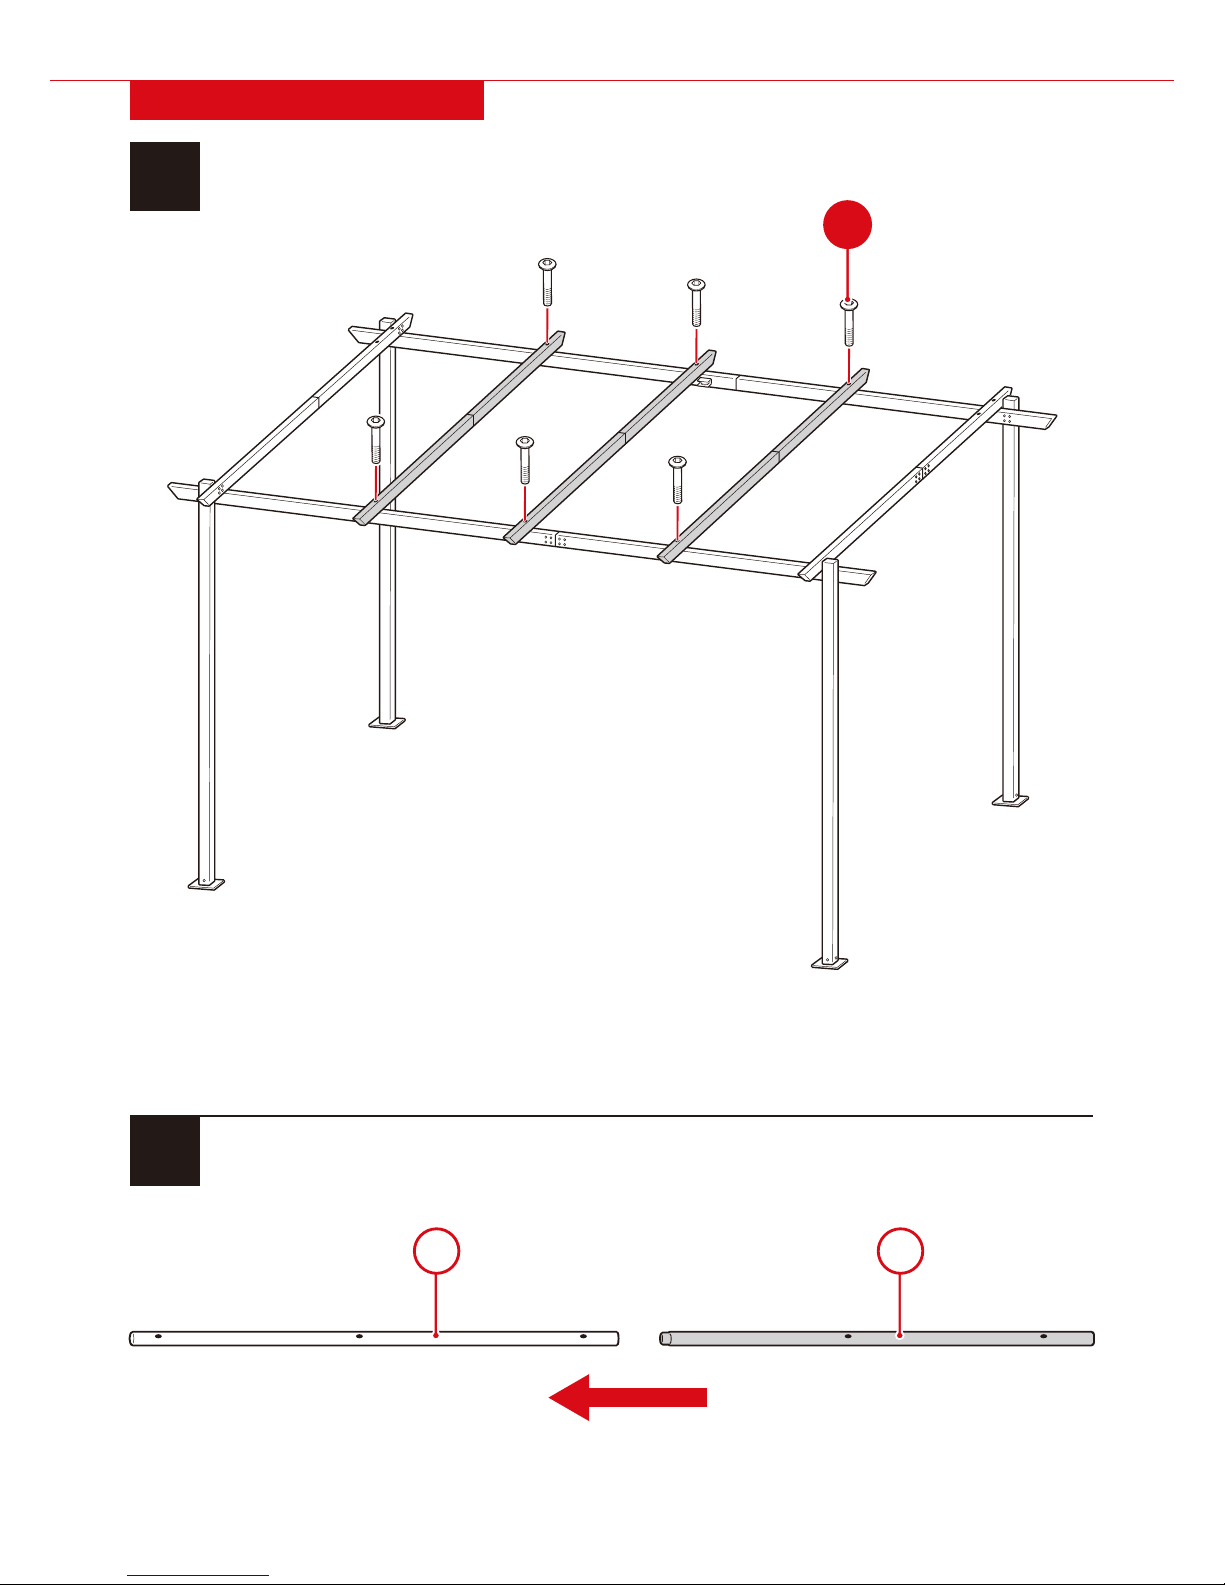
Attach the three middle frames with six part 21 screws.
PRODUCT ASSEMBLY
8
Slide five part 15 roof frame I into five part 16 roof frame II.
x6
21
16
x5
15
x5

8 |
9
Attach five part 24 eye bolts to a roof frame with five part 22 nuts.
Attach fifteen part 25 eye bolt/wheels to three roof frames fifteen part 22 nuts.
Attach four part 25 eye bolt/wheels and a part 27 eye bolt/plate to a roof frame with five part 22 nuts.
PRODUCT ASSEMBLY
10
Secure the five roof frames to the part 30 roof with the attached adhesive strips.
Arrange roof frames according to the following diagram:
27
24
30
x5
22
x25
25
x19

| 9
11
Insert the wheels into the tracks on the left, right, and three middle frames to attach the roof.
Secure the five part 24 eye bolts to the frames with five part 23 screws and five part 22 nuts.
PRODUCT ASSEMBLY
x5
23
x5
22
24
x5

10 |
12
Tie the part 28 string to the part 27 eye bolt/plate.
Follow steps to route the string through the pulleys:
PRODUCT ASSEMBLY
INSIDE VIEW
INSIDE VIEW
2
1
6
3
4
5
7
Tie the end of the
string back onto
the eye bolt/plate.
| 11
13
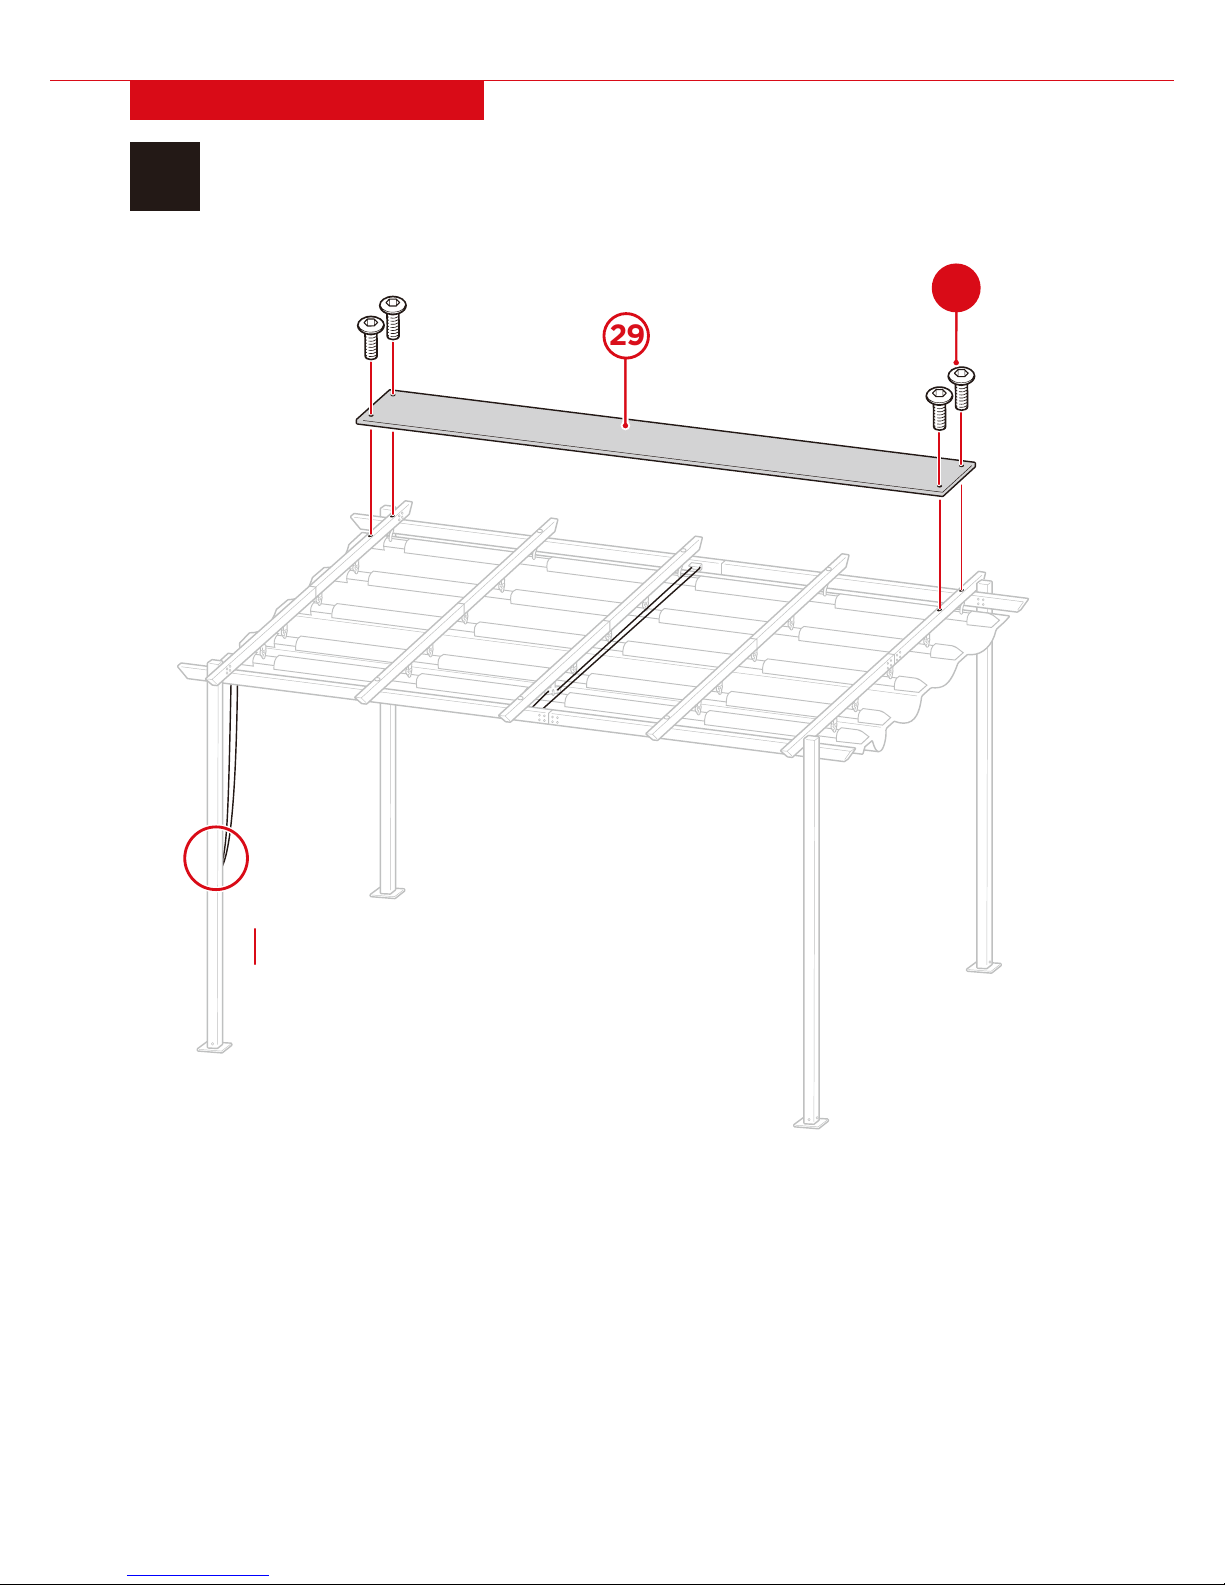
Attach the part 29 cover with four part 19 screws.
PRODUCT ASSEMBLY
x4
19
29
NOTE: Secure string
slack on the hook

All items can be returned for any reason within 60 days of the receipt and will receive a full refund as long
as the item is returned in its original product packaging and all accessories from its original shipment are
included. All returned items will receive a full refund back to the original payment method. All returned
items will not be charged a re-stocking fee.
All returned items require an RA (Return Authorization) number, which can only be provided by a Best
Choice Products Customer Service Representative when the return request is submitted. Items received
without an RA may not be accepted or may increase your return processing time. Once an item has been
received by Best Choice Products, refunds or replacements will be processed within 5 business days.
All returns must be shipped back to the Best Choice Products Return Center at the customer’s expense. If
the reason for return is a result of an error by Best Choice Products then Best Choice Products will provide
a pre-paid shipping label via email. Boxes for return shipping will not be provided by Best Choice Products,
and is the customer’s responsibility to either use the original shipping boxes or purchase new boxes.
Pictures may be required for some returns to ensure an item is not damaged prior to its return. Items
returned are not considered undamaged until they are received by Best Choice Products and verified as
such. All damages to items are the customer’s responsibility until the item has been received by and
acknowledge by Best Choice Products as undamaged.
PRODUCT WARRANTY INFORMATION
Manufacturer and seller expressly disclaim any and all liability for personal injury, property damage or
loss, whether direct, indirect, or incidental, resulting from the incorrect attachment, improper use,
inadequate maintenance, or neglect of this product.
HELP CENTER
Product Assembly
Product InquiryChat Support
Returns & Refunds
Orders FAQ
WARNING
Question about your product? We're here to help. Visit us at:
help.bestchoiceproducts.com
CHAT
US!
 Loading...