


SKY3755 + SKY3756 + SKY3757 Ver. 2
INSTRUCTION
MANUAL
Electric Pressure Cooker
Thank you for choosing us! Since 2002, Best
Choice Products has been bringing customers
high-quality products at the absolute lowest
price. With everything ranging from instruments
and toys to furniture and outdoor, we’ve got
your everyday living essentials covered. We’re
centered around a customer-first philosophy –
with free shipping, exceptional customer
service, and a catalog sourced with you in mind.
bestchoiceproducts.com
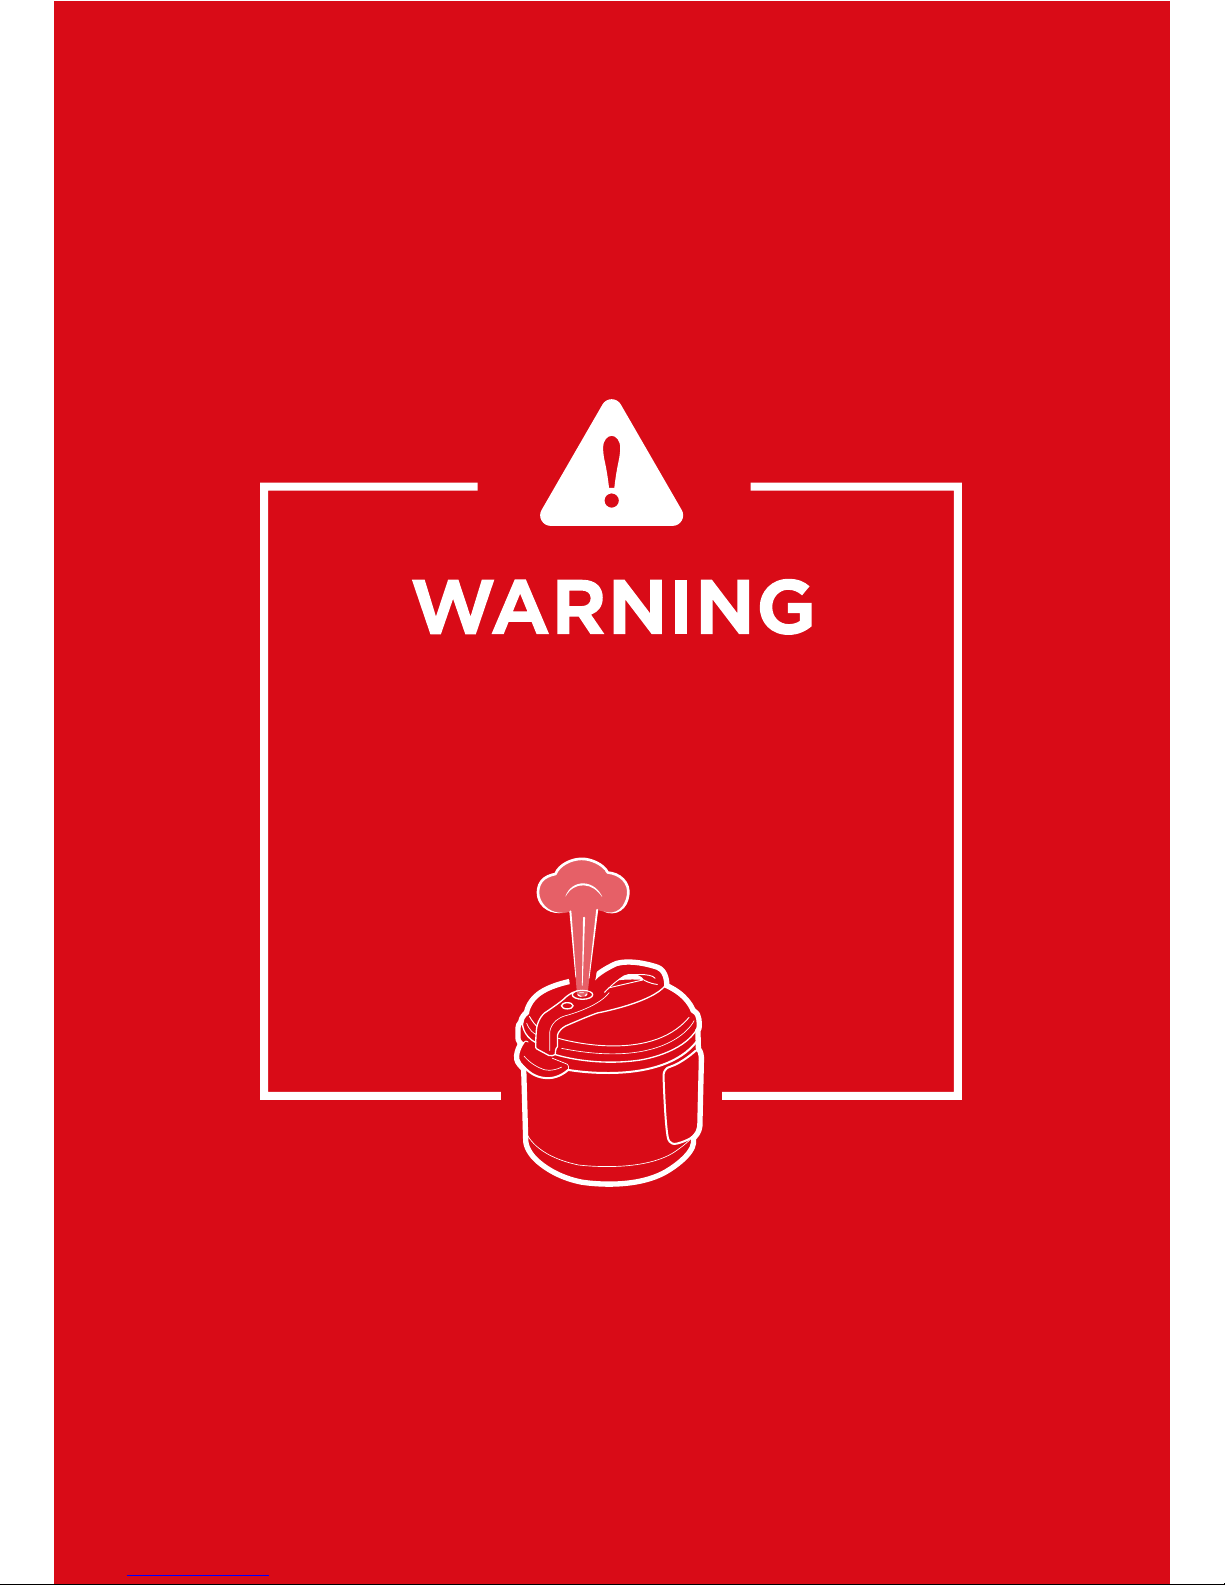
Be extremely careful of hot steam
escaping the pressure limiting device.
Do not place hands, objects, or
obstructions above the pressure cooker.

4 |
SPECIFICATIONS
Voltage
Max Pressure
Keep Warm Temperature
120V, 60Hz
90 KPa
140-175 °F
6-Liter Power (SKY3755)
10-Liter Power (SKY3756)
12-Liter Power (SKY3757)
1000 watts
1400 watts
1600 watts
Please retain these instructions for future reference.
• Read all instructions before operation.
• Do not allow children to operate this appliance. Keep appliance out of reach of children.
• Close supervision is necessary when appliance is used near children.
• This item is intended for indoor, household use only.
• Place appliance on a stable and level surface in a cool, dry environment.
• Do not leave appliance unattended while it is running.
• Unplug appliance if it is left unattended and before assembly, disassembly, or cleaning.
• Ensure that your voltage is consistent with specifications.
• Using an extension cord is not recommended as it may overheat and cause a risk of fire. If used, make
sure to organize cord to prevent accidental tripping.
• This appliance is not intended for use by persons (including children) with reduced physical, sensory or
mental capabilities, or lack of experience and knowledge, unless they have been given supervision or
instruction concerning use of the appliance by a person responsible for their safety.
• If any parts are missing, broken, damaged, or worn, stop using this product until repairs are made
and/or factory replacement parts are installed.
• Do not use this item in a way inconsistent with the manufacturer’s instructions as this could void the
product warranty.
NOTICE
• Immediately turn o and unplug in the event of an accident or if appliance malfunctions.
• Do not touch hot surfaces; only touch handles and knobs.
• Keep appliance away from direct sunlight and other sources of heat (stove, heater, etc.).
• Do not run power cord over sharp edges/corners or a hot surface.
• Do not pull or carry appliance by the power cord.
• Do not place outdoors or in a damp, humid environment like a bathroom or spa.
• Do not immerse the appliance or power cord in water or any other liquid.
• Do not spill water on the electrical components or connectors.
• Do not cover vents or obstruct openings. Beware of hot steam escaping from vents.
• Do not unplug the appliance by pulling on the power cord. Always grasp the plug firmly and pull
straight out from the outlet.
• Do not move appliance while it is in use. Take caution when moving appliance containing hot ingredients.
• Do not use if the plug, power cord, or any components are damaged.
• Do not use any accessory or fitting other than original accessories and fittings.
• Do not turn o or unplug appliance while it is in operation.
WARNING
| 5
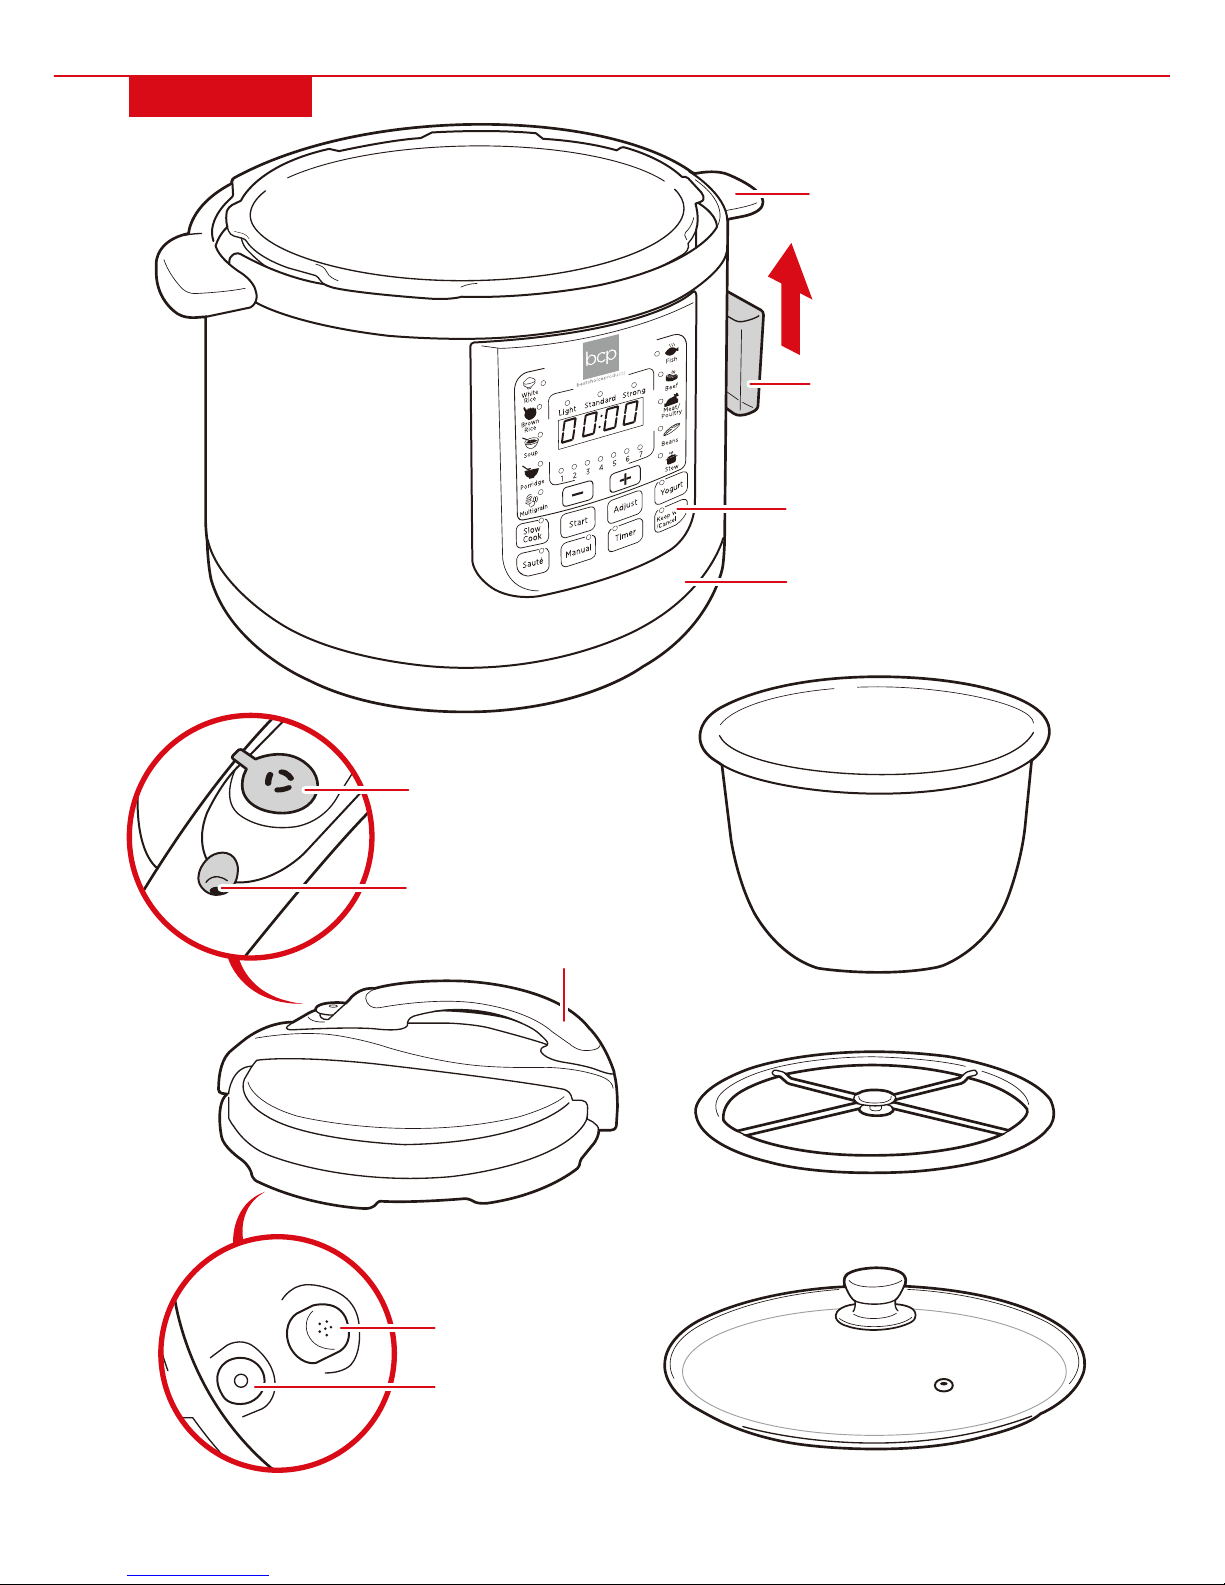
DIAGRAM
LID
RUBBER SEAL RING
CONTROL PANEL
HEATING PLATE (INSIDE)
LID HANDLE
HANDLES
CONDESATION CUP
PRESSURE
LIMITING DEVICE
FLOAT VALVE (OUTSIDE)
INNER POT
GLASS LID
UNDER LID
FILTER
VALVE SEAL

6 |
• COOKING PRESETS: See Cooking Presets section
• ADJUST: Toggle between light, standard, and strong pressure levels
• MANUAL: Manually cook by setting pressure and cook time
- Use if cooking over 3 pounds (or 6 cups) at a time
• TIMER: Delay the cooking start time by up to 24 hours
• KEEP WARM/CANCEL: Press once to keep cooked food warm, press again to cancel cooking
CONTROL PANEL
DIAGRAM
MEASURING CUP SPOON
COOKING
PRESETS
COOKING
PRESETS
PRESSURE LEVEL INDICATORS
DIGITAL DISPLAY
INCREASE/DECREASE TIME
COOKING INDICATOR LIGHTS
STEAM RACK
| 7
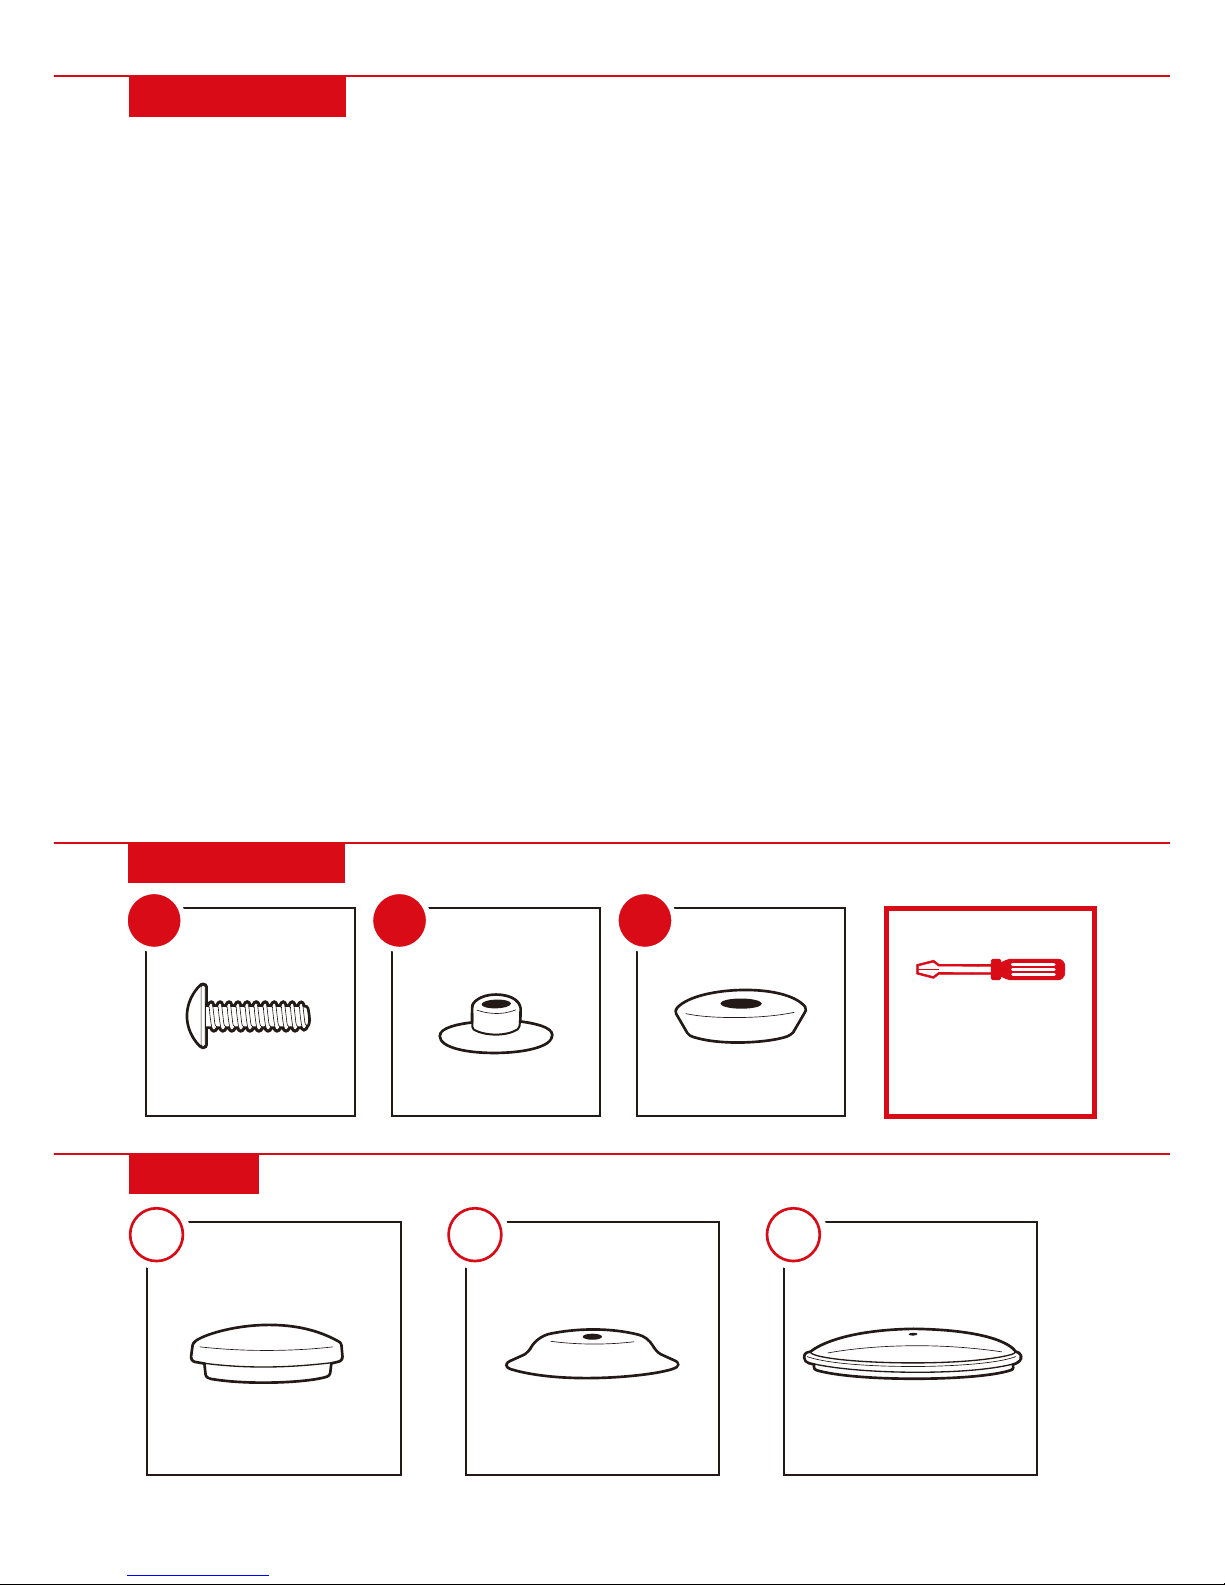
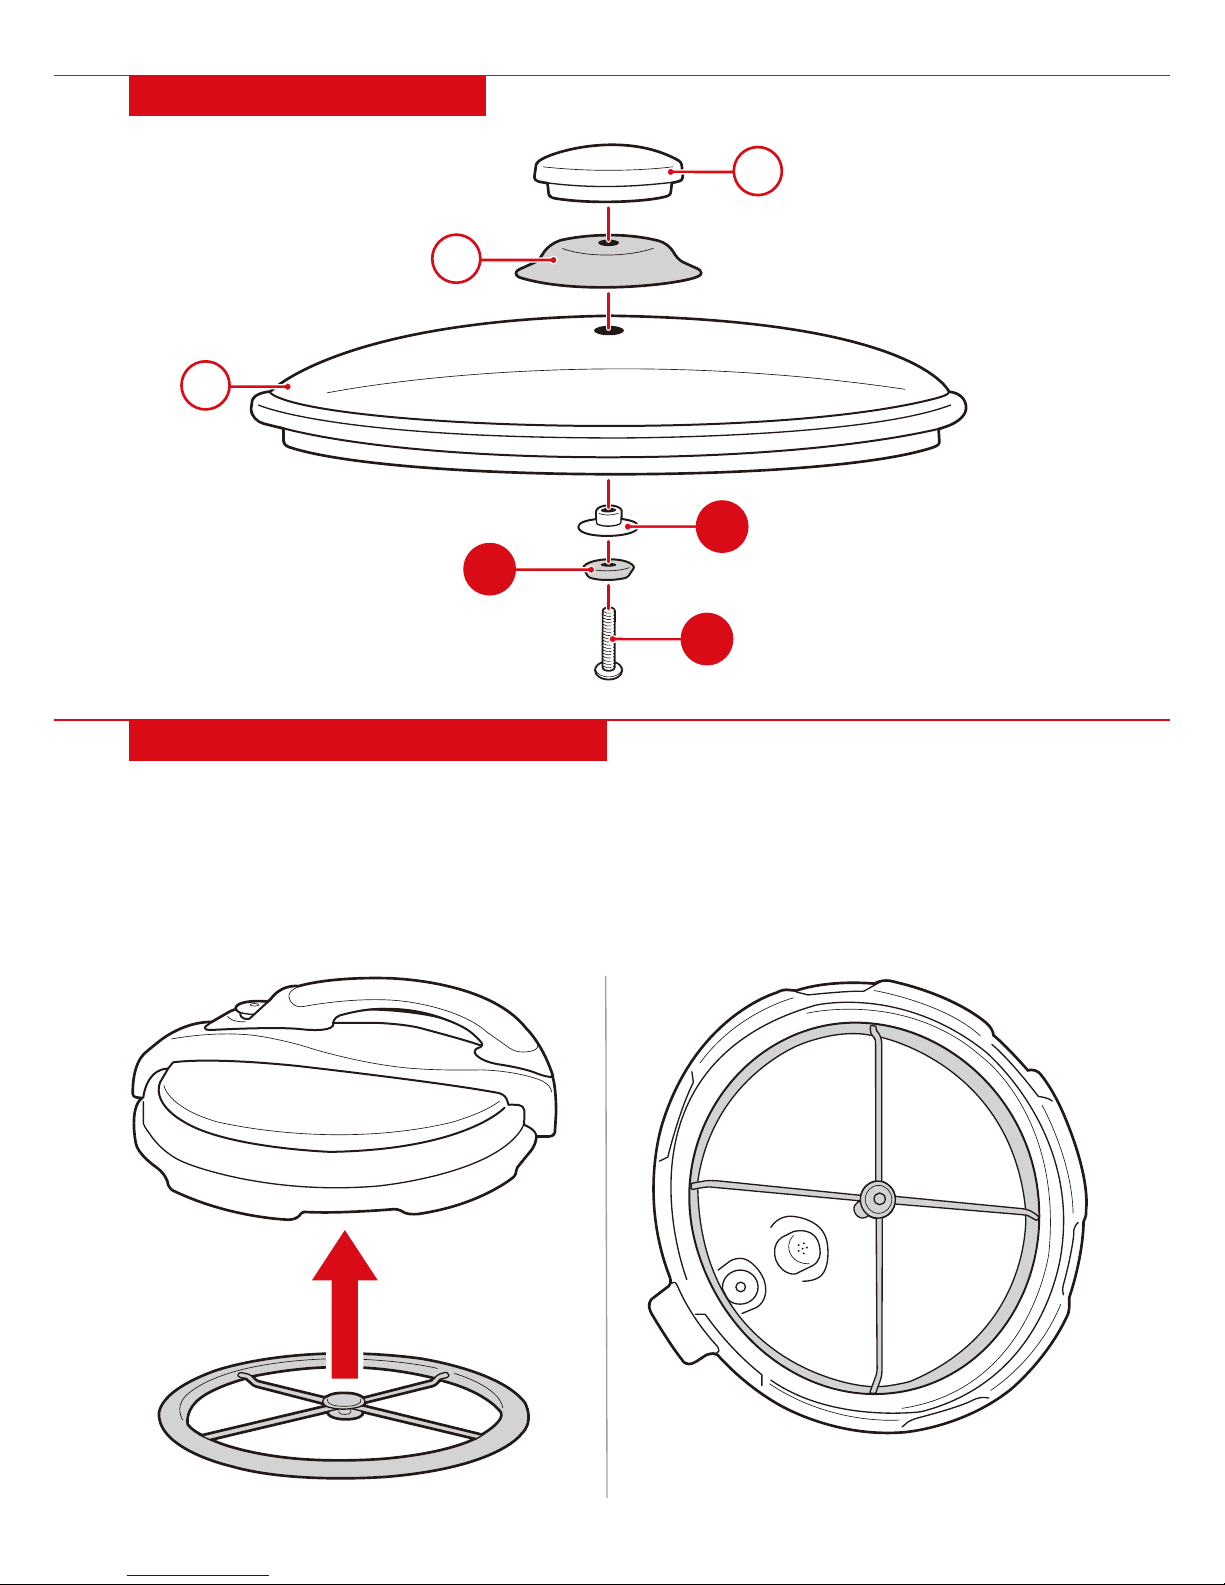
PARTS
HARDWARE
A
1 PC
KNOB
B
1 PC
KNOB BASE
C
1 PC
GLASS LID
1
1 PC
M4 SCREW
USAGE TIPS
• Appliance cooks under pressure; improper use may result in injury.
• Be extremely careful of hot steam escaping the pressure limiting device. Do not place hands, objects, or
obstructions above the pressure cooker.
• Do not use pressure cooker for more than 6 continuous hours.
• Do not use Keep Warm function for more than 4 hours.
• Make sure unit is properly closed before operating.
• Be aware that the pressure limiting device is loose when appliance is not cooking.
• Pressure cooker retains memory of cooking cycle. In case of a power failure, it will automatically renew
the cooking cycle it left o on when power resumes.
• Do not place pressure cooker in a heated oven.
• Make sure pressure limiting device is not clogged before use.
• Typically, do not fill inner pot more than ⅔ full.
• If ingredients expand during cooking (e.g. rice or dried vegetables), do not fill more than ½ full.
• Do not cook ingredients that can foam, froth, or sputter during cooking as they may clog the pressure
limiting device.
- Examples include: Applesauce, cranberries, pearl barley, oatmeal, cereal, split pea, noodles, rhubarb,
spaghetti, etc.
• Do not use appliance to fry oil.
• Do not open pressure cooker until unit has cooled and internal pressure has been released.
- If lid is locked, the unit still has internal pressure. Do not force the lid open.
• Inner pot is non-stick; do not use sharp or metal utensils on the inner pot. Only use wood or plastic utensils.
• Do not use the inner pot with other heat sources other than the pressure cooker.
• Do not damage or tamper with seal belt, steel ring, or pressure limiting device.
• Do not place additional weight or put pressure on the pressure limiting device.
• Unplug and let appliance cool before changing parts, cleaning, or storage.
3
1 PC
GASKET
2
1 PC
SILICON
GASKET
PHILLIPS
SCREWDRIVER
REQUIRED
8 |
SETTING UP THE APPLIANCE
1. Remove all packaging and accessories. Inspect appliance to make sure it is in good condition.
2. Rinse accessories and attachments with warm water. Allow parts to dry.
3. Wipe exterior of unit with a damp cloth and allow to dry.
4. Insert the rubber seal ring into the slot in the lid.
5. Place appliance on a stable and level surface and arrange so it is at least 12 inches away from other
kitchen appliances.
PRODUCT ASSEMBLY
Attach the knob to the glass lid
with a part 1 screw.
UNDERNEATH
2
1
3
A
B
C

OPERATING INSTRUCTIONS
1. Insert plug into appliance first, then plug into wall outlet.
2. Open the lid by rotating the handle clockwise until it unlocks.
3. Remove the inner pot and add desired ingredients.
- Do not fill inner pot less than full or more than ⅔ full.
- If ingredients expand during cooking (e.g. rice or dried vegetables), do not fill more than ½ full.
4. Place inner pot into the pressure cooker.
5. Place the lid by rotating the handle counterclockwise
until it locks.
- Make sure the rubber seal ring is properly installed in
the lid.
6. Adjust the pressure limiting device to the Air Tight position.
- Make sure that the float valve is depressed.
7. Select desired cooking preset or settings, then press
Start to begin cooking. Appliance will build up
pressure and cook food.
- If necessary, cook time and pressure level can be
adjusted after selecting a preset.
- The float valve will rise as pressure builds up.
- During the cooking process, you can press the Keep
Warm/Cancel button to cancel cooking.
8. Once cooking is finished, the appliance will emit a
sound and automatically switch to Keep Warm mode.
| 9
FILL ZONE

10 |
COOKING PRESETS
DEFAULT COOKING TIME
12 min.
COOKING PRESET
White Rice
COOKING TIME RANGE
8-15 min.
70 min.
Brown Rice
50-90 min.
25 min.
Soup
15-40 min.
15 min.
Porridge
10-25 min.
25 min.
Multigrain
20-60 min.
5 min.
Fish
3-10 min.
25 min.
Beef
20-60 min.
13 min.
Meat/Poultry
13-60 min.
40 min.
Beans
20-60 min.
40 min.
Stew
25-60 min.
6 hours
Slow Cook
30 min.-9.5 hours
5 min.
Sauté
3-8 min.
12 hours
Yogurt
8-24 hours
9. To remove food, adjust the pressure limiting device to
the Exhaust position to release hot air and steam.
- Be extremely careful of hot steam escaping the
pressure limiting device.
- The float valve should depress when pressure is released.
Do not open the lid if appliance is still pressurized.
10. Open the lid and use oven mitts or utensils to remove
cooked food.
11. Turn o appliance completely before unplugging.
NOTE: If cooking more than 3 pounds (or 6 cups) at a time, use the Manual cooking function instead of a preset.
• Each preset has a default cooking time; however, the actual cook time will vary depending on the
ingredients and the time required for full pressure to build.
• The pressure cooker will detect the weight of ingredients and how much liquid is inside the inner pot
and adjust the cook time accordingly.
NOTE: If using Slow Cook preset, use the glass lid instead of the normal appliance lid.
OPERATING INSTRUCTIONS

| 11
TROUBLESHOOTING
ERROR CODES
REASON
Wrong voltage
Not plugged in
Not turned on
Rubber seal ring not installed correctly
PROBLEM
Steam escaping around lid
Not working
SOLUTION
Use recommended voltage
Plug into outlet
Turn on
Cancel cooking, open lid, and
reposition rubber seal ring
Pressure limiting device not
properly sealed
Steam escaping from
pressure limiting device
Carefully reposition until it is sealed
Pressure limiting device obstructed Clean pressure limiting device
TIMER
Use Timer function to delay start of cooking by up to 24 hours.
1. Fill inner pot with desired ingredients and lock the lid.
2. Press the Timer button. Press the (+/-) buttons to increase or decrease delay time at 30-minute increments.
3. Select desired cooking preset or settings. Press Start and the timer will begin to count down.
4. Once the countdown completes, the appliance will pressurize and cooking will begin.
KEEP WARM
1. Close the lid and adjust the pressure limiting device to Exhaust.
2. Press the Keep Warm/Cancel button once to keep food warm.
- NOTE: Do not use Keep Warm function for more than 4 hours.
CLEANING AND STORAGE
NOTE: Do not immerse or soak the appliance in water or any other liquid.
• Make sure pressure cooked is unplugged, depressurized, and cool before cleaning or storage.
• Carefully pop o and remove the rubber seal ring, pressure limiting device, float valve, and filter.
• Clean inner pot, lid, accessories, and attachments with warm water, mild detergent, and a sponge.
• Wipe the exterior of the unit with a damp cloth.
• Do not clean with steel wool, abrasive detergents, or corrosive liquids like gasoline or acetone.
• Place unit and attachments in a cool, well-ventilated place to dry.
• Store in a cool, dry place away from direct sunlight.
CODE
E1
PROBLEM
Open circuit of the sensor
E2
Short circuit of sensor
E3
Overheating
E4
Signal switch malfunction

All items can be returned for any reason within 60 days of the receipt and will receive a full refund as long
as the item is returned in its original product packaging and all accessories from its original shipment are
included. All returned items will receive a full refund back to the original payment method. All returned
items will not be charged a re-stocking fee.
All returned items require an RA (Return Authorization) number, which can only be provided by a Best
Choice Products Customer Service Representative when the return request is submitted. Items received
without an RA may not be accepted or may increase your return processing time. Once an item has been
received by Best Choice Products, refunds or replacements will be processed within 5 business days.
All returns must be shipped back to the Best Choice Products Return Center at the customer’s expense. If
the reason for return is a result of an error by Best Choice Products then Best Choice Products will provide
a pre-paid shipping label via email. Boxes for return shipping will not be provided by Best Choice Products,
and is the customer’s responsibility to either use the original shipping boxes or purchase new boxes.
Pictures may be required for some returns to ensure an item is not damaged prior to its return. Items
returned are not considered undamaged until they are received by Best Choice Products and verified as
such. All damages to items are the customer’s responsibility until the item has been received by and
acknowledge by Best Choice Products as undamaged.
PRODUCT WARRANTY INFORMATION
Manufacturer and seller expressly disclaim any and all liability for personal injury, property damage or
loss, whether direct, indirect, or incidental, resulting from the incorrect attachment, improper use,
inadequate maintenance, or neglect of this product.
HELP CENTER
Product Assembly
Product InquiryChat Support
Returns & Refunds
Orders FAQ
WARNING
Question about your product? We're here to help. Visit us at:
help.bestchoiceproducts.com
CHAT
US!
 Loading...