

Page 1
INSTALLATION INSTRUCTIONS
R
UNLEASH.
THE SMARTEST PERFORMANCE TUNING TECHNOLOGY
BMW R1200R | 07-11
F1084 FUEL CONTROL
1>READ
WARNINGS > INSTALLING
• We strongly suggest that an experienced technician install this product.
• Read through all instructions before beginning installation.
• This document is intended for use by qualied technicians.
• This is not a replacement for the Engine Control Unit (ECU).
• Refer to a factory service manual for more specic stock component
identication/location information and removal/assembly procedures.
WARNINGS > USING
• Use only in race or other closed-course applications and never on public roads.
• Z-Fi products are not certied by the California Air Resource Board (CARB) for
use on CA highways.
GETTING HELP
• Factory support is available in the US at 909-597-8300.
• For fastest support outside of the US, nd your local importer at bazzaz.net.
Page 2
2>IDENTIFY
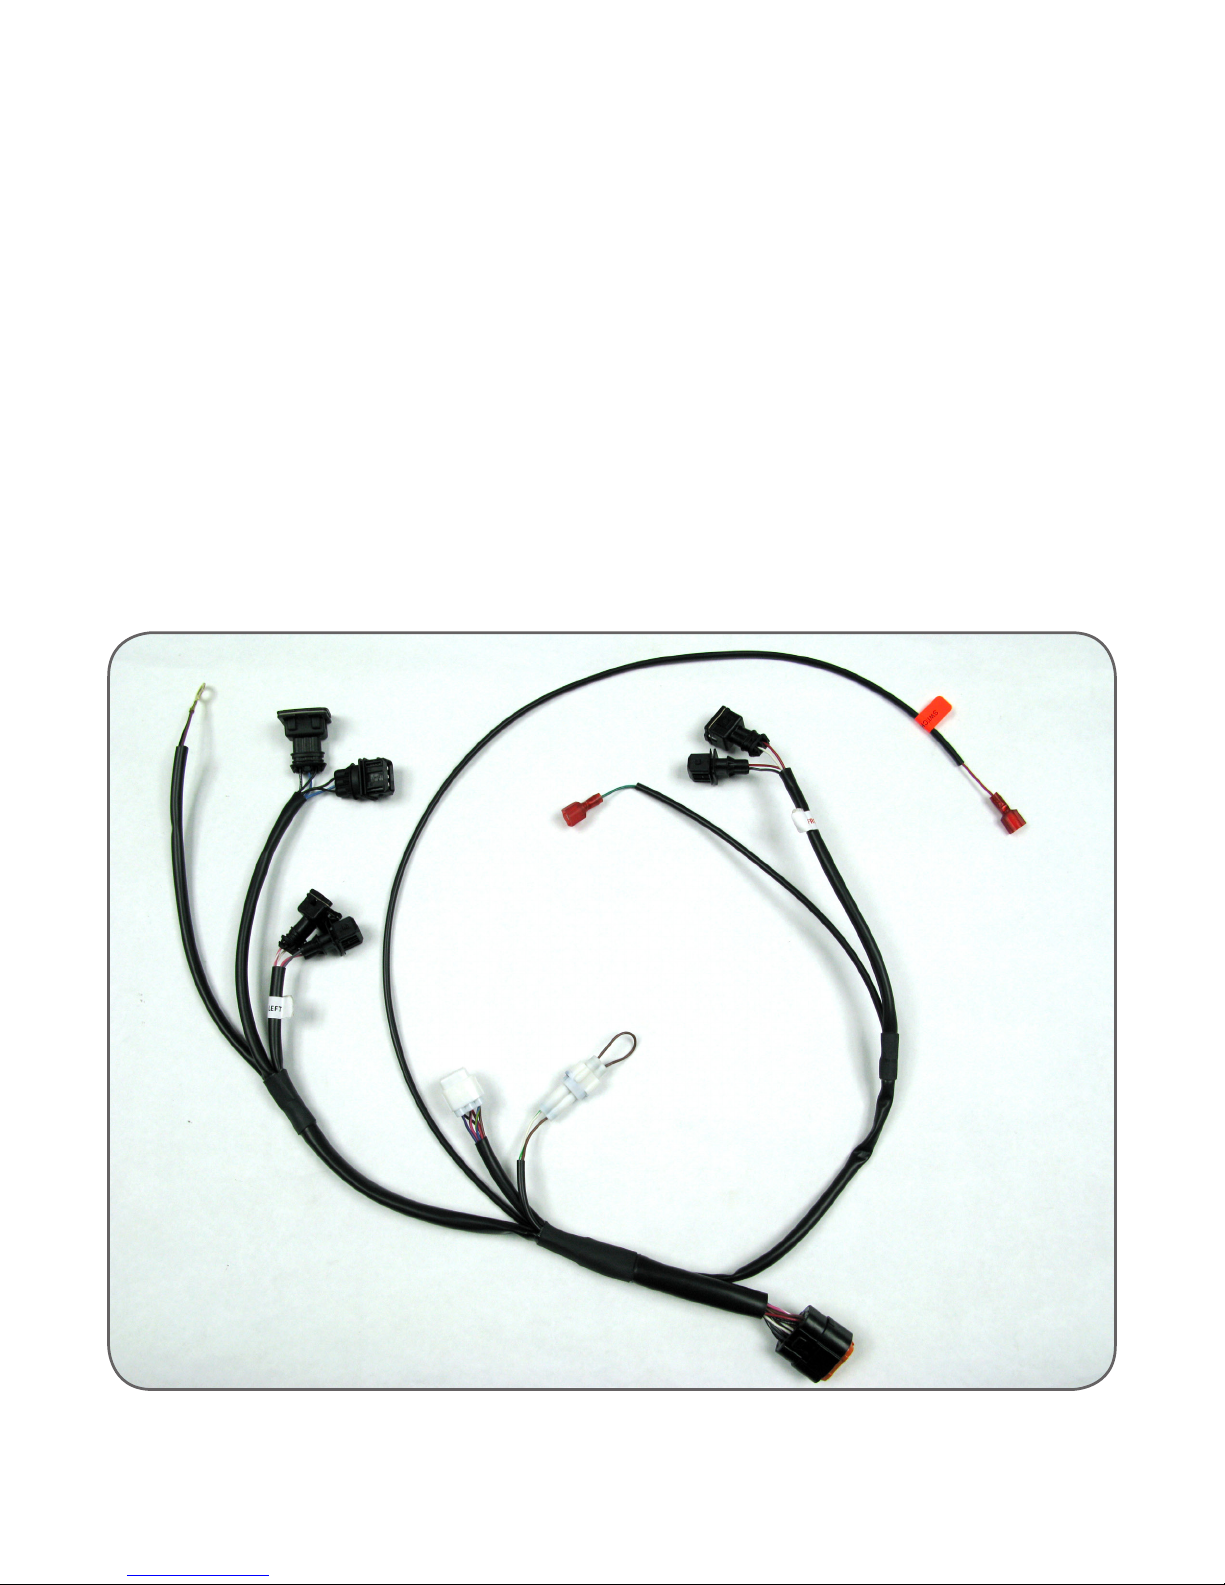
INCLUDED PARTS
1. Z-Fi control unit
2. Fuel harness
3. USB cable
4. Scotchlok (2)
5. Zip ties
6. Velcro
FUEL HARNESS
GROUND
LUG
TPS
INJ 2
(RIGHT)
INJ 1
(LEFT)
POWERCKPS
MAP SELECT
Z-AFM
CONNECTOR
MAIN
Page 3
3>REMOVE
1. Seats
2. All side panels
3. Tank
4>SECURE
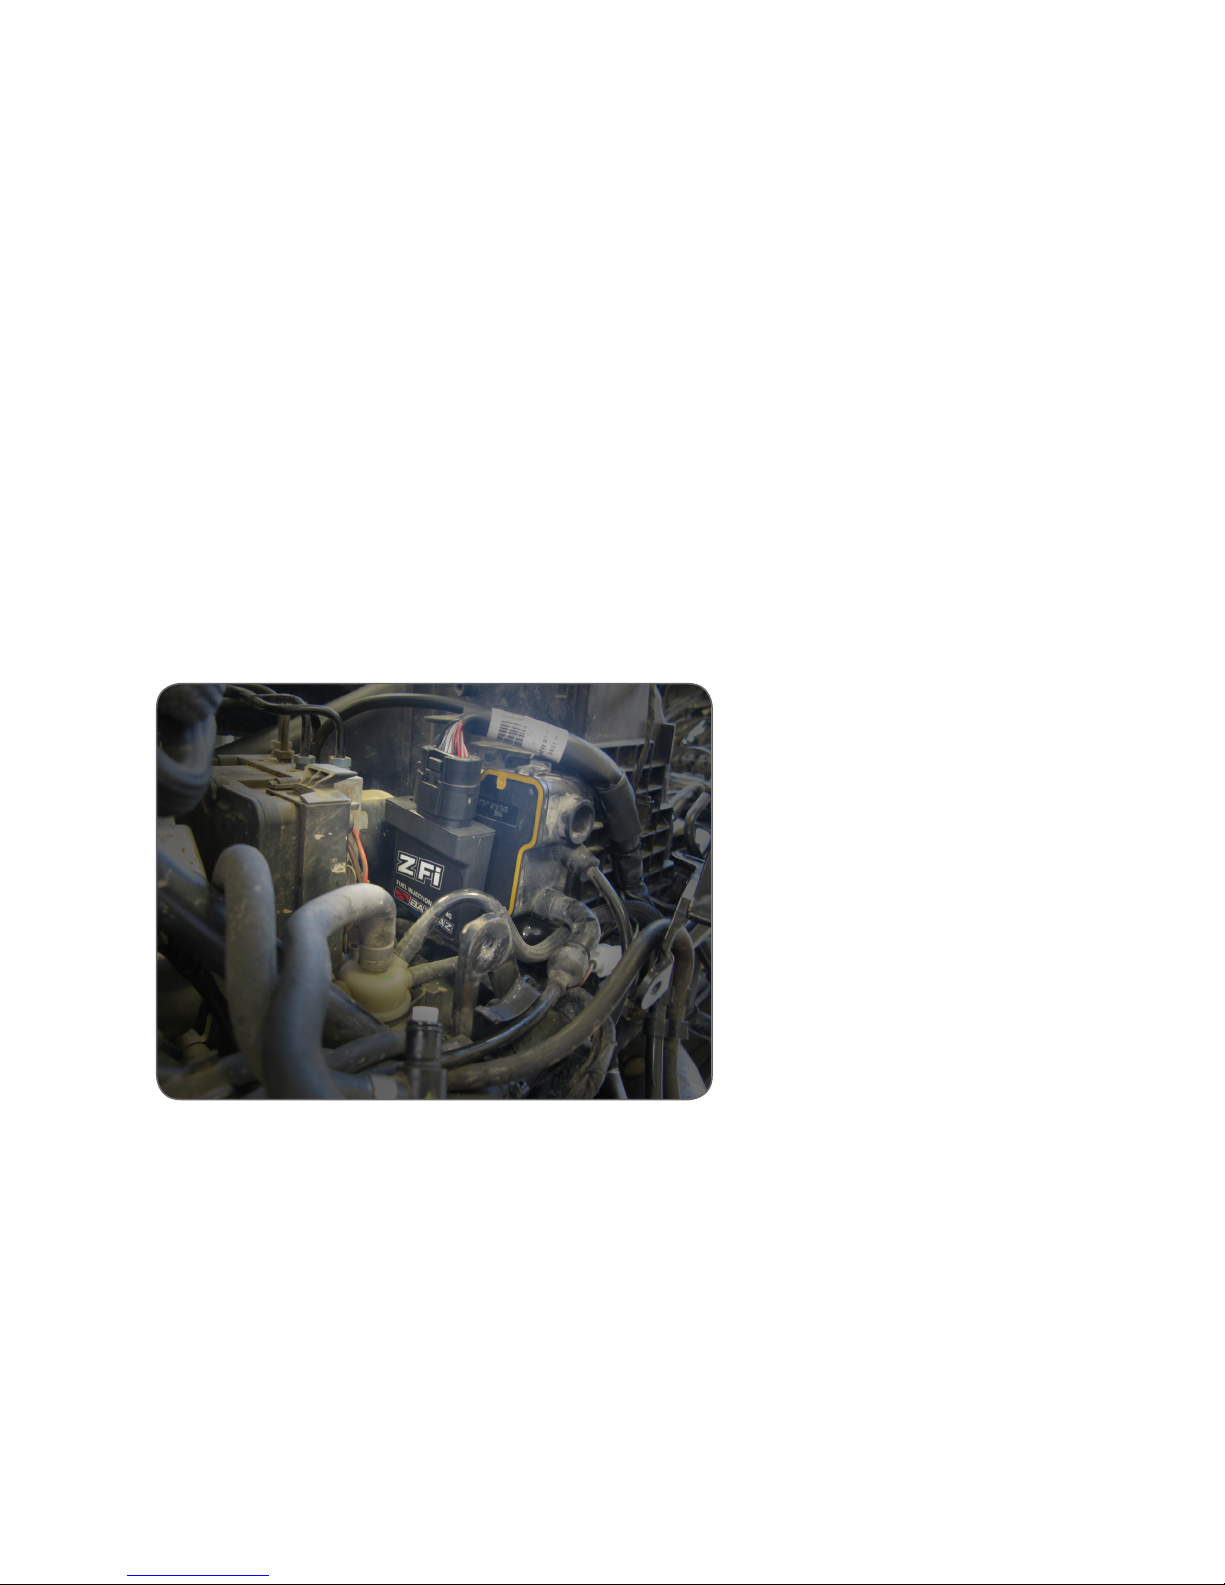
Using the supplied Velcro patch, secure the Bazzaz control unit
under the tank and against the fuse box.
Page 4
5>CONNECT/ROUTE
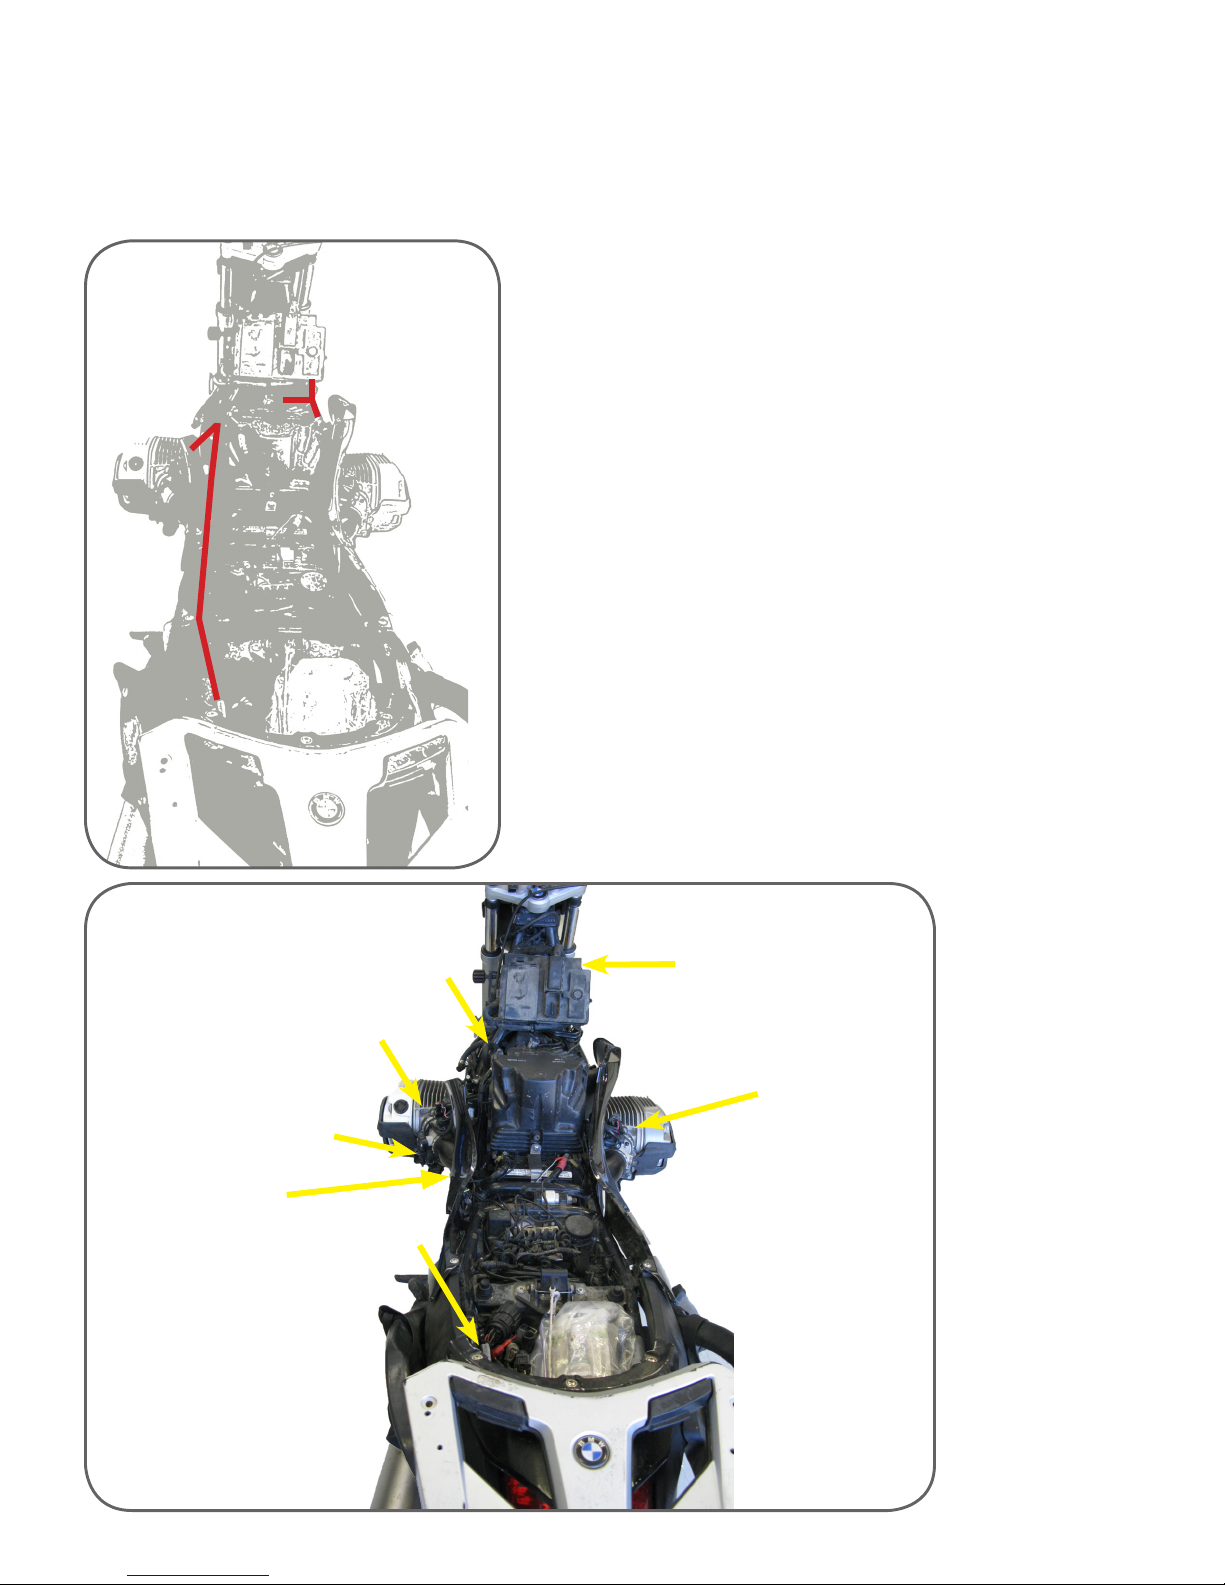
1. Connect the main connector of the Bazzaz fuel
harness to the control unit.
2. Route the portion of the fuel harness with the
injector #2 and CKPS connectors to the right
side of the bike.
3. Route the portion with the +12V switched
power connector towards the rear, next to the
battery.
4. The remaining portion can hang on the left side
for now.
GROUND
INJ #1
LEFT
TPS
POWER
Z-FI
CKPS
INJ #2
RIGHT
Page 5
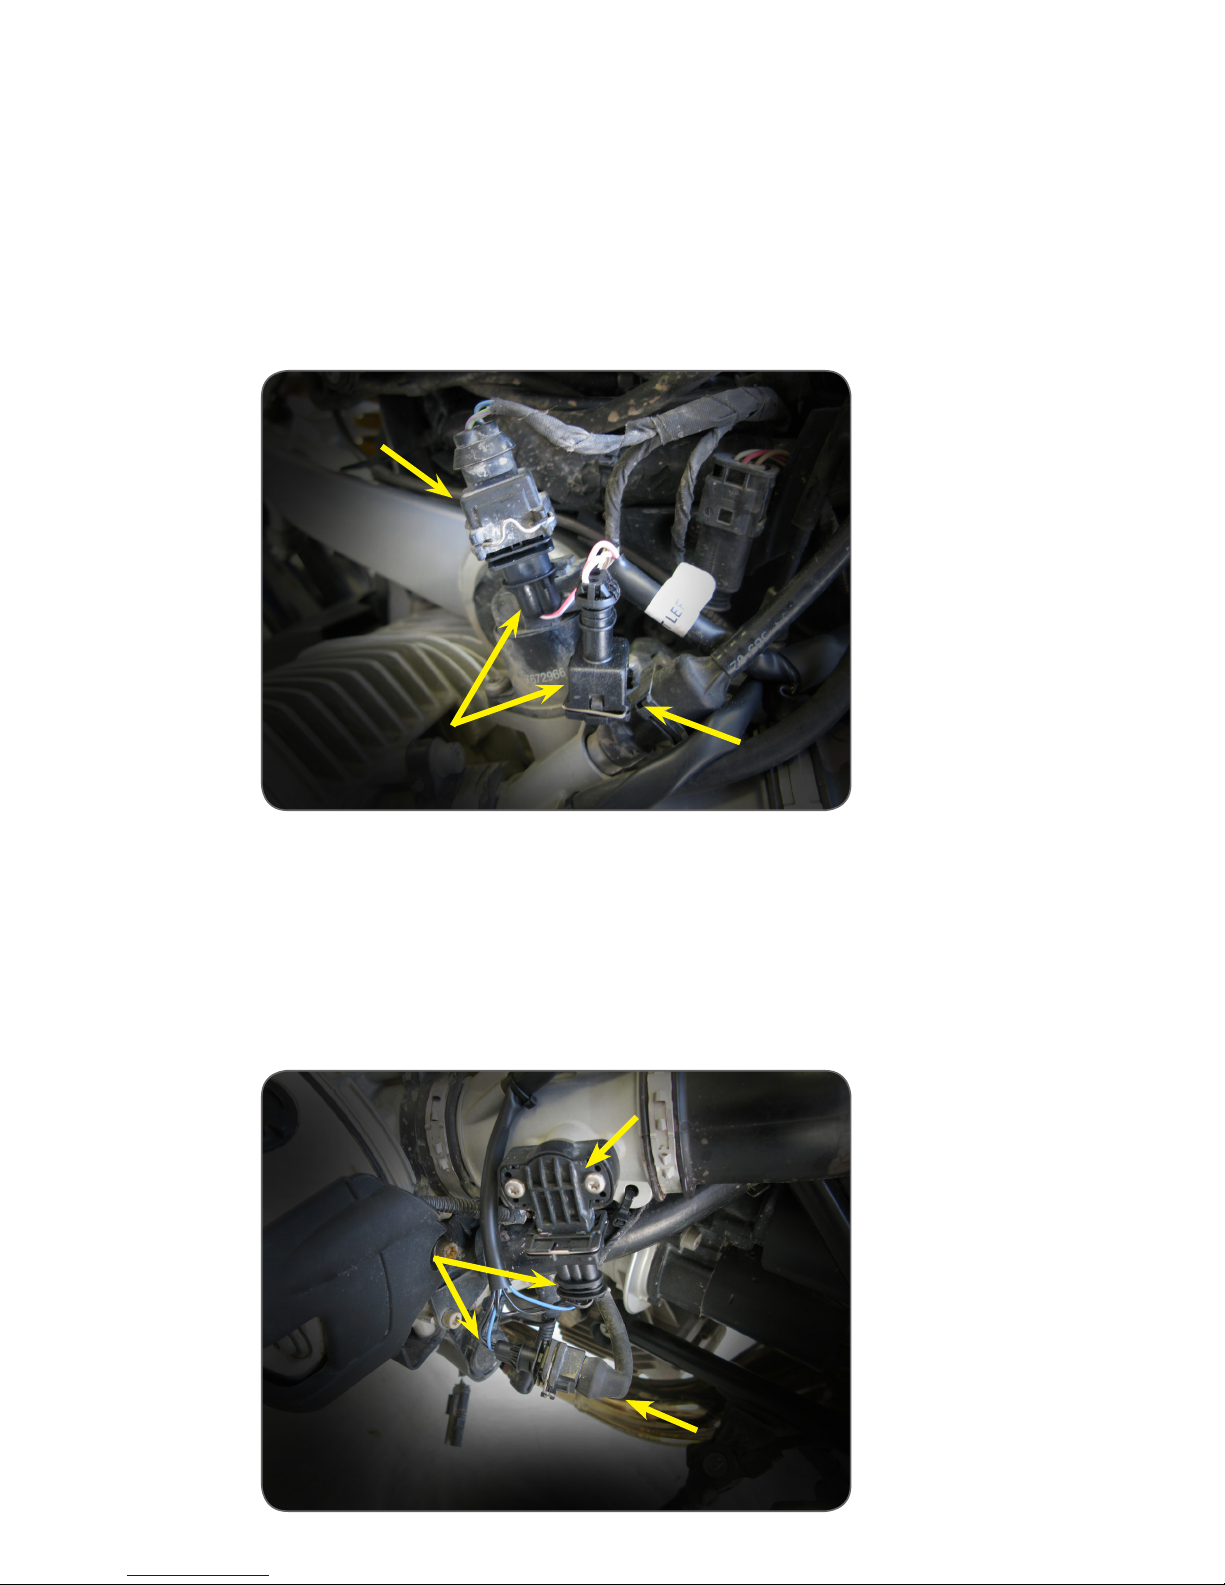
6>CONNECT
1. Locate the left side factory fuel injector on top of the throttle body.
6.1
2. Disconnect the factory injector connector from the injector.
3. Plug the Bazzaz injector #1 left connectors in-line between the
factory connector and injector.
FACTORY
CONNECTOR
6.2
BAZZAZ
CONNECTORS
1. Locate the factory Throttle Position Sensor (TPS) and connector, just
below the left side injector.
2. Disconnect the TPS connector from the sensor and connect the Bazzaz
TPS connectors in-line between the factory connector and sensor.
BAZZAZ
CONNECTORS
FACTORY
INJECTOR
FACTORY
TPS
FACTORY
CONNECTOR
Page 6
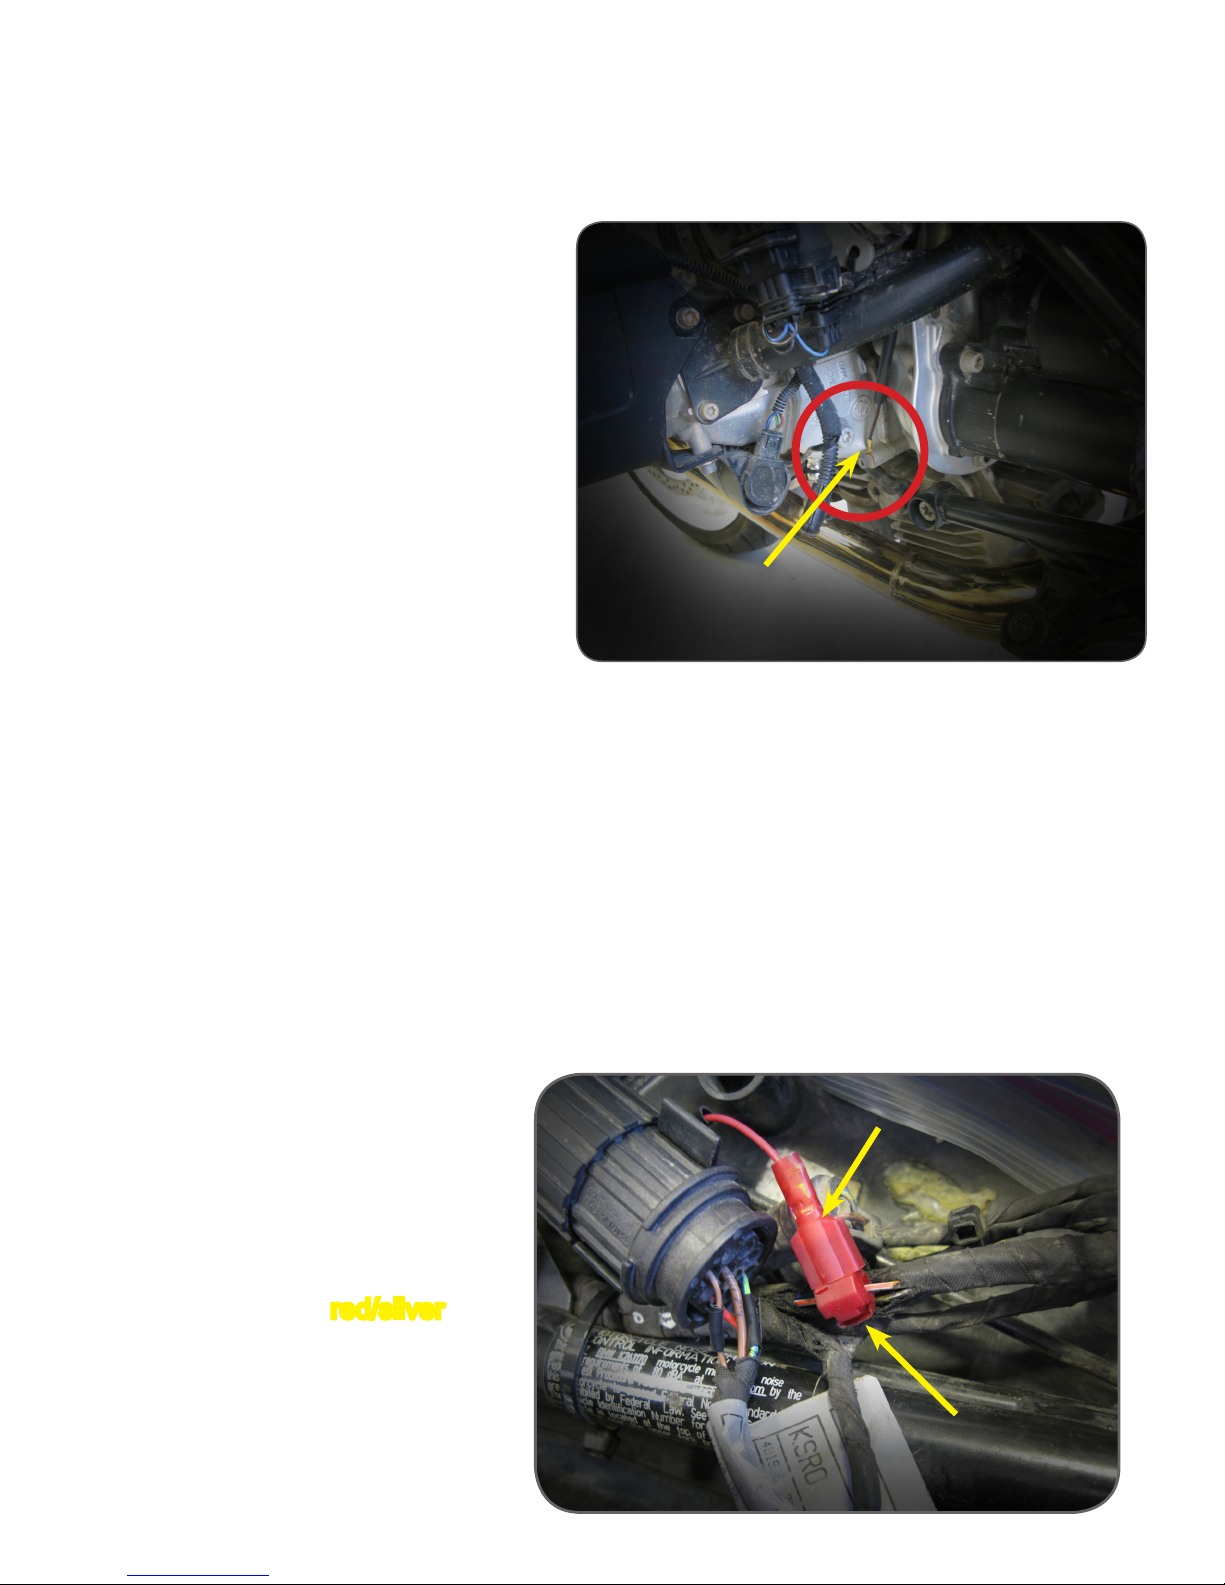
7>GROUND
1. Route the Bazzaz fuel harness’
ground lug past the TPS. Attach the
lug to one of the bolts on the side of
the cylinder. We recommend using
an engine case bolt.
BAZZAZ GROUND
8>ROUTE/CONNECT
8.1
1. Locate the factory diagnostic connector in the rear
of the bike, beneath the rider seat.
2. Route the Bazzaz +12V power connector (labeled
with orange tag) to the diagnostic connector.
3. Carefully open up the factory
harness (to expose the wiring)
by making a cut in the sheathing
where the tail light harness
enters the rest of the factory
harness.
4. Crimp a supplied Scotchlok
onto the exposed red/silver wire
and insert the Bazzaz +12V
switched power connector into
the Scotchlok.
SCOTCHLOK CRIMPED ONTO
EXPOSED RED/SILVER WIRE
BAZZAZ
CONNECTOR
Page 7
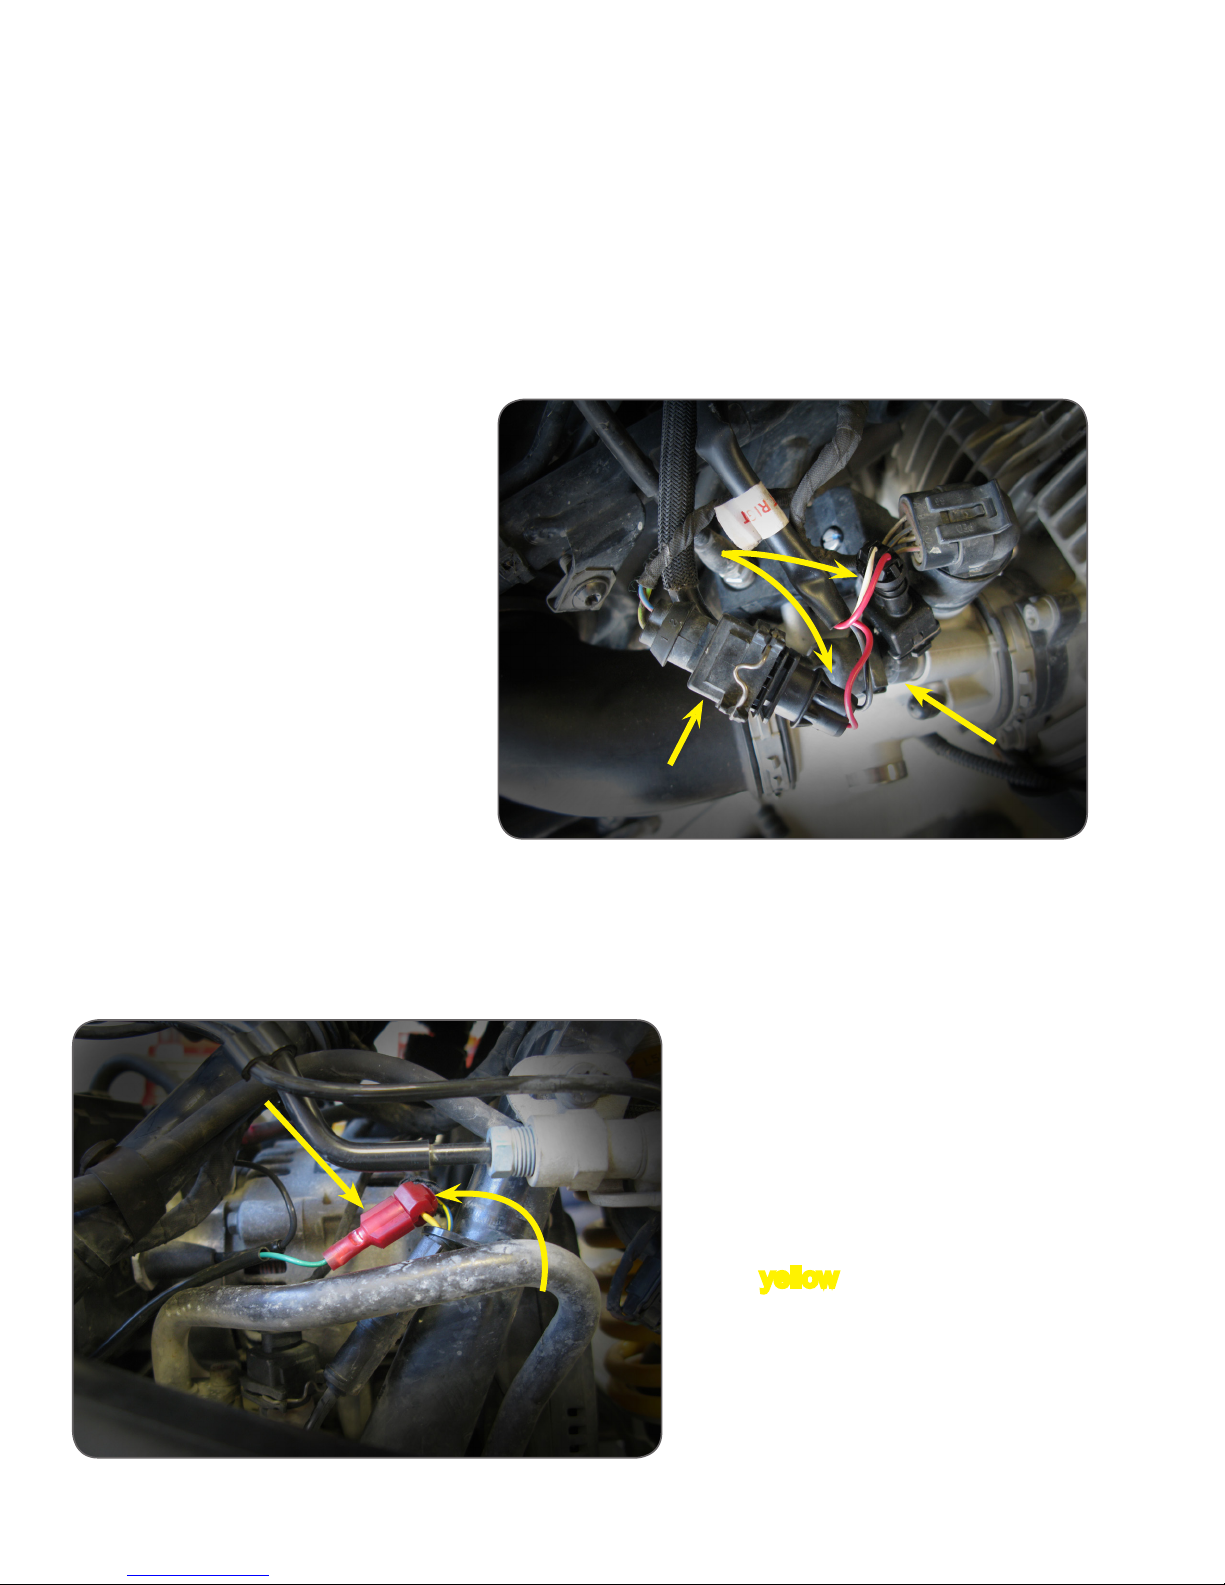
8>ROUTE/CONNECT
(CONT.)
8.2
1. Route the right side injector connectors under the air intake tube,
to the right side injector on
top of the throttle body.
2. Disconnect the factory
injector connector from the
injector.
3. Plug the Bazzaz injector
#2 right connectors inline between the factory
connector and injector.
BAZZAZ
CONNECTORS
BAZZAZ
CONNECTOR
FACTORY
CONNECTOR
SCOTCHLOK CRIMPED
ONTO YELLOW WIRE
FACTORY
INJECTOR
8.3
1. Route the Bazzaz Crank Position
Sensor (CKPS) lead to the front
right side of the bike.
2. Locate the factory CKPS connector
which can be found near the
factory alternator, on the right side,
attached to the frame rail.
3. Crimp a supplied Scotchlok onto
the yellow wire of the factory CKPS
connector and insert the Bazzaz
CKPS connector into the Scotchlok.
Page 8
9>SECURE
Use the supplied cable ties to secure the harness neatly
along the routing path free of any moving or hot components
(which could cause damage or failure of the system).
10>CHECK
If any problem is found, please carefully follow through the
installation steps again.
If problem still persists, please contact Bazzaz tech support
• Factory support is available in the US at 909-597-8300.
• For fastest support outside of the US, nd your local importer at bazzaz.net
11>REINSTALL
After it is determined that everything is correct,
reinstall the components removed in step 3.
12>USE
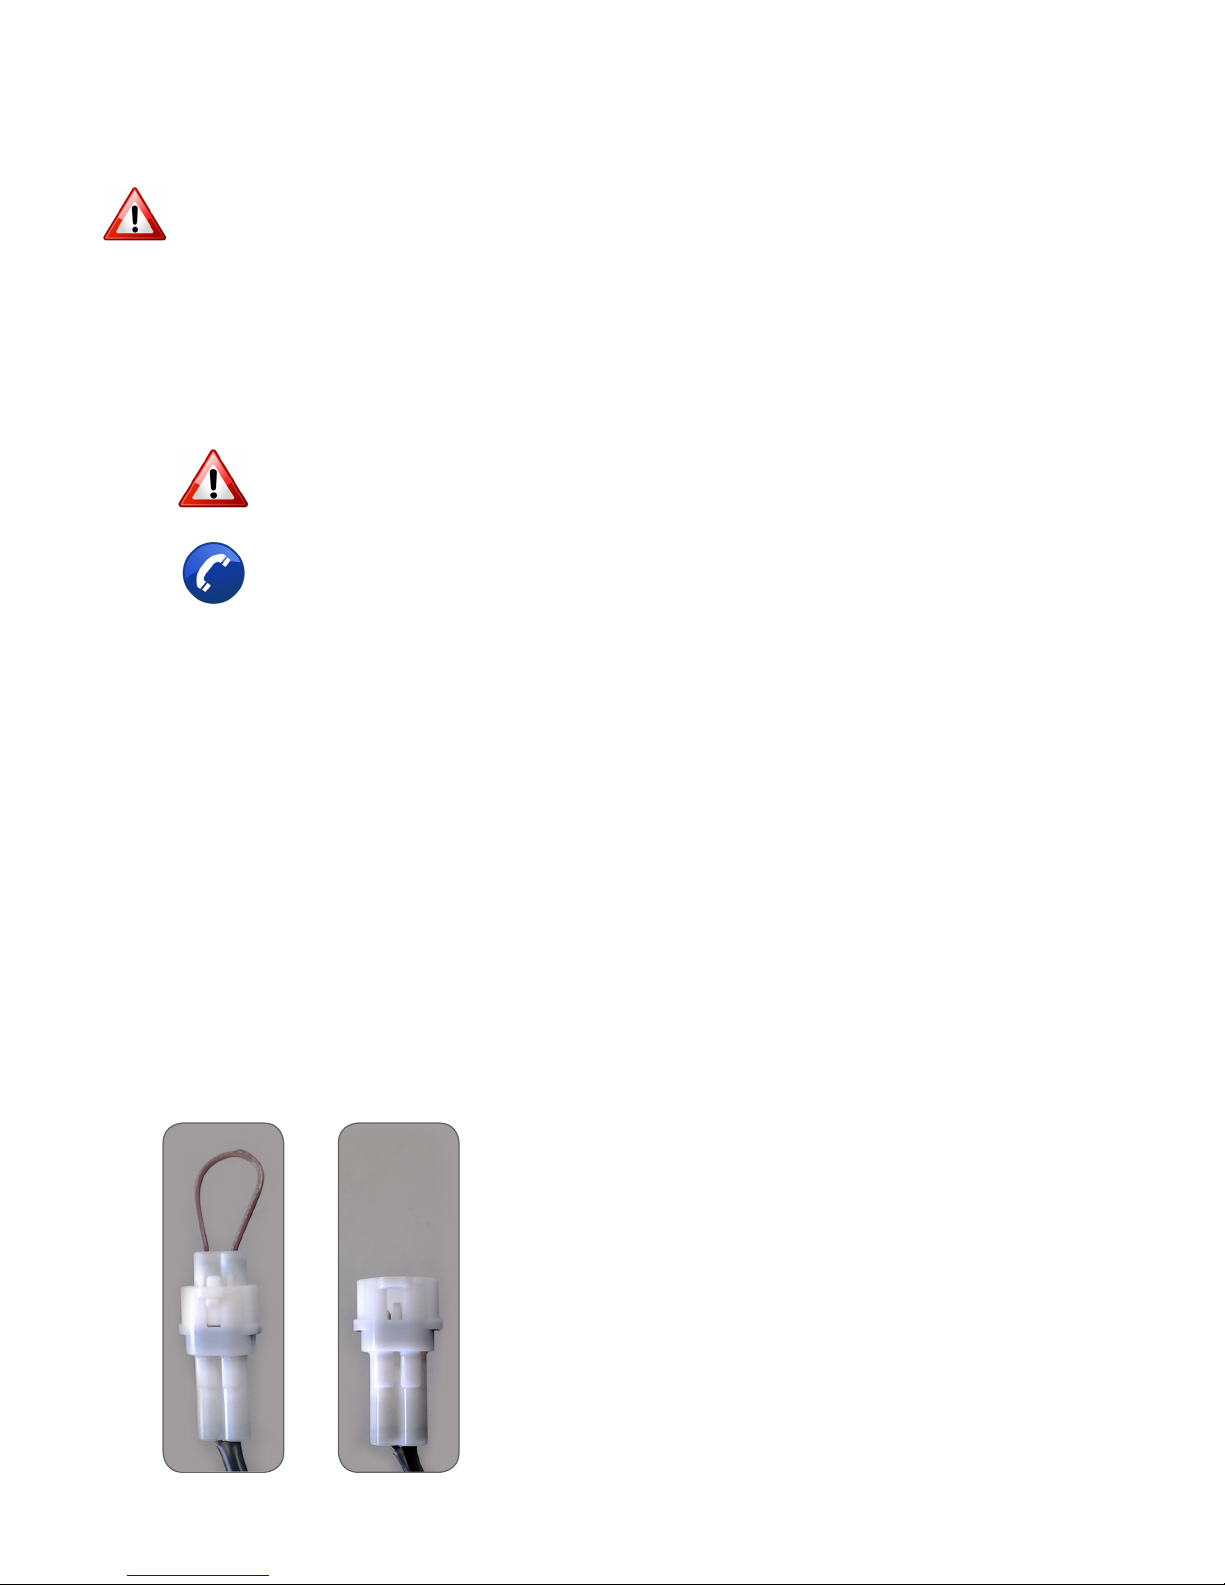
MAPS
The Bazzaz controller is
capable of storing two maps.
Switch maps by connecting or
disconnecting the map select
jumper supplied with the kit.
MAP 1 MAP 2
Page 9
13>SOFTWARE
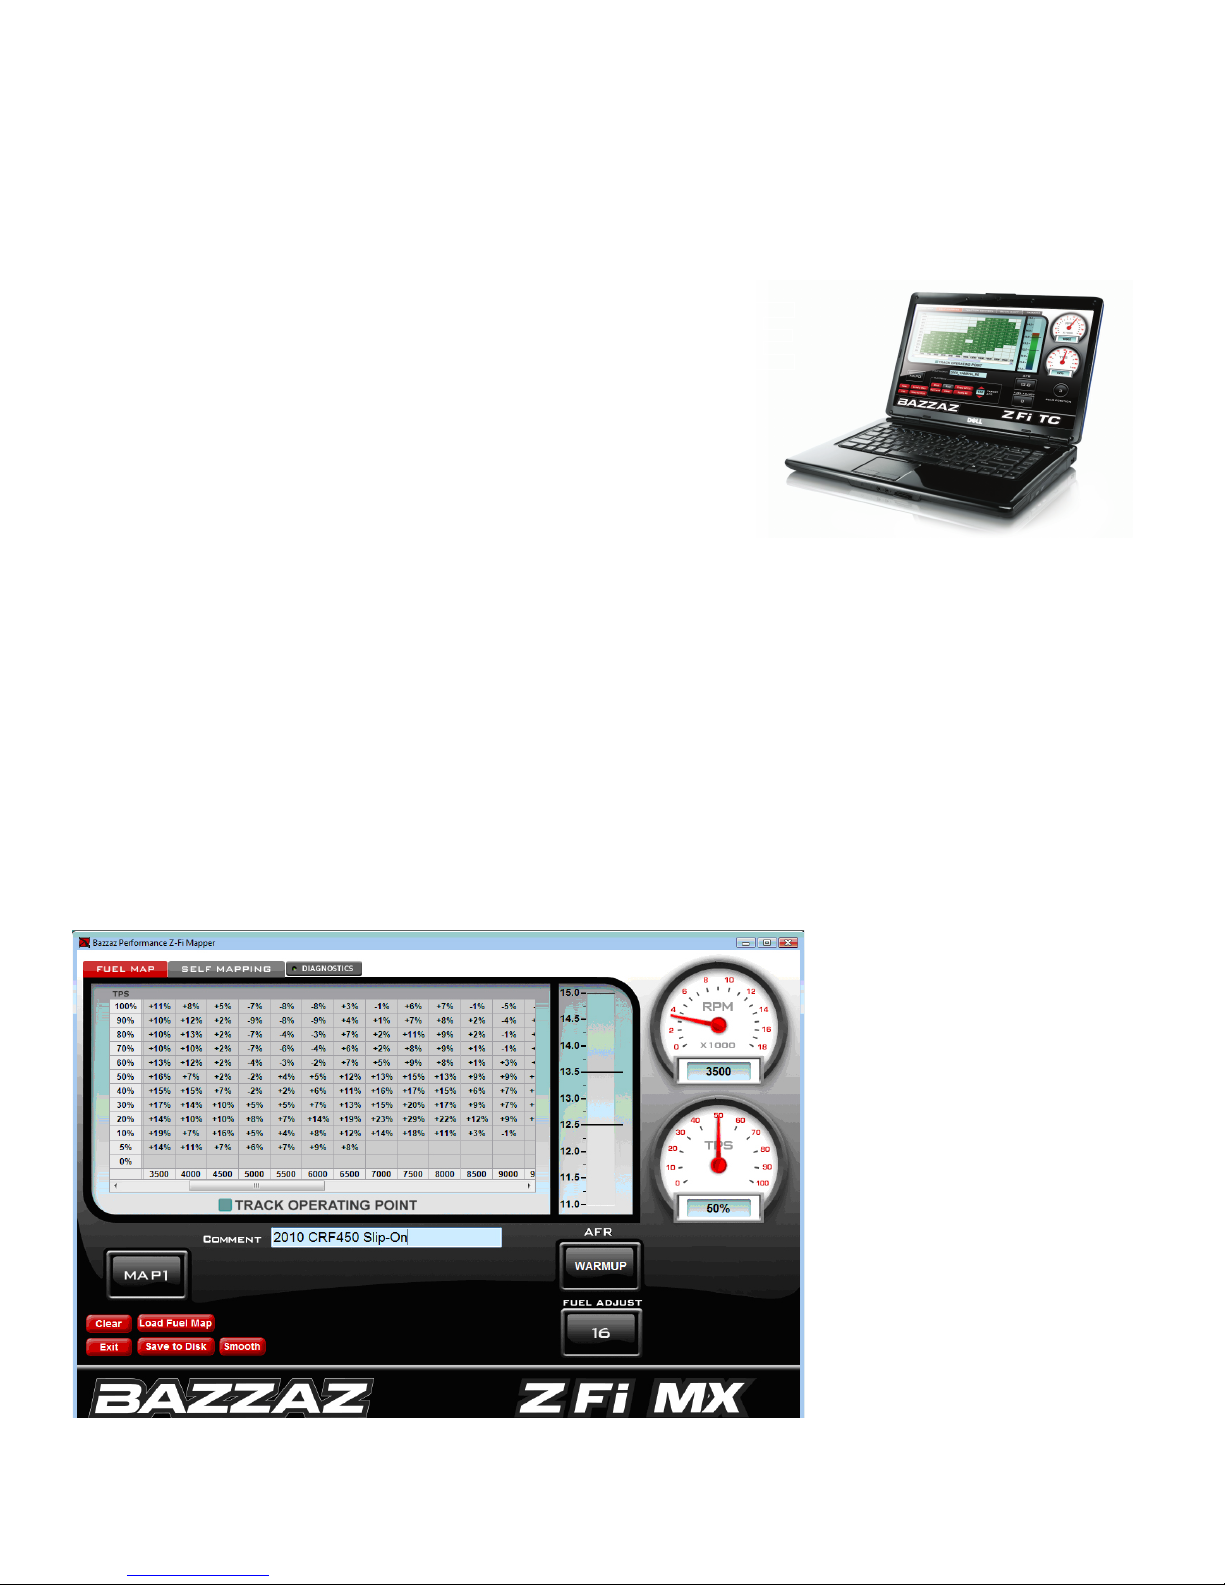
Download the latest software and instructions at bazzaz.net
Use software to:
• View and/or make adjustments to fuel maps
• Activate Z-AFM self mapper (sold separately)
• Save and load new fuel maps
• Re-calibrate throttle position sensor after throttle modications
• View diagnostics for troubleshooting
Page 10
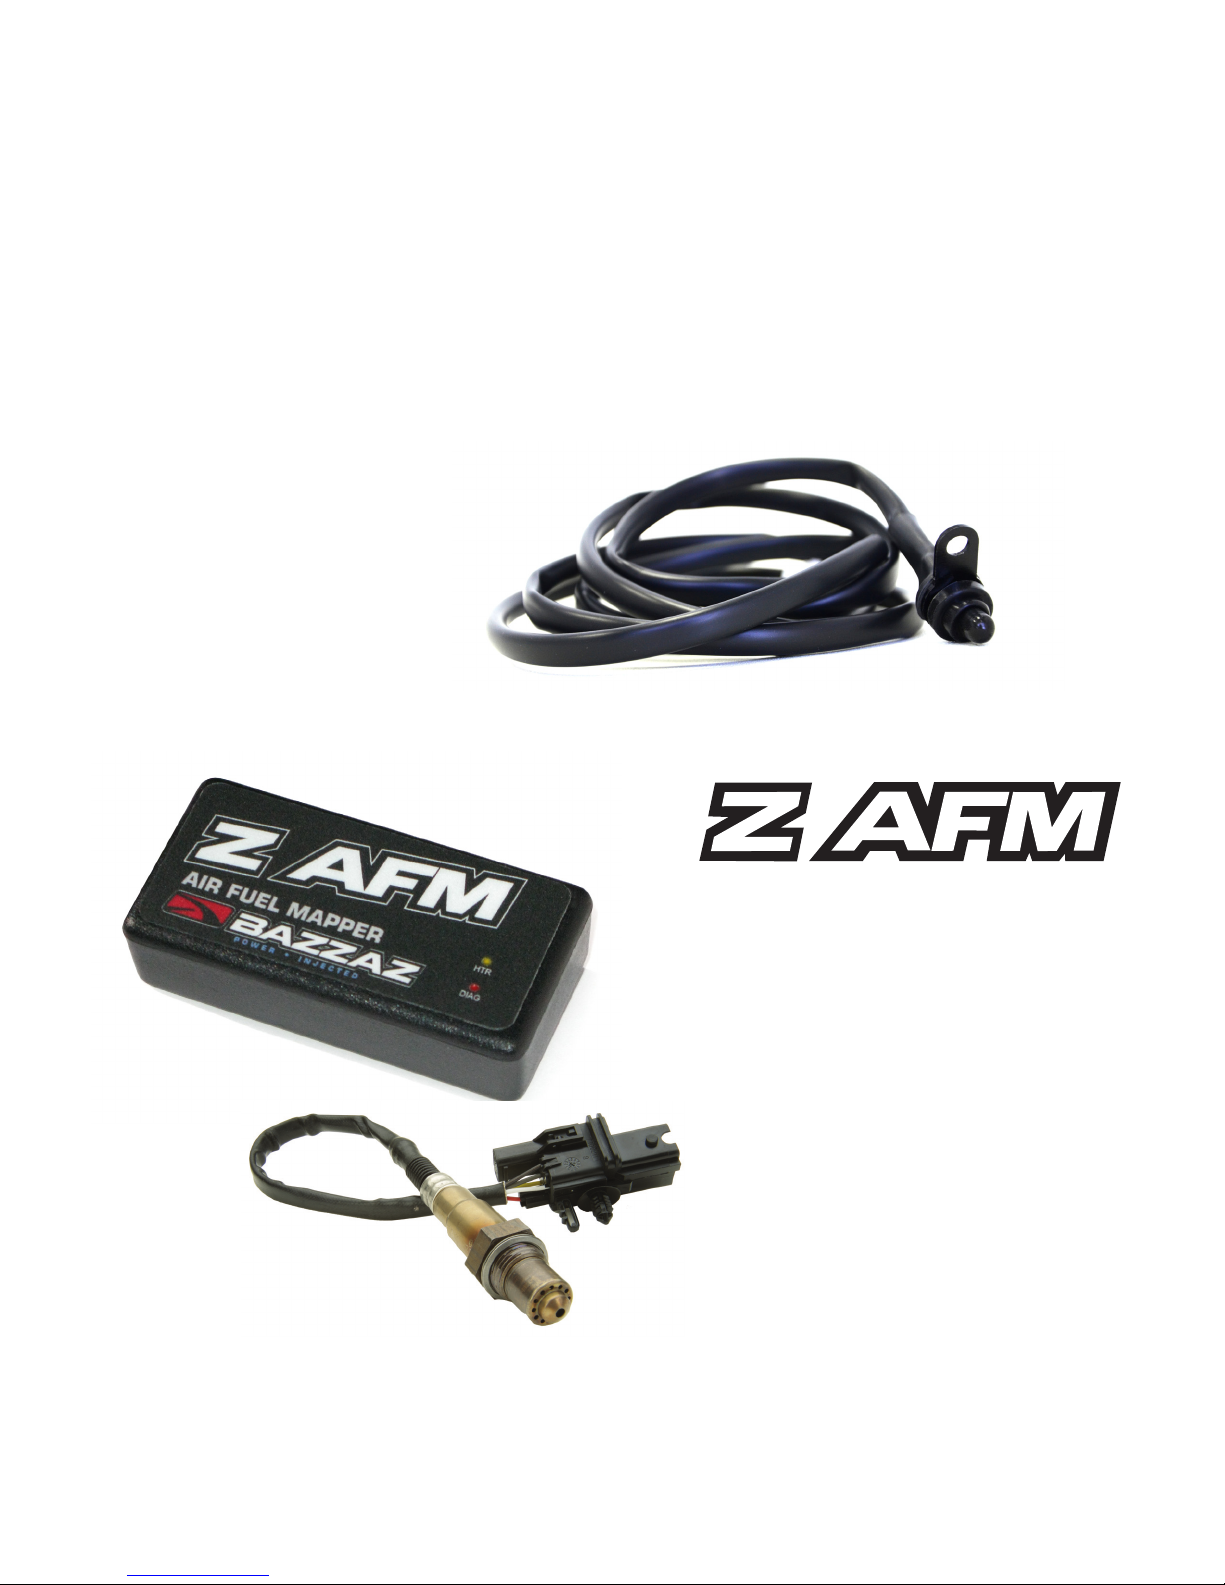
14>NEXT LEVEL
MAP SELECT SWITCH
Purchased separately.
Switch maps on the y with this handlebar-mounted switch.
Weatherproof toggle and easy installation.
79.95
SELF MAPPER
Purchased separately.
Build race-level
fuel maps for your
specic modications,
fuel type, engine,
and atmospheric
conditions simply
while riding.
02 sensor mounts into
exhaust and control
box easily plugs in
to any Bazzaz Z-Fi
product.
299.95
Page 11

Page 12

R
THE SMARTEST PERFORMANCE TUNING TECHNOLOGY
F1084
 Loading...