

For Use With
Ascensia
®
CONTOUR
™
Blood Glucose Meter
and Ascensia
®
MICROFILL
™
Test Strips
USER GUIDE
Blood Glucose Monitoring System

Thank you for choosing the Ascensia
®
CONTOUR™Blood Glucose Monitoring
System! We are proud to be your
partner in helping you manage your
diabetes. Our goal is to make this the
simplest, most straightforward Meter
you’ll ever use.
Additional Materials:
• Ascensia®MICROFILL™ Test Strips—Use for blood
glucose or control solution testing. Supplied in a
handy bottle with an easy-to-open flip-top lid.
• Ascensia™ M
ICROLET
®
Adjustable Lancing Device—Use
for finger puncture with Ascensia™ M
ICROLET
®
Lancet.
• BATTERIES—Uses two 3-volt (CR2032) lithium
batteries. Replace when necessary.
For short simple instructions, a quick reference guide is
also provided for your convenience. It can be useful
when traveling.
Your Ascensia
®
CONTOUR
™
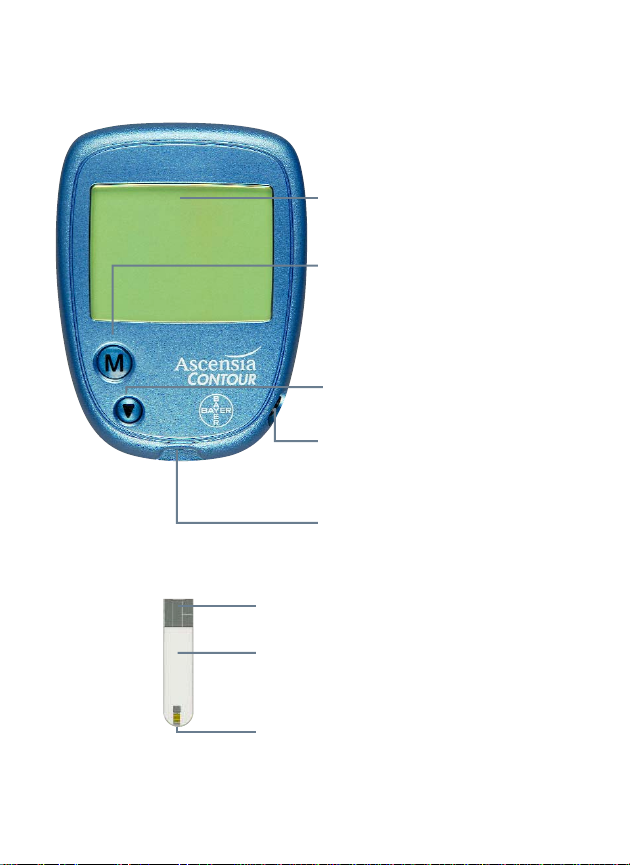
Meter
Screen: This is where your
blood glucose result will
display.
Gray Electrode End: Insert this end of
Test Strip into Meter.
Sample End or Tip of Test Strip:
Lightly touch this end of Test Strip to
blood drop.
Memory (M) Button: Use to
view results stored in the
memory, your 14-day average
and change Set-up features.
Scroll (▼) Button: Use to
scroll through your blood
glucose results in the memory
and change Set-up features.
Data Port: Allows Meter to
communicate with a personal
computer via a cable.
Test Strip Slot: This is
where you insert the
Test Strip.
Ascensia M
ICROFILL Test Strips: Use
for blood glucose or control solution
testing. Supplied in a handy bottle
with an easy-to-open flip-top lid. No
coding is required.
Caution: Before using any product to test your blood glucose (sugar),
read all instructions carefully and practice the test.
Note: Fold this page out for easy reference.
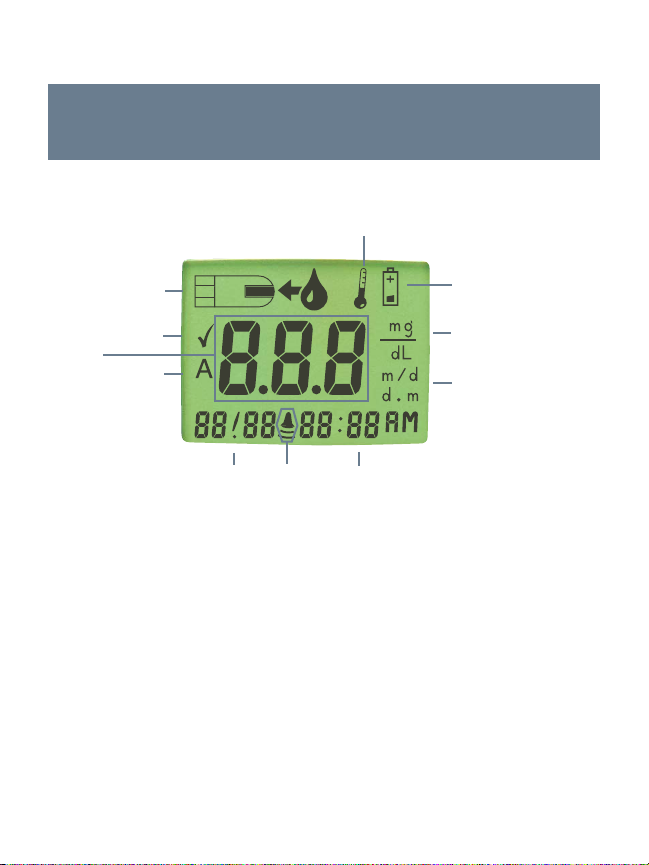
Ascensia®CONTOUR™Meter
Display Segments
A. Apply Sample: When your Meter is ready for you to apply a sample of blood
or control solution, it will show you this picture of a blood drop being
“sipped” into the Test Strip.
B. Te mperature Symbol: If you see this on your screen, you will know that it is
either too cold or too hot for your Meter to test accurately.
C. Low Battery Symbol: This is the symbol you will see when the battery life
is low. Replace batteries.
D. Control Marker: This ✓ is the Meter’s way of telling you it has
detected Control Solution.
Note: The✓does not indicate the Control Test
result is within the specified range.
E. Units-of-Measure: Blood glucose results can be displayed either in
milligram per deciliter (mg/dL) or millimole per liter (mmol/L) depending
on the country where you live.
F. Average: This “A” is used when displaying the 14-day average.
G. Date Format: The date can be displayed either as month/day (m/d) or as
day.month (d.m) depending on the country where you live.
H. Date: The month and day are displayed here.
I. Beeper: This picture will tell you if the beeper is on or off.
J. Time: The hour, minutes and AM/PM are displayed here.
K. Results/Errors: This is the area where your test results or any possible error
codes will be displayed.
{
{
{
{
}
}
{
A
K
B
C
D
E
F
G
HI J
A full display, as shown here, indicates that all characters in the display are working
properly.You will briefly see this display each time the Meter turns on. Compare your
Meter to the display shown here. If there is a difference, see Solving Problems, page 21.

Table of Contents…
Everyday Use
Testing Your Blood Glucose Level . . . . . . . . . . . . . . . . . . 4
Viewing Your Stored Test Results . . . . . . . . . . . . . . . . . . . 8
Performing a Control Test . . . . . . . . . . . . . . . . . . . . . . . . 10
Helpful Hints . . . . . . . . . . . . . . . . . . . . . . . . . . . . . . . . . . . 12
Beyond Everyday Use
Setting Time, Date and Other Features . . . . . . . . . . . . . . 13
Installing Batteries . . . . . . . . . . . . . . . . . . . . . . . . . . . . . . . 18
Meter and Test Strip Care . . . . . . . . . . . . . . . . . . . . . . . . . 19
Solving Problems . . . . . . . . . . . . . . . . . . . . . . . . . . . . . . . . 20
Specifications . . . . . . . . . . . . . . . . . . . . . . . . . . . . . . . . . . . 22
Performance Evaluations
Precision . . . . . . . . . . . . . . . . . . . . . . . . . . . . . . . . . . . . . . . 23
Accuracy . . . . . . . . . . . . . . . . . . . . . . . . . . . . . . . . . . . . . . . 24
Multiple Site Testing Evaluation . . . . . . . . . . . . . . . . . . . 34
Transfer Test Results to a Computer . . . . . . . . . . . . . . . . 36
Service . . . . . . . . . . . . . . . . . . . . . . . . . . . . . . . . . . . . . . . . 37
Supplies . . . . . . . . . . . . . . . . . . . . . . . . . . . . . . . . . . . . . . . 38
Warranty . . . . . . . . . . . . . . . . . . . . . . . . . . . . . . . . . . . . . . 40
The Ascensia®CONTOUR™Blood Glucose Monitoring System (Meter,
Test Strips and Controls) is intended for self-testing by persons with
diabetes, and by healthcare professionals, to monitor the level of
glucose in whole blood. The Ascensia CONTOUR System is specific for
glucose and has been referenced to plasma/serum glucose values.

2
Your Ascensia®CONTOUR™Meter…
❖ Easy to Use ❖ No Coding Required
❖ Small Blood Sample ❖ 15 Second Test Time
❖ Sleek Design
Easy: The Ascensia CONTOUR Blood Glucose Monitoring
System is all about simplicity. You’ll notice its noncomplicated
approach the first time you see it. Simple things—like the use
of two simple buttons and a clear display—are sure to make
this your favorite Meter right from the start.
Automatic: The designers of the Ascensia CONTOUR
Meter have worked very hard to make your life a little easier.
You no longer have to worry about coding the Meter (it’s
automatic) or marking a Control Test result (it’s automatic,
too). The Ascensia C
ONTOUR Meter will even automatically
tell you if a Test Strip is underfilled.
Makes Sense: Your new Ascensia CONTOUR Meter just
makes sense. You’ll find features that customers just like you
asked for. Practical features like a 15 second test time, a very
small blood sample size and a simple testing procedure make
the Ascensia C
ONTOUR Meter your Meter.
Convenient: The Meter’s small size, sleek design, and
ease of use means you’ll take it everywhere with you. Your
Ascensia C
ONTOUR Meter takes up about as much room in
your pocket or bag as your key ring. You’ll have it with you
and will be more likely to test more often, which can mean
better control of your diabetes.
Everyday Use
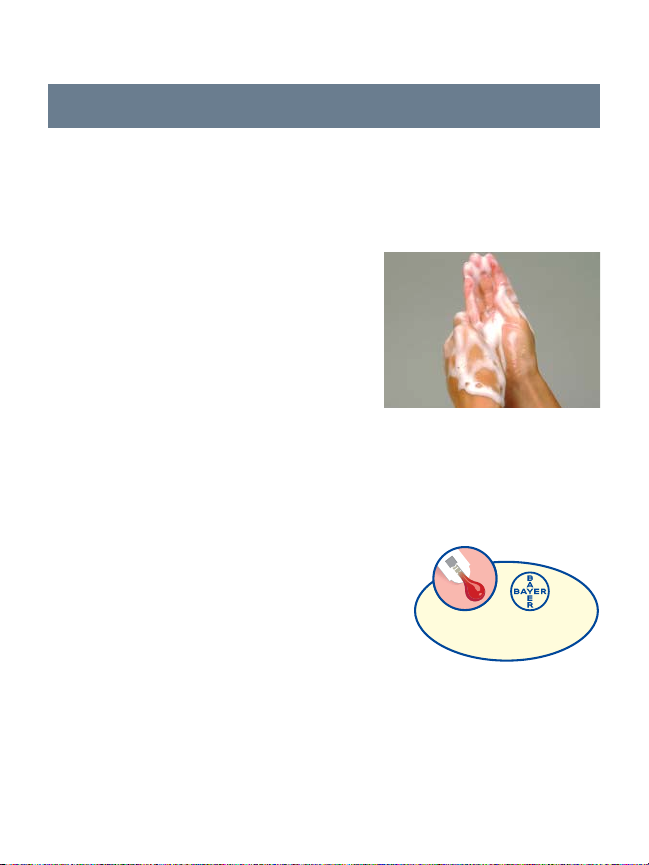
Before You Begin…
A few things you should know:
A) Gather your testing supplies: your Meter, Test Strips,
Ascensia M
ICROLET Adjustable Lancing Device, and
lancets.
B) Wash your hands thoroughly
with warm soapy water and
dry them well.
C) Avoid excessive “milking” of
your finger when forming a
drop of blood.
D) Test immediately after forming a drop of blood on
your finger.
E) DO NOT press Test Strip firmly against the finger.
F) DO NOT drop blood directly on
flat surface of the Test Strip.
Your Test Strip is designed to
easily “sip” the blood into the
Test Strip.
WARNING: Do not change your medication based on
Ascensia C
ONTOUR blood glucose results without the
advice of your physician or healthcare professional.
3
Sip-in Sampling
Automatic Sensor-filling Action
®
Testing Your Blood Glucose Level…
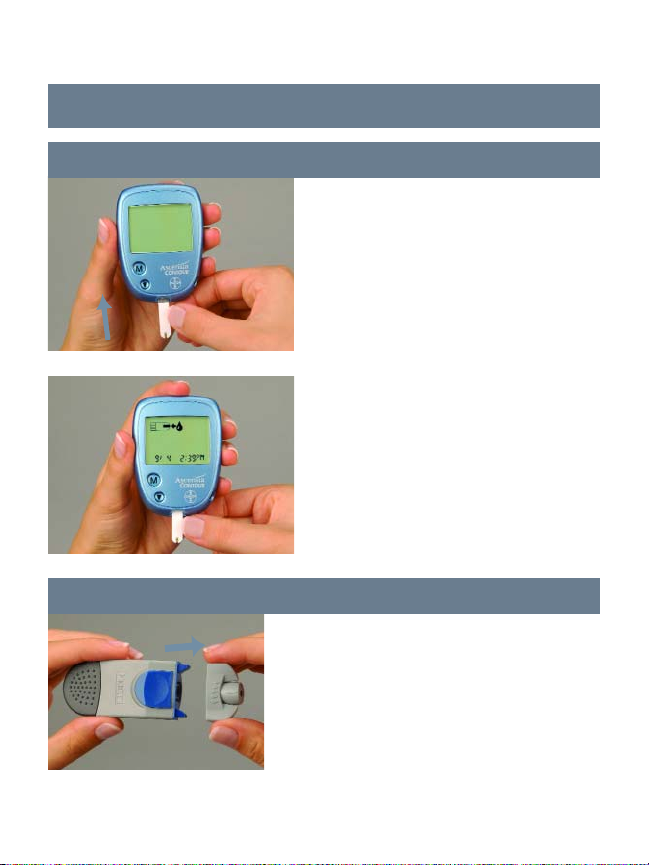
Insert Test Strip
1. Hold the round end of the
Test Strip with the gray
electrode side up, and insert
the Test Strip into the Meter
until it stops.
The Meter will run a quick
self-test and then prompt
you to apply blood by
showing you a picture of a
blood drop being “sipped”
into the Test Strip.
Obtain Blood Drop
2. Remove the Endcap from the
Ascensia™ M
ICROLET
®
Device.
See package insert for Ascensia
M
ICROLET Adjustable Lancing Device
for complete instructions for
obtaining a blood drop.
Note: Users wanting to use Multiple Site Testing see pg. 7.
4
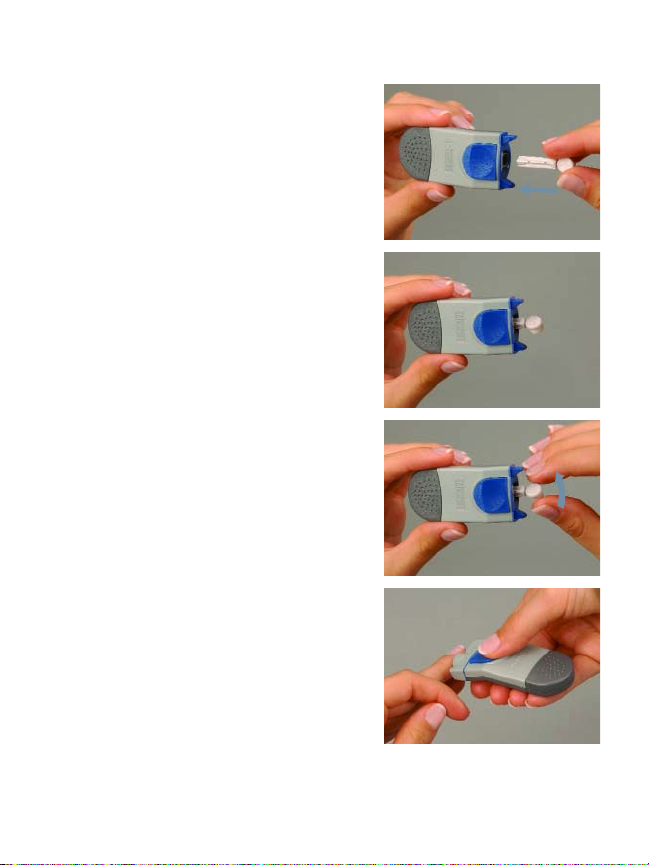
3. Insert lancet firmly until it comes
to a full stop. This will “cock”
the device.
4. Twist off lancet cap.
5. Replace the Endcap.
6. Press Ascensia M
ICROLET Device
firmly against puncture site and
press button to release. Form a
small drop of blood.
5
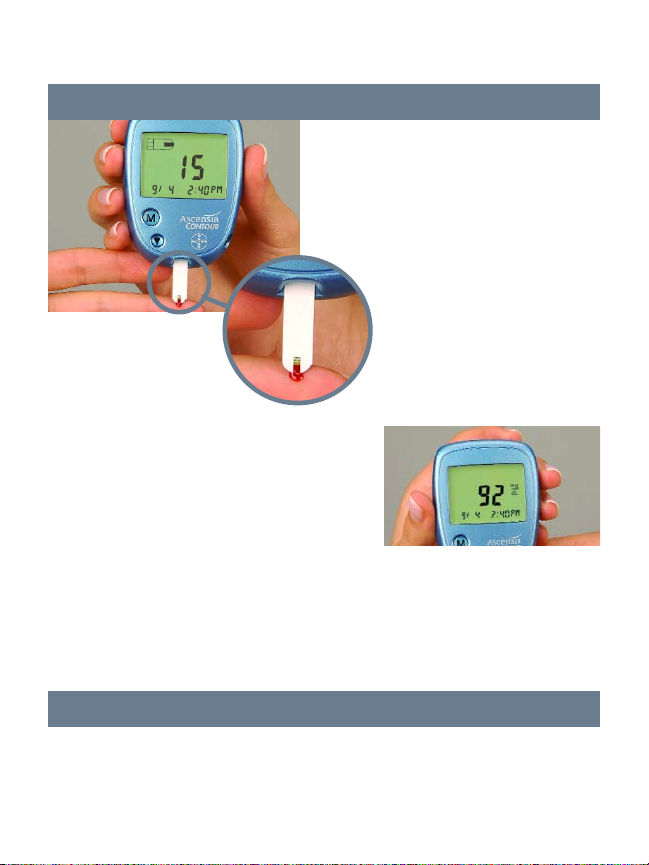
Test Blood Glucose
7. Bring tip of the Test Strip to
lightly touch the drop of
blood. Hold until the Meter
beeps. Blood is automatically
pulled into the Test Strip
through the tip. The Meter
will now begin counting
down the 15 seconds
until the test is
complete.
8. Leave the Test Strip in the Meter
until the test result appears on
the display.
Caution: If you see “HI” or “LO” displayed, your blood
glucose level may be above 600 mg/dL (33.3 mmol/L) or
below 10 mg/dL (0.6 mmol/L). Repeat test. If you receive the
same result, call your physician or health care professional
immediately.
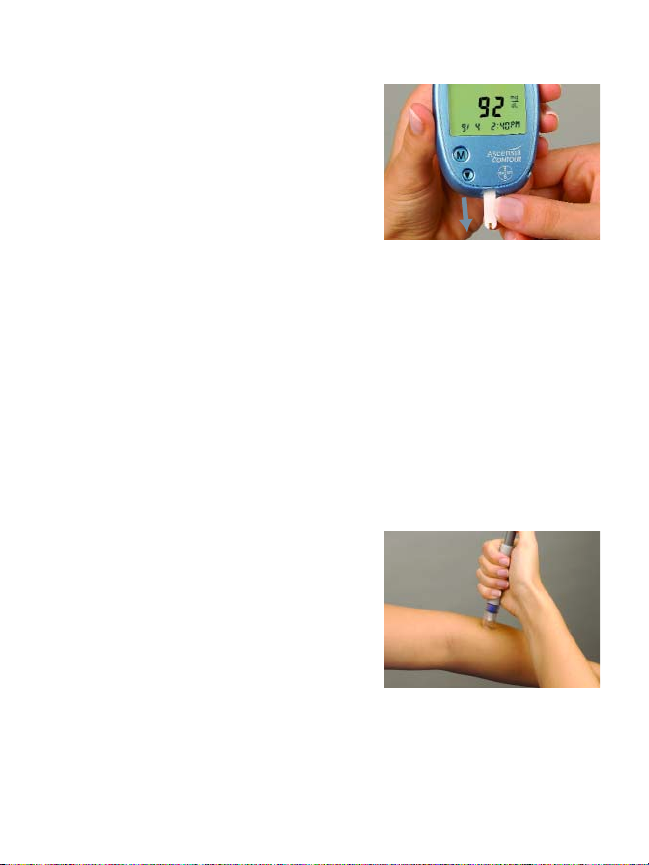
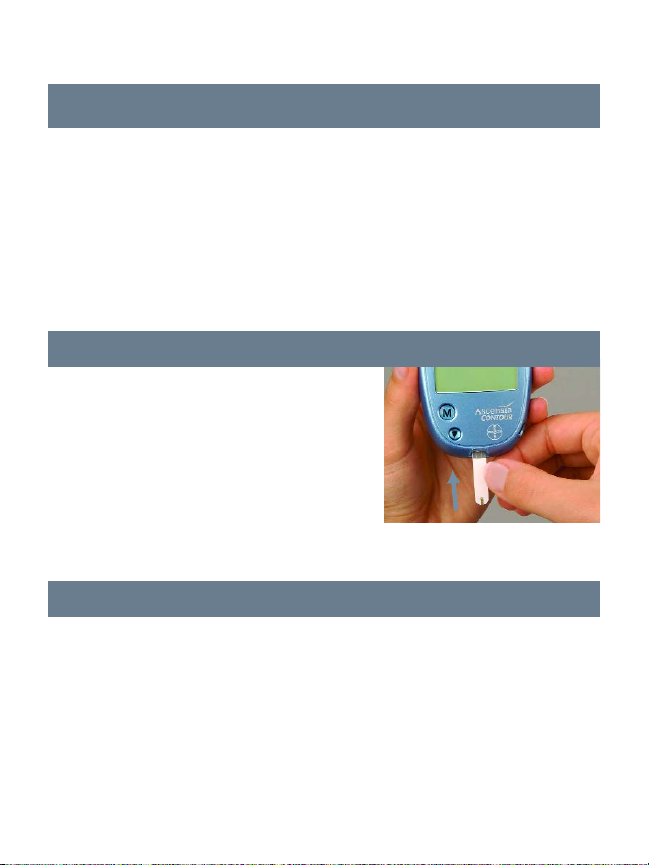
Turn Meter Off/Dispose of Used Test Strip
9. To turn your Meter off, simply remove the used Test Strip.
Your test result will automatically be stored in memory.
6
Caution: Dispose of the used Test
Strip and lancet carefully to prevent
injury or contamination to others.
J
Helpful Hint: You should always
turn your Meter off by removing the
Test Strip following a test. This will
conserve your battery power.
However, if you forget to turn the Meter off, the meter will
turn itself off after three minutes.
Multiple Site Testing
Blood samples for glucose testing may be taken from sites other than
your fingertips. Multiple site testing using blood from the forearm, palm,
abdomen or thigh may give glucose results that significantly differ from
fingertip blood. Differences occur when blood glucose levels are changing
rapidly, such as after a meal, after insulin and with exercise.Note: We
recommend using the Ascensia™ MICROLET VACULANCE®Lancing Device
when testing from sites other than the fingertip (see page 39).
We recommend the following:
1. Use a fingertip sample for testing blood glucose whenever you will
be participating in risky activities such as before driving a car or
operating machinery.
2. If you have hypoglycemic unaware-
ness (you do not recognize the symptoms of or cannot tell when you have
low blood sugar) Multiple Site Testing
is not recommended. Please consult
with your Healthcare Professional if
you have low blood glucose levels.
3. Select a soft, fleshy area of skin that is
free from hair and visible veins for Multiple Site Sampling.
4. Consult your Healthcare Professional to determine if Multiple Site
Testing is right for you.
5. Use Multiple sampling sites for blood glucose tests only when it is
more than 2 hours after a meal, more than two hours after taking
medication, or more than two hours after exercise.
7
Viewing Your Stored Test Results…
Recall Test Results and Your 14-Day Average
Note: Your Ascensia CONTOUR Meter automatically calculates
a 14-day average for you based on your blood glucose
readings over the past 14 days.
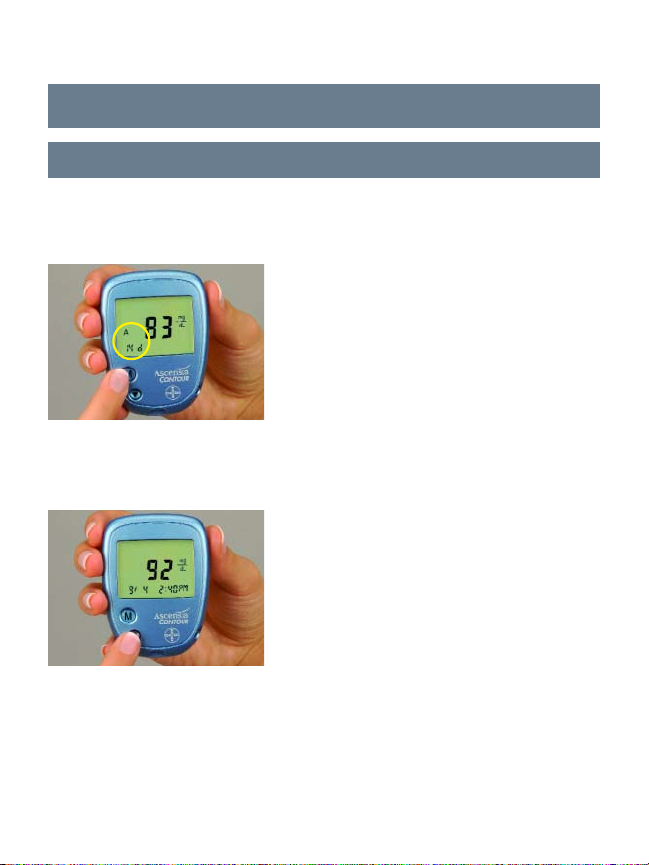
1. Press the M Button. This will turn
your Meter on and display your
14-day average.
Note: The “A” and “14d” icons on
the screen indicate that the number
displayed is your 14-day blood
glucose average.
J
Helpful Hint: The display will show three dashes if there
are no blood glucose test results in the memory.
2. Press the ▼ Button to access
memory and scroll through your
blood glucose results one by one.
You will see the most recent test
result. You may also press and
hold this button to continuously
scroll through the test results.
Your Meter can hold up to 240
test results. When you reach the end of the test results,
“End” will be displayed. The Meter will also beep. You may
press the ▼ Button to view the 14-day average and the
blood glucose test results again.
3. Press the M Button to turn off your Meter.
8
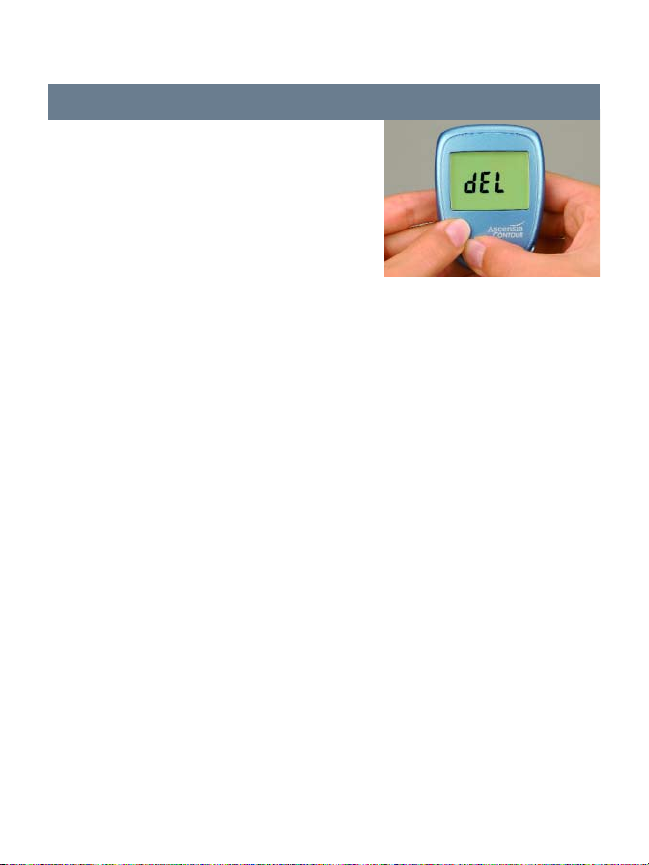
Delete All Test Results
If you wish to delete all test results,
follow these simple steps:
1) Press the M Button to turn your
Meter on and display your 14-day
average.
2) Press and hold the ▼ Button.
(Your results will begin to scroll on
the screen.) While holding the ▼ Button, press and hold
the M Button until “dEL” appears on the screen
(this will take about 3 seconds).
3) Release both buttons. “dEL” and “ALL” will now alternate
on the screen 5 times and all test results will be deleted.
The Meter will now show you 3 dashes along with the “A”
and “14d” icons. Your results have been deleted.
4) Press the M Button to turn your Meter off.
J
Helpful Hint: If you change your mind and decide that
you do not wish to delete all of the test results while the
“dEL” and “ALL” icons are alternating on the display, simply
press any button and the test results will not be deleted.
9
10
Performing a Control Test…
There are times when you will want to do a quality Control
Test so you know that your system is working properly. You
may also want to do a Control Test to check the way you
perform a test.
Before you begin, gather your testing supplies: your Meter,
Test Strips and a bottle of Ascensia
®
MICROFILL™ Control
Solution.
Insert Test Strip
1. Hold the round end of the Test
Strip with the gray electrode side
up, and insert it in the Meter until
it stops. The Meter will run a
quick self-test and then you will
see a flashing drop on the screen.
This is your signal to apply Control
Solution.
Prepare Control Drop
2. Squeeze a small drop of Control Solution on a clean
nonabsorbent surface (such as a clean piece of wax paper).
Do not apply Control Solution to the Test Strip directly
from the bottle.
 Loading...