

Page 1

Manual de usuario | Manuel d’usager | User’s guide
Báscula electrónica
Bascule électronique
Electronic weighing scale
PD
Page 2

ESFRENG
ÍNDICE GENERAL | INDEX GÉNÉRALE | GENERAL INDEX PD model
2
ÍNDICE
1. RECOMENDACIONES
3
2. FUNCIONES TECLADO 3
3. EXPLICACIÓN DE SÍMBOLOS 4
4. OPERACIONES 4
5. MENSAJES DE ERROR 6
6. PROGRAMAR PARÁMETROS EXTERNOS 6
7. CALIBRACIÓN EXTERNA 6
8. ESPECIFICACIONES BÁSICAS 7
9. GARANTÍA 7
INDEX
1. RECOMMANDATIONS
8
2. FONCTIONS DU CLAVIER 8
3. EXPLICATION DE SYMBOLES 9
4. OPÉRATIONS 9
5. MESSAGES D’ERREURS 11
6. PROGRAMMER LES PARAMÈTRES EXTERNES 11
7. CALIBRAGE EXTERNE 11
8. SPECIFICATIONS BASIQUES 12
9. GARANTIE 12
INDEX
1. NOTICES
13
2. KEYPAD FUNCTIONS 13
3. EXPLANATION OF SYMBOLS 14
4. OPERATIONS 14
5. ERROR MESSAGES 16
6. EXTERNAL PARAMETERS SETTING 16
7. EXTERNAL CALIBRATION 16
8. BASIC SPECIFICATIONS 17
9. WARRANTY 17
Declaración de conformidad
Déclaration de conformité
Declaration of conformity
18
Page 3

Modelo PD Manual de usuario
ESFRENG
3
1. RECOMENDACIONES
Precauciones antes de utilizar la báscula
1. Por favor, guarde la báscula en un sitio seco y con temperatura ambiente. No la almacene en sitios
donde la temperatura es alta.
2. No permita que ningún líquido entre dentro de la báscula o tenga algún contacto con ella. Si esto
ocurriese, seque la báscula con un paño seco.
3. Evite el impacto de cualquier objeto con la báscula. No tire cargas encima de la báscula ni someta
tampoco a la bandeja de pesar a fuertes golpes de carga.
4. La carga situada sobre la bandeja de pesar no debe exceder la capacidad máxima de peso de la báscula.
5. Si no va a utilizar la báscula durante cierto tiempo, por favor, límpiela y almacénela en una bolsa de
plástico, en condiciones secas. Debe incluirse también un saquito desecante para evitar que se formen
humedades.
6. No mezcle diferentes tipos de bacteria seca ni tampoco baterías secas usadas con baterías secas nuevas.
RECOMENDACIONES DE USO
1. Para conseguir una lectura precisa de las pesadas sitúe la báscula en una superficie firme y nivelada,
libre de vibraciones.
2. Evite realizar operaciones con la báscula a la luz directa del sol o con la influencia de corrientes de
cualquier tipo.
3. Retire cualquier peso que pueda encontrarse sobre la bandeja de pesar antes de encender la báscula
y evite dejar ningún peso sobre la bandeja de pesar durante largos períodos de tiempo
4. Una vez que se ha encendido la báscula, ella procederá a realizar una prueba de pantalla de LCD o
LED y después volverá a cero. Entonces estará a punto para su uso.
5. Para una mayor precisión encienda la báscula durante de 1 a dos minutos antes de su utilización.
6. Por favor, tenga en cuenta que cuando el símbolo aparezca en pantalla, las baterías gastadas deben
ser retiradas.
7. Todos los productos pesados deben situarse en el centro de la bandeja de pesar para asegurar una
pesada precisa. Las dimensiones totales de los productos que se están pesando no deben exceder las
dimensiones de la bandeja de pesar.
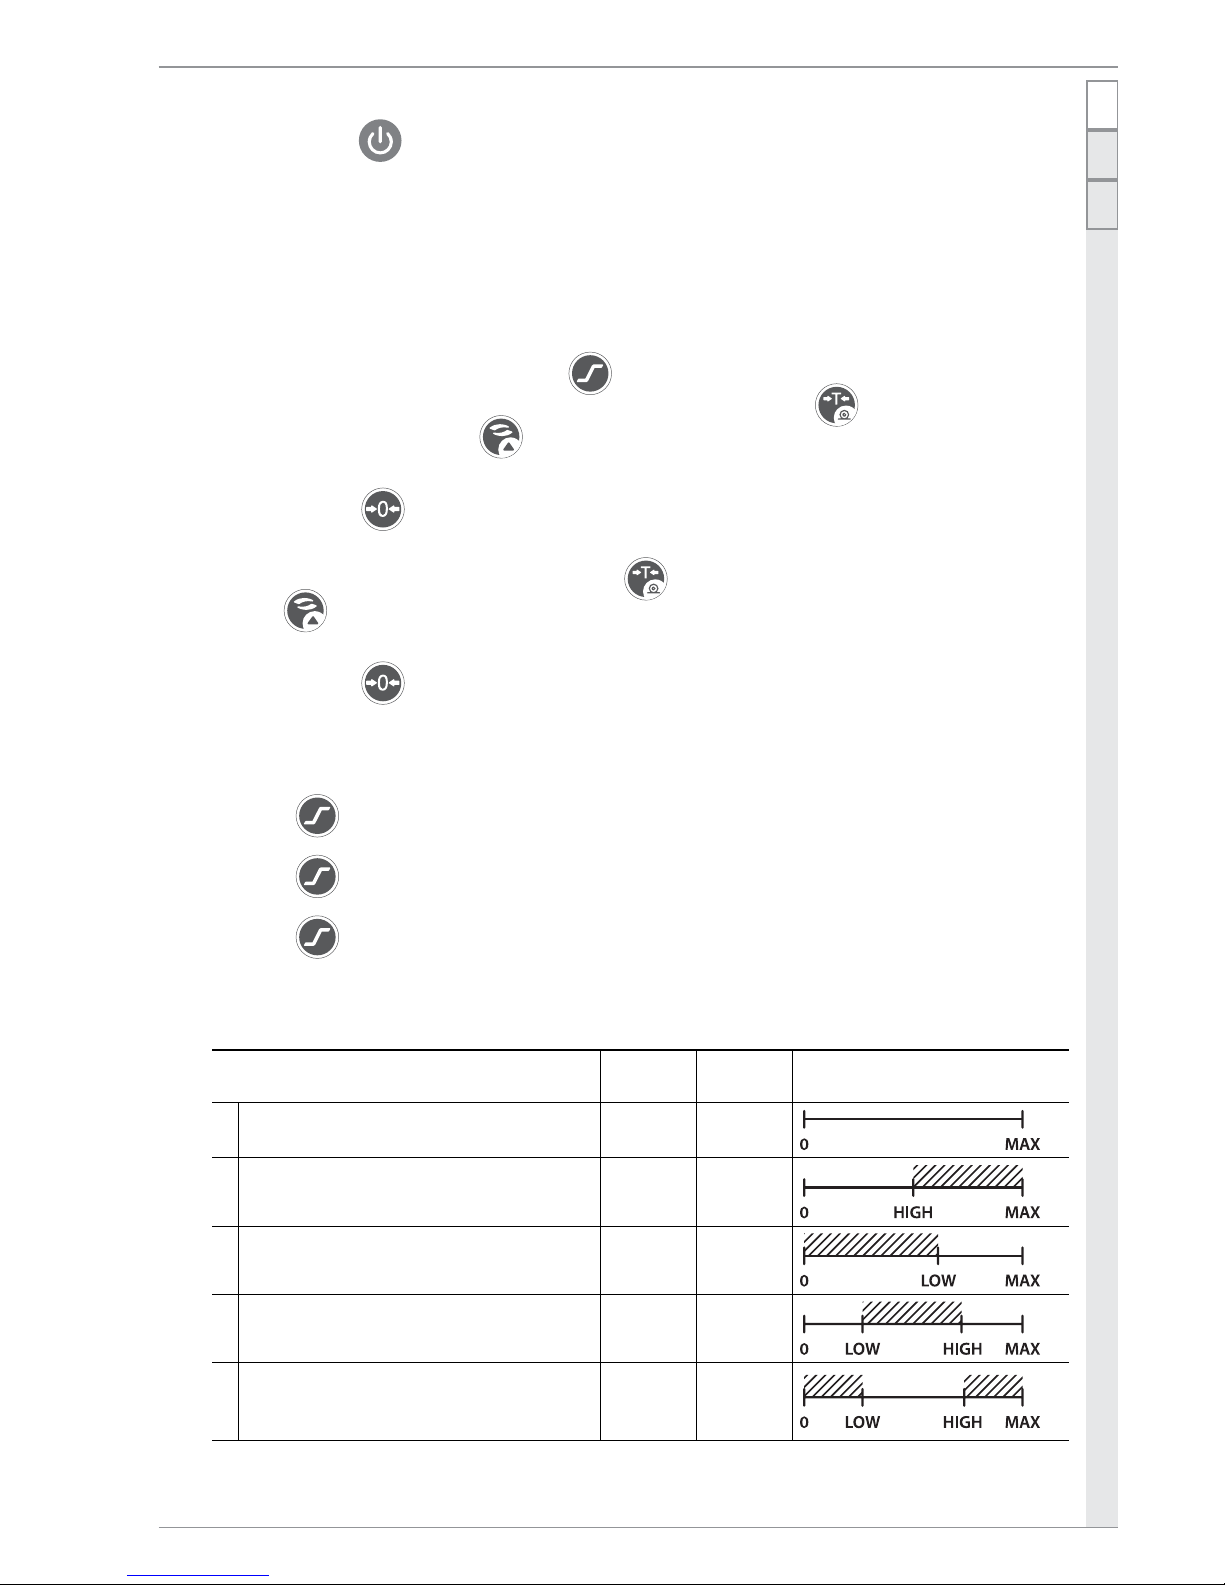
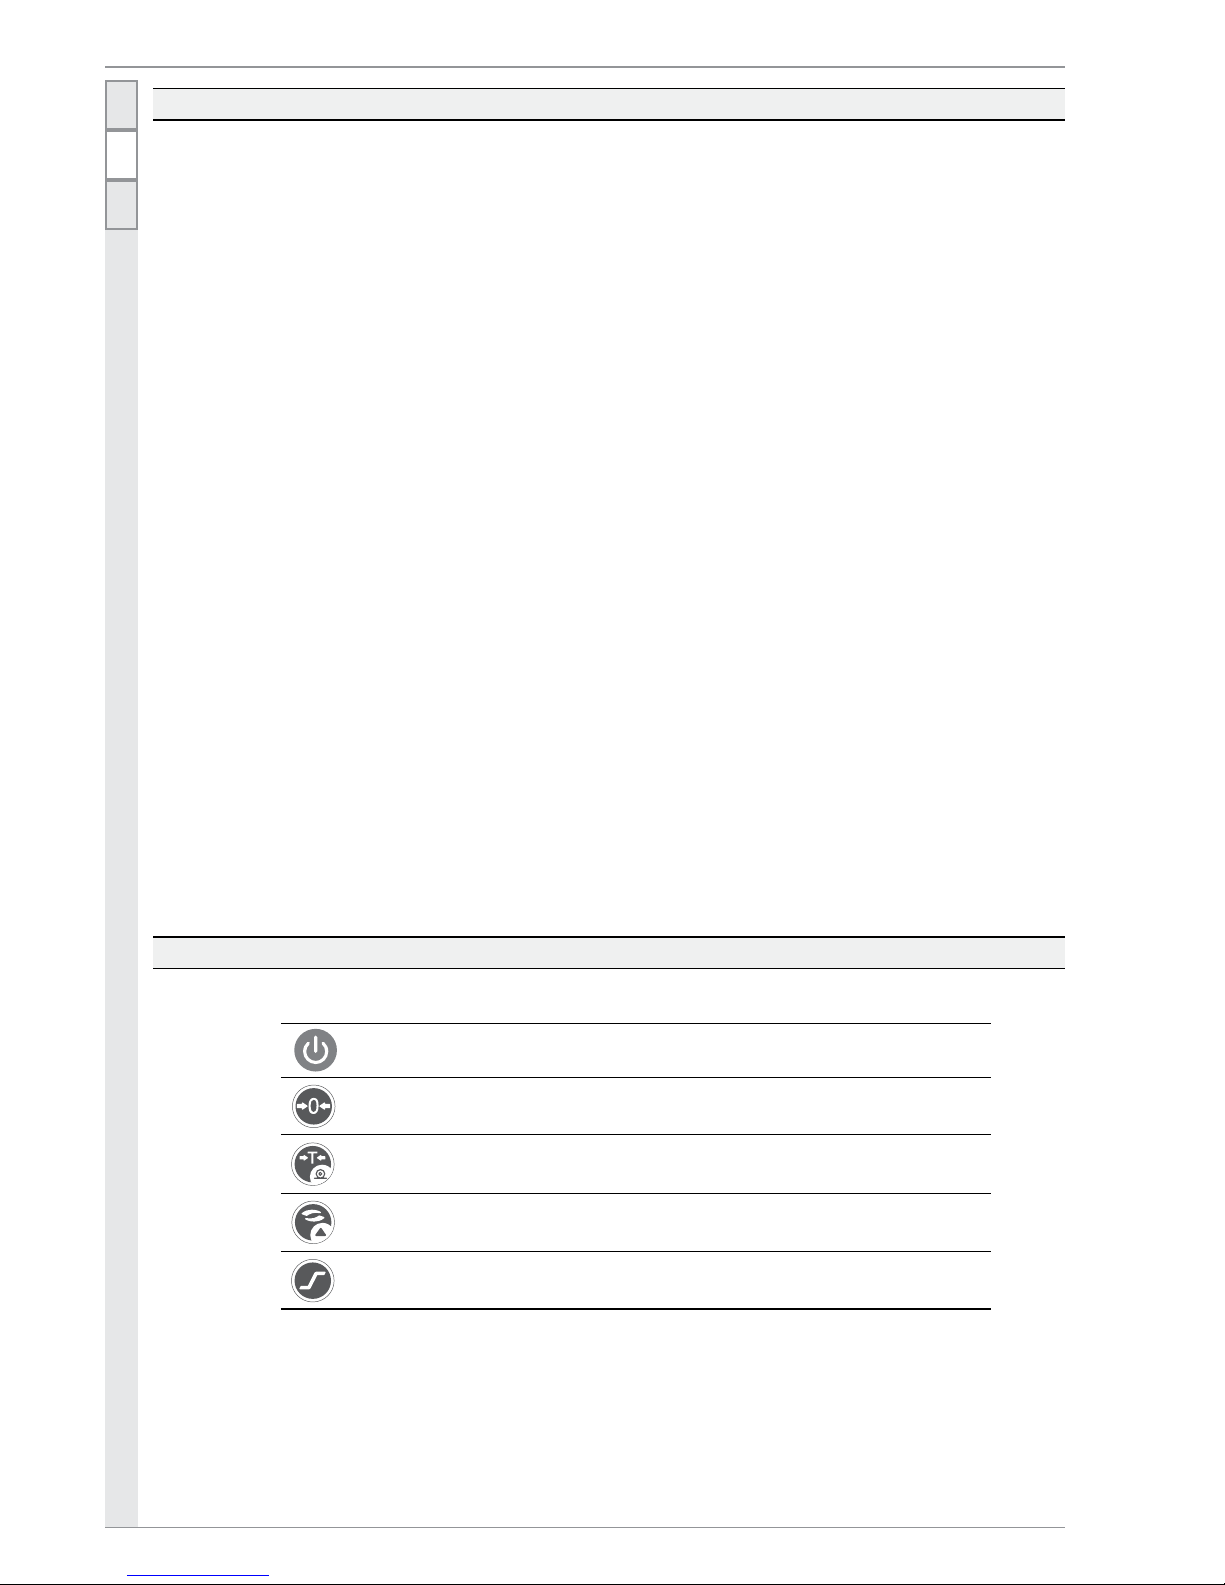
2. FUNCIONES DE TECLADO
Tecla de encender
Tecla cero a re-cero del peso
Tecla Tara para deducir el peso del contenedor
Seleccionar la unidad: las unidades opcionales hacen referencia a la placa principal
Pre programar los límites Superiores & Inferiores
Page 4

ESFRENG
Manual de usuario Modelo PD
4
3. EXPLICACIÓN DE SÍMBOLOS
Pantalla LED:
Pantalla LCD:
Indicador cero.
Indicador Tara.
Indicador estable.
Indicador batería baja. Indica que deben reemplazar las baterías.
Kg Unidades kg. Cuando aparezca “kg” en pantalla, ellos significa que el peso indicado es en kg.
g Unidades g. Cuando aparece en pantalla “g”, ello significa que el peso se muestra en g.
Ib Unidades libra. Cuando aparece en pantalla “lb”, ello significa que el peso se muestra en lb.
oz Unidades unza. Cuando aparece en pantalla “oz”, ello significa que el peso se muestra en oz.
Hi Preprogramar el Límite Máximo de Peso.
Ok Entre el límite de peso inferior y superior preprogramado.
Lo Preprogramar el límite Mínimo de Peso.
4. OPERACIONES
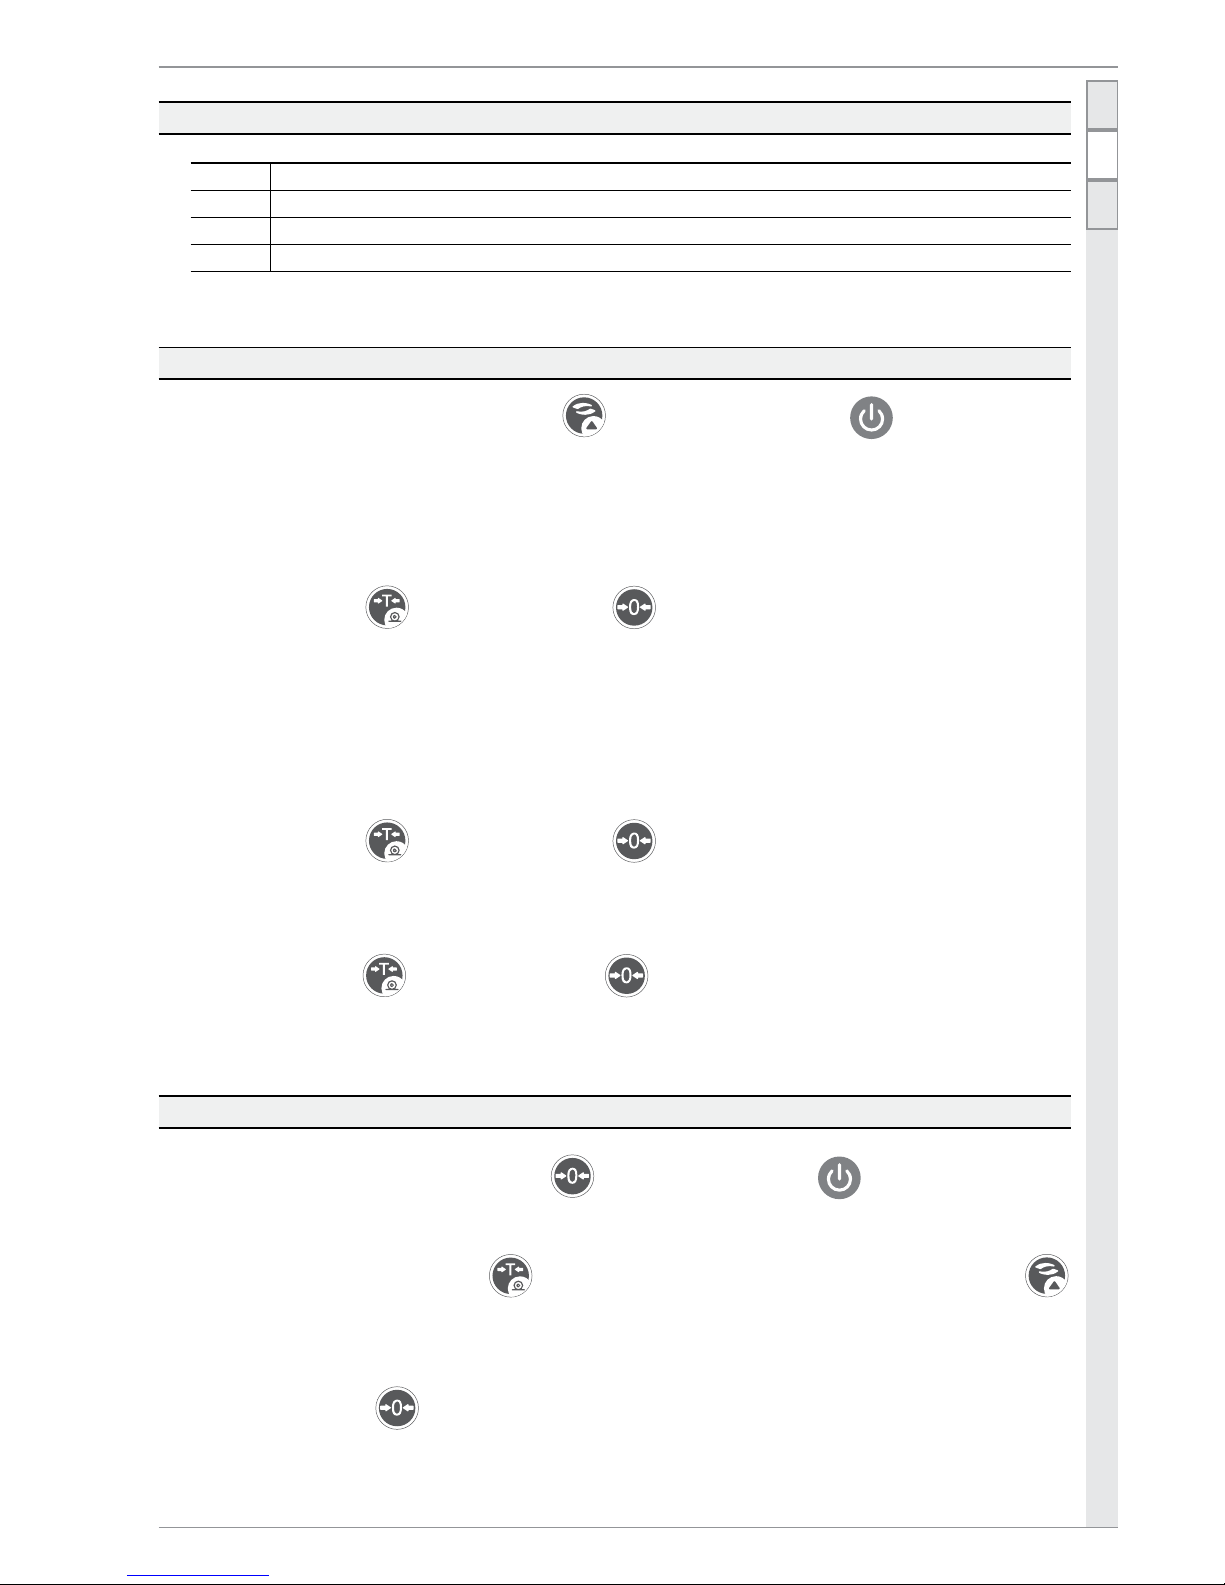
ENCENDER LA BÁSCULA
Presione la tecla para encender la báscula. La báscula procederá a realizar un proceso de calentamiento rápido y también un test, después de este proceso estará a punto para ser usada.
SELECCIONAR UNIDADES
Presione la tecla para escoger la unidad que necesite, entonces aparecerá la unidad en cuestión
en pantalla. Hay 4 unidades a seleccionar: Kg, g, lb, oz.
FUNCIÓN TARA
1. Sitúe un contenedor sobre la bandeja y presione la tecla cuando la lectura de la pantalla esté
estable. El peso tara se almacenará en la memoria y la pantalla volverá a situarse a cero. En pantalla
aparecerá el indicador “ ”. El peso aparecerá en pantalla como peso neto. Para cancelar el modo
tara, presione la tecla cuando ninguna carga se encuentre encima de la bandeja.
2. Rango Tara: Hasta la capacidad máxima de la báscula.
FUNCIÓN CERO
Presione la tecla para volver a poner a cero la pantalla, si la lectura no es de cero cuando no hay
ninguna carga encima de la bandeja. En este momento, aparecerá en pantalla el símbolo .
RANGO CERO
El rango cero del indicador es el 5% de la capacidad de la báscula.
Page 5
Modelo PD Manual de usuario
ESFRENG
5
CIERRE Y CIERRE AUTOMÁTICO
1. Presione la tecla para apagar la balanza directamente.
2. La báscula se apagará automáticamente, si la báscula se encuentra en un ambiente estable y no hay
ninguna operación durante 2 o 5 minutos (opcional).
COMPROBAR EL MODO DE PESAR
Ejemplo: Límite mínimo= 200g Límite Máximo = 3000g
PROGRAMAR LÍMITE MÍNIMO
El límite mínimo es superior a 9 d (d = división)
1. Presione y mantenga presionada la tecla
durante más de 2 segundos para programar el límite
inferior, la pantalla de la báscula mostrará “LXXXX”. Presione la tecla para cambiar el número
parpadeante. Presione la tecla para incrementar el valor del número parpadeante.
Ejemplo: “L0200” significa que el límite mínimo es de 200g.
2. Presione la tecla
para confirmar, después presione INTRO para programar el límite máximo.
PROGRAMAR EL LÍMITE SUPERIOR
3. La pantalla mostrará “HXXXX”. Presione la tecla
para cambiar el número parpadeante. Presione
la tecla para incrementar el valor del número parpadeante.
Ejemplo: “H3000” significa que el límite máximo es 3000g.
4. Presione la tecla
para confirmar, después vuelva a pesar normalmente.
El estado de el “MODO ALARMA” como Indicación (1)
RECORDAR LOS VALORES DE COMPROBACIÓN-PESO
1. Presione
► L 0 2 0 0 (Límite Inferior)
2. Presione
► H 3 0 0 0 (Límite superior)
3. Presione
► 0.0 0 0 (Volver a pesar de manera normal)
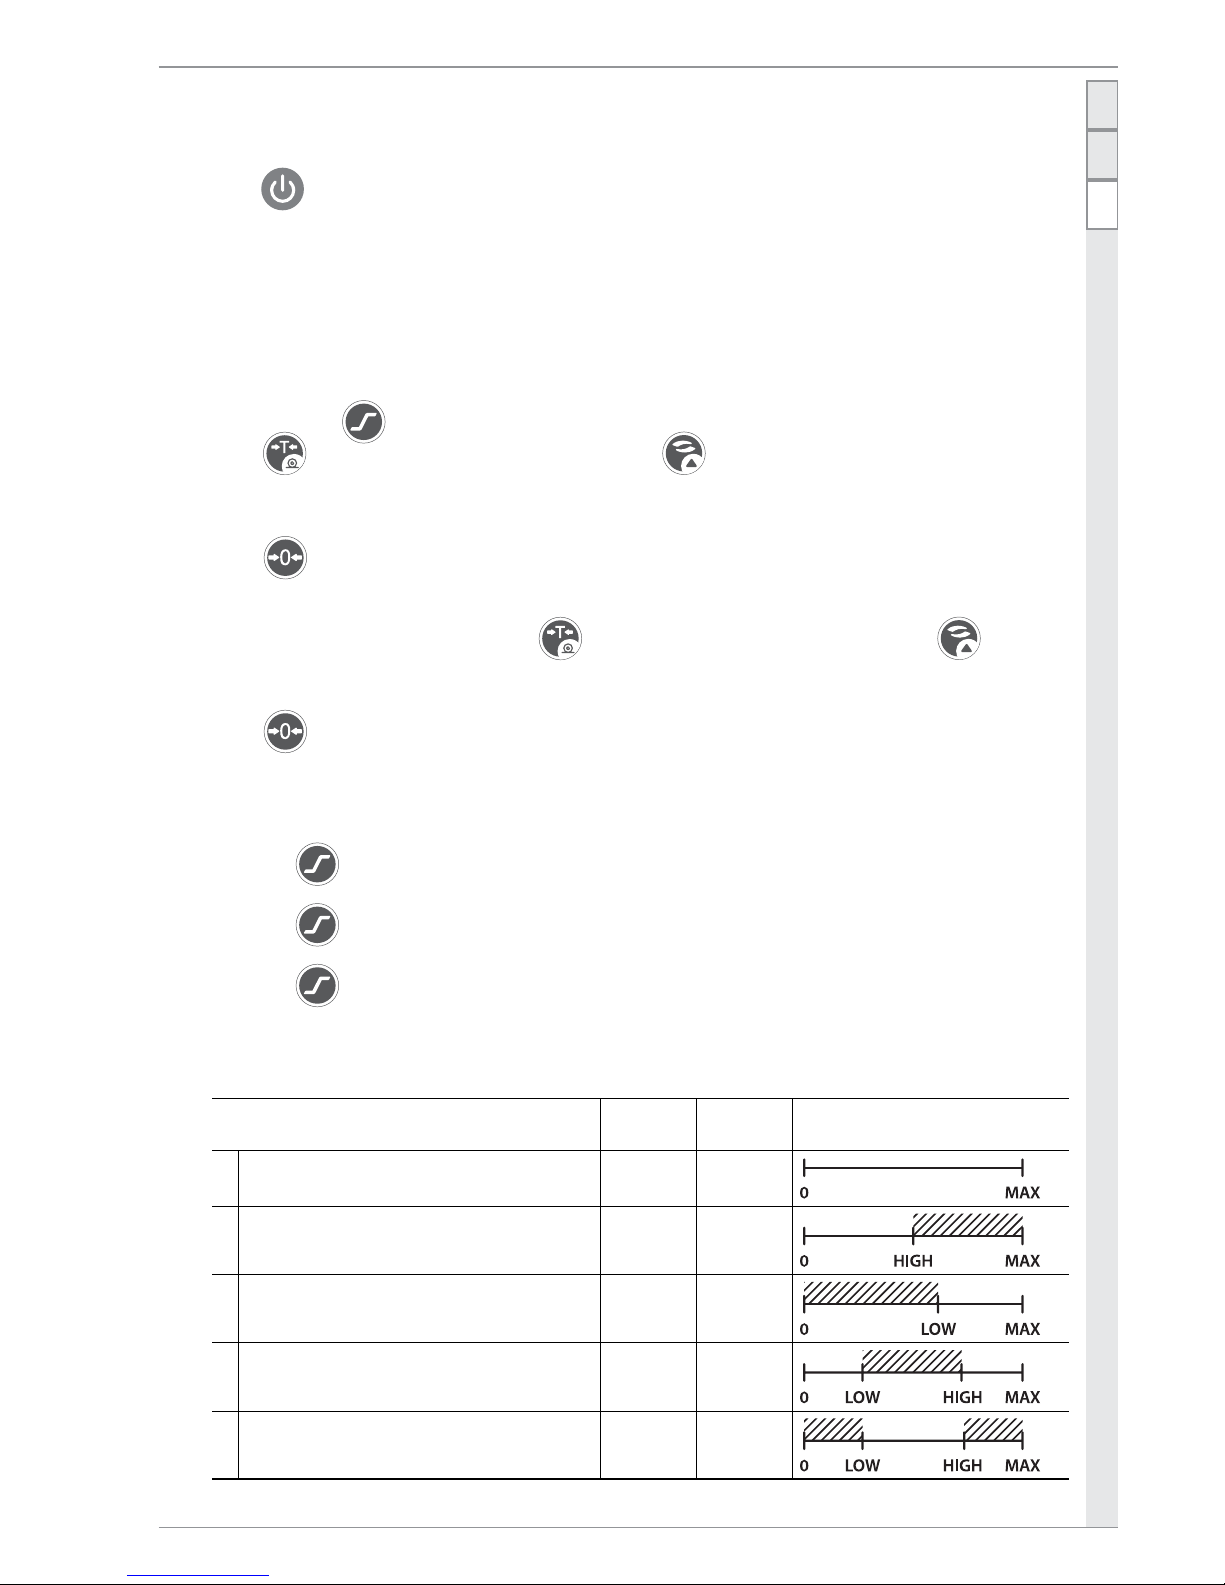
Indicación (1): Según la combinación del límite máximo y el límite mínimo, hay 5 modos.
FUNCIÓN
LÍMITE
INFERIOR
LÍMITE
SUPERIOR
LA PARTE SOMBREADA ES EL
ÁREA DE ADVERTENCIA
0 Sin alarma 0 0
1
Cuando el peso está por encima o es igual al
Límite Máximo, sonará la alarma
0 ALTO
2
Cuando el peso es inferior o igual al Límite
Mínimo (debe estar por encima de 9d), sonará la alarma
BAJO 0
3
Cuando el peso está entre el Límite Inferior
y el Límite Superior, sonará la alarma
BAJO ALTO
4
Cuando el peso está por debajo o es igual
al Límite Mínimo (debe estar por encima de
9d) y por encima o igual al Límite Máximo,
la alarma sonará.
ALTO BAJO
Page 6

ESFRENG
Manual de usuario Modelo PD
6
5. MENSAJES DE ERROR
- - - - -
Indican que la balanza se encuentra en sobrepeso
Lo
Indican que la potencia de las baterías es baja, y la báscula no puede funcionar normalmente
oUtZ
Indican que el peso de los objetos sobre la bandeja se encuentra fuera del rango de reprogramar
cero
Err1
Indican que la calibración ha fallado
6. PROGRAMAR PARÁMTEROS EXTERNOS
Presione y mantenga presionada la tecla , después presione la tecla para encender la báscula, entonces empezará a programar los parámetros externos.
Programar la función de apagar automáticamente
off 0: Cerrar la función de apagado automático.
off 1: 2 minutos para el apagado automático.
off 2: 5 minutos para el apagado automático.
Utilizar la tecla
para escoger y utilizar la tecla para confirmar.
Programar la función de ahorro de energía (aplicable sólo a la pantalla LED)
EC 0: La función de ahorro de energía se ha cerrado
EC 1: La función de ahorro de energía está abierta
Programar función luz trasera (aplicable solo a pantalla LCD)
BL 0: la función de luz trasera está cerrada
BL 1: la función de luz trasera está abierta
Utilizar la tecla
para escoger y utilizar la tecla para confirmar.
Introducir el funcionamiento de la bocina
bp 0: Esté estable o no esté estable la báscula , la alarma sonará
bp 1: Cuando la báscula esté estable la alarma sonará
Utilizar la tecla
para escoger y utilizar la tecla para confirmar, entonces la báscula vuelve
al modo de pesar normal.
7. CALIBRACIÓN EXTERNA
1. Presione y mantenga presionada la tecla , después presione la tecla par encender la báscula. En la pantalla aparecerá “CAL”.
2. Retire todos los objetos de la bandeja, presione otra vez, en pantalla aparecerán los siguientes números “0 0 0 0”. Presione la tecla
para cambiar el número que está parpadeando. Presione la tecla
para incrementar el valor del número que está parpadeando.
3. Sitúe un peso el valor del cual sea igual al número sobre la bandeja (unidad: g) Ejemplo. El número
que aparece es 6000, ello significa que usted debe situar un peso de 6000g sobre la bandeja y después
presione la tecla
para confirmar.
Si la operación se ha llevado a cabo con éxito la báscula volverá a su peso normal.
Page 7
Modelo PD Manual de usuario
ESFRENG
7
NOTA: Si después de la calibración su báscula no lee con precisión, ello significa que la calibración ha fallado y el proceso de calibración debe repetirse más despacio.
Por favor calibre la báscula sobre una superfície muy estable y lisa!
8. ESPECIFICACIONES BÁSICAS
Bandeja Bandeja cuadrada, tamaño: 176x176mm
Modo pantalla
Pantalla grande, pantalla LCD, 5.5 dígitos, 15 mm en altura
Pantalla grande, pantalla LED, 7 dígitos, 15 mm en altura
Suplemento potencia
Tres baterías (tamaño R6P/LR6/AA), DC5V/200mA
Adaptador AC/DC, 5V/0.6A (opcional)
Temperatura funcionamiento 0ºC a 40ºC
Luz trasera Auto luz trasera (opcional)
9. GARANTÍA
Esta balanza está garantizada contra todo defecto de fabricación y de materiales, por un período de
un año, a partir de la fecha de entrega.
Durante este período, GIROPÈS SL, se hará cargo de la reparación de la balanza.
Esta garantía no incluye los daños causados por uso indebido, sobrecarga, o no haber seguido las recomendaciones descritas en este manual.
La garantía no cubre los gastos de envío necesarios para la reparación de la balanza.
Page 8
ESFRENG
Manuel d’usager Modèle PD
8
1. RECOMMANDATIONS
Précautions avant d’utiliser la bascule
1. Placer la bascule dans un emplacement sec et à température ambiante. Ne la stockez pas dans des
emplacements où la température élevée.
2. Ne pas immerger sous l’eau et éviter le contact avec un liquide. Si ceci se produisait, séchez la bascule
avec un chiffon sec.
3. Évitez l’impact de tout objet avec la bascule. Ne jetez pas de charges sur la bascule ni ne soumettez
pas non plus au plateau à de fortes de charges.
4. La charge située sur le plateau ne doit pas dépasser la capacité maximale de la bascule.
5. Si vous n’utilisez pas la bascule pendant un certain temps, il faut la nettoyer et la stocker dans une
housse de matière plastique, afin qu’elle soit aux secs. Mettre un sachet déshydratant pour éviter
l’humidité.
6. Ne mélangez pas différents types de batteries ou piles, ne mélangez pas de batteries ou piles utilisées
avec des batteries ou piles nouvelles.
RECOMMANDATIONS D’UTILISATION
1. Pour obtenir une lecture de pesage précise, il faut placer la bascule sur une surface plane et stable,
sans vibrations.
2. Évitez d’effectuer des opérations avec la bascule à la lumière directe du soleil ou sous l’influence de
courants d’aires.
3. Retirez tout poids qui peut être trouvé sur le plateau avant d’allumer la bascule et évitez de ne laisser
aucun poids sur le plateau pendant une longue période.
4. Une fois qu’on a allumé la bascule, elle effectuera un essai d’écran LCD ou LED et ensuite elle retournera à zéro. Elle sera alors à prête pour être utilisée.
5. Pour une plus grande précision allumez la bascule pendant de 1 à deux minutes avant son utilisation.
6. Tenez compte des symboles qui apparaissent sur écran.
7. Tout les objets lourds à peser doivent être placés sur le centre du plateau pour assurer un pesage
précis. Les dimensions totales des objets qui sont pesés ne doivent pas dépasser les dimensions du
plateau.
2. FONCTIONS DU CLAVIER
Touche pour allumer la bascule
Touche zéro
Touche Tare pour déduire le poids du container
Sélectionner l’unité: les unités optionnelles font références a la plaque principal
Pre programmer les limites Supérieurs & Inferieurs
Page 9

Modèle PD Manuel d’usager
ESFRENG
9
3. EXPLICATION DE SYMBOLES
Écran LED:
Écran LCD:
Indicateur zéro.
Indicateur Tare.
Indicateur stable.
Indicateur faible batterie. Indique qu’on doit remplacer les batteries.
Kg Unités kg. Quand apparaîtra “kg” sur l’écran, cela signifie que le poids indiqué est en kg.
g g unités. Quand il apparaît sur l’écran “g”, cela signifie que le poids est montré en g.
Ib Quand il apparaîtra sur l’écran “lb”, cela signifie que le poids est montré en Ib.
oz Quand il apparaîtra sur l’écran “oz”, cela signifie que le poids est montré en oz.
Hi Pre programmer la Limite Maximale de Poids.
Ok Entre la limite de poids inférieur & supérieur pre programmé.
Lo Pre programmer la limite Minimum de Poids.
4. OPÉRATIONS
ALLUMER LA BASCULE
Appuyer sur pour allumer la bascule. La bascule effectuera un processus de préchauffage rapide
et aussi un essai, après ce processus vous pouvez utiliser la bascule.
SÉLECTIONNER UNITÉS
Appuyer sur Choisir les unités, appuyer sur la touche pour choisir l’unité dont vous avez besoin,
il apparaît alors l’unité en question sur l’écran. Il y a 4 unités à choisir: kg, g, lb, oz.
FONCTION TARE
1. Placer un container sur le plateau et appuyer sur la touche cquand la lecture de l’écran sera
stable. Le poids tare sera stocké dans la mémoire et l’écran indiquera son zéro. Sur l’écran apparaîtra
l’indication “ ”. Le poids apparaîtra sur l’écran comme poids net. Pour annuler le mode tare, appuyer la touche quand la charge n’est plus sur le plateau.
2. Rang Tare: Jusqu’à la capacité maximale de la bascule.
FONCTION ZÉRO
Appuyer sur pour mettre l’écran à zéro, si la lecture n’est pas à zéro vérifier qu’il n’y a aucune
charge sur le plateau. À l’heure actuelle, apparaîtra sur l’écran le symbole .
RANG ZERO
Rang zéro de l’indicateur est de 5% de la capacité de la bascule.
Page 10

ESFRENG
Manuel d’usager Modèle PD
10
ARRÊT ET MISE EN VEILLE AUTOMATIQUE
1. Appuyez la touche pour éteindre la bascule directement.
2. La bascule sera automatiquement éteinte, si la bascule est stable et qu’il n’y a aucune opération
pendant 2 ou 5 minutes (facultatives).
VÉRIFIER LE MODE DE PESER
Exemple: Limite minimum = 200g Limite Maximal = 3000g
PROGRAMMER LIMITE MINIMALE
La limite minimale est supérieur a 9 d (d = division)
1. Appuyez et maintenez appuyé la touche
pendant plus de 2 seconds pour programmer la limite
inférieure, l’écran de la bascule montrera “LXXXX”. Pousser la touche pour changer le chiffre
clignotant. Pousser la touche pour augmenter la valeur du chiffre clignotant.
Exemple: “L0200” signifie que la limite minimale est de 200g.
2. Appuyez sur
pour confirmer, appuyez ensuite sur INTRO pour programmer la Limite Maximale.
PROGRAMAR EL LÍMITE SUPERIOR
3. L’écran montrera “HXXXX”. Appuyez sur la touche
pour changer le chiffre clignotant. Appuyer
la touche augmente la valeur du chiffre clignotant.
Exemple: “H3000” signifie que la limite maximale est 3000g.
4. Appuyez sur
pour confirmer, et pour retourner en mode pesage.
L’état “MODE ALARME” comme Indication (1)
RAPPELER LES VALEURS DE VÉRIFICATION DE POIDS
1. Appuyez
► L 0 2 0 0 (Limite Inferieur)
2. Appuyez
► H 3 0 0 0 (Limite supérieur)
3. Appuyez
► 0.0 0 0 (retour en mode de pesage normal)
Indication (1): Selon la combinaison d’un seuil maximale et d’un seuil minimal, il y a 5 modes.
FONCTION
LIMITE
INFÉRIEURE
LIMITE
SUPÉRIEURE
LA PARTIE HACHURÉ EST LE
SECTEUR D’AVERTISSEMENT SONORE
0 Sans alarme. 0 0
1
Quand le poids sera superficiellement
ou est égal à la Limite Maximale,
l’alarme s’activera.
0 HAUT
2
Quand le poids sera inférieur ou égal
à la Limite Minimale (il doit être audessus de 9d), l’alarme s’activera.
SOUS 0
3
Quand le poids sera entre la Limite
Inférieure et la Limite Supérieure,
l’alarme s’activera.
SOUS HAUT
4
Quand le poids sera au-dessous ou est
égal à la Limite Minimale (doit être au-
dessus de 9 d) & ; superficiellement
ou égal à la Limite Maximale, l’alarme
sonnera.
HAUT SOUS
Page 11
Modèle PD Manuel d’usager
ESFRENG
11
5. MESSAGES D’ERREURS
- - - - -
Indique que la balance se trouve en surcharge
Lo
Indique que la puissance des batteries est faible, et la bascule ne peut pas fonctionner normalement.
oUtZ
Indique que le poids des objets sur le plateau est en dehors du rang du zéro.
Err1
Indique que le calibrage n’est pas correct.
6. PROGRAMMER LES PARAMÈTRES EXTERNES
Appuyez et maintenez appuyé la touche , appuyez ensuite la touche pour allumer la bascule, vous entrerez alors dans la programmation des paramètres externes.
Programmer la fonction mise en veille automatique
off 0: fonction non active.
off 1: 2 minutes.
off 2: 5 minutes.
Utiliser la touché
pour choisir et utiliser pour confirmer.
Programmer la fonction d’économie d’énergie (applicable seulement à l’écran LED)
EC 0: La fonction d’économie d’énergie non active
EC 1: La fonction d’économie d’énergie est active
Programmer la fonction rétro-éclairage (applicable seulement à écran LCD)
BL 0: La fonction est non active
BL 1: La fonction est active
Utiliser la touché
pour choisir et utiliser pour confirmer.
Introducir el funcionamiento de la bocina
bp 0: A stabilité ou non de la bascule, l’alarme sonnera
bp 1: Quand la bascule sera stable l’alarme il sonnera
Utiliser la touché
pour choisir et utiliser pour confirmer, alors la bascule retourne en mode
peser normal.
7. CALIBRAGE EXTERNE
1. Appuyez et maintenir appuyé la touche , après Appuyez la touche pour allumer la bascule.
Sur l’écran il apparaitra “CAL”.
2. Retirez tous les objets du plateau, appuyez une autre fois, sur l’écran apparaîtront les nombres “0 ciaprès 0 0 0”. Appuyer la touche
pour changer le nombre qui clignote. Appuyez la touche
appuyez la touche pour augmenter la valeur du nombre qui clignote.
3. Placez un poids dont la valeur est égale au chiffre indiqué sur l’écran (unité : g) (eg. Le chiffre qui
apparaît est 6000, cela signifie que vous devez placer un poids de 6000g sur le plateau) et ensuite
Appuyez la touche
pour confirmer.
Si l’opération a été menée à bien la bascule retournera à son poids normal.
Page 12

ESFRENG
Manuel d’usager Modèle PD
12
NOTE: Si après le calibrage la bascule ne lit pas avec précision, cela signifie que le calibrage a manqué et
le processus de calibration et doit être répété plus lentement.
Il faut calibrer la bascule sur une surface très stable et plane!
8. SPECIFICATIONS BASIQUES
Plateau Plateau carré, dimensions: 176x176 mm
Type d’écran
Écran grand, écran LCD, 5.5 digits, hauteur 15mm
Écran grand, écran LED, 7 digits, 15mm en hauteur
Supplément puissance
Trois batteries (dimensions R6P/LR6/AA), DC 5V/200mA
Adaptateur AC/DC, 5V/0.6A (optionnel)
Température fonctionne-
ment
0ºC à 40ºC
Rétro-éclairage Auto (Rétro-éclairage optionnel)
9. GARANTIE
Cette balance est garantie contre tout défaut de fabrication et de matériel pendant 1 an à
partir de la date de livraison.
Durant cette période, GIROPÈS SL. se chargera de la réparation de la balance.
Cette garantie n’inclut pas les dommages causés par une utilisation impropre, surcharge ou
par le non respect des recommandations décrites dans ce manuel.
La garantie ne couvre pas les frais d’envois nécessaires à la réparation de la balance.
Page 13

PD model User’s Guide
ESFRENG
13
1. NOTICES
Precautions before using the scale
1. Please keep scale in a cool and dry place. Do not store at high temperatures.
2. Do not allow any liquids to come into or contact with the scale. If it happens, wipe the scale dry with
a cloth.
3. Avoid objects impacting with the scale. Do not drop loads onto the scale or subject the weigh pan to
any strong shock loads.
4. The load placed on the weigh pan must not exceed the maximum weighing capacity of the scale.
5. If the scale is not going to be used for some time, please clean it and store it in a plastic bag in dry
conditions. A desiccant sachet may be included to prevent moisture build up.
6. Do not mix different types of dry battery or mix used dry batteries with new dry batteries
OPERATION ADVICES
1. For accurate weight readings locate the scale on a firm level surface free from vibrations.
2. Avoid operating the scale in direct sunlight or drafts of any kind.
3. Remove any weight that might be on the weigh pan before the scale is switched on and avoid leaving
weight on the pan for long periods of time.
4. Once the scale has been switched on, it will go through a LCD or LED display test and then re-zero to
be ready for use.
5. For best accuracy switch the scale on for 1 to 2 minutes before use.
6. Please note when symbol appears on the screen, the dry batteries need to be replaced.
7. All goods weighed should be placed in the centre of the weigh pan for accurate weighing. The overall
dimensions of the goods being weighed should not exceed the dimension of the weigh pan.
2. KEYPAD FUNCTIONS
Power Switch
Zero Key to re-zero the weight.
Tare Key to deduct the container weight
Select the unit: units optional refer to faceplate
Preset High & Low Limit
Page 14

ESFRENG
User’s Guide PD model
14
3. EXPLANATION OF SYMBOLS
LED display:
LCD display:
Zero indicator
Tare indicator
Stable indicator
Low battery indicator. Indicate that the batteries should be replaced
Kg kg units. When “kg” is displayed, it means the weight shown is in kg.
g kg units. When “g” is displayed, it means the weight shown is in g.
Ib Pound units. When “lb” is displayed, it means the weight shown is in lb.
oz Ounce units. When “oz” is displayed, it means the weight shown is in oz.
Hi High Preset Weight Limit.
Ok Between Low & High Preset Weight Limit.
Lo Low Preset Weight Limit.
4. OPERATIONS
TURN ON THE SCALE
Press key to turn on the scale. The scale will go through a quick warm up procedure and test,
and then it will be ready for use.
UNITS SELECTION
Press key to choose the needed unit, and the unit indicator will be shown. There are four units:
kg, g, lb, oz.
TARE FUNCTION
1. Put a container on the pan and press key when the display reading is stable. The tare weight
will be stored into memory and display will be brought to zero. Indication “ ” in the display will
appear. The weight will be displayed as net weight. To cancel the tare mode, press key when no
load on the weighing pan.
2. Tare range: Up to scale’s maximum capacity.
ZERO FUNCTION
Press key to re-zero the display if the reading is not zero with no load on the platter. At this
moment, the will appear.
Page 15
PD model User’s Guide
ESFRENG
15
ZERO RANGE
The zero range of the indicator is 5% of the capacity of the scale.
POWER-OFF AND AUTOMATIC POWER-OFF
1. Press key directly to turn the scale off.
2. The scale will automatically turn off, if the scale is in a stable environment and non-operation for 2
or 5 minutes (optional).
CHECK WEIGHING MODE
Example: Low Limit = 200g High Limit = 3000g
SETTING LOW LIMIT
El límite mínimo es superior a 9 d (d = división)
1. Press and hold
key for more than 2 seconds to set the low limit,the display will show “LXXXX”.
Press key to shift the twinkling number. Press key to increase the value of the twinkling
number.
Example: “L0200” means low limit is 200g.
2. Press
key to confirm, then enter to set the high limit.
SETTING HIGH LIMIT
3. The display will show “HXXXX”. Press
key to shift the twinkling number. Press key to in-
crease the value of the twinkling number.
Example: “H3000” means high limit is 3000g.
4. Press
key to confirm, then return to normal weighing.
The status of “BEEP MODE” as Indication (1)
RECALLING CHECK-WEIGHING VALUES
1. Press
► L 0 2 0 0 (Low Limit)
2. Press
► H 3 0 0 0 (High Limit)
3. Press
► 0.0 0 0 (Return to normal weighing)
Indication (1): According to the combination of Low and high limit, there have five modes.
FUNCTION
LOW
LIMIT
HIGH
LIMIT
THE SHARED PART IS
WARNING AREA
0 No beep 0 0
1
When the weight is over or equal to High
Limit, the buzzer beep
0 HIGH
2
When the weight is under or equal to Low
Limit (must be over 9d) the buzzer beep
LOW 0
3
When the weight is between Low Limit &
High Limit the buzzer beep
LOW HIGH
4
When the weight is under or equal to Low
Limit (must be over 9 d) & over or equal to
High Limit, the buzzer beep.
HIGH LOW
Page 16

ESFRENG
User’s Guide PD model
16
5. ERROR MESSAGES
- - - - -
Indicate that the scale is overloaded
Lo
Indicate that the voltage of the batteries is low, and the scale can’t work normally
oUtZ
Indicate that the weight of the objects on the tray is outside the zero-resetting range
Err1
Indicate that the calibration is failed
6. EXTERNAL PARAMETERS SETTING
Press and hold
key, then press key to turn on the scale, it will enter to setting the external
parameters.
Automatic power-off function setting
off 0: Shut up the automatic power-off function.
off 1: 2 minutes automatic power-off.
off 2: 5 minutes automatic power-off.
Use
key to choose and use key to confirm.
Energy-saving function setting (only apply to LED display)
EC 0: Energy-saving function is closed
EC 1: Energy-saving function is open
Backlight function setting (only apply to LCD display)
BL 0: Backlight function is closed
BL 1: Backlight function is open
Use
key to choose and use key to confirm.
Beep status setting
bp 0: Whether stable or not, the buzzer beep
bp 1: When stable, the buzzer beep
Use
key to choose and use key to confirm. Then return to normal weighing.
7. EXTERNAL CALIBRATION
1. Press and hold key, then press key to turn the scale, it will show “CAL”.
2. Remove all objects from the tray, press again, the screen will show “0 0 0 0”. Press
key to shift
the twinkling number. Press key to increase the value of the twinkling number.
3. Place a weight which value equal to the number on the tray (unit: g) (eg. the shown number is 6000,
that means you should place a 6000g weight on the tray) and then press
key to confirm.
If success it will return to normal weighing.
NOTE: If after calibration your scale does not read accurately, it means the calibration is failed and the
calibration process should be repeated more slowly.
Please calibrate on a very stable and flat surface!
Page 17

PD model User’s Guide
ESFRENG
17
8. BASIC SPECIFICATIONS
Tray Square tray, size: 176x176mm
Display mode
LArge screen, LCD display, 5.5 digits, 15 mm height
LArge screen, LED display, 7 digits, 15 mm height
Power supply
Three batteries (R6P/LR6/AA size), DC 5V/200mA
AC/DC adaptor, 5V/0.6A(optional)
Operating temp 0ºC to 40ºC
Backlight Auto backlight (optional)
9. WARRANTY
This scale is warranted against defects of manufacturing and materials for a period of 1 year, from the
delivery date.
During this period, GIROPÈS SL will take charge of repairing the scale.
This warranty does not cover defects or damaged caused by misuse, overloading or improper installa-
tion contrary to the recommendations described in this manual.
This warranty does not cover shipping costs for the reparation of the balance.
Page 18

ESFRENG
ÍNDICE GENERAL | INDEX GÉNÉRALE | GENERAL INDEX PD model
18
DECLARACIÓN DE CONFORMIDAD
DECLARATION OF CONFORMITY
DÉCLARATION DE CONFORMITÉ
Nosotros:
We/Nos:
BAXTRAN S.L.
Pol. Empordà International
C/F. Parcela 15-16
E-17469 VILAMALLA (Girona)
- SPAIN -
Declaramos bajo nuestra responsabilidad que el producto denominado:
Declare under our responsability that the denominated product:
Nous déclarons sous notre résponsabilité que le produit ci-dessous nommé:
Balanza modelo PD
Scale PD model
Balance modèle PD
A la cual se refiere la presente declaración, es conforme a las siguientes normas o documentos:
To wich déclaration referes to, conform wich the followings standards or other normative documents:
A la quelle se refaire la présente déclaration, et conforme aux normes suivantes ou documents:
Conformidad CE:
CE conformity / conformité CE:
2004/108/CE Directiva sobre la compatibilidad electromagnética.
2004/108CE directive on the electromagnetic compatibility.
2004/108CE directive surla compatibilité electromagnétique.
Jordi ribalta
Director General
General Manager
Page 19

Page 20

Pol. Empordà Internacional
Calle F. Parcela 15-16
17469 VILAMALLA
(Girona) SPAIN
T. (34) 972 527 212
F. (34) 972 527 211
marca propiedad de /
marque propriété de /
trade mark propiety of:
 Loading...