

Page 1
Operator Manual
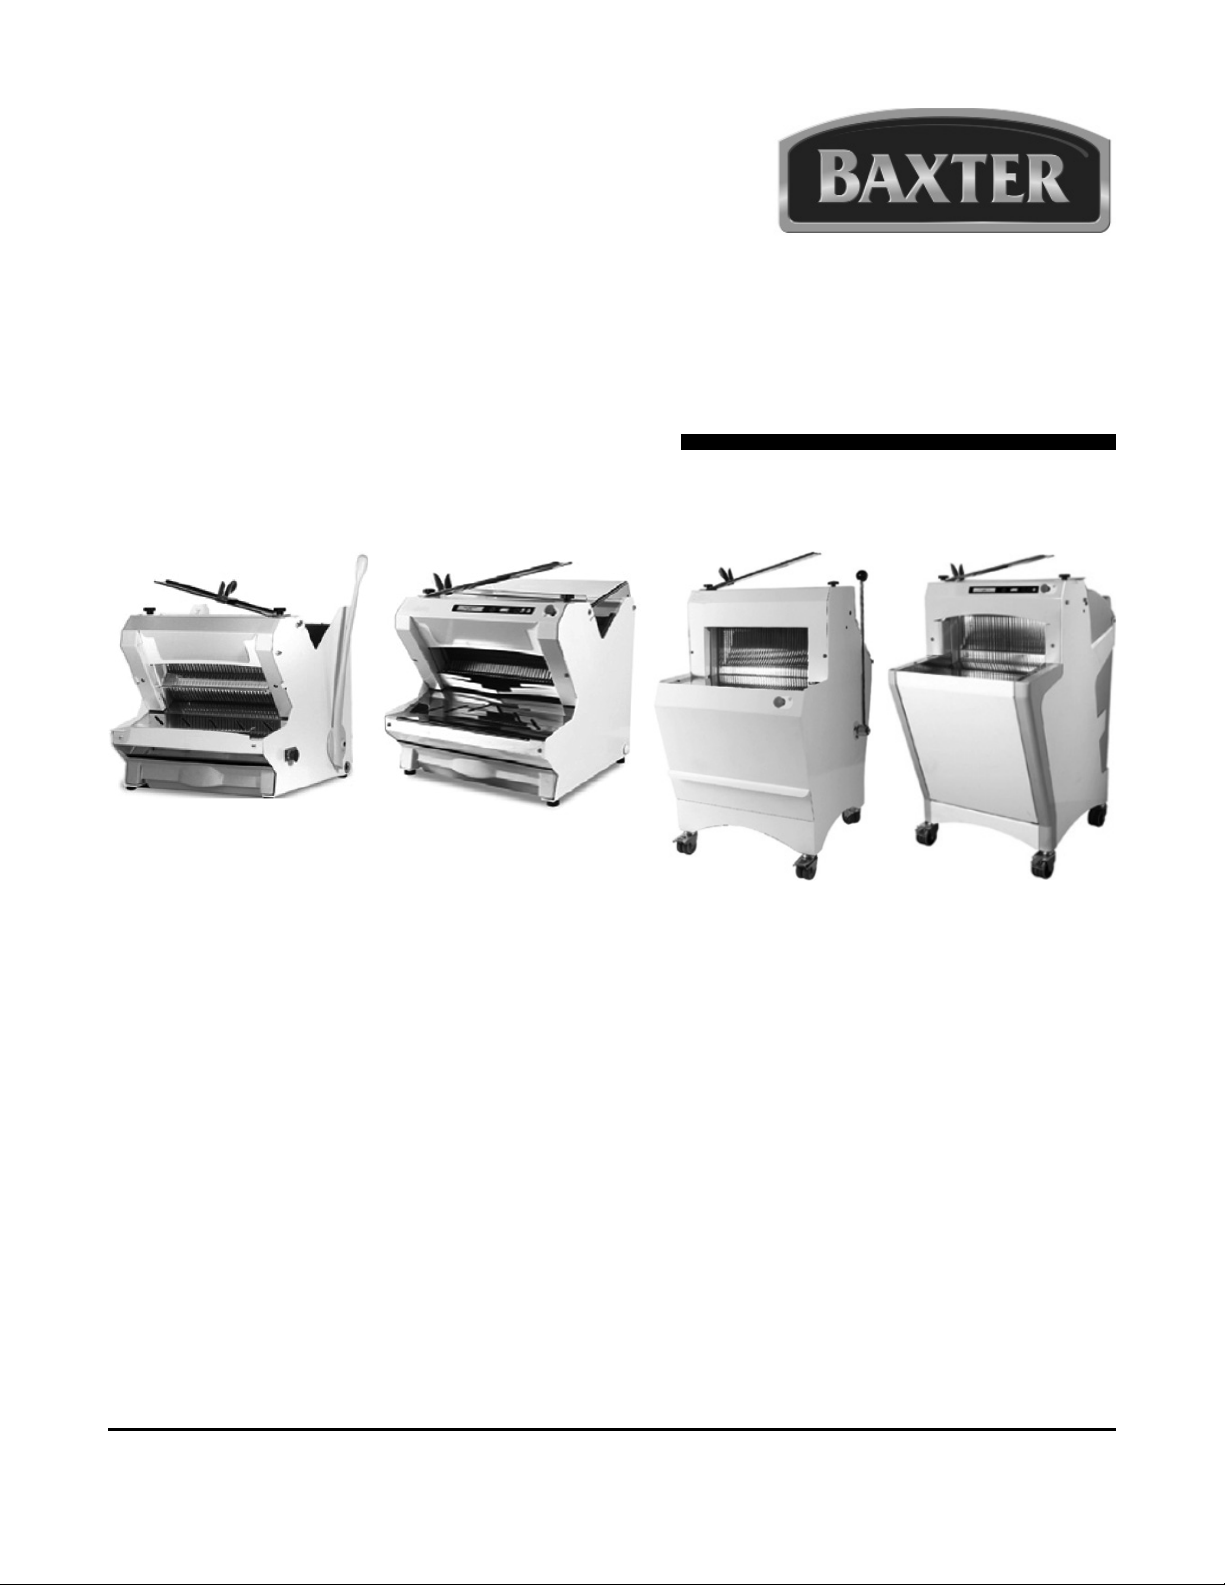
Bread Slicers
BBS100 SERIES ML: DP-BBS101, DP-BBS102, DP-BBS103
BBS150 SERIES ML: DP-BBS151, DP-BBS152, DP-BBS153
BBS200 SERIES ML: DP-BBS201, DP-BBS202, DP-BBS203
BBS500 SERIES ML: DP-BBS501, DP-BBS502, DP-BBS503
Model Number: ___________
Serial Number: ___________
Date of Installation: ___________
Baxter Mfg, a Division of ITW FEG, LLC • 19220 State Route 162 East • Orting, WA 98360-9236
Phone: (360) 893-5554 • Fax: (360) 893-1337
www.baxterbakery.com
FORM 36721 (February 2011)
Page 2

TABLE OF CONTENTS
GENERAL ............................................................................................................................................. 3
INSTALLATION ..................................................................................................................................... 3
Unpacking ........................................................................................................................................ 3
Location ........................................................................................................................................... 3
Electrical Connections ..................................................................................................................... 4
OPERATION .......................................................................................................................................... 5
BBS100 Series ................................................................................................................................ 5
BBS150 Series ................................................................................................................................ 6
BBS200 Series ................................................................................................................................ 7
BBS500 Series ................................................................................................................................ 8
CLEANING ............................................................................................................................................ 9
MAINTENANCE .................................................................................................................................... 9
Service ............................................................................................................................................. 9
Lubrication ....................................................................................................................................... 9
How To Change the Blades ........................................................................................................... 10
TROUBLESHOOTING .........................................................................................................................11
©BAXTER MFG, 2011
– 2 –
Page 3

OPERATION AND CARE OF
BBS SERIES BREAD SLICERS
SAVE THESE INSTRUCTIONS
GENERAL
Baxter Bread Slicers come in models with manual or automatic operation. Manual slicers feature an easyto-use slice lever, which enables you to personally control the slice pressure. Automatic models replace the
lever with push-button operation for continuous slicing. The built-in slice management system automatically
adjusts slice pressure to loaf consistency. In addition, electronic eye sensors increase safety by stopping
slicing operation if the loading area is entered.
Baxter Bread Slicers come in freestanding and countertop sizes. All models include a bagging spade and
an easy-to-clean crumb drawer or tray.
Thoroughly read this manual before operation and carefully follow the instructions provided.
INSTALLATION
UNPACKING
This equipment was inspected before leaving the factory. The transportation company assumes full
responsibility for safe delivery upon acceptance of the shipment. Immediately after unpacking, check for
possible shipping damage. If the slicer is found to be damaged, save the packaging material and contact
the carrier within 15 days of delivery.
Prior to installation, verify that the electrical service agrees with the specifi cation on the slicer data plate
and in this manual.
LOCATION
After unpacking the slicer, place in a work-accessible area as near to its fi nal installed position as possible.
Ensure there is adequate lighting for operation. Remove protective covering from exterior surfaces prior
to placing slicer in its fi nal location.
If necessary, attach feet or casters to the slicer.
– 3 –
Page 4

ELECTRICAL CONNECTIONS
Electrical and grounding connections must comply with the applicable portions of
the National Electrical Code and/or other state and local codes.
Disconnect the electrical power to the unit and follow lockout / tagout procedures
before servicing equipment.
Connection of the machine must be made using the cord with NEMA 5-15 plug supplied.
ELECTRICAL DATA
Model Volts Hertz Phase Amps
BBS100 120 60 1 6
BBS150 120 60 1 6
BBS200 120 60 1 5
BBS500 120 60 1 6
– 4 –
Page 5

OPERATION
BBS100 SERIES
Turn the machine off and disconnect electrical power before servicing or
cleaning.
This machine contains sharp knives. Do not touch the knives at any time unless
wearing protective gloves and the power has been disconnected from the machine.
The BBS100 Series Bread Slicers are operated manually.
The capacity for the BBS100 Series is 2,000 loaves per day
(depending on the type of bread). The loaf dimensions for this
slicer are:
Minimum: 4.8"L x 2.4"W x 2.4"H
Maximum: 17.0"L x 11.4"W x 7.0"H
To operate:
1. Unlock the STOP button to turn the machine on.
2. For machines with oil lubrication system, press the green
button.
3. Pull the lever forward.
4. Place loaf on the rear tray, between the blades and the
bread pusher.
5. Gradually release the lever to set the pusher and push the loaf through the blades.
NOTE: Adjust the pressure on the bread by holding or pushing the lever according to the kind of bread.
6. Remove sliced loaf and repeat steps 3 through 6 as required.
7. When fi nished, press the red STOP button to switch the machine off.
NOTE: It may be necessary to check the blade tension after a few days of operation. Follow the directions
under the Maintenance section entitled How to Change the Blades.
– 5 –
Page 6

BBS150 SERIES
Turn the machine off and disconnect electrical power before servicing or
cleaning.
This machine contains sharp knives. Do not touch the knives at any time unless
wearing protective gloves and the power has been disconnected from the machine.
The BBS150 Series Bread Slicers are operated automatically.
The capacity for the BBS150 Series is 2,000 loaves per day
(depending on the type of bread). The loaf dimensions for this
slicer are:
Minimum: 4.8"L x 2.4"W x 2.4"H
Maximum: 17.0"L x 11.4"W x 7.0"H
To operate:
1. Power up the machine by turning on the main switch
inside the machine (near the crumb collector) and press
the green button to switch the machine on.
2. Place loaf on the rear tray, between the blades and the
bread pusher.
3. Push the green START button.
4. Remove sliced loaf and repeat steps 2 through 4 as required.
5. When fi nished, press the red STOP button to switch the machine off.
NOTE: It may be necessary to check the blade tension after a few days of operation. Follow the directions
under the Maintenance section entitled How to Change the Blades.
Safety
Each BBS150 series machine is equipped with a safety feature that stops the machine from working
when something is in the way of the electric eye. A message will appear on the screen when the safety
is engaged.
– 6 –
Page 7

BBS200 SERIES
Turn the machine off and disconnect electrical power before servicing or
cleaning.
This machine contains sharp knives. Do not touch the knives at any time unless
wearing protective gloves and the power has been disconnected from the machine.
The BBS200 Series Bread Slicers are operated manually.
The capacity for the BBS200 Series is 4,800 loaves per
day (depending on the type of bread). The loaf dimensions
for this slicer are:
Minimum: 4.8"L x 2.4"W x 2.4"H
Maximum: 17.3"L x 12.3"W x 6.3"H
To operate:
1. Power up the machine by turning on the main switch
inside the machine (near the crumb collector).
2. Pull the lever forward.
3. Place loaf on the rear tray, between the blades and
the bread pusher.
4. Gradually release the lever to set the pusher and
push the loaf through the blades.
NOTE: Adjust the pressure on the bread by holding or
pushing the lever according to the kind of bread.
5. Remove sliced loaf and repeat steps 2 through 5 as
required.
6. When fi nished, press the red STOP button to switch
the machine off.
NOTE: It may be necessary to check the blade tension
after a few days of operation. Follow the directions under
the Maintenance section entitled How to Change the Blades.
– 7 –
Page 8

BBS500 SERIES
Turn the machine off and disconnect electrical power before servicing or cleaning.
This machine contains sharp knives. Do not touch the knives at any time unless
wearing protective gloves and the power has been disconnected from the machine.
The BBS500 Series Bread Slicers are operated automatically.
The capacity for the BBS500 Series is 2,000 loaves per day
(depending on the type of bread). The loaf dimensions for this
slicer are:
Minimum: 4.8"L x 2.4"W x 2.4"H
Maximum: 17.4"L x 12.6"W x 6.3"H
To operate:
1. Power up the machine by turning on the main switch
inside the machine (near the crumb collector) and press
the green button to switch the machine on.
2. Place loaf on the rear tray, between the blades and the
bread pusher.
3. Push the green START button.
4. Remove sliced loaf and repeat steps 2 through 4 as
required. For continuous slicing mode, push the white
AUTO button.
5. When fi nished, press the red STOP button to switch the
machine off.
NOTE: It may be necessary to check the blade tension after
a few days of operation. Follow the directions under the Maintenance section entitled How to Change the
Blades.
Safety
The BBS500 series machine is equipped with a safety feature that stops the machine from working when
something is in the way of the electric eye. A message will appear on the screen when the safety is engaged.
– 8 –
Page 9

CLEANING
Turn the machine off and disconnect electrical power before servicing or
cleaning.
Daily
1. Empty the crumb drawer or tray.
2. Wipe exterior of machine with a clean damp cloth.
3. Open the table in front to clean on the inside.
MAINTENANCE
Turn the machine off and disconnect electrical power supply before performing
any maintenance.
Routinely inspect the machine to make sure that it is in proper working order.
SERVICE
Contact your local authorized service offi ce for any repairs or adjustments needed on this equipment.
LUBRICATION
Some models are equipped with a lubrication system. The oil to use is a liquid food grade vegetable oil
with natural antioxidant.
Daily
A trained user should check the oil level in the lubrication tank (on models equipped with lubrication
system).
Bi-Weekly
Every 1000 cuts or every 15 days, a trained user should add edible oil as needed (100 to 150ml) to imbibe
trolley felt and check the tank (optional) oil level.
Yearly
Every 25,000 cuts and/or at least 1 time a year, replace the blades of the bread slicer.
Clean with a brush and vacuum the inside of the machine.
Check the state of the bearings.
Lubricate the guides.
– 9 –
Page 10

HOW TO CHANGE THE BLADES
Turn the machine off and disconnect electrical power before servicing or
cleaning.
This machine contains sharp knives. Do not touch the knives at any time unless
wearing protective gloves.
1. Remove the bagging spade, open the shroud that protects the frames supporting the blades.
2. Remove the stainless steel table (or belt) at the front of the machine and disconnect the bread press
(for machines equipped with “Stop”).
3. At the top of the front frame, loosen the screws holding the frame to the polypropylene lamellas
(Item A in Figure 1) (never remove the screws and unfasten the lamellas (A) from the frame, as you
might alter the default settings).
4. Tilt the frame forward.
Only replace 4 or 5 blades at a time to avoid dangerous breaks and not warp the frame.
5. Replace the blades on the front frame.
6. Loosen the hexagonal socket head screws (Item B in Figure 1) which tighten the blades.
7. Replace the blades. Check that they are well positioned in the rocker arm pin.
8. Re-tension the blades by tightening screw (B), so that the blades remain in the frame as a mark of
tension.
9. Repeat steps 3 to 8 for the rear frame. Cover the front frame blades to prevent injury.
10. After all blades have been changed, re-assemble the frames while ensuring that you do not overtighten the frame lamellas (A).
11. Connect your machine to the electrical power, it is now ready.
Blade set
Models BBS100, BBS150
Blade set
Models BBS200
Blade set
Models BBS500
Fig. 1
– 10 –
Page 11

TROUBLESHOOTING
SYMPTOM POSSIBLE CAUSE SUGGESTED ACTION
Slicer will not start. Fuse or circuit breaker interrupting
power.
Broken wire or connection. Disconnect power and call your local
Slice thickness is
irregular
Bread vibrates in the
cutters
Bread cuts slowly Blades need replaced Contact service
Bread breaks Frame not aligned Contact service
Tension on blades not correct Contact service.
Space between blades irregular Correct space between blades.
Frame not aligned Contact service
Springs on bread pressing plate not
even
Springs on bread pressing plate not
even
Blades need replaced Contact service
Check for blown fuses or reset circuit
breaker.
Service Offi ce.
Contact service
Contact service
– 11 –
Page 12

NOTES
FORM 36721 (February 2011) PRINTED IN U.S.A.
– 12 –
 Loading...