

Page 1
User manual for your Baumatic
150L Single Zone Beverage Centre
BBCSZ150GL/BBCSZ150SS
SINGLE ZONE BEVERAGE CENTRE
NOTE: This user manual contains important information including safety & installation
points which will enable you to get the most out of your Baumatic appliance. Please keep it in
a safe place so that it is readily available for future reference.
Page 2

2
Thank you for purchasing a Baumatic Beverage Centre.
Contents
Your appliance is exceptionally easy to use and extremely efficient. Before being packaged and leaving the
factory, the appliance was thoroughly checked with regard to safety and functionality.
Before using the appliance, please carefully read these Operating Instructions.
Environmental note
Important safety information
Structure drawing
Installation
Accessory installation before
operating
Using your Baumatic Appliance
Care and maintenance
Troubleshooting
Warranty Registration Card
3
4 - 5
6
7 – 10
11 9
12 - 13
14 - 15
16
17
NOTE: The appliance is intended for household use only.
The manufacturer reserves the right to introduce changes which do
not affect the operation of the appliance.
Page 3
3
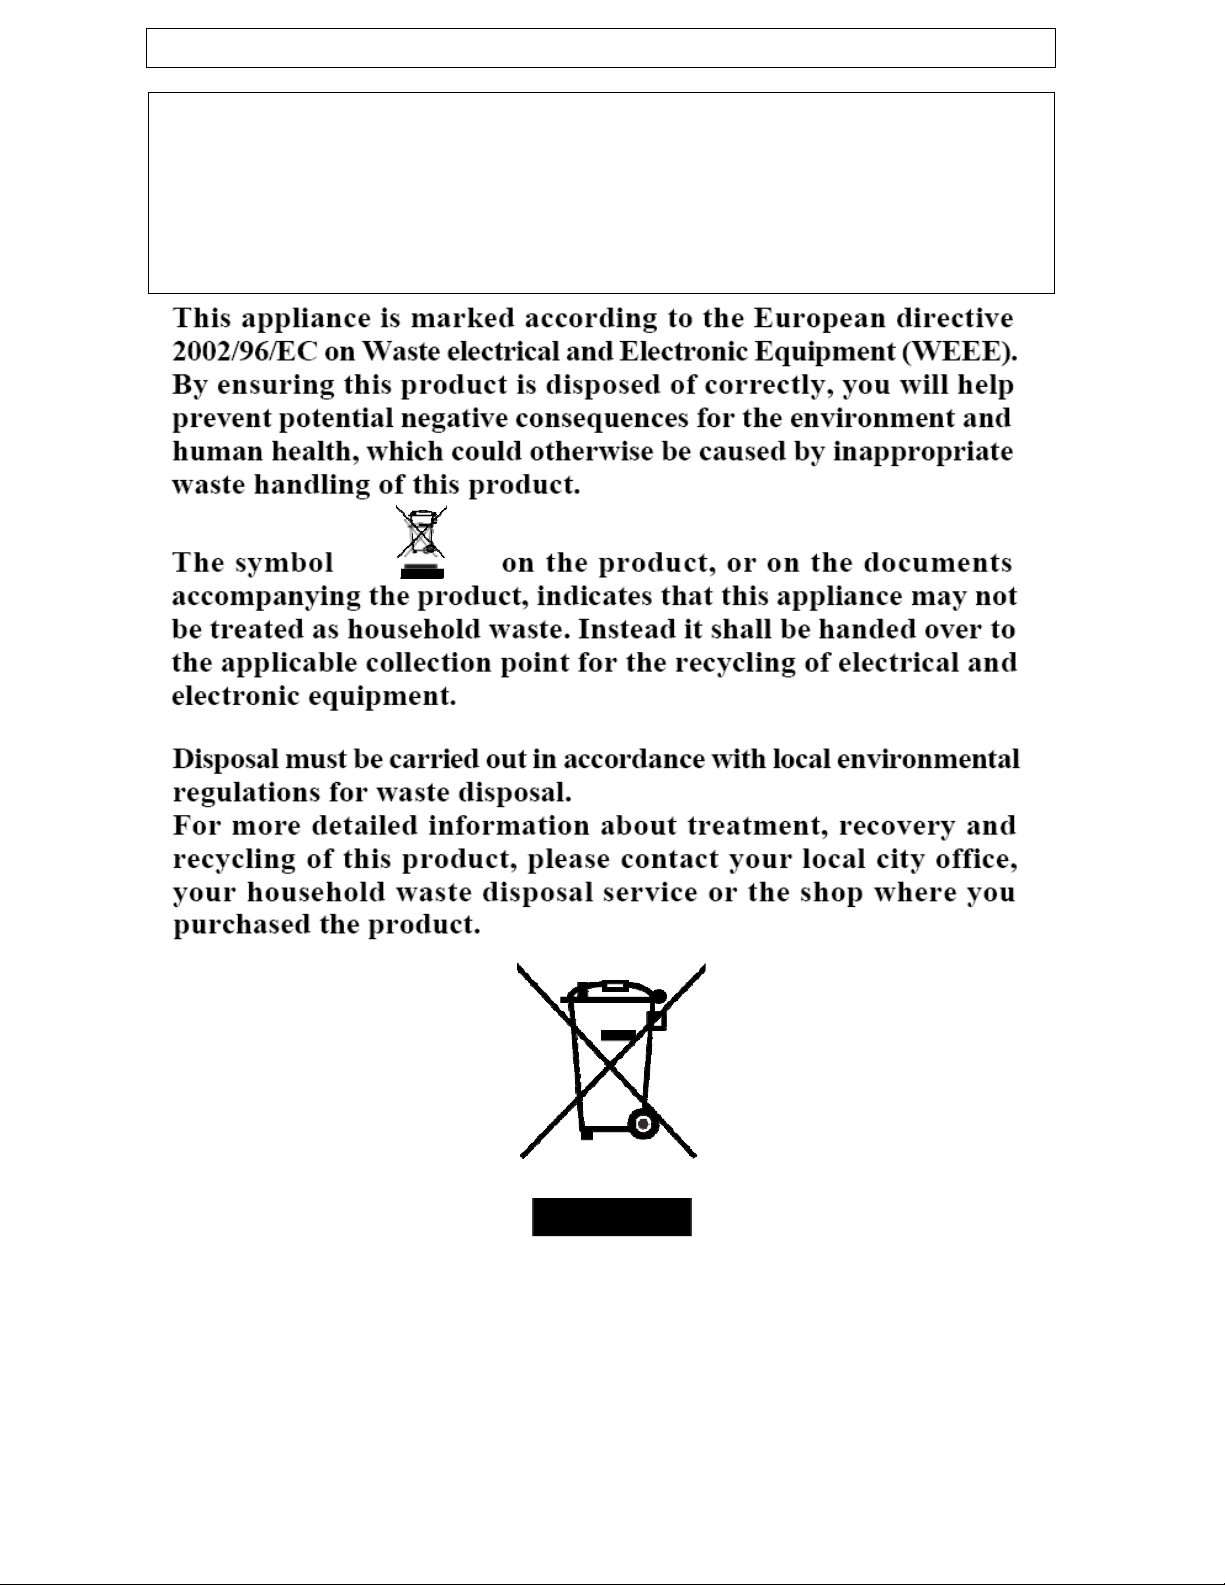
Environmental note
Note: Before discarding an old appliance, switch off and
disconnect it from the power supply. Cut off and render any
plug useless. Cut the cable off directly behind the appliance to
prevent misuse. This should be undertaken by a competent
person. Disable the door lock to make sure that children
cannot get stuck inside the appliance.
o
The packaging materials that Baumatic uses are environmentally
friendly and can be recycled.
o
Please discard all packaging material with due regard for the
environment.
Page 4
4
Important safety information
Your safety is of the utmost importance to Baumatic.
Please make sure that you read this instruction booklet
before attempting to install or use the appliance. If you
are unsure of any of the information contained in this
booklet, please contact Baumatic Service Care.
IMPORTANT: Any installation work must be carried
out by a qualified electrician or competent person.
Use of the appliance
o
Your appliance is only designed to be used in the
home. It is suitable for storing and chilling wine.
NO food stuffs must be stored in the appliance. If it
is used for any other purpose or it is not used
correctly, then Baumatic will accept no liability
for any damage that is caused.
o
Altering the specification of the appliance must not be attempted
for reasons of safety.
Before using your appliance
o
Check the appliance for any signs of transport damage. If you
notice any damage, then you should not connect your appliance
to your mains supply and should contact your retailer.
Refrigerant
o
Your appliance contains R600a refrigerant, which is a natural gas
that does not contain CFCs that can damage the environment.
However it is a flammable substance, therefore care should be
taken:
During the transportation and installation of the
appliance, make sure that the refrigeration pipework
does not get damaged.
If it does become damaged then sources of ignition
and open flames should be avoided. Also the room
that the appliance is situated in should be thoroughly
ventilated.
o
Do not place any objects on top of the appliance,
as this may damage the table top.
Page 5

5
Child safety
o
Packaging material should be kept away from
children.
o
Children should not be allowed to touch the
controls or play with the appliance.
General safety
o
Do not pull on the power supply cable to remove the plug from
your mains supply socket.
o
Do not pull out or insert the plug with wet hands.
o
Do not attempt to use your appliance outdoors or
any place where it is likely to come into contact
with the elements.
o
Before cleaning the appliance or performing maintenance work,
ensure that the appliance has been disconnected from your
mains supply.
o
Never allow the back coils of the appliance to come into contact
with the wall surface.
o
Always ensure that the location where you are installing your
appliance is free of stored items such as papers and other
flammable materials.
o
Never block the ventilation openings of the appliance, either on
the inside or its exterior.
o
It is vital to keep your appliance well ventilated, so
that there is proper air flow between the bottom of
the unit and the plinth/kick plate which it is sitting
on.
o
Do not place electrical devices inside of the appliance, such as
mixers or ice cream makers.
Service
You should not attempt to repair the appliance
yourself, as this could cause injury or a more serious
malfunction. If you require a service call then please
contact Baumatic Service Care.
Page 6
6
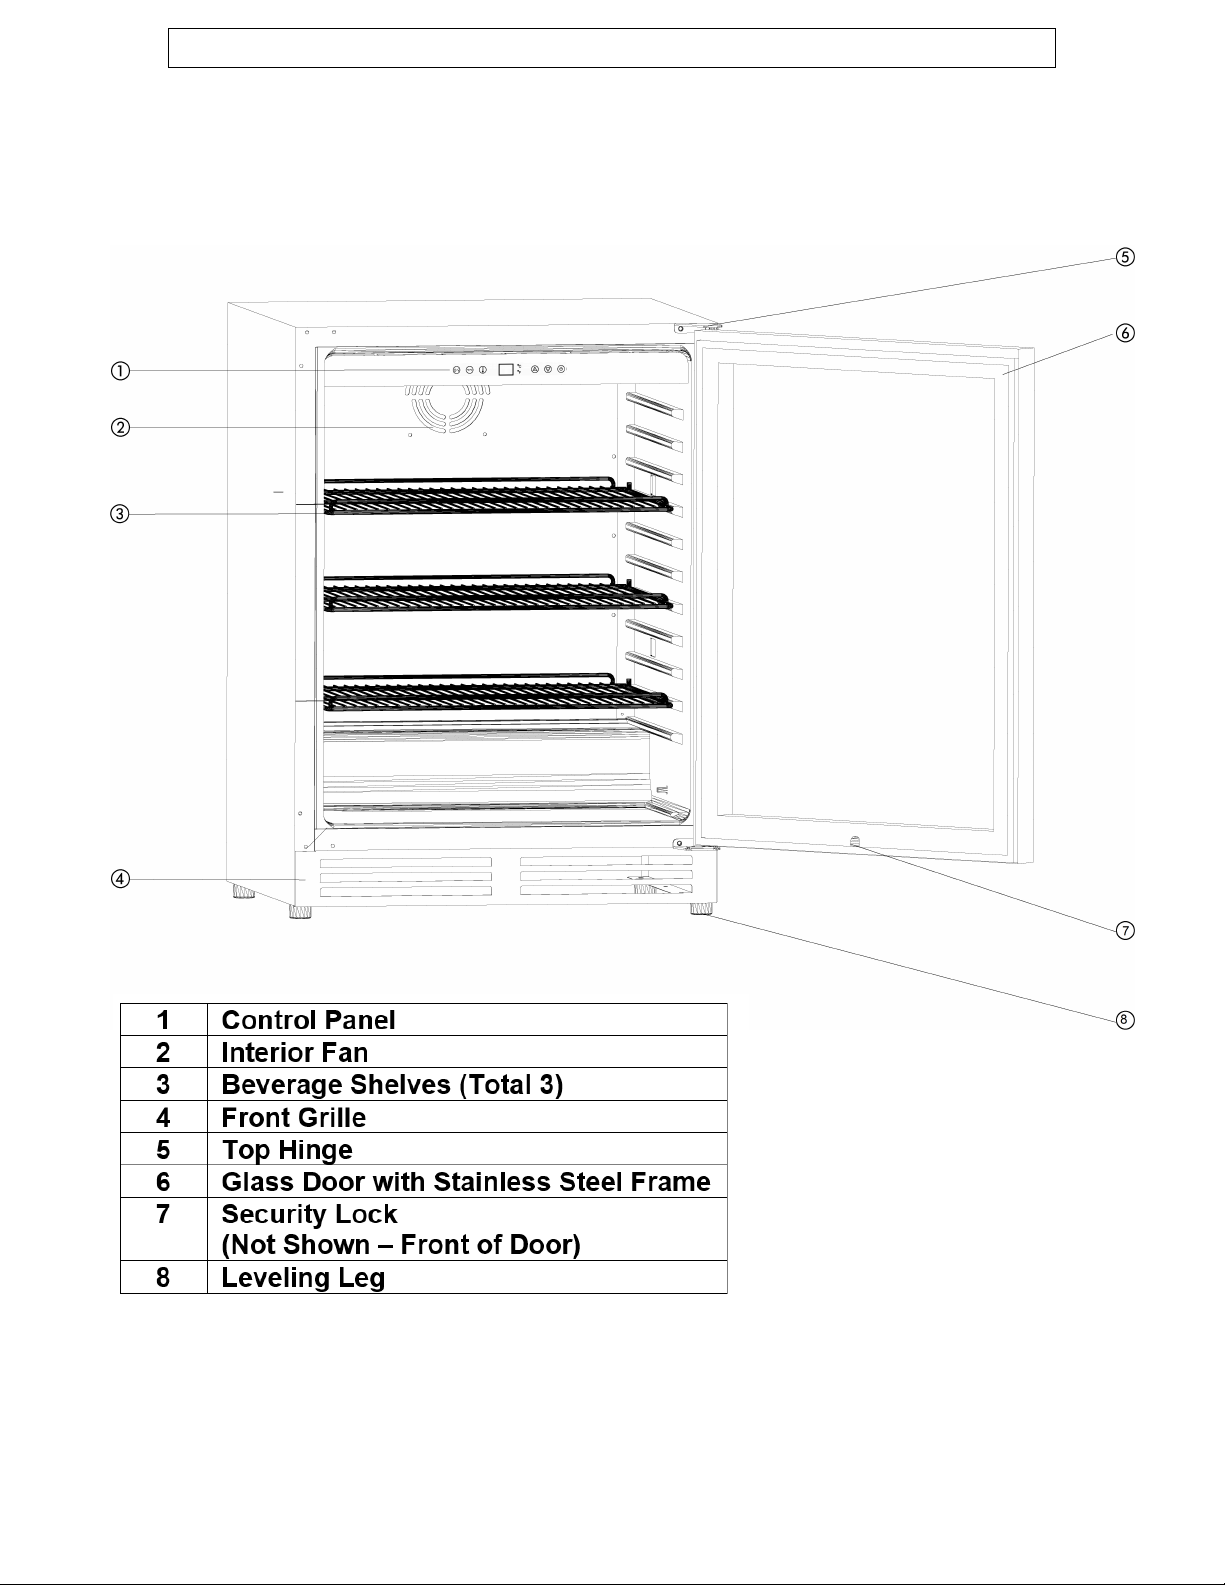
Structure drawing
The following pictures only show the structure of the appliance as well
as the installation drawing. The dimension and shelf quantity may
differ among the models of the same series.
Page 7

7
Installation
IMPORTANT: Before installation and usage read
all the instructions and make sure that the
voltage (V) and the frequency (Hz) indicated on
the rating plate are exactly the same as the
voltage and frequency in your home. The rating
plate can be found on the front left edge of the
inside of the wine cabinet.
The manufacturer declines all responsibility in the event of the installer
failing to observe all the accident prevention regulations in force,
which are necessary for normal use and the regular operation of the
electric system.
Electrical connection
YOUR BEVERAGE CENTRE IS INTENDED FOR FITTED
AND PERMANENT INSTALLATION.
"We recommend that the appliance is connected by a
qualified electrician, who is registered on the E.W.R.B. web site
and who will comply with the AS/NZS 3000 Wiring
Regulations and local regulations.
Your beverage centre comes supplied with a 10 amp moulded lead
with an AS/NZS 3112 approved plug.
The wiring in the mains lead is coloured as follows:
o
Brown Live
o
Blue Neutral
o
Green and yellow Earth
As the colours of the wires in the appliance's mains lead may not
correspond with the coloured markings identifying the terminals in
your spur box, please proceed as follows:
o
The brown wire must be connected to the terminal marked
"L" (live), or coloured red.
o
The blue wire must be connected to the terminal marked
"N" (neutral), or coloured black.
o
The green and yellow wire must be connected to the terminal
marked "E" (earth), or by the earth symbol, or coloured green and
yellow.
When the connection is completed, no stray strands or cut wire should
be present. The cord clamp must be secured over the outer sheath."
Page 8

8
Positioning
o
Positioning the appliance requires two people in order to avoid
injuries or damage to the appliance.
o
Your appliance should not be located in direct sunlight
exposed to continuous heat or extremes of temperature (e.g.
next to a radiator or boiler). If this is not feasible, then you
should install an insulation plate between the appliance and the
adjacent heat source.
o
You should check whether there is an electrical socket available,
which will be accessible after your appliance is installed.
o
Place the appliance flatly and firmly on a solid base. The
appliance is fitted with adjustable feet on the front side, which
should be used to level the appliance.
o
Be sure to leave enough space for the opening of the door, to
avoid damage to the appliance or personal injury.
or
o
IMPORTANT: The vent at the base of the appliance is for
ventilation. Nothing should be placed in front of this vent;
otherwise your appliance may not operate properly.
595mm Width Installation Drawing (mm)
o
Your beverage centre can be used as a built in unit. The
clearances shown in the above drawing should be followed for
both types of installation.
o
In particular the depth dimension must be observed.
Page 9

Reverse the door swing
This appliance has the capability of the door opening from either the left
or right side. The unit is delivered to you with the door opening from the
left side. Should you desire to reverse the opening direction, please
follow these instructions.
Note: All parts removed must be saved to reinstall the door.
1. Open the glass door⑤and remove the two screws① holding the
lower hinge②
to the glass door. Be careful to hold the glass door
firmly after removing the screws.
2. Pull down to remove the glass door from the right upper hinge and
place the door on a padded surface to prevent scratching it.
3. Remove the lower door hinge supporter and bush③.
4. Remove the upper hinge pivot from the right side then install and
tighten it into the left position.
9
Page 10

5. Remove the lower door hinge from the right side. Remove three
screws that are used to fix the bottom grille with the cabinet then
install the three screws at the designated position on the right side.
6. Install the lower door hinge to the designated position on the left side.
7. Install the lower hinge supporter together with the bush to the
designated position.
8. Guide the glass door to the designated position making sure that
the door shaft enters the door hole at the left upper corner of the glass
door. Install the two screws that are used to connect the left lower
hinge with the glass door and tighten them before the door is leveled.
10
Page 11

Accessory installation before operating
UNPACKING AND CLEANING THE BEVERAGE CENTRE
• Make sure that it has been installed by a suitably qualified person, as
per the information contained in Baumatic’s installation instructions.
• Let the appliance stand upright for approximately 2 hours before
connecting it to the mains supply. This will allow any refrigerant
gasses that may have been disturbed during the transportation
process to settle.
• The outside of the appliance and the removable accessories contained
within it, should be cleaned with a solution of liquid detergent and
water.
• The interior of the appliance should be cleaned with a solution of
sodium bicarbonate dissolved in lukewarm water. The interior and
accessories should be thoroughly dried, after the cleaning process has
been completed.
• There can be an odour when you first switch on the appliance. It will
lessen as the appliance starts to cool.
LOCK THE DOOR
●
Your appliance has a lock for the door and a key should be attached
inside the packing of this User Manual.
●
Insert the key into the lock and turn it counter-clockwise to unlock
the door. To lock it, please follow the reversed operation. Please save
the key well.
11
Page 12

Using your Baumatic appliance
During first use
IMPORTANT: When you use the appliance for the first time or
restart the appliance after it has been turned off for a long
time, there could be a few degrees variance between the
temperature you select and the one indicated on the LED
display. This is normal and it is due to the length of activation
time. Once the wine cabinet has been running for a few hours
everything will be back to normal.
POWER ON/OFF CONTROL
●
When the appliance is plugged in to a power outlet, it powers on
automatically.
●
Touch the power mark
to turn off (or turn on) the appliance
.
Warning:
If the unit is switched off or unplugged, you must allow at least 5
Minutes before restarting the appliance or reconnecting it to your mains
supply in order to avoid breaking the compressor
.
12
Page 13

SETTING THE TEMPERATURE
It is recommended you install the beverage centre in a place where the
ambient temperature is between 19oC-24oC (66oF-75oF). If the ambient
temperature is above or below recommended temperatures, the
performance of the unit may be affected.
• and
.
•
INTERIOR LIGHTING ON/OFF CONTROL
Touch the light button
●
to switch the interior lighting on and off.
CHANGING BETWEEN FAHRENHEIT & CELSIUS
, you can interchange the
Fahrenheit
(oF).
and
Celsius (oC) or You can select
13
Page 14

CARE & MAINTENANCE
WARNING: PLEASE ENSURE THAT
YOUR APPLIANCE IS DISCONNECTED
FROM YOUR MAINS SUPPLY BEFORE
ATTEMPTING TO CLEAN IT.
o Do not clean the appliance by pouring
or spraying water over it.
o
The interior of the appliance should be cleaned
periodically, using about 2 tablespoons of baking soda
to a quart (approx. 1 litre) of warm water.
o
Clean the accessories separately with soap and water.
Do not clean them in a dishwasher. Dry wooden
shelves before placing back into the wine cooler.
o
Do not use abrasive products, detergents or soaps.
o
Wiring excess water our of the sponge or soft cloth
when cleaning area of the controls, or any electrical
parts.
o
Do not use steel wool or steel brush on the stainless
steel. These will contaminate the stainless steel with
steel particles and rusting may
occur.
water onto it
16
POWER FAILURE
o
Most power failures are corrected within a few hours and should
not affect the temperature of your appliance if you minimise the
number of times the door is opened.
o
If the power is going to be off for a longer period of time, you
need to take the proper steps to protect the contents.
IMPORTANT: If the appliance is unplugged, the power is lost
or turned off you must wait 5 minutes before restarting the
appliance. If you attempt to restart before this time delay,
the appliance will not turn on.
14
Page 15

VACATION TIME
Short holidays: Leave the appliance in operation for holidays of less
than 3 weeks.
Long absences: If the appliance will not be used for several months,
remove all items, turn off the appliance and unplug the electricity
cable. Clean and dry the interior thoroughly. To prevent odour and
mould growth, leave the door open slightly by blocking it open if
necessary.
MOVING YOUR APPLIANCE
If you need to move your appliance to another location you should follow
the steps outlined below.
o
Remove all items from the appliance.
Securely tape down all loose items such as the shelves inside of the
appliance.
o
Turn the adjustable foot up to the base to avoid damage.
o
Tape the door closed.
o
Ensure the appliance stays secure in the upright position during
transportation. Also protect the outside of the appliance with a blanket
or similar item.
ENERGY SAVING TIPS
o
The appliance should be located away from heat producing appliances,
and away from direct sunlight.
o
Ensure that the unit is adequately ventilated. Never cover air vents.
o
Only open the door when necessary. Avoid leaving the door open for
long periods or opening/closing the door frequently.
15
Page 16

Troubleshooting
IMPORTANT: If your beverage centre appears not to be
operating properly, before contacting Baumatic
Service Care, please refer to the checklist below.
PROBLEM
Appliance does not operate.
Appliance is not cold enough. Check the temperature control setting.
Turn-on and turn-off frequently.
The lighting does not work.
POSSIBLE CAUSE / MEASURE
Not plugged in.
The appliance is turned off.
The circuit breaker has tripped or the fuse has blown.
The door is opened too frequently.
The door is not closed completely.
The door gasket does not seal properly.
The room temperature is hotter than normal.
A large amount of contents has been added to the
Appliance.
The door is opened too frequently.
The door is not closed completely.
The temperature control is not set correctly.
The door gasket does not seal properly.
Not plugged in.
The circuit breaker has tripped or the fuse has blown.
The lighting is turned off.
Too much vibration.
The appliance seems to make too
much noise
The door will not close properly.
Display flashes Error message "E1".
Display flashes Error message "E2".
Check to assure that the appliance is level.
The rattling noise may come from the flow of the
refrigerant, which is normal.
As each cycle ends, you may hear gurgling sounds
caused by the flow of refrigerant.
Contraction and expansion of the inside walls may
cause popping and crackling noises.
The appliance is not level.
The door is misaligned.
The appliance is not level.
The gasket is dirty.
The shelves are out of position.
Temperature sensor failure.
Defrost sensor (Coil Sensor) failure.
16
Page 17

IMPORTANT: If your appliance appears not to
be operating correctly, then you should
disconnect it from your mains supply and then
contact the Customer Care Department.
DO NOT ATTEMPT TO REPAIR THE APPLIANCE
YOURSELF.
Please note that if an engineer is asked to attend whilst the
product is under guarantee and finds that the problem is not the result
of an appliance fault, then you may be liable for the cost of the call
out charge.
The appliance must be accessible for the engineer to perform
any necessary repair. If your appliance is installed in such a
way that an engineer is concerned that damage will be caused
to the appliance or your kitchen, then they will not complete a
repair.
This includes situations where appliances have been tiled in,
sealed in with sealant, have wooden obstructions placed in
front of the appliance - like plinths, or any installation other
than the one specified by Baumatic has been completed.
Please refer to the conditions of guarantee that appear on the
warranty card that you receive with the appliance.
IMPORTANT: Baumatic operates a policy of continuous
improvement and reserves the right to adjust and modify its
products without prior notification.
17
Page 18

WARRANTY REGISTRATION CARD
Congratulations on your new appliance purchase! To
help care for your investment, be sure to register your
appliance online. Registration will help you if you need to
arrange service in the future, and serves as a record of your
purchase – including critical information like model number
and serial number – that you can refer to at any time. Simply
visit the below website, or ask your retailer for help:
www.applico.co.nz/register
WARRANTY:
These products are covered by a warranty for a period of 24
months from the date of purchase, subject to the following
conditions*. The Warranty covers rectification free of charge
of any fault arising from defective materials or components,
or faulty workmanship or assembly.
* The conditions above mentioned are:
1.
that the purchaser carefully follows all instructions
packed with the product;
2.
that the purchaser and/or installer carefully follows
the installation instructions provided and complies
with electrical wiring regulations, gas and or
plumbing codes;
3.
that the purchaser carefully follows instructions
provided in the owner’s handbook relating to the
proper use and care of the product and does not
use the product for any purpose other than the
domestic use for which it has been designed;
4.
all appliances being used in a non-residential
commercial situation are covered by a 3 month
warranty from the original date of purchase;
5.
that the product was purchased and installed in
New Zealand;
6.
that this warranty does not extend to:
a)
optional glass lids for hobs apart from claims
which relate to mechanical or physical damage
thereof at the date of purchase;
b)
‘consumable’ parts such as light bulbs or filters;
c)
damage to ceramic glass caused by liquid or
solid spill-overs, lack of maintenance, or impact;
d)
damage to surface coatings caused by cleaning
or maintenance using products not recommended
by the owner’s handbook;
e)
defects caused by normal wear and tear,
accident, negligence, alteration, misuse or incorrect
installations;
f)
a product dismantled, repaired or serviced by any
serviceman other than an authorised
service agent;
g)
a product not in possession of the original
purchaser;
h)
damage caused by power outages or surges
i)
damage caused by pests (eg. rats, cockroaches etc.)
7.
that if the product is a freestanding microwave oven
or small appliance it must be returned to the dealer/
retailer for servicing. These products, unless stated
otherwise have a 12 month warranty from original
date of purchase with 24 months on the microwave
magnetron; Waste disposers have a 12 month
warranty.
8.
The provision of service under this Warranty is
limited by a 25km boundary from the retailer where
the product was purchased. Such travelling outside
of these limits will incur commercial cost to be paid
by you, regulated by the number of kilometres
travelled beyond the 25km limit (50km return trip).
Nothing herein contained shall be construed in any way as
excluding or limiting your rights under the Consumer Guarantees Acts 1993.
For service please visit www.applico.co.nz/service or
contact the dealer/retailer from whom you purchased the
product. If you are unable to establish the date of purchase,
or the fault is not covered by this Warranty, or if the product
is found to be in working order, you will be required to bear
all service call charges.
Registration of this warranty constitutes acceptance of the
terms and conditions of this Warranty.
Distributed by Applico Ltd
www.applico.co.nz
After registering your appliance online, we recommend you fill out the below information for your reference
and keep this warranty card in a safe place.
PRODUCT: ................................................................................
RETAILER:.................................................................................
DATE OF PURCHASE:..............................................................
INVOICE NO:.............................................................................
MODEL NO: ..............................................................................
*Please consult your user manual for guidance on finding the serial number.
SERIAL NO*: .............................................................................
WEBSITE USERNAME: ............................................................
WEBSITE PASSWORD: ............................................................
REGISTRATION WEBSITE DETAILS FOR
www.applico.co.nz/register
THIS WARRANTY IS VALID IN NEW ZEALAND ONLY.
 Loading...