

Page 1
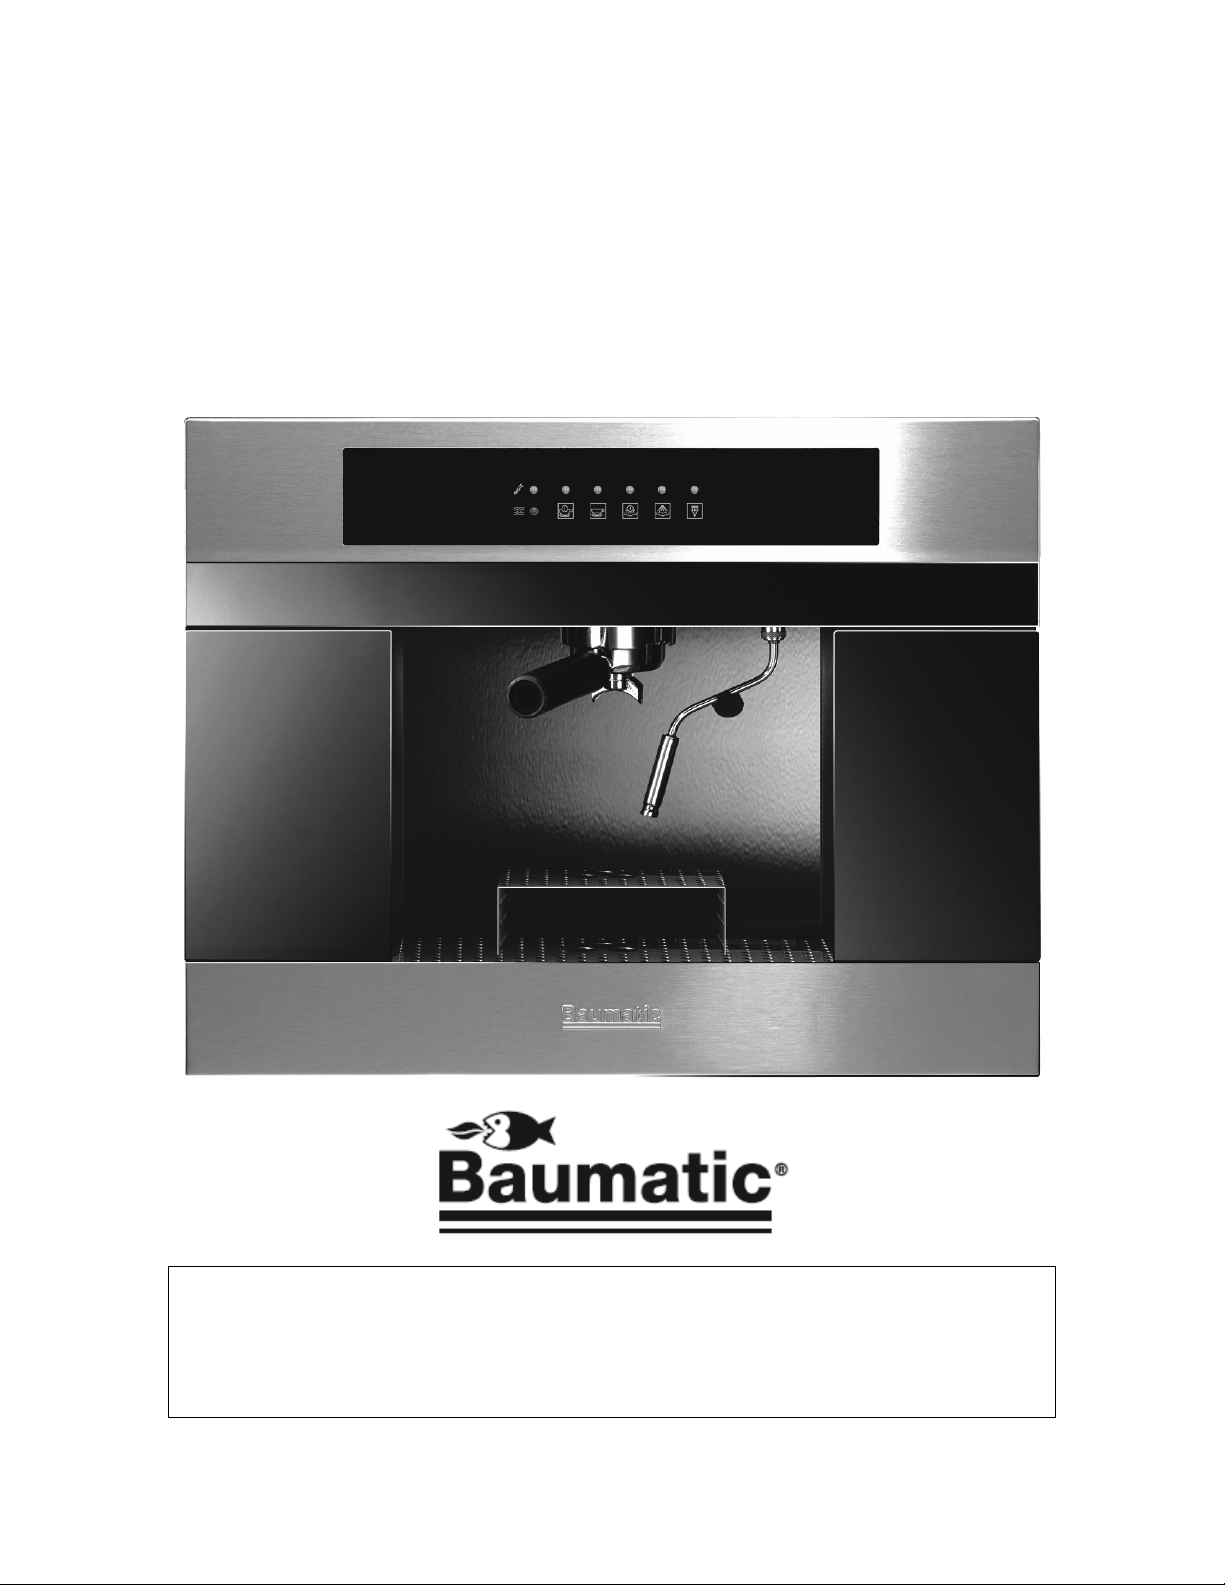
User Manual for your Baumatic
BAEC2SS.2
Semi-automatic built-in espresso maker
in a safe place so that it is easily available for future reference; for
you or any person not familiar with the operation of the appliance.
LIB30367
1 2
NOTE: This User Instruction Manual contains important
information, including safety & installation points, which will
enable you to get the most out of your appliance. Please keep it
DD 17/02/11
Page 2
2
Page 3

Contents
Environmental note 4
IMPORTANT SAFETY INFORMATION 5 – 7
Specifications 7 – 11
Product and aperture dimensions 7
Product specifications 7 - 8
Standard accessories 8
Technical specifications 9
Description of the coffee machine 9 - 10
Control panel 10
The filters 11
Things to do before first use 11 – 14
Cleaning 11
Filling the water reservoir (manual fill mode) 12
What to do if the water level runs low during operation 12 – 13
Getting started (Loading the system with water) 13
Using your espresso maker 14– 16
Dispensing hot water through the main boiler 15
Dispensing steam through the steam boiler 15 – 16
Dispensing boiler water through the steam boiler 16
Making drinks 17 – 21
Connecting the filter holder to the main boiler 17
Making a drink using coffee pods 17 – 18
Making drinks using espresso ground coffee 18 – 19
Tips on making an espresso 19 – 20
Tips on making a cappuccino 20– 21
Tips on making tea 21
Cleaning and maintenance 23 – 24
Installation 24 – 29
Electrical connection 24
Installing the espresso maker into a kitchen cabinet 25 – 27
Troubleshooting 28 - 29
Coffee glossary 29
Contact details 30
3
Page 4
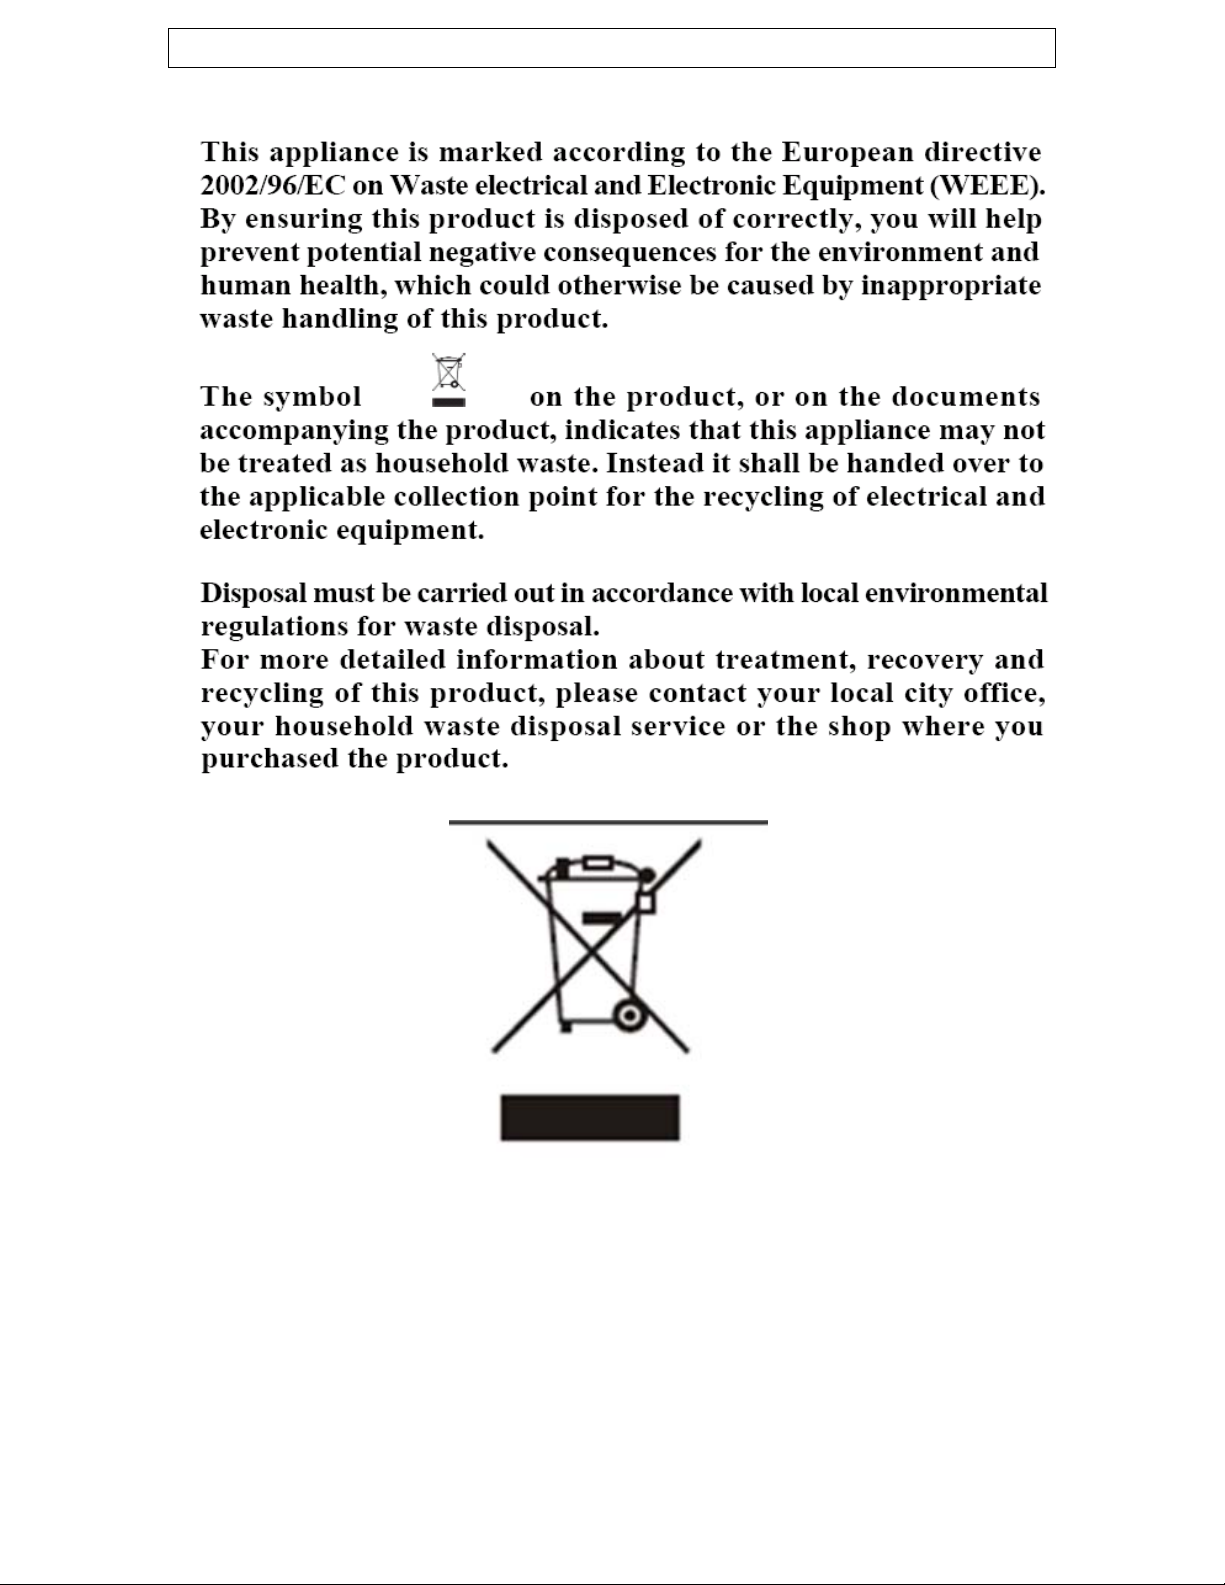
Environmental note
o The packaging materials that Baumatic uses are environmentally
friendly and can be recycled.
o Please discard
environment.
all packaging material with due regard for the
4
Page 5
IMPORTANT SAFETY INFORMATION
Your safety is of the utmost importance to Baumatic.
Please make sure that you read this instruction booklet
before attempting to install or use the appliance. If you
are unsure of any of the information contained
ooklet, please contact Think.
b
eneral Information
G
in this
o This appliance is designed for domestic household use only. It
can ONLY be built into a standard kitchen cabinet or ho
unit and should NOT be used as a freestanding appliance.
o The use of this appliance for any other purpose or in any other
environment without the express agr
invalidate any warranty or liability claim.
o Your new appliance is guaranteed against electrical or
mechanical defects, subject to certain exclusions that are noted
in Baumatic’s Conditions Of
affect your statutory rights.
Guarantee. The foregoing does not
eement of Think will
using
o Repairs may only be carried out by Baum
engineers or their authorised service agent.
arning and safety instructions
W
• This appliance is not intended for use by persons (including
children) with reduced physical, sensory or mental capabilities,
or lack of experience and knowledge, unless they have been
given supervision or instruction concerning use of the appliance
by a person responsible for their safety.
• Children should be
with the appliance.
supervised to ensure that they do not play
atic service
o This appliance complies with all current safety
legislation. Baumatic do wish to emphasise that
this compliance does not remove the fact that
the appliance surfaces will become
extremely hot during use and retain heat after
operation.
o Extreme care MUST be taken when removing any of the
filters or nozzles. They should be allo
they are removed from the appliance.
wed to cool before
5
Page 6
Child Safety
o Baumatic strongly recommend that
are prevented from being near to the appliance and not allowed
to touch the appliance at any time.
o If it is nece
kitchen, please ensure that they are kept under close supervision
at all times.
General Safety
ssary for younger family members to be in the
babies and young children
o Do not leave the espresso maker unattended.
o Do not allow electrical fittings or cables to come into contact
with areas on the appliance that get hot.
o Do not curtains or soft furnishings.
install the appliance next to
Cleaning
o Cleaning of the espresso maker should be carried
out on a regular basis.
o Great care should be taken whilst using this appliance and when
following the cleaning procedure.
o IMPORTANT: The appliance must be disconnected from the
mains before following the cleaning procedure.
Installation
This applian
qualified person, strictly in accordance with the
manufacturer’s instructions.
ce must be installed by a suitably
o Think declines any responsibi
any person or property, as a result of improper use or
installation of this appliance.
lity for injury or damage, to
6
Page 7
o The manufacturer declares that the espresso maker is
built using certified materials and requires the appliance
to be installed in accordance
in force. This appliance must be used by a trained person
for domestic
pecific
S ations
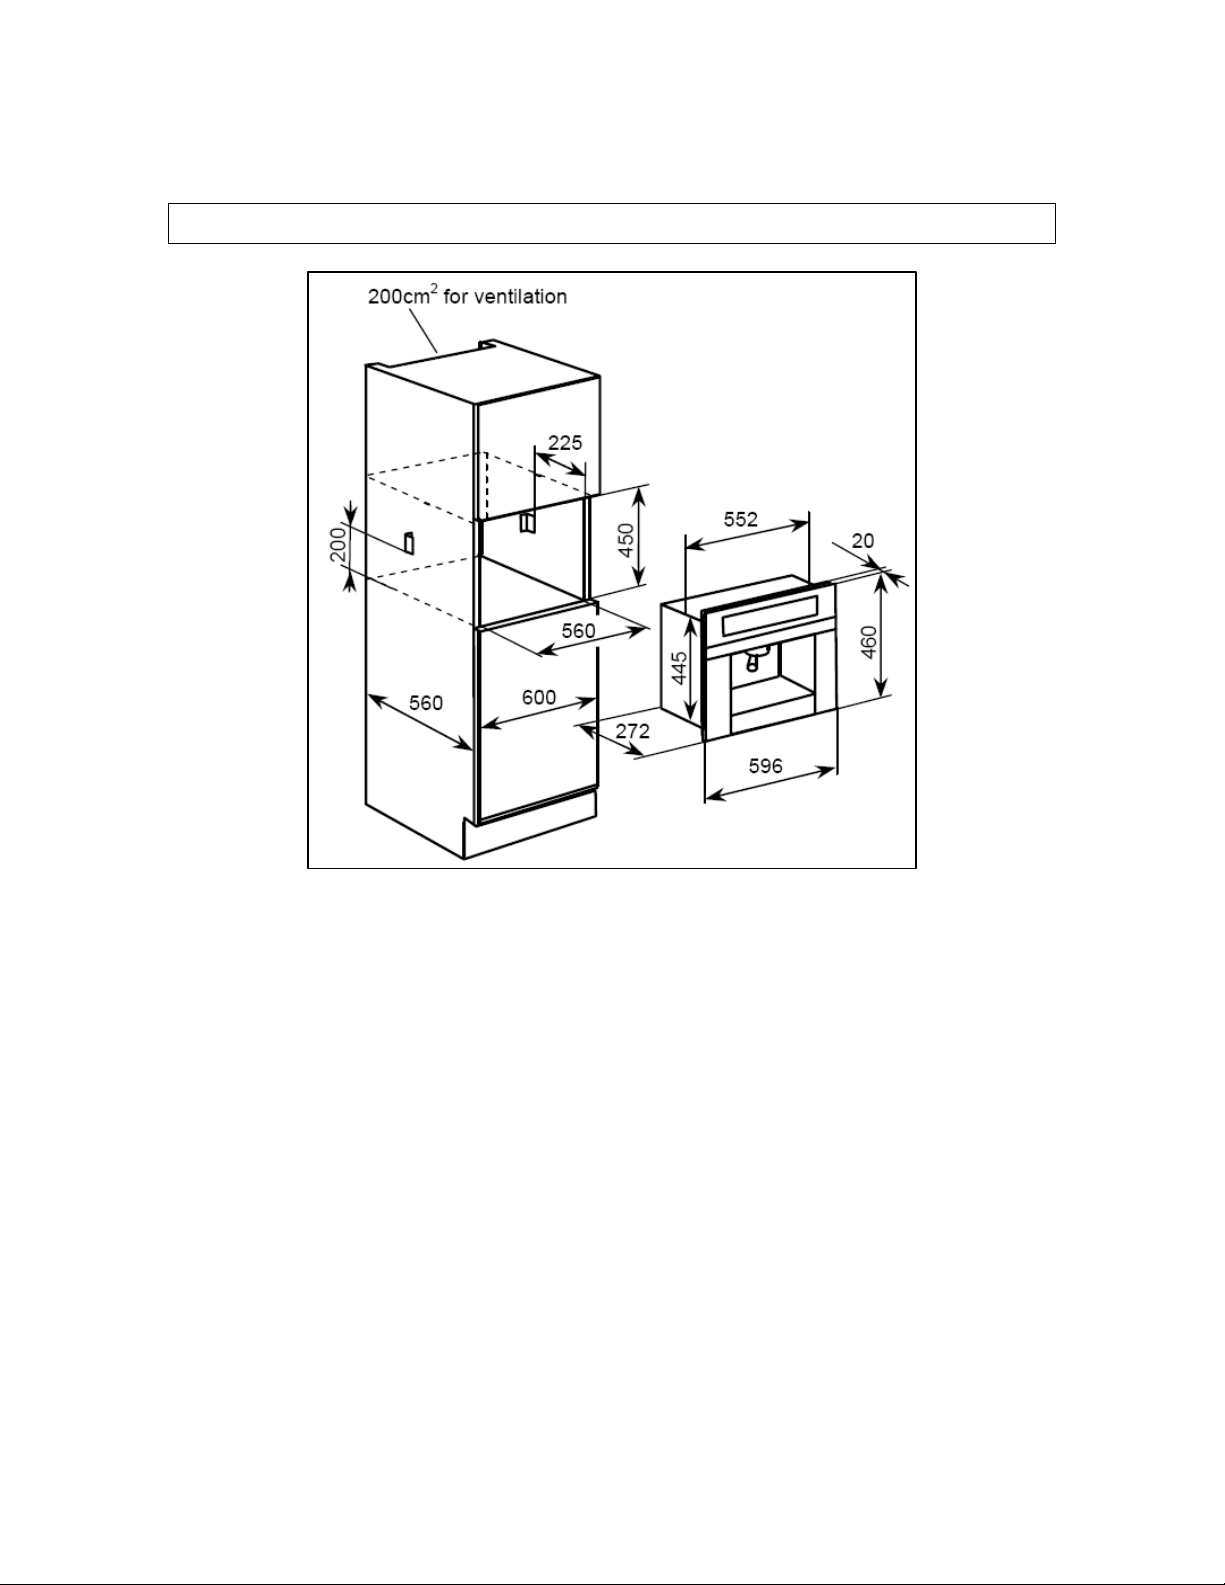
Product Dimensions
Height: 460 mm
Width: 596 mm
Depth: 272 mm
Product specifications
o Touch control operation
o Mark resistant coating
o Choice of 1 or 2 cup filters
o Suitable
o Steam spout for
coffee
o Pull-out drawer
o Compartment for cu
o Single pump with in
cappuccino/steam
o Manual fill system
for sealed coffee pods or ground coffee
purposes only.
cappuccino, hot chocolate, tea and instant
dividual boilers for coffee making &
ps & saucers
with the standards currently
Aperture Dimensions
Height: 450 mm
Width: 600 mm
Depth: (min) 560 mm
7
Page 8

o Removable water tank (capaci
o Empty water tank warning light
o LED high density ill
Standard accesso
o Filter holder
o 1 x one measure espresso cup fi
o 1 x two measure
o 2 x espresso cups with saucers
o Water softener
Technical specifications
o Coffee pump pressure 15 bar
o Total output 1860 W
o Coffee boiler output 1000 W
o Steam boiler output 800 W
o Power supply 230 Vac 50 H
o Supply connection 10 A plug to AS/NZS3112
o Mains supply lead 3 x 1.5mm²
For future reference please record the following information which can
be found on the rating plate and the date of purchase which can be
found on your
n be located by opening the pull out drawer at the bottom of the
ca
coffee maker.
Model Number ……………………………….
Serial Number ……………………………….
Date of Purchase ………………………………
ries
sales invoice. The rating plate for your coffee machine
umination
espresso cup filter
ty 1.8 litres)
lter
z
8
Page 9
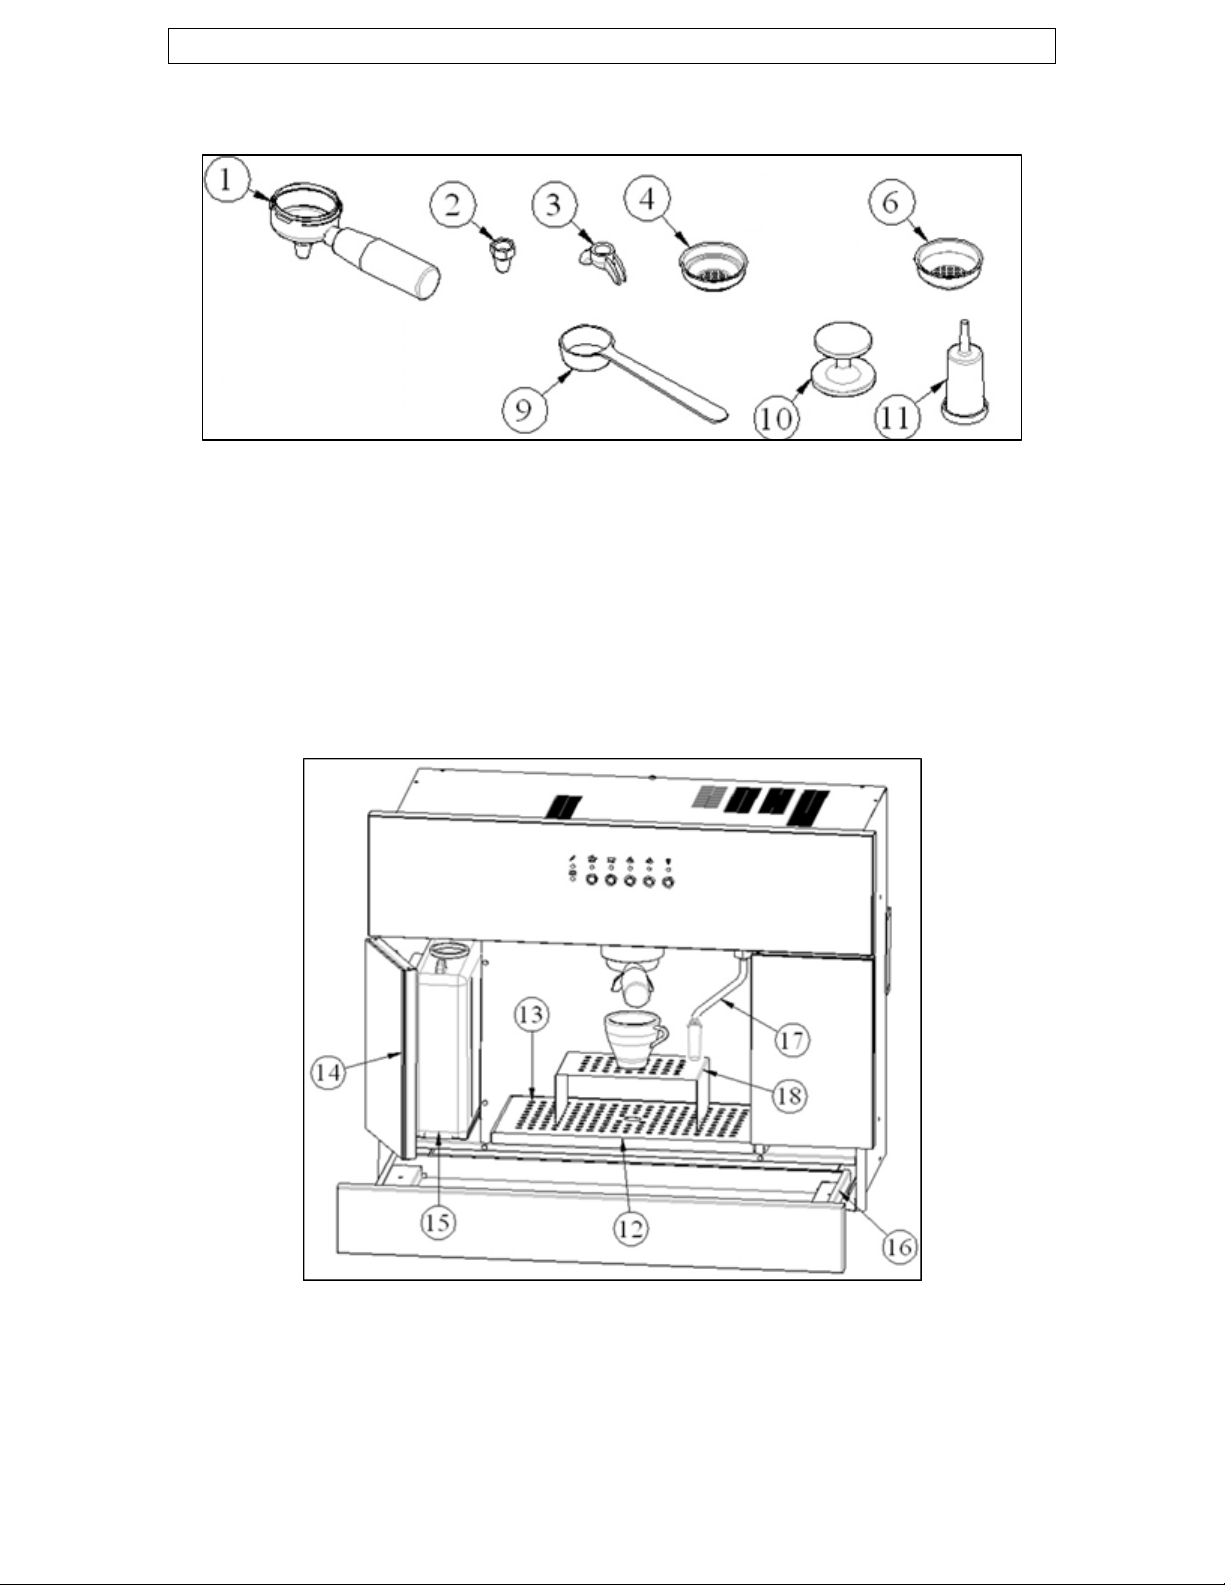
esso maker Description of the espr
Standard accessories
1) Filter holder
2) Spout for a single coffee dose
3) Spout for a double coffee dose
4) Filter for 1 Italian coffee pod or 1 d
6) Filter for 2 doses of e
9) Espresso coffee batcher (ground)
0) Coffee pressing tool
1
11) Water softener filter for the reservoir
13) Drip tray grid 17) Pipe for boiling wate
14) Water reservoir door
15) Water reservoir
spresso coffee or 1 French coffee pod
ose of ground coffee
16) Pull out dra12) Drip tray
and steam
18) Espresso cup stand
wer
r
9
Page 10

19) Filter holder ring nut
20) Power ON/OFF switch
21) Light
Control panel
22) Power ON indicator (green)
23) Main boiler status indicator (green)
24) Main boiler dispensing indicator (green)
25) Steam boiler status indicator (green)
26) Steam dispensing indicator (green)
27) Boiling water dispensing indicator (green)
28) Low water level indicator (red)
29) Main boiler activation button
30) Main boiler dispensing button
31) Steam boiler activation button
32) Steam boiler dispensing button
33) Boiling water dispensing button
10
Page 11

The filters
o Filter for 1 Italian coffee pod or 1
dose of ground coffee.
o Filter for 2 measures of espresso
coffee of 1 French coffee pod.
Things to do before first use
1) Cleani
o It is strongly recommended to clean the appliance
o For further information on cleaning the appliance, please refer to
the cleaning instructions on pages 23 - 25.
2) Filling the water reservoir (manual fill mode)
ng
prior to its first use. Particular attention should be
paid to the water reservoir.
11
Page 12

o Install the appliance as per the installation instructions contained
within this booklet.
o Open the water reservoir door (14) and remove the water
reservoir (15) from the cabinet.
o Remove the water softener filter (11) from its connecting pipe
and immerse it in a bowl of cold water for approximately five
minutes prior to reconnecting.
o Fill the water reservoir with cold water until it is two thirds full.
o Re-connect the water softener filter (11) to the longest tube and
then place it inside the water reservoir, along with the other two
tubes.
o Put the water reservoir back into the cabinet.
o IMPORTANT: Make sure that the water reservoir is
positioned correctly on the pedal inside the water
reservoir cabinet (as shown in the picture on the
previous page).
o Switch the appliance on using the power ON/OFF switch (20);
the power ON indicator (22) will light.
o If the water level in the water reservoir is not sufficient the low
water level indicator (28) will start flashing. You should add
more water to the water reservoir.
o IMPORTANT: If the low water level indicator (28)
remains steady even after filling the water reservoir
with additional water, you should switch the machine
off using the power ON/OFF switch (20) and then
restart after few seconds.
2a) What to do if the water level runs low during operation
o If whilst making drinks, the water reservoir runs low
on water, the low water level indicator (28) will
flash. The espresso machine will stop any drinks
making operation that is in progress.
o You should turn the appliance off using the power ON/OFF switch
(20).
o Then follow the process described above on filling the water
reservoir manually.
12
Page 13

o Restart the machine using the power ON/OFF switch (20).
o You must start the drinks making process right from the
beginning, as stated in the “Using your espresso maker” section
(pages 15 – 17).
3) Getting started (Loading the system with water)
IMPORTANT: YOU MUST FOLLOW THE STEPS BELOW
BEFORE HEATING THE WATER BOILER FOR THE
FIRST TIME.
o Place a jug below the pipe (for boiling water and steam) (17).
o Push the boiling water dispensing button (33).
o Allow the appliance to have a constant flow of water running
through the system for a few seconds.
o Press the boiling water dispensing button (33) again to stop the
flow of water from the pipe.
Using your espresso maker
IMPORTANT: Please note that the main boiler and
the steam boiler CANNOT be operated at the same
time.
1) Dispensing hot water through the main boiler
o Follow the instructions on filling the water reservoir as stated
previously and proceed as follows:-
o Press the main boiler activation button (29) to allow the boiler
to heat up. During this process, the main boiler status indicator
(23) will flash.
o When the boiler has reached its operating temperature, the main
boiler status indicator (23) will stop flashing and remain steady.
o Place a cup underneath the filter holder ring nut (19) and then
press the main boiler dispensing button (30).
o To stop hot water from dispensing, press the same button again.
13
Page 14

¾ Noise generated during this operation is perfectly
normal. This is caused by the activation of the high
pressure pump during this operation.
¾ It is also quite normal for a certain amount of water
to drip into the drip tray after water has been
dispensed.
2) Dispensing steam through the steam boiler
o Follow the instructions on filling the water reservoir (pages 12 –
13) as stated previously and proceed as follows:-
o Press the steam boiler activation button (31) to allow the boilers
to heat up. During this process, the steam boiler status indicator
(25) will flash.
o Whilst the steam boiler is heating up, it is normal to get a small
amount of water dripping from the pipe for boiling water and
steam. (17).
o When the boilers have reached their operating temperature, the
steam boiler status indicator (25) will stop flashing and remain
steady.
o To dispense steam, press the steam boiler dispensing button
(32).
NOTE: Steam will dispense from the pipe for boiling water and
steam (17).
o To stop steam from dispensing, press the same button again.
¾ The noise generated during this operation is perfectly
normal. This is caused by the activation of the high
pressure pump during this operation.
¾ It is also quiet normal for a certain amount of water to
drip into the drip tray after water has been dispensed.
o WARNING: During this operation,
extreme caution should be
exercised, as the dispensing pipe wi
get hot.
o When releasing steam, avoid
directing the steam towards your
person.
scalding.
o Always use a container or a mug
underneath the dispen
There is a danger of
sing pipe
ll
14
Page 15

whilst dispensing steam.
3) Dispensing boiling water through the steam boiler
o Follow the instructions on filling the water reservo
14) as stated previously and proceed as follows:-
o Press the steam boiler activation button (31) to allow the boilers
to heat up. Durin
(25) will flash.
o Whilst the steam boiler is heating up, it is nor
amount of water dripping from the pipe (17).
o When the boilers have reached their operating temperature, the
steam bo
steady.
o To dispense bo
button (33).
NOTE: Boiling wate
and steam) (17).
o To stop
again.
iler status indicator (25) will stop flashing and remain
boiling water from dispensing, press the same button
¾ The noise generated during this operation is perfectly
normal. This is caused by the activa
pressure pump during this operation.
¾ It is also quiet normal for a certain amount of water to
drip into the drip tray after water has been dispensed.
g this process, the steam boiler status indicator
iling water, press the boiling water dispensing
r will dispense from the pipe (for boiling water
o WARNING: During this operation,
extreme caution should be
exercised, a
will get hot.
o When releasing boiling water, avoid
directing boiling water towards
your pers
scalding.
o Always use a container or a mug
erneath the pipe whilst
und
dispensing boiling water.
s the dispensing pipe
on. There is a danger of
ir (pages 11 –
mal to get a small
tion of the high
15
Page 16

aking drinks M
Connecting the filter ho
o Lift the filter holder (1) towards the filter holder ring nut (19);
making
above.
o Continue lifting the holder until it locates inside of the ring nut.
o Turn the handle o
is fully secured.
o When you have finished using the holder, turn the han
clockwise and remove it from the filter holder ring nut (19).
Making a drink using coffee pods
Coffee pods are an easy, practical and hygienic way to make coffee.
The packaging used for coffee pods does not
pill out
s and can be easily removed after use.
o For best results ensu
to their use by date.
o Follow the instructions on filling the water reservoir (pages 11 –
14) and “Dispensing hot water through the main boiler” (page
15).
sure that it is in the position shown in the drawing
IMPORTANT: If the filter gets attached to the boiler, you
should carefully remove it. This is a result of a v
eing created during the espresso making process.
b
o IMPORTANT: If you are using Italian coffee
pods, then the filter for 1 Italian coffee pod (4)
must be used. If you are using French coffee
pods, then the
must be used.
lder to the main boiler
f the holder anti-clockwise, making sure that it
dle
acuum
allow excess coffee to
filter for 1 French coffee pod (6)
re that the coffee pods are used prior
16
Page 17

o To make a single dose of espresso, use the spout for a single
coffee dose (2) and use one espresso cup.
To make a double dose of espresso, use the spout for a double
o
coffee dose (3) and use two espresso cups.
Insert an appropriately sized coffee pod filter (4) or (6) into the
o
filter holder (1).
o Place the coffe
the filter holder ring nut (19) on to the main boiler and lock it
into position.
o Place a
espresso for making espresso shots use the espresso cup stand
(18).
o Press the main boiler dispensing button (30).
o When your espresso is made, press the same button again to
stop hot water from dispensing.
o Release the filter holder (1) from the filter holder ring nut (19).
o When the coffee pod is sufficiently cooled, remove it from the
filter holder (1) and discard it.
o Wipe over the filters with a damp cloth, if you want to make
another drink.
o When you have finished making drinks, you can either wash the
filters and spouts in hot soapy water or in a
Making drinks using espresso ground coffee
o Follow
14) and “Dispensing hot water through the main boiler” (page
15).
o To make a single dose of espresso, use the spout for a single
coffee dose (2) and use one espresso cup.
o To make a double dose of espresso, use the spout for a double
coffee dose (3) and use two espresso cups.
o Insert the appropriately sized coffee pod filter (4) or (6) into
the filter holder (1).
suitably sized cup under the main boiler. If using the
the instructions on filling the water reservoir (pages 11 –
e pod into the filter holder (1) and place it onto
dishwasher.
17
Page 18

o Using the supplied espresso coffee batcher (ground) (9) put the
required amount of espresso coffee into the filter holder (1).
Use the coffee pressing tool (10) to pack down the espresso
o
co
ffee in the filter holder. Place the filter holder into the filter
ho
lder ring nut (19) on the main boiler and lock it in position.
o IMPORTANT: Do not overfill or compact the
espresso coffee too tightly. Doing this will not
allow the water to flow freely.
o Place a suitably sized cup under the main
espresso cup stand (18) if using the espresso cup.
o Press the main boiler dispensing
o When your espresso is made, press the same button again to
stop hot water from dispensing.
o Release the filter holder (1) from the filter holder ring nut (19)
and discard the
o Wipe over the filters with a damp cloth, if you want to make
another drink.
When you have finished making drinks, you can either wash the
o
filters an spouts in hot soapy water or in
d a dishwasher.
used espresso coffee.
button (30).
boiler. Use the
Tips on making an espresso
n espresso is a strong black coffee that is made
A
by forcing pressurised hot water, through finely
ground espresso coffee.
o Approximately 7 grams of coffee is required for an espresso.
After filling the filter with coffee, use the coffee pressing tool
(10) to tap down the coffee in the filter holder. Remove any
excess coffee from the filter holder before making the espresso.
If you are using the small cups especially designed for
o
espressos, then you should utilise the espresso cup stand (18)
to raise the cup closer to the filter holder (1).
o The main boiler should be pre-heated and a small amount of
water should be
dispensed through the machine to warm it up.
18
Page 19

The espresso cups should also be warmed before making any
o
espresso dri k.
o After making a cup of espresso, you should follow the dispensing
steam from the steam boiler section (pages 15 – 16).
Press the steam boiler dispensing button (32) and release steam
o
for a few seconds onto the drip tray. During this time, a certain
amount of co
o Pr
o Press the steam boiler dispensing button for the third time and
o Move the container of milk up and down very slowly whilst
o The temperature of the milk should be monitored by carefully
o Milk should not be overheated, in order to avo
o When the required froth has been achieved, press the steam
ess the steam boiler dispensing button again to stop the steam
dis
pensing.
allow the
a steady flow of steam is obtained, immerse the pipe (for boiling
water and steam) (17) into the milk, holding the rubber sleeved
section.
simultaneously rotating the container at the same tim
touching the container with the palm of your hand.
boiler dispensing button to stop the function.
n
Tips on making a cappuc
n espresso topped with an equal amount of
A
teamed milk and froth.
s
o IMPORTANT: When
steam boiler should be heated before the main
boiler in order to reduce the time taken to heat
up the main boiler.
ndensed water will be released.
o IMPORTANT: Using the metal jug supplied along
with the appliance, fill approximately 150 - 200 ml of
milk required for frothing.
steam to flow onto the drip tray for few seconds. Once
making a cappuccino, the
cino
e.
id it being diluted.
19
Page 20

o Put the e
milk from
proce
o After using the above function, a certain amount of steam
should be dispen
the froth making nozzle cleaned with a damp cloth.
o The froth making nozzle can be dismantled and wa
in a dishwasher.
o NOTE: You can also use the steam pipe to heat up other
beverages such as water, punch and hot chocolate etc.
o For tea bags, follow the instructions as stated in the dispensing
boiling water through the steam boiler section (pages 15 – 16).
spresso shot into a large cup and then pour the heated
the jug into it. The froth achieved during the frothing
ss should be spooned
o IMPORTANT: To get the best results, milk should
be semi-skimmed and preferably at room
temperature.
sed through the pipe several times and
Tips on making tea
o For loose leaf tea, follow the instructions as
stated in the “Making drinks using espresso
ground coffee” section (page 19 - 20).
over the top.
shed
20
Page 21

leaning and maintenance C
Cleaning operations must only be carried out
when the coffee maker is cold.
The appliance should be disconnected from your
mains supply before commencing any cleaning
process.
tS ainless steel sections
o The stainless steel sections should be cleaned using warm soapy
water.
o No abrasive detergents or cleaners should be used.
o No abrasive sponges or steel wool should be used on any area of
the appliance.
o Dry the
o We would recommend that an appropriate stainless steel cleaner
and polish
Steam pipe
o You sho
each use.
o NOTE: When milk cools, it creates impurities which may block
the steam discha
poorly.
o If you have used the steam pipe, you should dismantle the froth
making device and wipe both the sections using a clean sponge
or a damp cloth.
Water reservoir
o If you are n
should drain the boiler by following the “Dispensing hot water
through the main boiler” section (page 15).
Press the main boiler dispensing button (30) until tho e reservoir
is empty.
o If your appliance is connected to your m
should turn the machine off us
from the m
appliance afterwards thoroughly with a soft cloth.
is regularly used on the stainless steel surfaces.
uld flush the steam pipe thoroughly with steam after
rge hole and cause the appliance to function
ot using the appliance for a long period of time, you
ains water supply, you
ing the power ON/OFF switch or
ains, before it starts to refill the reservoir.
21
Page 22

o Clean the water reservoir regularly using warm soapy water and
make sure that the water reservoir has been rinsed thoro
before being placed back in the machine.
The drip tray
o Pull the storage drawer forward and remove the drip tray.
You can either wash this drip tray in warm soapy water or wash
o
it in a dis
o Make sure that the drip tray and cover are thoroughly dried
before reinstalling.
Water boiler
o Depending on the water hardness in your area of the c
is normal for limescale to form in the boilers. Therefore it is
recommended that you should carry out the following process a
least every six months.
o Manually fill the water reservoir with 2 litres of water.
o Add half a glass of citric a
o Follow the process stated in the “Dispensing hot water through
the main boiler” section (page 15) and follow the process stated
in the “Dispensing boiling water through the
section (pages 15 – 16).
o When the water reservoir is completely empty,
with cold water (either manually or automatically) and then
dispense water until the reservoir is empty again.
o You should do this twice to make sure that there are no
citric acid or vinegar left in the water reservoir.
o IMPORTANT: There are coffee boiler cleaners that are readily
available from supermarkets or D.I.Y. stores. Please refer to the
manufacture
Water softener
o The water softener will need to be replaced approximately every
six months.
o If the colours of the granules in the water softener have changed
from their original colour, then it
hwasher.
ountry, it
cid or vinegar to the water reservoir.
steam boiler”
fill the reservoir
traces of
r’s instructions when using these products.
is time to replace it.
ughly
t
22
Page 23

o A replacement water softener can be obtained from the
Baumatic Spares Department.
o Whe w
NSTALLATION
I
o UK Regulations and Safety
Building Regulations (issued by the Department of the
o
o Building Standards (issued by the Scottish Development
o IEE Wiring Regulations.
o
Before
marked on the rating plate corresponds with your mains supply
voltage.
n a new
the e
water res
Replacements.
Environment).
artment).
Dep
Electricity At Work Regulations.
connecting the appliance, make sure that the supply voltage
WARNING: THIS APPLIANCE MUST BE EARTHED.
o This appliance should be plugged into a 10 A General
Purpose Outlet (GPO), placed in an easily accessible position
adjacent to the appliance. The GPO must still be accessible even
when your coffee machine is located in its housing.
ater softener is fitted, you should follow the filling
rvoir instructions.
Installation of this appliance must be carried
out by a suitably qualified person, in
accordan
following.
ce with the current version of the
Standards or their European Norm
o If you have to change the coffee machine power cord, the
earthing (yellow/green) conductor must always be 10 mm longer
than the line conducto
o Care must be taken to ensure that the temperature of the mains
supply cable does not exceed 50°C.
o If the mains supply cable is damaged, then it must be replaced
with a suitable cable.
rs.
23
Page 24

nstalling thI e espresso maker into a kitchen cabinet
Ensure that the aperture that you will be fitting the coffee
o
machine into is of the size given in the diagram above.
o Ensure that the rear panel of the furniture housing unit has been
removed and that the ventilation cut out shown is adhered to.
24
Page 25

o You must ensure that there is a hole to feed the electrical cable
through. These steps must be done before commencing the rest
of the installation process.
1. Measure a height of
200 mm from the
base of the housing
unit. Then at that
height, measure out
a distance of 225
mm from the front
of it and mark it.
You should make
the same
measu
marking on both
sides of the housing
unit.
2. On the marks that you have just made,
use the screws provided to fix a support
piece to either side of the housing unit.
3. Use a spirit level to make sure that the support
pieces are vertically level.
ou should also feed the electrical cable through the hole that you
Y
have made for it in the housing unit. You should NOT
cable to the GPO at this stage.
4. Place the coffee machine inside of the housing unit.
rement and
connect the
25
Page 26

5. Sit the coffee machine in the housing unit. You must make sure
that the coffee machine is flush with the housing unit, otherwise
it will not line up properly with the support pieces.
6. There are two screw holes on the main body of the coffee maker,
one on the right hand side of the machine and the other on the
left hand side. You have to open the water reservoir door (14)
and remove the water reservoir (15) to access the left hand
one.
7. Fix the coffee machine against the housing unit by fully
tightening the screws provided, through the screw holes on the
above drawing.
8. Follow the electrical connection information on page 24 and then
check that the appliance is functioning correctly.
IMPORTANT: You must follow the before first use section on pages
11 - 14.
26
Page 27

TROUBLESHOOTING
My espresso machine will not work at all.
o Check your mains supply and the electrical connection.
My espresso machine will not dispense water.
Check that the water reservoir is filled with water and the
water softener and other tubes are immersed in the water
reservoir.
Is it ‘OK’ to leave my espresso machine switched ON?
o Appliance should not be left unattended when drinks making
process is in progress.
o The appliance will go in a stand by mode when not in use after
approximately 60 minutes. To restart follow the drink making
processes from the start.
Flashing red light
o Low water level in the water reservoir. Follow the filling
instructions.
Steady red light
o Low water level in the water reservoir. Follow the filling
instructions.
All ‘LED’ light indicators flashing constantly
o Switch off the appliance and restart after approximately
60 minutes. If the error still persists, contact the
Customer Care Department to arrange an engineer’s visit.
27
27
Page 28

Coffee glossary
Caffe- Italian word for a standard espresso
Caffe Americano- a thin espresso with water added
Caffe latte- a double espresso mixed in a large cup
with hot milk. It should be topped with little or no
foam.
Caffe mocha- made from equal parts milk and
cocoa.
Caffeine- espresso’s caffeine content is only a third or
half of that found in coffee. The stronger the roast, the
less caffeine the espresso will contain.
Cappuccino- is espresso frothed with milk. It is
equal parts of espresso, foam and hot milk.
Crema- this is the sign of the perfect cup of
espresso; a fine, nutty or cinnamon brown foam on the surface of the
espresso. This is only created when the pressure is sufficiently high.
The crema contains the foamed oils which are rich in flavour and
aroma.
Espresso- see “caffe”.
Macchiato- espresso carrying a dollop of hot, foaming milk to give a
dappled look.
IMPORTANT: If your appliance appears not to be
operating correctly, then you should disconnect it
from your mains supply and then contact the
Customer Care Department on telephone number
1 800 444 357
DO NOT ATTEMPT TO REPAIR THE APPLIANCE
YOURSELF.
The manufacturer has the right to change any specifications on
the product without giving prior notice.
Please note that if an engineer is asked to attend whilst the product is
under guarantee and finds that the problem is not the result of an
28
Page 29

appliance fault, then you may be liable for the cost of the call out
charge.
The appliance must be accessible for the engineer to perform
any necessary repair. If your appliance is installed in such a
way that an engineer is concerned that damage will be caused
to the appliance or your kitchen, then he will not complete a
repair.
This includes situations where appliances have been tiled in,
sealed in with sealant, have wooden obstructions placed in
front of the appliance, like plinths. Or any installation other
than the one specified has been completed.
Please refer to the conditions of guarantee that appear on the
warranty card that you receive with the appliance.
IMPORTANT: The manufacturer operates a policy of continuous
improvement and reserves the right to adjust and modify its
products without prior notification.
29
 Loading...