

Bauknecht KRB 1310 Instructions For Use Manual

Bauknecht AG, Industriestrasse 36, 5600 Lenzburg, www.bauknecht.ch
Verkauf Telefon 0848 801 002 Fax 0848 801 017 verkauf@bauknecht.ch
Kundendienst Telefon 0848 801 001 Fax 0848 801 003 service@bauknecht.ch
Ersatzteile Telefon 0848 801 005 Fax 0848 801 004 ersatzteilverkauf@bauknecht.ch
Instructions for use
KRB 1310
PRODUCT SHEET
GB
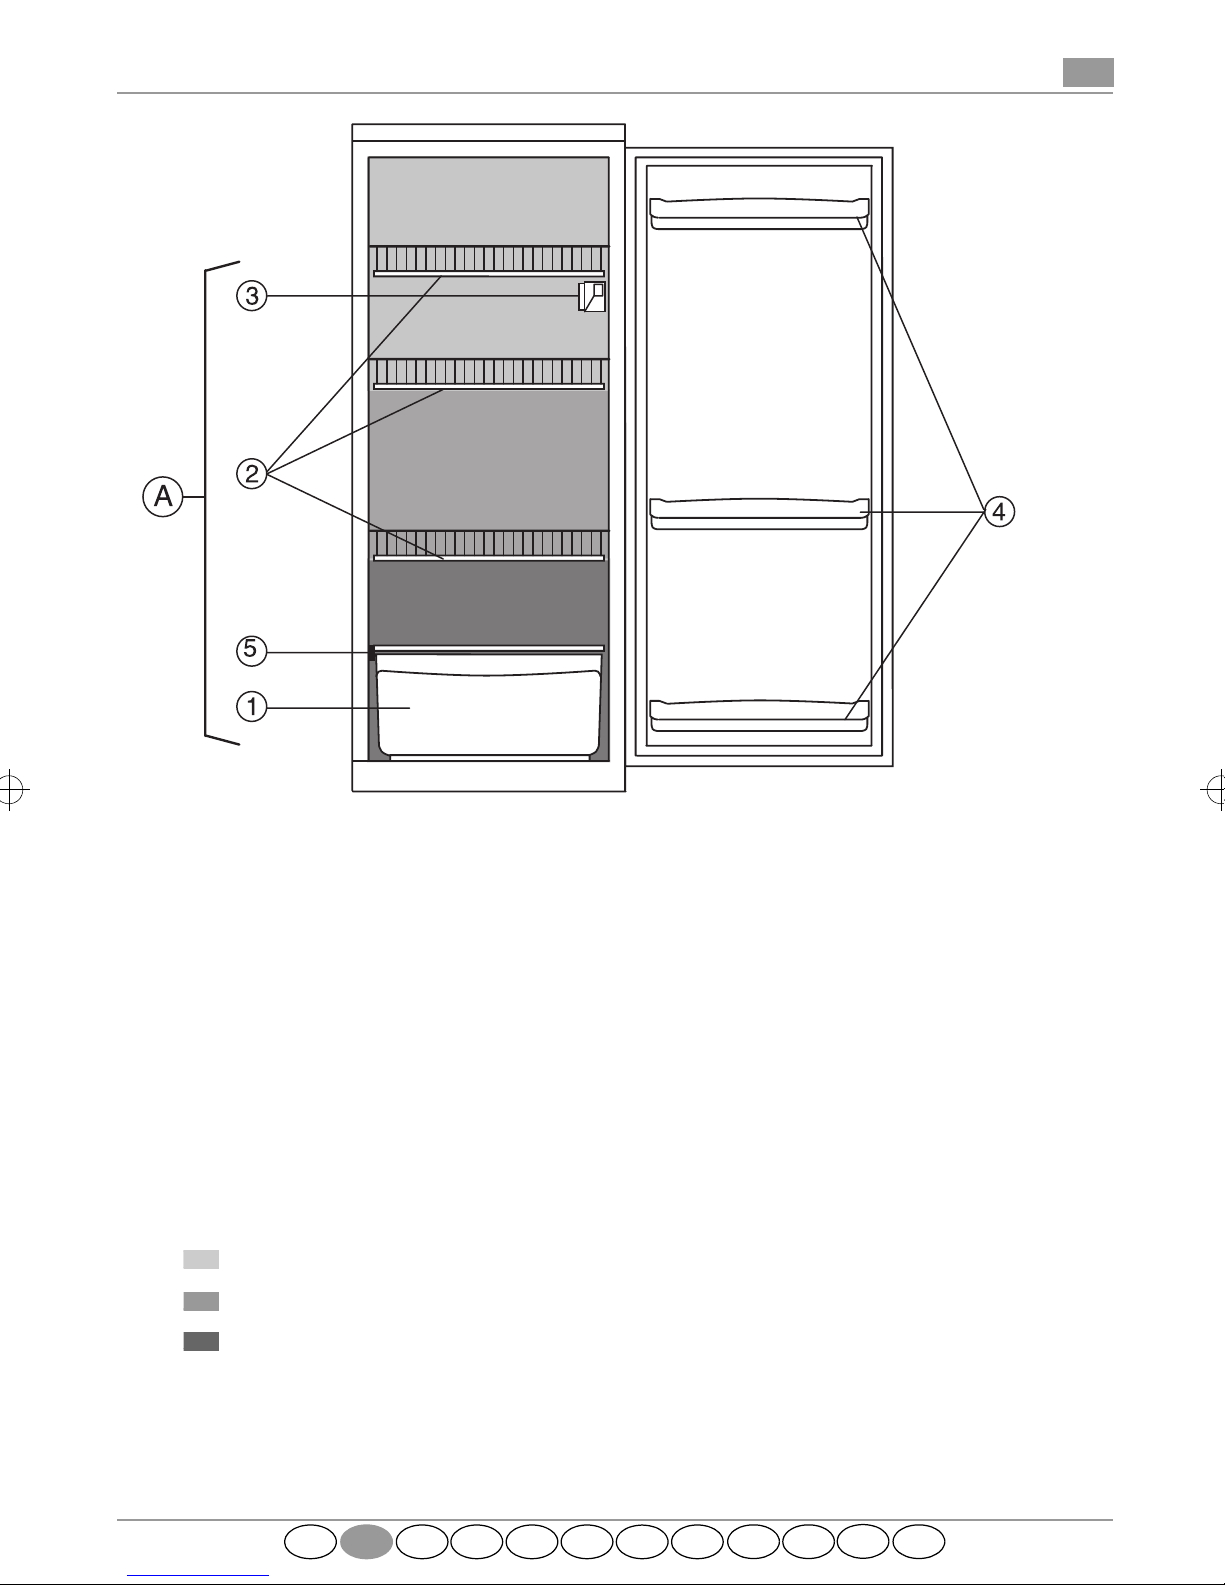
A. Refrigerator compartment
Crisper drawer
1.
Shelves / Shelf area
2.
Thermostat control knob/light
3.
Shelves
4.
Rating plate (at the side of crisper
5.
drawer)
Least cold zone
Intermediate temperature zone
Coldest zone
: The number of shelves and type of accessories may vary, depending on the model.
Notes
All shelves and racks are removable.
Important: Refrigerator accessories must not be washed in a dishwasher.
GB ID F NL E P GR
S N FIN
DK
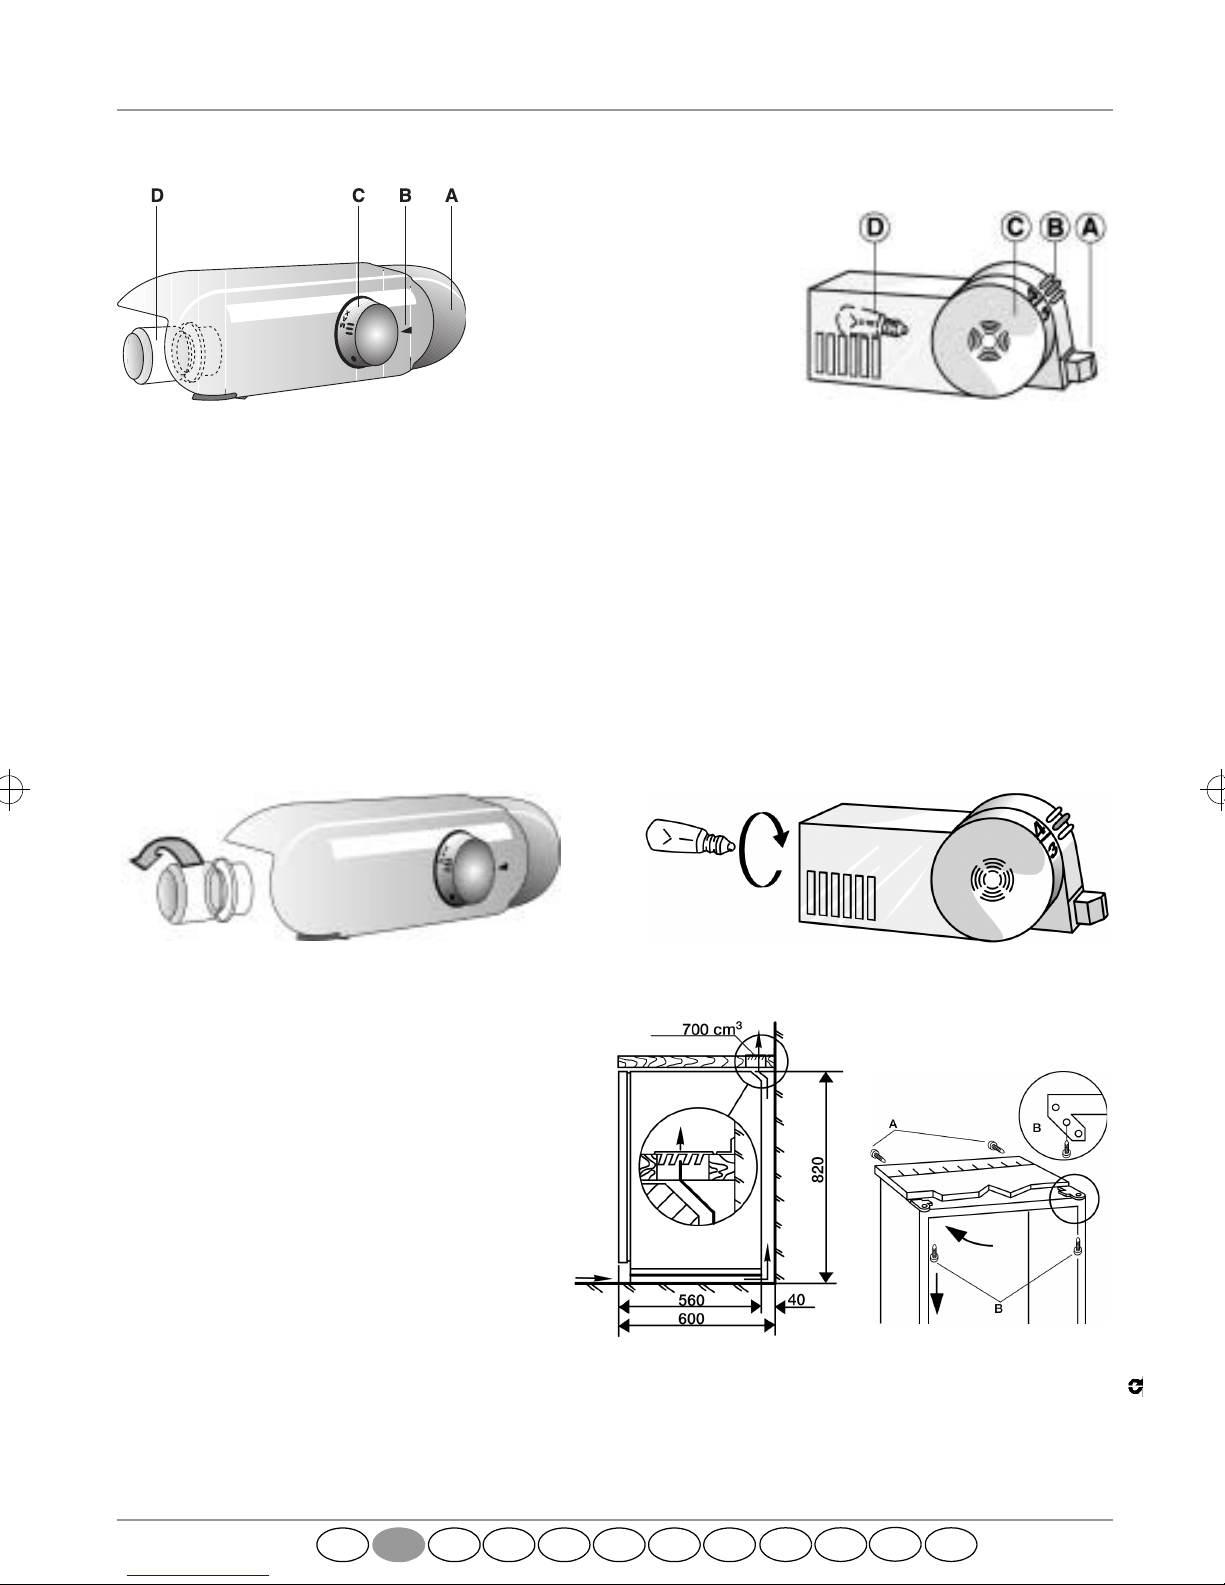
Refrigerator compartment controls
A.
Light switch cam
B.
Thermostat control
reference
C.
Thermostat knob
D.
Light bulb (max 15 W)
Thermostat set to
Thermostat set to
Thermostat set to
Thermostat set toz:
Recommended thermostat setting: MED/3-4 position.
Optimal performance is obtained at temperatures between +16°C and +32°C for appliances with climatic
class “N” and at temperatures between +10°C and +32°C for appliances with climatic class “SN”.
The climatic class is indicated on the data plate inside the appliance.
Note
: The ambient air temperature, the frequency of door opening and the position of the appliance can
affect the internal temperatures of the refrigerator. These factors must be taken into account when setting
the thermostat.
Removing the light bulb
To remove the light bulb, unscrew it anticlockwise (see figures).
MIN/1-2: minimum
MED/3-4:medium
MAX/5-7:maximum
no refrigeration, no light.
refrigeration.
refrigeration.
refrigeration.
Posizioning the appliance under the
worktop
The appliance can be installed under a
worktop (worktop height 850 mm from floor).
Proceed as follows:
•
First loosen the rear “A” and front “B”
screws; then remove the appliance top
Fig. 1
(
•
Make a vent outlet on the worktop (
•
Push the appliance under the worktop and
secure at the front with the same screws
“B” used for the top.
Observe the distance from the rear wall
indicated in (
5019 602 33027
).
Fig. 2
)
GB ID F NL E P GR
Fig. 2
).
FIG. 1
S N FIN
FIG. 2
Printed in Italy 02/01
DK

.
 Loading...