

Page 1

E-Gen 400
User Manual
Page 2
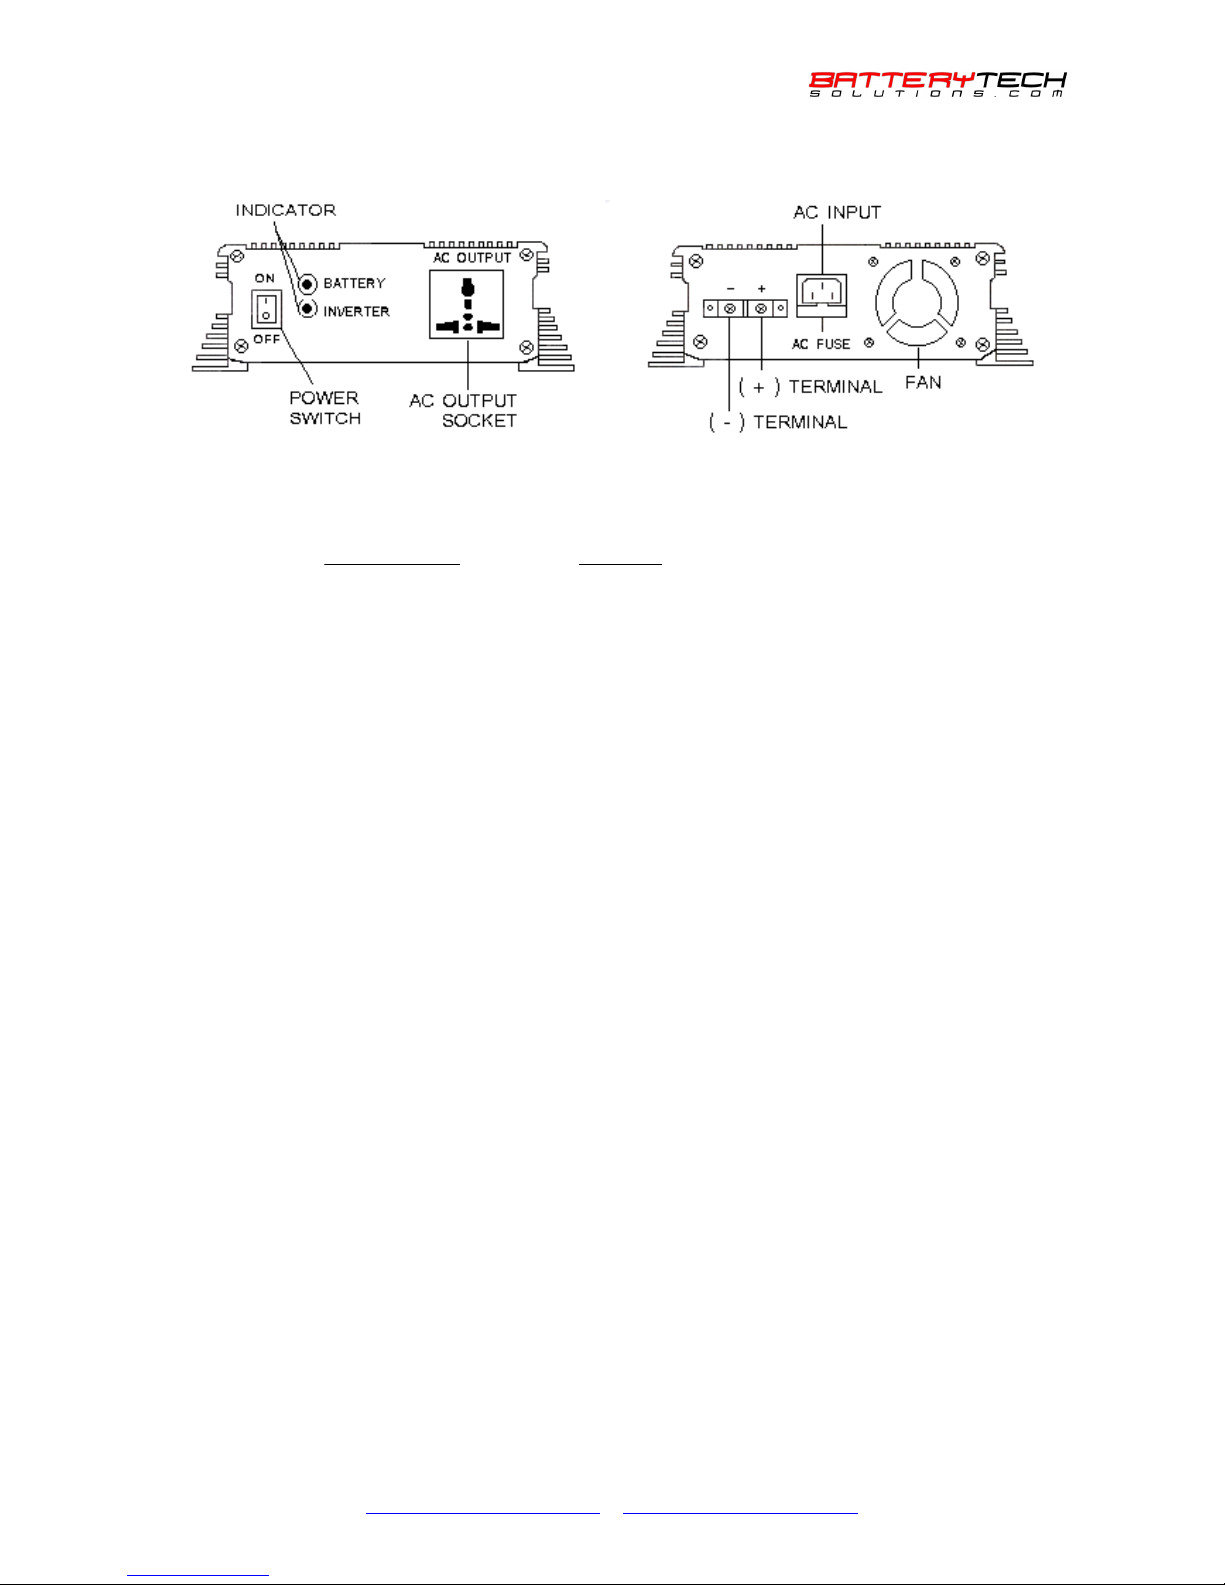
Indicators & Protection: Power Processing Unit
Temperature
:
A microprocessor-controlled fan is used to cool the internal circuit. The fan turns itself off
when the internal temperature is below 60°C
Fuse
:
The power unit is protected against over current and surges
Audio Alarms
:
Beeping Interval
1 second
2 second
3 second
Continuous
Diagnosis
Overload
Overheat
Battery Low
Unit fault: An automatic shutdown will follow
LED Indicators
:
Inverter
The RED Inverter LED will illuminate when the Power switch is turned on.
Note that if the unit is plugged into the wall socket, the AC output socket
will still be energized even if the Power Switch is turned off. At this time,
the unit is running on Bypass Mode
Battery
The GREEN Battery LED will illuminate when the charger is charging
the battery. During the charging process, the Battery LED will illuminate
for a few minutes, and then turn off itself for a few minutes. This process
will repeat itself until the battery is fully charged, during which, the Battery
LED will blink continuously then turn itself off.
This feature of the E-Gen is know as pulse charging, where the battery is
repeatedly charged for a certain time period, and allowed to rest. Pulse
charging protects the battery from any risk of overheating, hence
extending the lifespan of the battery.
Warning:
1. Never short the (+) and (-) battery terminals.
2. Never block the fan intake.
3. Never touch the inside of the output socket outlet when the Power Switch is turned on.
4. Never expose the unit to water.
5. Never attempt to dismantle the unit. There are no user-serviceable parts inside.
6. Never let the connected equipment exceed the maximum capacity (400W) of the E-gen.
Storage:
Always make sure that the unit is charged after 2 weeks of storage. If the battery is left to sit for too long
without a recharge, the low battery warning can be heard when it is first turned on.
[email protected] www.batterytechsolutions.com
Page 3
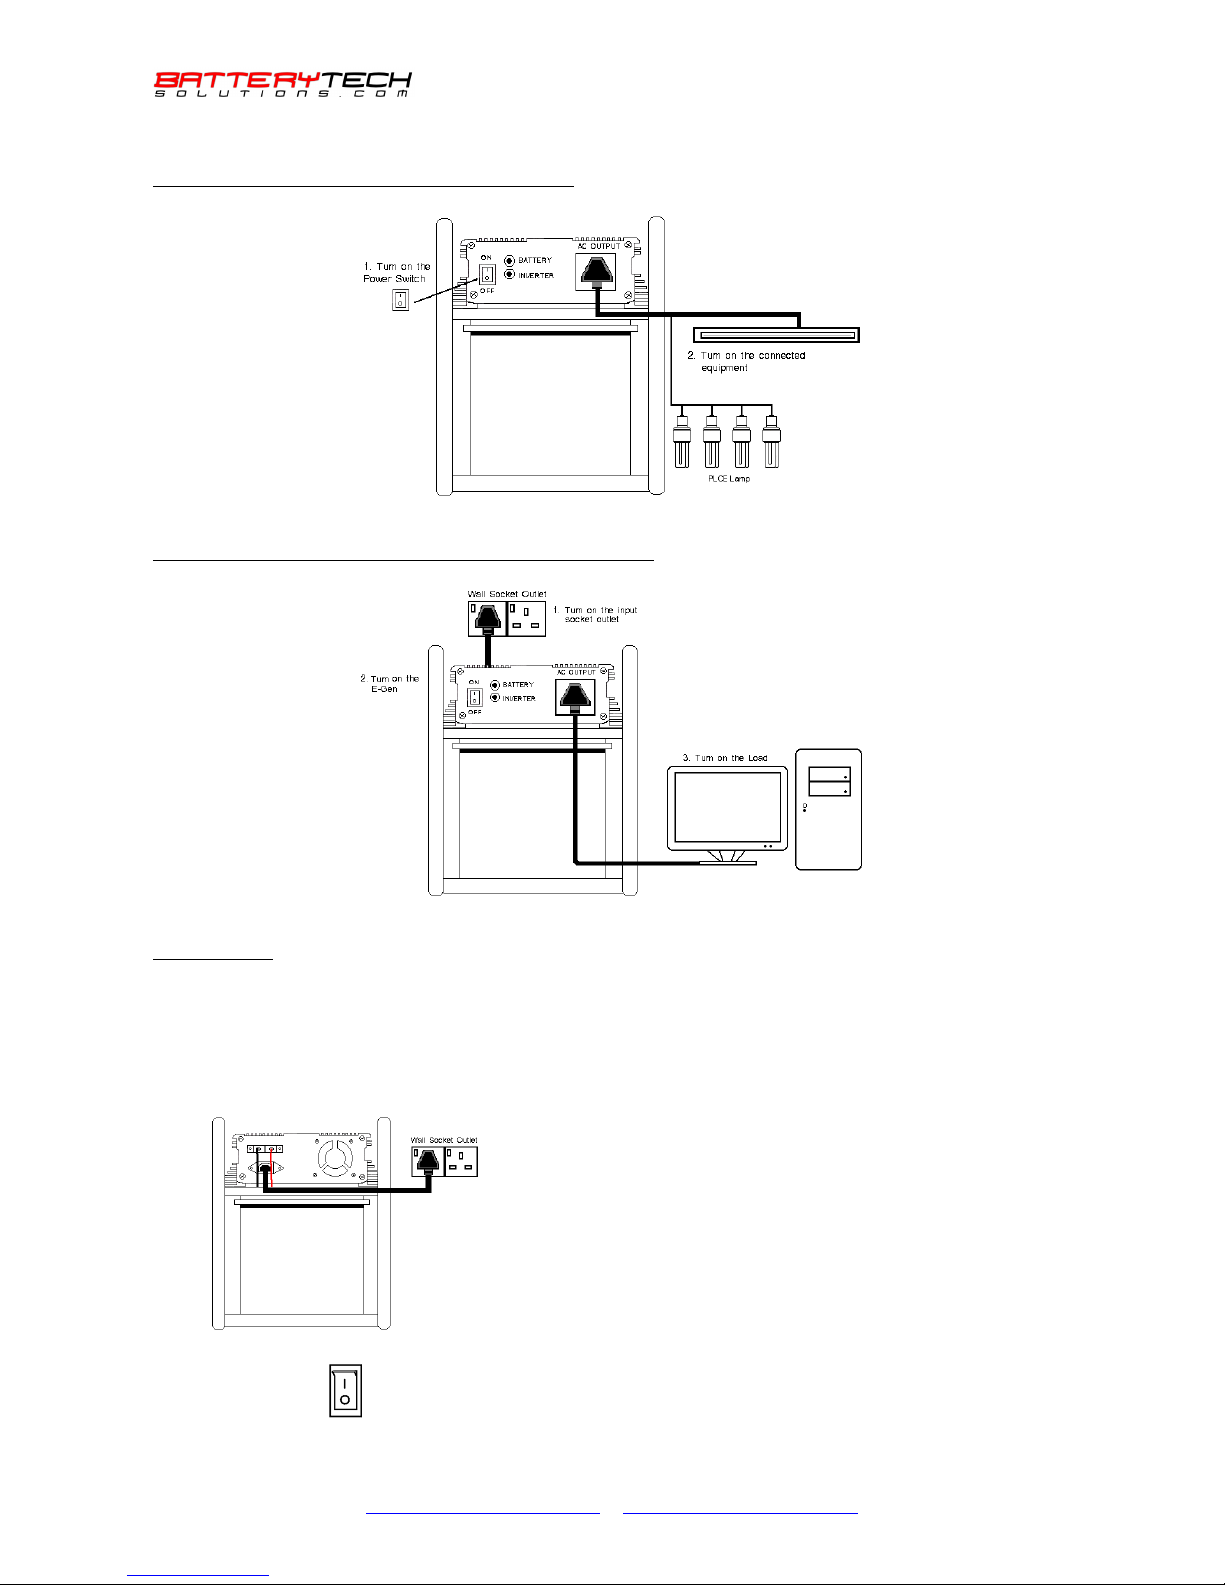
Operating Instructions:
Using the E-Gen as a Portable Power Supply Unit:
Using the E-Gen as an Uninterruptible Power Supply (UPS):
Bypass Mode:
If the E-Gen is plugged in, there will be power supply from the output socket outlet even if the Power Switch is
not turned on. The unit is in Bypass Mode.
Charging
1. Plug the E-Gen into a wall socket outlet via a power
cord connected to the Input Socket.
2. Turn on the wall socket outlet. The E-Gen will
automatically charge the connected battery.
3. The GREEN Battery LED will alternately illuminate and
turn itself off on a continuous basis.
4. Leave the E-Gen to charge for at least 8 hours to
ensure the battery is fully charged. An overnight charge
is recommended.
1. For a shorter charging time, turn off the Power Switch.
[email protected] www.batterytechsolutions.com
Page 4

Replacing the Battery
1. Ensure that the unit is unplugged and the Power Switch is in the OFF position.
2. Detach the battery cables from the battery terminals.
3. Replace the battery. Be very careful not to short the battery terminals.
4. Ensure that the Power Switch is in the OFF position. Attach the RED cable to the positive (+) terminal
followed by the BLACK cable to the negative (-) terminal of the battery. Ensure that the connection is
secure. Note that sparking may occur when the cables first touch the battery terminal.
5. Plug in the E-Gen to a wall socket outlet.
6. Turn on the socket outlet.
7. Leave the Power Switch in the OFF position. The GREEN Battery LED will illuminate. After some
time, the LED will repeatedly illuminate for a certain period and turn itself off.
Specifications
Parameter
E-Gen 400
Input
Voltage (AC)
Voltage (DC)
220 - 250 V
10 -15 V
Current (AC)
Current (DC)
2 A (Fuse: 13 A)
60 A (Fuse: 25 A x 3)
Standby Current
< 0.1 A
Output
Voltage
230 V ± 10 %
Frequency
50 Hz ± 3 Hz
Continuous Power
400 W
Surge Power
1,000 W
Efficiency
85 % - 90 %
Waveform
Modified Sine Wave
Socket
Universal Type
Battery
Rating
75 Ah Deep Cycle
Low Alarm
10.8 V ± 0.3 Vdc
Low Shutdown
10.4 V ± 0.3 Vdc
Polarity Protection
Fuse
Charging Current
8 A Pulse Charging
Thermal Protection
60 oC ± 5 oC
Overload Protection
Microcontroller Controlled
Output Short Circuit
Microcontroller Controlled
UPS Changeover
10 ms
Dimensions (mm)
380 (L) x 340 (H) x 220 (W)
Weight
25 kg
Duration
Load
50 W
100 W
200 W
300 W
500 W
12 hours
6 hours
2.5 hours
1.5 hours
1 hour
[email protected] www.batterytechsolutions.com
 Loading...