

Page 1
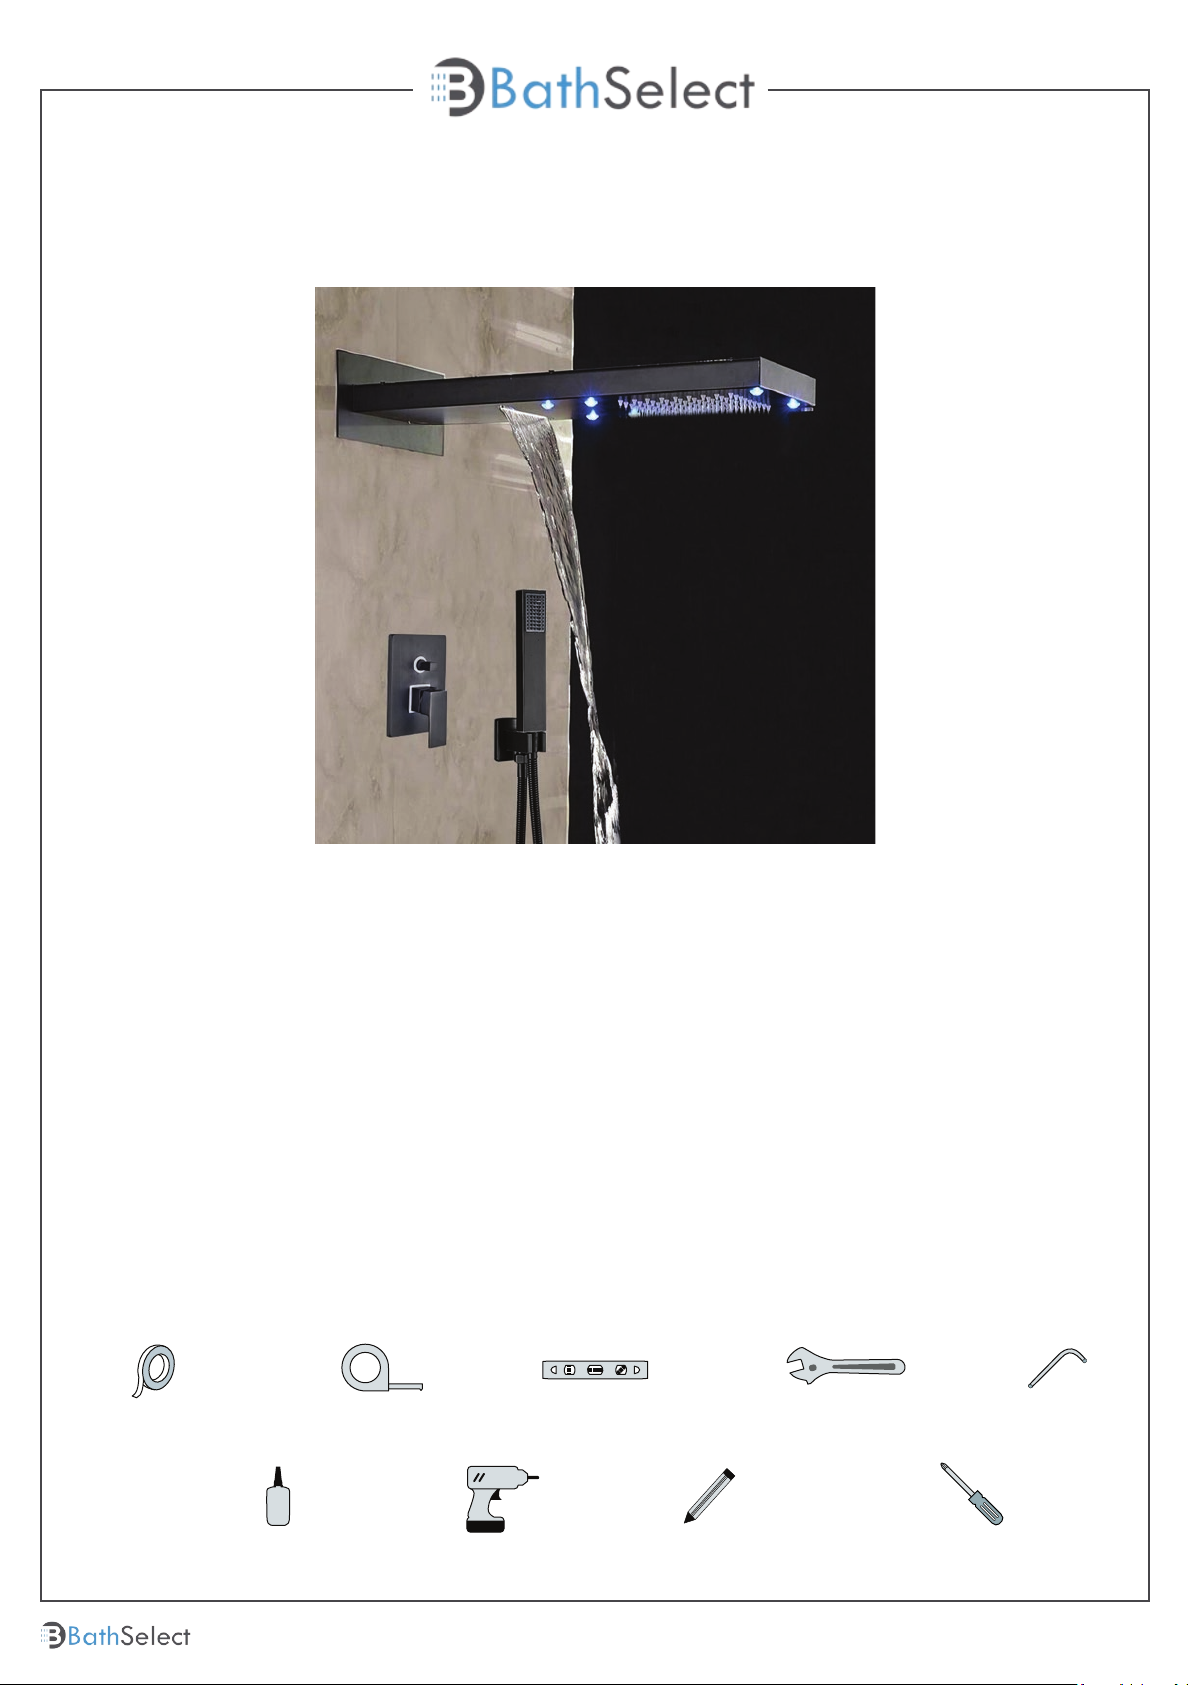
Product code: BZ-5809
BATHSELECT RAINFALL LED COLOR CHANGES
SHOWER FAUCET SINGLE HANDLE OIL RUBBED
BRONZE SHOWER INSTALLATION INSTRUCTIONS
BEFORE YOU BEGIN
Before you begin, please read the installation instructions below. Observe
all local building and safety codes.
Unpack and inspect the items for any shipping damages. If you find
damages, do not install.
Please note all products must be installed by a professional and certified
plumber otherwise warranty might be voided.
POSSIBLE TOOLS REQUIRED*
Plumbers Tape
Tape Measure
Level
Adjustable Wrench
Hex Wrench
Thread Sealant
Drill
Pencil or Marker
1
Screwdriver
*not included
bathselect.com
Customer Service: 800-500-9895
Page 2
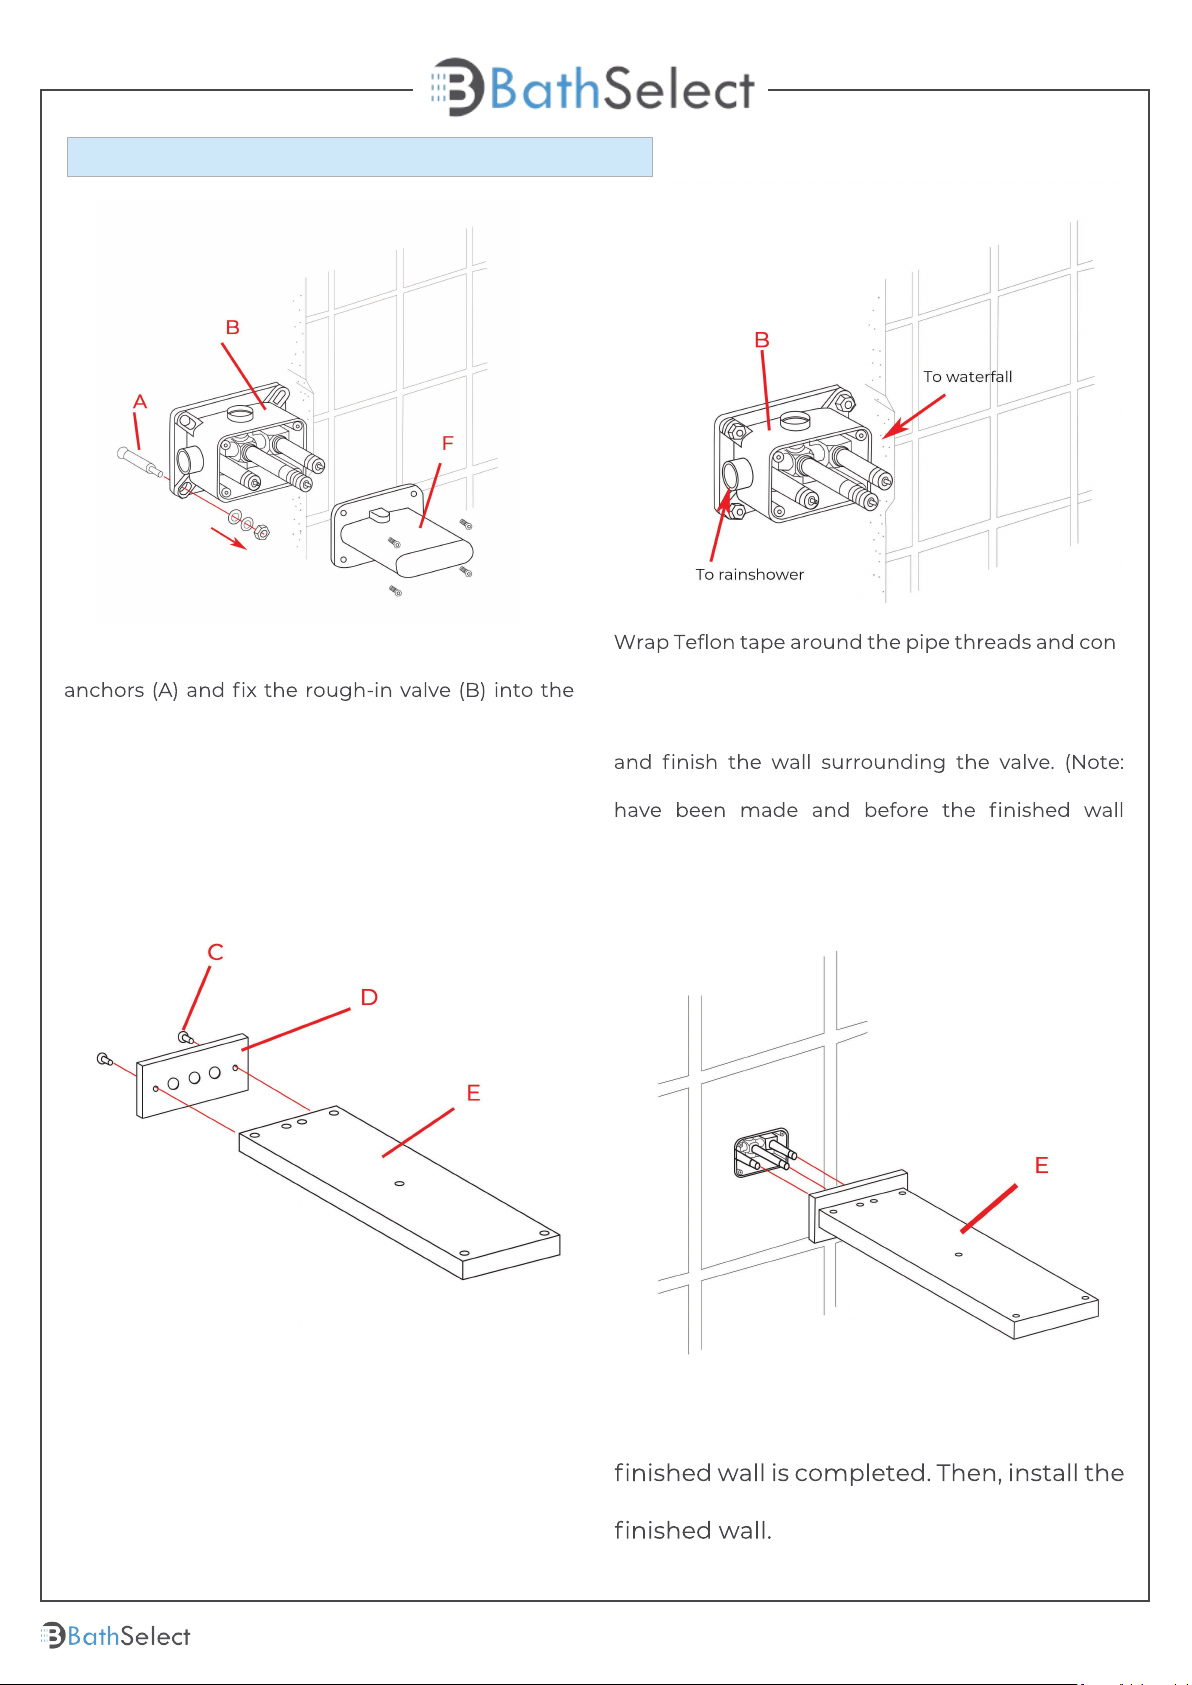
Shower Head Installations Instruction
Step 1:
Remove the protective cover (F). Mark the positions
and drill holes to suit the anchors (A). Install the
wall with screws. Use a level to ensure that the
rough-in valve (B) is straight and level. (Important:
Flush the water supply to remove any dirt and
debris before installing the valve body).
Step 2:
nect water supply lines and in-wall pipes (not
included) as desired to the rough-in valve (B). Turn
on the water supply and open the cartridge to
check for leakage. Then put on the protective cover
Test the water pressure after the pipe connections
material is installed).
Step 3: Step 4:
Fix the escutcheon (D) to the showerhead
(E) with screws (C).
Remove the protective cover when the
showerhead (E) and press it against the
2
Customer Service: 800-500-9895
bathselect.com
Page 3
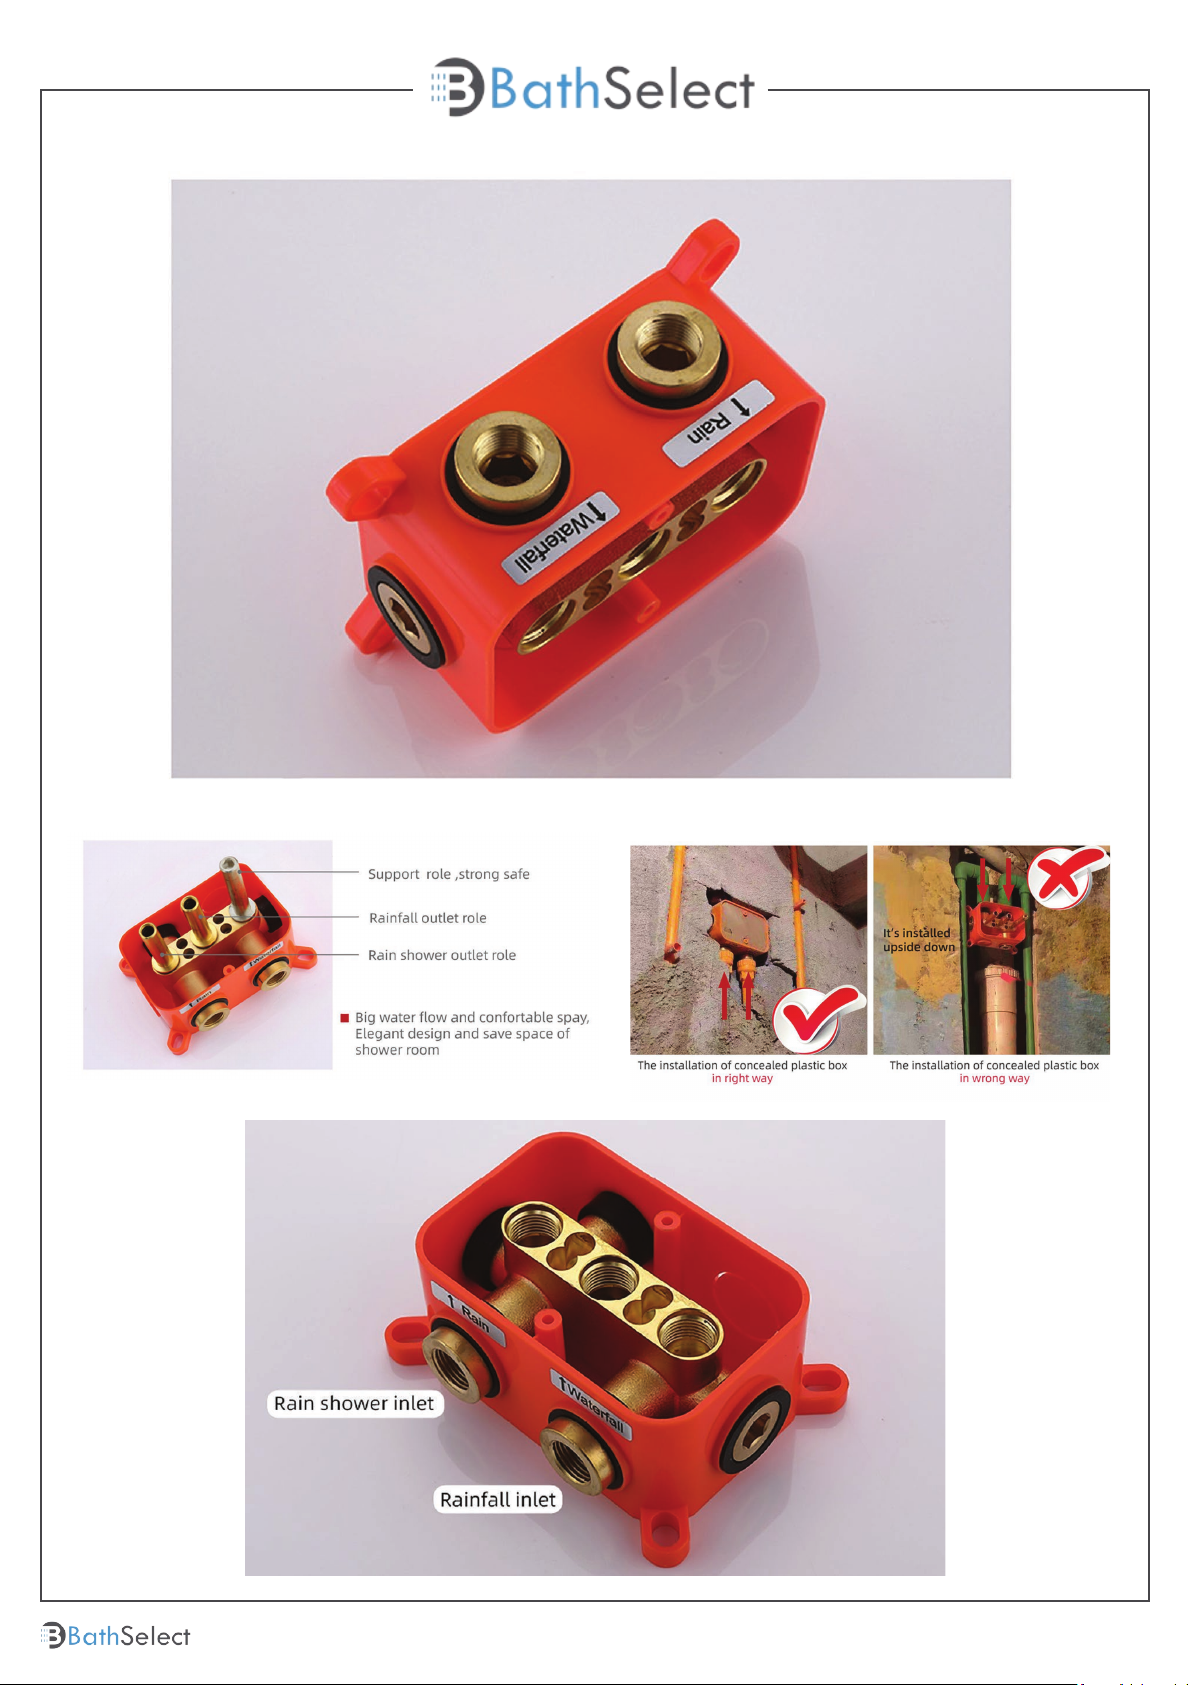
Step 5:
Step 6:
3
Customer Service: 800-500-9895
bathselect.com
Page 4
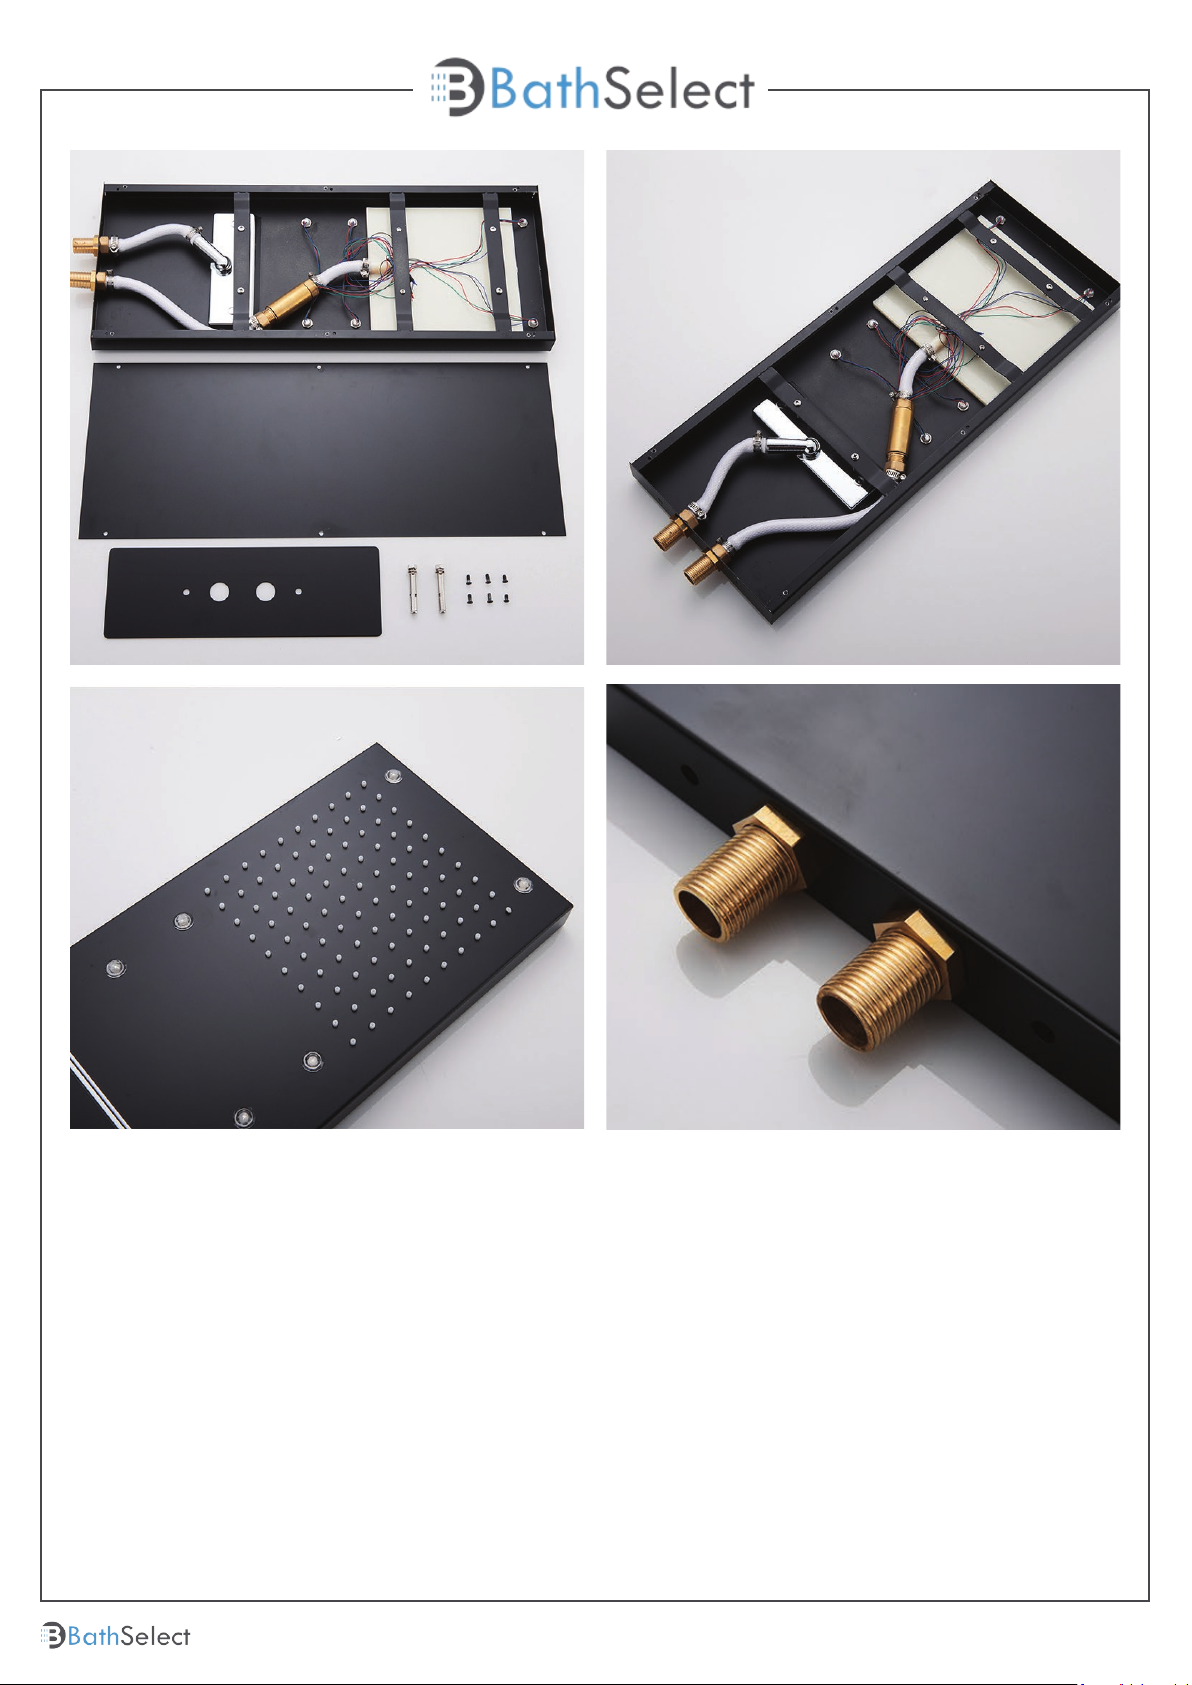
The LED light will change its color by detecting water temperature:
0-30°C (32-86°F): Blue LED
30-40°C (86-104°F): Green LED
40-50°C (104-122°F): Red LED
50-100°C (122-212°F): Flashing Red LED
Note: The LED lights are powered by water flow, and will be activated once the water is
turned on.
4
Customer Service: 800-500-9895
bathselect.com
Page 5
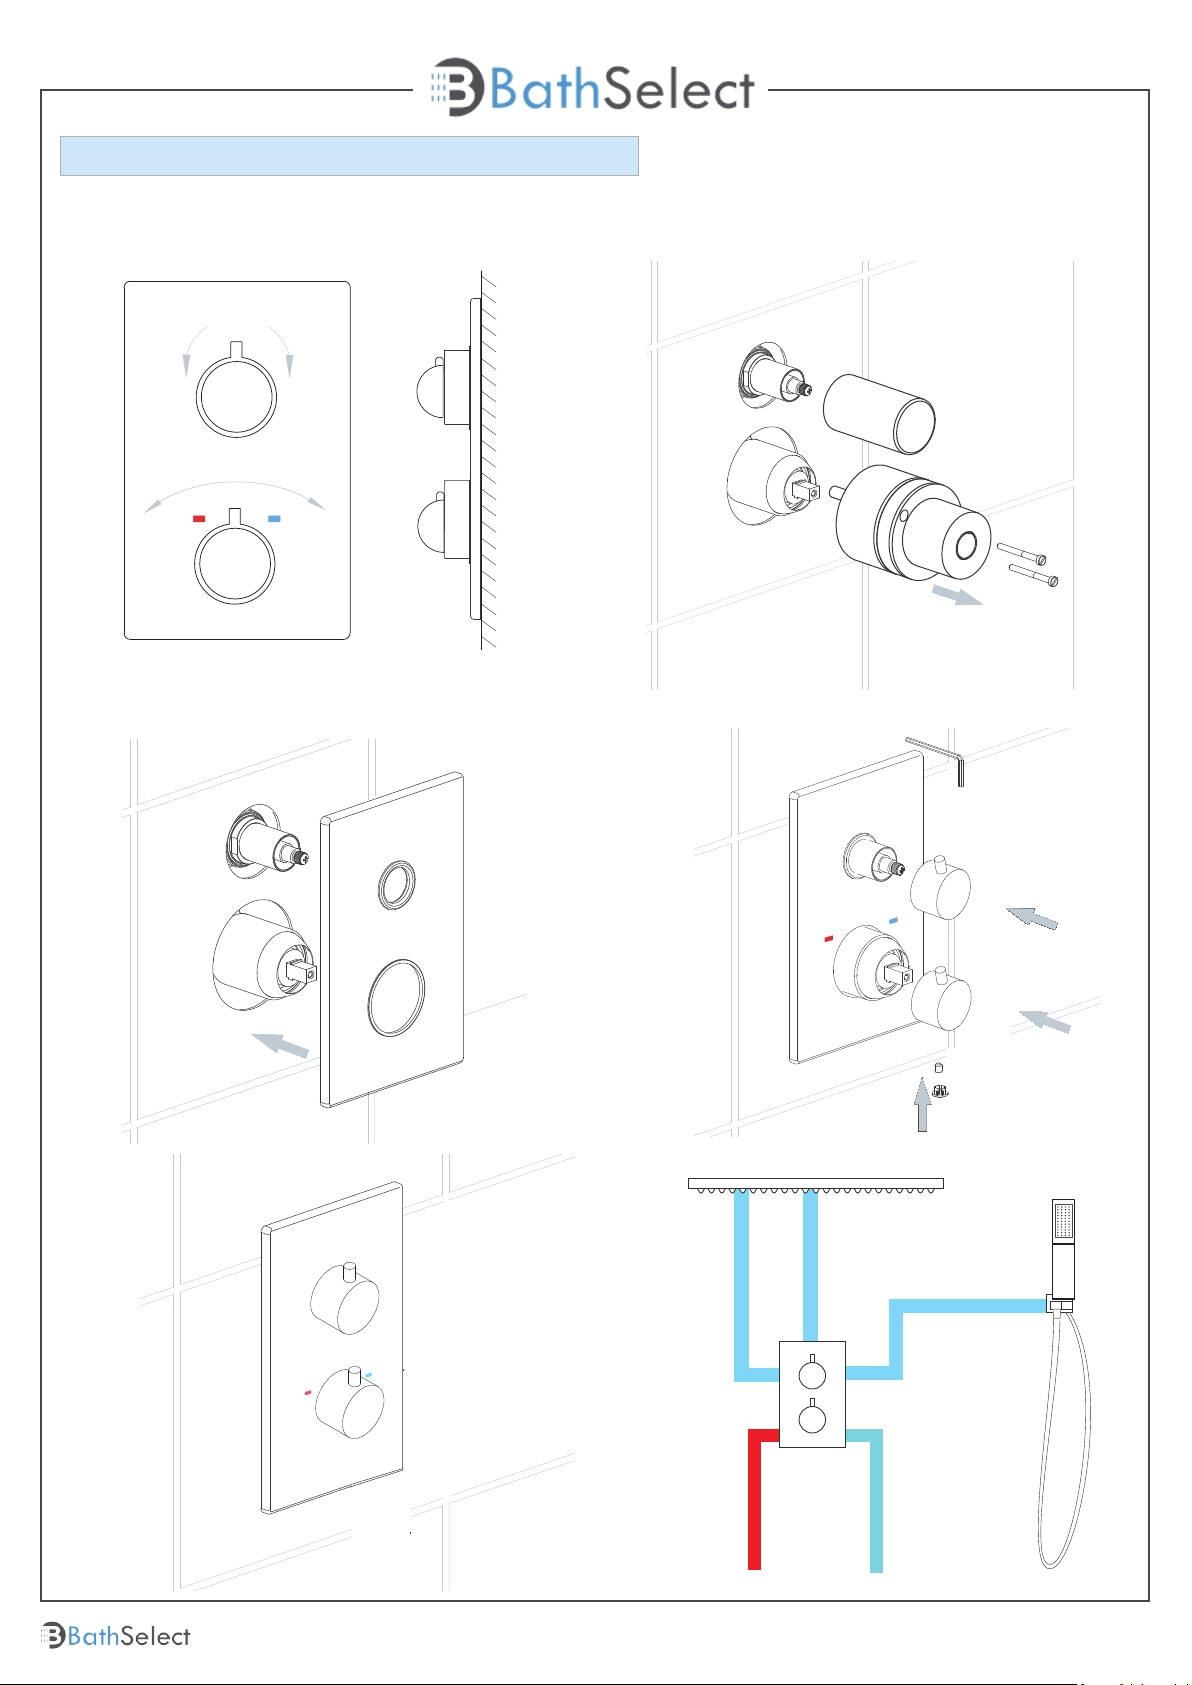
Mixer Installations Instructions
Hot Cold
Step 2Step 1
Step 3
Step 5
Step 4
Shower
5
Mixer
Hot Water
Inlet
Hand
Shower
Cold Water
Inlet
bathselect.com
Customer Service: 800-500-9895
Page 6
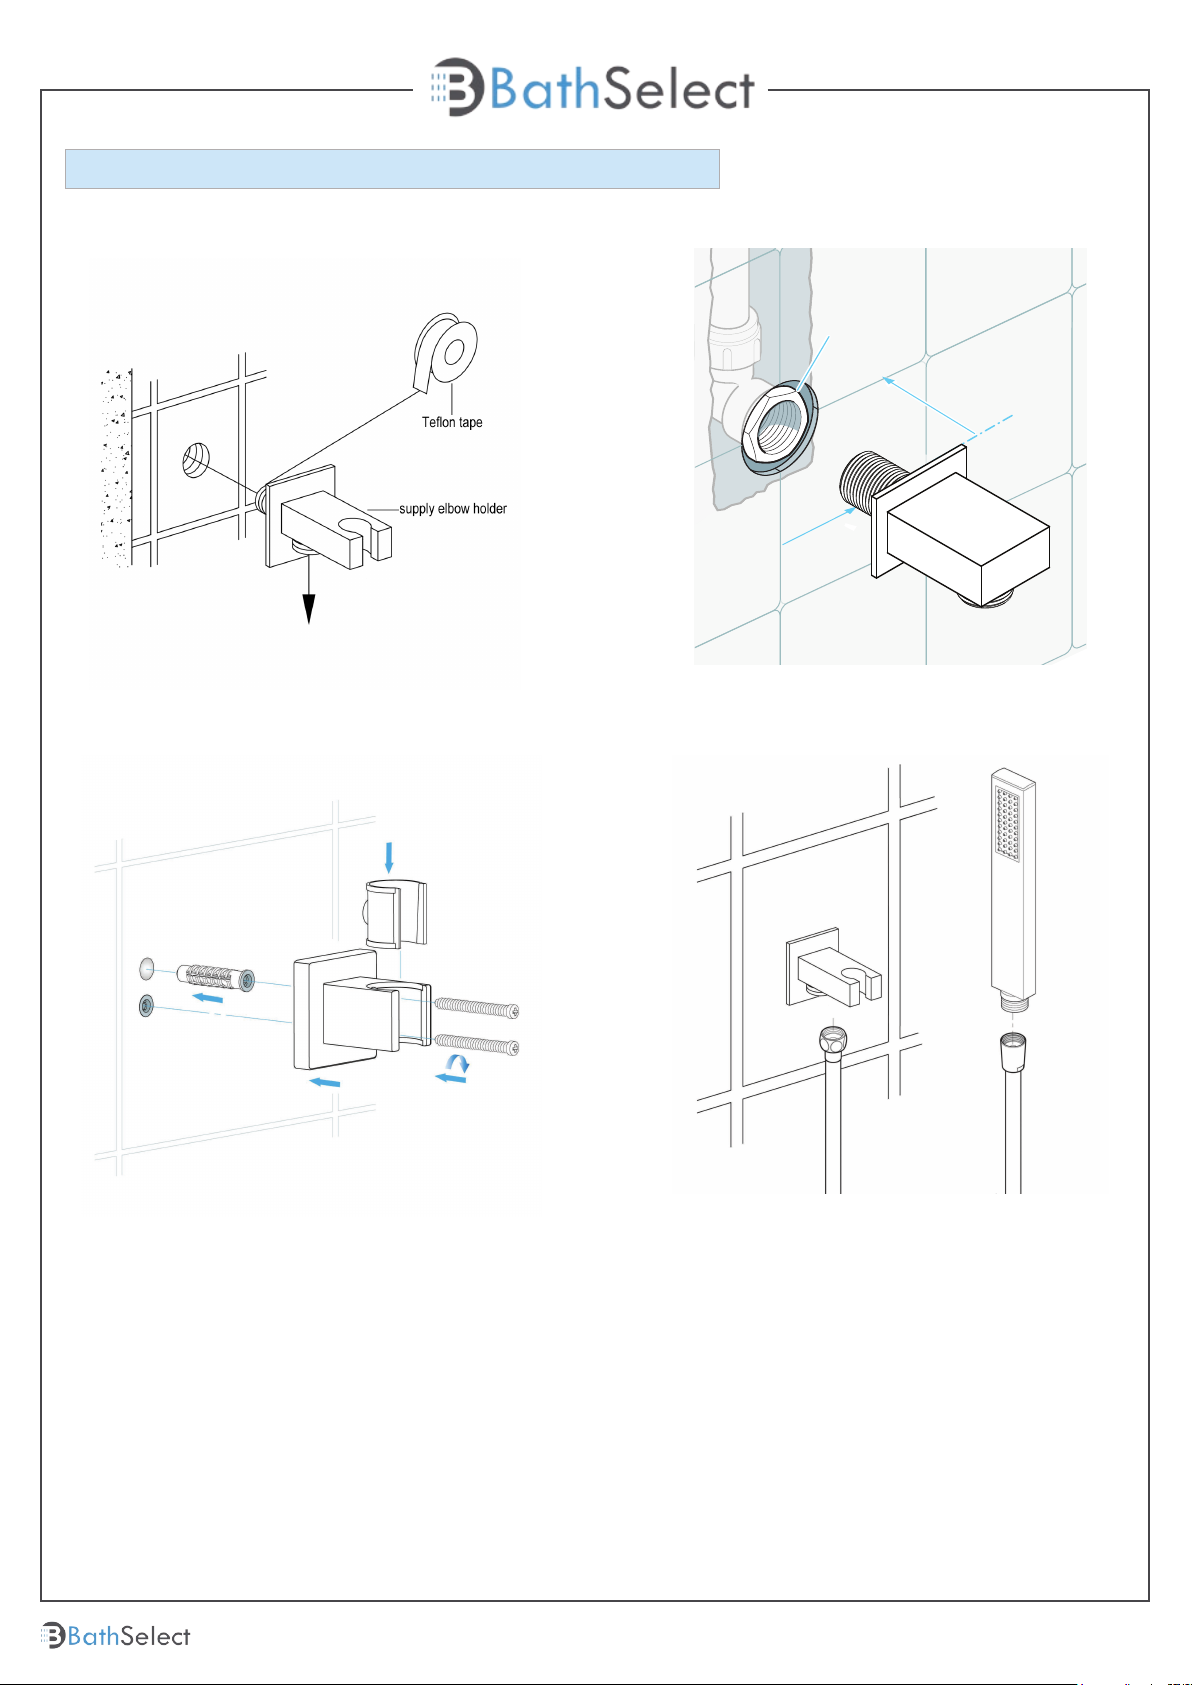
Hand-Held Shower Installations Instructions
Appropriate
fitting
To fit
flush
Can be cut
to length
Step 1 Step 2
Step 3 Step 4
Hand Shower Outlet Installation
• Complete the outlet pipework ensuring it ends in an appropriate 15mm x 1/2" BSP female thread elbow.
Note: This fitting is not supplied as variations in installations require the selection of a suitable solder or
compression fitting.
• Install the 'Wall Outlet', thread long male 1/2" BSP into the appropriate female fitting using PTFE tape to
give a watertight joint.
Note: The thread can be cut to size if required. Make sure that all debris is removed from the connector
and the section that has been cut is dressed correctly, before installation.
The minimum required water pressure is 0.05 MPa (0.5 bar).
Flow rate 2.5 GPM (9.5 LPM).
6
bathselect.com
Customer Service: 800-500-9895
Page 7
Acid
General Information
All products manufactured and supplied by BathSelect are safe and comply to legislative
requirements. Providing they are installed correctly and receive regular maintenance in
accordance with these instructions your user experience will not be affected
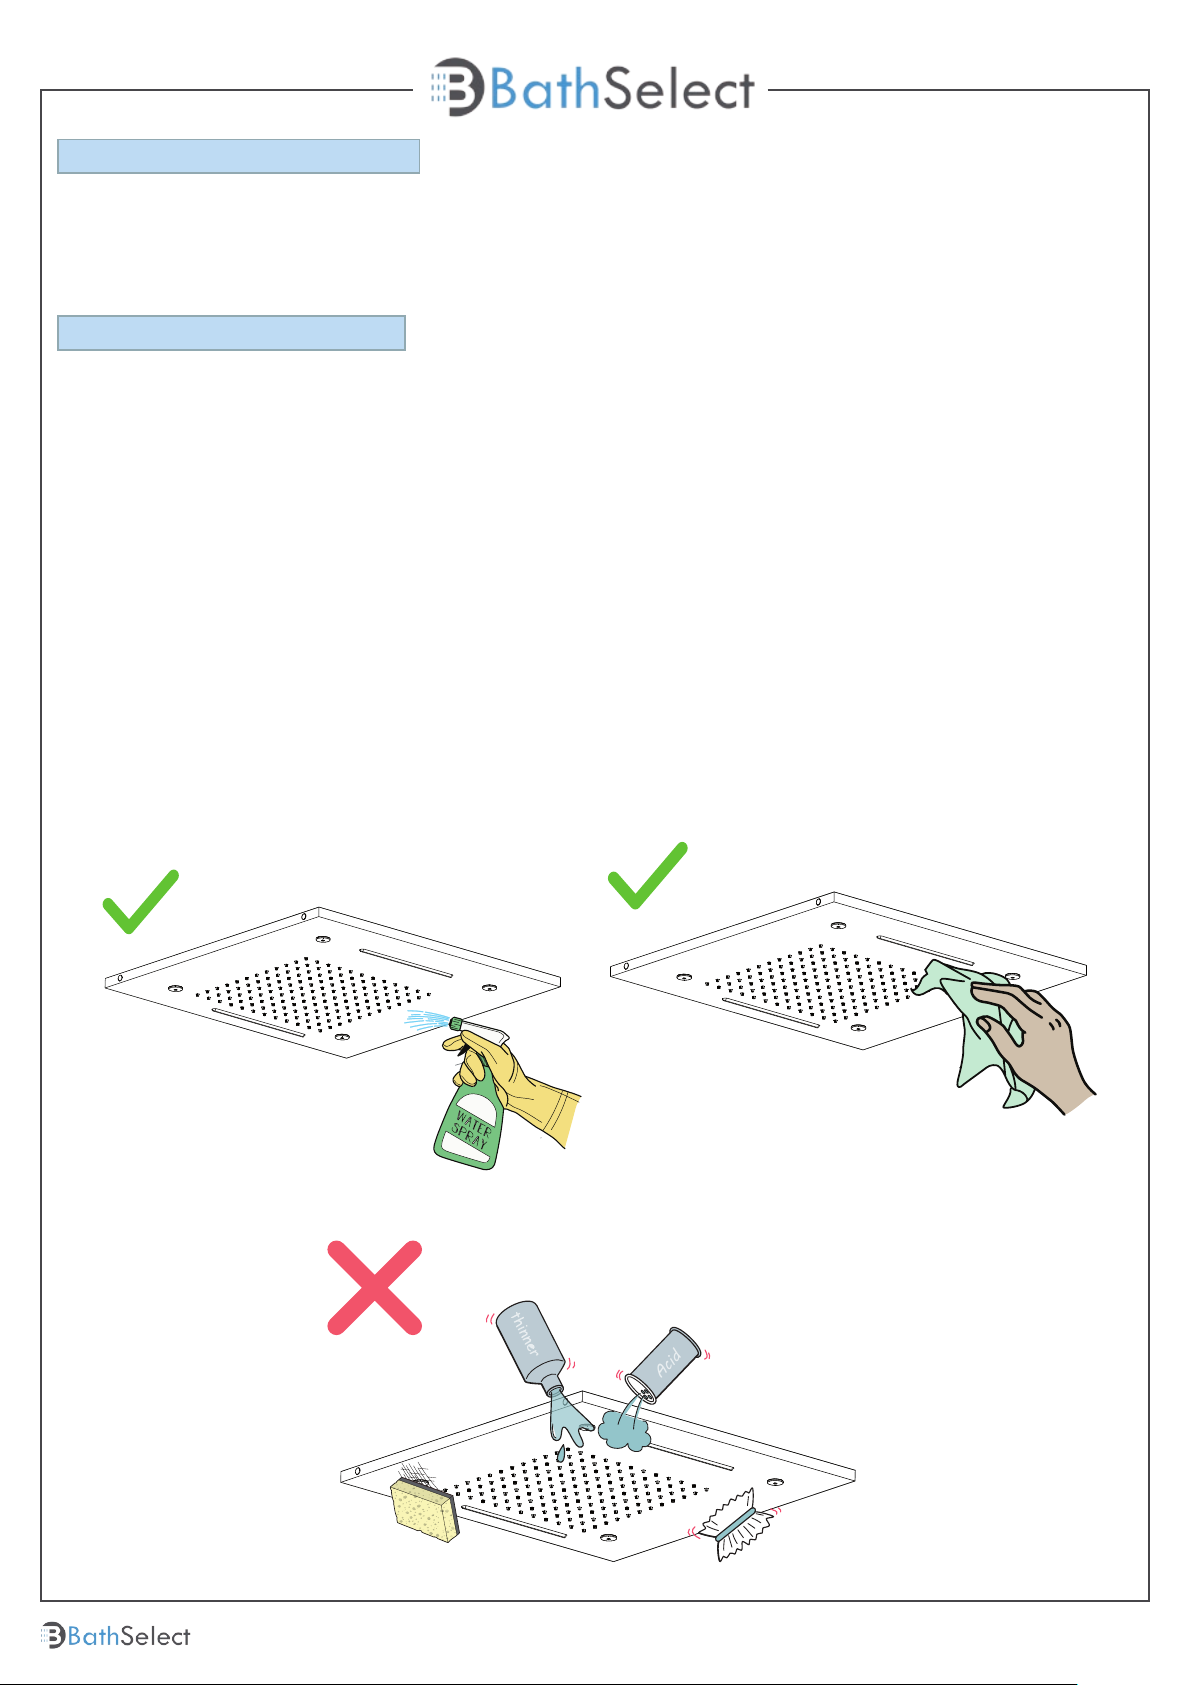
Care & Cleaning
1. The product can be cleaned with warm water, a mild soap and a clean soft cloth.
2. Clean progressively and gently.
3. It is not required to use any abrasive cleaning pads, wire wool or cloths to clean the
product.
4. Avoid a vigorous cleaning action, as this could contribute to denaturing and dulling
5. Abrasive or strong cleaning products containing ammonia, bleaches, alcohol, dyes,
acids (hydrochloric, formic, phosphorus, chlorine or acetic) will be not be affected.
6. If using a spray cleaner, apply the cleaning agent onto a soft cloth, never directly
spray onto the product as the cleaner may enter gaps and openings and cause
damage. Do not allow the cleaner to remain on the product for a period of time. After
cleaning, rinse thoroughly with clean water.
7
Customer Service: 800-500-9895
bathselect.com
 Loading...