

Page 1
Customer Services
t: 01225 303900
Before you start
Wear suitable eye protection when drilling. Take care when using power tools near water - the use of a residual current
device (RCD) is recommended. Beware of hidden pipes or cables. Take care when drilling tiled surfaces as the drill might slip.
Use a piece of masking tape to prevent the drill from wandering.
The unit and basin are secured to a suitably strong / reinforced wall to ensure stability. Fix in place following instructions on
page 2. If in any doubt please consult an expert.
Installation and Fitting Instructions
CONTOUR / IOS - Instructions
Please retain for future reference
12/16 .V2
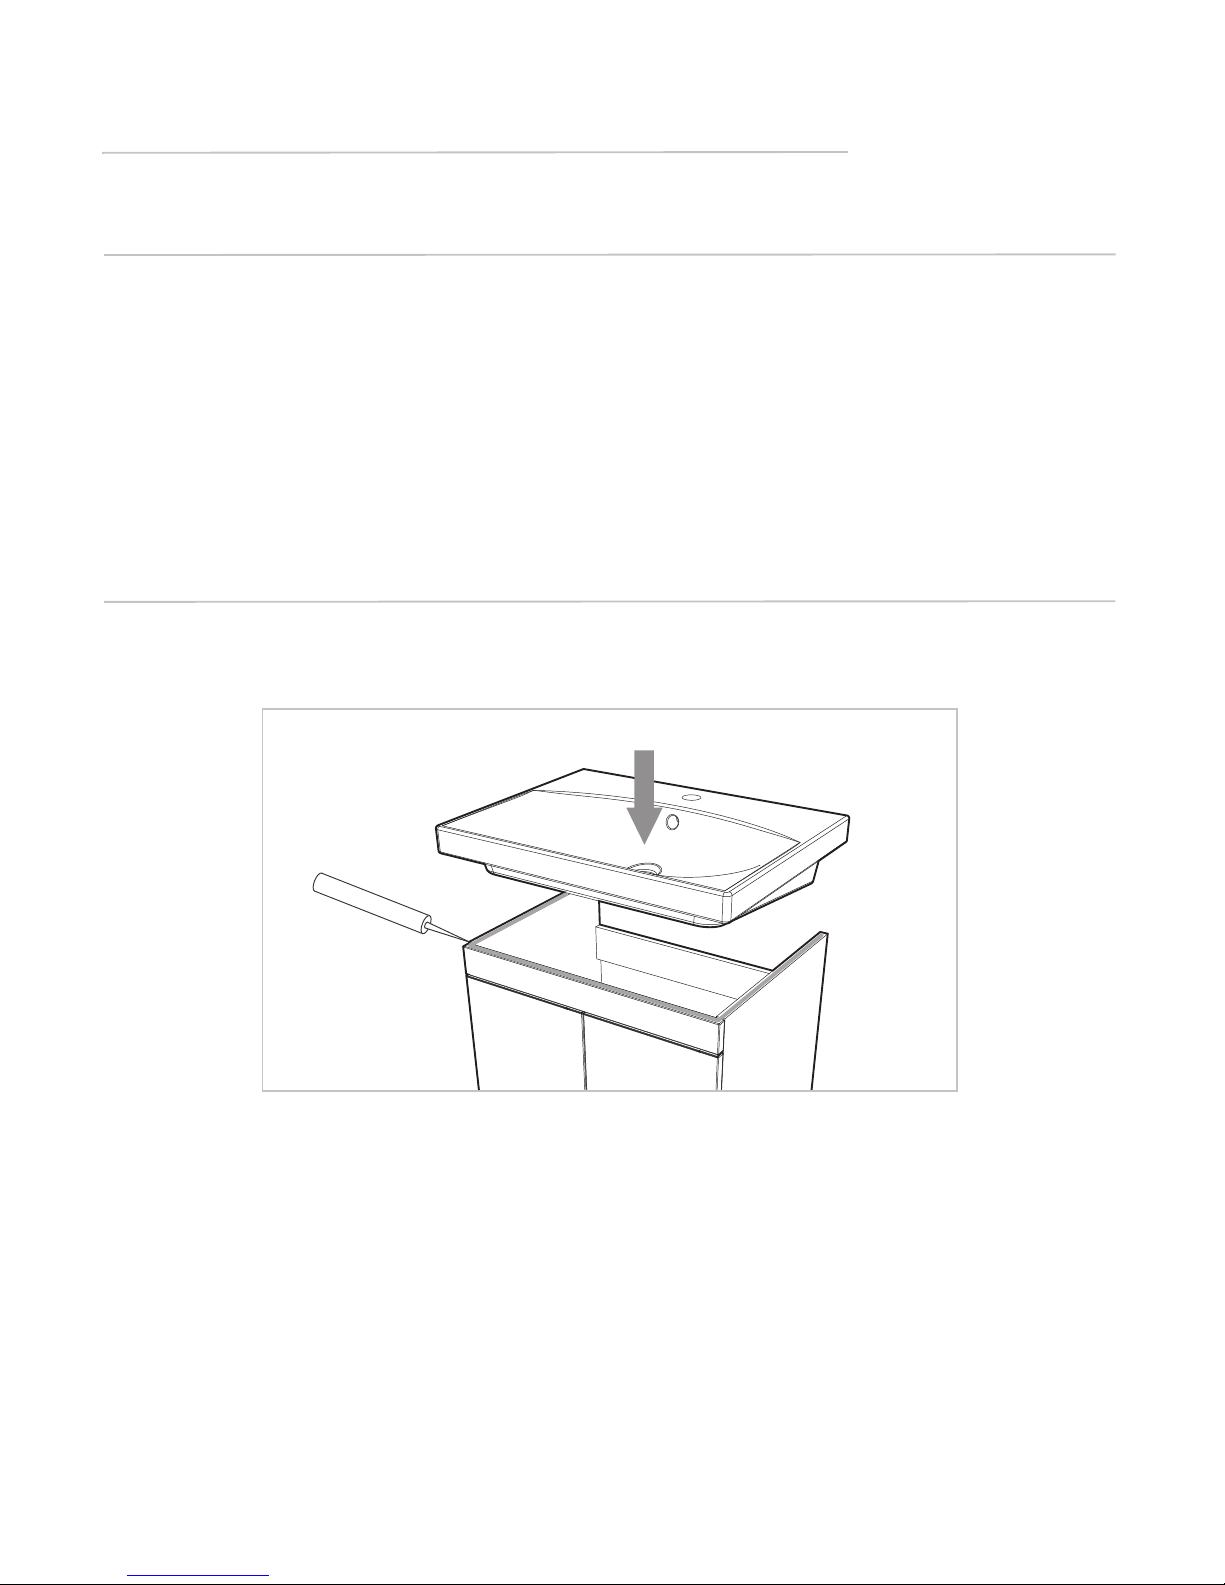
Once the basin is plumbed in nish by securing to the washstand with a silicone sealant (not supplied).
Fitting Basin
Page 2
Customer Services
t: 01225 303900
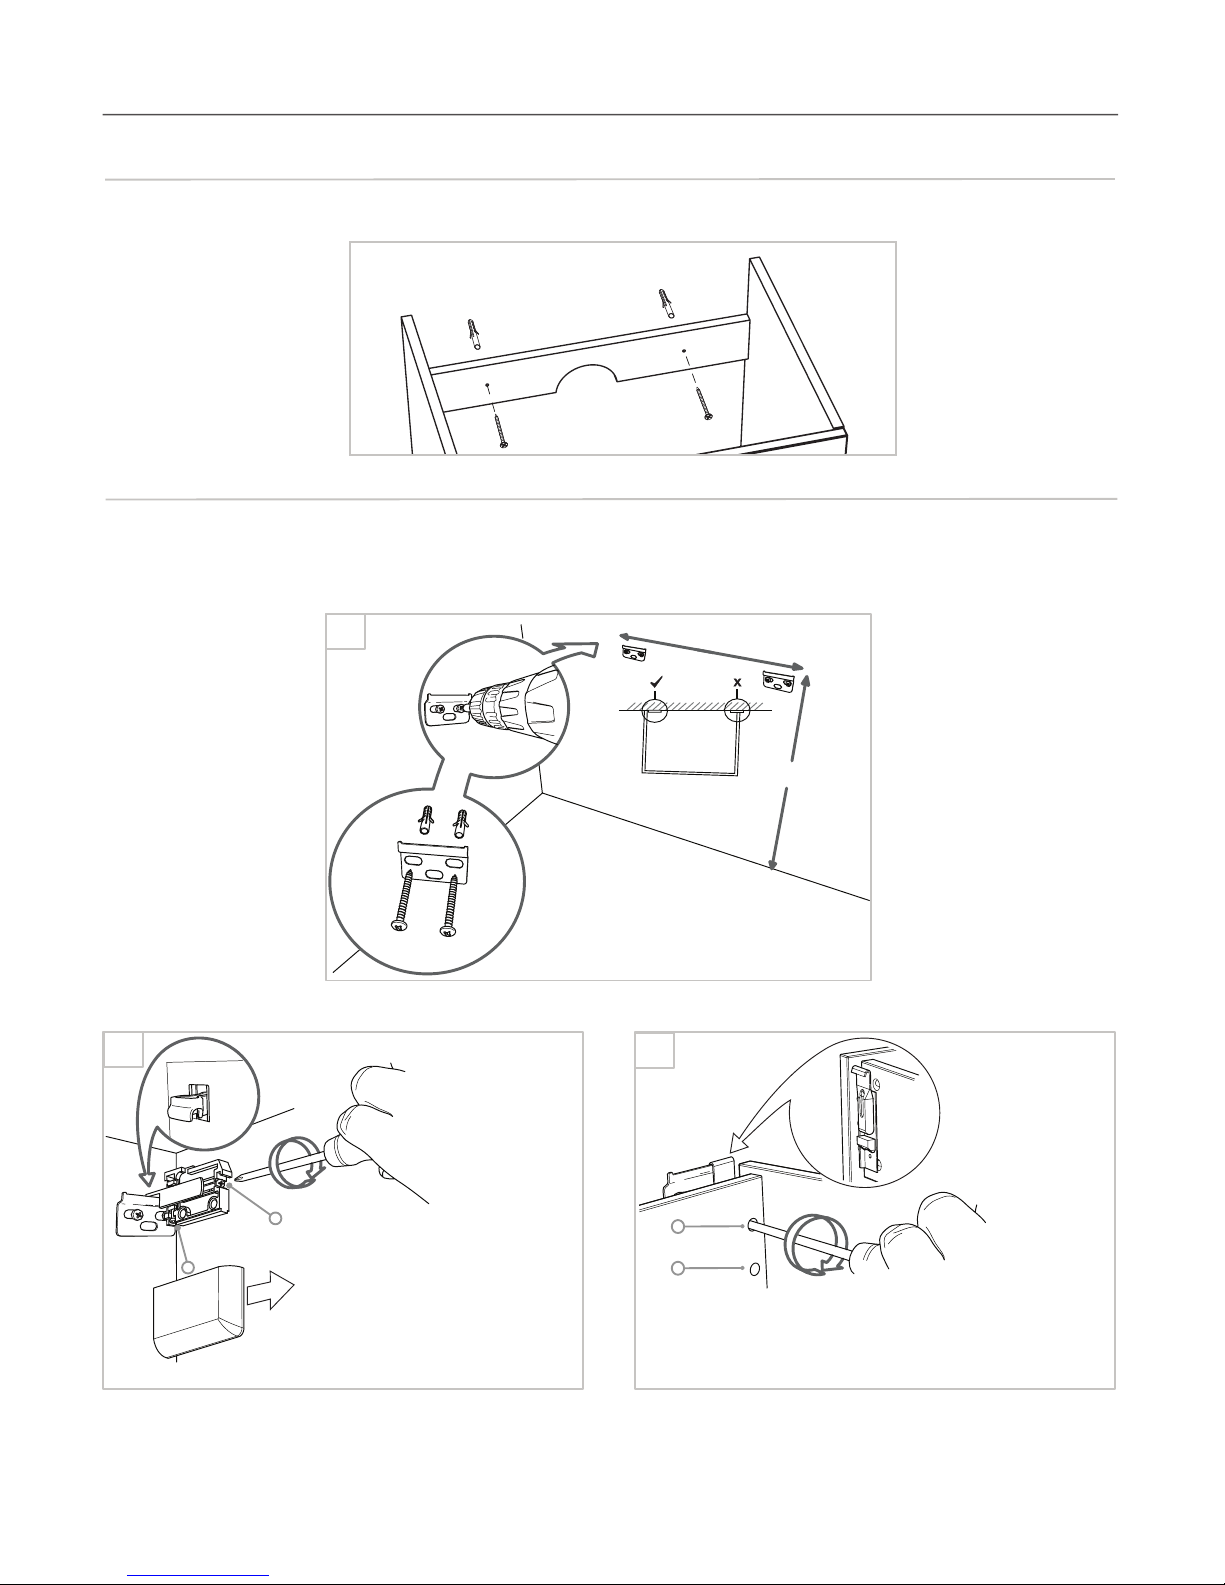
To secure the oor mounted units to the wall use the provided kit to screw the unit through the back top brace.
To hang the unit use the provided kit. Mark the location of each mounting plate ensuring that they are positioned inside the
sidewalls of the unit. Fix the hanging plates in place using the appropriate xings and then follow the adjustment guides
from the options below:
Wall mounted units
Fixing to the wall
Floor mounted units
12/16 .V2
2A
B
A
B
A
2B
1
height
- Ensure screw B is loose
before starting. Locate hangers
on wall plates.
- Screw A: vertical adjustment.
- Screw B: Tighten to wall.
- Remove cover cap. Locate
hangers on wall plates.
- Screw A: vertical adjustment.
- Screw B: Tighten to wall.
Page 3
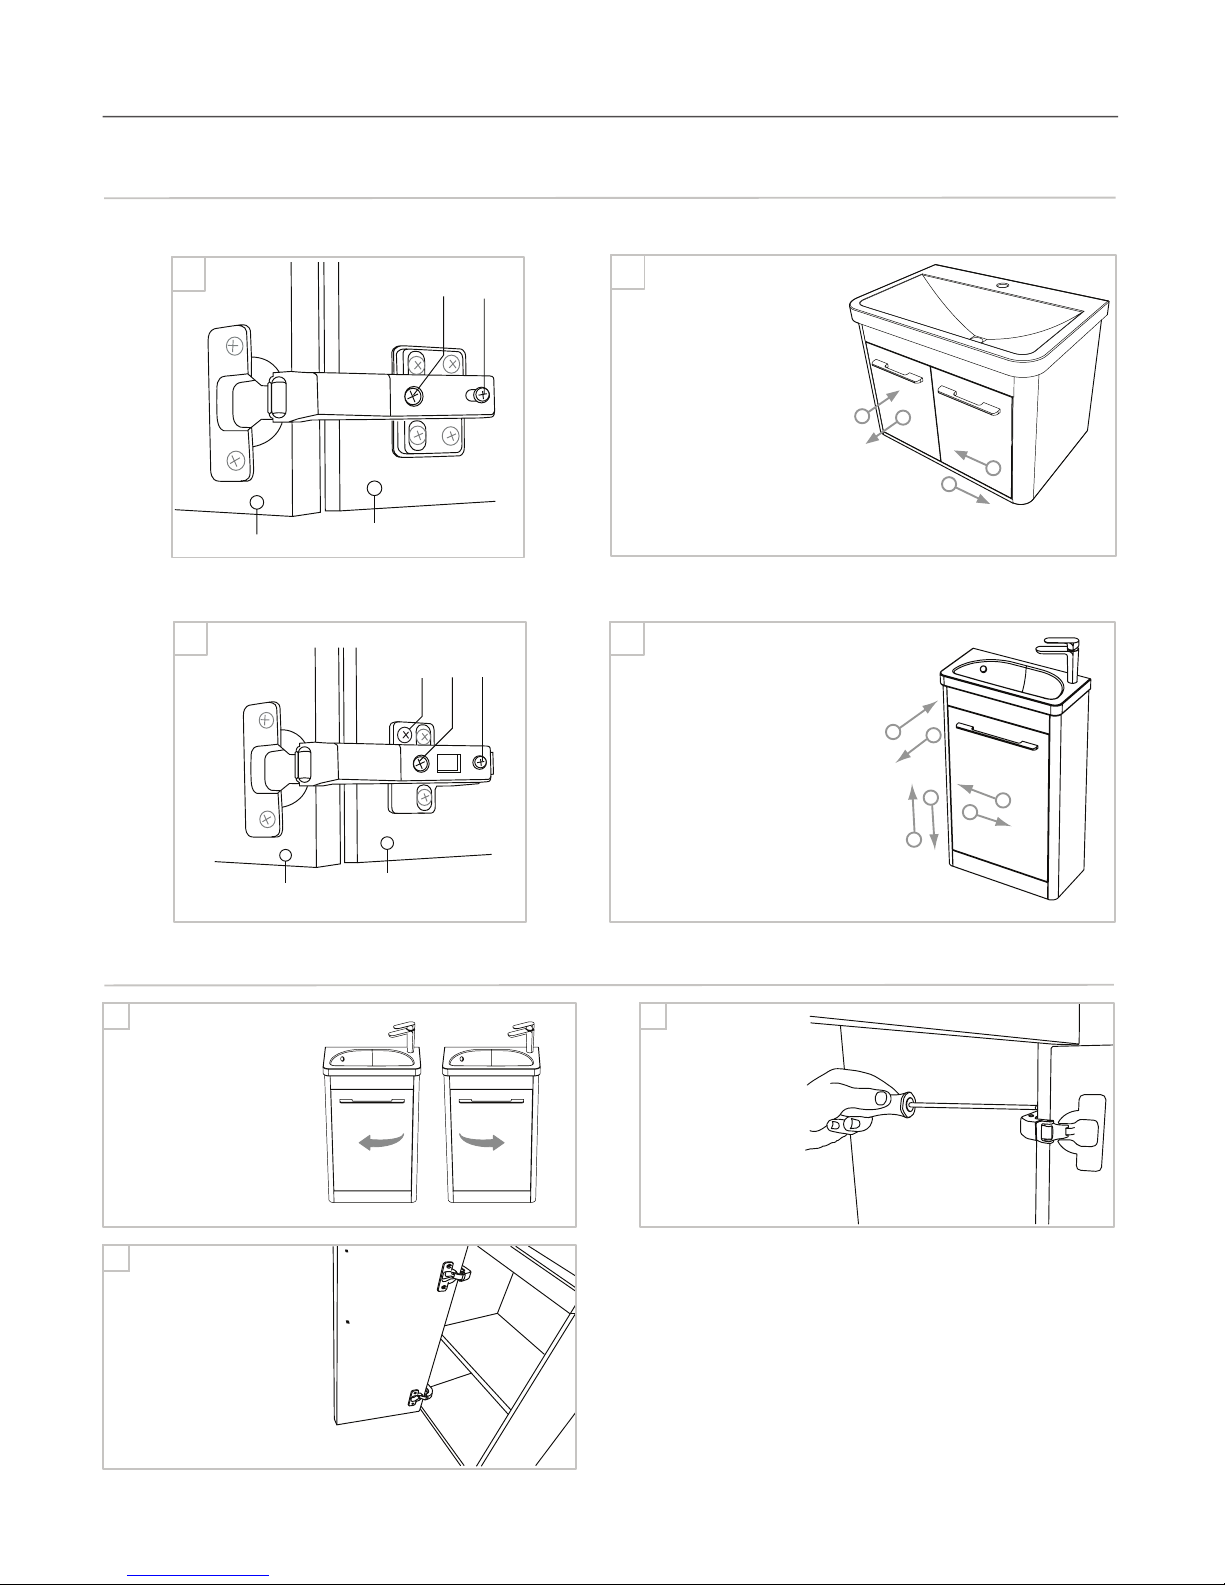
To adjust the door hinges use a screwdriver and follow the appropriate adjustment according to the hinge type:
Customer Services
t: 01225 303900
11/16 .V2
Hinge adjustment
Cloakroom unit reversible door
Door adjustment
- Reattach the door to the
chosen side
- Replace cover caps in the
obsolete hinge holes.
L
R
- Depending on the
intended location of
the unit choose
whether you want a
left or right hand
opening door.
- If the delivered
conguration isn’t
suitable.
- Remove door and
hinges from unit
using a suitable
tool.
1
2
3
1B
C
Door
Furniture Frame
B
A
1
1
2
2
2B
3
3
A B
Door
Furniture Frame
1
1
2
2
1A
2A
To make adjustment 1
(Drawing 1A) tighten/loosen
screw A.
To make adjustment 2
(Drawing 1A) simply turn
screw B.
To make adjustment 1
(Drawing 1B) tighten/loosen
screw A.
To make adjustment 2
(Drawing 1B) simply turn
screw B.
To make adjustment 3
(Drawing 1B) simply turn
screw C
Page 4
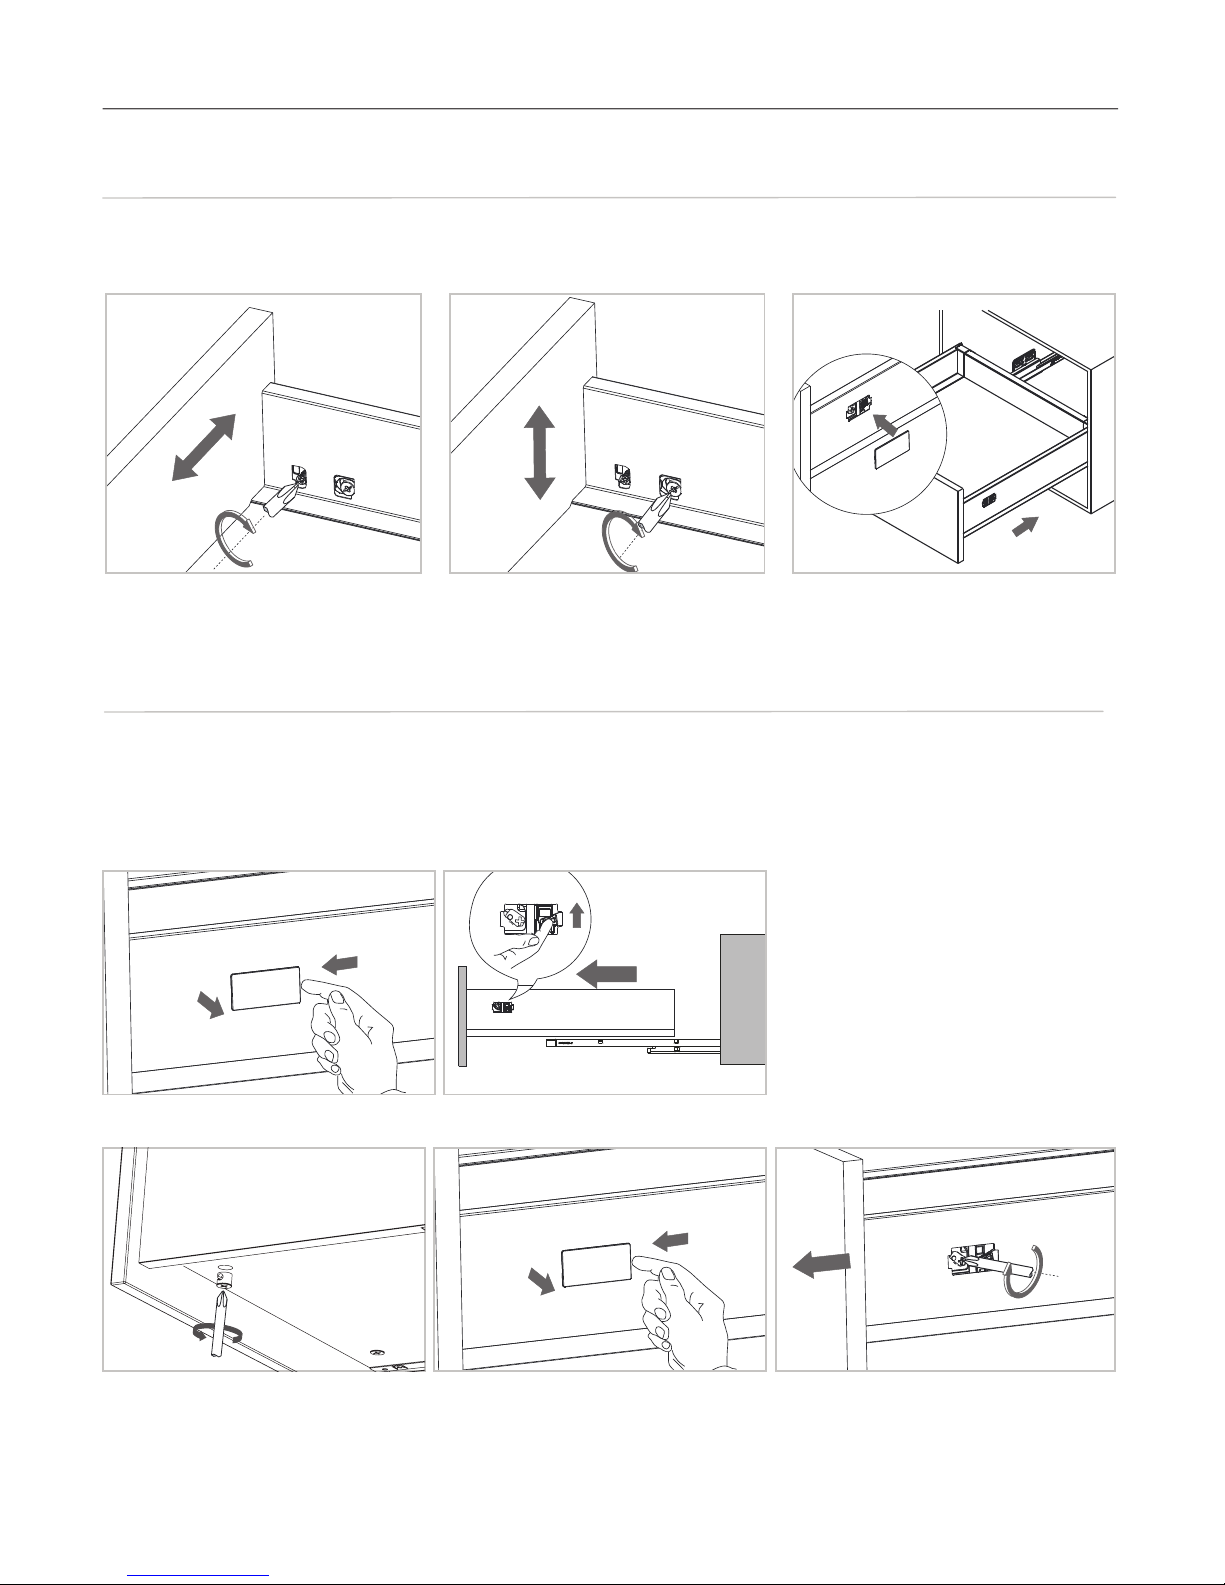
The drawer can be removed and if faulty the drawer fascia can be removed and replaced uncovering the mechanism on
the outside of the drawer side.
Removing Drawer and Fascia
Fascias may require adjustment for correct alignment. This is achieved with the adjusting mechanisms under the interior
covercap.
Adjusting and Fascia
Customer Services
t: 01225 303900
11/16 .V2
Press-in
Drawer adjustment
Remove drawer - use nger triggers on both sides
Remove fascia - turn release mechanism on both sides after removing cams under drawer
Page 5
Customer Services
t: 01225 303900
11/16 .V2
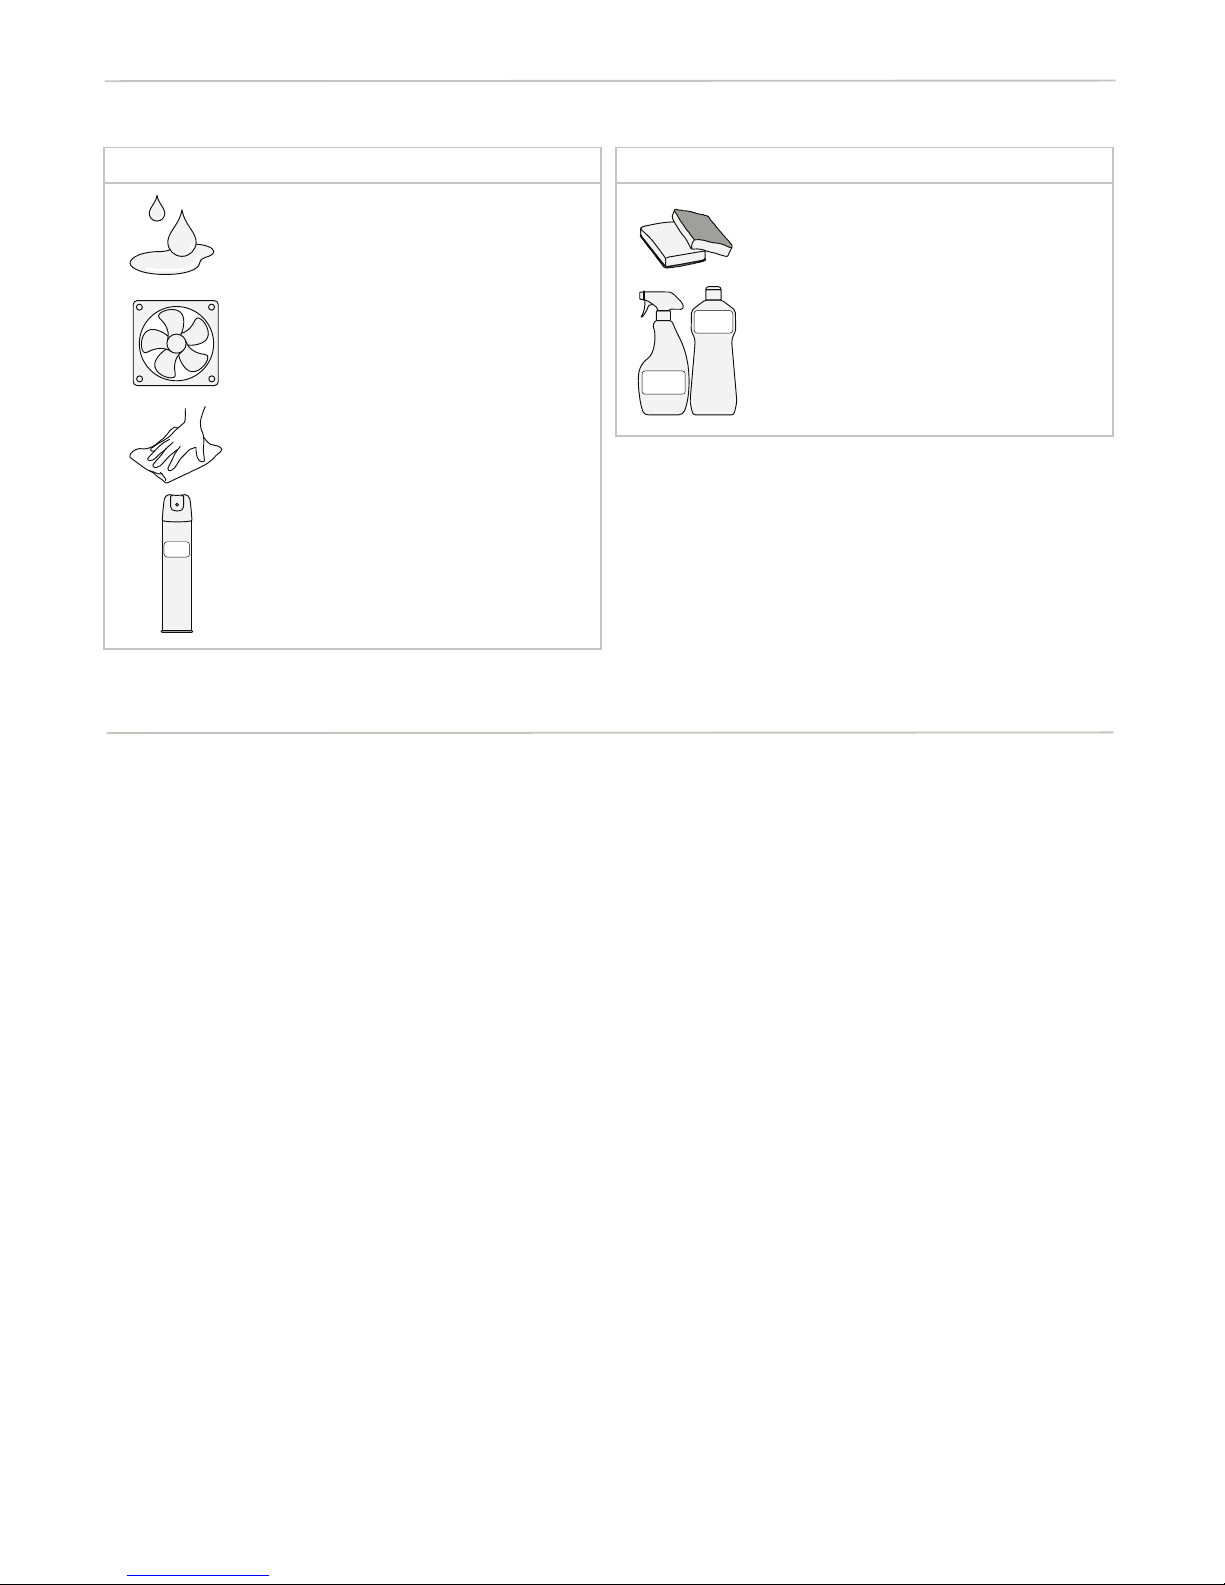
As with all wooden furniture, this unit should be treated with care:
Furniture Aftercare Instructions
Should you require any replacement components for this product please contact customer services using the contact
details below.
Replacement components
WAX FREE
POLISH
We recommend...
Wipe away any water splashes or
condensation after use. Excessive exposure to water will deteriorate the furniture.
All bathrooms should be well ventilated
with a suitable extractor fan.
Clean with a soft damp cloth only.
Use a wax free polish if one must be
used.
For removal of lime scale deposits use a
suitable proprietary cleaner. If necessary
test on an inconspicuous area rst.
WIPE AWAY
Please DO NOT...
BLEACH
CLEANER
CREAM
CLEANER
Do not scrub or scour
Do not use abrasive cleaning agents
 Loading...