

Page 1
App Instruction Manual
Basetech Home
Item No. 1710064
Page 2
Contents
Basetech Home Control
Basetech Home Control App
Smart Plug Core Functions
Symbols
Legal Notice
App To Device Communication
Introduction
App Installation
App Deinstallation
Basetech Home Control Account
App Landing Page - Home Screen
Scene Screen
Me Screen
Page 3

Basetech Home Control
Basetech Home Control currently supports the
following devices:
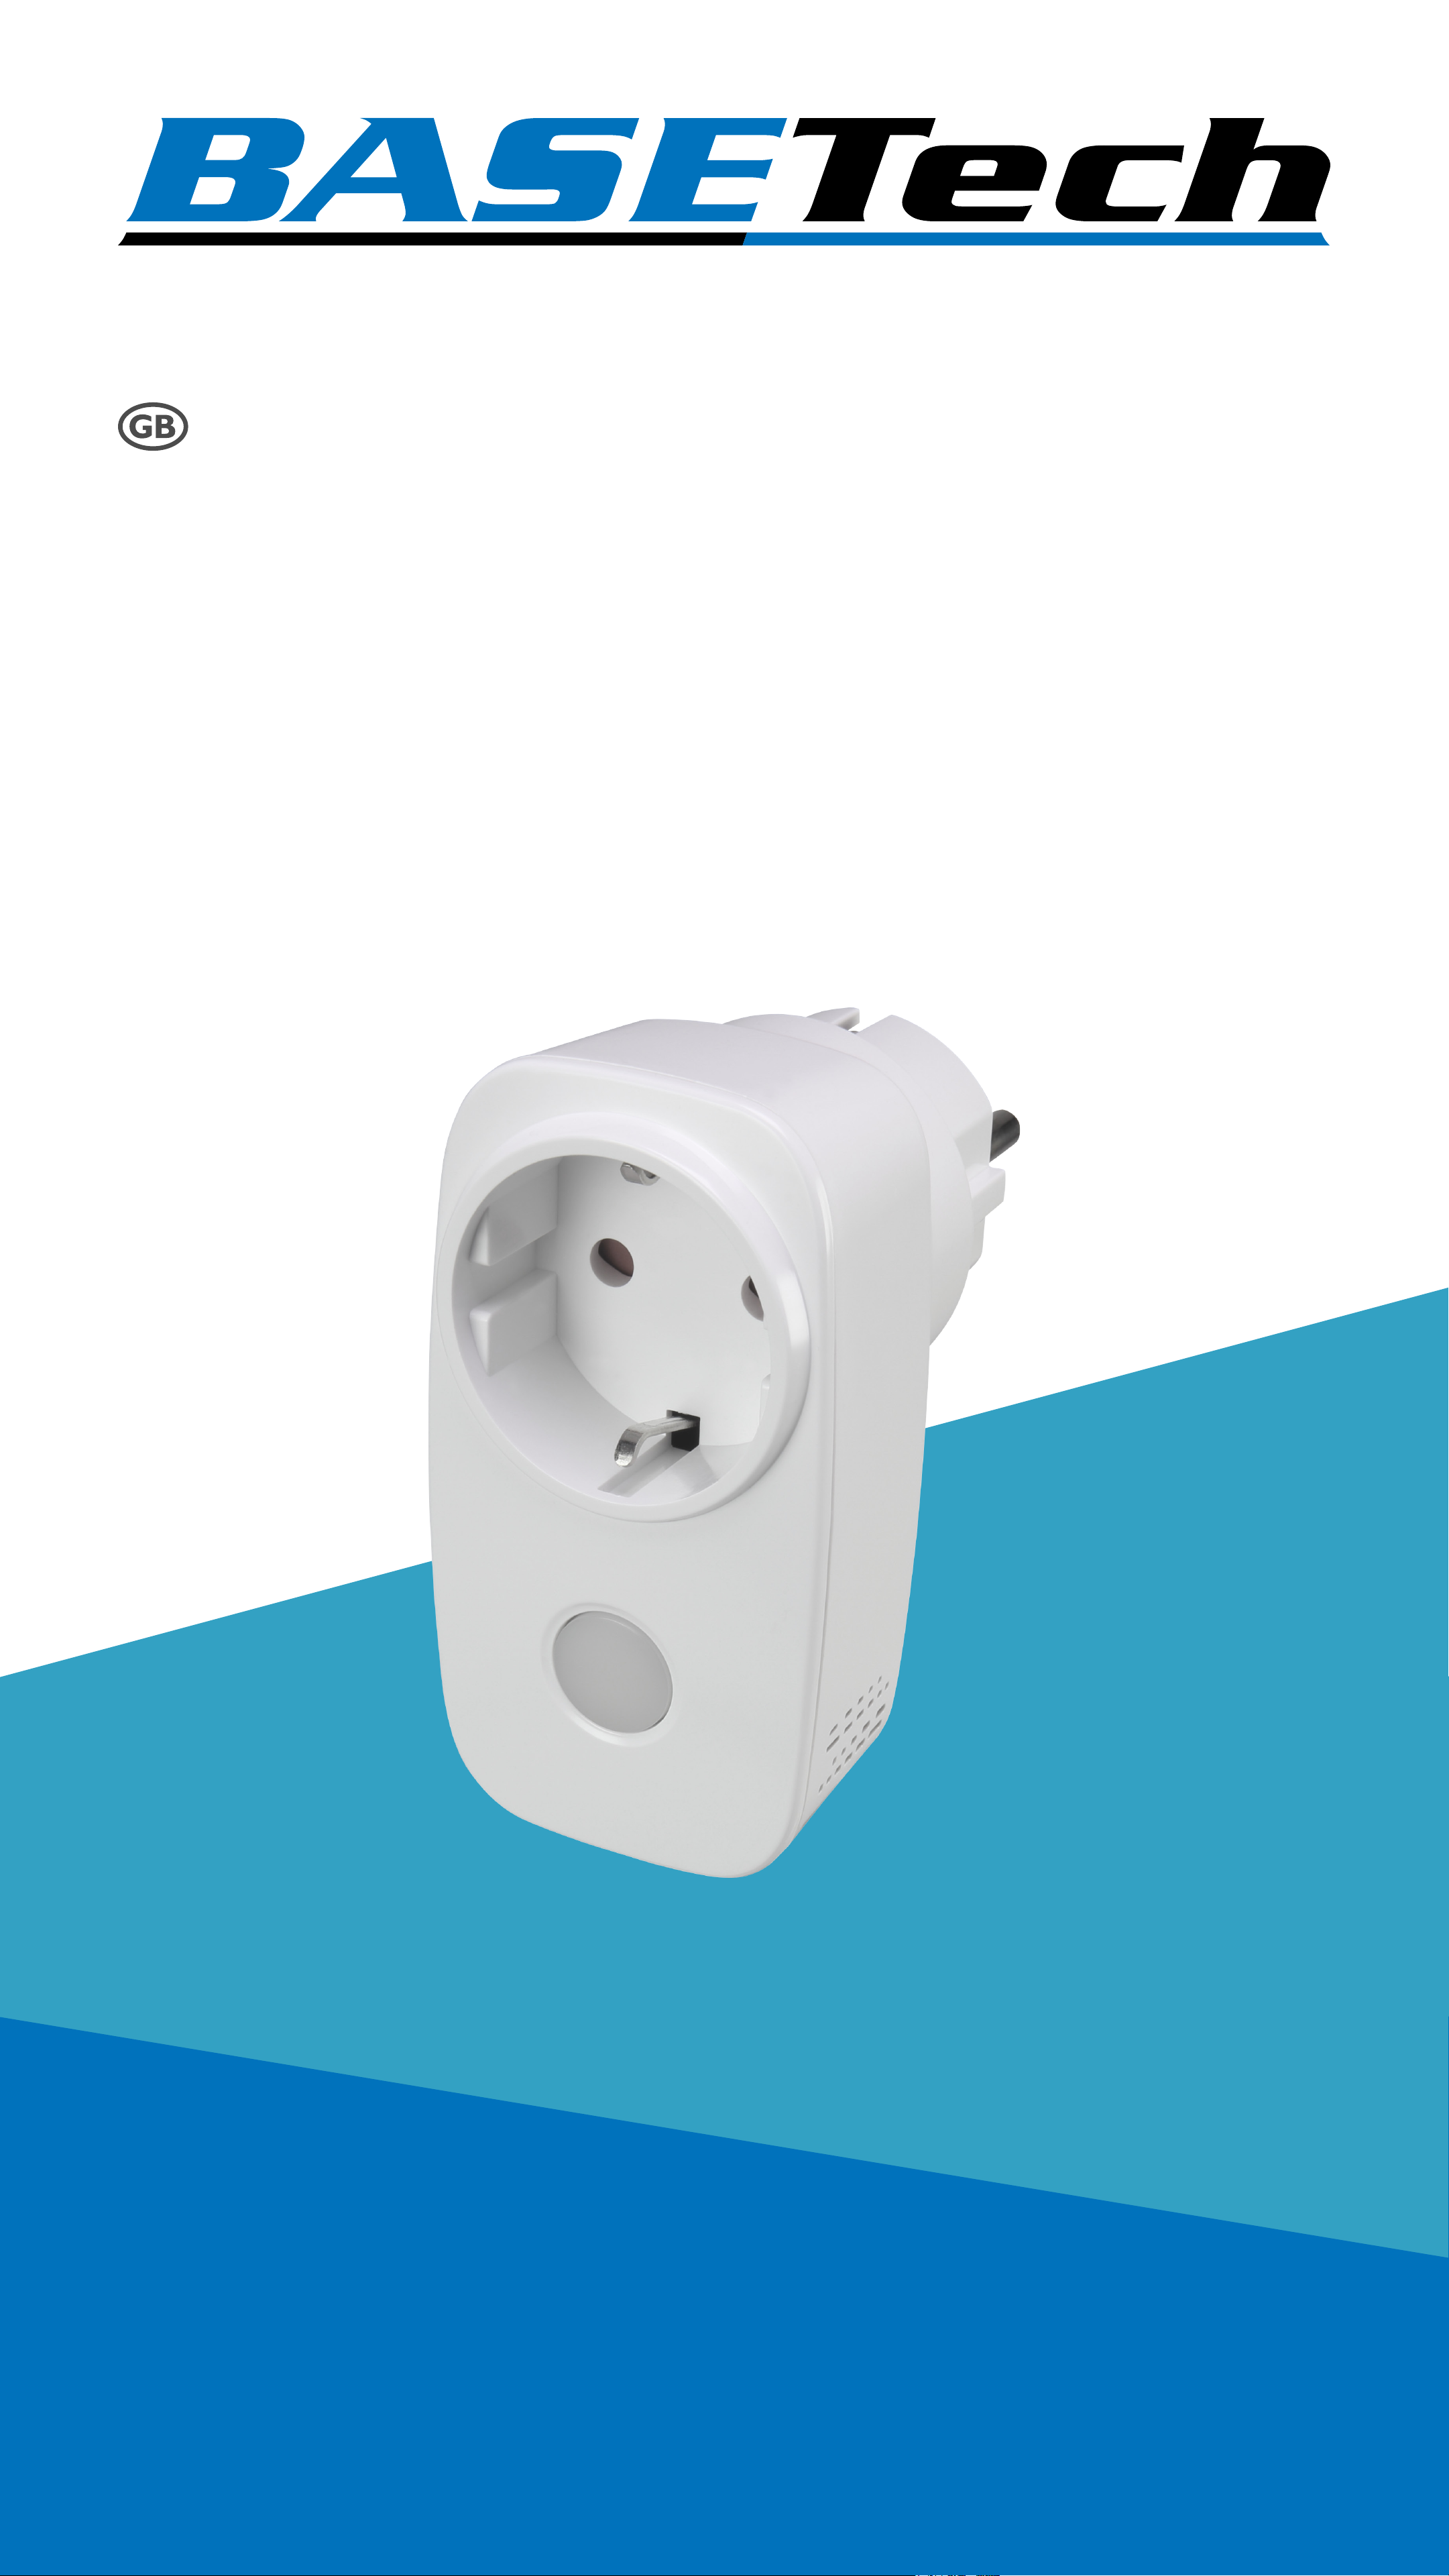
■ Power Socket (item no. 1710064)
Basetech Home Control App
Home Control Screen
Adding, removing and editing supported
devices.
Scenes Screen
Scenes are a set of user-dened rules when
and how certain events may occur, for example
switching lights on/off after a chosen time
period.
Me Screen
The Me screen lists various data of a user
account and allows to modify settings. This
includes device sharing, room management,
FAQs and version information of the app.
Page 4

Smart Plug Core Functions
Simple Switching
The smart plug switches power to the socket
ON or OFF.
Timer function
Timers are monitored via app and events
logged in the app.
Switching Delay
You can set a switching delay using a delay
timer incorporated in the app.
Light mode setting
Switch on/off the white night light.
Page 5
Symbols
The following instructional symbols are used in
this instruction manual.
This triangle indicates important
instructions contained in these
operating instructions that must be
followed.
This symbol indicates that special
advice and notes on operation are
provided.
Legal Notice
This is a publication by
Conrad Electronic SE, Klaus-Conrad-Str. 1,
D-92240 Hirschau (www.conrad.com).
All rights including translation reserved.
Reproduction by any method, e.g. photocopy,
microlming, or the capture in electronic data
processing systems require the prior written
approval by the editor. Reprinting, also in part,
is prohibited. This publication represents the
technical status at the time of printing.
Copyright 2018 by Conrad Electronic SE.
Page 6

App To Device Communication
■ In order to add a new device to the app,
the mobile device that runs the app and the
smart device must connect to your WLAN.
■ Once a new device was added, you can
control that smart device through the app
via WLAN or mobile network.
■ Subnetting: If you subnetted your WLAN
network, then mobile device and smart
device must be hosts on the same subnet.
Page 7
Introduction
App installation is also briey mentioned in
the hardware manual available for the Smart
plug. Seek guidance on installation and use
whenever necessary.
In order to function, the smart device
connected and the mobile device
running the controlling app must
be connected to the same 2.4 GHz
WLAN network.
1. The app installer for iOS or Android can be
downloaded from the appropriate app store.
You can create multiple accounts for
different users having installed the
Basetech Home Control app on their
devices.
2. Start the app and login using valid account
information and the right password.
Page 8
App Installation
Apps are available for Android and iOS
mobile devices. Make sure your mobile device
satises the minimum requirements as outlined
on the app page before downloading.
1. Head to the respective app store and
download the app named 'Basetech Home
Control' onto your mobile device.
2. Start the installation. You will be prompted
to start the installation.
3. Follow the installation instructions. You will
need an email address or phone number.
You will need to create a user account, or
you may use an existing account if you
already have one.
4. Set up a user account as outlined in the
chapter "Basetech Home Control Account".
You can install the app on multiple
mobile devices and login with the
same account details to control the set
of smart device/s.
App Deinstallation
If you de-install the app from your mobile
device, the settings are not lost and become
available again as soon as you re-install the
app and login with the same account details.
<Account cloud>.
Page 9

Basetech Home Control Account
An email account or phone number is required
for you to operate the smart device/s.
Your smart device can be controlled
by two or more different mobile
devices, if they are shared.
Prerequisite for a new account
1. Create a new email account or use an
existing email address for your Basetech
Home Control account.
Setting up a new account
1. Start the app.
2. Tap Sign up and agree with the privacy
terms.
3. Enter your email address or phone
number to use with the app and conrm.
A verication code will be sent via email to
your email address or via SMS to the phone
mailbox.
4. Enter the email address or phone number
as user name and the verication code
received and your chosen password.
Conrm with Finish.
Page 10

Signing in
1. Open the app.
2. Tap Sign in.
- If you have logged in before, the user
name should appear in the corresponding
eld. Otherwise, input your email or phone
number.
- Enter your password.
3. Conrm with Sign in.
4. If you login successfully, the landing page
with the device list will appear.
- If no smart devices have yet been set up,
the device list is blank.
- If devices have been set up, they appear
in the list of connected devices.
Page 11

App Landing Page - Home Screen
Tap on screen button to execute actions and
see settable options.
■ Tap on an option (text or icon) to open.
Delete a device
Open the device control -
Smart plug
Add a device
Switch a device
directly
Switch to Home screen Switch to Me screen
Switch to scenes screen
Page 12

Add a device
1. Select +.
2. Tap on the device to install to start the
installation process. Follow the installation
instructions of this app manual and the
operating instructions of the smart device.
3. Tap Finish to terminate and return to
previous screen.
4. Tap to return to previous screen without
installing.
Delete a device
1. Select Edit.
2. Tap on the device you want to delete.
3. Tap on the red - icon and conrm to delete.
4. Tap on the device to see:
- Device name: Smart plug
- Room: See and change the location for a
device.
- Device info: See PID, DID, Access to the
cloud, MAC, Firmware version, Device IP,
Data cloud and SDK.
- Or alternatively, tap Remove device and
conrm to delete.
Open the device control for the Smart plug
1. Select smart plug from the connected
devices shown in the list on the landing
page.
Page 13

Smart plug operation
Observe the indicator lights of the physical
device during set up and use.
Settings and Attribute
Switch Smart plug on/off
Set switching delay
Set timer and time, repeat
Turn on/off night light
conditions and type of action
(on/off)
1. Tap ... to open the smart plug settings. Tap
to return to previous screen.
Page 14

2. Chose Settings to view usage history, or
chose Attribute to adjust settings.
Settings
1. Select History.
2. Tap icons to see the history of the smart
device.
Previous
day
Today Set the date for today.
Usage history of the previous
day.
Next day Usage history of the next day.
Attribute
1. Tap Remove device.
2. Conrm to delete the smart device or
cancel.
Device
name
Room
Give your connected device a
name. You may type in a new
name.
Determines the location (room)
of a smart device. Tap the room
you want the smart device to be
located.
Page 15

Device info
PID, DID, Access to the cloud,
MAC address, Firmware,
Device IP Data cloud and SDK.
Tap Copy all if you want to copy
the information to your mobile
device's clipboard.
Switch on/off
1. Select Switch to switch the connected
device on or off.
Add timer
1. Select Timer.
2. Choose Add Timer, while in basic mode.
3. Tap the time (HOUR and MIN) to set the
time.
4. Tap Repeat to set switching time repetition
to Only once, everyday, weekday,
weekend or choose custom. Customize
individual days for the recurrence of the
action by tapping.
5. Tap Action to set switching mode. Choose
On or off and Conrm.
6. Tap Save to complete the timer setting.
7. Choose + Add Timer to programme
another timer.
8. Tap Advanced to switch from basic to
advanced mode. You may set the advanced
timer options. You can set Start time, End
time, Action One and Action Two (on or
off) and Repeat conditions.
Page 16

9. Tap Save to complete the timer setting.
10. Repeat the above steps to add more timers.
Delete a timer
1. Tap on a timer and choose Delete and
Conrm.
2. Or Slide the slider to the left and Conrm
deletion.
Setting switching delay
Depending on the smart device's present
status, switching on or off delay can be set.
1. Select Delay.
2. Choose a preset switching delay period of
1, 2, 5, 10, 15, 30 minutes, or 1 to 2 hours.
Alternatively, tap customize to choose a
delay period of up to 24 hours. Set HOUR
and MIN separately and Conrm.
Switch the night light on the Smart plug
1. Tap Light (bulb button) to switch on the
white night light.
Switching depends on the initial state
of the indicator light. When the blue
light is on, it switches off while the
white one goes on. The white light is
the night light. The blue light indicates
the smart plug's switching status.
3. Tap Light again to switch off. All lights go
off.
Page 17

Scenes Screen
A scene is a sequence of actions one or many
home devices can perform.
Delete a scene
Execute a scene
Add a new scene
Page 18

Add a scene
1. If no scenes have been dened, tap Add
scene.
2. Select + on the scenes page to add more
scenes.
3. Tap Custom Scene to start creating a new
scene.
4. Tap to return to previous screen.
5. Chose Scene picture to assign an identier
icon to the scene.
6. Chose Name of scene to type a name for
the scene, save the name or cancel the
operation.
7. Tap Add device to add a device to the
sequence of the scene.
8. Select a device from the list of connected
device.
9. Choose the switching status ON/OFF, OFF,
ON or cancel.
10. Save your choices for a scene.
11. To add more devices to the same scene,
select Edit. Then tap the scene name and
choose Add device +.
12. The further adding procedure is identical to
the one described above.
Page 19

Delete a scene
1. Select Edit on the scenes page.
2. Tap on the red - icon of the scene and
conrm to delete.
3. To return to previous screen and cancel, tap
Finish.
Edit a scene
1. Select Edit on the scenes page.
2. Tap on a scene name to start editing the
scene.
3. Chose scene picture to select a different
identier icon for the scene.
4. Chose Name of scene to amend the name
of the scene.
5. Tap on the switching pause symbol (given
in seconds) to amend the switching
delay between each device action in the
sequence.
6. Save your amendments to the scene by
tapping Save.
7. Tap Add device to add another device to
the sequence of the scene.
Execute a scene
1. Tap the scene icon and name of the scene
you want to execute.
2. The scene runs its course and nishes.
Page 20

Me Screen
Manage rooms
Manage your account
Create device sharing QR code for
scanning
Show shared devices
Scan QR code
Show FAQs
Send Feedback
Show app information
Page 21
Manage account
Change linked phone number or email
address:
1. Select Phone to change the linked phone
number.
2. Select Email to change the linked email
account.
3. You are prompted to enter your Basetech
Home Control password and tap Next.
4. Now change the password or email address
given and conrm.
5. Tap to return to previous screen.
Change password
1. Tap Change to change the password.
Enter your old and new password and
conrm.
2. Tap to return to previous screen.
Exit account
1. Tap Sign out and conrm to exit your
account, or cancel.
2. Tap to return to previous screen.
3. You can sign into the same account or use
another account later.
Manage rooms
Add and edit room settings.
1. Select Room Management.
2. Tap to return to previous screen.
3. Select Add room to create a new room.
4. Type a new room name and Save.
Page 22
5. Tap existing room name to edit. Type the
new name for the room and Save your
changes.
Delete rooms
1. Tap on a room name to open.
2. Tap Delete room to remove a room and its
devices from the app.
Rearrange devices in rooms
1. Tap on a room name that has a smart
device listed.
2. Tap on Change room after the name of a
smart device.
3. Tap to return to previous screen.
4. Select the new room to change the device
to. The device location is moved to the new
room.
Make sure you move the physical
smart device into the new room.
Share devices
1. Tap Device sharing to display a temporary
QR code on the originating mobile device.
Make sure you nish the sharing process
within the validity of the QR code. Create a
new one if necessary.
2. Make sure the mobile sharing has the
Basetech Home Control App installed on
it and you have created another account.
For details of these setup processes,
refer to the chapters "App installation" and
"Basetech Home Control Account".
Page 23
A sharing device is an additional
mobile device with the Basetech
Home Control App installed on it and
running with a different account.
3. On a sharing device, tap Scan QR code to
scan the QR code of the originating device
to share.
4. Place the scan window on the screen of
the sharing mobile device over the valid
QR code displayed on the screen of the
originating device. The scanner scans
automatically and conrms when scanning
was successful.
5. After sharing is complete, the shares are
shown under Accepted sharing.
6. Tap to return to previous screen.
Accepted sharing
1. Tap Accepted sharing to see a list of
devices already accepted for sharing.
2. Tap to return to previous screen.
FAQ
1. Tap Device Conguration, Device Ofine,
App related issues, Scenes and 3rd party
voice services to open and read helpful
hints on those topics.
2. Tap to return to previous screen.
Page 24
Feedback
1. Tap Feedback, then type in your comments
and add pictures concerning your issue and
comments.
2. Tap Submit to send your feedback.
3. Tap to return to previous screen.
About
1. Tap on App Info to see available app
information such as Version, Backstage
cloud, Family cloud, account cloud, IR-code
cloud and private cloud.
2. Tap Copy all to copy app information to the
clipboard for further processing.
3. Tap to return to previous screen.
 Loading...