

Original-Gebrauchsanleitung
V1/0917
W10-KB Plus
401621

Technical data
Name
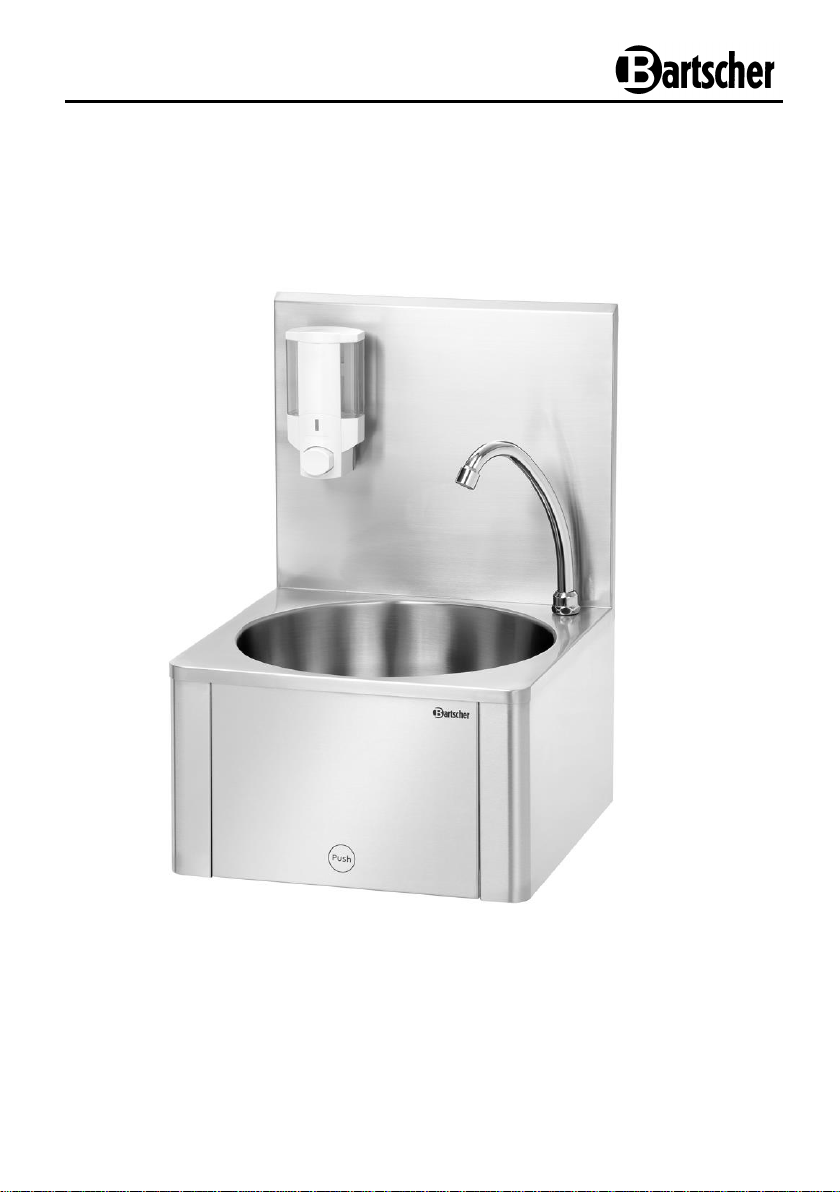
Hand wash basin W10-KB Plus
Code no.:
401621
Material:
Chrome nickel steel
Realization:
Wall-mounted
With soap dispenser
With knee operation
Water dispensed via knee operation: approx. 15 seconds
Cold and/or hot water connection 1/2”
Water outlet 1 1/4“
Kitchen faucet: swivel fitting 140 mm
Splashback 345 mm
Basin:
Capacity: 13.5 litres
Basin diameter: 350 mm
Basin height 170 mm
Soap dispenser:
Material: pastic, filling capacity: 300 ml
Dimensions:
W 400 x D 404 x H 577 mm
Weight:
7.05 kg
GB/UK
We reserve the right to implement the technical modifications!
- 7 -
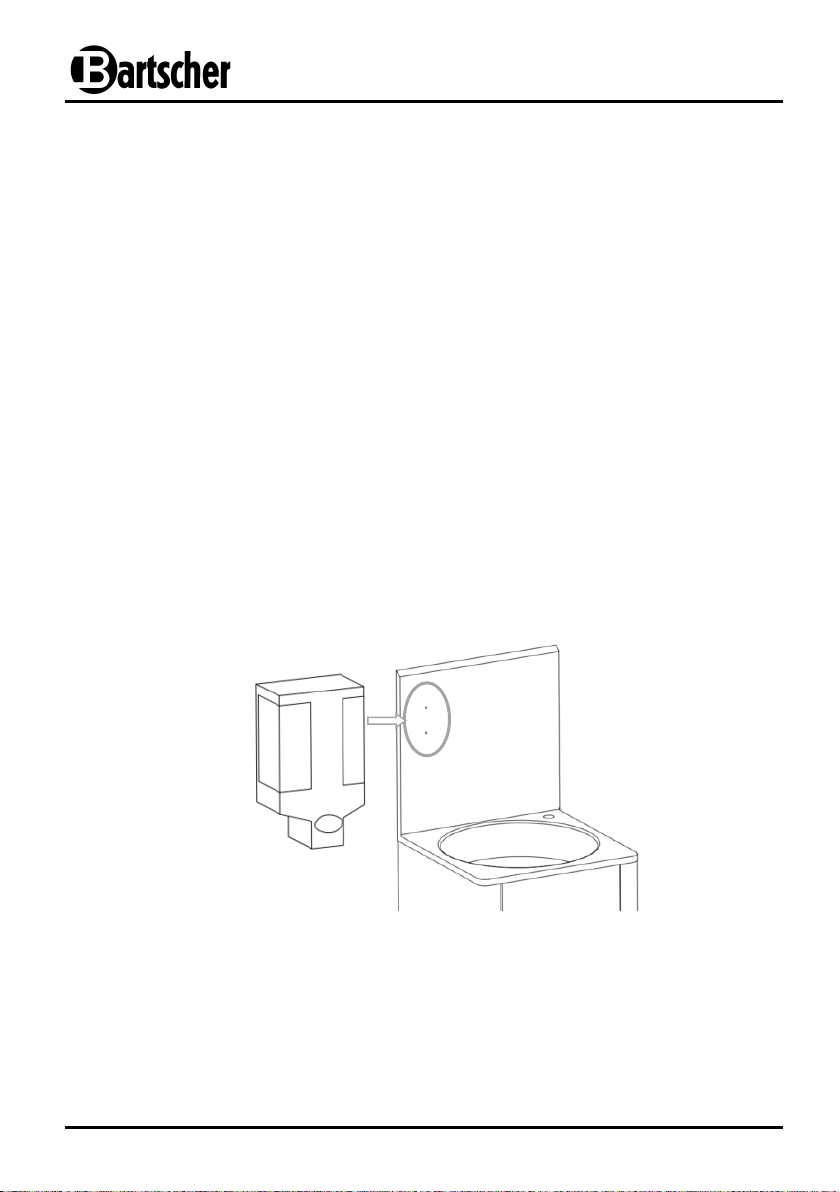
Fig. 1
Delivery range
Unpack the device and remove all package materials according to the valid
environment protection regulations.
Ensure that all parts are present:
- 1 x hand wash basin
- 1 x swivel fitting
- 1 x soap dispenser
- 1 x knee fitting
- 1 x mixer fitting
- 1 x siphon
- 1 x 1 1/4” pipe, length: 320 mm
- 1 x 1 1/4” pipe, length: 120 mm
- 3 x flexible hose
- 1 x wall support rack
- 1 x set of brackets, screws
- 1 x installation instructions
Installation
Install the soap dispenser and swivel fitting
1. First, install the support of the soap dispenser in the 2 designated holes at the left
side of the splachback of the hand wash basin (fig. 1).
- 8 -
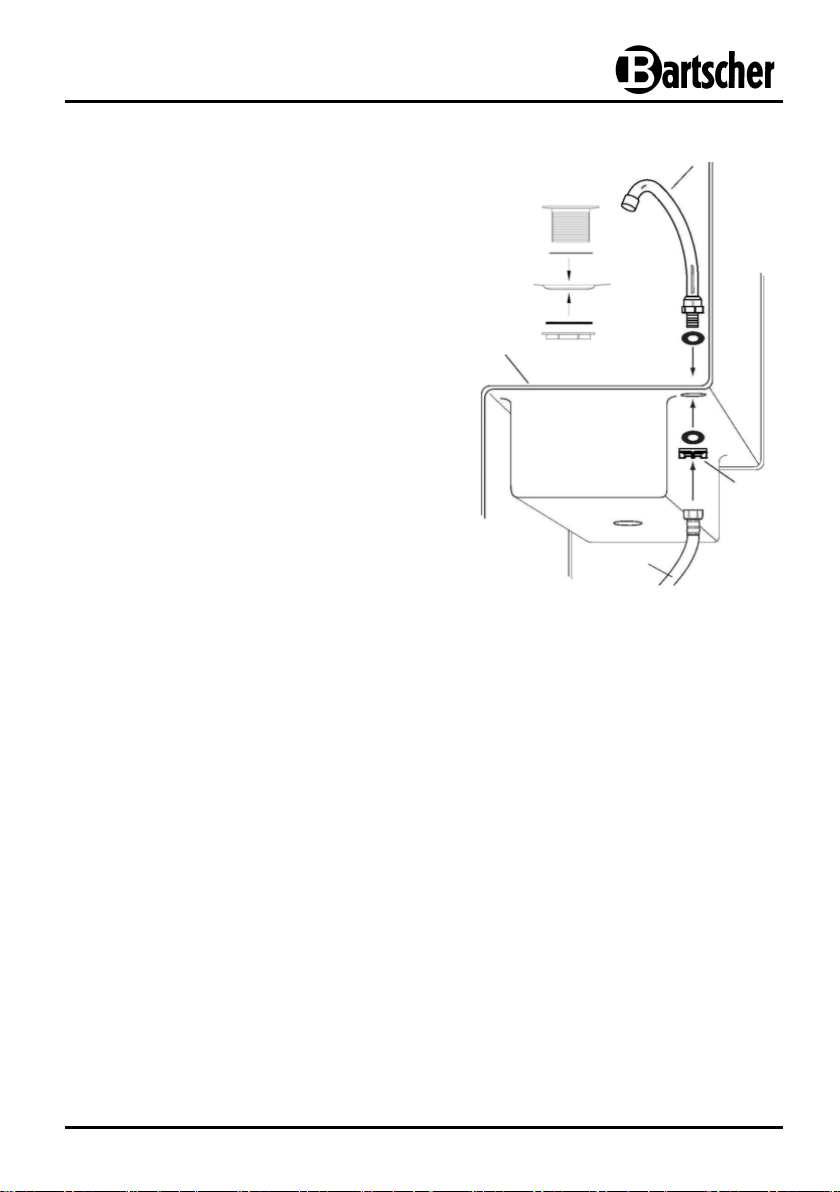
2. Install the supplied swivel fitting (1) on
the right back edge of the hand wash
basin (4) (rys. 2).
3. To do so, unscrew the plastic nuts (2)
from the underside of the swivel fitting (1)
and remove the washers.
4. Insert the thread of the swivel fitting (1)
through the hole in the hand wash
basin (4). Place one washer supplied
with the unit between the basin and
swivel fitting (1) and another washer
between the basin (4) and the plastic
nut (2).
5. Replace the plastic nut (2) on the thread
of the swivel fitting (1) on the underside
of the hand wash basin (4) (fig. 2).
Fig. 2
4
1
3
2
6. Tighten one end of the flexible hose (3) to the swivel fitting (1) connector.
7. Install the drain set to the drain of the hand wash basin. Make sure that the thin
gasket in the hand wash basin between the drain set and basin, and the thicker
gasket between the bottom and nut are fiitted under the hand wash basin (fig. 2).
- 9 -

8. Open up the front cover plate (5) of
the hand wash basin.
9. Mount the mixer fitting (12) to the
thread (6) of the knee operated
fitting (10) (fig. 3).
10. Follow the direction arrow on the
mixer fitting (12) and on the knee
operated fitting (10).
Fig. 4 at the left shows how to
perform correct installation.
11. Install the knee operated fitting (10)
and mixer fitting (12) in the opening of
the metal plate (9) in the front part of
the basin in such a way so that the
push button (7) of the knee operated
fitting is at the front.
12. Connect the free end of the supplied
flexible hose (3) with the knee
operated fitting (10) by screwing the
hose onto the thread of the knee
operated fitting (10) (fig. 3).
Fig. 3
Fig. 4
11
3
5
8
13
7 9 10
6
12
Install the cold and/or water mixer fitting / knee operated fitting
- 10 -
Mount the hand wash basin
Connect the hand wash basin with the drain pipe.
To do so, use the supplied connection pipes and siphon.
A. Measure off the required length of the connection
pipe from the basin drain to the connection in the
wall and cut to the size as needed. Then, fasten
the connection pipe with the siphon.
Place the connection pipe in the socket of the drain
pipe in the wall, put the gasket and tighten.
B. Place the other end of the siphon in the drain socket
of the hand wash basin. Here place the gasket as
well and tighten the whole set using the siphon pliers
and nuts.
B
A
Hang the hand wash basin near the water supply.
Before mounting the hand wash basin, check the parameters of the wall where
the basin is to be installed. The wall should be able to support the weight of the
hand wash basin.
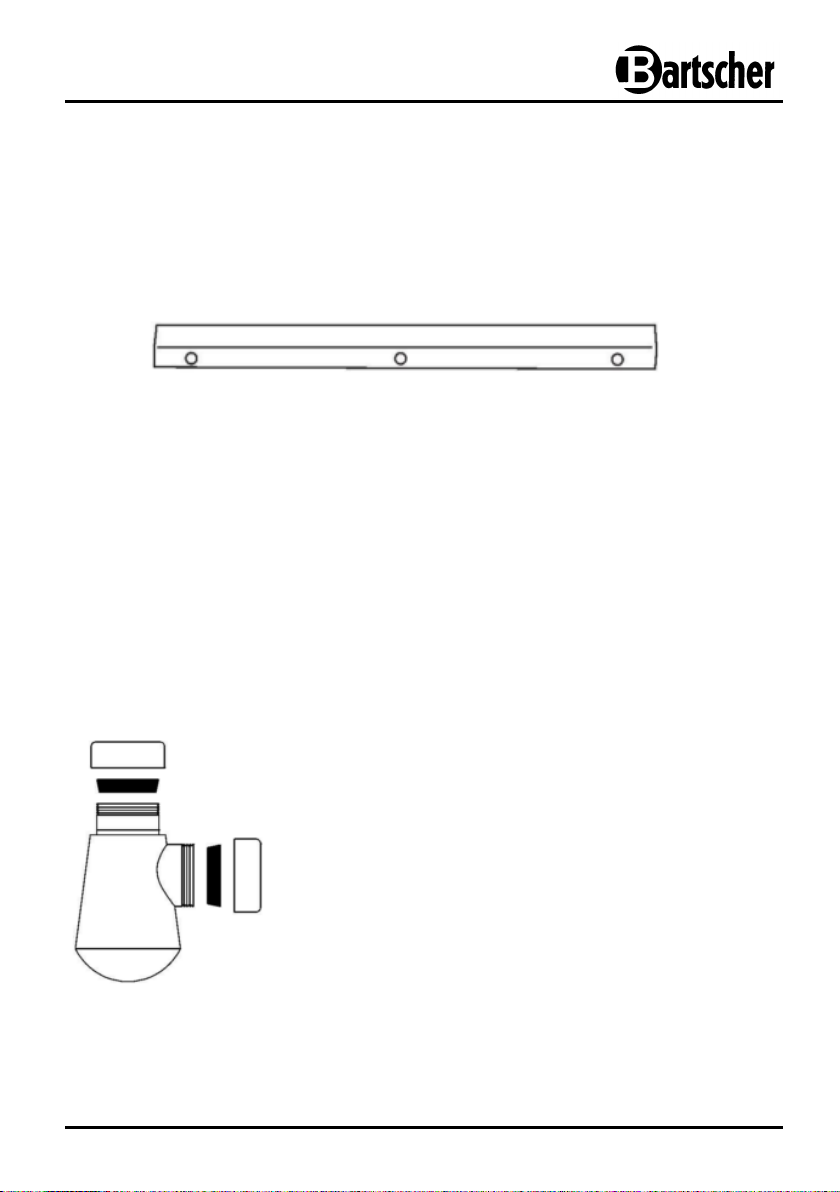
Mark 3 points in the appropriate place on the wall via the holes in the installation
rack (fig. below).
Drill the holes in the wall and place the supplied brackets in.
Attach the support rack to the will with the screws.
Then, hang the basin on the upper edge on the support rack.
Cold / hot water supply
Using the flexible hoses connect the cold water connection (11) and hot water
connection (13) with the mixer fitting (12). Using the screw (8) you can adjust the
hot/cold water ratio (fig. 3).
Drain connection
- 11 -
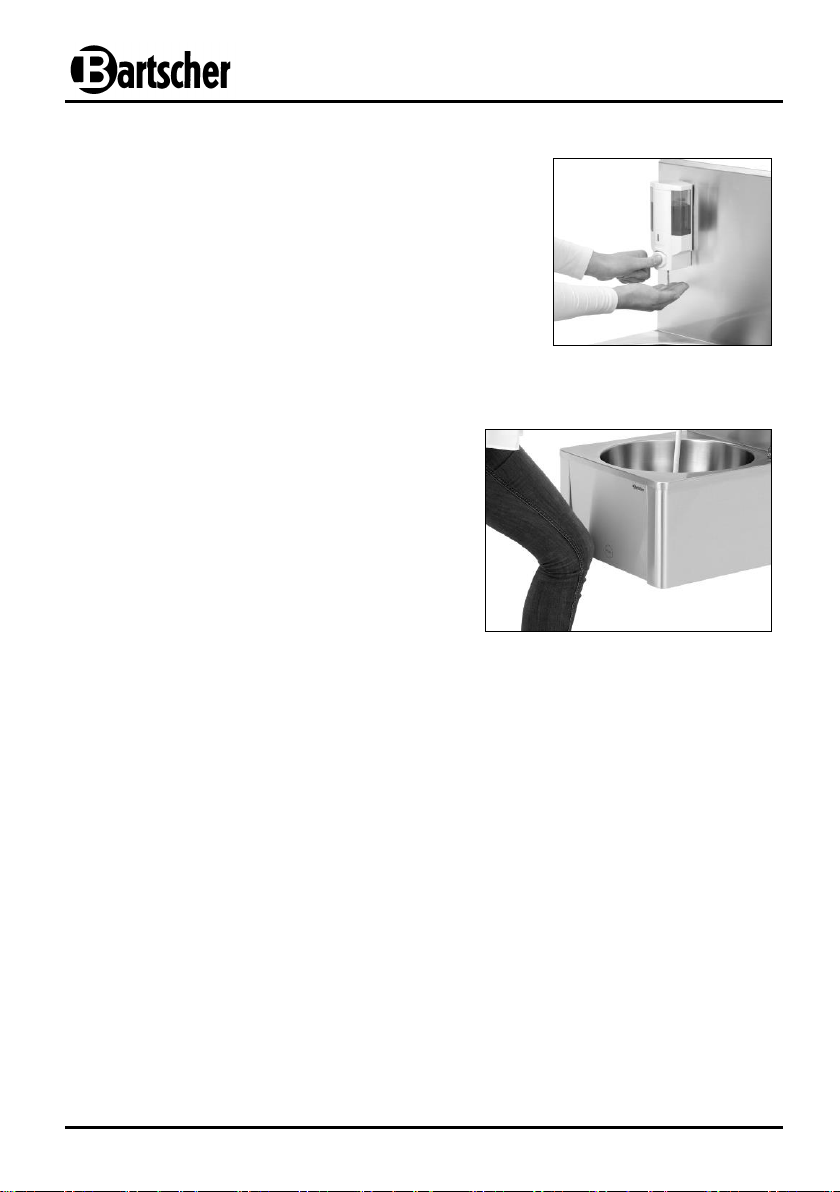
Mount the soap dispenser on the support and fill
up with liquid soap.
Note: Upon the first use, the soap dispenser
must be fully filled up to completely remove the
air from the dispensing pump.
To draw soap, press the button at the front.
Operate the hand wash basing by
touching the front cover plate with
one’s knee within the area marked
“PUSH“ (fig. at the right).
Then, the water flows from the swivel
fitting for approx. 15 seconds. After that
time the water flow is automatically
stopped.
Soap dispenser
Knee operation
Cleaning
Clean the hand wash basin regularly with a soft cloth and non-abrasive cleaner.
Bartscher GmbH
Franz-Kleine-Str. 28
33154 Salzkotten phone: +49 (0) 5258 971-0
Germany fax: +49 (0) 5258 971-120
- 12 -
 Loading...