

Page 1
Original-Gebrauchsanleitung
V2/0318
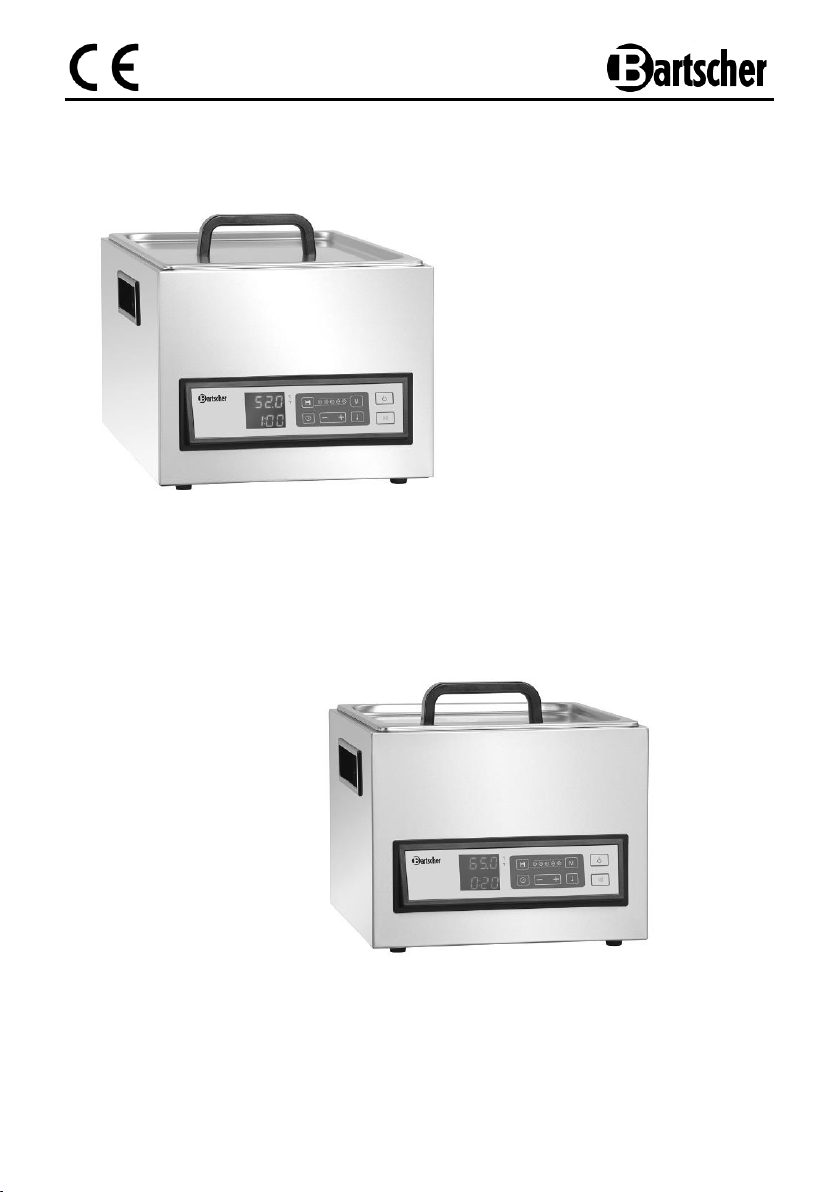
SV G25L
115130
SV G16L
115131
Page 2
GB/UK
ENGLISH
Table of contents
1.Safety ........................................................................................................................ 26
1.1 Key to symbols ..................................................................................................... 26
1.2 Safety instructions ................................................................................................ 27
1.3 Proper use ............................................................................................................ 32
2. General information ................................................................................................ 33
2.1 Liability and Warrantees ....................................................................................... 33
2.2 Copyright protection ............................................................................................. 33
2.3 Declaration of conformity ...................................................................................... 33
3. Transport, packaging and storage......................................................................... 34
3.1 Delivery check ................................................................ ...................................... 34
3.2 Packaging ............................................................................................................. 34
3.3 Storage ................................................................................................................. 34
4. Technical data ......................................................................................................... 35
4.1 Technical specification ......................................................................................... 35
4.2 Overview of parts ................................................................................................. 37
5. Installation and operation ....................................................................................... 38
5.1 Installation ............................................................................................................ 38
5.2 Operation .............................................................................................................. 39
5.2.1 Preparation of the device ........................................................................... 39
5.2.2 Control panel / functions of operational elements ...................................... 40
5.2.3 Settings ..................................................................................................... 41
5.2.4 Cooking food ............................................................................................. 42
6. Cleaning and maintenance ..................................................................................... 44
7. Possible Malfunctions ............................................................................................ 46
8. Waste disposal ........................................................................................................ 48
Bartscher GmbH phone: +49 5258 971-0
Franz-Kleine-Str. 28 fax: +49 5258 971-120
33154 Salzkotten Service-Hotline: +49 5258 971-197
Germany www.bartscher.com
- 25 -
Page 3
Read this instruction manual before using and
keep them available at all times!
This instruction manual contains information about the installation, operation and
maintenance of the device and should be consulted as an important source of
information and reference guide.
Awareness of the safety instructions and instructions for use in this manual will ensure
the safe and correct use of the device.
In addition to the information given here, you should comply with any local Health and
safety Controls and generally applicable safety regulations.
The instruction manual forms part of the product and should be kept near the device
and easily accessible for anyone carrying out the installation, servicing, maintenance or
cleaning.
Please keep these instructions and give them to future owners of the device.
1.Safety
This device is designed in accordance with the presently applicable technological
standards. However, the device can pose a danger if handled improperly and
inappropriately.
All persons using the device must follow the recommendations and instructions
in this instruction manual.
1.1 Key to symbols
In this manual, symbols are used to highlight important safety instructions and any
advice relating to the device. The instructions should be followed very carefully to avoid
any risk of accident, personal injury or material damage.
DANGER!
This symbol highlights hazards which could lead to injury.
WARNING!
This symbol highlights dangerous situations which could lead to injury or death.
- 26 -
Page 4
HOT SURFACE!
This symbol is a warning that the device surface is hot when in use.
Ignoring this warning may result in burns!
CAUTION!
This symbol highlights dangerous situations which could lead to light
injuries, or damage, malfunction, and/or destruction of the device.
NOTE!
This symbol highlights recommendations and information aimed for effective
and trouble-free device operation.
1.2 Safety instructions
The device is not intended for use by individuals (including
children) with physical or mental disabilities, insufficient
experience, and/or insufficient knowledge unless such persons
are under the care of a person responsible for their safety or
have received instructions regarding appropriate use of the
device.
Children should be observed to ensure that they are not playing
with or starting the device.
Only use the device indoors.
The device must be operated in correct and safe technical
condition only. In case of operational problems disconnect the
device from the power supply (pull the plug from the socket) and
contact the service company.
Prevent access of children to the package materials like plastic
bags and foamed polystyrene elements. Suffocation hazard!
- 27 -
Page 5
Only a qualified technician and using original spare parts and
accessories should carry out repairs and maintenance of the
device. Do not attempt to repair the device yourself.
Do not use any accessory or spare parts that have not been
recommended by the manufacturer. These can be dangerous
for the user or lead to damages of the device or personal injury,
and further, the warranty expires.
To prevent hazards and to ensure optimum efficiency, no
modifications or alterations to the device that are not explicitly
approved by the manufacturer may be undertaken.
DANGER! Electric shock hazard!
To avoid the hazard results please follow the safety instructions
below.
Never allow the power cable to come into contact with heat
sources or sharp edges. The power cable should not hang over
the side of the working surface. Ensure that no one can step on
or trip over the cable.
The power cable must not be folded, bent or tangled, and must
always remain fully unrolled. Never place the device or other
objects on the power cable.
Do not cover the cable. Keep away the cable from operating
range and do not immerse it into water.
Check the power cord regularly for damage. Do not use the
device if the power cord is damaged. If this cable is damaged, it
must be replaced by customer service or a qualified electrician in
order to avoid dangers.
- 28 -
Page 6
Always hold of the plug to disconnect the device from the power
supply.
Never carry the device by its supply cable.
In any case do not open the device housing. In case of
electrical or mechanical modifications the electric shock
hazard will occur.
Do not use any acid agents and make sure no water ingresses
the device.
Never operate the device with moist hands or standing on wet
floor.
Remove the plug from its socket:
- when the device is not used,
- in case of anomalies during operation,
- before cleaning.
HOT SURFACE! Risk of burns!
Follow the safety instructions below to avoid the hazard.
During the operation device housing and lid become very hot.
Do not touch the device! The device must be held only by the
designed handles and operational elements.
After the device has been switched off it remains hot for some
time. Before cleaning or moving the device let it cool down
sufficiently.
Never move the device during work.
- 29 -
Page 7
WARNING! Fire and explosion hazard!
Follow the safety instructions below to avoid the hazard:
Do not cover the device with e.g. aluminium foil or clothes.
Do not use the device in the immediate vicinity of the heat source
and hot surfaces.
Do not place any flammable objects on the hot surface or the
device.
Never use the device near the flammable materials (such as
alcohol, spirits, petrol, etc.). High temperature may cause their
evaporation and due to contact with the ignition sources the
explosion may occur, and it may result in personal injuries and
material damage.
In case of fire, remove the plug from the socket before the fire
extinguishing activities. When the fire has been extinguished
ensure sufficient fresh air inflow. Caution: Never use water for
fire extinguishing when the device is connected to the power
supply. Electric shock hazard!
- 30 -
Page 8
CAUTION! Risk of damage due to improper operation!
Incorrect handling may cause damage to the device. To avoid the
hazard results please follow the safety instructions below.
Never expose the device to high temperature (a cooker, etc.) or
weather conditions (rain, etc.).
Do not allow that the power supply cord hangs above the edge
of the working surface.
Use the device only when it is positioned on an even and
stable surface.
Do not use the device with the external timer or remote control.
Use the device only to heat up water for heat processing of the
vacuum packed foods.
Note the minimum volume of water.
Do not heat up any liquids but water.
Do not immerse the device in water or other liquids during
cleaning.
Do not use any scouring agents that include solvents or corrosive
cleaning agents for cleaning. They may damage the surface.
- 31 -
Page 9

1.3 Proper use
The operational safety of the device is assured only in case of proper use, according
to the operation manual.
All technical activities like installation and maintenance must be performed by the
qualified service personnel only.
The Sous-Vide cooker is designed for cooking the vacuum-packed food products
in the water bath.
CAUTION!
Any use going beyond the intended purpose and/or any different use of the
device is forbidden and is not considered as conventional.
Any claims against the manufacturer or his authorized representative as a
consequence of experiencing damages resulting from unconventional use
are impossible.
The operator is liable for all damages resulting from inappropriate use.
- 32 -
Page 10

The device complies with the current standards and directives of the EU.
We certify this in the EC declaration of conformity. If required we will be
glad to send you the according declaration of conformity.
2. General information
2.1 Liability and Warrantees
All the information and instructions in this manual take into account standard safety
regulations, current levels of technical engineering as well as the expertise and
experience we have developed over the years.
The instruction manual was translated with all due care and attention. However, we do
not accept liability for any translation errors. The German version of this instruction
manual is definitive.
If the delivery consists of a special model, the actual scope of delivery may differ from
the descriptions and illustrations in this manual. This is also the case for special orders
or when the device has been modified in line with new technology.
CAUTION!
Read this manual carefully and thoroughly before any operation
of the device, and especially before turning it on!
Manufacturer is not liable for any damages or faults caused by:
- violation of advice concerning operation and cleaning;
- use other than designed;
- alterations made by user;
- use of inadequate spare parts.
We reserve the right to make technical changes for purposes of developing and improving
the useful properties.
2.2 Copyright protection
The instruction manual including any texts, drawings, images or other illustrations is
copyright. No part of this publication may be reproduced, transmitted or used in any
form or by any means without permission in writing from the manufacturer. Any person
who commits any unauthorized act in relation to this publication shall be liable to claims
for damages. All rights reserved.
NOTE!
The contents, texts, drawings, pictures and any other illustrations are
copyright and subject to other protection rights. Any person unlawfully
using this publication is liable to criminal prosecution.
2.3 Declaration of conformity
- 33 -
Page 11

If you liked to dispose the packing, consider the regulations applicable
in your country. Supply re-usable packing materials to the recycling.
3. Transport, packaging and storage
3.1 Delivery check
Please check the delivery upon completeness and transport damage immediately
after receipt. In case of visible damage do not accept or accept the delivery with
reservation only.
Note the extent of damage on the carrier’s bill of delivery. Trigger off the complaint.
Hidden damages should be reclaimed immediately after notice, as claims for damages
can only be asserted within the effective period for complaints.
3.2 Packaging
Please do not throw away the covering carton of your device as it might be useful for
storage purposes, when moving or, in case of damages, when the device must be sent
back to a repair center. The outer and inner packing material should be removed
completely from the device before installation.
Please inspect the device upon completeness. In case any part is missing please
contact our customer service center immediately.
3.3 Storage
Keep the package closed until installation and under consideration of the outside
indicated positioning- and storage markings.
Packages should be stored under consideration of the following:
- do not store outdoors,
- keep it dry and dust-free,
- do not expose it to aggressive media,
- do not expose it to direct sunlight,
- avoid mechanical shocks and vibration,
- in case of longer storage (> 3 months) make sure you check the state
of the packaging and the parts regularly, if required refresh or renew.
- 34 -
Page 12

Description
Sous-Vide cooker SV G25L
Code-No.:
115130
Material:
Stainless steel
Realization:
Timer
Digital display
Dry-run protection
control: electronic
Properties:
- Memory function with 5 memory slots
- Programmable timer
- Acoustic timer
Basin:
Number of basins: 1
Basin size: W 300 x D 500 x H 200 mm
basin capacity: 25 litres
Temperature range:
25 °C to 90 °C
Temperature control:
in 0.1 °C steps
Time setting:
0 minutes – 99 hours, intervals time setting:
1 minute / 10 minutes / 30 minutes
Power:
2 kW / 220-240 V 50 Hz
Dimensions:
W 345 x D 575 x H 317 mm
Weight:
9.5 kg
Accessories:
Holder, frame for vacuuming bags, drain hose
4. Technical data
4.1 Technical specification
We reserve the right to make technical changes!
- 35 -
Page 13

Name
Sous-Vide cooker SV G16L
Code-No.:
115131
Material:
Stainless steel
Realization:
Timer
Digital display
Dry-run protection
control: electronic
Properties:
- Memory function with 5 memory slots
- Programmable timer
- Acoustic timer
Basin:
Number of basins: 1
Basin size: W 300 x D 330 x H 200 mm
basin capacity: 16 litres
Temperature range:
25 °C to 90 °C
Temperature control:
in 0.1°C steps
Time setting:
0 minutes – 99 hours, intervals time setting:
1 minute / 10 minutes / 30 minutes
Power:
2 kW / 220-240 V 50 Hz
Dimensions:
W 345 x D 400 x H 317 mm
Weight:
7.5 kg
Accessories:
Holder, frame for vacuuming bags, drain hose
We reserve the right to make technical changes!
- 36 -
Page 14

1
Lid handle
8
Cable holders / drain hose
2
Lid 9 Basin
3
Handle (2)
10
Handle
4
Water drain with valve
11
Frame for vacuuming bags
5
Feet (4)
12
Water outlet
6
Control panel
13
Water inlet
7
Body
7
6
5
1
2 3 11
12
9
10
8
13
4
4.2 Overview of parts
- 37 -
Page 15

5. Installation and operation
5.1 Installation
Positioning
Unpack the device and remove all package materials according to the valid
environment protection regulations.
Put the device on an even, stable, dry and waterproof surface which is resistant to
high temperature.
Never place the device on an inflammable surface.
Never place the device at the edge of a table to avoid tilting or falling.
Never put the device in a moist or wet area.
Do not place the device near open flame, electric heaters or other heat source.
Place the device so that the plug is easily accessible so as to quickly disconneet the
device if the need arises.
Before the first use, remove the protective foil from the device. Remove the foil slowly
not to leave glue residues. Remove possible glue residues with appropriate solvent.
CAUTION!
Never remove the nameplate and warning signs from the device.
- 38 -
Page 16

Fill the device with water before use, paying
attention to the “MIN” mark on the basin back wall.
When the water level is below the “MIN” mark,
the sensors installed below detect it and the
device does not start. The digital display shows
error code E001.
Always fill the device with water above
the “MIN” mark.
Connection
DANGER! Electric shock hazard!
The device can cause injuries due to improper installation!
Before installation and connecting the local power grid
specification should be compared with that of the device
(see rating plate).
Connect the device only in case of compliance!
The power supply circuit with the socket must be protected by the fuse of at least 16A.
Connect the device directly to a single grounded socket. Do not use any power bar or
multiple socket.
5.2 Operation
5.2.1 Preparation of the device
The device should be thoroughly cleaned before the first use. Follow
instructions in section 6 “Cleaning and maintenance”.
Connect the device to the single grounded socket.
Start the device by pressing ON/OFF key (1). (fig on page 40).
The “click” sound is heard. The digital display shows the current water temperature
in the basin.
- 39 -
Page 17

1
ON/OFF key
Press and hold the key for 1 second to turn the device on.
The LED indicator comes on and indicates that the device is connected
to the power supply.
2
Program key
Pressing of that key allows for selecting the saved program (M1-M5).
3
LED indicators “M1-M5”
Appropriate LED indicator comes on after selecting the saved program.
4
“Save” key
That key allows for saving the entered settings.
5
Digital temperature display
Shows current water temperature in the basin.
6
Digital time display
Shows time remaining to the cooking end.
7
Time setting key
Allows for setting time between 00:00 and 99:00 hours.
The default time is: 02:00.
8
Setting key decreasing temperature or time
9
Setting key increasing temperature or time
10
Temperature setting key
Temperature may be set in range from 25 °C to 90 °C.
The default temperature is 60 °C.
11
Start/Stop key
Pressing of that key starts and stops the cooking process.
3
4 2 5
6
10
11
8 1 7
9
5.2.2 Control panel / functions of operational elements
- 40 -
Page 18

5.2.3 Settings
Temperature
The default temperature is 60 °C. Temperature may be set in range from 25 °C
to 90 °C.
To set the required temperature press the temperature setting key (10) once.
The blinking default temperature appears in the upper part of the digital display.
When the temperature indicator blinks, keys “-” (8) or “+” (9) allow for
decreasing or increasing the preset value.
Pressing and holding the key during the first 2°C allows for setting every 0.1 °C,
and then every 1.0 °C.
Press and hold “Save” key (4) for 6 seconds to save the set temperature.
Hint: The device is set for temperature measurement in °C (Celsius) by default.
To switch it to °F (Fahrenheit) press the temperature setting key (10) until the digital
display shows °F.
Cooking time
It is preset to 02:00 hours by default. It is possible to set the cooking time in
range 0 minutes – 99:00 hours.
To set the required cooking time press the time setting key (7). The lower part
of the digital display shows blinking time of 02:00 hours. When the cooking time
indicator blinks, keys “-” (8) or “+” (9) allow for decreasing or increasing the
preset value.
There are the following intervals of setting the cooking time:
0 – 0.30 h in 1-minute intervals;
0.30 - 3 h in 10-minute intervals;
3 - 99 h in 30-minute intervals;
Press and hold “Save” key (4) for 6 seconds to save the set cooking time.
When the set cooking time elapses the device turns off and the digital display
returns to the temperature indicator after 5 seconds.
During the device turning off the digital display counts down 10 seconds before
complete turning off.
- 41 -
Page 19

Programs
It is possible to set up to 5 programs (M1 – M5). The required program should be set in
the following way:
Press the program key “M” (2) once. The M1 LED comes on. Now select free
program for data entering. After selecting the program press “Save” key (4).
Hint: to select another free program and enter data press the program key “M” (2),
depending on free program:
M2 – program 2 - 2 times
M3 – program 3 - 3 times
M4 – program 4 - 4 times
M5 – program 5 - 5 times
In case of accidental pressing the program key “M” (2) six times the LED indicators
go off. To return to data entering press the program key “M”. again.
To enter data into the individual programs press the program key “M” (2) again to
save the required temperature and cooking settings in program M1. The M1 LED
comes on.
Press the temperature setting key (10), the temperature indicator blinks. When the
temperature indicator blinks, keys “-” (8) or “+” (9) allow for setting the required
temperature in range from 25 °C to 90 °C. Finally press “Save” key (4).
The LED indicator for program M1 is on and the cooking time may be set. Press the
time setting key (7), the cooking time indicator blinks and the required cooking time
may be decreased or increased with use of keys “-” (8) or “+” (9). Finally press
“Save” key (4).
After entering settings for program M1 press the program key “M” (2) twice to
select free program M2 and enter data for it. Setting of all successive programs
should be realized in the same way as for program M1.
5.2.4 Cooking food
After entering the required temperature and time settings press the Start/Stop
key (11) to heat water in the basin to the preset temperature.
In order to use of previously set programs press the program key “M” (2)
depending on program to be used (e.g. three times for program M3). Then press
Start/Stop key (11) to heat water in the basin to the preset temperature. When the
device starts heating the acoustic signal is emitted.
- 42 -
Page 20

Place frame on the holder and insert prepared
vacuum-packed food into the frame.
Carefully remove the lid with use of handle.
Put the frame with holder and food in the
heated water on the basin bottom using the
handles.
Bigger food pieces in the vacuum bags should
be put directly into the basin next to the frame.
(Fig. on the right)
CAUTION!
HOT SURFACE! Risk of burns!
The device becomes very hot during the operation!
Do not touch the device! The device must be held only
by the designed handles and operational elements.
After reaching the preset temperature 3 - 5 acoustic signals are emitted. The time
indicator blinks.
Pay attention that the vacuum bags in the basin are fully immersed in water.
Otherwise press them with use of pliers.
Put the lid back on the basin.
Press the Start/Stop key (11). The cooking process begins and will be realized
according to the entered settings. The cooking time is counted down.
To read the remaining time during cooking press the time setting key (7).
The cooking time is shown in the lower part of the digital display.
When the cooking time elapses, the acoustic signal is emitted.
Hot steam is released while opening the lid during the
operation, and hot condensate accumulates under the lid.
Burns may occur. Use the protective gloves.
Carefully remove the lid and take prepared food from the basin with use of holder or
pliers.
WARNING! Risk of burns!
- 43 -
Page 21

Further setting instructions
In case of manual setting of the cooking process (without selecting any program saved
for M1 - M5) the temperature and cooking time may be changed at any moment during
the cooking process. Follow the instructions in section 5.2.3 “Settings”, subsections
“Temperature” and “Cooking time”.
Setting of the cooking time is NECESSARY for realization of the cooking process.
For setting 00:00 hours the cooking process lasts without the time limit until it is
interrupted or stopped by pressing the Start/Stop key (11).
In order to interrupt the power supply and turn the device off press the time setting
key (7) for 1 second.
Unless specified otherwise, each key must be pressed for longer than 0.5 second to
use it.
When the water level in the basin is above the “MIN” mark and the digital display
shows error code E001, ass some salt to water and stir it well.
6. Cleaning and maintenance
WARNING!
Before cleaning disconnect the device from the power
supply (pull the plug!).
Leave water and the device to cool down completely.
Water in the device may cause short-circuit, the device
must not be penetrated by water.
CAUTION!
Improper use may cause the device damage:
Never immerse the device fully in water or other liquids.
Never wash the device in the dishwasher.
The device is not designed for flushing with direct water jet. The device is not
suited for direct washing via water jets.
Never use any abrasive or aggressive cleaning agents to clean the device.
- 44 -
Page 22

o Drain water from the device after cooling down.
o Fix the supplied drain hose to the water drain
pipe (A) on the right side of the device.
Put appropriate container under the drain
hose and open valve (B) by moving it towards
the “OPEN” (fig. on the right). Wait for water
to drain completely.
B
A
Cleaning of device and accessories
o Clean the device thoroughly after each use.
o Remove all food from the device.
o Remove frame and holder. Clean the accessories thoroughly with warm water and
gentle washing agent. Rinse the cleaned elements in clean water and dry.
o Clean the basin with warm water and gentle washing agent.
o Rinse with clean water and empty the basin by draining water through the drain hose
(as described above) or through the basin edge. Dry the basin using the soft cloth.
o Pay attention to keep the water inlet and outlet clean.
Realization of the cleaning cycle
o Periodically (once a month) realize the cleaning/descaling process. Proceed in
the following way:
- Fill the basin with clean water above the “MIN” mark and add appropriate
amount of descaling agent (e.g. Bartscher descaler 190065). Follow the
descaler manufacturer’s instructions on the packaging.
- Set temperature to 40 °C and cooking time to 20 minutes. Press the Start/Stop to
start the cooking process (without food).
- When the preset time elapses, remove the plug from the socket and drain water
from the basin through the drain hose. Rinse the basin 2 - 3 times with clean
water or realize another cleaning cycle (without the cleaning / descaling agents)
to make sure that the chamber and water inlet and outlet are clean.
- When the vacuum bag cracks and the released food is in the water, it is also
required to realized the cleaning / descaling process as described above.
- 45 -
Page 23

Error -
Code
Cause
Solution
E001
The basin is empty
Fill the basin with water above the
“MIN” mark
The water level is too low
Fill the basin with water above the
“MIN” mark
The device is not placed on
the even surface
Place the device on the even surface
Despite correct filling with
water the sensors indicate too
low water level
Add some salt to the water and stir
well
Error in the electronic system
Contact the service company.
Storing the device
o If the device is not used for a long time, clean it according to the above description
and store in a dry, clean place, protected against cold, sun and, children.
Do not place any heavy objects on the device.
7. Possible Malfunctions
In case of operational anomalies before contacting the customer service department or
vendor check the troubleshooting table below.
In case of non-operational device:
1. Check the supply cable to make sure it is properly connected to the socket.
2. Check the supply cable for damages.
3. Check the socket by connecting another device.
4. Check if the ON/OFF key is illuminated. If so, make sure it was pressed for longer
than 1 second.
5. The digital is on, but the device does not start the cooking process, the display shows
the error code. The following error codes may be displayed:
- 46 -
Page 24

Error Code
Cause
Solution
E002
Contaminants in water have
clogged filter in the water outlet
Realize the cleaning cycle
(6. “Cleaning and maintenance”)
The vacuum bags clog the
water inlet in the basin
Put the vacuum bags again into the
basin. Always use supplied frame
and holder for the vacuum bags.
The vacuum bags clog the
water outlet in the basin
The vacuum bag has cracked
and its content clogs the water
inlet
Realize the cleaning cycle
(6. “Cleaning and maintenance”)
Dirt has accumulated in the
water circulation system
Error in the electronic system
Contact the service company.
E003
Error in the electronic system
Contact the service company.
E004
The lid is not placed correctly
Place the lid correctly
Error in the electronic system
Contact the service company.
E009
Error in the electronic system
Contact the service company.
C
The device operates
continuously for more than
200 hours
Realize the cleaning cycle
(6. “Cleaning and maintenance”)
If you cannot remove the malfunctions:
- do not open the body,
- notify the customer service point or contact the sales agent,
while providing the following information:
type of malfunction;
article and serial number (rating plate at the rear of the device);
date of purchase.
- 47 -
Page 25

For the disposal of the device please consider and
act according to the national and local rules and
regulations.
8. Waste disposal
Discarding old devices
At the end of its service life the discarded device has to be disposed in accordance with
the national regulations. It is advisable to contact a company which is specialized in
waste disposal, or just contact the local disposal service in your community.
WARNING!
To exclude any abuse and the dangers involved make
the waste device unfit for use before disposal.
For that purpose disconnect device from mains supply
and remove mains connection cable from the device.
Bartscher GmbH phone: +49 5258 971-0
Franz-Kleine-Str. 28 fax: +49 5258 971-120
33154 Salzkotten Service-Hotline: +49 5258 971-197
Germany www.bartscher.com
- 48 -
 Loading...