


3000/25
110437

Bartscher GmbH
Franz-Kleine-Str. 28
D-33154 Salzkotten
Germany
Phone: +49 5258 971-0
Fax: +49 5258 971-120
Service hotline: +49 5258 971-197
www.bartscher.com
Version: 1.0
Date of preparation: 2022-01-06
Original instruction manual
EN

EN
Name:
Noise-insulating hood 3000/25
Art. No.:
110437
Material:
stainless steel
Designed for:
Cutlery polishing machine 3000/25
Dimensions (W x D x H), in mm:
635 x 435 x 345
Weight, in kg:
7,0
Fig. 1
Technical Data
We reserve the right to implement technical modifications.
Operation
The noise-insulating hood reduces the background noise created when cutlery is
finely polished using cutlery polishing machine 3000/25 (110432).
The set includes:
– filling chute with noise insulation
– noise-insulating mat for cutlery basket
110437 3 / 8

EN
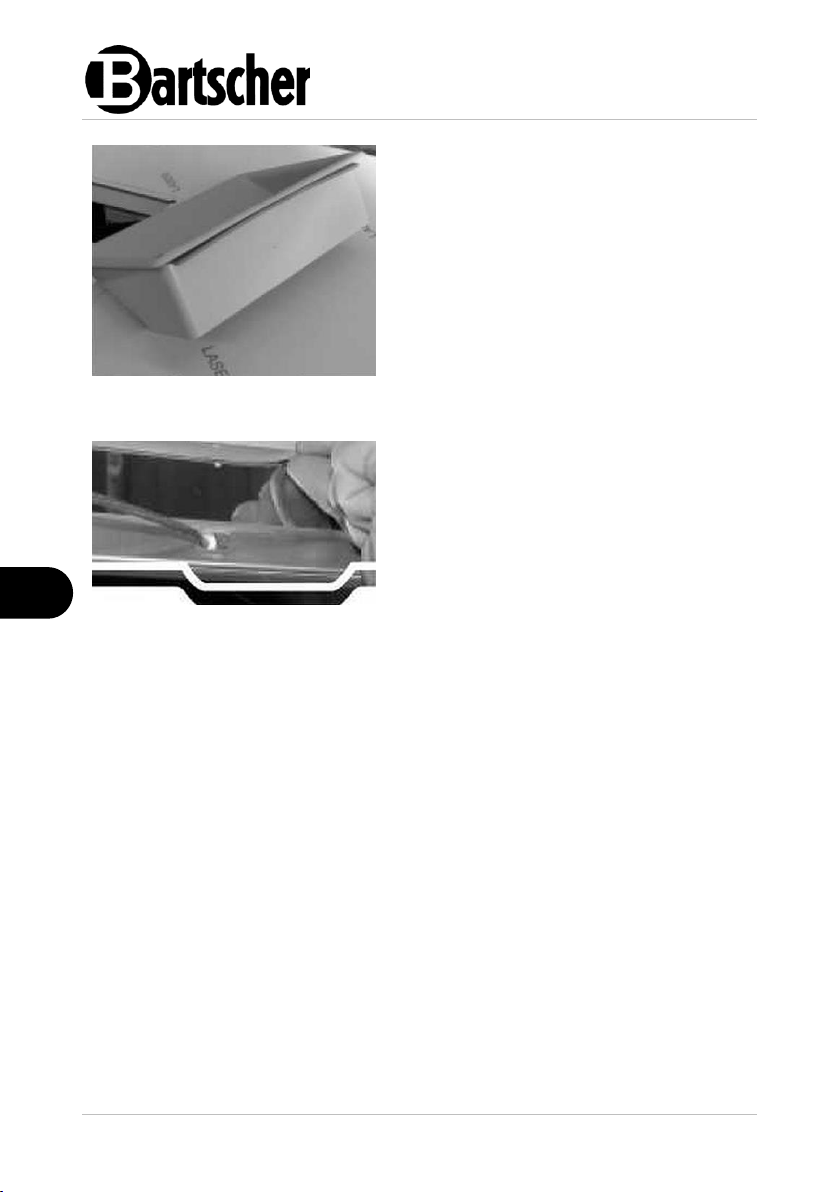
1. Remove interlocking screws i the top
section of the cutlery polishing machine
front panel.
Fig. 2
2. Fix both plastic spacer elements,
delivered with the noise-insulating
hood.
3. Perform the same action on both sides
of the cutlery polishing machine by
interlocking the spacer elements
(Fig. 3).
Fig. 3
4. In order to facilitate the assembly,
remove the screw at one side only, as
shown in Fig. 4.
Fig. 4
Assembly
4 / 8 110437

EN
5. Fix the noise-insulating hood on the
cutlery polishing machine, as shown in
Fig. 5:
- when the appliance is on a tabletop, fix
the noise-insulating hood with the use
of bottom openings.
- when the appliance is on a base, hook
the noise-insulating hood with the use
of top openings.
Fig. 5
6. Lift the noise-insulating hood and fix
the transverse bar, as shown in Fig. 6:
- when the appliance is on a tabletop, fix
the transverse bar with the use of
bottom openings.
- when the appliance is on a base, fix
the transverse bar with the use of top
openings.
Fig. 6
7. To remove rivets fixing the standard
chute, use a power drill. Use a drill bit
with the diameter of 3.25 mm.
Fig. 7
110437 5 / 8
EN
8. Remove the standard chute.
9. Prepare the special filling chute, which
is equipped with a sound-suppressing
rubber.
Fig. 8
10. Place the chute, making sure the
rubber is aligned as shown in the
figure.
Fig. 9
6 / 8 110437

EN
11. Fix the placed chute with new rivets at
the side opposite to the rubber.
Fig. 10
12. Insert the frame and fix the chute also
at the rubber side.
Fig. 11
110437 7 / 8

EN
Overview after assembly
inside
outside
Fig. 12
Fig. 13
The appliance with noise-insulating hood
Fig. 14
8 / 8 110437
 Loading...