

Page 1
Digital Microscope
10x-300x
User Guide
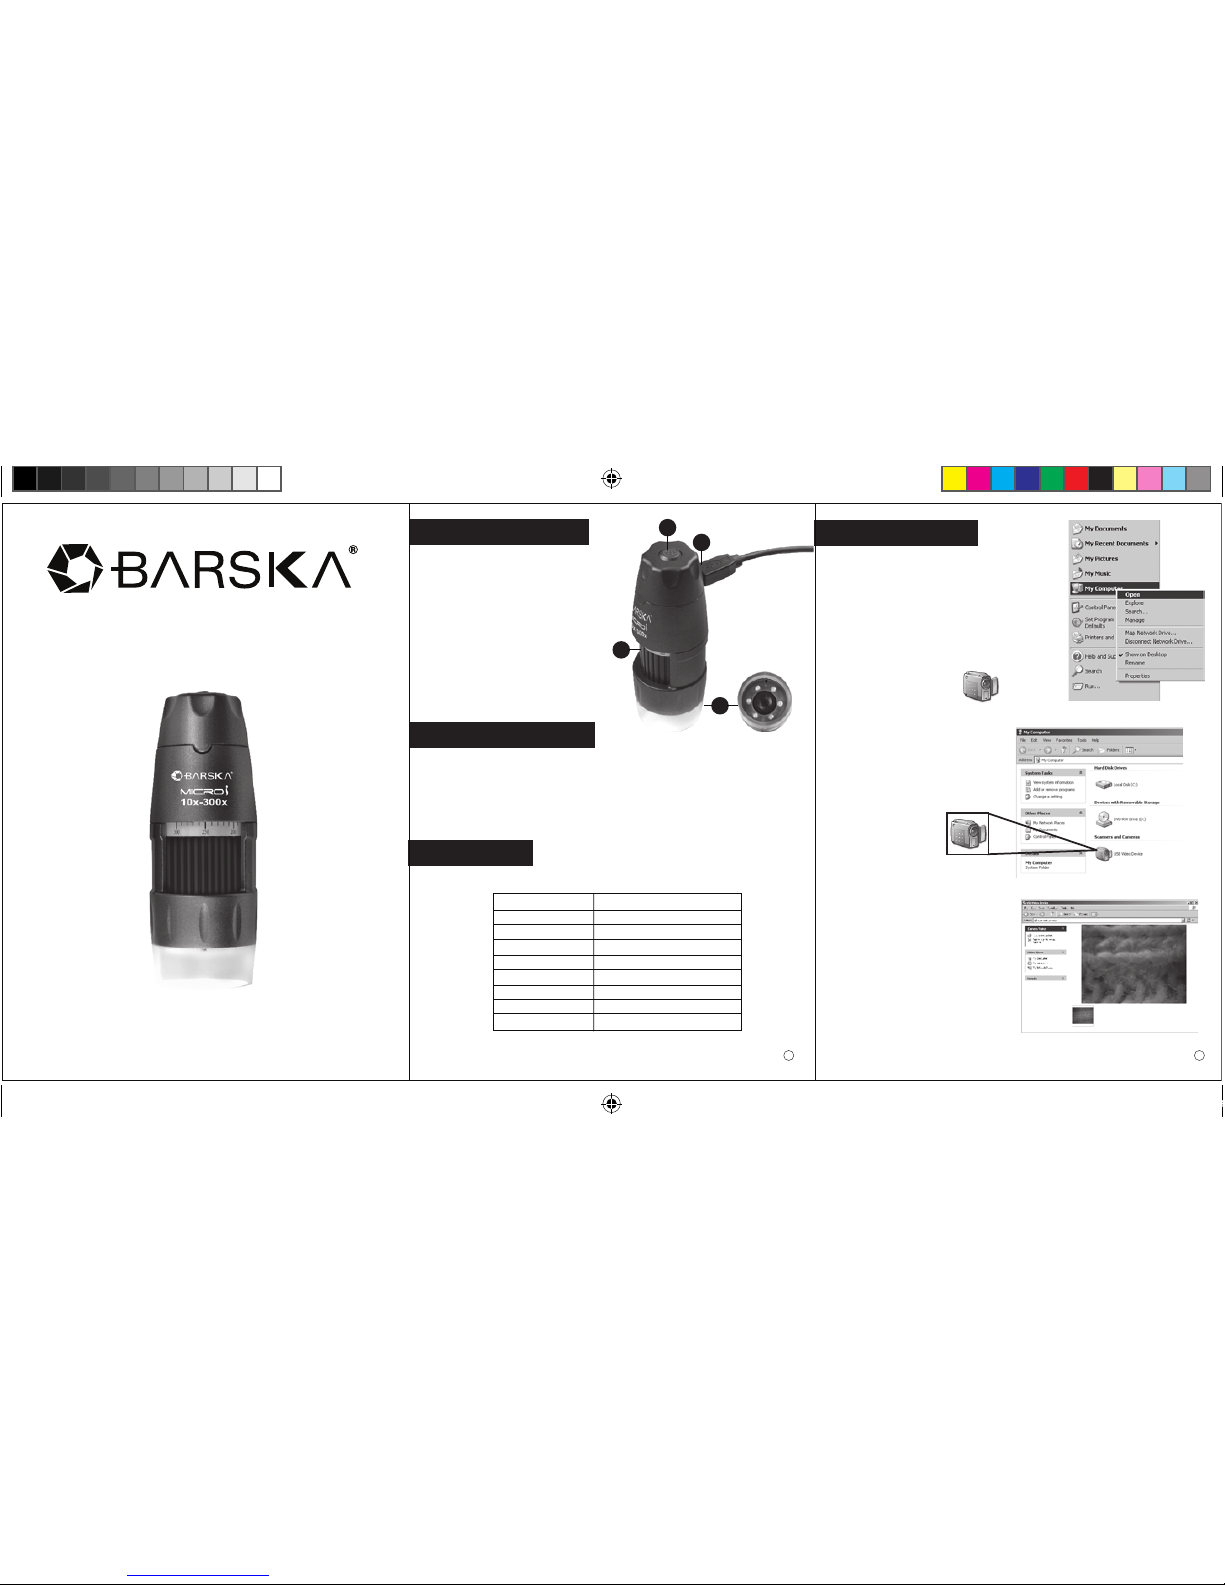
Location of Controls
Specifications
1. Shutter
2. USB Port
3. Adjustment Wheel
4. LED Lamp
- 6 LED Lights
Accessories Included
1. High Speed USB 2.0
2. Windows VISTA CD
3. User Guide
Windows XP Users
1. Connect your microscope to PC with the
included USB cable into the USB port, LED
lights will automatically turn on.
2. Go to “My computer” from “Start” on
desktop, then click “Open”.
3. “USB Video Device” icon will display
on screen automatically.
1 2
1
3
4
2
5. Preview screen will appear
(show-up time depends on PC
configuration).
NOTE: Only takes images
4. Double Click icon “USB Video
Device”.
La Verne, CA 91750 | USA | www.barska.comBC144
©2009 BARSKA
®
Magnification
Lens
Frame Range
Image Sensor
Resolution
Image Format
Illumination
OS Support
Interface
10x-300x
4G
640x480 30 fps
300K Pixel CMOS
640x480 Pixels
Still Image JPEG
6 LED Lights
Windows XP/ VISTA
High Speed USB 2.0
Untitled-1 1 8/17/09 11:59:12 AM
Page 2
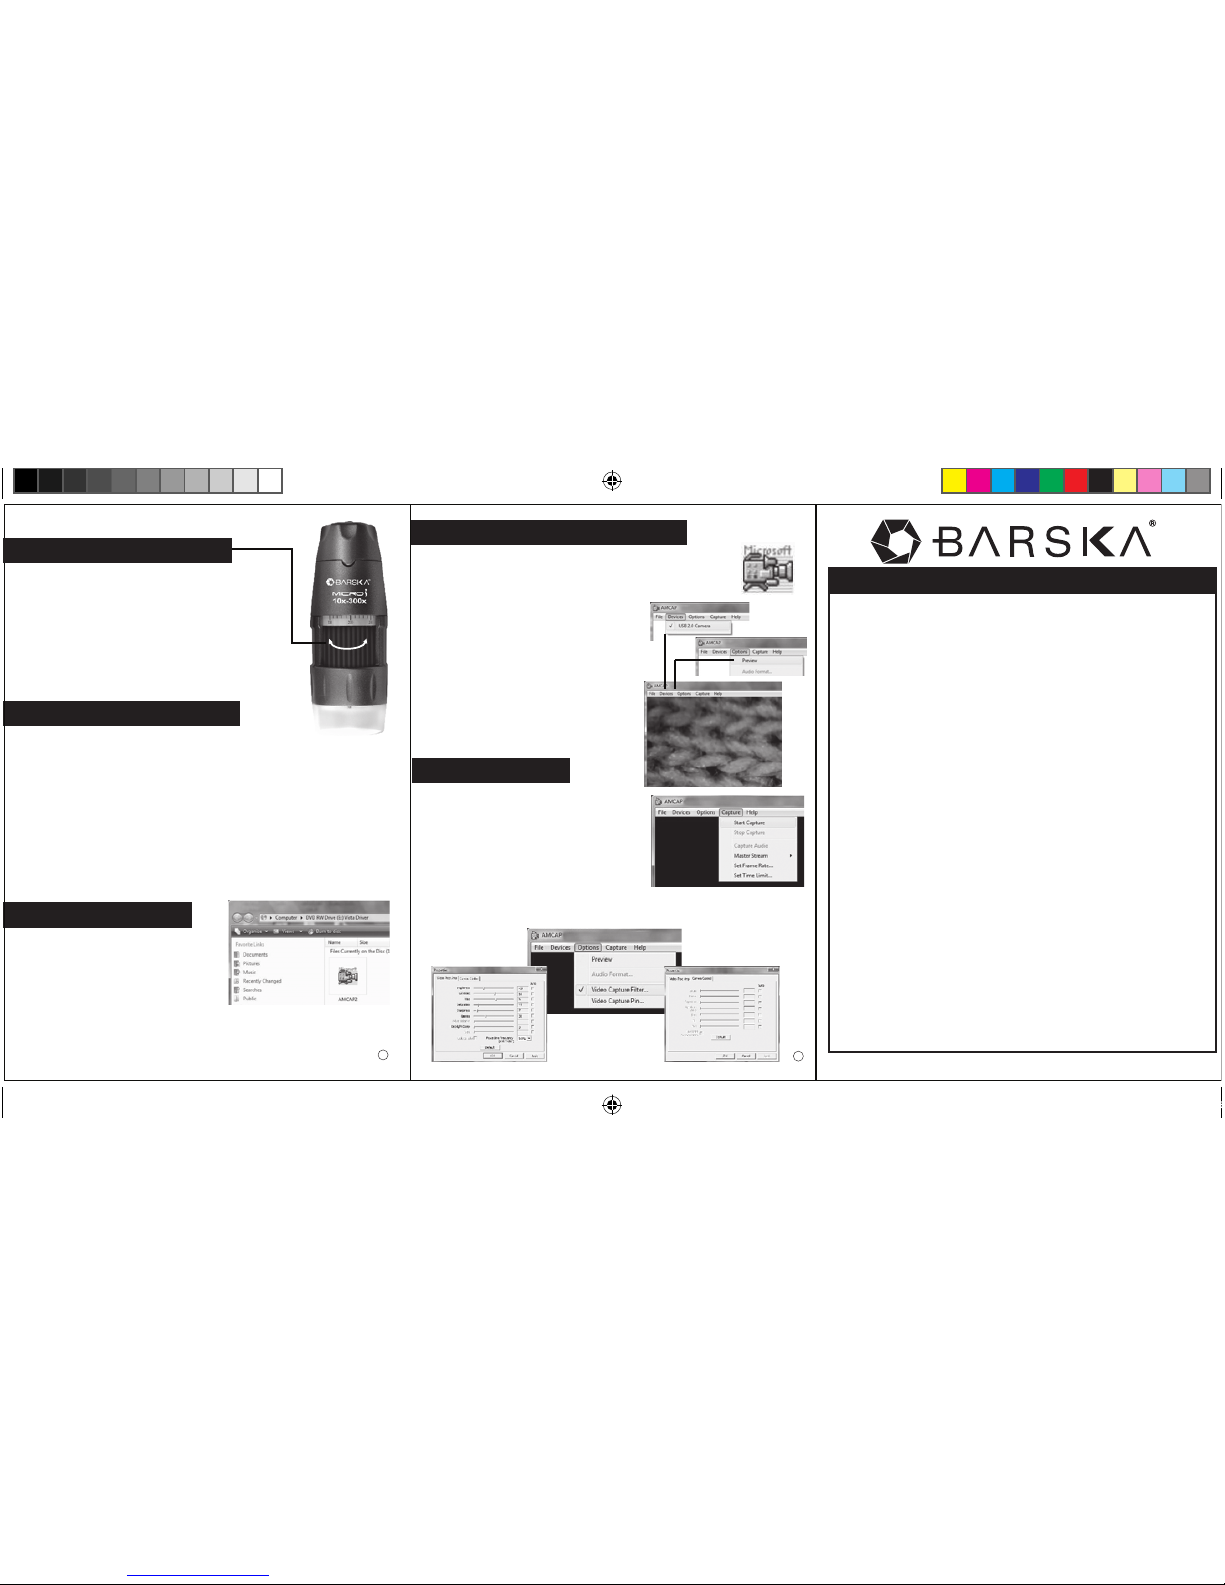
Recording Video
1. Go to ”Capture”.
2. Click “start capture” for video recording.
3. To change settings go to “Options”
“Video Capture Filter” .
NOTE: Remember to save your video
before you exit the program. Once microscope is disconnected from
computer videos are immediately deleted.
Focusing & Magnification
To adjust the focus, rotate the adjustment wheel
slowly until image on the screen is clearly
displayed. Marks on wheel show measurement
for your reference.
Windows VISTA Users continued
4. Under “V ista Driver” you can see file “AMCAP2”.
5. Copy and paste this folder or file on VISTA desktop or any
other place you like.
6. Click “AMCAP2” Preview Screen will
come out.
7. Go to “Device” from screen and choose
“USB 2.0 camera”.
8. Go to “Option” and click “Preview”.
9. Real time image will display on screen.
© 2009 BARSKA
®
8/09BC-144
DIGITAL MICROSCOPE
1 YEAR LIMITED WARRANTY
BARSKA® Optics, as manufacturer, warrants this new precision optical product to be free
of original defects in materials and/or workmanship for the length of time specified by this
warranty. This warranty does not include damage caused by abuse, improper handling,
installation, maintenance, normal wear-and-tear, unauthorized repairs or modifications
and tampering in anyway.
This warranty is limited to the original purchaser and is not transferable. This warranty
applies only to products purchased in the United States of America and Canada.
In the event of a defect within 30 days, the consumer must return the defective unit to
the BARSKA dealer (the place of purchase) at his/her own expense.
Beyond 30 days, BARSKA products should be sent to the following address for warranty
repairs. Products must be packed carefully and sturdily to prevent damage in transit, and
returned freight prepaid to:
BARSKA® OPTICS
1721 WRIGHT AVE.
LA VERNE, CA 91750
For additional and updated information
please visit our website at www.barska.com
Please email [email protected] or call 1.888.666.6769 for Return Merchandise Number
(RMA#) before any returns.
NOTE: All merchandise received without a valid RMA # will be returned to shipper at
his/her own expense.
Please include all of the following when returning BARSKA products for service and/or
replacement:
1. Please write your complete details (Name, Address, Telephone #, E-mail address,
RMA#, etc.)
2. Purchase receipt or Proof of Purchase. (Original/Copy)
3. A brief explanation of the defect.
4. A Check/Money Order of $20.00 to cover inspection, shipping and handling.
*Please allow 6-8 weeks for delivery.
This product will either be replaced or repaired at the discretion of the warrantor. If it's a
discontinued item, we will replace the product with an equivalent product. Should the
repair not be covered by this warranty, an estimate will be sent for your approval.
Non-warranty repairs or refurbishing of your optical products are always provided at a
reasonable cost.
BARSKA® Optics shall not be liable for any consequential, incidental and/or contingent
damages whatsoever. This warranty supersedes all previous BARSKA® Optics warranties.
Saving and Taking Pictures
1. Hold microscope steady and press the shutter on top of the unit for
a snapshot of the image.
2. Move your cursor to the picture you want to save. Right click your
mouse and choose “Save As”.
NOTE: Remember to save the picture before you exit the program.
Once microscope is disconnected from computer images are
immediately deleted.
3
4
Windows VISTA Users
1. Insert CD in CD-ROM.
2. Connect your microscope to the
PC with the included USB cable into
USB port, LED lights will automatically
turn on.
3. Open CD & go to the folder “Vista Driver ”.
NOTE: Only records video
Untitled-1 2 8/17/09 11:59:15 AM
 Loading...