

Page 1
Quick Start Guide
Faux Panel Interior Installation Instructions
General Tools and Materials:
Caulk Gun
Safety
Glasses
Laser
Small Paint
Brush
Consult full, project-specic installation guide before starting:
www.barrondesigns.com/project-resources/installation-instructions/panels-installation/
Panel Installation
Clean Cloth
T-square
Color
Coordinating
Textured
Caulk
Cotton
Swabs
Tape
Measure
Level
Touchup Kit
Loctite® PL®
Premium® 3X
Construction
Adhesive
Water
Panels Chalk Line /
Wire BrushTack Cloth
Pencil
Wood Cutting
Saw with
Finish Blade
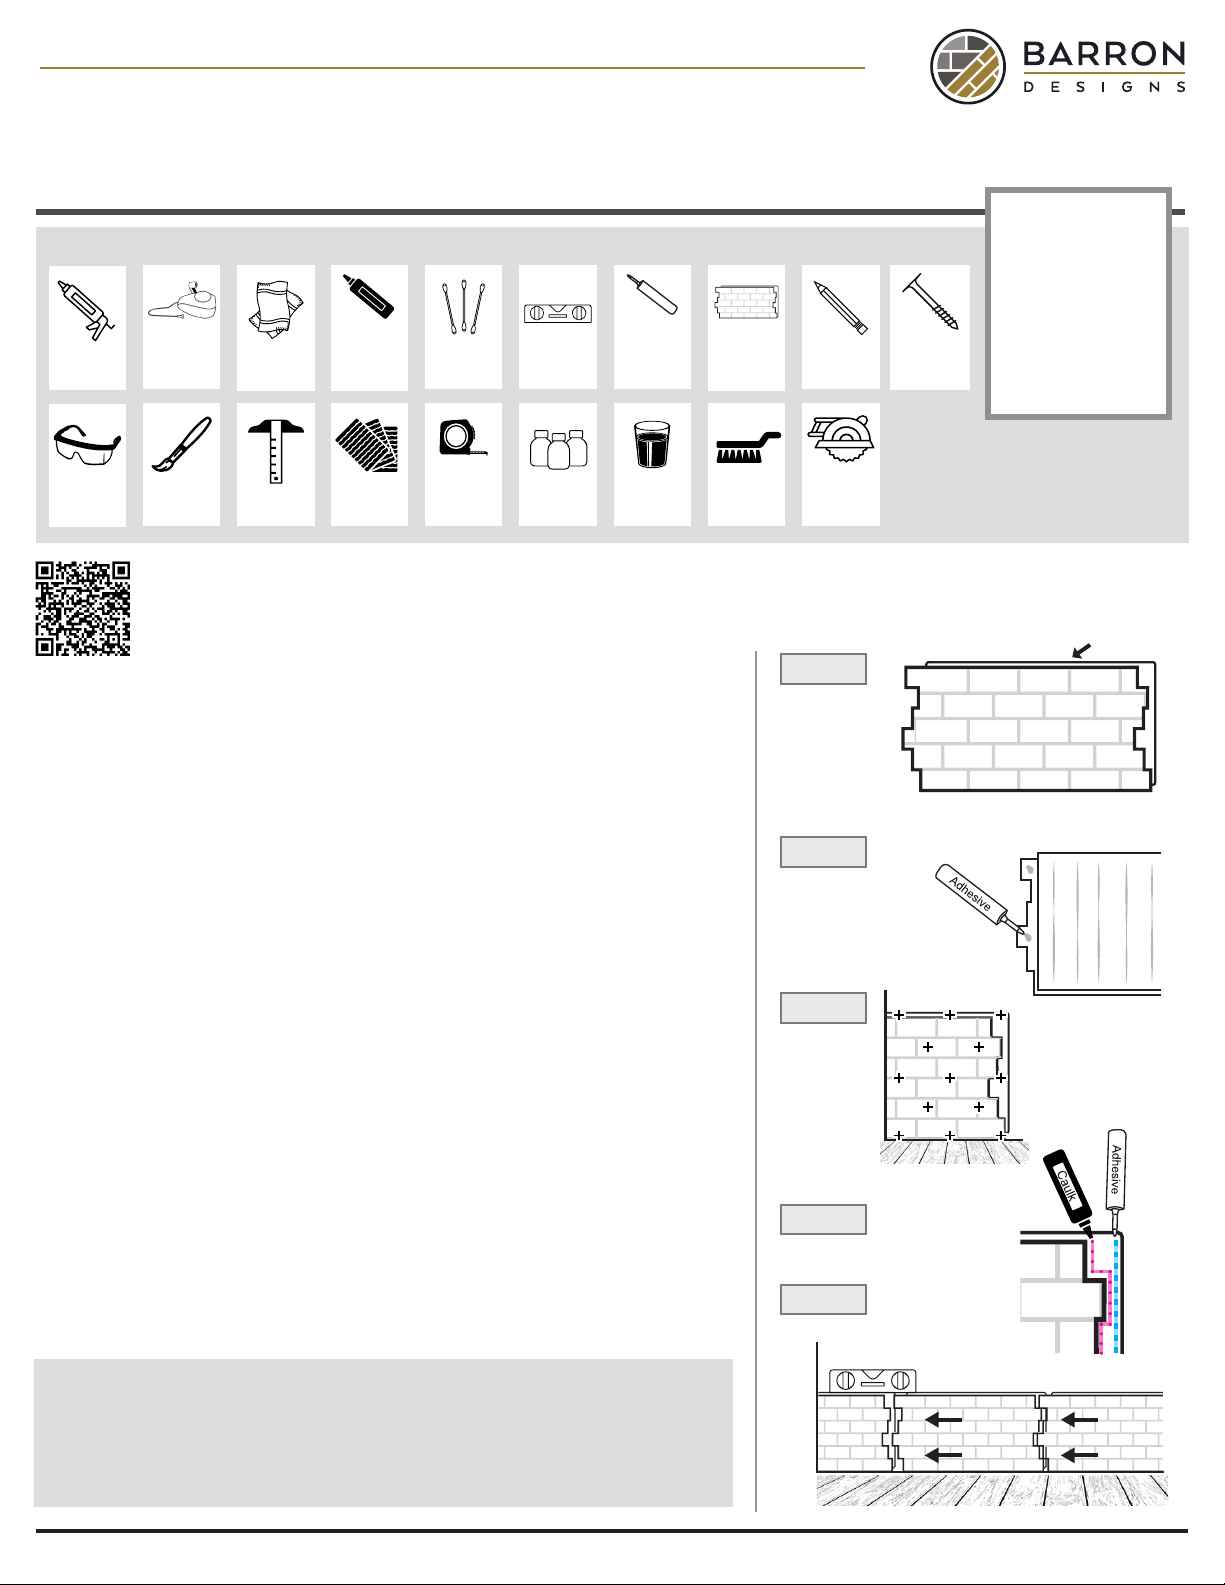
Figure A
24 Hours Before
Starting
Acclimate all panels
by storing them at
in the installation
location (but away
Deck
Screws
NOTE: (1) tube of Loctite PL
Premium 3X adhesive is typically
needed for every (3) panels. (1) tube
of textured caulk is typically needed
for every (4) panels.
from moisture and
direct sunlight or other
heat sources) for at
least 24 hours.
A
1. Ensure that the installation surface is structurally sound and clean.
2. Orient the panels with the smooth, at lip (A) facing up. Start with the
bottom row and go up (Figure A).
3. Measure the wall and lay panels out. Make necessary cuts to start the row
and accommodate obstacles. Trim the rst panel and use the slot side to
start the run. The style of panel you selected will dictate if the installation
should go right to left (ngers on right) or left to right (ngers on left).
4. Apply construction adhesive to the back of the panel in vertical lines 4-6”
apart (Figure B). Adhere the panel to the wall using a slight twisting motion
to ensure good contact. Secure by inserting (1) screw per foot throughout
the panel (Figure C). Screws need to be long enough to penetrate the panel
and substrate.
5. Add a bead of caulk where the face meets the side lip of the panel to the
slot side of the installed panel. Apply a bead of adhesive to the lip of the
panel about 1 inch from the face (Figure D).
6. Install next panel ensuring that each panel interlocks and is straight (Figure E).
7. Once rst row is complete, proceed to the next row, taking care to stagger
the seams.
8. Touch-up by adding caulk to ll in screw holes and using the base coat,
paint and wash (in that order) from the touch-up kit.
Figure B
Figure C
Figure D
Figure E
Finger Side
Slot Side
WARNING:
• Be sure to obey all safety rules and recommendations set forth by tool manufacturers.
• Wear safety glasses during the entire installation process.
• Be sure to follow all applicable building codes.
• Always comply with clearances set forth by the manufacturer of stoves, replaces,
furnaces, and any other heat source.
Questions? Our Customer Experience & Design Support Team is here to assist you Mon-Fri: 9AM to 5PM EST at (800) 651-4223.
 Loading...