

Page 1

page1
Cold frame directions and uses
To get the most out of a garden, you can extend the growing season by sheltering plants from cold weather
both in early spring and during the fall. Very ambitious gardeners harvest greens and other cool-weather
crops all winter by providing the right conditions. And using a cold frame can lengthen your growing season.
The ideal location for a cold frame is a southern or southeastern exposure with a slight slope to ensure good
drainage and maximum solar absorption. A sheltered spot with a wall or hedge to the north will provide
protection against winter winds. Sinking the frame into the ground somewhat will also provide protection,
using the earth for insulation. To simplify use of the frame, consider a walkway to the front.
In early spring, a cold frame is useful for hardening-off seedlings that were started indoors or in a
greenhouse. This hardening-off period is important as seedlings can suffer serious setbacks if they
are moved directly from the warmth and protection of the house to the garden. The cold frame
provides a transition period for gradual adjustment to the outdoor weather. It is also possible to
start cool-weather crops in the cold frame and either transplant them to the garden or grow them
to maturity in the frame.
Spring and summer uses of the cold frame center on plant propagation. Young seedlings of hardy
and half-hardy annuals can be started in a frame many weeks before they can be started in the
open. The soil in a portion of the bed can be replaced with sand or peat moss or other medium
suitable for rooting cuttings and for starting sweet potato slips.
Fall is also a good time for sowing some cool-weather crops in frames. If provided with adequate
moisture and fertilization, most cool-season crops will continue to grow through early winter in the
protected environment of the cold frame. Depending on the harshness of the winter and whether
or not additional heating is used, your frame may continue to provide fresh greens, herbs, and root
crops throughout the cold winter months.
Page 2
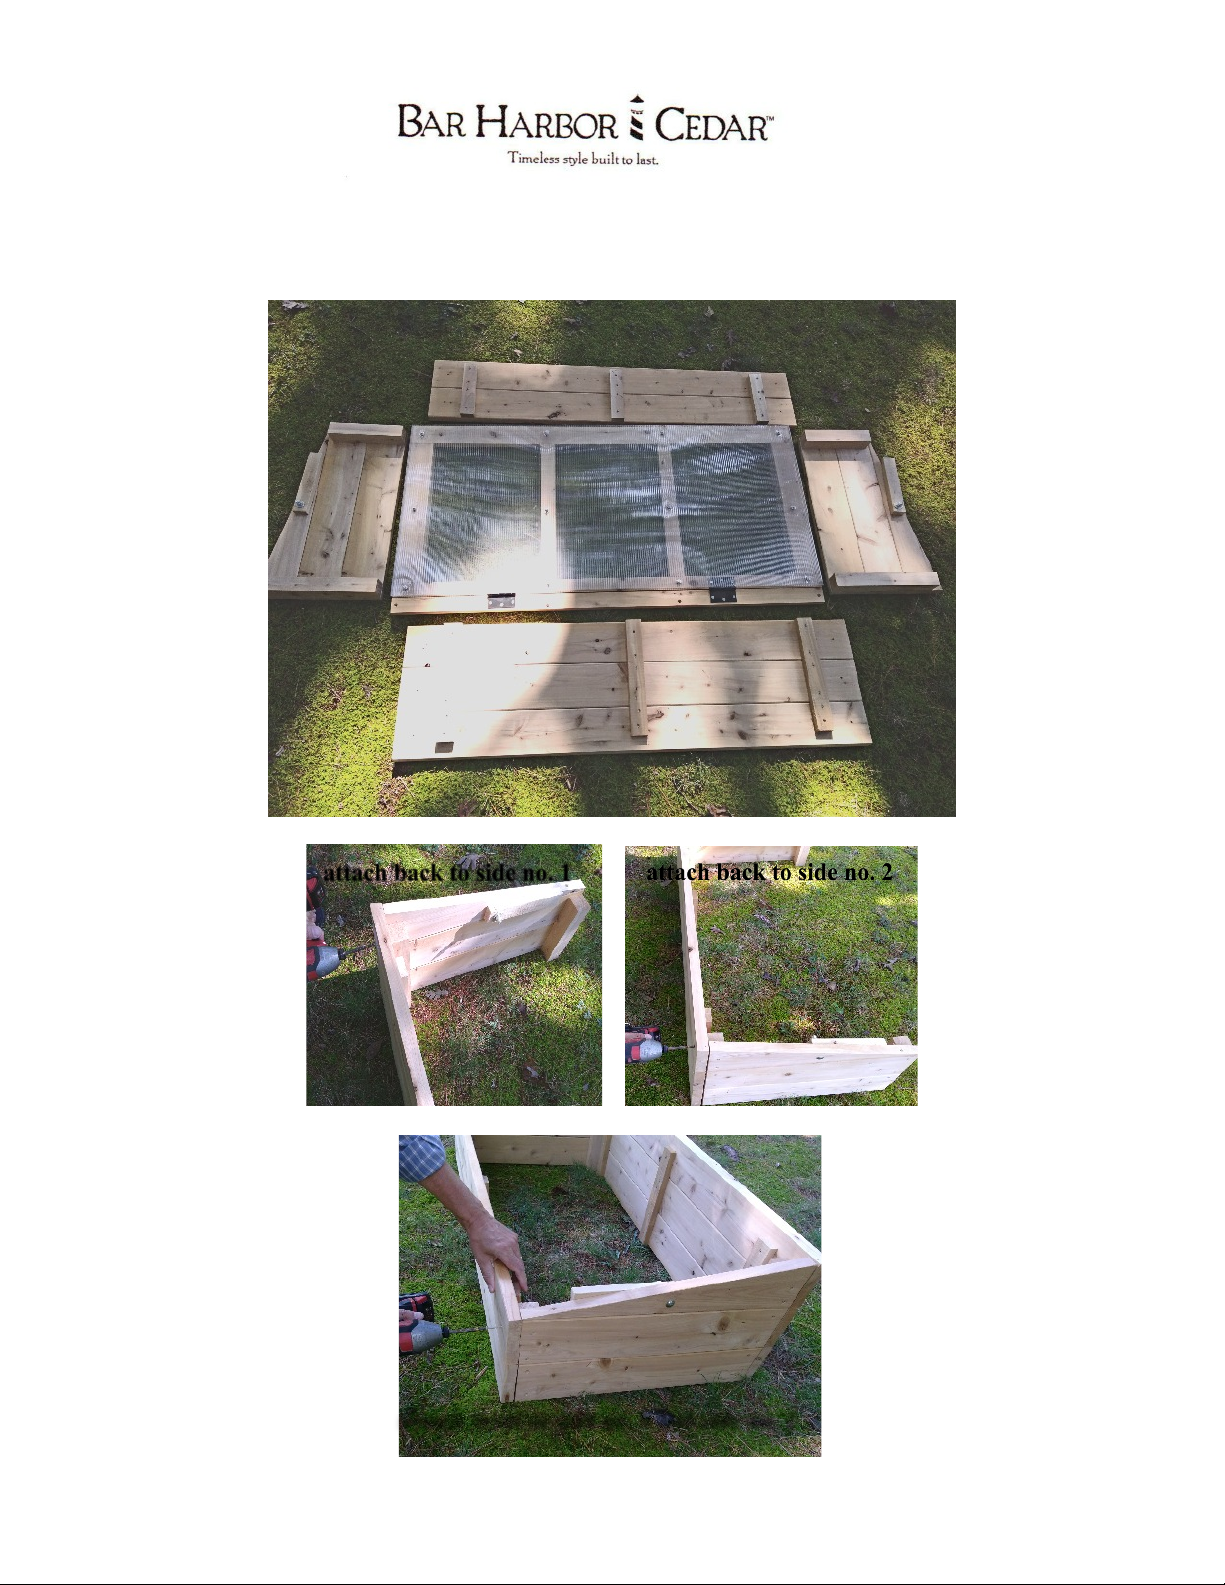
Assembly
front
back
page2
side no. 1
side no. 2
top lid
attach back to side no. 1 attach back to side no. 2
attach front to side no. 1 and side no. 2
Page 3
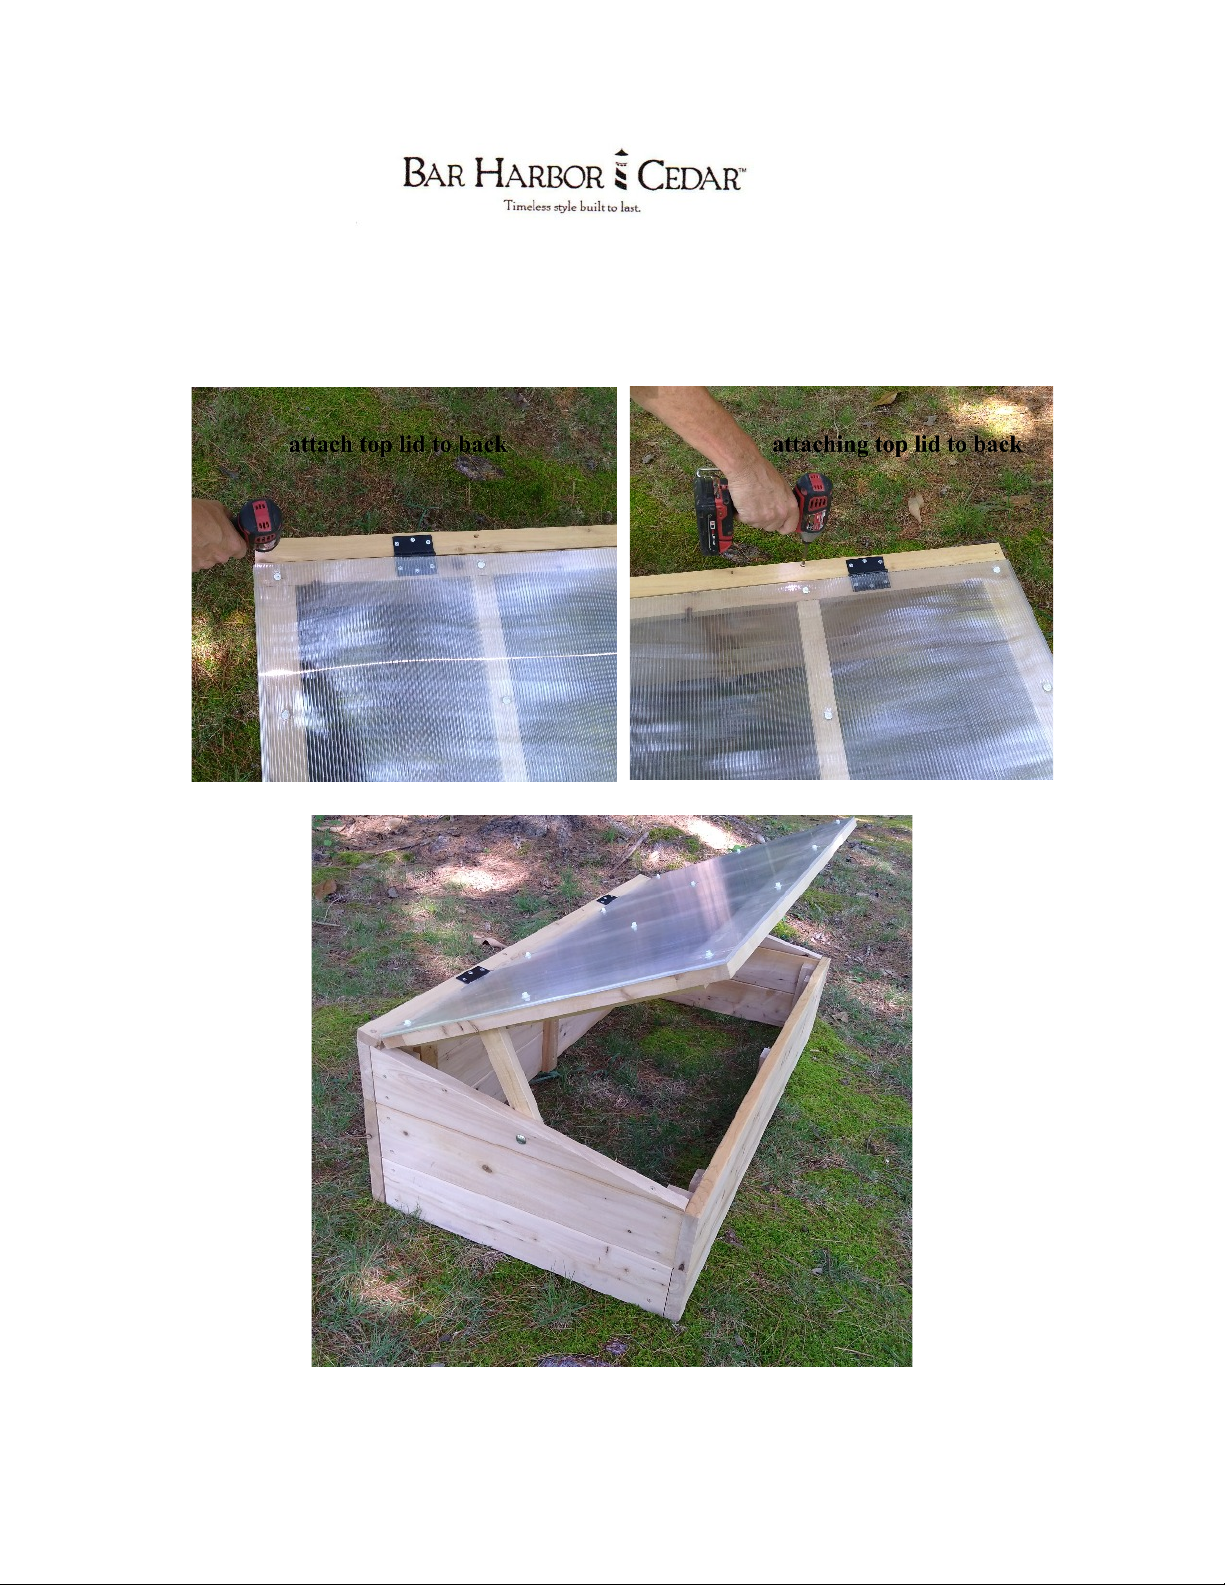
completed
Assembly
page3
attach top lid to back
attaching top lid to back
 Loading...