

Page 1
BUOYANCY COMPENSATOR MANUAL
Page 2

TABLE OF CONTENTS
SUBJECT HEADING PG
YOUR PURCHASE, OUR COMPANY 2
DEFINITIONS 3
BARE BC MODELS 5
ASSEMBLY 9
INTEGRATED WEIGHT SYSTEM 12
USE OF THE BARE BCD 13
BARE BCD WARRANTY 16
SIZE CHART 17
NOTES 18
SERVICE RECORD 20
This manual reflects correct and current information about BARE
BCDs as of January 2010. For your own safety and to ensure you are
following the most up to date information and advice, please refer
to www.baresports.com.
Les informations dans ce manuel sont courantes et exactes à
partir de 15 Janvier 2008 aux spécifications des BCDs BARE. Pour
s’assurer de votre sécurité et que vous suivez les informations et les
avis courants, prière de vous réferer à notre site web
www.baresports.com
Ce manuel est aussi disponible en Français.
1
Page 3

THE RIGHT PURCHASE
Thank you for purchasing a BARE Buoyancy Compensator. You
should feel confident that it will provide you with many years of satisfaction. Our level of commitment is exemplified by the quality of
workmanship of your new Buoyancy Compensator and our ability to
oer a 3-year Guarantee. It is our goal to ensure that everything we
do is Done Right. That means continuing to exceed your expectations through unparalleled customer service, new product oerings
and continued market innovations.
Dive safely and enjoy yourself!
OUR COMPANY
For over 30 years, BARE has been designing and producing wetsuits
and drysuits for SCUBA diving, watersports, oshore safety and
survival. Today, BARE is distributed and sold in over 56 countries
making it a global leader in aquatic exposure protection. Headquartered on the coast of British Columbia - consistently voted the best
coldwater diving in the world - BARE has easy access to extreme
conditions that provide a demanding environment for testing products.
At BARE we constantly strive to advance the technology used to
produce our products, so you can comfortably enjoy your favorite
activity in the water even under the most extreme conditions.
2
Page 4
DEFINITIONS
Certain aspects of SCUBA diving in general and SCUBA diving using
a Buoyancy Compensator in particular can be inherently hazardous
if ignored or misunderstood.
BARE uses certain captions throughout this BUOYANCY COMPENSATOR MANUAL to emphasize the importance of following the
guidelines.
!!! DANGER !!!
Refers to an immediately dangerous situation that if not averted
will result in death or serious injury.
!! WARNING !!
Refers to a potentially dangerous situation that if not averted
could possibly result in death or serious injury or damage to the
BC that could possibly result in death or serious injury.
! IMPORTANT !
Refers to a potentially dangerous situation that if not averted
may result in minor to moderate injury to you or damage to the
BC.
3
Page 5
!! WARNING !!
This Owner’s manual contains information specific to BARE
Buoyancy Compensators. It is not a training manual and does not
replace the need to participate in and complete a SCUBA diving
certification course taught by an instruction with an internation-
ally recognized certification agency.
!! WARNING !!
Use of any BARE Buoyancy Compensator (BC) without complete
certification training can result in serious injury or death. BARE
Buoyancy Compensators are designed to provide the capabil-
ity of buoyancy control at depth. They are NOT approved by
any Coast Guard, SOLAS, IMO or other maritime organization as
a Personal Flotation Device as they will not guarantee face up
flotation for the user.
! IMPORTANT !
Read and understand this User Manual completely and learn the
features and components of your BC. Practice the use of the BC
in a controlled environment - swimming pool or sheltered shallow
water – with all the equipment you plan to use – before venturing
into open water. Understand and be aware of the performance
characteristics of your BARE BC under all diving conditions.
If there is any information in this manual that you do not understand, is unclear, or you feel is insucient, please contact your nearest BARE dealer, or a BARE Customer Service Representative.
North America
T: 604.533.7848
F: 604.530.8812
E: [email protected]
Customer Service: 1.800.663.0111
International
T: +356-21-693323
F: +356-21-693343
E: [email protected]
4
Page 6

BARE BC MODELS
BLACKJACK - Front Adjustable Style
Front adjustable BCs oer ease of adjustability, with the wrap–
around air cell providing stability in the water and exceptional comfort while inflated at the surface. Single Bladder construction.
• Bladder material: 1000 Denier Cordura with 3.5 oz/square yard
Polyurethane
• Main body/pockets and shoulder straps: 1000 Denier Cordura
with 1.5 oz/square yard Polyurethane
• Pocket trim: 1680 Denier Nylon
• Buoyancy: S-35 lbs/15.8 kg/155 N, M-38 lbs/17.2 kg/169 N,
L-44 lbs/19.9 kg/195 N, XL-48 lbs/21.7 kg/213 N
• Main releasable weight pockets: 15 lbs/6.8 kg maximum each
• Supplemental weight/accessory pockets with 1” side release
buckle hold 10 lbs/4.54 kg each
• Rear trim weight pockets hold 5 lbs/2.27 kg each. Full flap adjustable security closure with 1” Nylon webbing and side release
buckle
• Fully padded hard-back pack with carrying handle
• Soft polymer “gripper” section inset in back pack to prevent
tank slippage
• Tank height adjustment strap: 1” nylon webbing with Ladderlock
adjustment
• Standard tank band and Steel/Delrin cam buckle can be replaced with all steel upgrade by dealer or consumer
• Cummerbund: Size adjustable padded nylon cummerbund with
2” centre-pull side release buckle. Small zippered pocket at centre for car keys, C card. Also includes nickel/brass grommet for
accessory attachment
• Main shoulder strap adjustment buckle: 1.5” side release buckles
with extended thumb ledge for easy loosening adjustment
• D-Rings: 4 on shoulder straps (welded pre-bent stainless steel).
4 on hips (welded stainless steel)
• Cargo holders on hips: 2 x 1.5” side release buckles
• Inflation: Corrugated rubber oral inflation (hose is neoprene rub-
ber)
• Auto-inflate choice of basic or premium inflator, or breathable
inflator. Inflation system equipped with cable dump for rapid
exhaust
• Pull dump: One at right hip. Pull dump toggles are high contrast
light charcoal color “T” handles for good visibility and easy location
• Weight quick dump system: 15 lbs/6.8 kg per side, with high
contrast light charcoal color “T” handles for good visibility and
easy location
5
Page 7

• Chest strap: 1” nylon with centre-pull side release buckle. Unique
system allows easy strap location adjustment to avoid drysuit
valve on chest
• Accessory attachment grommets: Nickel plated brass - four on
left pocket for knife or other accessory attachment, one on right
pocket for retractable lanyard installation
BLACKWING - Back Wing Style for Men
Back wing or back floatation BCs oer streamlined construction
with all the flotation at the back of the diver, leaving the front area
low profile and clear for the attachment of accessory items
CURVE - Back Wing Style for Women
Back wing or back floatation BCs oer streamlined construction
with all the flotation at the back of the diver, leaving the front area
low profile and clear for the attachment of accessory items. The
curve has all the same features and benefits as the BLACKWING,
with a harness ergonomically designed and sized for women.
• Bladder material: 12 Mil Clear Virgin Polyurethane
• Main body/pockets and shoulder straps: 1000 Denier Cordura
with 1.5 oz/square yard Polyurethane
• Pocket trim: 1680 Denier Nylon
• Wing buoyancy: 48 lbs/21.7 kg/213 N (Men’s), 35 lbs/15.8 kg/
155 N (Women’s)
• Main releasable weight pockets: 15 lbs/6.8 kg (Men’s), 10 lbs/4.5
kg (Women’s) maximum each
• Supplemental weight/accessory pockets with 1” side release
buckle hold 10 lbs/4.54 each
• Fully padded hard-back pack with carrying handle
• Tank height adjustment strap: 1” nylon webbing with Ladderlock
adjustment
• Standard tank band and Steel/Delrin cam buckle can be replaced with all steel upgrade by dealer or consumer
• Cummerbund: Size adjustable padded nylon cummerbund with
2” centre-pull side release buckle. Small zippered pocket at centre for car keys, C card. Also includes nickel/brass grommet for
accessory attachment
• Main shoulder strap adjustment buckle: 1.5” side release buckles
with extended thumb ledge for easy loosening adjustment
• D-Rings: 4 on shoulder straps (welded pre-bent stainless steel).
4 on hips (welded stainless steel)
• Cargo holders on hips: 2 x 1.5” side release buckles
• Inflation: Corrugated rubber oral inflation (hose is neoprene rub-
ber)
• Auto-inflate choice of basic or premium inflator, or breathable
6
Page 8

inflator. Inflation system equipped with cable dump for rapid
exhaust
• Pull dump: One at right hip. Pull dump toggles are high contrast
light charcoal color “T” handles for good visibility and easy location
• Weight quick dump system: 15 lbs/6.8 kg per side, with high
contrast light charcoal color “T” handles for good visibility and
easy location
• Chest strap: 1” nylon with centre-pull side release buckle. Unique
system allows easy strap location adjustment to avoid drysuit
valve on chest
• Accessory attachment grommets: Nickel plated brass - four on
left pocket for knife or other accessory attachment, one on right
pocket for retractable lanyard installation
VOODOO - Combination Back Wing with Additional Side Air
Cells
The VOODOO oers all the advantages of back floatation during
the dive, with the ability to activate supplemental side air cell buoyancy for stability and “Armchair Comfort” on the surface.
• Bladder material: 1000 Denier Cordura with 3.5 oz/square yard
Polyurethane
• Main body/pockets and shoulder straps: 1000 Denier Cordura
with 1.5 oz/square yard Polyurethane
• Pocket trim: 1680 Denier Nylon
• Wing buoyancy: 48 lbs/22.7 kg/213 N
• Side buoyancy: 17 lbs/7.7 kg/75 N
• Main releasable weight pockets: 15 lbs/6.8 kg maximum each
• Supplemental weight/accessory pockets with 1” side release
buckle hold 10 lbs/4.54 each
• Fully padded hard-back pack with carrying handle
• Tank height adjustment strap: 1” nylon webbing with Ladderlock
adjustment
• Standard tank band and Steel/Delrin cam buckle can be replaced with all steel upgrade by dealer or consumer
• Cummerbund: Size adjustable padded nylon cummerbund with
2” centre-pull side release buckle. Small zippered pocket at centre for car keys, C card. Also includes nickel/brass grommet for
accessory attachment
• Main shoulder strap adjustment buckle: 1.5” side release buckles
with extended thumb ledge for easy loosening adjustment
• D-Rings: 4 on shoulder straps (welded pre-bent stainless steel).
4 on hips (welded stainless steel)
• Cargo holders on hips: 2 x 1.5” side release buckles
• Inflation: Corrugated rubber oral inflation (hose is neoprene rub-
ber)
7
Page 9

• Auto-inflate choice of basic or premium inflator, or breathable
inflator. Inflation system equipped with cable dump for rapid
exhaust
• Pull dump: One at right hip. Pull dump toggles are high contrast
light charcoal color “T” handles for good visibility and easy location
• Weight quick dump system: 15 lbs/6.8 kg per side, with high
contrast light charcoal color “T” handles for good visibility and
easy location
• Chest strap: 1” nylon with centre-pull side release buckle. Unique
system allows easy strap location adjustment to avoid drysuit
valve on chest
• Accessory attachment grommets: Nickel plated brass - four on
left pocket for knife or other accessory attachment, one on right
pocket for retractable lanyard installation
• Premium badging and embroidery
IMPORTANT NOTES ON VOODOO FUNCTION AND USE
1) The VOODOO is designed operationally to be a back wing only
style BC during the submerged portion of the dive.
2) It is made up of two connected air cells, the back wing cell and
the side pockets cell. The side pocket cell is connected to the back
wing cell by a cable activated internal Over-Pressure (OP) valve.
IMPORTANT - this OP valve is set to a higher break pressure than
the external OP valve on the rear cell. Excess pressure will always be
vented from the rear cell to the outside, not into the pocket cell.
3) When on the surface before a dive, inflate the rear cell as usual
using the power or oral inflator. If you want some air in the pocket
cell, pull on the toggled lanyard attached to the right pocket. Air will
flow from the rear cell into the pocket cell. If you want more air in
both cells, keep pulling the toggle while depressing the inflate button on the power inflator.
4) To submerge, FIRST dump the air from the pocket cell via the
dump valve on the left side of the pocket cell. Then dump the air
from the main rear cell with the cable activated shoulder dump
valve, the deflate button on the inflator unit, or the pull dump valve
located on the right rear hip.
THE POCKET CELL INFLATION IS “ONE-WAY” ONLY. AIR DOES
NOT AND NEVER WILL UNDER ANY CIRCUMSTANCES FLOW
BACK INTO THE REAR CELL. IT MUST BE DUMPED USING THE
TOGGLED LANYARD ON THE OP VALVE LOCATE ON THE LEFT
SIDE POCKET CELL. THE SIDE POCKET CELLS ARE NOT DESIGNED TO BE USED OR INFLATED UNDERWATER UNLESS THE
8
Page 10
DIVER RECOGNIZES THAT THEY MUST BE VENTED INDEPENDENTLY ON ASCENT.
5) During the dive, simply use the VOODOO as you would any other
back wing BC. If you add air to the side pockets during the dive, you
will have to dump air from both SIDE AND REAR cells to maintain
neutral buoyancy on ascent.
!!! DANGER !!!
Refers to an immediately dangerous situation that if not averted
will result in death or serious injury.
6) Air will never “accidentally” move from rear to pocket cell. It must
be a conscious step by the diver.
ASSEMBLY
! IMPORTANT !
Recommended cylinder size range in Europe is 10, 12
and 15 litres.
Mounting the BARE BC to a SCUBA Cylinder:
Slide the Tank Band Assembly over the SCUBA cylinder until the
BC is at the desired height. At this point you may adjust the length
of the Height Adjustment Strap so that it hangs over the tank valve
suspending the BC at the same height every time. This convenient
feature allows you to quickly position the BC at your preferred
height quickly and easily every dive.
Conventional Cam Buckle assembly
When possible wet the nylon strap prior to mounting procedure.
Webbing can stretch when wet, and loosen during the dive. Prewetting the webbing minimizes stretch.
Loosen the cam buckle so the webbing slips easily over the cylinder
and into position. The Height Adjustment Strap will suspend the BC
at the correct height, leaving your hands free to tighten the cam
buckle.
Pull the webbing to snug the cam against the cylinder. Carefully cam
over and lock the buckle by pushing the buckle towards the cylinder
wall. Secure the excess strap webbing with the attached hook and
loop fastener.
9
Page 11

All models include a non-slip section on the tank strap to reduce/
prevent slippage.
Note: A heavy duty Stainless Steel Cam Buckle is available as an
option. Ask your dealer to install this buckle at any time. This is a
simple process – just undo the webbing from the Stainless Steel
TriBar slide, remove the plastic Cam Buckle, and replace it with the
Stainless Steel upgrade.
Removal from Cylinder
Undo the hook and loop fastener on the tank strap.
Pull back on the webbing to release the cam buckle and remove
tension from strap.
Slide the BC up and o the cylinder.
It is not necessary to completely undo the strap from the buckle.
Low Pressure Inflator
Every BARE BC comes complete with a Low Pressure (LP) hose
to be connected to one of the LOW PRESSURE ports of your First
Stage Regulator. This LP hose has a Quick Disconnect feature to attach to the power inflator on the BC.
The LP hose can be attached to the regulator first stage by your authorize BARE dealer. Should you wish to install the LP hose yourself
follow these important steps:
Using the correct tool remove one LP port from the first stage
regulator. Port should have a 3/8” 24 pitch thread to match the male
threaded end of the LP hose
!! WARNING !!
Incorrectly installing an LP hose on a 3/8” HP port found on
some older first stage regulators models can result in serious
injury or damage to the LP hose or power inflator. The LP hose is
rated for pressure NOT TO EXCEED 400 PSI/28 BAR MAXIMUM.
Check the hose and port thread are compatible before installing.
Lubricate the ‘O’ Ring and ensure it is properly installed to the LP
3/8” connection
Carefully insert and hand thread the connection until the ‘O’ ring is
fully seated, carefully tighten with a suitable wrench.
Install the first stage regulator on a correctly pressurized scuba cylinder and slowly open the cylinder valve.
10
Page 12
Check and listen for any air leaks between the hose connection and
the LP port.
Attach the quick disconnect fitting at the end of the LP hose to the
main nipple on the power inflator. Check and listen for any air leaks
at the power inflator nipple.
To inflate the BC, press slowly on the inflate button on the power inflator. The power inflator uses air from the LP port on the first stage
regulator attached to the pressurized cylinder, so become familiar
with the inflation before using in open water.
Completely inflate the BC and check for any leaks in the connections or the air cell.
!! WARNING !!
If you detect a leak at the connection to the first stage, the
power inflator, or the air cell that you cannot immediately solve –
DO NOT DIVE WITH THE BC.
Have the BC inspected and serviced by an Authorized BARE
Dealer.
Adjusting your BARE BC for fit and comfort.
All BARE BCs come with several adjustment points to allow you to
customize the fit for the best comfort and stability.
Shoulder Strap Length – The shoulder strap length on all models
can be adjusted with the side activated Quick Release (QR) buckles.
These buckles all have extended thumb tabs to allow easy location
and loosening at any point before, during or after the dive. Simply place the thumb under the tab and push up. The webbing will
become looser. To tighten the adjustment, simply pull down on the
strap, using the D ring at the end if preferred. To disconnect the
shoulder strap completely, simply squeeze the side bar release tabs
on the buckle and the lower strap will disengage.
Chest Strap – All BARE BCs have a cross-chest strap to keep the
shoulder straps firmly in place. The straps can be located in two
positions for greatest comfort and to avoid interference with the
inflate valve located on the centre chest of most dry suits. To move
the chest strap from one location to the other, slide the fold-over
end of the short mounting strap attached to the shoulder assembly
through and out of the chest strap loop, locate the other mounting strap and thread it through the chest strap loop. The short
mounting straps are designed to tuck away under the webbing on
11
Page 13

the top of the shoulder assembly. The side release QR buckle in the
centre chest is designed to be adjusted from both sides to keep it
centered. There is an elastic loop on the webbing to control excess
webbing length.
Cummerbund – The cummerbund can be adjusted for length on
both sides where it attaches to the cylinder backpack. Peel back the
hook and loop fastener on each cummerbund side and adjust the
length longer or shorter until the right amount of fold over at the
front of the BC makes the cummerbund snug.
Note: Make sure you make this adjustment while wearing the same
wetsuit or dry suit & underwear combination you will be wearing on
the dive.
INTEGRATED WEIGHT SYSTEM
All BARE BCs are equipped with an Integrated Weight System to
allow convenient management and emergency release of ballast
weights.
There are three sets of pockets on the BCs where weights can be
placed, but only one set with quick release capability.
Main Weight System – There are two releasable main weight pockets. These pockets hold between 10-15 pounds (4.54 – 6.8 Kg) each,
depending on size and model of BC chosen. (see details pages for
specific amounts)
Each pocket has a weight pouch with a large flap secured with Hook
& Loop fasteners.
Remove the weight pouch from the pocket with a sharp tug on the
grey handle.
Undo the pocket flap and insert the desired amount of bagged lead
shot or solid weights.
Environmental note – If you choose to use lead shot, please make
sure the shot pack is sealed and waterproof to avoid the possibility
of lead-tainted liquid leaking into the water.
Once the weight pouches are loaded, secure the flap by pressing
firmly on the Hook & Loop fasteners.
The loaded weight pouches may be inserted into the pockets after
donning the assembled BC and cylinder set-up.
Slide the weight pouch into the pocket and connect the male side of
the Side Release Quick-Disconnect buckle on the weight pouch with
the female side on the BC pocket.
The weight pouch is now secured in the pocket until you choose to
disengage the buckle with another sharp tug on the grey handle.
12
Page 14
In an emergency weight-ditching situation, grasp the grey handle
and pull sharply forward. Retain control of the weight pouch in your
hand until you can see it is clear to drop without danger of becoming entangled in any other gear you may be wearing.
To ease normal water exits onto a boat or dock ladder, the weight
pouches can be removed and passed to an assistant to lighten your
load when climbing out of the water.
Rear Tank Ballast Pockets – All BARE BCs come equipped with two
Tank Ballast Pockets. The pockets are built in to the BLACKJACK
on each side of the tank backpack. The pockets are separate on the
BLACKWING, CURVE, & VOODOO models. They are designed to be
installed on the cylinder strap if desired.
The purpose of the ballast pockets is to counteract the positive
buoyancy of an empty aluminum cylinder. Some divers find this
buoyancy – especially when using a back wing air cell – tends to
tip them forward. The ballast pockets hold up to 5 lbs/2.27 Kg of
weight per side.
Supplementary Side Pockets – Should you need more weight than
the Main Releasable Weight System and the Rear Tank Ballast
Pockets combined, there are two Supplementary Side Pockets, one
on each side of the front of the BC. These pockets hold up to an additional 10 lbs/ 4.54 Kg each.
!!! DANGER !!!
WEIGHT INSTALLED IN THE REAR TANK BALLAST POCKETS
& SUPPLEMENTARY SIDE POCKETS IS NOT EASILY REMOVED
UNDERWATER. ALWAYS ENSURE THAT WITH A FULL TANK THE
COMBINED WEIGHT IN THE REAR TANK BALLAST AND SUPPLE-
MENTARY TANK BALLAST POCKETS IS INSUFFICIENT TO CRE-
ATE NEGATIVE BUOYANCY WITH THE BC FULLY DEFLATED.
USE OF THE BARE BC
!!! DANGER !!!
CERTIFIED INSTRUCTION ON THE USE OF A BUOYANCY COM-
PENSATOR INCLUDING POWER AND ORAL INFLATION AND
DEFLATION MUST BE COMPLETED PRIOR TO THE USE OF ANY
BC. FAILURE TO DO SO MAY RESULT IN SERIOUS INJURY OR
DEATH.
13
Page 15
!! WARNING !!
In Europe the maximum recommended depth rating for BARE
Buoyancy Compensators is 50M.
Inflation
Power inflation – BARE BCs are equipped with a corrugated hose
with a cable activated shoulder dump valve. You may choose to
install a power inflator or a breathable power inflator before diving
the BC.
When installing either a power inflator or a breathable power inflator, be sure to connect the looped end of the shoulder dump activator cable to the stainless steel pin found in the body of the inflator.
Use a small screwdriver or awl to push the stainless steel pin halfway
out of the housing tube, then install the loop over the pin before
pushing the pin back into place. The cable activated exhaust valve is
now operational.
Using the power inflator or breathable power inflator you can inflate
the BC to achieve neutral buoyancy during the dive or positive
buoyancy at the surface.
!! WARNING !!
Excessive or rapid power inflation can quickly create positive
buoyancy and/or a rapid ascent that could lead to serious injury
or death. Always be aware of the amount of air being added and
be ready to dump excess air from the BC at any time.
Oral Inflation – The power inflator and breathable power inflator are
equipped with an oral inflation feature to allow manual inflation on
the surface or underwater. Take a deep breath and blow into the oral
inflation mouthpiece while pressing the oral activation valve button.
Air will flow into the BC. Release the button to close the valve, then
take another breath if needed and repeat the process until there is
sucient air in the air cell. If performing this skill underwater, always
maintain control of the second stage regulator in your right hand,
ready to take the next breath.
Deflation
BARE BCs come equipped with Manual and Over-Pressure dump
valves. All BARE BCs have a manual, cable activated dump valve
located on the left shoulder where the corrugated inflation hose enters the air cell. To dump air with this valve, simply pull gently on the
14
Page 16
inflator body at the end of the corrugated hose while in a horizontal
or vertical diving position.
! IMPORTANT !
The cable activated manual shoulder dump valve may not oper-
ate in a head down position. When in this position, the valve on
the lower right side may be more eective.
There is also a manual dump valve with an over pressure relief feature on the lower right side of the air cell. To activate this valve to
release air, pull on the toggle extending from a lanyard on the valve.
All toggles on BARE BCs are light grey to maintain contrast for high
visibility at depth or in dark water.
The oral valve activator button on the power inflator or breathable
power inflator can also be used to deflate the air cell. Raise the inflator to an elevated position and depress the button.
! IMPORTANT !
Depressing the button after bubbles have stopped flowing from
the mouthpiece will allow water to enter the air cell.
Care and Maintenance
All BARE BCs are produced using the highest quality materials with
state of the art construction technology. The materials from which
your BC is made have been developed specifically to withstand the
demands of diving and the elements to which BCs are exposed.
There are, however, some basic care and maintenance considerations for your BC, which will greatly contribute to its life and function. We recommend your BC valves be checked annually by an authorized BARE Dealer, to ensure proper function and performance.
1) Avoid prolonged exposure to direct sunlight. The Ultra-violet
rays can reduce the life expectancy of the fabric.
2) Avoid contact with gasoline, oil, or solvents, which will damage
the fabric.
3) Avoid placing the BC on rough or sharp surfaces that can
abrade or puncture the fabric and aircell.
4) Always store the BC in a cool dark place with the aircell partially
inflated, preferably on a wide hangar.
5) Do not store in direct sunlight.
6) Do not store the BC folded or damp.
7) Rinse the BC both inside and out after every dive to flush away
any chlorine, salt, or other chemicals that can cause corrosion.
15
Page 17

Rinsing Instructions:
1) Fill the BC 1/4 - 1/3 full of clean fresh water through the oral
inflation mouthpiece.
2) Inflate the BC and rotate it in all directions several times to thoroughly rinse the inside of the aircell.
3) Continue to rotate the BC while inflated and water filled, then
hold it upside down with the left hand shoulder dump valve at
the lowest point. Activate the shoulder pull dump valve until all
the water has drained from the BC. This may require re-inflation
one or more times.
4) VOODOO ONLY – The VOODOO BC requires an extra step to
rinse the side pockets. After adding water to the rear cell, and
rotating the BC to rinse the inside, pull the dump-toggle on the
right pocket to allow water to enter the side pockets. Then, continue to rotate the BC a few more times to rinse the side pockets. To fully drain both cells of the BC you may have to re-inflate
and drain several times.
5) Rinse all exterior fabrics and components thoroughly with fresh,
clean water after every use.
6) After all water is drained from the BC, partially inflate it, and
hang to dry.
7) Occasionally lubricate the quick-disconnect fitting and nipple
with a silicone lubricant approved for SCUBA use.
BARE BC WARRANTY
All BARE BCs are covered by a 3-year warranty on materials and
workmanship. The warranty does not cover damage caused by
normal wear and tear, misuse or negligence. The warranty is limited
to repair or replacement, at BARE’s option, and where permitted
by law does not include consequential or incidental damages. This
warranty is rendered invalid by unauthorized repairs.
16
Page 18
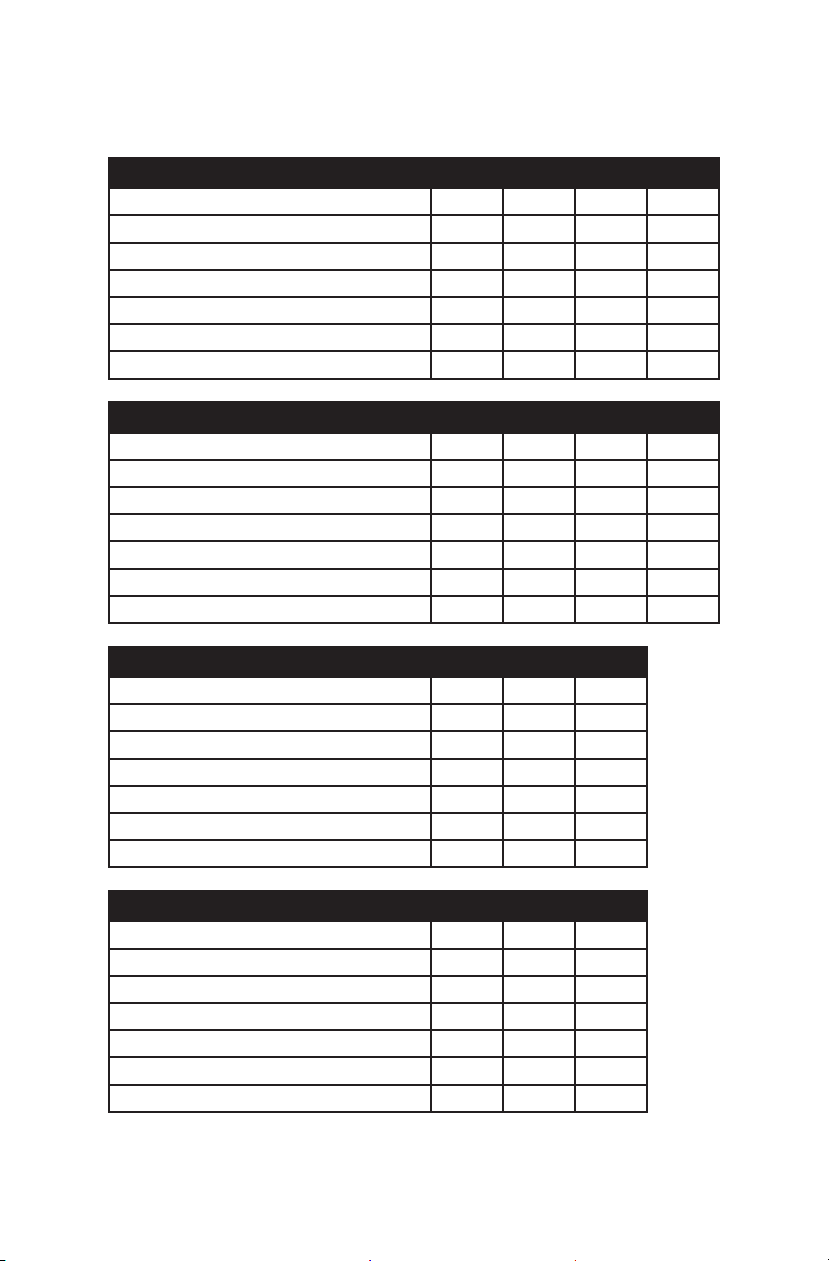
SIZE CHART:
BLACKJACK UNISEX BARE-FIT
S M L XL
Chest (in.) 35/38 38/41 41/44 44/47
Chest (cm.) 89/97 97/104 104/112 112/119
Waist (in.) 30/32 33/35 34/36 36/38
Waist (cm.) 76/81 84/89 86/91 91/97
Torso (in.) 19/21 20/22 22/24 24/26
Torso (cm.) 48/53 51/56 56/61 61/66
BLACKJACK UNISEX BARE-FIT
S-M M-L L-XL XL-XXL
Chest (in.) 35/41 38/44 41/47 44/51
Chest (cm.) 89/104 97/112 104/119 112/130
Waist (in.) 30/34 34/38 36/40 38/41
Waist (cm.) 76/86 86/97 91/102 97/104
Torso (in.) 19/21 20/22 22/24 25/27
Torso (cm.) 48/53 51/56 56/61 64/69
BLACKJACK UNISEX BARE-FIT
S-M M-L L-XL
Chest (in.) 32/39 36/42 39/45
Chest (cm.) 81/99 91/107 99/114
Waist (in.) 28/32 31/35 34/38
Waist (cm.) 71/81 79/89 86/97
Torso (in.) 18/20 19/21 21/23
Torso (cm.) 46/51 48/53 53/58
BLACKJACK UNISEX BARE-FIT
S-M M-L L-XL
Chest (in.) 35/41 38/44 41/47
Chest (cm.) 89/104 97/112 104/119
Waist (in.) 30/34 34/38 36/40
Waist (cm.) 76/86 86/97 91/102
Torso (in.) 19/21 20/22 23/25
Torso (cm.) 48/53 51/56 58/64
NOTE: When sizing your BC, please consider the added bulk of your suit.
17
Page 19

NOTES:
Date of Purchase:
Model:
Serial Number:
Dealer:
18
Page 20

19
Page 21
SERVICE RECORD
Dealer Name Service Performed Date
20
Page 22

 Loading...