

Page 1
INSTALLATION INSTRUCTIONS
P 847•244•1234 www.barclayproducts.com
3/23/12
1. Determine the height at which you want to install the rod. This should be approximately
6’ 3” from the inside bottom of your tub. Mark the position of the flanges on the wall and
the position of the holes to be drilled.
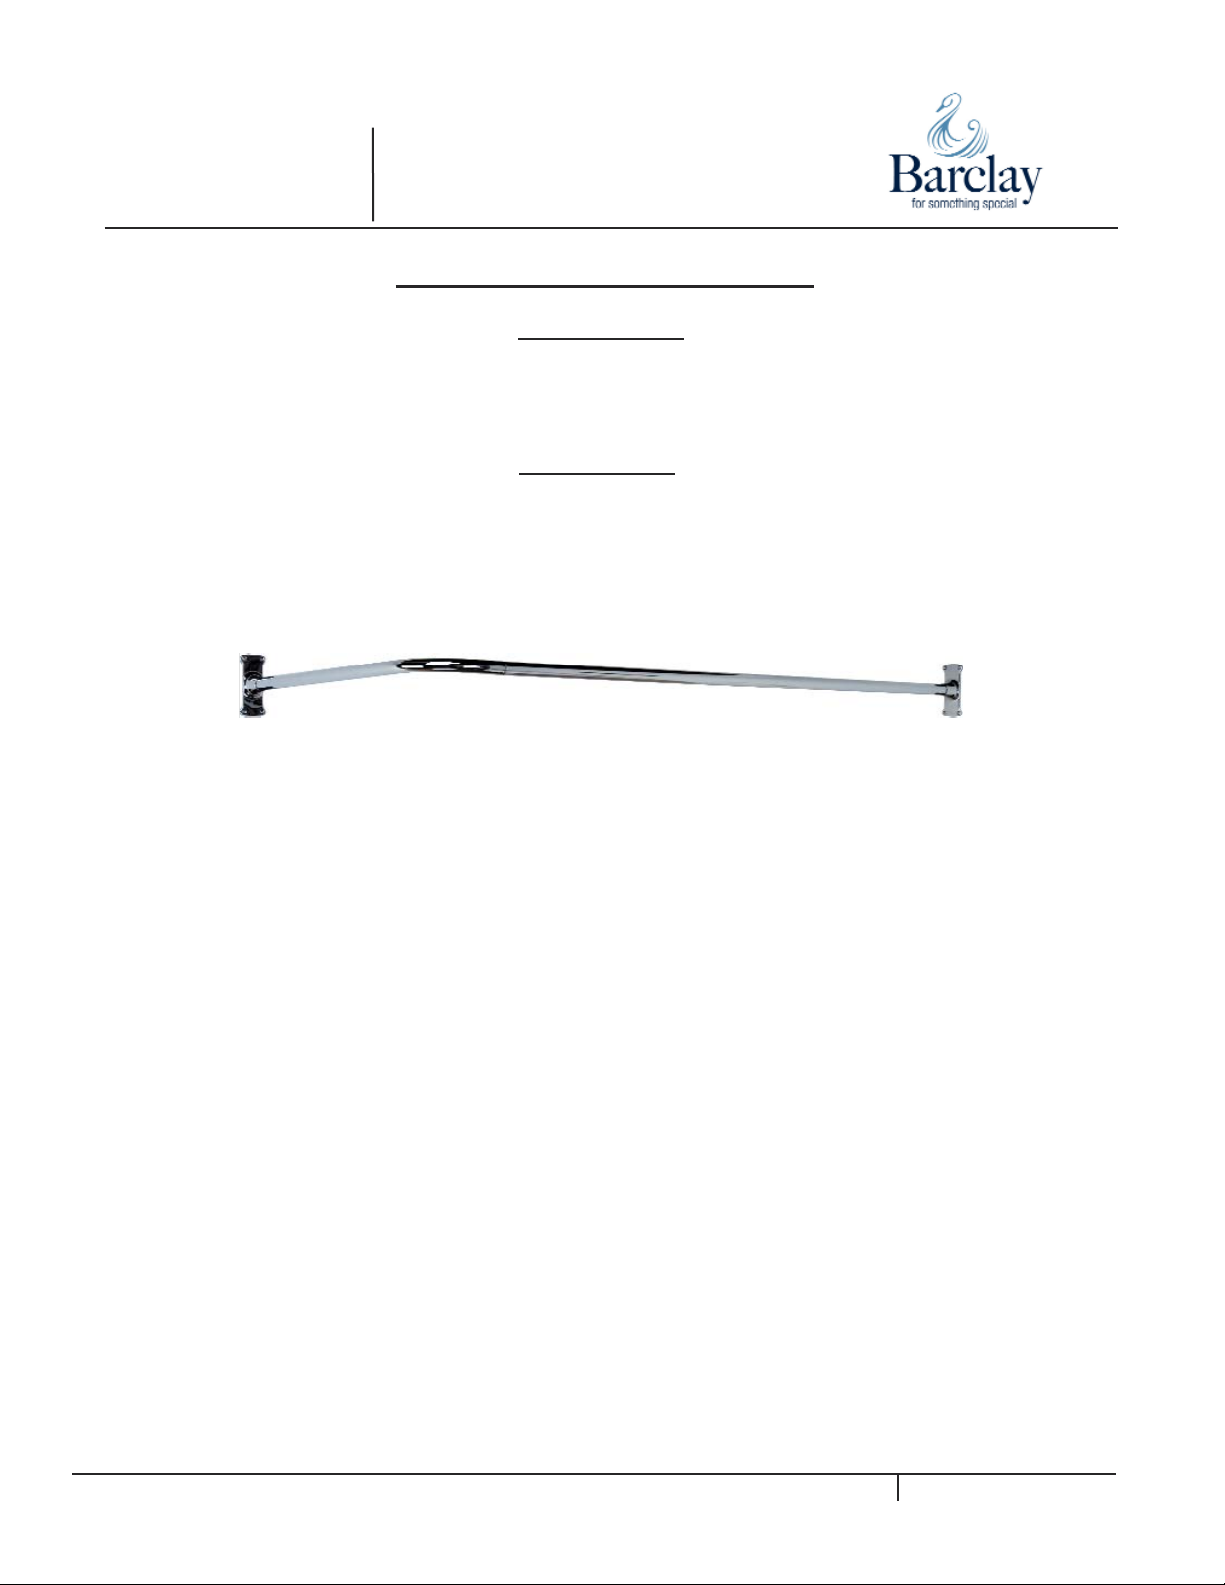
2. Your rod is furnished in two pieces; a corner section and a straight section. You will
note that the corner rod has a female thread on the short end, and that the straight rod
has a male thread on the end. Connect the two sections together by turning until hand tight.
Do Not use any tools to tighten!
3. Before proceeding any further, hold the rod up in approximate position to make sure that
the rod is not too long. This rod is furnished long enough to fit most tubs and may have to
be shortened. If rod is too long, cut off excess length from end without bushing, using a
hacksaw. Rough edges left will be covered by the flange. Do not cut the rod too short.
4. Slip the flanges over each end of the rod and tighten the set screw on one flange to
prevent it from falling off. Fasten the other flange to the wall using the wood screws
provided. Loosen the set screw on the other flange and fasten it to the wall. After fastening
flanges to the wall, tighten the set screws on the flanges.
Parts Included
• 1 Corner (curved) section rod 26” or 48” long (#121-C or #123-C) •
• 1 Straight Rod 60”, 66”, or 78” long (#121-S or #123-S) •
• 2 #300 Flanges • 8 Wood Screws • 2 Set Screws •
Tools Needed
• Pencil • Level • Drill •
• Pipe Cutter / Hacksaw •
Corner
Shower Rod
 Loading...