

Page 1
Before you start
assembling
your BBQ
here are some
important
safety warnings
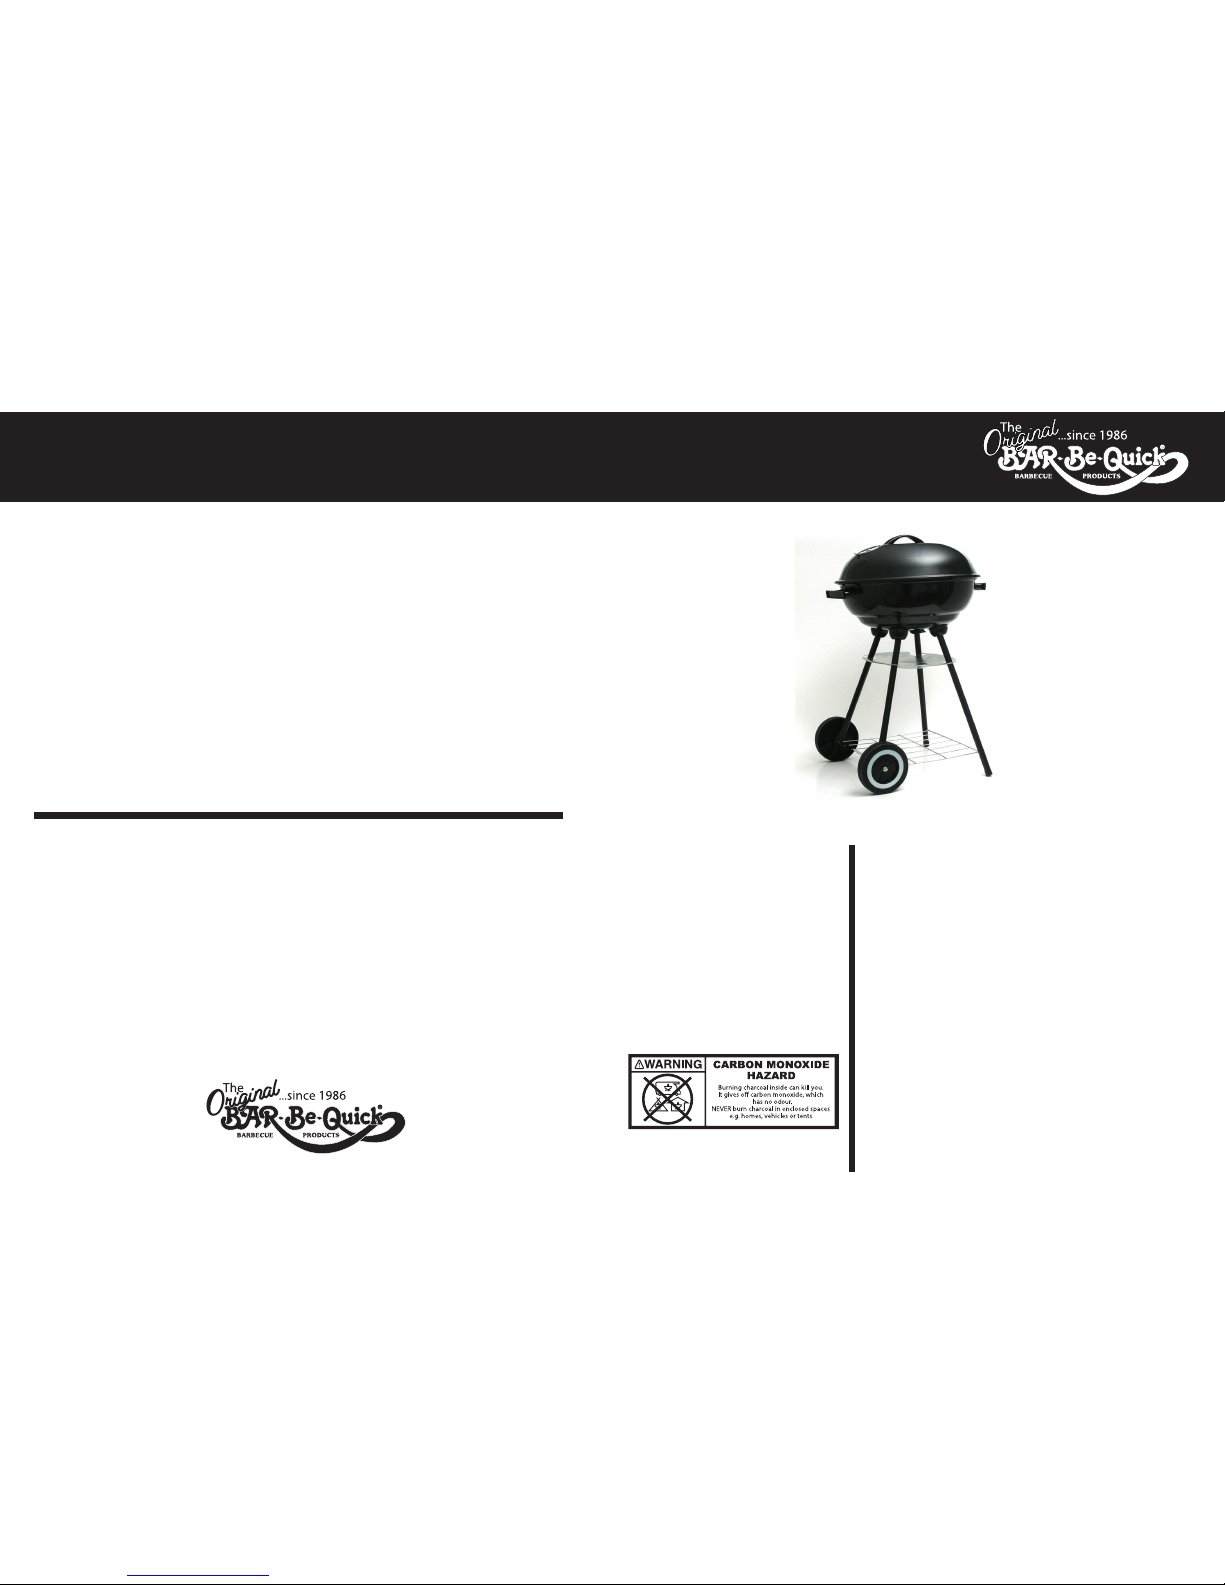
43cm Classic Kettle BBQ
NOTE! Missing parts Tel 01282 478200 Email [email protected]
Simple assembly instructions - Please keep for future reference
How to light the BBQ
1. Make sure the assembly instructions have been followed correctly.
2. Set the BBQ up in a sutable position, on a level surface away from areas likely to catch re.
The base will get hot so ensure it is standing on an appropriate surface.
3. Use Bar-Be-Quick Charcoal and Lighting products.
Method 1 - Lighting Fluid / Gel
a) Place enough charcoal in the bowl to a depth of 3-5cm.
b) Taking care not to spill any liquid / gel onto your hands or clothes, squirt it over the
charcoal.
c) Wait for 30 seconds to allow the liquid to soak into the charcoal.
d) Light the charcoal using a long taper or safety lighter. The charcoal will then burn for a
period with ames.
Note -Do not light the charcoal if you have spilt uid or gel onto your clothes.
e) Do not add more liquid or gel onto burning charcoal.
Method 2 - Lighting Cubes
a) Place three or four cubes in the centre of the BBQ rebowl and light with a match
b) Place pieces of charcoal gently around the burning cubes. Add more charcoal as required,
in a pyramid formation.
4. When burning is established, spread the fuel out evenly. After lighting, the BBQ should be
ready for cooking in approx 30 min. The BBQ is ready when the charcoal has a coating of ash.
5. Make sure the cooking grill is fully located in the grill bowl before cooking commences.
Care and Maintenance
1. To make it easier to clean your BBQ after use , line the rebowl with aluminium cooking foil,
shiny sideup. Remember to leave ventilation holes clear by piercing foil where necessary. This
process will lengthen the life of your BBQ and reect the heat more eciently onto the food.
2. Charcoal is available in lumpwood form (large irregular pieces) and briquettes (uniform
pieces). As a guide lumpwood works best for quick cook foods such as sausages and burgers,
whilst briquettes are more suitable for slow cooking, smoking or roasting as
they burn longer and hotter.
3. Do not use more than 3kg of charcoal with this BBQ. It is not advisable to completely
ll the rebowl as the barbecue may become too hot to cook successfully.
4. If the re ares up due to dripping fat, douse the ames lightly with a ne water spray.
5. When you have nished cooking never poor cold water over the coals to extinguish,
as this may damage your barbecue. Use sand, old cinders or a ne water spray.
6. To clean your barbecue soak the grills and tools in hot soapy water as soon as possible
after use. Dry thoroughly and store in a dry place. Do not leave your BBQ outside unprotected.
| www.barbequick.com | Bar-Be-Quick | The home of the “original” disposable barbecue...since 1986. |
Call +44 (0)1282 478200 | Rectella International Ltd Bancroft Road Burnley Lancs BB10 2TP.
© 2016 Rectella International.
BQ2846-1a
1. This product generates extreme heat therefore great care must be taken with
using, handling and with safe disposal.
2. Never use indoors or in conned spaces (for example tents) or as a source of heat,
Carbon Monoxide poisoning can result from burning charcoal in areas with poor
ventilation, even when extinguished.
3. Do not use in prohibited areas or areas which prohibit open res.
4. Never use petrol, methylated spirits or any other similar volatile fuels to ignite or
re-ignite barbecues or res.
5. Never place your barbecue on, or near, anything liable to be damaged by heat or
are up or from hot fat which may spit during cooking.
6. Due to the potential risks involved with barbecuing, it is recommended that an
adult not consuming alcohol is in control of the barbecue and that rst aid and other
emergency provisions such as re extinguishers, are at hand.
7. Always keep children and pets away from the barbecue area.
8. Never leave a lit barbecue unattended.
9. Never handle the barbecue while in use as it soon becomes very hot.
10. To prevent food poisoning, always ensure that food is completely defrosted
before cooking commences and that it is always cooked thoroughly.
11. After use, extinguish completely and allow to go cold before handling or moving.
12. Remember the area beneath and around your barbecue will become extremely
hot and may remain so for some time after use.
WARNINGS
Page 2
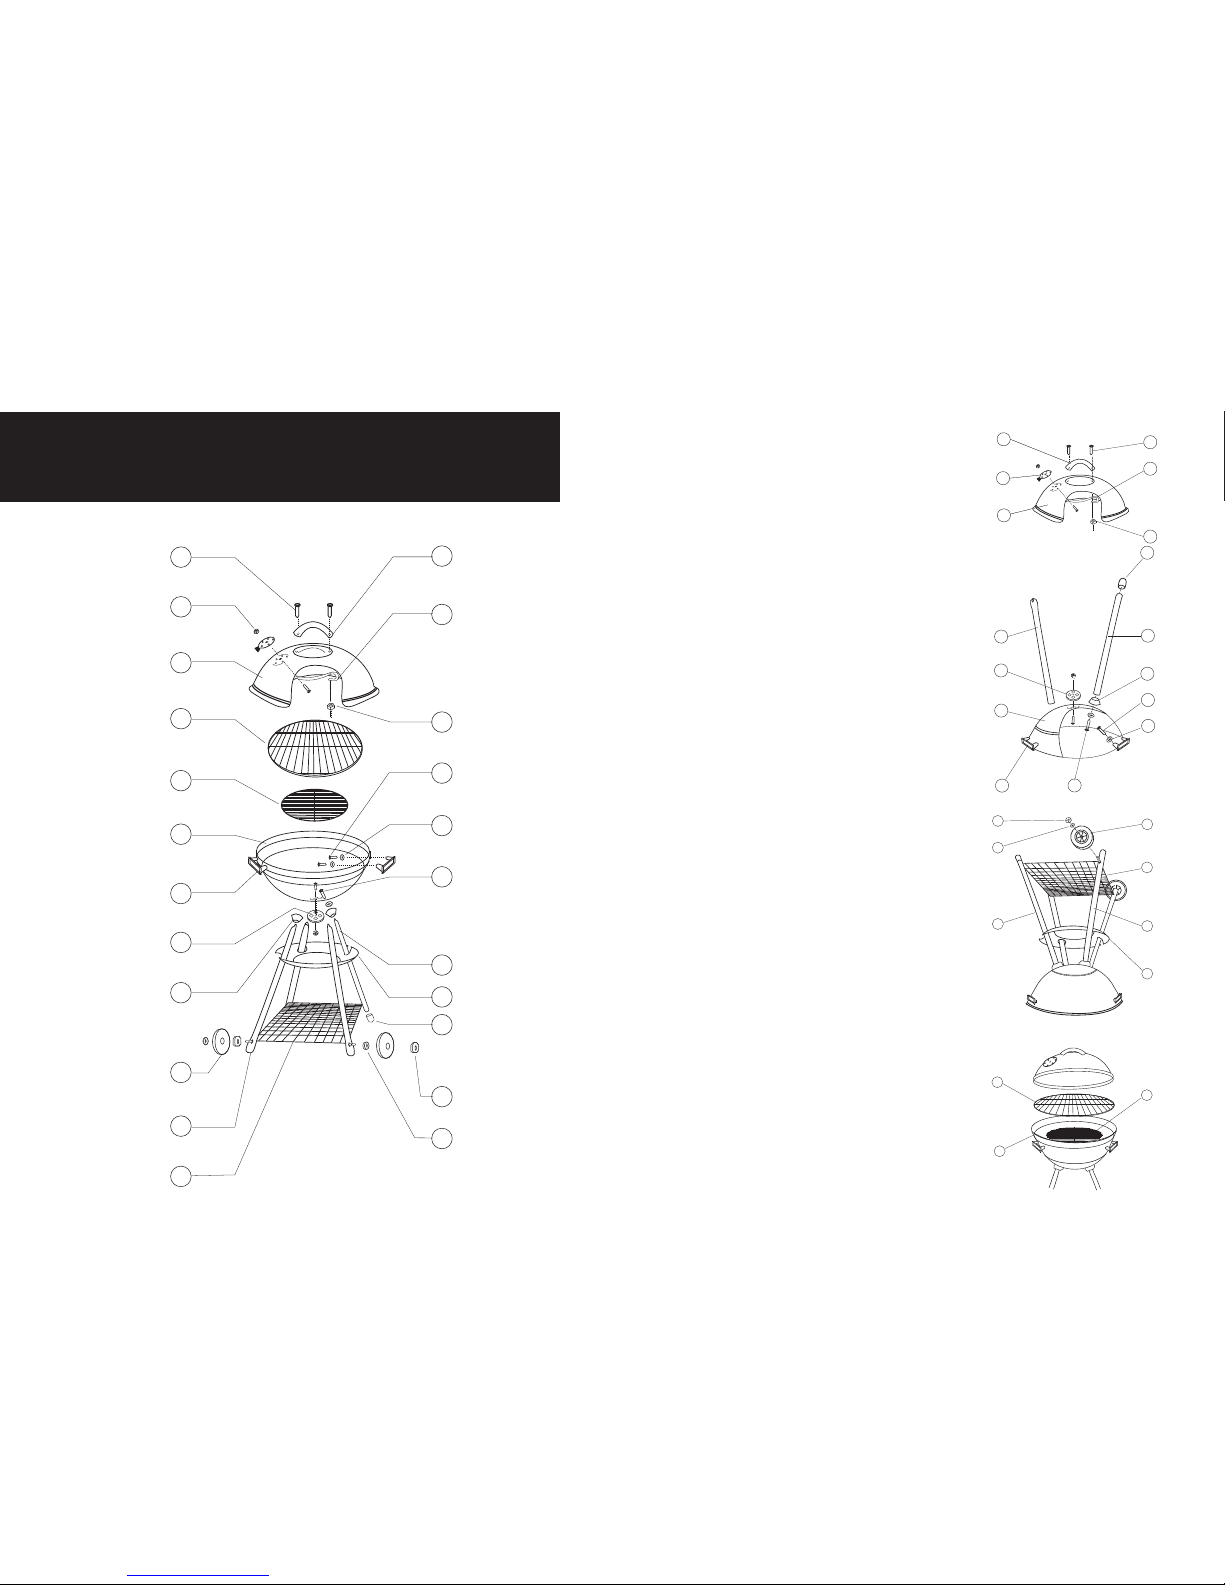
2 x Lid Handle Srew
1 x Vent
Screw+Nut
1 x Grill Lid
1 x Grill
1 x Grate
1 x Grill Bowl
1 x Ash Vent
Screw+Nut
4 x Leg Holders
2 x Short Legs
1 x Wire Shelf
2 x Wheel
2 x Bowl Handles
1 x Lid Handle
1 x Hanger Bracket
2 x Hex Nutsl
4 x Handle Screws
4 x Handle Washers
2 x Long Legs
1 x Ash Tray
2 x Leg Caps
2 x Wheel Lock Nut
1 x Wheel Washer
4 x Leg Srews
& Washers
A
B
C
D
E
F
G
H
I
J
K
L
X
W
V
U
T
S
R
Q
P
N
M
These items may be already attached to the legs.
*
*
43cm Classic Kettle BBQ - Components
G
I
T
F
S
V
H
K
Q
R
U
X
W
L
K
T
J
M
P
C
N
B
A
D
F
E
Stage One - Grill Lid
Fasten the curved lid handle and lid hanger bracket onto the
grill lid, using 2 screws and 2 nuts.
Attach the lid air vent to the grill lid using nut and bolt.
TOOLS NEEDED: 8mm & 12mm OPEN END OR ADJUSTABLE SPANNER, SLOT
HEAD SCREWDRIVER, & CROSS HEAD SCREWDRIVER.
PRE-ASSEMBLY CHECK
To ensure fast and easy assembly, follow the instructions below in their
proper sequence. Check all parts carefully and compare them to the parts
listing. Report any missing parts to the helpline listed on front page of
these instructions.
Stage Two - Grill Bowl & Legs
Fasten the two at bowl handles to the grill bowl, using the
four screws and washers. Attach ash disposal vent to grill bowl
with nut and bolt. Insert leg holders on the short legs and long
legs and attach them to the grill bowl one by one using the
longest screws and washers. Tighten with ngers only.
NOTE: ONE OF THE SIDE HANDLES SHOULD BE LOCATED
BETWEEN THE TWO LONG LEGS AND THE OTHER SIDE HANDLE
SHOULD BE LOCATED BETWEEN THE TWO SHORT LEGS.
*Insert the plastic caps onto the end of the long leg’s.
Stage Three - Shelf and Wheels
Insert the wire shelf into the holes in the long
legs. The bent tips go into holes of long legs rst.
NOTE: BENT TIPS TO POINT AWAY FROM KETTLE
TOWARDS THE GROUND.Align and insert the other threaded
tips of the wire shelf through the holes in the ends of the two
short legs.
NOTE: ENSURE HOLES AT END OF SHORT LEGS
FACE OUTWARDS AND ARE IN LINE TO TAKE THE
AXLE FOR THE WHEELS.
Slide the wheels and washers onto the wire shelf spindles
protruding through the short legs. Secure both wheels with
Wheel Lock Nuts . Turn the unit upright and tighten all screws
securing the legs. Install Ash Tray by aligning slots with legs
and rotating to lock into place.
Stage Four - Grills
Place grate into the recess in the bottom of
Grill bowl. Place Grill into top recess in Grill bowl .
Place the Lid assembly on top of the base unit.
Your BBQ is now ready for use.
When using for the rst time allow it to burn with
the fuel red hot for 30 minutes prior to cooking in
order to burn o any material fumes etc.
Happy Barbecuing!
1
2
3
4
 Loading...