

Page 1
RS232
dongle Plug & Scan
Data Capture
User Guide
for Workforce
in Motion
©Baracoda TM – April 2009
Page 2
Data Capture
for Workforce
in Motion
SUMMARY
SUMMARY
SUMMARYSUMMARY
SUMMARY ................................................................... 2
REVISION HISTORY .......................................................... 3
1.
INTRODUCTION ........................................................ 4
2.
TECHNICAL INTRODUCTION .............................................. 5
2.1.
H
ARDWARE DESCRIPTION
2.2.
S
CANNER STATUS - DONGLE LINK
2.3.
N
O DATA LOSS MODE
2.4.
B
ATCH MODE
H
OW TO USE WITH ROADRUNNERS
H
OW TO USE WITH PENCIL2 & ROADRUNNERS EVOLUTION & DUALRUNNERS
.......................................................... 7
.................................................. 5
........................................... 6
..................................................... 7
.................................................... 8
....................... 8
3.
HOW TO CONNECT YOUR BARACODA BARCODE SCANNER ....................... 10
H
OW TO CONNECT YOUR BARACODAPENCIL/PENCIL
H
OW TO CONNECT YOUR
H
OW TO CONNECT YOUR
H
OW TO CONNECT YOUR
H
OW TO CONNECT YOUR ROADRUNNERS/ROADRUNNERS EVOLUTION
H
OW TO CONNECT YOUR SCANWEAR
H
OW TO CONNECT YOUR TOUGHRUNNERS
H
OW TO CONNECT YOUR DUALRUNNERS
4.
HOW TO DISCONNECT YOUR PLUG & SCAN DONGLE .......................... 14
5.
ADDITIONAL FEATURES ................................................ 15
P
REFIX
.................................................................... 15
S
UFFIX
.................................................................... 15
UART S
O
P
T
6.
ETTINGS
NLY FOR
RINT FIRMWARE VERSION
RANSPARENT MODE
BC2604/BL2604/BLR2604
COMPATIBILITY ...................................................... 20
BC2604/BL2604/BLR2604.................................... 10
BCM2604-L/BCM2604-F...................................... 11
D-FLY .................................................... 11
.................................................. 12
............................................... 12
............................................... 13
............................................................. 16
PRODUCTS
....................................................... 19
............................................................ 19
2 ...................................... 10
............................. 12
..................................... 17
LIMITED WARRANTY. ........................................................ 21
Baracoda RS232 dongle Plug & Scan – User Guide v3.28.2 - 2 -
Page 3

Data Capture
Revision History
Revision History
Revision HistoryRevision History
Changes to the original manual are listed below.
Document Date Description
3.27.1 30 Jun 08 Initial release
3.27.2 08 Jul 08 added schemes and transparent mode description
3.27.3 06 Aug 08 added Hardware description section
3.27.4 14 Aug 08 Modify the Batch section
3.28 27 March 09 Add DualRunners
3.28.2 17 April 09 Modify “Hardware Description” section
for Workforce
in Motion
Baracoda RS232 dongle Plug & Scan – User Guide v3.28.2 - 3 -
Page 4

Data Capture
for Workforce
in Motion
1.
1. Introduction
1.1.
This document concerns the RS232 dongle Plug & Scan v3.28 (see “Print Firmware Version” section for how to
get the firmware version).
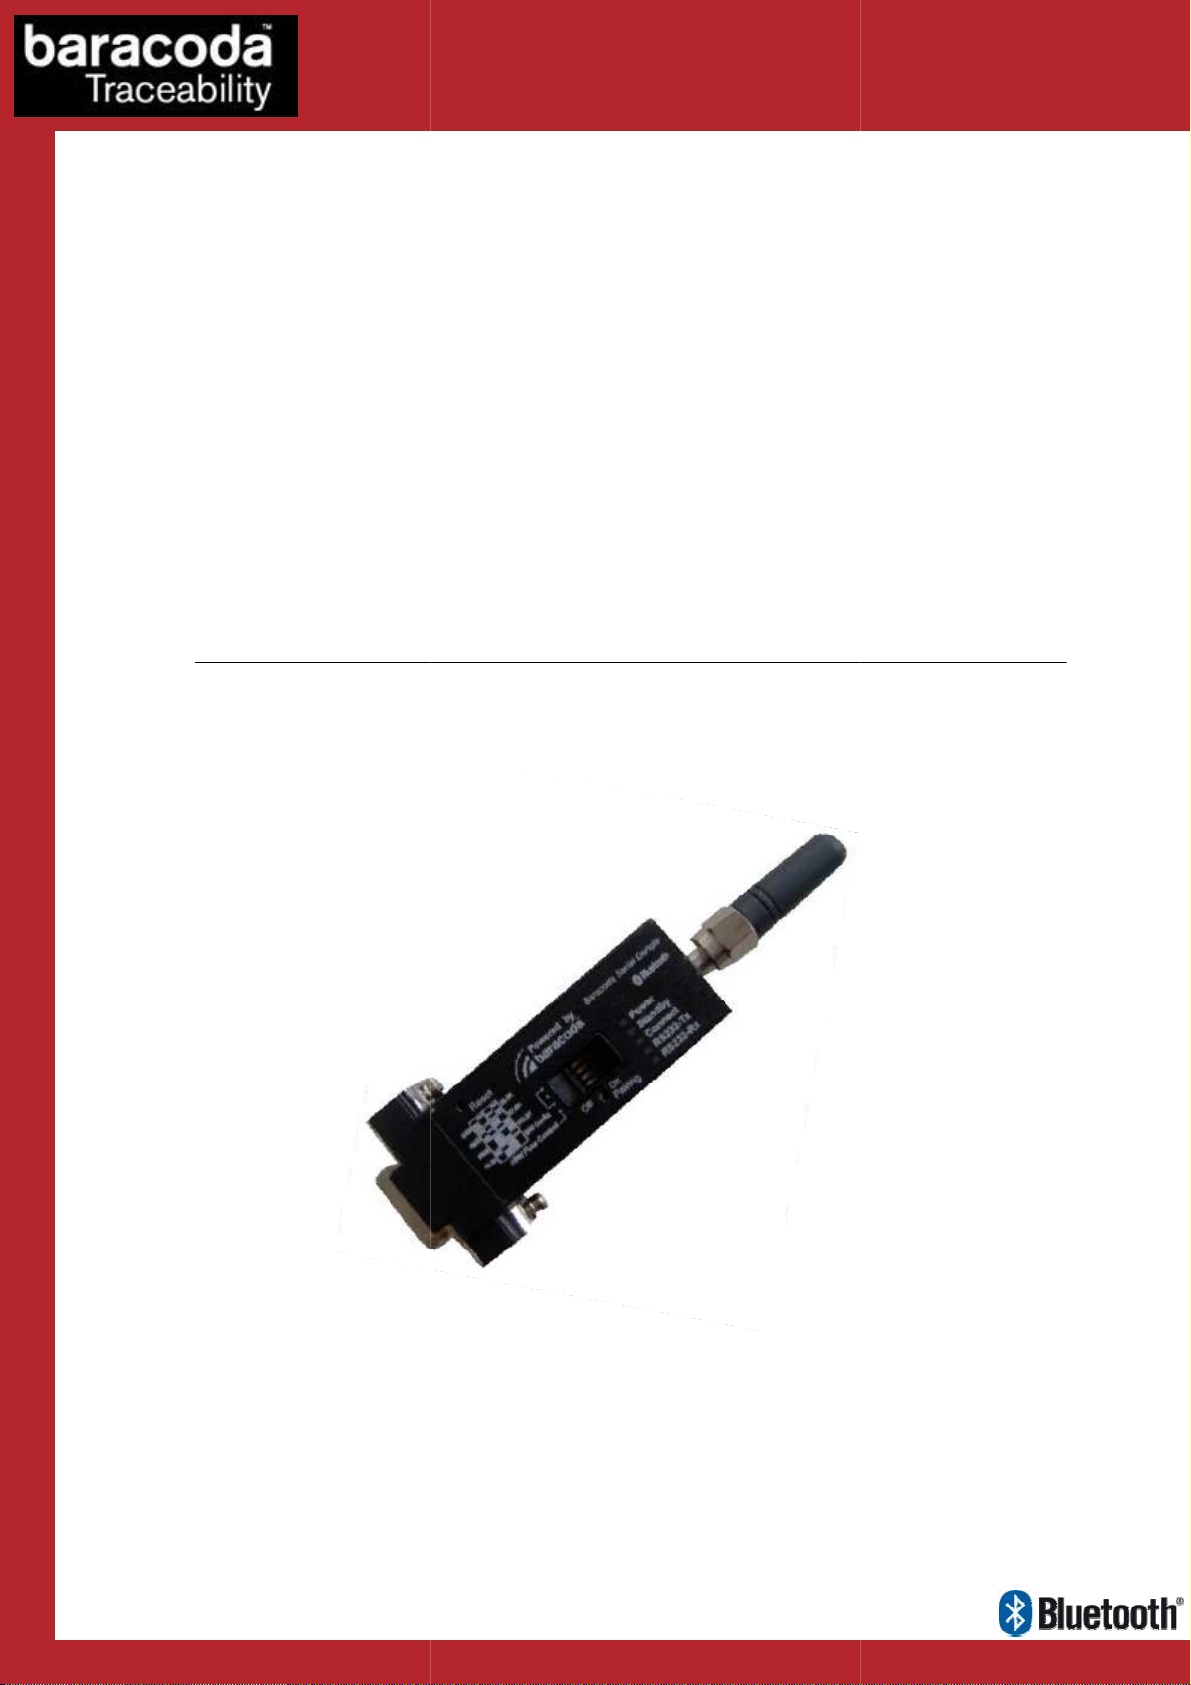
The RS232 Plug & Scan dongle is a connectivity solution and allows to simplify the connection between the
Baracoda scanners and all laptops, PCs, Tablet PCs, or all devices equipped with a RS232 COM port.
The Baracoda RS232 Plug & Scan dongle has the Bluetooth drivers and the Bluetooth application embedded in
the RS232 device. This configuration avoids the installation of the drivers and the software for the end-user.
The RS232 Plug & Scan solution allows users to have an acknowledgement beep, automatic reconnection, and
bufferisation of the incoming barcode data. Bufferisation of the barcode data allows the Baracoda scanner to
store incoming barcodes even when the scanner is not connected to the dongle (this is the ‘No data loss mode’)
Simply plug the RS232 Plug & Scan dongle in your computer, scan a “connect barcode” with a Baracoda
barcode scanner, and the Bluetooth connection will be automatically established.
Introduction
IntroductionIntroduction
Please note that the BaracodaManager software for PC does not work
NOTE:
with Plug & Scan solutions.
Baracoda RS232 dongle Plug & Scan – User Guide v3.28.2 - 4 -
Page 5

Data Capture
2.
2. Technical Introduction
2.2.
Baracoda Serial Dongle has a 9-PIN SUB-D female (DCE) connector as shown in the Figure below.
Technical Introduction
Technical IntroductionTechnical Introduction
2.1.
2.1. Hardware description
2.1.2.1.
Hardware description
Hardware descriptionHardware description
for Workforce
in Motion
Block diagram
3 ways available to power on the RS232 dongle Plug&Scan:
- With its External Power Adaptor.
- On the PIN9 of the RS232 connector if the Terminal gives 5V on this PIN.
- With its USB Power Adapter (“option not included with the product, please contact our Sales
Department to buy this accessory).
Note: The 4 switchs available on the front casing are not used to configure the RS232 dongle adapter. So you
can let all switchs to OFF.
Baracoda RS232 dongle Plug & Scan – User Guide v3.28.2 - 5 -
Page 6
Baracoda RS232 dongle Plug & Scan
Scanner Status
Scanner Status Scanner Status
Scanner Status
Plug & Scan dongle is only able to establish point
connect simultaneously to more than one device.
three (
: The dongle can accept connections from any Baracoda scanner (see how to connect
Paired and waiting for connection
switch on this scanner inside the Bluetooth range of the dongle and the connection will be
automatically established.
This mode allows other Baracoda scanners to connect to the
barcode, then the previous Baracoda scanner will disconnect and the new Baracoda scanner will
Plug & Scan
ransmitted to the terminal
This mode allows other Baracoda scanners to connect to the dongle. Scan the “connect” barcode, then
the previous Baracoda scanner will disconnect and the new Baracoda scanner will connect to the
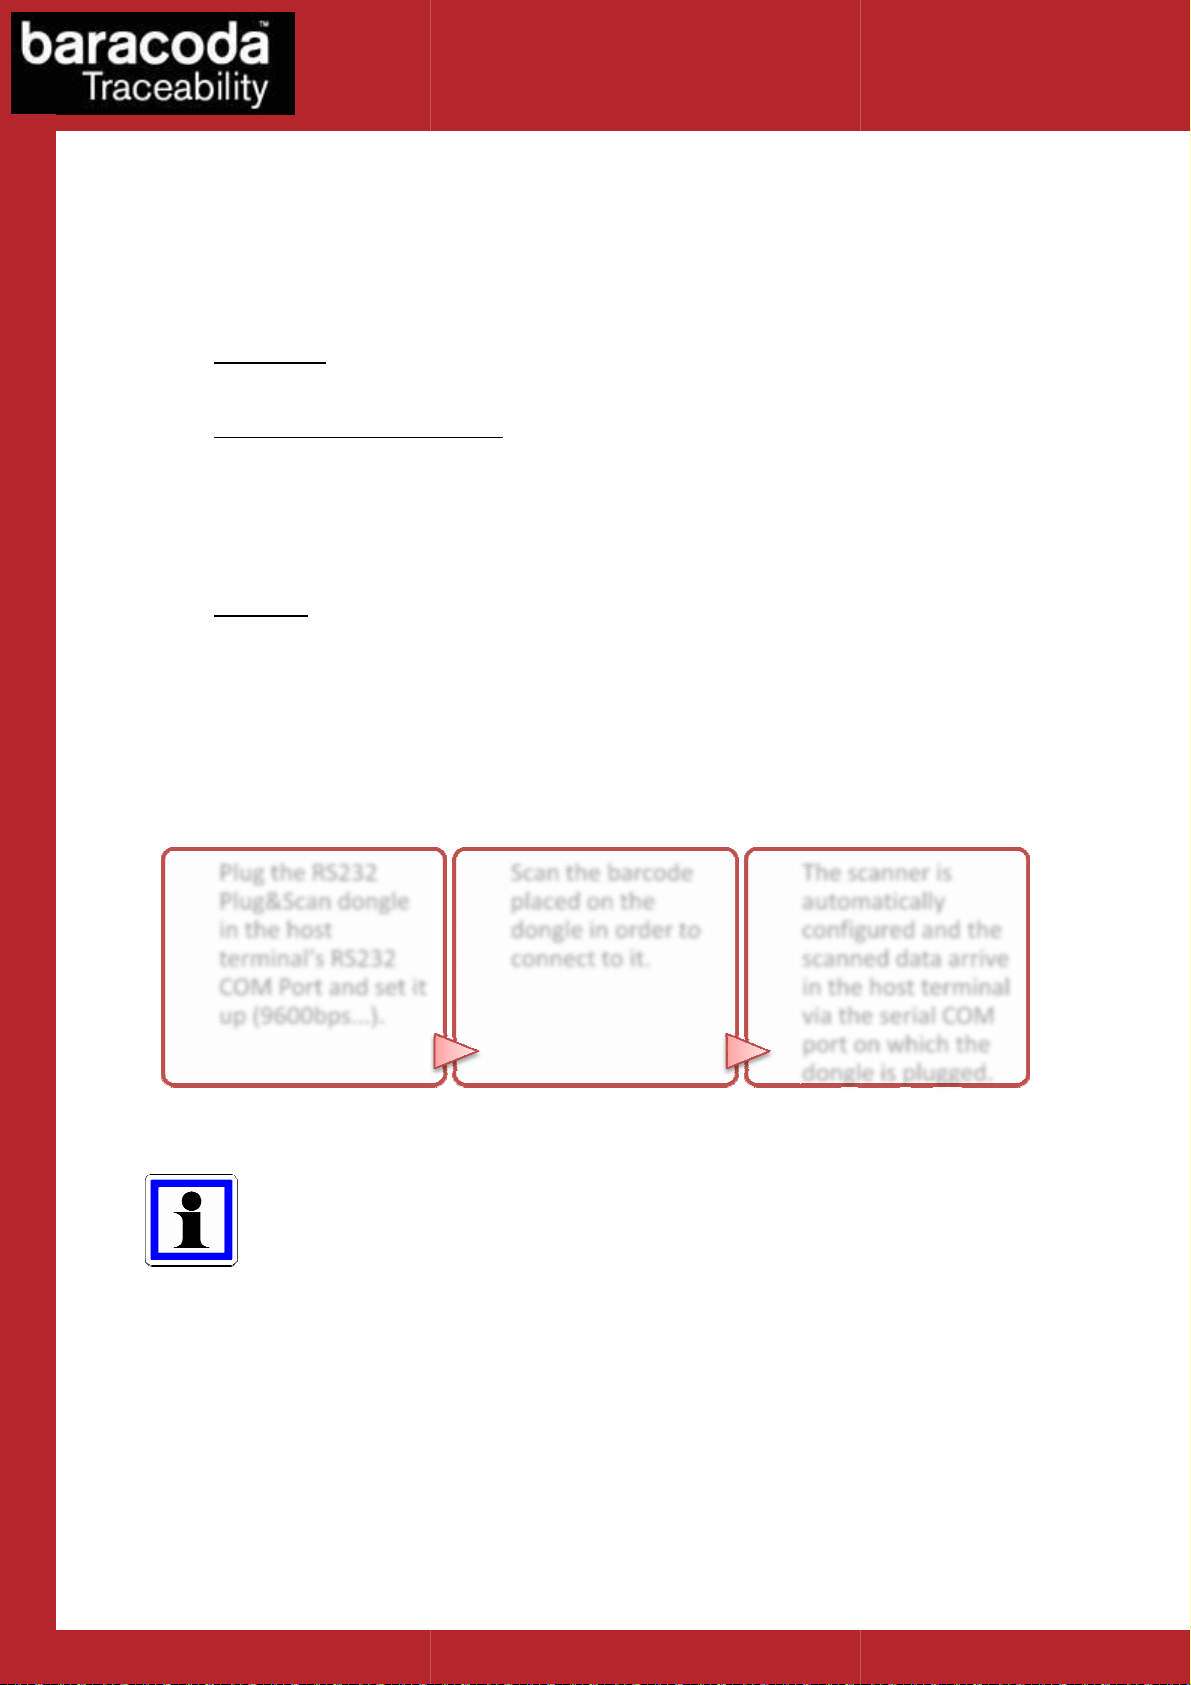
gle is quite simple. In three steps, it can be installed and ready to operate:
As shown in the above diagram, once the connection is done, the scanned data is transmitted
through the RS232 link.
which is compatible with the RS232 Plug&Scan solution. Using this, each scanned data will
appear on the PC as if it had been typed on the keyboard.
COM Port and set it
This means that the dongle ca
: The dongle has already been paired to a Baracoda scanner. Just
ongle. Scan the “connect”
dongle is connected to the Baracoda scanner. Just scan barcodes and the
Please note that Baracoda provides a keyboard emulation s
The scanner is
automatically
configured and the
scanned data arrive
in the host terminal
via the serial COM
port on which the
dongle is plugged.
Data Capture
2.2.
2.2.
2.2.2.2.
The
The Plug & Scan dongle can have
• Disconnected
your Baracoda scanner).
•
connect to the dongle.
• Connected: The
data will be t
3) states:
---- ddddongle link
ongle link
ongle linkongle link
-to-point connections.
.
for Workforce
in Motion
nnot
Plug & Scan d
dongle.
Using the RS232 P&S don
Plug the RS232
Plug&Scan dongle
in the host
terminal's RS232
up (9600bps...).
1/ Plug the dongle
Scan the barcode
placed on the
dongle in order to
connect to it.
2/ Scan to connect
3/ work !
oftware
– User Guide v3.28.2
- 6 -
Page 7

Data Capture
for Workforce
in Motion
2.3.
2.3. No data loss mode
2.3.2.3.
The ‘No data loss mode’ is activated by default for all scanners supporting the feature (RoadRunners,
BaracodaPencil2, RoadRunners Evolution, D-fly, ScanWear, ToughRunners, DualRunners). When you leave the
connection zone, the ‘No data loss mode’ allows a bufferisation of scanned barcodes. All scans will be
automatically uploaded to the host when reconnected.
If your application is unable to handle all of the incoming barcode scans, disable this feature by scanning the
‘no data loss mode’ barcode. Your scanner and any future connected scanners will retain this configuration.
No data loss mode
No data loss modeNo data loss mode
Enable ‘no data loss mode’ (*)
Disable ‘no data loss mode’
Note : This feature is enabled by default.
2.4.
2.4. Batch
2.4.2.4.
The batch mode can be used with scanners supporting batch mode:
- RoadRunners Evolution (CPU firmware version 1.33 and newer)
- RoadRunners (CPU firmware version 3.20 and newer)
- BaracodaPencil2 (CPU firmware version 1.34 and newer)
- DualRunners (CPU firmware version 1.38 and newer)
This functionality is only available for Plug&Scan dongles with firmware version 3.27 and newer (see “Print
Firmware Version” section for how to get the firmware version).
NOTE: For an application requiring batch mode feature, please note that the RS232 Plug & Scan forces the
settings of the scanner to which it gets connected in the last configuration used by the RS232 dongle. So it’s
very important before to connect a new scanner using Batch mode (and with datas in its Batch memory) to
check that the RS232 Plug & Scan is already configured in Batch mode, and not in Real Time mode. So you have
to respect the following process:
1) Associate the scanner to the RS232 Plug &Scan FIRST (by scanning its CONNECT barcode).
2) Configure your scanner in Batch mode AFTER (by scanning the configuration barcodes available in this
document), and start your work.
The upload process consists of temporarily switching the scanner into Real time with “no data loss mode” ON
(all the barcodes or RFID Tag ID in memory will be sent using the no data loss protocol). Then the scanner
switches back to batch mode when all the barcodes are properly sent.
Batch mode
BatchBatch
mode
modemode
Baracoda RS232 dongle Plug & Scan – User Guide v3.28.2 - 7 -
Page 8

Data Capture
for Workforce
in Motion
How to
How to use with
How to How to
When this mode is set, all the scanners (supporting the functionality) working with the dongle are in batch
mode: all scanned data is stored in the flash memory.
The stored barcodes can be discharged by scanning the following barcode:
use with RoadRunners
use withuse with
RoadRunners
RoadRunners RoadRunners
Enable batch mode
Upload batch data
(only for RoadRunners)
How to use with
How to use with Pencil2 &
How to use with How to use with
DualRunners
DualRunners
DualRunnersDualRunners
Pencil2 & RoadRunners Evolution
Pencil2 & Pencil2 &
Enable batch mode
RoadRunners Evolution &
RoadRunners EvolutionRoadRunners Evolution
&
& &
When this mode is set, all the scanners (supporting the functionality) working with the dongle are in batch
mode: all scanned data is stored in the flash memory.
The stored barcodes or TagID can be discharged by scanning the following barcode:
Upload batch data
(only for Pencil2, RoadRunners Evolution, DualRunners)
Baracoda RS232 dongle Plug & Scan – User Guide v3.28.2 - 8 -
Page 9

Data Capture
for Workforce
in Motion
Note: UPLOAD Messages
As keyboard emulation is used, the host application has a limited access to information on the scanner. To
answer this, the dongle can use a messages system which can help the host application having a status on the
upload process. This mode can be enabled or disabled (default) using the following barcodes:
Enable upload messages
(for Pencil2 & RoadRunners Evolution)
Disable upload messages (*)
(for Pencil2 & RoadRunners Evolution)
When this is used, the dongle adds information messages with the incoming data:
Before the upload:
<UPL>: start xxxxx
xxxxx being the number of expected barcodes to come
After the upload, two messages can appear:
<UPL>: transmission OK
This means that the barcodes were correctly transmitted from the scanner to the dongle and thus that they
have been erased from the scanner
<UPL>: transmission NOK
This means that an error occurred and has been detected by the dongle during the data upload. This means
that the data has not been erased from the scanner.
Baracoda RS232 dongle Plug & Scan – User Guide v3.28.2 - 9 -
Page 10

Data Capture
3.
3. How to connect your Baracoda barcode scanner
3.3.
How to connect your Baracoda barcode scanner
How to connect your Baracoda barcode scannerHow to connect your Baracoda barcode scanner
How to connect your BaracodaPencil/Pencil2
How to connect your BaracodaPencil/Pencil2
How to connect your BaracodaPencil/Pencil2How to connect your BaracodaPencil/Pencil2
1. Reset your BaracodaPencil (see BaracodaPencil/Pencil2 User Guide to perform this operation).
2. Plug the dongle into the RS232 COM port of the computer and switch it on.
3. Do not scan any other barcodes except the ‘connect barcode’ that is delivered with the dongle.
4. The LED on the scanner will start double flashing green: you are now connected! (*)
5. Start scanning barcodes.
(*) If the LED on the BaracodaPencil is not double flashing green, this may possibly mean:
The BaracodaPencil is low on power. Charge the unit up completely and try again
The BaracodaPencil has not been reset. Reset it and try again
The BaracodaPencil has been programmed from its default status and it is not able to decode
the Code 128 symbology. Be aware that the pairing barcode is a code128 and so the
BaracodaPencil shall stay in its default mode “Code128
on”
for Workforce
in Motion
By default, the Plug & Scan dongle activates the “No Data Loss Mode”. (Please refer to the paragraph 2.3
for additional information)
How to connect your BC2604/BL2604/BLR2604
How to connect your BC2604/BL2604/BLR2604
How to connect your BC2604/BL2604/BLR2604How to connect your BC2604/BL2604/BLR2604
1. Reset the scanner by taking out and replacing both batteries.
2. Plug the dongle into the RS232 COM port of the computer and switch it on.
3. Do not scan any other barcodes except the ‘connect barcode’ that is delivered with the dongle.
4. You will hear the scanner beeping for 7 times. After these 7 beeps, the LED on the scanner will start
double flashing green: you are now paired and connected! (**)
5. Start scanning barcodes.
(**) If the LED on the BL/BC/BLR2604 is not double flashing a green light, this may possibly mean:
• The scanner is low on power. Charge the unit up completely and try again
• The scanner has not been reset. Reset it and try again
• The scanner has been programmed from its default status and it is not able to decode the
Code 128 symbology. Be aware that the pairing barcode is a code128 and so the scanner shall
stay in its default mode “Code128 on”
Baracoda RS232 dongle Plug & Scan – User Guide v3.28.2 - 10 -
Page 11

Data Capture
How to connect your BCM2604
How to connect your BCM2604----L/BCM2604
How to connect your BCM2604How to connect your BCM2604
1. Reset the scanner by taking out and replacing both batteries.
2. If the scanner has not been programmed to read the Code 128 symbology, scan the Code 128 active
barcode (“Code 128 on”). The scanner should beep. The LED should remain a single flashing light.
Immediately reset the scanner. This will clear the memory buffer and allow the pairing barcode to
operate correctly.
L/BCM2604----FFFF
L/BCM2604L/BCM2604
for Workforce
Code 128 on
3. Plug the dongle into the RS232 COM port of the computer and switch it on.
4. Do not scan any other barcodes except the ‘connect barcode’ that is delivered with the dongle.
5. You will immediately get a “good read” confirmation beep from the scanner. In case you don’t get an
immediate double beep, simply reset your scanner and try again.
6. The scanner will beep a second time: the LED on the scanner will start double flashing green: you are
now paired and connected! (*)
7. Start scanning barcodes. Please note that the Plug & Scan dongle is not able to transmit 2D barcodes
with an amount of information bigger than 1080 characters.
(*) If the LED on the BL/BC/BLR2604 is not double flashing a green light, this may possibly mean:
FOR THE BCM2604-L
FOR THE BCM2604-F
in Motion
• The scanner is low on power. Charge the unit up completely and try again
• The scanner has not been reset. Reset it and try again
• The scanner has been programmed from its default status and it is not able to decode the
Code 128 symbology. Be aware that the pairing barcode is a code128 and so the scanner shall
stay in its default mode “Code128 on”
HHHHow to connect your D
ow to connect your D----Fly
ow to connect your Dow to connect your D
1. Reset the scanner (see D-Fly User Guide to perform this operation).
2. Plug the dongle into the RS232 COM port of the computer and switch it on.
3. Do not scan any other barcodes except the ‘connect barcode’ that is delivered with the dongle.
4. Within 5 seconds (not necessary to rescan), the connection is established. The scanner beeps twice
and the LED will change to a double flashing green.
5. Start scanning barcodes.
By default, the Plug & Scan dongle activates the “No Data Loss Mode”. (Please refer to the paragraph 2.3
for additional information)
Fly
FlyFly
Baracoda RS232 dongle Plug & Scan – User Guide v3.28.2 - 11 -
Page 12

Data Capture
How to connect your RoadRunners/RoadRunners
How to connect your RoadRunners/RoadRunners
How to connect your RoadRunners/RoadRunners How to connect your RoadRunners/RoadRunners
Evolution
Evolution
EvolutionEvolution
1. Reset the scanner (see RoadRunners User Guide to perform this operation).
2. Plug the dongle into the RS232 COM port of the computer and switch it on.
3. Do not scan any other barcodes except the ‘connect barcode’ that is delivered with the dongle.
4. Within 5 seconds (not necessary to rescan), the connection is established. The scanner beeps twice
and right LED will change to a double flashing green.
5. Open up the target application (such as Notepad, Excel and Word). Make sure the application can
accept data from a keyboard and the active cursor is where you want the barcode information to be
placed.
6. Start scanning barcodes.
By default, the Plug & Scan dongle activates the “No Data Loss Mode”. (Please refer to the paragraph 2.3
for additional information)
for Workforce
How to connect your ScanWear
How to connect your ScanWear
How to connect your ScanWearHow to connect your ScanWear
in Motion
1. Reset the scanner (see ScanWear User Guide to perform this operation).
2. Plug the dongle into the RS232 COM port of the computer and switch it on.
3. Do not scan any other barcodes except the ‘connect barcode’ that is delivered with the dongle.
4. Within 5 seconds (not necessary to rescan), the connection is established. The scanner beeps twice
and the right LED will change to a double flashing green.
5. Start scanning barcodes.
By default, the Plug & Scan dongle activates the “No Data Loss Mode”. (Please refer to the paragraph 2.3
for additional information)
How to connect your ToughRunners
How to connect your ToughRunners
How to connect your ToughRunnersHow to connect your ToughRunners
1. Reset the scanner (see ToughRunners User Guide to perform this operation).
2. Plug the dongle into the RS232 COM port of the computer and switch it on.
3. Do not scan any other barcodes except the ‘connect barcode’ that is delivered with the dongle.
4. Within 5 seconds (not necessary to rescan), the connection is established. The scanner beeps twice
and the LED will change to a double flashing blue.
5. Start scanning barcodes.
By default, the Plug & Scan dongle activates the “No Data Loss Mode”. (Please refer to the paragraph 2.3
for additional information)
Baracoda RS232 dongle Plug & Scan – User Guide v3.28.2 - 12 -
Page 13

Data Capture
How to connect your DualRunners
How to connect your DualRunners
How to connect your DualRunnersHow to connect your DualRunners
7. Reset the scanner (see DualRunners User Guide to perform this operation).
8. Plug the dongle into the RS232 COM port of the computer and switch it on.
9. Do not scan any other barcodes except the ‘connect barcode’ that is delivered with the dongle.
10. Within 5 seconds (not necessary to rescan), the connection is established. The scanner beeps twice
and right LED will change to a double flashing green.
11. Open up the target application (such as Notepad, Excel and Word). Make sure the application can
accept data from a keyboard and the active cursor is where you want the barcode information to be
placed.
12. Start scanning barcodes.
By default, the Plug & Scan dongle activates the “No Data Loss Mode”. (Please refer to the paragraph 2.3
for additional information)
Note: When you will be connected with the DualRunners, you could scan barcodes and read RFID TAG ID.
for Workforce
in Motion
Baracoda RS232 dongle Plug & Scan – User Guide v3.28.2 - 13 -
Page 14

Data Capture
4.
4. How to
4.4.
There are 3 different ways to disconnect a scanner from the Plug & Scan dongle.
How to dis
How to How to
1. Reading the “disconnect” barcode with the connected barcode scanner. Use this barcode to
disconnect your barcode scanner from a Plug and Scan dongle.
2. Send the “disconnect command” (cf. RS232 Plug&Scan Communication protocol) via the RS232
link.
3. Connect another scanner by reading the dongle’s Connect barcode with it (Swap process).
disconnect your
connect your Plug & Scan Dongle
disdis
connect your connect your
Disconnect
Plug & Scan Dongle
Plug & Scan DonglePlug & Scan Dongle
barcode
for Workforce
in Motion
Baracoda RS232 dongle Plug & Scan – User Guide v3.28.2 - 14 -
Page 15

Baracoda RS232 dongle Plug & Scan
Additional features
Additional featuresAdditional features
Additional features
Carriage Return (CR)
Data Capture
for Workforce
in Motion
5.
5.
5.5.
Prefix
Prefix
PrefixPrefix
Disable prefix [default]
Horizontal Tab (HT) prefix
SOH prefix
STX prefix
Suffix
Suffix
SuffixSuffix
Disable suffix [default]
EOT suffix
ETX suffix
Horizontal Tab (HT) suffix
Carriage Return (CR) suffix
Line Feed (LF) suffix
+ Line Feed (LF) suffix
– User Guide v3.28.2
- 15 -
Page 16

Data Capture
UART Settings
UART Settings
UART SettingsUART Settings
The default settings of the Baracoda Serial dongle are 9600 / 8 / 1 / None.
Baud Rate selection
9600 bps [default]
38400 bps
for Workforce
in Motion
19200 bps
57600 bps
115200 bps
Stop bits
1 stop bit [default]
Parity
None [default]
2 stop bits
Odd
Even
Baracoda RS232 dongle Plug & Scan – User Guide v3.28.2 - 16 -
Page 17

Baracoda RS232 dongle Plug & Scan
Only for BC2604/BL2604/B
Only for BC2604/BL2604/BOnly for BC2604/BL2604/B
Only for BC2604/BL2604/B
The Number of Beeps for ‘good scan’
Warning: These settings are only possible with BC/BL
disconnect the scanner (reading the “
LR2604 products
LR2604 productsLR2604 products
LR2604 products
2604 scanners. After scanning the desired barcode,
isconnect barcode”), wait for ten seconds and connect again u
Data Capture
DISCONNECT
“Connect barcode.”
for Workforce
in Motion
-
D
0 beep [default]
1 beep
sing the
2 beeps
3 beeps
– User Guide v3.28.2
- 17 -
Page 18

Baracoda RS232 dongle Plug & Scan
The Number of Beeps for ‘ACK’(in ‘no data loss mode’)
Warning: These settings are only possible with BC/BL
scanner (reading the “D
2604 scanners. After scanning the desired barcode,
s and connect again using the
Data Capture
DISCONNECT
disconnect the
“Connect barcode.”
for Workforce
in Motion
-
isconnect barcode”), wait for ten second
0 beep
1 beep [default]
2 beeps
3 beeps
– User Guide v3.28.2
- 18 -
Page 19

Data Capture
getversio
n
Print firmware version
Print firmware version
Print firmware versionPrint firmware version
This barcode will display the firmware version of your Plug & Scan dongle:
Print firmware version
Transparent mode
Transparent mode
Transparent modeTransparent mode
for Workforce
in Motion
The RS232 Plug&Scan can also provide a “transparent plug&scan” mode (Please refer to the RS232
Plug&Scan dongle’s communication protocol to see how to activate this mode). In this mode, the
connection process is the same (simply scan the “connect” barcode in order to get connected) but the
dongle will offer larger communication capabilities between the host and the scanner : all data sent by the
scanner is directly forwarded by the dongle to the host via the RS232 link. Therefore, it becomes
transparent in the communication.
Please note that Baracoda provides software support for applications using this mode. This
comes into a library (.dll) file containing all the necessary functions for a developer to simply get
to communicate with a Baracoda scanner using the RS232 Transparent Plug&Scan mode.
Baracoda RS232 dongle Plug & Scan – User Guide v3.28.2 - 19 -
Page 20

Data Capture
6.
6. Compatibility
6.6.
The RS232 Plug & Scan (v3.28) is only compatible with the following Baracoda barcode readers:
• BaracodaPencil
• BaracodaPencil2
• D-Fly
• RoadRunners (BRR-L, BRR-LA, BRR-F, BRR-Fe, BRR-Fs) :
• RoadRunners Evolution :
Compatibility
CompatibilityCompatibility
Minimum Bluetooth version required 1.5 and minimum Decoder version required 1.5
All versions (‘Batch mode’ configurable from decoder v1.34)
All versions
All versions (‘No data loss mode’ configurable from decoder v3.10 & Radio v1.72)
All versions
for Workforce
in Motion
• BC/BL/BLR2604 :
Minimum Bluetooth version required: 1.6 and minimum Decoder version required BT085
• BCM 2604-L and BCM2604-F :
All versions
• ToughRunners
All versions
• ScanWear
All versions
• DualRunners
All versions
Baracoda RS232 dongle Plug & Scan – User Guide v3.28.2 - 20 -
Page 21

Data Capture
for Workforce
in Motion
Limited Warranty.
Limited Warranty.
Limited Warranty.Limited Warranty.
Manufacturer warrants that the product will be free of defects in material and workmanship for one (1) year
from the date of shipment. Manufacturer will, at its option, either repair, replace or refund the purchase price
paid by buyer for the defective products.
Such repair, replacement or refund shall be buyer's sole remedy in the event of Manufacturer's breach of this
limited warranty. Repaired or replaced parts or product may include new, reconditioned or remanufactured
parts and equipment at Manufacturer's option. All costs associated with shipment to Manufacturer for
warranty service, including but not limited to freight, duties, insurance and customs fees are buyer's
responsibility. Manufacturer will pay the freight costs (duties, insurance, customs and any other fees are
buyer's responsibility) associated with the return shipment to buyer. The method of shipment will be at
Manufacturer's discretion. Repair or replacement of any parts or equipment does not extend the period of
warranty provided for herein. THIS LIMITED WARRANTY IS MANUFACTURER'S ONLY WARRANTY.
MANUFACTURER DOES NOT GIVE WARRANTIES OF MERCHANTABILITY OR WARRANTIES OF FITNESS FOR A
PARTICULAR PURPOSE. To take advantage of this warranty, buyer should contact the seller not the
Manufacturer. The warranty set forth herein does not cover and Manufacturer will have no obligations
hereunder if any non-conformance is caused in whole or in part by; accident, transportation, neglect, misuse,
alteration, modification, or enhancement of the products or incorporation, interfacing, attachment of any
feature, program, or device to the Products by a person or entity other than Manufacturer, failure to provide a
suitable installation environment, use of the products for other than the specific purpose for which the
products are designed or any use of the product not in accordance with the User Guide or other misuse or
abuse of the product. The warranty does not cover problems linked to batteries.
Baracoda RS232 dongle Plug & Scan – User Guide v3.28.2 - 21 -
 Loading...