

Page 1

E S 1 2 0
I n s t r u c t i o n M a n u a l
V 1.0.3
Page 2

I.
Safety Statement
II. Product Introduction
III.Performance Parameters
IV. Surface and Sockets
V. Use Steps
VI. Parameter Setting
VII. Firmware Upgrade
VIII. FAQ
IX. Certification Marks
Contents
P1
P2
P2
P3
P4
P5
P6
P7
P8
Page 3

1
I. Safety Statememt
1. General Safety
Please use output of 5V power adapter for charging.
Do not operate under high humidity;
Do not operate in inflammable/explosive environment.
keep product surface clean & dry.
Please don’t operate ES120 when it’s wet or operate
it with wet hands,which will cause an electric shock.
When using ES120,the handle is constructed with
precision, dropping shall be avoided.
2. Liability Statement
Any damage of the product,or losses related to the product
damage,if it’s man-caused,or assumed to be man-caused,
the liability will belong to the user.
Page 4

II. Product Introduction
ES120 is a STM32 processor-based mini smart
electric screwdriver. It is featured with OLED
display, Micro USB interface which serves as PC
connecting and charging. Compact size, simple
operation and easy to use. It can meet the essential
requirements of school experiment, home appliance
repair and electronic engineering.
2
III.Performance Parameters
Voltage: 3-5V
Operate time: 60 min
Charging time: 40 min
Unload speed: 170 RPM
Torque range: 2.5/20kgf.cm
Bit specification: 4mm hex socket
Charging mode: Micro USB 5V input
Page 5
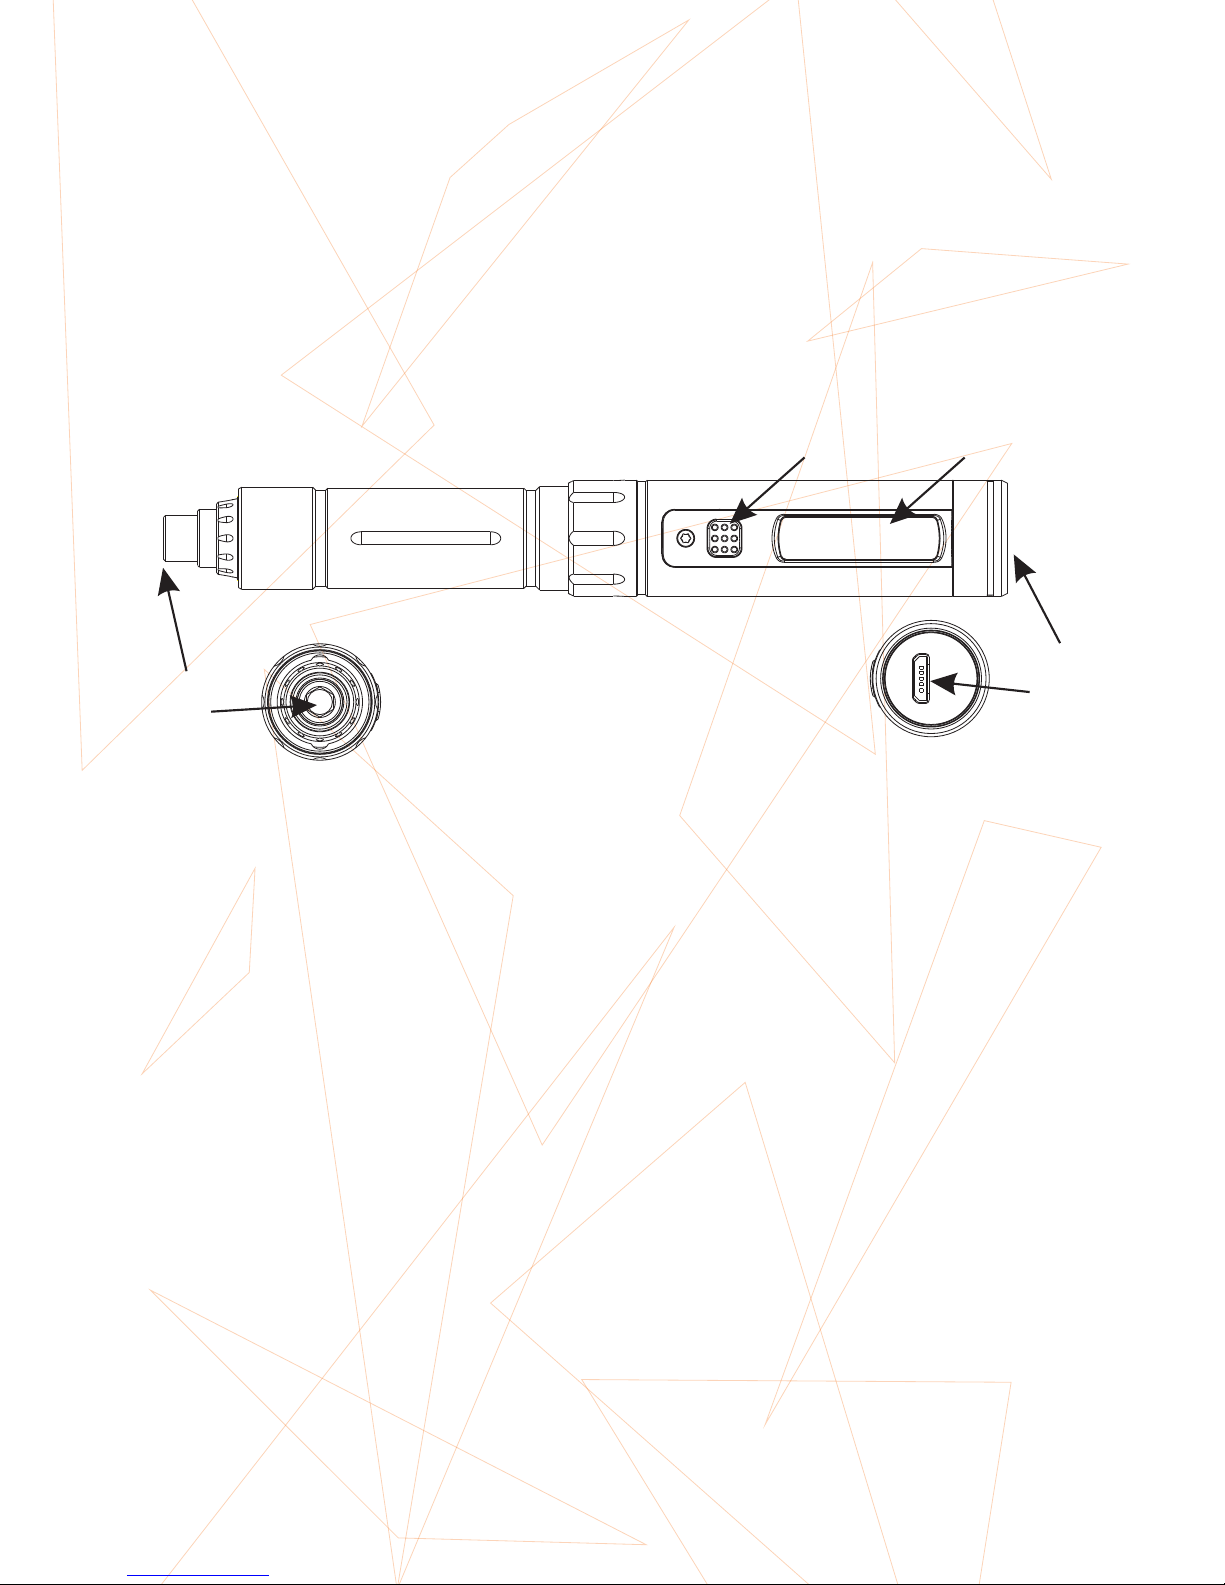
IV. Surface and Sockets
1. Button
2. OLED screen
3. Hex socket (size: 4mm)
4. Micro USB socket
①
②
③
④
3
Page 6
V. Use Steps
1.
2.
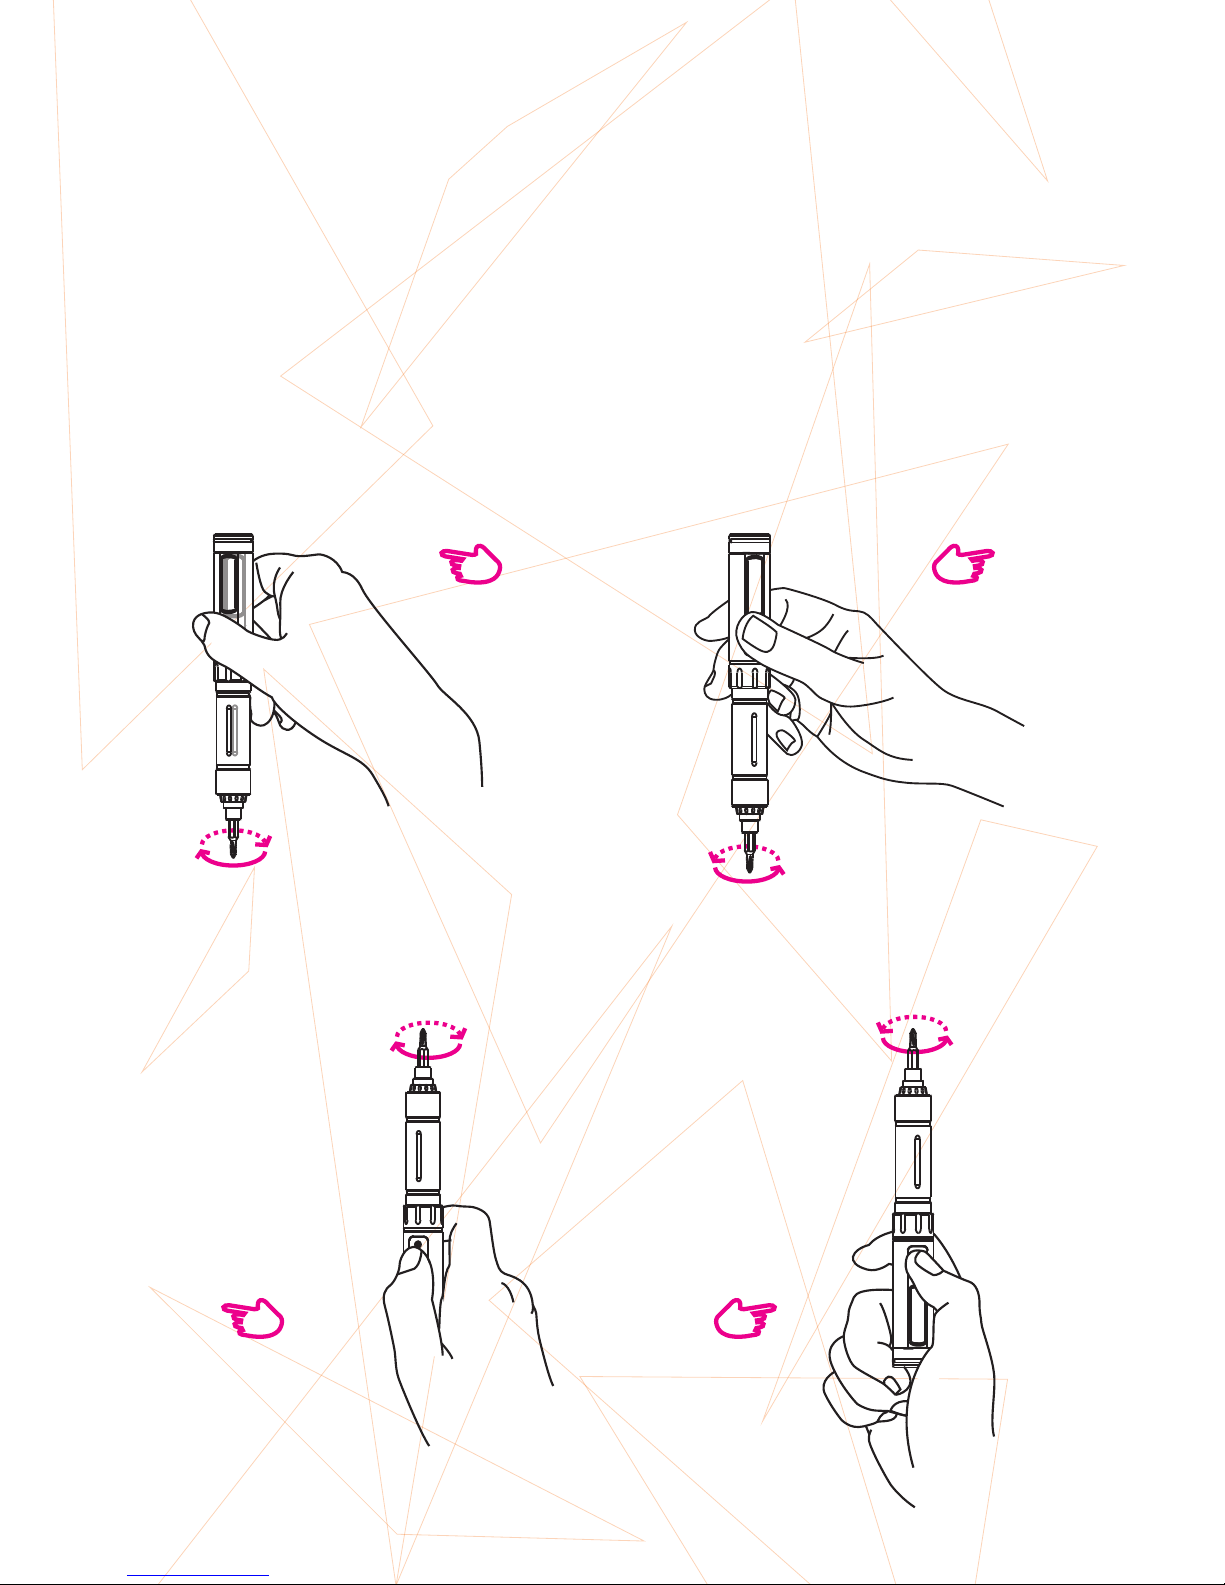
When the screwdriver is power off, short press the key
to enter stand-by interface.
Way of use: In Standby mode, hold ES120's button,
and:
1) When your wrist turns left (see Pic.1 and Pic.3), the
bit of ES120 will turn clockwise;
2) On the contrary, when your wrist turns right (see Pic.2
and Pic.4), the bit of ES120 will turn anti-clockwise.
4
Pic. 1 Pic. 2
Operation Instructions:
Pic. 3
Pic. 4
Wrist turn left
Bit rotation direction
Wrist turn right
Bit rotation direction
Bit rotation direction Bit rotation direction
Wrist turn left
Wrist turn right
Page 7
3.Keep the screwdriver still on stand-by interface and
hold the key for 0.5 second, the screwdriver will rotate
in the same direction as that of previous use.
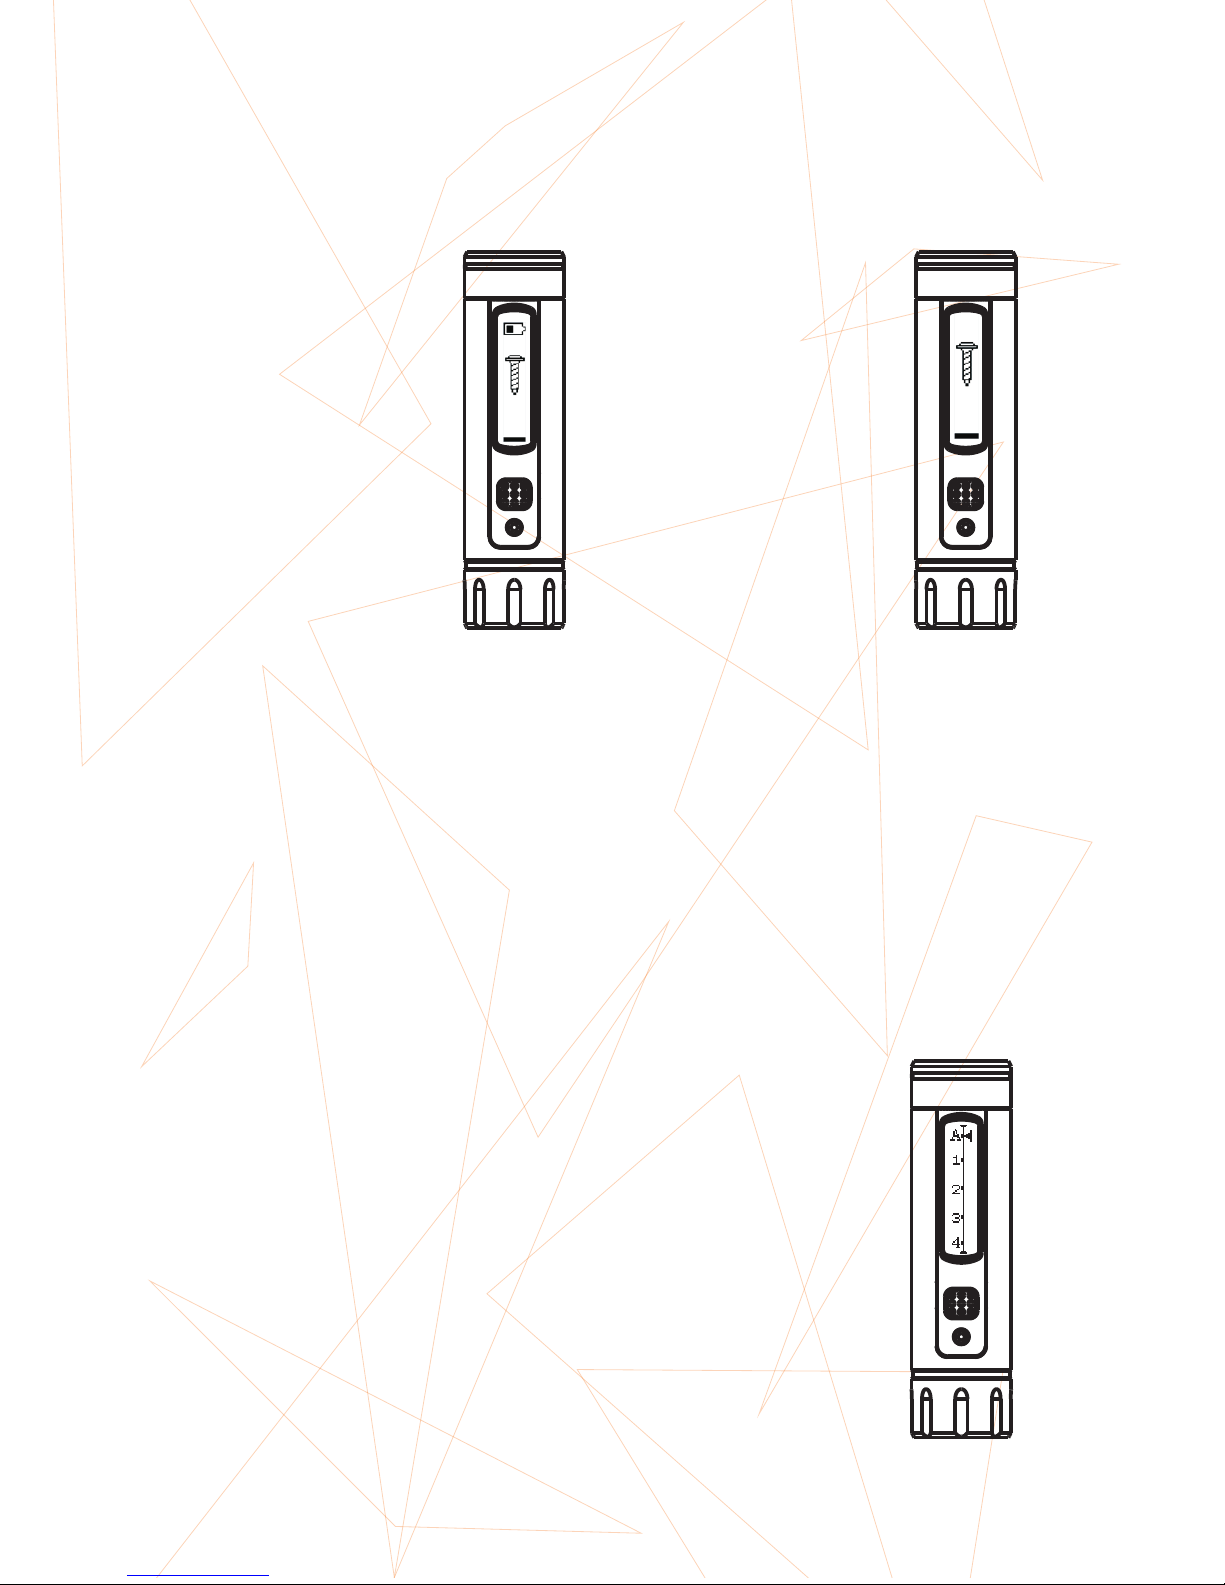
Stand-by interface: Working interface:
VI. Parameter Setting
1. Manual setting
Press the key continuously thrice on stand-by interface
to enter setting mode, and long press the button or wait
for 1.5 seconds to quit the setting mode. There are five
torque shifts in setting mode:
Shift A adopts an automatic mode,
in which the rotation speed of
screwdriver increases with the
increase of rotation angle.
Shift 1 to 4 correspond four
torques, which decrease gradually.
●
●
5
4、ES120 will automatically turn off if kept still for 15
seconds.
Page 8

2.Configuration file setting
When the screwdriver is power off, connect it to PC with
USB data cable, short press the key to activate the flash
disk; open config.txt file in the disk, and the contents are:
StartAngle=2 #(2~10)
Gear=4 #(0~4)
MotoTimeCont=0 #ReadOnly
Ver=1.1 #ReadOnly
StartAngle
The angle that starts ES120. E.g. set as
“2”, ES120 will start working at a rotation
angle of 2 degree.
Gear
Torque shifts, “0-4“ corresponds with “A-4”
MotoTimeCont
Motor service time, read only
Ver
Version, read only
VII. Firmware Upgrade
1、Visit www.miniware.com.cn and download the latest
ES120 firmware to your PC
2、When the screwdriver is power off, connect it to PC
with USB data cable, and hold the key until “DFU3.44”
displays on screen to enter DFU mode, and a virtual disk
will appear on PC.
6
Parameters Paraphrase
Range
2~10
0~4
Note: Settings will be applied to ES120 by saving.
Page 9
VIII. FAQ
1
2.
.Torque shift: when the torque reaches the highest
torque shift, the screwdriver will stop for 3 seconds before
working again, as to protect the screw and motor.
DFU & flash disk mode: it may enter the mode only if
you start the machine when the screwdriver is power
off and connected with USB data cable.
3
4.
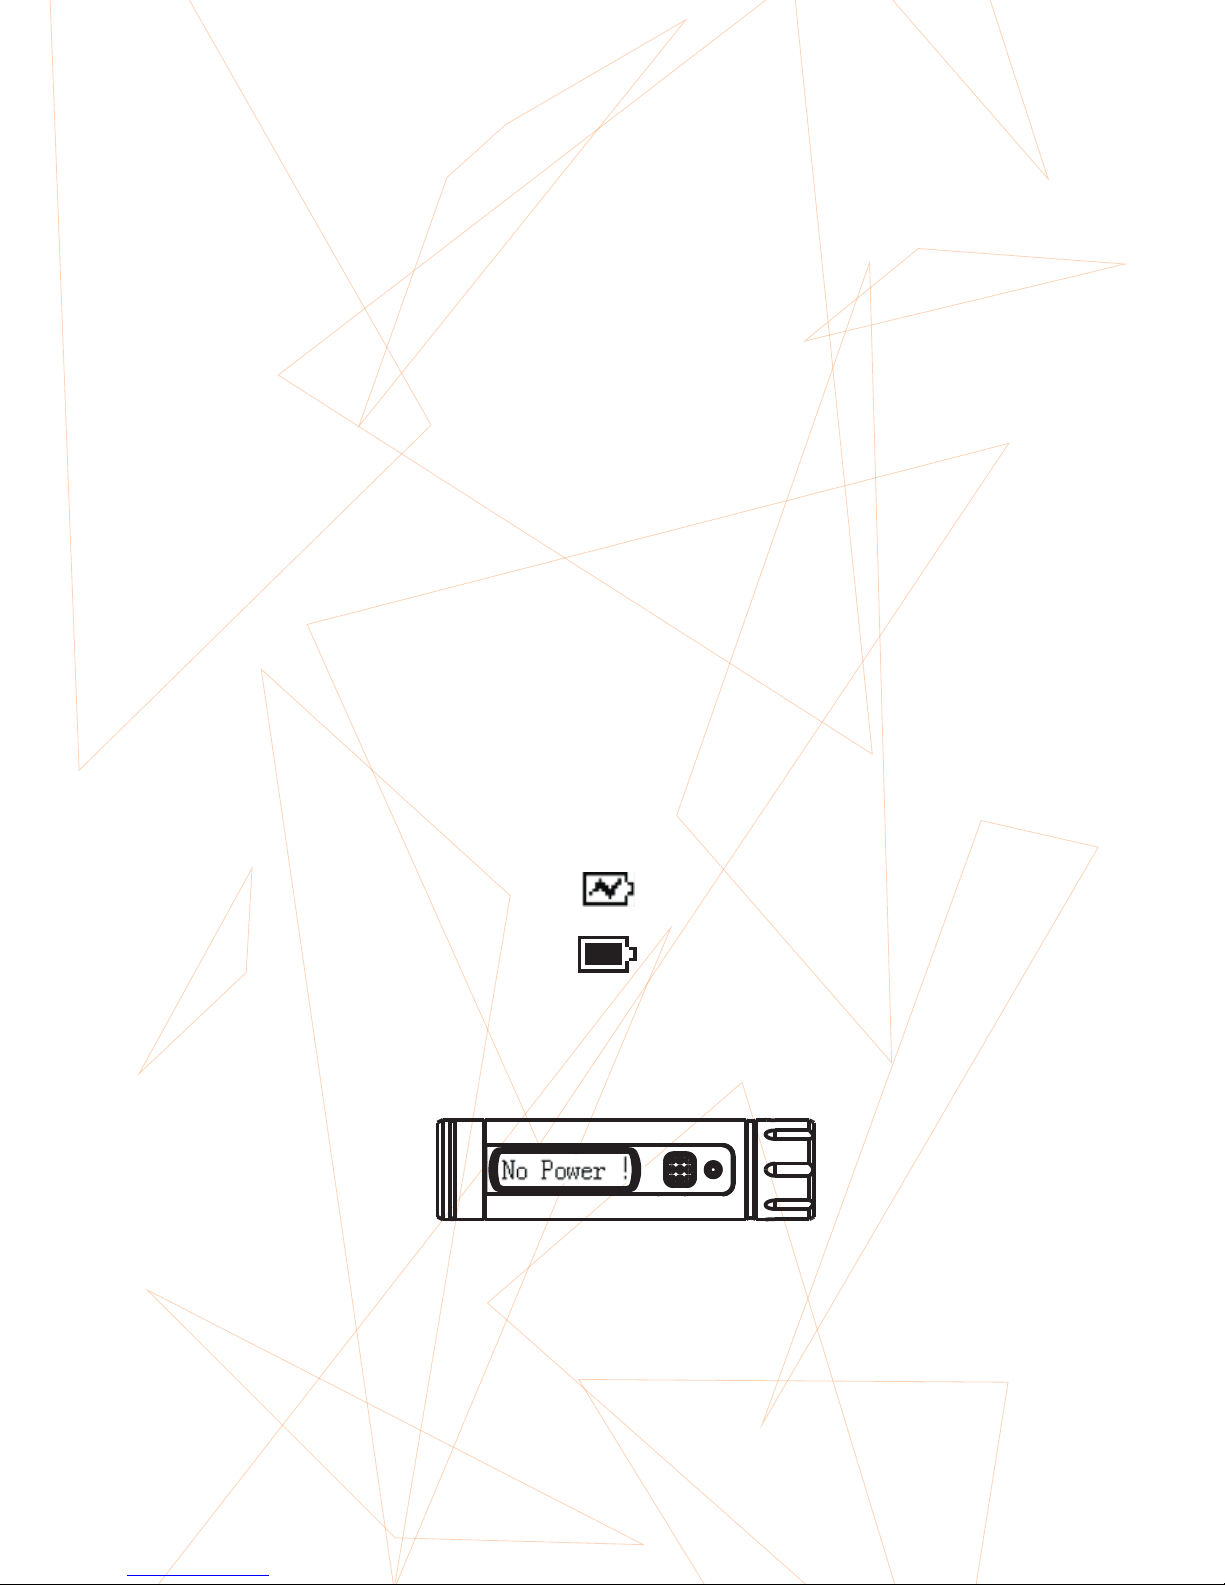
.Charging icon:
Fully charged icon:
When in low battery, a warning will appear on screen
and the screwdriver will be automatically powered off:
It is a normal phenomenon if a little oil stain exists on
surface of hexagon wrench socket.
7
3.Copy the hex firmware to root directory of the disk,
and when the suffix of firmware changes to .rdy,
disconnect USB data cable or press the key continuously
thrice to quit DFU mode and thus complete the firmware
upgrade.
Page 10
8
9.2 Statement of Fulfilling FCC Standard
This device fulfills part 15 of the FCC regulations Device
must fulfill below 2 conditions:
(1) Device must not generate interference.
(2) Device must be able to resist any interferenceson it,
including interferences that could cause dangerous
manipulation.
9.3 Statement of Fulfilling CE Standard
This is a trademark of Europe Union.
This product with CE logo on it fulfills related Euro Union
laws and regulations.
IX. Certification Marks
9.1 Disposal
Do not dispose this product with domestic waste.
Handling and recycle: Disposal of the product shall be
manipulated according to laws and regulations in your
area.
 Loading...