

Page 1

Bandspeed AirMaestro 3100AG Access Point
User’s Guide
- 1 -
Page 2

SAFETY AND REGULATORY NOTICES
FCC STATEMENT
The Bandspeed AirMaestro 3100AG Access Point has been tested and found to
comply with the specifications for a Class B digital device, pursuant to Part 15 of
the FCC Rules.
Operation is subject to the following two conditions:
1) This device may not cause harmful interference, and
2) This device must accept any interference received, including interference
that may cause undesired operation.
These limits are designed to provide reasonable protection against harmful
interference in a residential installation. This equipment generates, uses, and can
radiate radio frequency energy and, if not installed and used according to the
instructions, may cause harmful interference to radio communications. However,
there is no guarantee that interference will not occur in a particular installation. If
this equipment does cause harmful interference to radio or television reception,
which is found by turning the equipment off and on, the user is encouraged to try
to correct the interference by one or more of the following measures:
• Reorient or relocate the receiving antenna;
• Increase the separation between the equipment or devices;
• Connect the equipment to an outlet other than the receiver's;
• Consult a dealer or an experienced radio/TV technician for assistance;
FCC Caution: Any change or modification to the product not expressly approved
by Bandspeed could void the user's authority to operate the device.
FCC Caution: Operation within the 5150 to 5250GHz band is restricted to indoor
use only.
FCC RF Radiation Exposure Statement: To comply with the FCC and ANSI
C95.1 RF exposure limits, the antenna(s) for this device must comply with the
following:
• Access points with 2.4 GHz or 5 GHz integrated antenna must operate
with a separation distance of at least 20 cm from all persons using the
cable provided and must not be co-located or operating in conjunction with
any other antenna or transmitter.
• End-users must be provided with specific operations for satisfying RF
exposure compliance.
- 2 -
Page 3

Note: Dual antennas used for diversity operation are not considered co-located.
Canadian Department of Communications Industry Canada (IC) Notice:
This Class B digital apparatus complies with Canadian ICES-003 and RSS-210.
Cet appareil numérique de la classe B est conforme à la norme NMB-003 et
CNR-210 du Canada.
"To prevent radio interference to the licensed service, this device is intended to
be operated indoors and away from windows to provide maximum shielding.
Equipment (or its transmit antenna) that is installed outdoors is subject to
licensing."
" Pour empêcher que cet appareil cause du brouillage au service faisant l'objet
d'une licence, il doit être utilisé à l'intérieur et devrait être placé loin des fenêtres
afin de fournir un écran de blindage maximal. Si le matériel (ou son antenne
d'émission) est installé à l'extérieur, il doit faire l'objet d'une licence. "
- 3 -
Page 4

Important Factory Defaults
Here are the factory defaults that you may need to get your BSP1000 AP up and running
on your local network. The defaults were chosen to provide quick initial access to the
system and you will likely want to change some of them.
Bandspeed recommends that you change your admin/root password immediately and that
you configure some level of security. These Quick Start topics will be covered in later
sections.
IP address DHCP (need a DHCP server on Ethernet
network)
admin/root password Bandspeed
SSID Bandspeed
Frequency band 802.11b/g 2.4GHz on WIF 1, 802.11a
5.0GHz on WIF 3, background monitoring
on WIF 2.
Channels Automatic Intelligent Channel Selection
Security None
Serial Port 115,200 baud, 8 data bits, no parity bits, 1
stop bit, no flow-control, null-modem cable
- 4 -
Page 5

Configuring BSP1000’s IP Address Over Ethernet
The BSP1000 is configured with DHCP-assigned IP address at the factory (see Important
Factory Defaults). You can access the BSP1000’s configuration web page by creating an
isolated network with a personal computer, a DHCP server, an Ethernet switch (or hub)
and the BSP1000 in one of the configurations shown using a standard CAT-5 cable with
RJ-45 connectors.
To determine the IP address of the BSP1000, run the Bandspeed Management Console
application and it will display details information about BSP1000 systems.
Figure 1: Possible Ways to Configure BSP1000’s IP Address over Ethernet
- 5 -
Page 6

- 6 -
Page 7

Launch your personal computer’s web browser, enter the IP address (see Important
Factory Defaults) in the "Address" field and press <Enter>.
When prompted for user name and password, enter “admin” as the user name and the
factory default password (see Important Factory Defaults) as the password. You will see
the BSP1000 configuration home page (below).
- 7 -
Page 8
Select Configure at the main menu and the configuration page will appear (below).
- 8 -
Page 9

Select TCP/IP from the configuration bullet-list and the TCP/IP configuration page will
appear (below).
If you use a DHCP server on your network to assign IP addresses and you want the
BSP1000 to obtain its IP address from the DHCP server, select “Obtain an IP address
automatically (DHCP client)”, then press [Apply].
You will need to save this configuration change to make it persist across power-cycles, as
shown below. Select Commands from the main menu and the Commands menu will
appear.
- 9 -
Page 10

The configuration change should be saved to the Current Boot Config (nueces in this
case).
Enter nueces in the Filename text field and press [Save Config].
- 10 -
Page 11

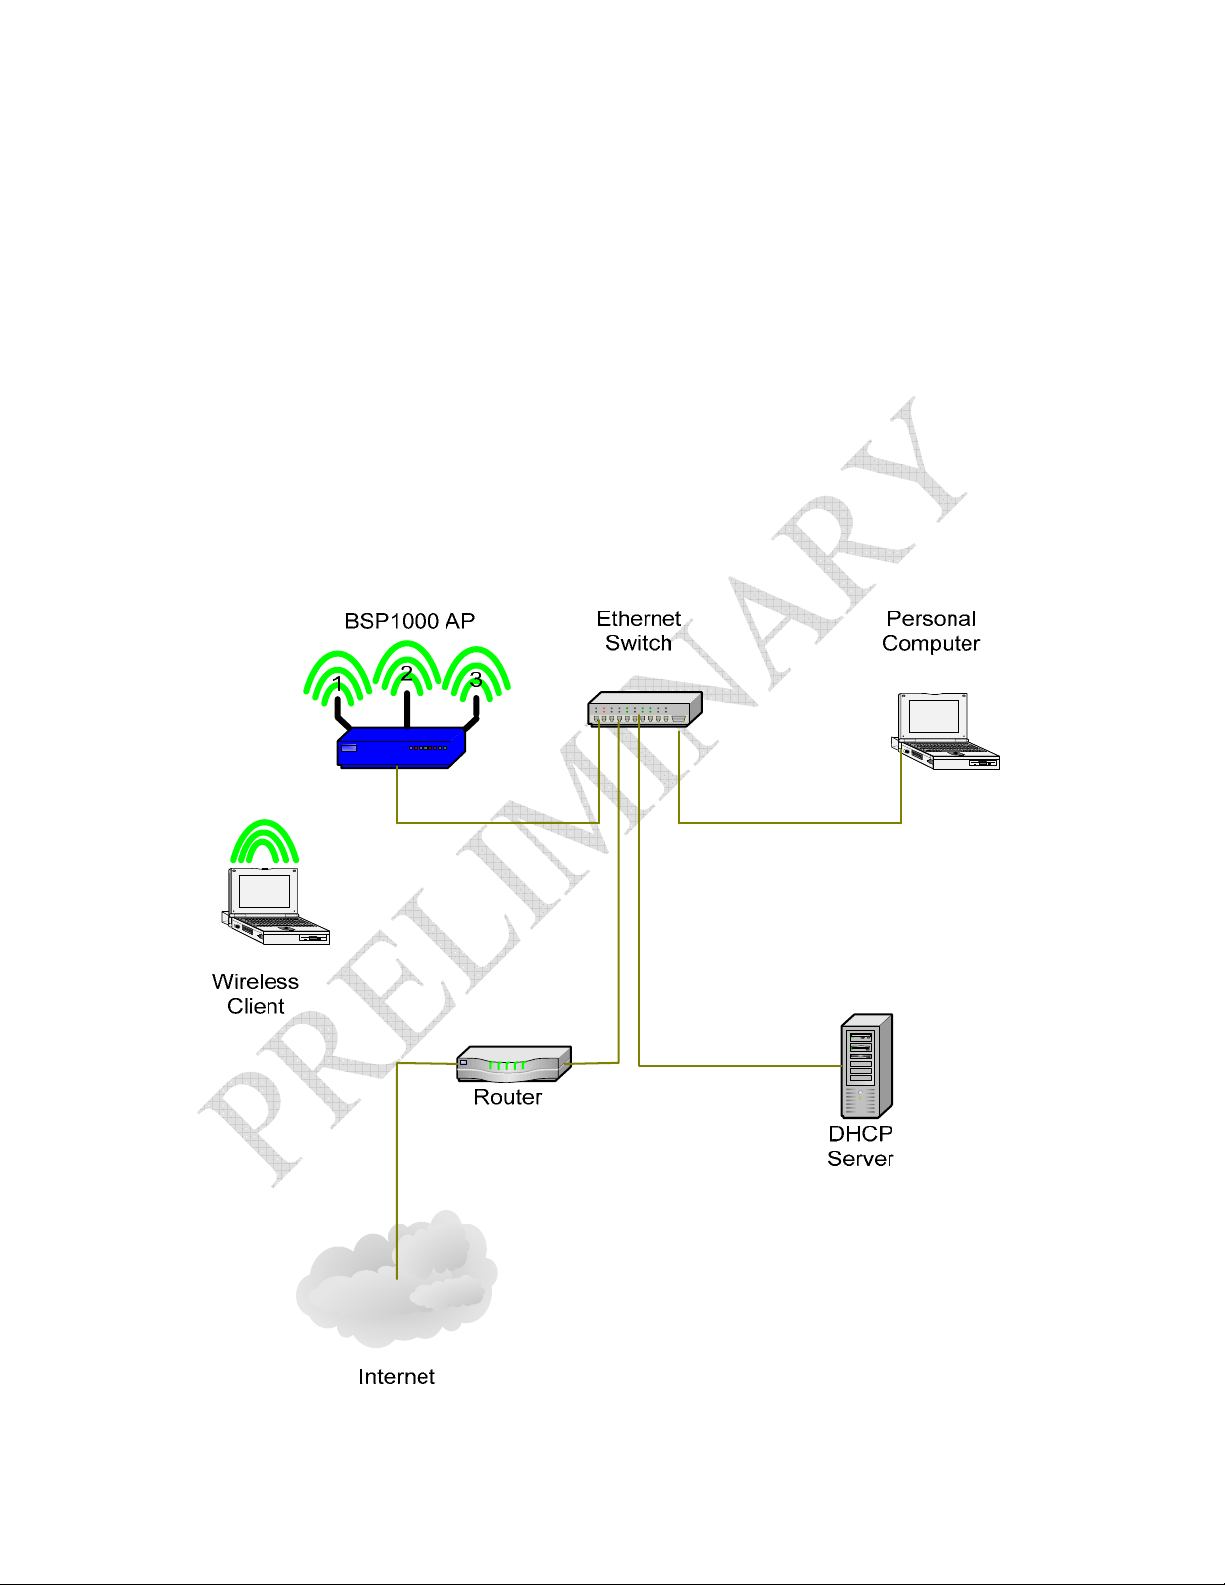
Before you can actually acquire an IP address from your DHCP server, you will need to
connect the BSP1000 to your enterprise network. Power-off the BSP1000.
Figure 2: Connection to enterprise network using automatic IP address assignment
Connect the BSP1000’s ethernet port to a switch on your enterprise network where the
DHCP server can provide its IP address. Power-on the BSP1000. Test the connection by
attempting to access the BSP1000’s web page from a personal computer on the enterprise
network.
NOTE: If you select this mode, you will need some way of determining what IP address
the DHCP server has assigned to the BSP1000. You can log into the BSP1000 through
the serial port and type “get tcpip<Enter>”. See Configuring BSP1000 Over the Serial
Port for more information.
- 11 -
Page 12

After restarting and logging in to the new automatically-obtained IP address, your
Configure/TCP/IP page should look something like the one shown below.
The DHCP server has not only provided an IP address dynamically, it has also provided a
Default Gateway address and DNS server addresses dynamically. This will vary
depending on how your network is set up. Have your network administrator verify the
information that appears if you have reason to suspect there’s something wrong.
- 12 -
Page 13

Otherwise, you may have obtained a static IP address from your network administrator. If
so, enter that IP address in the “IP Address” field. Your network administrator may have
also provided a Subnet Mask, Default Gateway and DNS server addresses. If so enter
them at this time. Press [Apply] when finished.
Save the configuration change as described in the dynamic IP address section,
power-off the BSP1000 and test the configuration as indicated in Figure 2.
After restarting and logging in to the new static IP address, your Configure/TCP/IP page
should look something like the one shown below.
- 13 -
Page 14
Connecting a 2.4GHz Wireless Client (station)
At this point, wireless clients should be able to “see” the BSP1000 on the 2.4 GHz
network. For the purposes of this guide, we’ll assume that the BSP1000 SSID has been
set to “QuickStart”. You do not need to change the SSID on your system for this test. If
you choose not to change it, just substitute the BSP1000 factory default SSID (see
Important Factory Defaults) wherever you see “QuickStart”. For information on setting
the BSP1000’s SSIDs, see Configuring SSIDs.
Figure 3: Connecting a Wireless Client Through the BSP1000 AP
- 14 -
Page 15

Your wireless client should have some sort of utility to “discover” APs and it can be
configured to scan the 2.4GHz spectrum or the 5GHz spectrum or both. By default, the
BSP1000 is broadcasting its services in the 2.4GHz spectrum, supporting either .11b or
.11g clients. If your client NIC supports .11b and/or .11g, its “discovery” utility should
detect the BSP1000 at the “QuickStart” SSID.
For a Windows XP client, select “Network Connections” in the Control Panel and
highlight the wireless NIC you’re trying to connect through. You should see a screen
something like the one below.
- 15 -
Page 16

Select “View Available Wireless Networks” under “Network Tasks” and you’ll see a
display something like this.
Under “Choose a wireless network”, you’ll see a list of the APs “discovered” through
your wireless NIC. The BSP1000’s “QuickStart” SSID should appear in this list. If it
doesn’t, try selecting “Refresh Network List” under “Network Tasks”. If the BSP1000’s
SSID still doesn’t appear, contact Bandspeed for technical assistance.
- 16 -
Page 17

Once your wireless client can “see” the BSP1000’s “QuickStart” SSID, you should be
able to connect it to your enterprise network through the BSP1000.
Continuing with a Windows XP client, highlight the BSP1000’s “QuickStart” entry in the
list under “Choose a wireless network” (see previous paragraphs) and press [Connect].
Ignore the warning about unsecured networks for now and proceed with the connection.
Shortly, the BSP1000’s “QuickStart” SSID should appear at the top of the “Choose a
wireless network” list with a status of “Connected”.
You should now be able to access your enterprise network from the wireless client. If not,
contact Bandspeed for technical assistance.
- 17 -
Page 18

Configuring BSP1000’s admin and root Passwords
Now that your BSP1000 is accessible from computers on your enterprise network, you
can perform all administration tasks over TCP/IP and ethernet. Bandspeed recommends
changing the admin and root passwords immediately.
The BSP1000 admin password may be set through the web (HTTP) or command line
interfaces.
Changing the Password Using the Web Interface
Launch your personal computer’s web browser, enter the BSP1000’s IP address in the
"Address" field and press <Enter>.
When prompted for user name and password, enter “admin” as the user name and the
current password. You will see the BSP1000 configuration home page (below).
- 18 -
Page 19

Select Configure at the main menu and the configuration page will appear (below).
- 19 -
Page 20

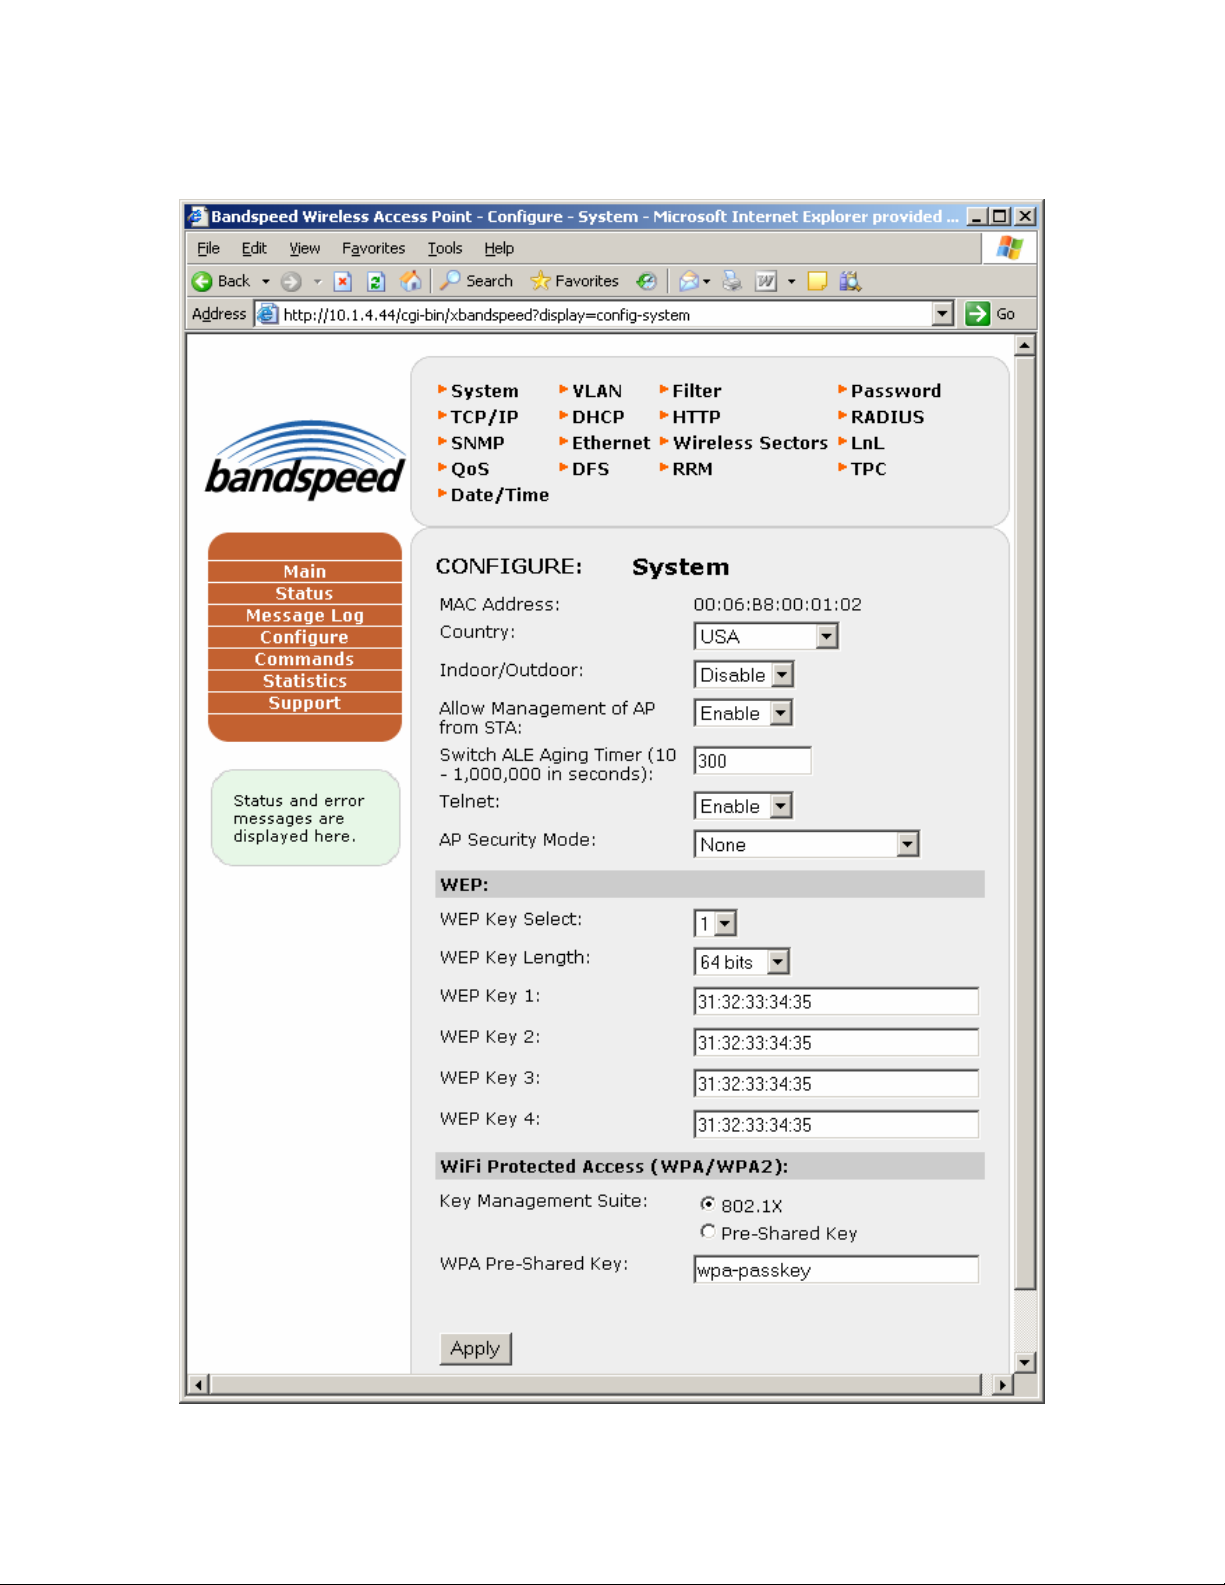
Select Password from the configuration menu bullet list and you will see the password
configuration screen (below).
Enter the new password in the fields provided, consulting the Password Guidelines if
needed. Press [Apply] to commit the password change.
- 20 -
Page 21

Changing the Password Using the Command Line Interface
You can access the BSP1000 command line by ssh (recommended) or telnet login to the
BSP1000’s base IP address. Note that using telnet to set passwords is not secure, in that
the password is exposed in clear-text on your network. If you must use telnet, Bandspeed
recommends using it on an isolated network only, where network traffic can not be
viewed by unauthorized parties. An example is shown for ssh but the telnet process is
similar. Note that ssh support for Windows is part of the open source Cygwin package.
For a Windows/XP client, open a Command Prompt window from Programs/Accessories
and type “ssh –l admin {IP address}”. See the example window below.
Press <Enter> and you’ll be presented with a password prompt as shown below.
- 21 -
Page 22

Enter the BSP1000 factory default password and the IXP425 prompt appears.
Set a new “admin” password using the Bandspeed “set password” command as shown.
Press <Enter> and you’ll be prompted for the new password as shown.
- 22 -
Page 23

Enter the same password a second time when prompted as shown.
If you’ve successfully entered the same password twice, you’ll see the following screen
acknowledging the password change.
The process for using UNIX or Linux as a client is similar to the process above.
- 23 -
Page 24

Configuring SSIDs
You will likely want to use site-specific SSIDs on your wireless LAN, as opposed to the
BSP1000 factory default or the “QuickStart” SSID used in preceding examples. You can
configure site-specific SSIDs through the BSP1000 configuration web page, as follows.
Launch your personal computer’s web browser, enter the BSP1000’s IP address in the
"Address" field and press <Enter>.
When prompted for user name and password, enter “admin” as the user name and the
current password. You will see the BSP1000 configuration home page (below).
- 24 -
Page 25

Select Configure at the main menu and the configuration page will appear (below).
- 25 -
Page 26
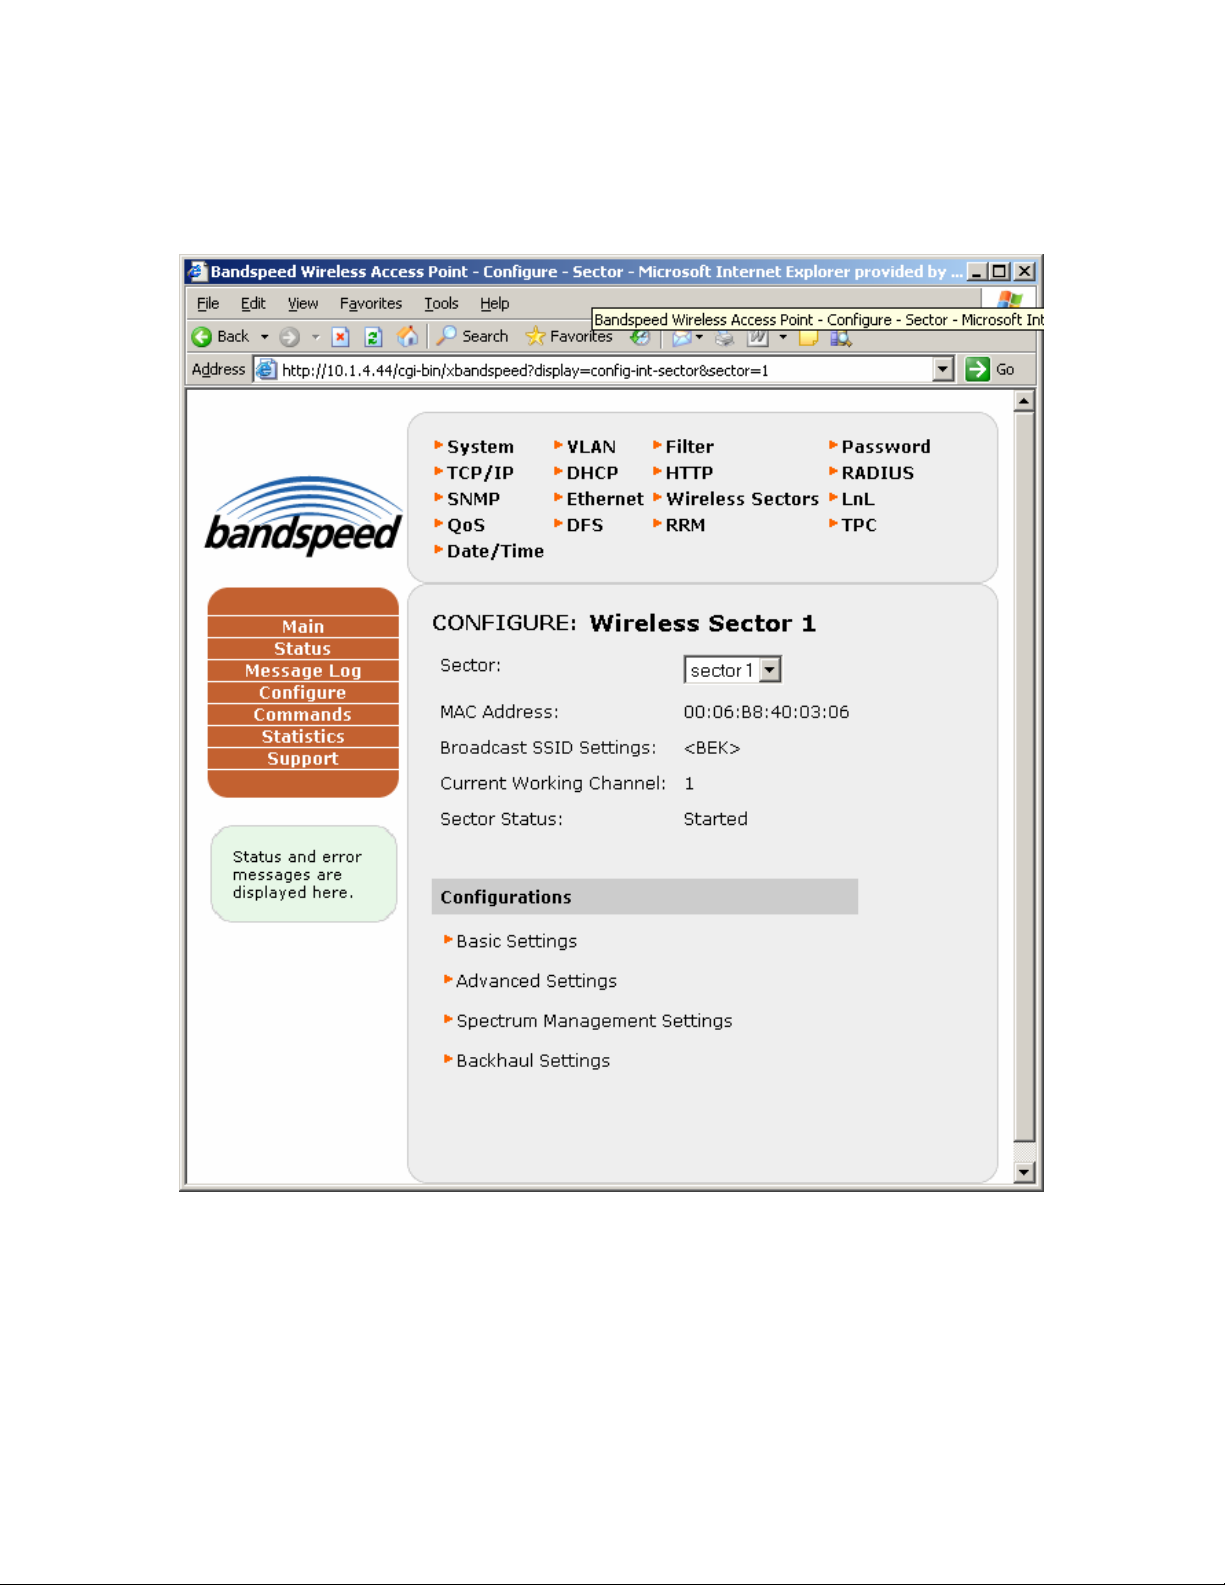
Select Wireless Sectors from the configuration bullet-list and the Wireless Sectors
configuration page will appear (below).
The current broadcast SSID for wireless sector 1 is displayed under Broadcast SSID
Settings. You can configure the same SSID on each of sectors (interfaces) 1, 2 and 3 or
different SSIDs on each of them.
- 26 -
Page 27

To change the SSID for wireless sector 1, select Basic Settings under Configurations and
the Wireless Sectors Basic Settings page will appear (below).
- 27 -
Page 28

To change the SSID, edit the text between <> in the Broadcast SSID Settings text box
and press [Apply]. This example sets the SSID for sector 1 to “QuickStart1”.
- 28 -
Page 29

To configure an SSID on a different wireless sector (interface), open the Sector pulldown under Wireless Sector and select the sector you want to configure. Repeat the
process above for this wireless sector.
- 29 -
Page 30
Configuring BSP1000 Using the Serial Port
Should the BSP1000 become inaccessible over the network (ethernet or wireless), you
may need to configure it using the serial interface.
Connect a null-modem cable from an industry-standard PC to the serial port on the back
of the BSP1000.
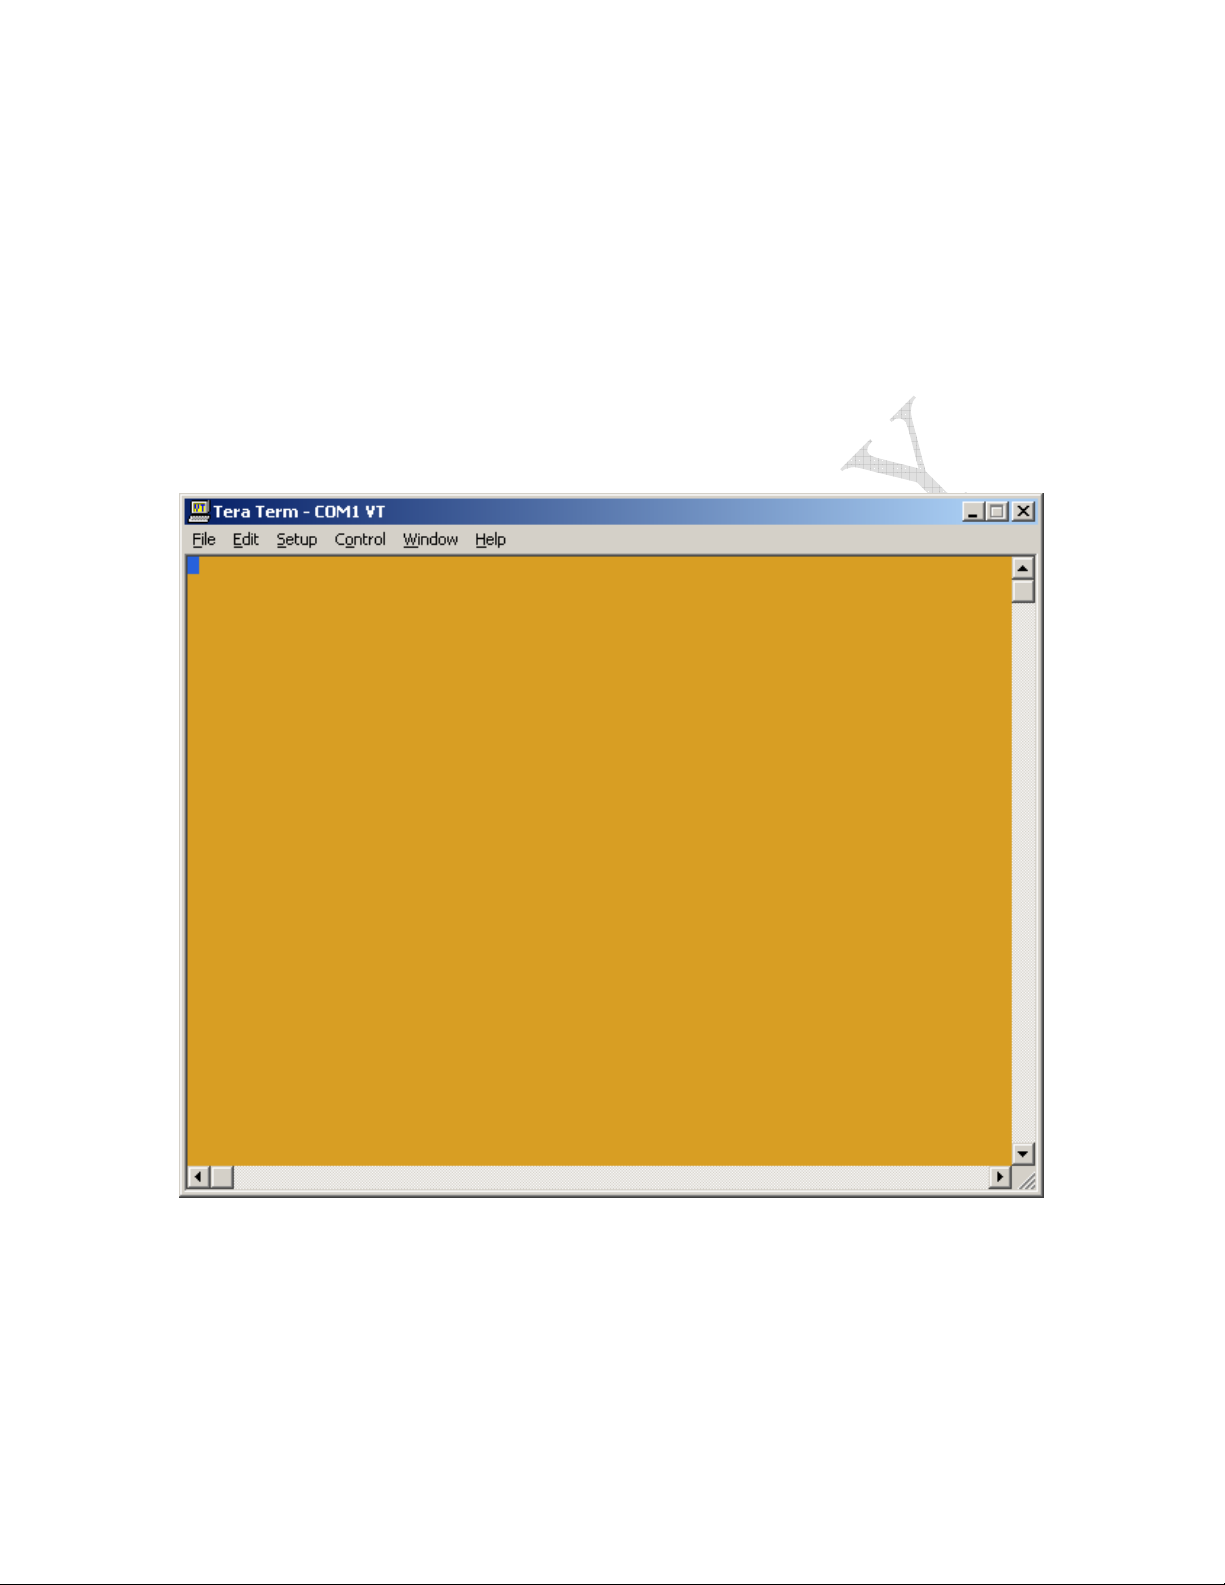
Configure the serial interface according to the Serial Port information in Important
Factory Defaults. Use a serial interface program such as TeraTerm to configure the
serial interface, usually COM1.
After configuring the serial interface, press <Enter> on the PC keyboard and you will be
presented with the BSP1000 login prompt (below).
- 30 -
Page 31

Enter admin as the user name as shown and press <Enter>.
- 31 -
Page 32

Enter the admin password when prompted.
You are now logged in to the BSP1000, just as with the ssh/telnet examples given earlier.
All Bandspeed CLI functionality is available. See the BSP1000 User Guide for more
information on functionality available from the CLI.
- 32 -
 Loading...