

Page 1
User Manual
BandLuxe
P530
Mobile
Series
Router
P/N: 65014400041 Rev.A
1
Page 2

T able of Contents
Introduction..............................................................................
Features.............................................................................................. 4
Getting
Started .........................................................................
4
5
Package Content s ............................................................................... 5
Hardware Overview............................................................................. 6
Installation ........................................................................................... 7
USB Connectivity ...............................................................................11
Basic Functions................................................................................. 12
Powering On and Off ................................................................ 12
Hardware Wi-Fi Switch (Optional)............................................. 12
Battery Information............................................................................ 12
P530 Series Management
.....................................................
14
Accessing the Device ........................................................................ 14
Mobile Network Option ............................................................. 15
WiFi Options ............................................................................. 17
Battery Saver............................................................................ 19
Connection Statistics ................................................................ 20
SMS .................................................................................................. 21
New SMS ................................................................................. 21
Inbox ........................................................................................ 22
Outbox...................................................................................... 24
Draft ......................................................................................... 25
Setting ...................................................................................... 26
Status Info ................................................................................ 27
microSD ............................................................................................ 28
Device Security ................................................................................. 29
Advanced Settings ............................................................................ 30
Wi-Fi Network ........................................................................... 30
Wi-Fi Security ........................................................................... 33
Router LAN............................................................................... 35
Router Security......................................................................... 37
Management ............................................................................ 39
Tools ......................................................................................... 40
Device Information ............................................................................ 41
Appendices
............................................................................
42
2
Page 3

Appendix A: FAQ................................................................................42
Appendix B: Specifications .................................................................42
Appendix C: Important Safety Information.......................................... 45
Europe – EU Declaration of Conform ity .................................... 45
FCC.......................................................................................... 46
Glossary.............................................................................................47
3
Page 4

Introduction
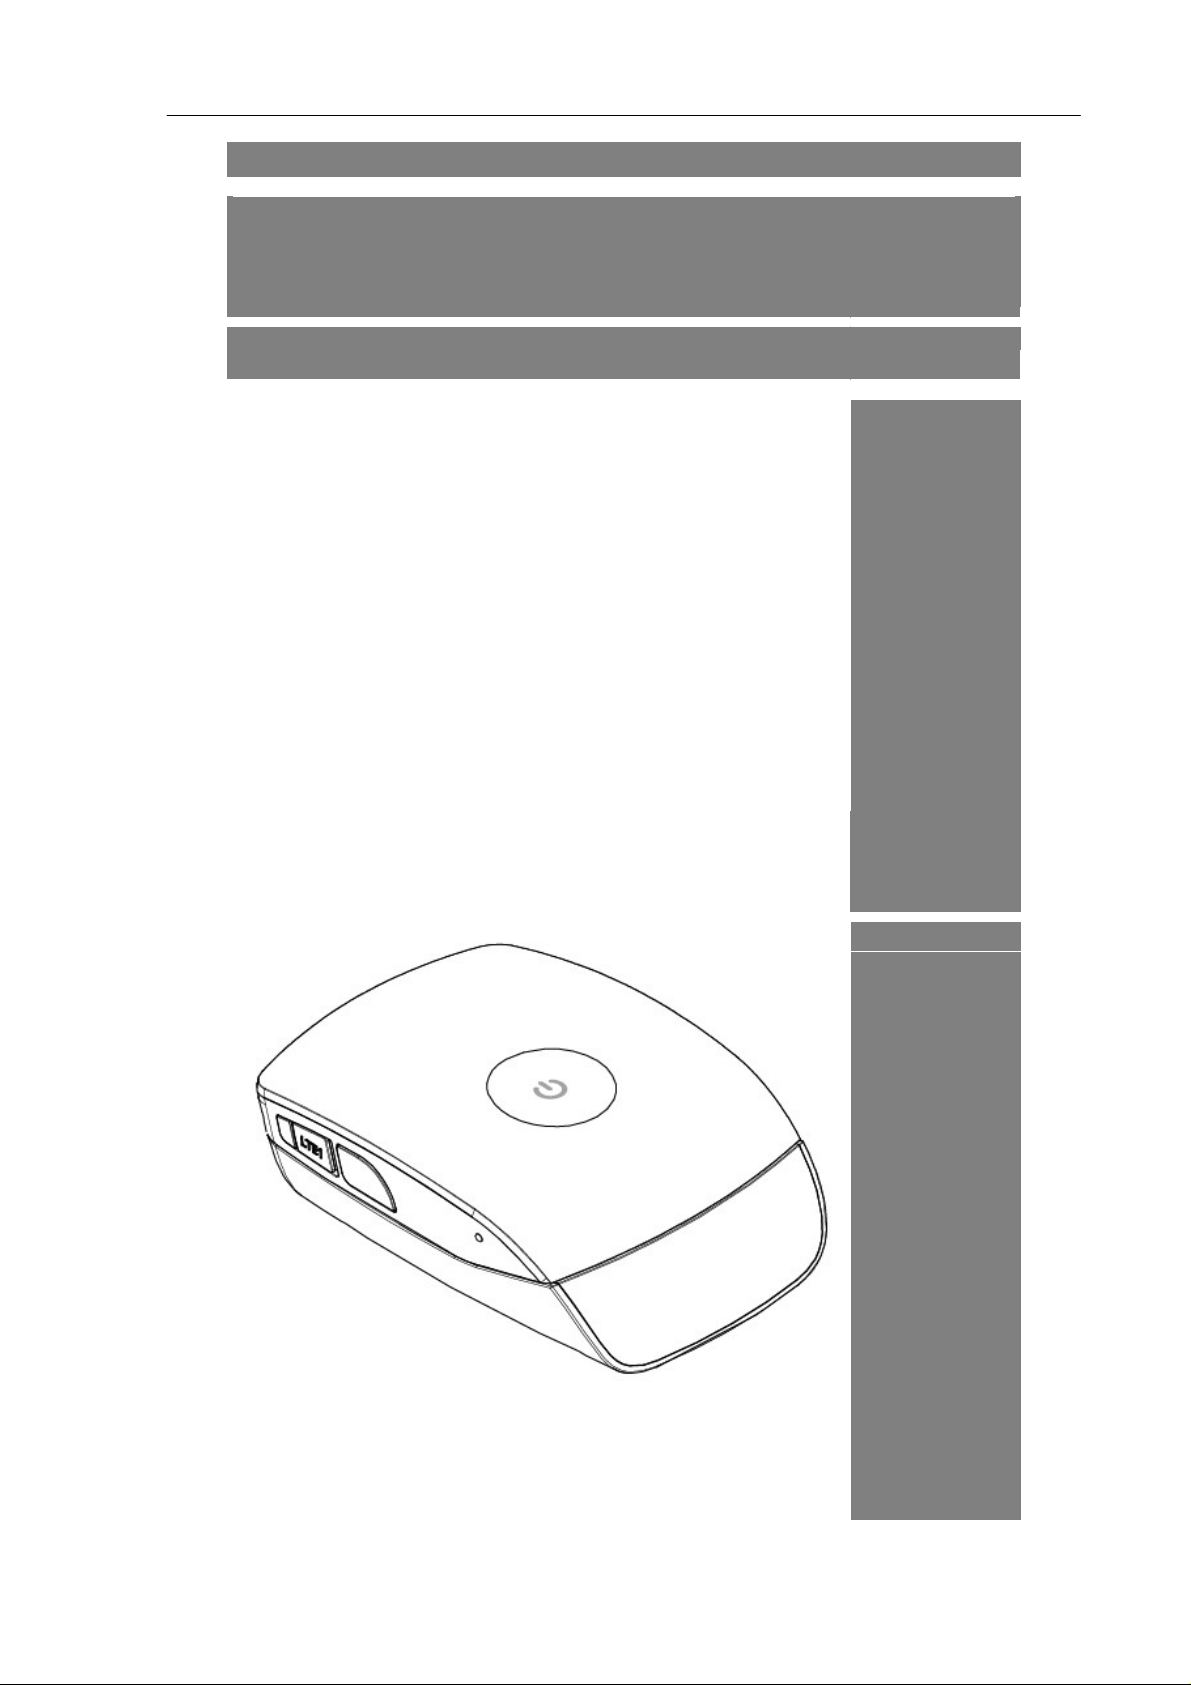
Thank you for your purchase of the P530 Series Mobile Router. This
device is designed to access the Internet via LTE (4G) technology and
share the Internet through a WLAN network. You can also share files with
your friends with a microSD card. The P530 Serie s Rou ter is por t able and
easy to use. Reading the u ser manua l will help y ou make the most o f y our
product.
Features
LTE/EVDO/HSPA+ WLAN Mobile Router
Wi-Fi Protected Setup (WPS) Support
Supports up to 10 simultaneous wireless users
Supports microSD card up to 32 GB
Uplink speeds up to 50 Mbps
Downlink speeds up to 100 Mbps
Supports 802.11 b/g/n
4
Page 5
Getting S tarted
This chapter will provide a hardware overview of the P530 Series Mobile
Router and step by step instructions on installing the device.
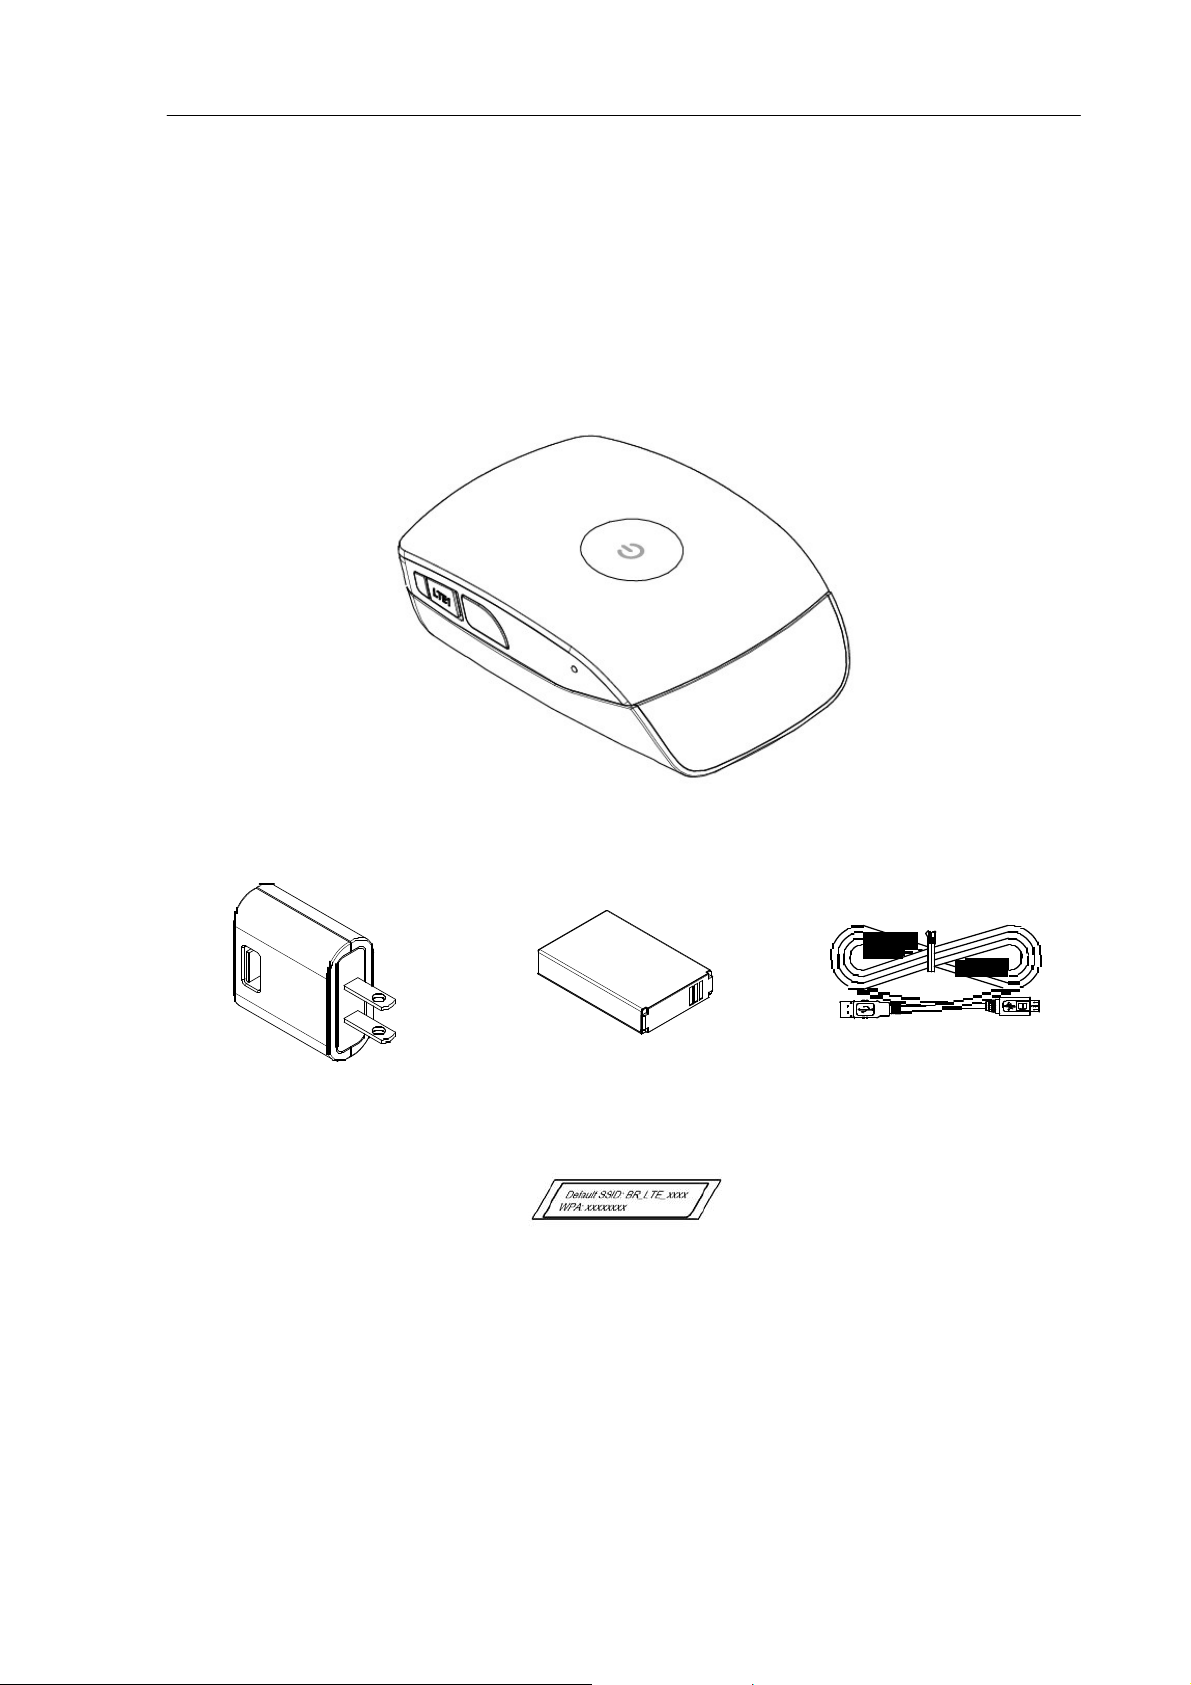
Package Contents
P530 Series Mobile Router
Power Adapter Battery USB Cable
Network Information
Back Cover
Sticker
5
Page 6

Hardware Overview
1
Wake up/ WPS/
Reset Button
Activates WPS. See “ WiFi Options”,
p.17.
Wakes the device from sleep mode (1
sec.)
2 Residual Battery
LED
Activates WPS (3 sec.)
Resets the device to factory settings
(>10sec.)
Displays the battery capa city and power st atus.
Blue – 50-100% capacity
Green – 10-50% capacity
Red – 0-10% Capacity
6
Page 7

3
Roaming/SMS
LED
Indicates mobile Roam ing and SMS st atus.
Off – No SMS and Not Roaming
Flashing - No SMS and Roaming ON
Solid – New SMS and Roaming OFF/ON
4 WLAN LED Indicates WLAN sta tus.
5 Charging LED Indicates battery ch arge status.
6 Network Status
LED
Indicates the type of mobile technology used.
Blue – LTE
Green – HSPA+/HSPA/EVDO
Pink – EDGE/GSM/GPRS
Red – No Signal/SIM error/No Service
7 Network Signal
Strength LED
Indicates mobile co nnection signal strength
0 bars – No signal
1 bar – Weak signal
2 bars – Medium signal
3 bars – Strong signal
8 MicroUSB port
Connect the USB cable to the power adapter or
a laptop/PC.
Installation
1. Release the SIM card cage. Insert the SIM card into the slot. Ensure
the SIM card orientation matche s the SIM card slot. Secure the SIM
card cage.
Release the microSD card cage. Insert the microSD card into the slot
with the metal contacts facing down and towards the slot. Secure the
microSD card cage.
7
Page 8

NOTE: The microSD card allows for file sharing between PCs on the
same network. For more details, see “microSD”, p.28.
2. Insert the battery. Ensure the battery cont acts are properly oriented.
3. Replace the back cover of the device.
8
Page 9

W
4. To charge the battery, connect the USB cable to the router and the
power adapter. Plug the power adapter into a wall outlet.
Important:
Please charge the battery for at least 3 hours using wall
charger before using your device for the first time.
Battery life depends on the technology, signal strength
and temperature.
To prevent the battery from overheating, do not charge
the device for long periods of time (>8 hours) or during
use.
The battery stops charging when overheated due to
safety concern s.
No tools are needed to open the back cover or to
remove the battery. Please contact your operator
support if excessive force is required to open the back
cover or to remove the battery. Using any type of tool
may damage the device as well as the battery.
Never leave the device or battery in an unattended
vehicle as the temperature might exceed specif ications.
Used batteries should be promptly disposed in
accordance with local regulations.
arning:
Use only batteries and chargers with your device provided
by your operator. Using other batteries or chargers might
result body injury or property damage.
Improper use of the battery will cause a fire, explosion or
other hazards.
Caution: Disposing batteries in a fire might cause explosion.
9
Page 10

NOTE: When the USB cable is connected to a PC, the cable also
provides LTE connectivity. The USB port may not provide sufficient
charge to replenish battery power. To charge the battery, use the power
adapter to connect the dev ice to a wall outlet.
5. Link the device to your PC or Mac.
To link the device to your PC via a wireless connection, in Microsoft
Windows, go to Control Panel > Network Connections. Right click
on the Wireless N etwork Conn ection and choose V iew Availab le
Wireless Net wo rks. (Mac users, click the on the upper side
of the screen to view available wireless networks)
Select the SSID and enter the password (see the network
information sticker in the box) and click Connect.
To link the device to your PC via a USB connection, connect the
USB cable to the device and PC. Microsoft Windows automatically
installs drivers and establishes a local area connection, as indicated
by the Local Area Connection icon on your PC. On a Mac, no
drivers are needed and the USB connection functions as a LAN
connection similar to a PC (Support Mac OS 10.7 and above).
To use the web-based interface to configure and manage the w ireless
settings, see “P530 Series Management”, p. 14.
10
Page 11

USB Connectivity
If the USB cable is connected between the device and a PC/M ac, the
device establishes a local a r ea connection and a connection to the
Internet via the device's mobile network connection, such as LTE.
If the USB cable is not used, the device may function as a wireless router
and/or an Internet access point.
Note:
1) Please turn off the device before connecting the device to a
Laptop/PC via USB.
As a wireless router, this device is capable of supporting up to 10
simultaneous wireless client connections. In addition, the device can
operate as a USB modem, providing Internet connection to a single user.
If a microSD card is installed, the card may be used as a common storage
space among the connected PCs. The device supports microSD cards up
to 32GB. For more details, see “microSD ”, p28.
File sharing
USB
Upload available
for USB
connected PC.
WLAN
Download only for
clients.
Download only for
Wi-Fi clients.
13
Page 12

Basic Functions
Powering On and Off
To turn the device on, slide the top half of the device towards the rear. If
your device is equipped with the Residual Battery LED, the LED turns on
and displays the battery capacity when the device is powered on.
Hardware Wi-Fi Switch (Optional)
Your device may be equipped with an optional hardware Wi-Fi ON/OFF
switch located underneath the battery. Use a thin object to carefully
toggle the switch.
To enable Wi-Fi, perform both the following:
Turn the hardware switch to the ON position.
Enable Wi-Fi in the software. To enable the Wi-Fi in the software,
see “ WiFi Option”, p.17.
Note that the hardware switch h as a higher priority than the software
switch.
Battery Information
The device is designed with power saving features to maximize battery
life, see “ Battery Saver”, p.19.
12
Page 13

Notes:
Charging tempera t ure (surroun ding temperature): 0~35℃. If the
temperature exceeds 35 ℃, the device may stop charging.
Operating temperature ( surrounding temperature): 0~40 ℃. If
the temperature exceed s 40 ℃, the device may power off.
It is recommended NOT to charge and use the device at the
same time.
It is recommended to use the device in an open space with
better coverage and avoid multiple walls or metal materials
around the device.
If the device operates in a poor coverage area, the device will
heat up due to higher transmitting power. Thus, it is
recommended to use the device in an adequately vented
environment to prevent the device from overheating.
When the device operates under poor coverage conditio n s, the
top cover may be hot. Please avoid touchingthe cover.
13
Page 14

P530 Series Management
Accessing the Device
The P530 Series Router uses the web-based interface for managing and
configuring wireless network settings. To access the interface, open a
browser such as Internet Explorer and enter the device’ s default IP in the
browser’s address bar . Use the appropriate IP depending on the
connection method.
Connection method Default IP
USB 192.168.1.1
WLAN 192.168.1.1
The Home screen displays status information on the device in several
categories. Click on the icons along the left side of the Home screen to
view descriptions and edit con figurations.
14
Page 15

Click on Admin Login in the upper right corner to enter adm inistrative
mode. Enter the default password (GUIPASS) in all caps and click on
Login.
Mobile Network Option
This setting allows you to change device settings related to the packet
data network for mobile technologies.
Preferred Radio Technologies Select from the drop-down menu the
type of radio technology the device will use. Auto allows the device
automatically determine the radio technology type based on your SIM
card. Selecting WCDMA only, LTE only or EVDO/1x only limits the
15
Page 16

device into using only the radio technology you have selected.
Auto Connect Select from th e drop-d own menu how the device connects
to your network operator. Select Always to connect to a network even if
you are roaming. Auto connect when not roaming connects to a
network only if you are not roaming. Never requires you to manually
enable or disable the connection.
Note: Rates for roaming can be very high. Contact your
network operator for rates and more information.
APN Setting Auto/Manual The APN (Access Point Name) is provided by
your network operator. You can choose to set the APN automatically or
manually. In most cases, it is recommended to select Auto.
To preserve the changes you have made, click Save. To d elete the
changes, click Cancel. To automaticall y update your APN database, click
APN Update.
For manual APN configuration, select Manual to display the Default
Profile Selection. Select a previously sav ed profile from the drop-down
menu or click on Profile Editor to configure a new APN profile. You can
configure and save up to 16 different APN profiles.
Enter a name for your APN profile. Contact your operator for the APN,
16
Page 17

Username and Password.
Authentication Type The type of authenti cation used to connect to the
mobile data network. Contact your network operator for details.
Click the Set as default option to set this profile as your APN default.
To preserve the changes you have made, click Save. To delete the
changes, click Delete.
WiFi Options
This setting allows you to quickly co nfigure your WLAN network.
17
Page 18

Note: You may be required to reconnect to the devi ce if you
change these settings from the factory default.
User Number Control Select from the drop-down menu the maximum
number of client devices (1-10) allowed to connect to your WLAN.
User List Client devices that are connected to your WLAN are listed in
tabular form, which displays the Device Name, MAC Address and IP.
SSID Network name of your WLAN. It is case sensitive and can not
exceed 32 characters. By default, the SSID is "BR_LTE + last 4 digits of
the device's MAC address". The default SSID is also printed on the
network informat ion card.
Wi-Fi On/Off Software option to enable or disable the WLAN function. By
selecting the Off option, you disable WLAN functions. Select On to
re-enable. If you ha v e selected the Off option when connected via WLAN,
use the USB cable to regain access to the w eb inte rface . This optio n do es
not affect the Internet connection and does not override the hardware
switch.
To preserve the changes you have made, click Save. To delete the
changes, click Cancel.
Wi-Fi Protected Setup (WPS) is a standard designed for easy setup and
automatic configuration of secure Wi-Fi networks between two WPS
supported devices. If your wireless adapter supports WPS, the WPS
feature can be a user-friendly and simple process to get your WLAN up
and running.
If the client device support s WPS, you can perform the follow ing steps to
connect the client device to your WLAN.
1. Press the WPS button located on the side of the device or click
Connect. This initiates a search for client devices for 120 seconds.
2. Press the WPS button on client device or the software WP S bu tton
on the client device.
If you wish to manually pair with a client device, enter the PIN from the
client devi ce WPS software in WPS PIN and click Submit. The device will
attempt to pair with the client device using WPS.
18
Page 19

Battery Saver
This setting allows you to configure the Power options for your device to
conserve your battery charge.
Sleep Mode Select from the drop-down menu the length of idle time (in
minutes) before the device enters sleep mode. Press the WPS button to
wake the device fr o m sleep m ode . Sleep mode i s a ba tter y sav ing st ate in
which the mobile network connection and Wi-Fi connection are disabled.
Wi-Fi Range Indicates the transmission range of your WLAN . A Long
Range allows client devices to be physically located further away to
transmit/receive data to y our WLAN, but w ill co nsume mor e ba ttery pow er
on the device. Conversely, a Short range requires client devices to be
located closer to the device, but will consume less battery power.
LED Blinking Period Select from the drop-down menu how (in seconds)
often the LED indicators on the top of the device update their status and
flash. Using a smaller value will consume more battery power than using
a larger value, but will provide status updates more often.
Active State
Sleep Mode
19
LED Behavior
Residual Battery LED
LED behavior defined by
LED blinking period
LED behavior defined by
LED blinking period
All other LEDs
LED behavior defined by
LED blinking period
LED off
Page 20

To preserve the changes you have made, click Save. To delete the
changes, click Cancel.
Connection Statistics
This setting provides statistics in tabular format on your mobile network
connection.
Data Volume Reflects how much da t a you hav e recei ved ( DL) or sent (U L)
on your mobile network connection.
Connected Time Reflects the amount of time you have been connected
to your network.
Session Values in this column pertain to yo ur current se ssion only. These
values reset to 0 every time your device reboots
Total Values in this column are aggregated across all your past and
current sessions. These values do not reset unless you click on Reset.
Click Reset to reset values under Total to 0.
20
Page 21

SMS
This tab allows you to manage your SMS (Short Message Service)
messages. You can also click on SMS to access this feature.
New SMS
This tab allows you to compose a new SMS.
To compose a new SMS:
1. Enter a destination phone number in the Phone number field.
21
Page 22

2. Enter a message in the Contents field. The counter below the field
keeps a tally of the number of characters currently in the Contents
field.
To clear both the phone number and contents field, click Clear. To save
the message for editing later, click Save to Draft. To send the message,
click Send.
Inbox
This tab allows you to view and manage SMS that you have received.
22
Page 23

Show entries Select from the drop-down menu the number of messages
to display.
Search Allows you to search the content in your messages for text or
words that match your search entry. Results that match your search entry
are displayed as you type.
You can sort your SMS messages by Read/Unread status, Number,
Date, or Content. Click the up or down arrows next to each category to
sort in ascending or descending o rder, respectively.
To view the contents of a message, click on the Contents area of the
message. A popup window appears displaying the entire message. Click
on the “X" in the upper righ t corner to close the window.
To reply a message, select the message and click Reply. To delete a
message, select the message and click Delete. To forward a message to
another party, select the message and click Forward. To import SMS
messages saved on your SIM card, click Import.
23
Page 24

Outbox
This tab allows you to view and manage SMS messages that you have
sent.
Show entries Select from the drop-down menu the number of messages
to display.
Search Allows you to search the content portion of your messages for
text or words that match your search entry. Results that match your
search entry are displayed as you type.
You can sort your SMS messages by Read/Unread status, Number,
Date, or Content. Click the up or down arrows next to each category to
sort in ascending or descending o rder, respectively.
24
Page 25

To delete a message, select the message and click Delete. To forw ard a
message to another p a rty, select the message and click Forward.
Draft
This tab allows you to access SMS messages that you have saved for
editing.
Show entries Select from the drop-down menu the number of messages
to display.
Search Allows you to search the content portion of your messages for
text or words that match your search entry. Results that match your
25
Page 26

search entry are displayed as you type.
You can sort your SMS messages by Read/Unread status, Number,
Date, or Content. Click the up or down arrows next to each category to
sort in ascending or descending o rder, respectively.
To delete a message, select the message and click Delete. To edit a
message, select the message and click Edit.
Setting
This tab allows you to configure the number of your SMS center.
26
Page 27

The SMS Center address is typically provided by your network operator.
Contact your network operator for additional service center details.
Enter the number of the service center you wish to use for sending and
receiving SMS messages in the Service Center Address field. Click
Save to begin using this service center.
Click Reset to reset to the default service center num ber p rovided by y our
network operator.
Status Info
This setting displays a summary on the current status of the wireless
connections on the device.
27
Page 28

Mobile Network Displays information on the user’s mobile subscription
service.
Wifi and Router Displays inform ation on the WLAN. To modify Wi-Fi
settings, see “Wi-Fi Network”, p.30. To modify Router settings, see
“Router LAN”, p.35.
microSD
This tab allows the user to download files from the microSD card and
change settings on the device for the m icroSD card.
If a microSD card is inserted, the card functions as a common storage
space shared among the PC s connected to your device's WLAN.
To share the contents of the microSD card with client devices on your
WLAN, select On under Enable microSD sharing and click Apply.
If you are accessing the microSD card via WLAN, you can only download
28
Page 29

files from the shared storage.
1. Enable WLAN on the device.
2. Connect to the device's WLAN on the client PC.
3. Open My Computer and go to 192.168.100.1. A folder
"PR_SD_Shared" is displayed.
4. Download files others have shared with you from the folder.
Device Security
29
Page 30

PIN Code Verification
If your SIM card PIN security protec tion is enabled, you must enter the
PIN code for verification. Enter the code in the Current PIN Code field
and click Apply.
Change SIM Car d Security
You ca n e na bl e or d is ab l e th e PI N se cu rity protection on your SIM card.
Select Enabled or Disab led. If you change the status of the PIN protection
you r SI M c ar d, y o u m us t e nt e r a cod e i n th e Current PIN code fiel d and
click Apply.
Change SIM PIN Code
You can change the PIN code on the SIM card. Enter your original PIN
code in Current PIN Code, enter the new PIN code in New PI N Code
and click Apply.
To change your administrator login password, enter the new password in
Administrator Password and in Confirm Password. The password in
both fields must match in orde r to successfully change the password. The
new password will take effect after you have clicked Apply.
To change the Encryption Options and the Wi-Fi Key on your WLAN,
see “Wi-Fi Security”, p.33.
To preserve the changes you have made, click Apply. To abort the
changes, click Cancel.
Advanced Settings
The Advanced Tab gives the user more flexibility and control for
managing the P530 Series Mobile Router.
Wi-Fi Network
This tab allows you to configure advanced network settings for your
WLAN.
30
Page 31

SSID Network name of your WLAN. It is case sensitive and can not
exceed 32 characters. By default, the SSID is "BR_LTE + last 4 digits of
the device's MAC address". The default SSID is also printed on the
network informat ion card.
User Number Control Select from the drop-down menu the maximum
number of client devices (1-10) allowed to connect to your WLAN.
Wi-Fi MAC The MAC address of your device. This value is unique and
can not be changed.
802.11 mode Select from the drop-down menu the type of wireless
standard for your Wi-Fi network. The default setting is 802.11b/g/n
compatible.
Channels The radio channel number. The permissible channels depend
on the Regulatory Domain (e.g in the USA, it is 1 to 11).
31
Page 32

Wi-Fi Range Indicates the transmission range of your WLAN. A Long
Range allows client devices to be phy sically located further away to
transmit/receive data to y our WLAN, but w ill co nsume mor e ba ttery pow er
on the device. Conversely, a Short range requires client devices to be
located closer to the device, but will consume less battery power.
RTS Threshold This value should remain at its default setting of 2347. If
inconsistent data flow is a problem, only a minor modification should be
made.
SSID Broadcast For security purpo se s, y ou may choose to hide your
network’s SSID by selecting Disable. This will prevent computers
scanning for the presence of wireless networks to detect your network
name.
To preserve the changes you have made, click Save. To abort the
changes, click Cancel.
32
Page 33

Wi-Fi Security
This tab allows you to configure advanced security settings for your
WLAN.
802.11 mode Select from the drop-down menu the type of wireless
standard for your Wi-Fi network. The default setting is 802.11b/g/n
compatible.
Encryption Options Method of encryption used when transferring data
through the airwaves from the device to the client PC or vice versa. This
device supports 3 encryption types - WEP, WPA, and WP A/WPA2.
Two WEP (Wired Equivalent Privacy) standards are supported: 64-bit
(40-bit Key) and 104-bit (128-bit Key). Open and shared refer to the
33
Page 34

method of WEP key authenti cation.
WPA, or Wi-Fi Protected Acce ss, is a Wi-Fi st andard th at w as designed to
improve the security features of WEP. WPA2 is a more advanced, more
secure version of WPA. AES is a stronger encryption method than TKIP.
Wi-Fi Key Sequence of words or text that combine to form your WLAN
password. A value m ust be ente red if encryption is selected. Depending
on the type of encryp tion used, the maximum key length will vary.
Encryption Type Key Length
WEP 64-bit
10 hexadecimal digits (letters from A-F and
numbers 0-9)
26 hexadecimal digits (letters from A-F and
WEP 128-bit
numbers 0-9)
WP A and WP A2 8-63 characters
MAC Filter You can allow or deny specific users access to your wireless
network by filtering the client MAC address. The system default is Disable.
If you select Allowed List, only the MAC addresses listed in the Mac
Filter List are allowed to access your WLAN. If you select Denied List,
only the MAC addresses listed in the Mac Filter List are denied access
from your WLAN.
To add a new entry to the Mac Filter List:
1. Enter the MAC address of a client device in the Mac address field
and click Add. The newly added entry will be display in the list.
2. Check the box under the column labeled Enabled.
3. Click Save. The client device is now allowed or denied WLAN
access depending on your selection in MAC Filter.
To delete an entry from the MAC Filter List:
1. Uncheck the box under the column labeled Enabled associated
with the MAC address to delete.
2. Click Save. The client device MAC address is now removed from
the list.
To abort the changes you have made, click Cancel.
34
Page 35

Router LAN
This tab allows you to configure advanced router settings for your device.
Router IP This is the device’s IP address and the gateway to the Internet
for your WLAN. The default IP address is 192. 168. 1.1.
Hostname The URL of your device. You can enter the hostname instead
of the IP to access the device’s web GUI.
Subnet mask Keep the default value at 255.255.255.0.
USB IP This is the device’s IP address to use when accessing the web
GUI via a USB cable. The default IP address is 192.168.1.4.
35
Page 36

DHCP Option to enable the device as a DCHP server. A DHCP Server
automatically assigns an IP addre ss to the computers on the LAN/private
network.
DHCP IP Range Enter the starting IP address for the DHCP server’s IP
assignment range and ending IP address for the DHCP server’s IP
assignment range. IP a ddre sses w ithin this range are assig ned to devi ces
that are connected to the WLAN.
DNS Auto/Manual Select Auto to use the DNS (Domain Name Service)
servers provided by your network provider. Select Manual to enable the
device to use the DNS serv ers y ou have provided. Enter the DN S serv ers
you wish t o use in DNS1 and DNS2.
To preserve the changes you have made, click Save. To abort the
changes, click Cancel.
DHCP Reservation Allows you to assign a specific IP address to a
specific client device.
To assign an IP address:
1. In the field under the column Mac, enter the MAC address of the
client device.
2. In the field under the column IP, enter the IP address to assign to
the client device.
3. Click Add.
To delete an entry in DH C P Reservation, check the box under the column
labeled “Delete” and click A pply.
36
Page 37

Router Security
This tab allows you to configure port settings for your device.
Port Forwarding Allows you to set up public services on your network,
such as web servers, ftp servers, e-mail servers, and other specialized
Internet applications. Note that Port Forwarding allows forwarding of only
single ports.
To forward a port:
1. In the field under the column Private IP, enter the IP address of the
PC running the specific application.
2. In the field under the column Private Port, enter the port number of
the internal port used by the server or Internet application.
3. In the field under the column Global Port, enter the port number of
the external port used by the server or Internet application.
37
Page 38

4. From the drop-down menu, select the transport protocol used for
To apply the changes, click Apply.
this application: TCP, UDP, or TCP+UDP.
5. Click Add.
To delete a Port Forwarding rule, activate the appropriate checkbox in the
Delete column and click Apply.
Port Filtering Allows you to deny port specific services to all devices
within your WLAN. Note that Port Filter ing allows filtering of only single
ports.
To filter a port:
1. In the field under the column Name, enter a name for the serv ice.
2. In the field under the column Port, enter the port number of the
internal port used by the server or Internet application.
3. From the drop-down menu, select the transport protocol used for
To apply the changes, click Apply.
this application: TCP, UDP, or TCP+UDP.
4. Click Add.
To delete a Port Filtering rule, activate the appropriate checkbox in the
Delete column and click Apply.
DMZ When a firew all is used, it is sometimes necessary to place some
clients (for example Internet games, video conferencing, or VPN
connections) out side of the firewall while leaving the others protected.
You can do this using a Demilitarized Zone. Select Enable or Disable. If
the Enable op tion is sele cted, enter t he IP for the dev ice using the DMZ in
Destination IP Address.
uPnP A set of networking protocols to allow networked dev ices to
discover each other and share dat a. It is recommended to Disable this
feature due to security.
VPN Passthrough A Virtual Private Network (VPN) is a type of secured
private network connection, built upon publicly-accessible infrastructure
such as the Internet. Enable to allow VPN protocols, such as PPTP,
IPSec, and L2TP, access through the device.
38
Page 39

To preserve the changes you have made, click Save. To abort the
changes, click Cancel.
Management
This tab allows the user to manage the device’s software settings.
Backup Setting to PC Use this option to ba ck up the device's current
configuration settings to the PC . Click Export to begin the backup
process.
Recover Setting Fr om PC Use this option to restore the device’s
configuration settings from a backup file. Click Select File to locate the
configuration file and click Import.
Recover Factory Setting Use this option to restore the device to the
factory default. Click Load Default to begin the restore process.
Firmware Upgrade Use this option upgrade the device's firmware
version. Download the new firmware file from the web address given by
your operator to your PC/laptop and click Select File to locate the file.
Click Import to begin the upgrade process.
Warning: Firmware upgrade may take a few minutes; do not
turn off the power or reset the device during upgrade. Doing so
will cause the device inoperable.
39
Page 40

Tools
This tab allows users to ping the network devices to verify connection
status as we ll as trac e t he r out es t hat tes t pack ets take from on e web
destination to another.
Ping Test Enter the IP address of the network device that you want to
ping.
Packet size Enter the packet size.
Number of Pings Enter the number of pings.
Click Ping to ping other network device.
Traceroute Test Enter the IP or the domain name
Click Trace to monitor a network trace.
40
Page 41

Device
Information
This tab displays information on the device including:
Technolog
3G/2G
y
,
MEID (Applicable for EVDO
networks,)
Model
Supporte d Technolo
Wi-Fi MAC address and FW/SW
gi.
es
P531
Lτ
'E!
3G/2G
networks
Mode,l
)
,
IMEI (Applicable
version.
Suppo
前
ed
for
MEID
IMEI
355336050005650
IMEISV
Wi-Fi
J:vlAC
FWVersion
0026fae
QC_2_00008551_2_001_0024
192c4
1 [Feb 27 2013 19:1
日
53
]
SWVersion
QC_2_00008551_2_001_0024 [ABZCEP2507]
[ 2013/02/27
19: 14:50
]
41
Band
Luxe
Page 42

Appendices
Appendix A: FAQ
Q: What is the default “Usernam e” and “Password” for the device?
A: User name: admin
Password: GUIPASS
Q: How do I to enter the web interface?
A: 1. Open Internet Explorer or any Web browser.
2. Input “http://192.168.1.1” (default) in the address bar.
3. Input username and password.
Q: How do I use WPS to setup a connection?
A: 1. Press the WPS button on the side.
2. Accept the WPS option on PC requesting connection.
3. Or perform steps 1 and 2 in reverse.
Q: Why can’t I connect to the Internet via built-in 4G modul e?
A: 1. Check if the SIM/USIM is inserted properly.
2. Check if Auto Connect is enabled up Mobile Network Options.
3. Check if the APN is correct under Mobile Netwo rk Op tions.
Appendix B: Specifications
Note: Specifications are subject to change without notice.
Physical
WLAN 802.11 b/g/n (1x1)
Cellular modem Embedded, LTE/HSPA+/EVDO/GSM/GPRS
Dimension (LxWxH, mm) 73.6 (L) x 53 (W) and 24.3 (H) mm
Weight (g) 90g
Interface
USB interface for PC connection Support tethering connectivit y to PC with driver
Power Switch
42
Power on/off by slider design
Page 43

Wake-up/WPS button/Reset
button
Wakes the device from sleep mode (1 sec.)
Activates WPS (3 sec.)
Resets the device to factory settings (>10sec.)
41
Band
Luxe
Page 44

Page 45

A
WLAN on/off switch
Embedded beneath battery for special use of
WLAN signal off
Power supply plug Yes, charging via Micro-USB
SIM slot Yes, hidden under battery
microSD slot
Operation Modes
Yes, support up to 32 Gby tes, hid den under
battery.
1. USB & WiFi simultaneous
2. Wi-Fi only
3. USB only (Wi-Fi can be turned off by
hardware switch or by software switch
Device Power States
1. Active State
2. Sleep State
Connectivity and Data Speed
LTE Data Rate Downlink: up to 100 Mbps, Uplink: up to 50 M bps
WLAN 802.11 b/g/n
ntenna
Cellular embedded main antenna Yes
Cellular embedded diversity
antenna
Cellular external main antenna
port
Cellular external diversity antenna
port
WiFi antenna Embedded
Yes, supporting LTE bands
Yes
Yes
Router Features
Security
DHCP DHCP Server/Client
Other features
Firewall, Multiple VPN pass-through (IPSec,
PPTP, L2TP), Port forwarding, Port filtering,
DMZ
IPv4, TCP, UDP, ICMP, ARP, HTTP, NTP, ALGs
(FTP, SIP, PPTP, RTSP)
Wireless LAN
802.11b data rate 1/2/5.5/11 Mbps
802.11g data rate Up to 54 Mbps
802.11n data rate Up to 150 Mbps
Security
Device Unique Default Encryption
Key
Simultaneous wireless users Up to 10 clients
Auto Channel Select (ACS) Yes, for channel 1 through 1 1
WPA2/WPA/AES/TKIP, W PA/WPA2 PSK mode,
None/64/128 bits WEP Encryption, open system
and shared key authentication
Such unique key is linked to MAC address of the
device
43
Page 46

A
Other features
WPS software button, SSID broadcas t disable,
Access control (block or allow by MAC filter),
Max number of user control, WLAN on/off
software switch, WLAN range control.
Status Indication
LED Display
1. Cellular signal strength
2. Network status/technology
3. Wi-Fi status
4. Roaming/SMS status
5. Residual battery power/Charging status
Software feature (web based administration & driver)
Plug & Play for driver CD-free installation for device driver
Web GUI
Web GUI Language Support English
Web-based Setu p Wizard for GUI.
Browser supported: IE, Firefox, Safari.
Connection Status in Web GUI
Network name, Signal strength, Roaming
indication, Radio technology, Data volume,
Number of user on WLAN
Connection management
Connection on demand, Connecti on when
available, Auto APN matching with USIM, APN
database update through browser-based GUI
Other Features
PIN management, LED blinking period control in
WEB GUI
microSD Access File sharing access up to 32Gb
ccessories
AC adapter
Battery
Supported with USB head
Input – 100~240V 50~60Hz, output – 5VDC
High capacity re-chargeable Li-ion battery, DC
3.7V
Environment
Operation Temperature
Storage Temperature
0oC to 40oC
o
C to 70oC
-20
Operating Humidity 10% to 80% Non-Condensing
Storage Humidity 5% to 90% Non-Condensing
44
Page 47

Europe – EU Declaration of Conformity
European Union Notice
Products with CE marking co mply with the R&TTE Directive (99/5/EC), the EMC
Directive (2004/108/EC), and the Low Voltage Directive (2006/95/EC) issued by the
Commission of the European Community.
Compliance with these directives implies conformity to the following European
Norms (in parentheses are the equivalent international standards).
EN 60950-1 (IEC 60950-1)
Safety of Information Technology Equipment.
EN 300 328
Electromagnetic compatibility and Radio spectrum Matters (ERM); Wideband
Transmission systems; data transmission equipment operating in the 2.4 GHz
ISM band and using spread spectrum modulat ion techniques.
EN 301 489-24
Electromagnetic compatibility and Radio spectrum Matters (ERM);
Electromagnetic Compatibility (EMC) standard for radio equipment and services;
Part 24: Specific conditions for IMT-2000 CDMA direct spread (UTRA) for mobile and
portable (UE) radio and ancillary equipment.
ETSI EN 301 511
Global system for mobile communications (GSM); Harmonised EN for mobile stations
in the GSM 900 and GSM 1800 bands, covering essential requirements of article 3.2
of the R&TTE directive (1995/5/EC).
ETSI EN 301 489-1
Electromagnetic compatibility and Radio spectrum Matters (ERM);
Electromagnetic Compatibility (EMC) standard for radio equipment and
services; Part 1: Common technical requirements.
ETSI EN 301 489-7
Electromagnetic compatibility and Radio spectrum Matters (ERM); Electromagnetic
Compatibility (EMC) standard for radio equipment and services; Part 7: Specific
conditions for mobile and portable radio and ancillary equipment of digital cellular
radio telecommunications systems (GSM and DCS).
ETSI EN 301 489-17
Electromagnetic compatibility and Radio spectrum Matters (ERM);
Electromagnetic Compatibility (EMC) standard for radio equipment and services;
Part 17: Specific conditions for 2.4 GHz wideband transmission systems.
45
Page 48

ETSI EN 301 908-1 & -2
Electromagnetic compatibility and Radio spectrum Matters (ERM); Base Stations (BS),
Repeaters and User Equipment (UE) for IMT-2000 Third Generation cellular networks;
Part 1: Harmonised EN for IMT-2000, introduction and common req ui rements,
covering essential requirements of article 3.2 of the R&TTE Directive.
EN 50385
Product standard to demonstrate the compliance of radio base stations and fixed
terminal stations for wireless telecommunication systems with the basic restrictions or
the reference levels related to human exposure to radio frequency electromagnetic
fields (110 MHz - 40 GHz) - General public.
FCC
Federal Communication Commission Interference Statement
This device complies with Part 15 of the FCC Rules. Operation is subject to the
following two conditions: (1) This device may not cause harmf ul interference, and (2)
this device must accept any interference received, including interference that may
cause undesired operation.
This equipment has been tested and found to comply with the limits for a Class B
digital device, pursuant to Part 15 of the FCC Rules. These limits are designed to
provide reasonable protection agains t harmful interference in a residential installation.
This equipment generates, uses and can radiate radio frequency energy and, if not
installed and used in accordance with the instructions, may cause harmful
interference to radio communications. Howeve r, there is no guarantee that
interference will not occur in a particular installation. If this equipment does cause
harmful interference to radio or television reception, wh ich can be determined by
turning the equipment off and on, the user is encouraged to try to correct the
interference by one of the following measures:
- Reorient or relocate the receiving antenna.
- Increase the separation between the equipment and receiver.
- Connect the equipm ent into an outlet on a circuit different from that
to which the receiver is connected.
- Consult the dealer or an experienced radio/TV technician for help.
FCC Caution: Any changes or modifications not expressly approv ed by the pa rty
responsible for compliance could void the user's authority to operate this equipment.
This transmitter must not be co-located or operating in conjunction with any other
antenna or transmitter.
Radiation Exposure Statement:
The product comply with the FCC portable RF exposure limit set forth for an
uncontrolled environment and are safe for intended operation as described in this
manual. The further RF ex posure reduc tion can be achieved i f the product can be kept
as far as possible from the user body or set the device to lower output power if such
function is available.
46
Page 49

Glossary
2G: Second-generation mobile networking technology. Represents a switchover from
analog to digital; most 2G networks use GSM.
3G: Third-generation mobile networking technology that enables simultaneous
transfer of voice and non-voice data; most 3G networks use WCDMA.
3.5G: A more recent standard of mobile networking techn ology; generally uses
HSDPA.
3.75G: A more recent standard of mobile networking technology; generally uses
HSUPA.
APN (Access Point Name/Netw ork): Provides GPRS routing information. Consists
of:
Network ID: Identifies the external service requested by a GPRS user.
Mobile network operator ID: Specifies routing information.
ARFCN (Absolute Radio Frequency Channel Number): The specific ID numbers
for all radio channels used in cellular mobile communications.
bps (bits per second): How data flow is measured.
CHAP (Challenge Handshake Authentication Protocol): CHAP identifiers are
changed frequently and authentication can be requested by the server at any
time.
DNS (Domain Name System): Helps route network traffic by making the addressing
process more user-friendly.
DHCP (Dynamic Host Configuration Protocol): How devices obtain IP addresses
from a server.
DUN (Dial-Up Network): Windows component that enables online access via a
modem.
EDGE (Enhanced Data GSM Environment/Enhanced Data for Global Evolution):
Advanced GPRS that delivers multimedia and other data needing greater
bandwidth at up to 237 kbps.
GPRS (General Packet Radio Service): Delivers da ta in packets at up to 86 kbps.
GSM (Global System for Mobile Communications): The most popular cellular
network, mostly operates in 85 0-900 or 1800-1900 MHz; the primary 2G syst em.
HSDPA (High Speed Downlink Packet Access): Advanced WCDMA that delivers
downlink bandwidth intensive data at up to 7.2Mbp s; typically associated with
3.5G.
HSUPA (High Speed Uplink Packet Access): Adv anced WCDMA that deliv ers
uplink bandwidth intensive data at up to 5.76Mbps; typically associated with
3.75G.
HSPA+ (High Speed Packet Ac cess +): This is also known as HSPA Evolved, is the
next step and is more focused on delivering data services enabling speeds of up
to 42Mbps in the downlink and 11Mbps in the uplink.
IMEI (International Mobile Equipment Identity): A number unique to each
47
Page 50

GSM/UMTS device that can be used block network access by a stolen mobile
device.
IP (Internet Protocol): Routes packets over a network.
Kbps (Kilobits per second): A data flow measure; 1024 bits/second.
LAN (Local Area Netw ork): A data network with limited range but good bandwidth.
Mbps (Megabits per second): A data flow measure; 1,048,576 bits/second.
P AP (Password Authentication Protocol): The difference between PAP
authentication and a manual or scripted login, is that PAP is not interactive. The
username and password are entered in the client's dialing software and sent as
one data package as soon as the modems ha ve establi shed a connecti on, rather
than the server sending a login prompt and waiting for a response.
PPP (Point-to-Point Protocol): An internet connection method.
PIN (Personal Identity Number): Four to eight digita l n umbers SIM card security
code; allows access to the carrier’s network.
Rx: Shorthand for Reception.
SIM (Subscriber Identity Module): A small card that contains key mobile device
identification, subscription and contact information.
Tx: Shorthand for Transmission.
WCDMA (Wideband Code Division Multiple Access): Advanced EDGE that
supports 384kbps data flow. Most 3G networks use this standard, the same as
UMTS.
48
 Loading...