

Page 1
Operating
G40269 Giant II
Instructions
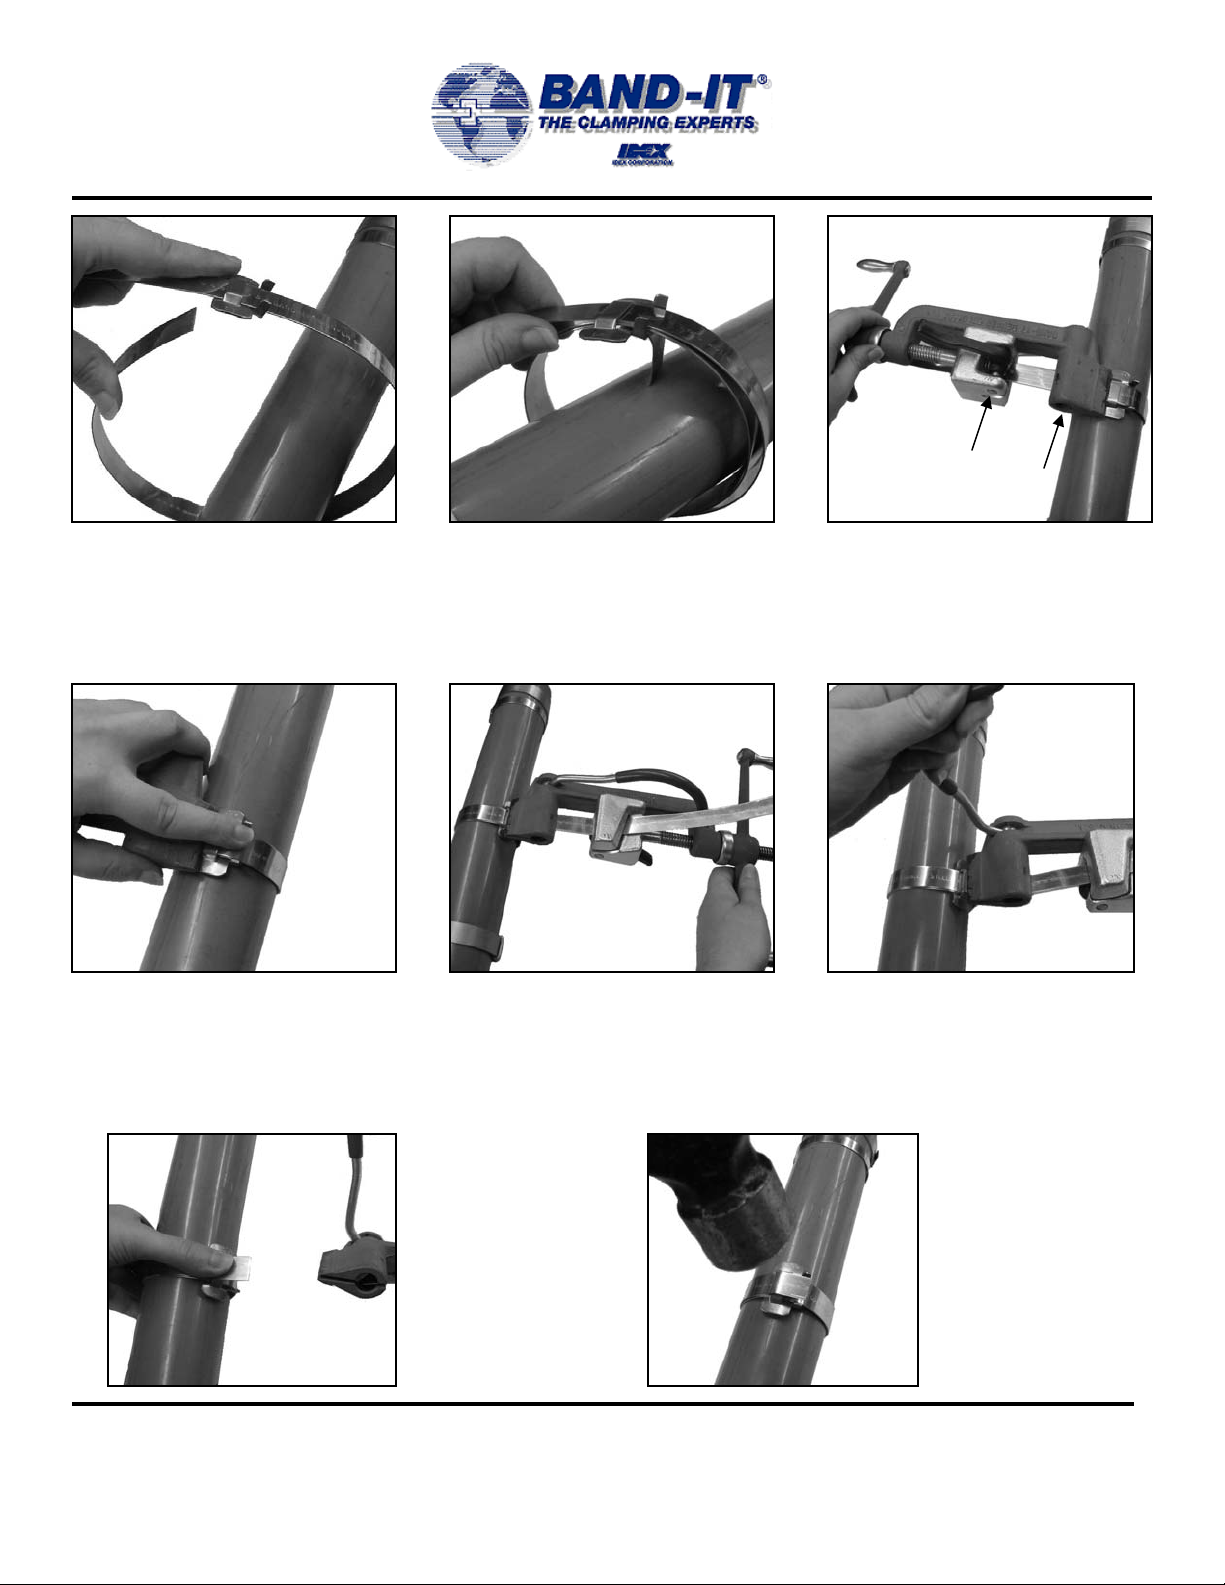
1. Band may be used from bulk roll as this
completely eliminates waste of band. Slide
buckle on band as shown, bringing end of
band around object to be clamped and
again through buckle.
4. Place finger on BAND-IT Band at buckle
bridge while tensioning with tool handle.
When you feel BAND-IT Band stop moving
through buckle as you are turning handle,
maximum pressure is being exerted by the
BAND-IT Band around object being
clamped. Stop turning handle.
2. Continue band around object once
more and again through buckle.
Double banding develops a great deal
more radial compression than single
banding. Bend end of band under
buckle.
5. Roll tool over buckle, backing off with
tension handle1- 1½ turns throughout entire
rolling operation. Failure to back off tension
with tension handle throughout entire course
of roll-over may result in breaking of band.
There is no loss of tension as band released
is used up in the bend.
Hand Tool
3. Place band in open of tool nose and
gripper block. Move into slot as far as
possible, to avoid buckle sliding into tool
nose. Apply tension by turning handle of
tool.
6. Pull cutting handle to cut the band.
When applying Giant Band clamps, prior
to cutting off clamp, release band gripper
and push tool nose away from buckle
approx. ¼”.
BAND-IT-IDEX, Inc.
A Unit of IDEX Corporation
4799 Dahlia Street
Denver, CO 80216-3070 USA
P: 1-800-525-0758
F: 1-800-624-3925
7. Remove tool,
holding stub of band
down with thumb.
www.BAND-IT-IDEX.com
Page 1 of 3
8. Hammer
down buckle
ears to complete
BAND-IT clamp.
Document # P36187 Rev. H
© Copyright
BAND-IT-IDEX, Inc. 2007
All rights reserved
Page 2
Cleaning and
G40269 Giant II
Warranty
Hand Tool
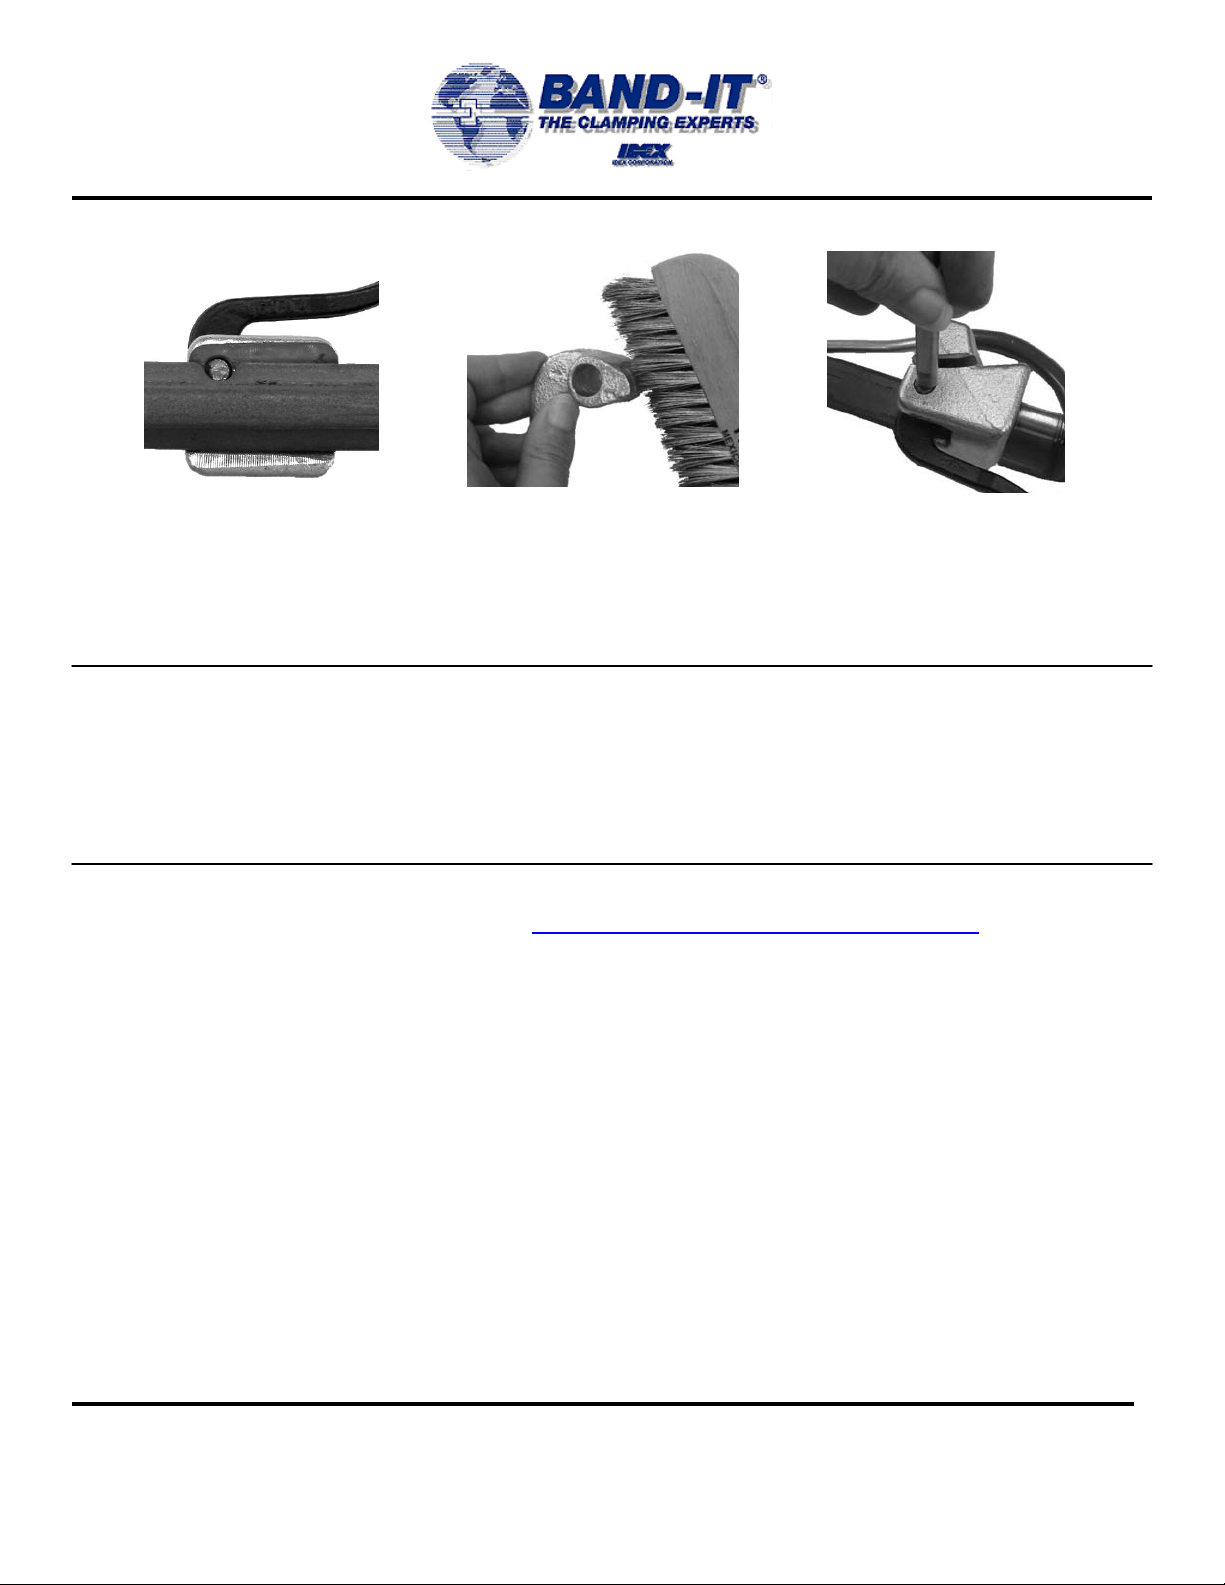
Gripper Cleaning Instructions:
1. Remove gripper. Align gripper pin
hole with notch in tool frame. Using a
punch and hammer, punch pin out of
slide block.
2. Using a wire brush, clean all
foreign matter from teeth.
NOTE: Periodically apply food-grade white lubricant or equivalent to tension screw thread (on
page 3) to prevent excessive wear.
If tool fails to securely grip tail of clamp, follow gripper cleaning instructions above.
3. Replace pin: Align gripper hole with
slide block hole, insert pin in hole and
hammer pin in place.
Refer to website for warranty information: http://www.band-it-idex.com/warranty.html
BAND-IT-IDEX, Inc.
A Unit of IDEX Corporation
4799 Dahlia Street
Denver, CO 80216-3070 USA
P: 1-800-525-0758
F: 1-800-624-3925
www.BAND-IT-IDEX.com
Page 2 of 3
Document # P36187 Rev. H
BAND-IT-IDEX, Inc. 2007
© Copyright
All rights reserved
Page 3

Tool Assembly
G40269 Giant II
Parts List
SET SCREW
CUTTER BAR
TENSION SCREW
CUTTER BAR HANDLE
SLIDE BLOCK
ECCENTRIC LEVER TENSION NUT
Hand Tool
EXTERNAL RETAINING RING
SPIN GRIP
THRUST
BEARING
TENSION HANDLE
TOOL FRAME PIN, ECC. LEVER PIVOT
1. To assist in removing threaded parts,
apply heat to soften locking compound.
2. When connecting the tension screw to
the slide block, clean threads (male and
female) of foreign matter, then apply two
drops of high strength locking compound
(Loctite 271 or equiv.) onto male threads
and connect parts together. Apply 3 oz.
of white lubricant or equiv. to tension
screw thread.
3. When connecting the set screw to the
cutter bar, clean threads (male and
female) of foreign matter, then apply one
drop of medium strength locking
compound (Loctite 242 or equiv.) onto
male thread and connect parts together.
BAND-IT-IDEX, Inc.
A Unit of IDEX Corporation
4799 Dahlia Street
Denver, CO 80216-3070 USA
P: 1-800-525-0758
F: 1-800-624-3925
www.BAND-IT-IDEX.com
REPAIR PARTS LIST FOR G40269
PART # DESCRIPTION
G41387 TOOL FRAME
G40888 THRUST BEARING
SLIDE BLOCK ASSEMBLY
G42487
INCLUDES: SLIDE BLOCK, TENSION SCREW,
TENSION NUT, ECCENTRIC LEVER, AND LEVER
PIVOT PIN
TENSION HANDLE ASSEMBLY
G42087
INCLUDES: TENSION HANDLE, SPIN GRIP AND
EXTERNAL RETAINING RING
CUTTER BAR ASSEMBLY
G42287
INCLUDES: CUTTER BAR HANDLE, CUTTER
BAR, AND SET SCREW (ON FAR SIDE)
Page 3 of 3
Document # P36187 Rev. H
© Copyright
BAND-IT-IDEX, Inc. 2007
All rights reserved
 Loading...