

BALCO HE180021 Instruction Manual

.
.
MODEL NUMBER: HE180021
INSTRUCTION MANUAL
VERSION 1
ISSUED 10/08/17
.

.
.
.

.
.
WARRANTY NOTE
If you experience any issues with this product, or its
performance is not what you had expected, please contact
us at Balco Lifestyle before returning the item to the store.
It is likely that we can resolve any problems for you via
phone or email.
IMPORTANT
Getting the most out of your 3D Printer Touch:
Read the manual carefully
It will help you set up with ease
Visit www.balcolifestyle.com
We have additional additional support videos and guides
Call After Sales Support - 0800 296 9698 (UK)
800-372-5715 (USA)
Email customercare@balcolifestyle.com
We’re always happy to help
.

.
.
.
5
.
AFTER SALES SUPPORT
CUSTOMERCARE@BALCOLIFESTYLE.COM MODEL: HE180021
SAFETY INSTRUCTIONS
Before you get started, please read these important safety instructions.
CAUTION: The Balco 3D Printer Touch generates high temperatures and includes moving parts
that can cause injury. Never reach inside of the Balco 3D Printer Touch while it is in operation, and
allow time for the printer to cool down after operation.
Vapours/fumes may be irritating at operating temperatures. Always use the Balco 3D Printer
Touch in an open, well ventilated area.
Do not leave the Balco 3D Printer Touch unattended during operation
Contact with extruded material may cause burns. Wait for printed objects to cool before
removing them from the build platform.
Always take care when using the Scraper. Never direct the Scraper towards your ngers.
Only use the 3D Printer Touch in a clear working area
• The printer must not be exposed to water or rain, or damage will occur.
• The printer is designed to be used with ambient temperature ranging 15°C - 30°C, and humidity
ranging 20% - 50%. Operating outside these limits may result in low quality models.
• In case of emergency, turn o the 3D Printer Touch at the power outlet.
• It is recommended that you use eye protection when cleaning/sanding printed models to avoid small
particles contacting eyes.
• Please read and understand the contents of this installation and user manual carefully. Failure to read
the manual may lead to personal injury, inferior results, or damage to the 3D Printer Touch. Always
make sure that anyone who uses the 3D printer knows and understand the contents of the manual
and makes the most out of the 3D Printer Touch.
• 3D Printer Touch is not intended for use by persons with reduced physical and/or mental capabilities,
or lack of experience and knowledge, unless they have been given supervision or instruction
concerning the use of the appliance by a person responsible for their safety. Children should be under
constant supervision when using the printer.
• Before installation, you should make sure that the 3D Printer Touch is unplugged from the power
supply. Only using furniture that can safely support 3D Printer Touch.
• The socket-outlet shall be installed near the equipment and shall be easily accessible.
3D Printer Touch has been tested according to the EN 60950, which falls under the low voltage directive.
3D Printer Touch must be used in conjunction with the original power cord. In combination, they
guarantee safe use in relation to short-circuit, overload, over-voltage and over temperature. Always
unplug the printer before doing maintenance or modications.
HOT SURFACE
DO NOT TOUCH
MOVING PARTS

6
.
CONTENTS
Safety Instructions 5
Parts List 8
Technical Specications 9
Introduction 10
1.1 What is 3D Printing? 10
1.2 From 3D Design to Printed 3D Object 10
1.3 Good 3D Printing Practices 12
Product Overview 13
2.1 Printer Front View 13
2.2 Printer Rear View 14
2.3 Print Bed 15
2.4 Control Panel 16
2.5 Touch Screen Control Panel 17
Setup 20
3.1 Unboxing and Assembly 20
3.2 Levelling the Bed 22
3.3 Filament 24
3.3.1 Filament Types 24
3.3.2 Inserting Filament 25
3.3.3 Removing Filament 25
3.3.4 Storage 25
3.4 Using the SD Card 26
3.4.1 Loading les from your Computer 26
3.4.2 Printing from the SD Card 26
3.5. Removing 3D Objects from the Bed 27
Preparing To Print a File 28
4.1 Creating a GCODE File 28
4.2 Cura Setup 28
4.3 Download the Latest Cura Prole 28

7
.
AFTER SALES SUPPORT
CUSTOMERCARE@BALCOLIFESTYLE.COM MODEL: HE180021
Servicing 29
5.1 Servicing your 3D Printer Touch 29
5.1.1 Replacing the Print Mat 29
5.1.2 Nozzle Cleaning 29
5.1.3 Extruder Cleaning 30
5.1.4 Routine Component Check 30
5.1.5 Storing 30
Finishing 31
6.1 Finishing Techniques 31
6.1.1 Useful Tools/Equipment 31
6.1.2 Removing Support Material 31
6.1.3 Sanding 32
6.1.4 Surface Coating 32
Maintenance 33
Disposal of Packaging 33
Disposal of Product 33
Troubleshooting 34
10.1 Troubleshooting 34
10.1.1 Printing Problems 34
10.1.2 Connectivity Problems 35
10.1.3 Other Problems 36
10.2 Useful Terms 36
Appendix 38
References 38
8
.
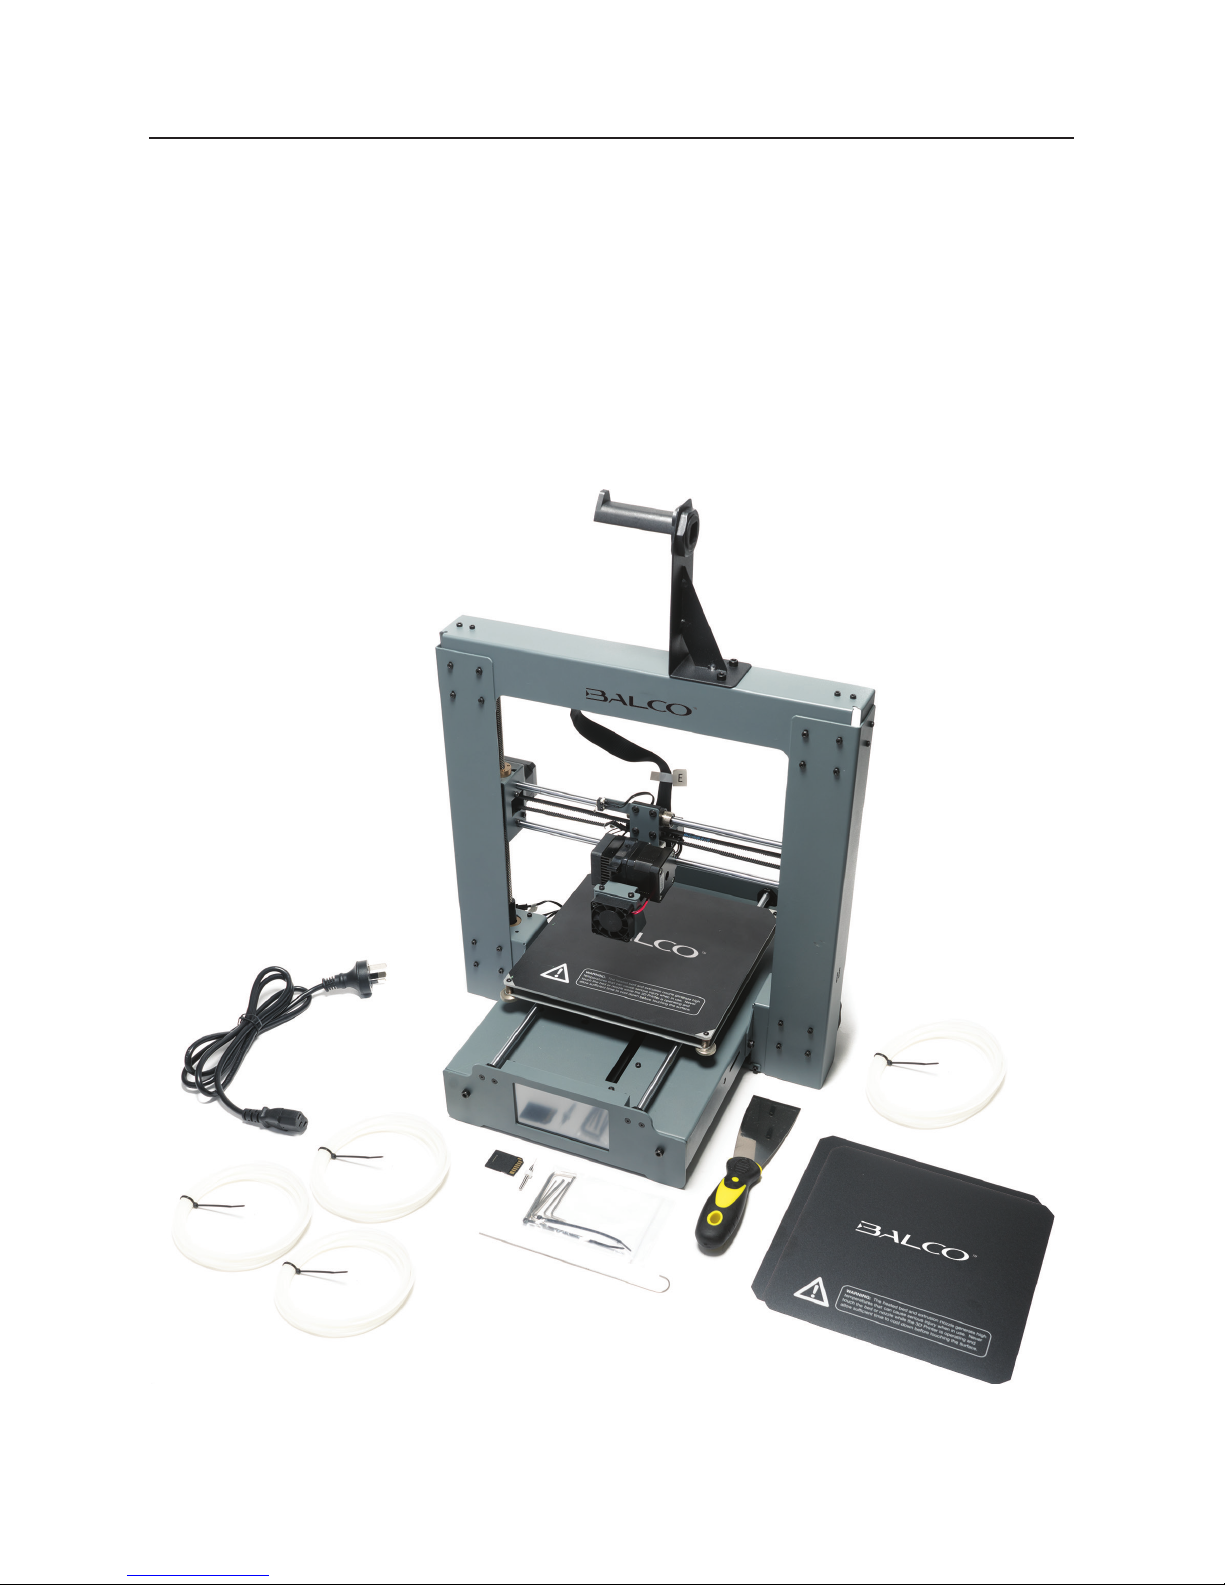
PARTS LIST
1 x Balco 3D Printer Touch
(Extruder Tower,
Heated Print Bed)
1 x Filament Spool Holder
1 x Filament Spool Stand
1 x Power Cable
1 x SD Card Class 10
1 x Scraper
1 x Replacement PTFE Tube
1 x Hex Key Set
6 x Hex Bolts
2 x Cable Ties
1 x 100m PLA Filament
3 x Print Bed Mats
(1 on Print Bed and 2 spare)
1 x 0.4mm Drill Bit
1 x Extruder Cleaner
6 x Rubber Feet
1 x Levelling Card
1 x Instruction Manual
1 x Getting Started Guide
1 x Warranty Card

9
.
AFTER SALES SUPPORT
CUSTOMERCARE@BALCOLIFESTYLE.COM MODEL: HE180021
TECHNICAL SPECIFICATIONS
Printing
Print Technology: Fused Filament Fabrication (FFF)
Build Volume: 200 x 200 x 180mm
Layer Resolution: 0.1 – 0.4mm
Positioning Accuracy: X 0.012mm
Y 0.012mm
Z 0.004mm
Extruder Quantity: Single Extruder
Extruder Diameter: 0.4mm
Print Speed: 10mm/s - 70mm/s
Travel Speed: 10mm/s - 70mm/s
Supported Print Materials: Balco Branded PLA, ABS, PVA,
HIPS, PLA Wood, PLA Flex, Conductive
Temperature
Ambient Operating Temperature: 15°C – 30°C
Operational Extruder Temperature: 170°C - 260°C
Operational Print Bed Temperature: 30°C - 110°C
Software
Slicer Software: Cura
Cura Input Formats: .STL, .OBJ, .DAE, .AMF
Cura Output Format: .GCODE
Connectivity: SD Card
Electrical
Input Rating: 100-240V AC, 50-60Hz, 4A
Physical Dimensions
Printer Frame Dimensions: 400 x 410 x 400mm
Weight: 10KG
This device is noise-suppressed according to the applicable EU directives. This product
fulls the European directives 2011/65/EU, 2014/30/EU and 2014/35/EU.
10
.
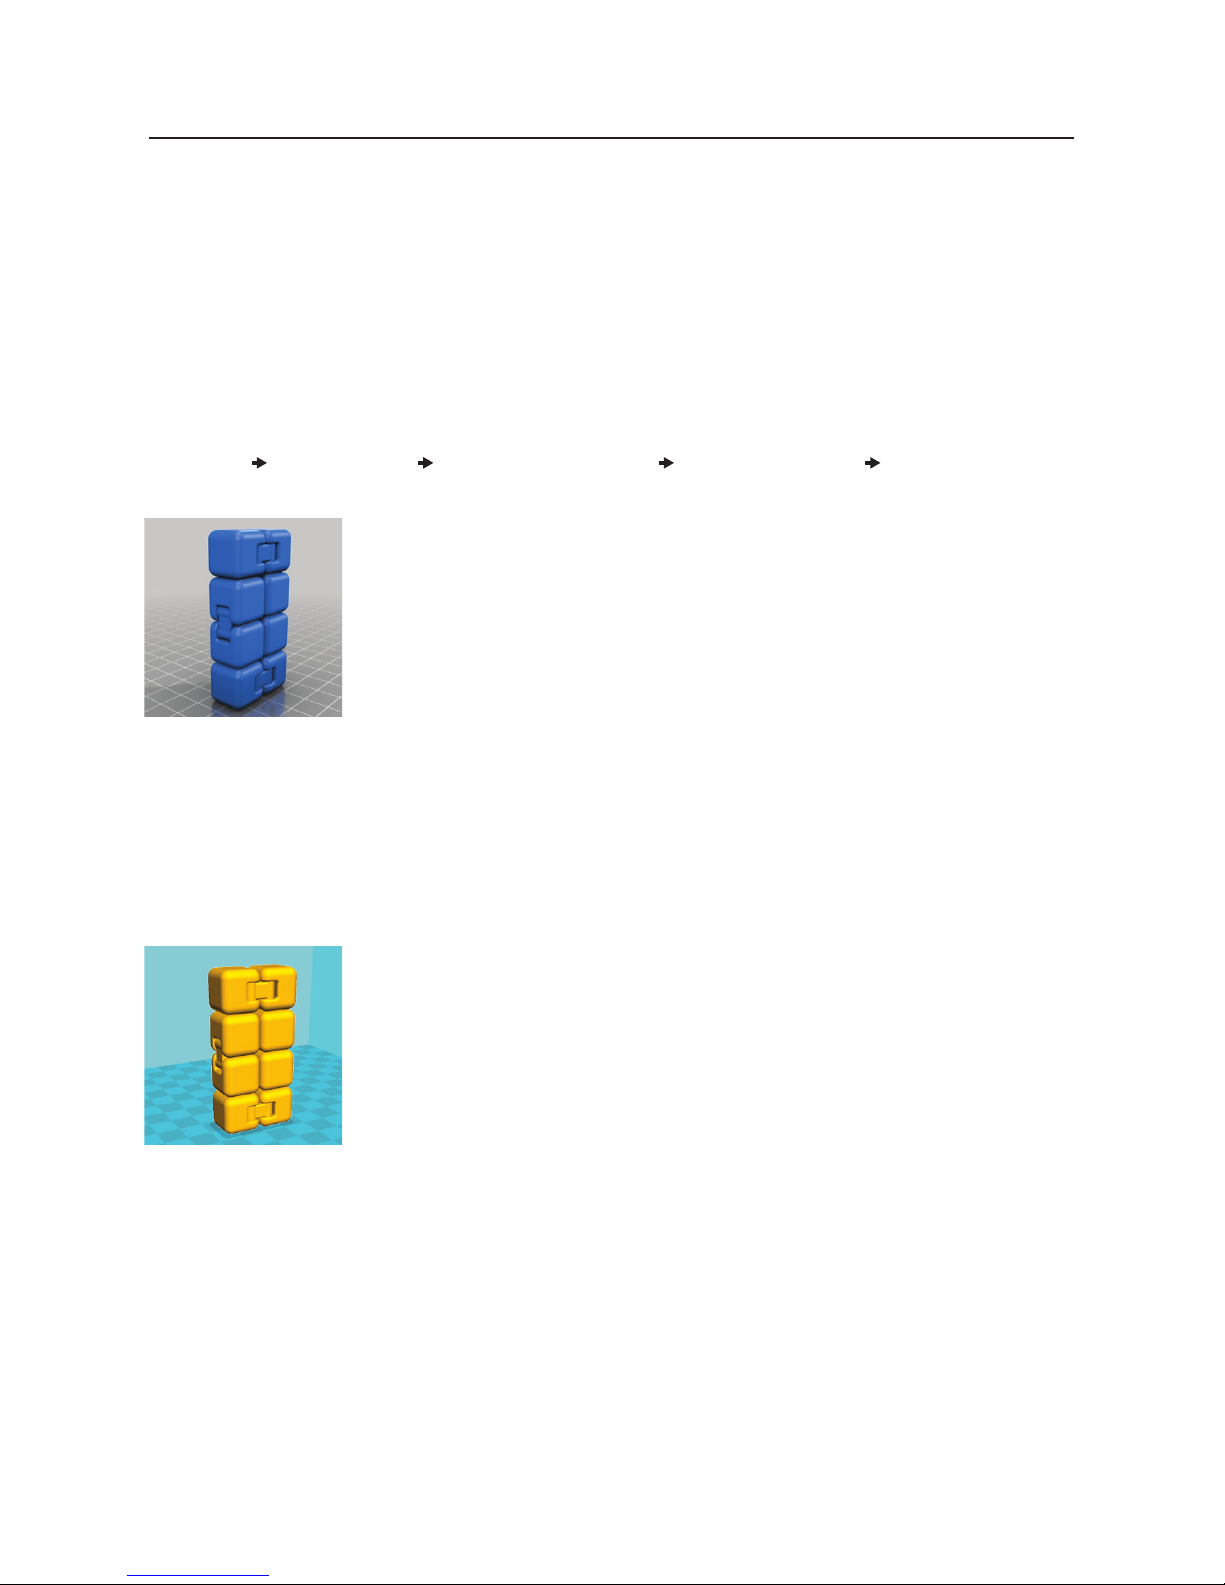
1.1 What is 3D Printing?
3D Printing is a process whereby a real object is created from a 3D Design. Fused Filament
Fabrication (FFF) is one of the most common technologies used by 3D Printers to achieve this. FFF
works on an ‘additive’ principle by laying down material, such as PLA or ABS lament, in layers to
create a 3D object.
1.2 From 3D Design to Printed 3D Object
3D Design Slice to GCODE Setup 3D Printer Touch 3D Printing Process 3D Printed Object
3D Design
Having a 3D Design is the rst step to creating a 3D Object. There are
a number of free 3D Designs that can be downloaded and printed for
personal use. Websites such as Thingiverse.com, Pinshape.com and
YouMagine.com are a good place to start, but there are many more
available!
Alternatively, you can create your own 3D Design using 3D Modelling Software. Programs such as
SketchUp or Blender allow this, however this can take some practice before successfully modelling
your 3D Design. After you’ve nished your 3D Design, you can export it as an .STL le, to be
imported into a ‘Slicer’ program such as Cura.
Slice to GCODE
A ‘Slicer’ converts a 3D Design (usually in .STL or .AMF format) into
individual layers. It then generates the machine code (such as GCODE) that
the 3D Printer Touch will use for printing.
We recommend the program Cura as it uses a simple interface and includes a large amount of
support material.
INTRODUCTION
11
.
AFTER SALES SUPPORT
CUSTOMERCARE@BALCOLIFESTYLE.COM MODEL: HE180021
Setup 3D Printer Touch
It’s important to set up your printer before every print. We’ve included some
steps on page 12 in section 1.3 Good 3D Printing Practices for you to
quickly refer to each time.
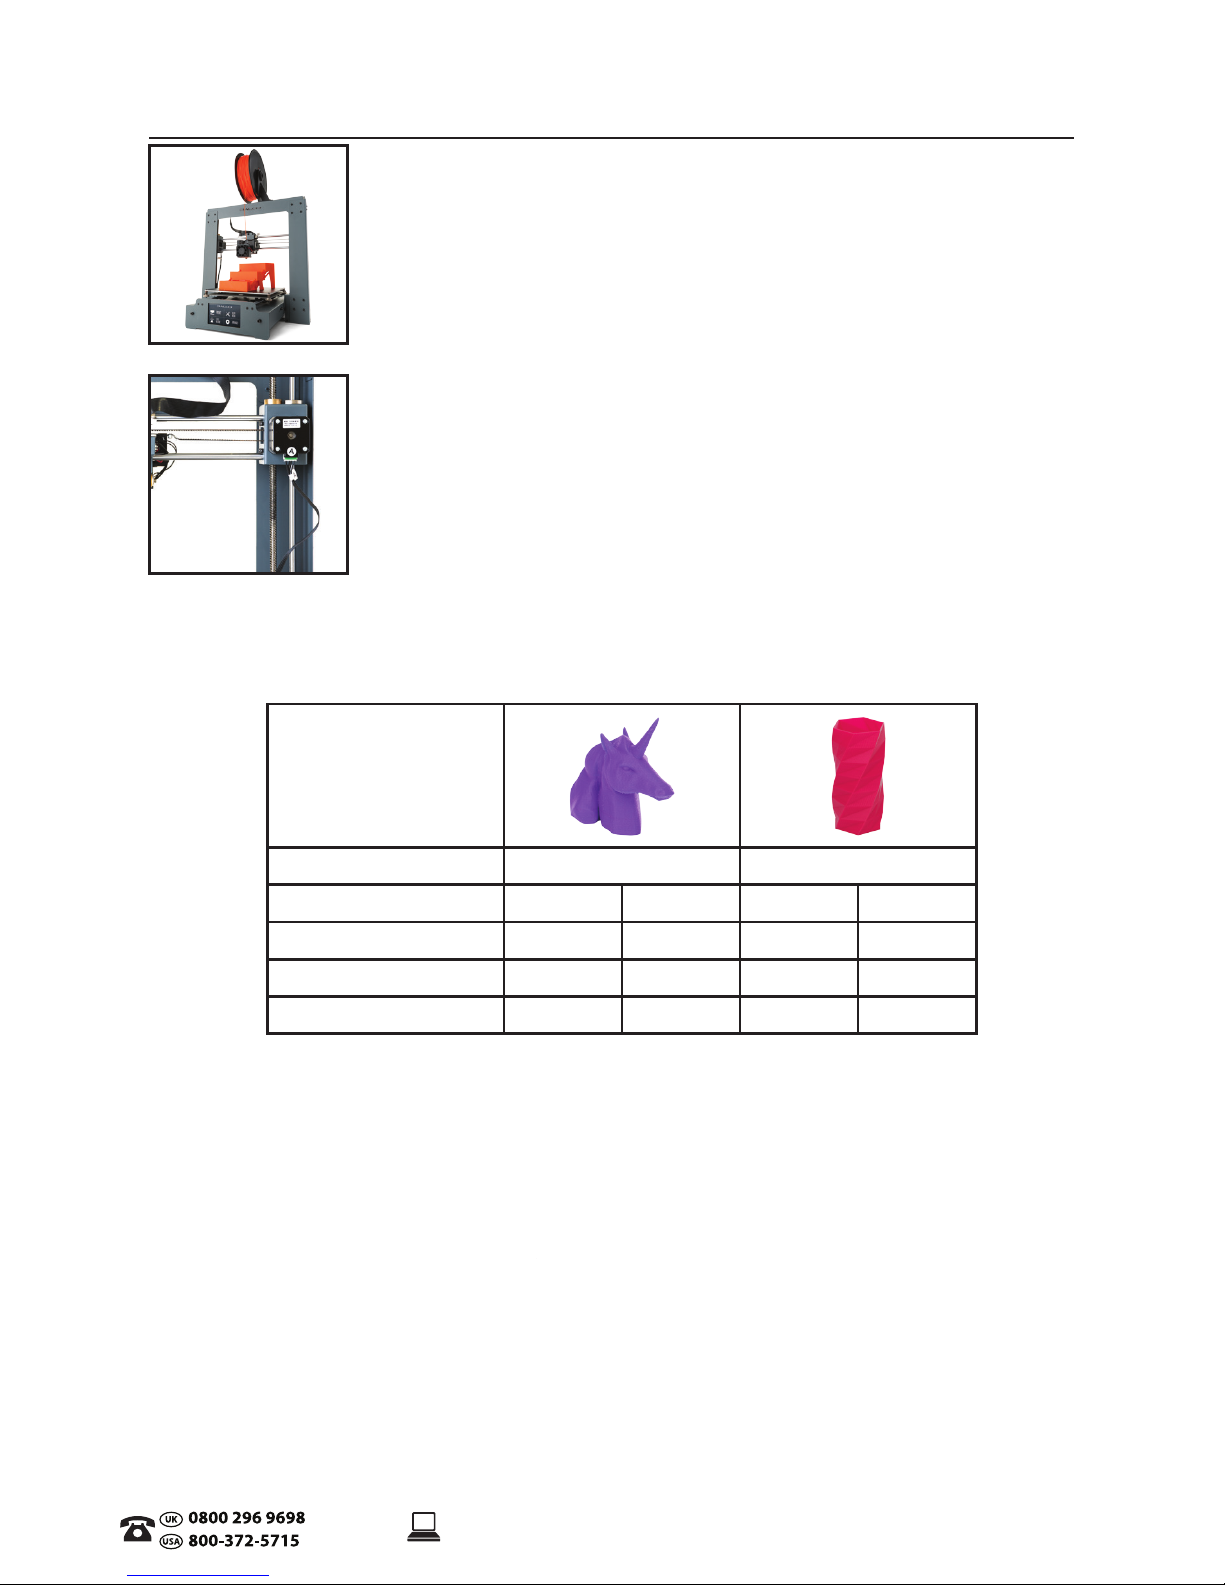
3D Printing Process
Now that you’ve loaded a GCODE le onto the printer, it will commence
heating up the Extruder and Heated Print Bed, then start printing. While
printing, the nozzle will move along the X and Y axis as each layer is printed.
This can take some time, depending on the size of the 3D model, print speed
of the 3D Printer Touch and resolution of each layer.
Here is an example of how size, inll, and resolution can aect printing time:
Dimensions:
62.5 x 25.75 x 67.75mm 70 x 70 x 140mm
Inll:
20% 0% 20% 20%
Resolution:
2mm 2mm 2mm 1mm
Print Time:
53min 39min 6hr 40min 13hr 12min
Filament Used:
4m 2.54m 45m 45.67m
3D Printed Object
Once the printer has completed all the layers, you will have a 3D Printed Model.
The Balco 3D Printer Touch is compatible with a broad range of lament types and is capable of
printing 3D models ranging from small and simple to complex objects with moving parts. What you
print is limited only by your imagination.
INTRODUCTION

12
.
1.3 Good 3D Printing Practices
Please refer to these steps during every print to ensure the best quality.
Before Printing
1. Ensure your GCODE le is correctly setup, lament diameter is set to 1.75mm and correct
temperature settings for the material you are using (refer to table 3.3.1, page 24)
2. Check all cables and connectors are connected
3. Check that the Heated Print Bed is level and approximately 0.1mm from the nozzle
4. Check that the Heated Print Bed is clean, dust free and the nozzle does not have excess
material
stuck to it
During Printing
1. Closely monitor the rst layer being printed – Most problems will occur in the rst layer. If
problems occur, stop the 3D Printer Touch at the power outlet
2. Do not leave the 3D Printer Touch unattended while in operation
3. Keep hands clear while machine is operating
After Printing
1. Wait for the Heated Print Bed and Extruder to cool down
2. Carefully remove 3D Object using the supplied Scraper. Never use Scraper towards your body.
Keep Scraper evenly at when scraping to avoid damage to the Heated Print Bed. Damaged
Heated Print Bed will aect adhesion for future prints
3. Store 3D Printer Touch in a clean, dry environment
INTRODUCTION
Always check Print Mat
is clean and there is no
residual plastic
Always check all cords
are connected
Always check GCODE
file settings match
filament and printer
Always check Extruder
distance is 0.1mm
from Print Mat
Always check Print
Bed is level
 Loading...