

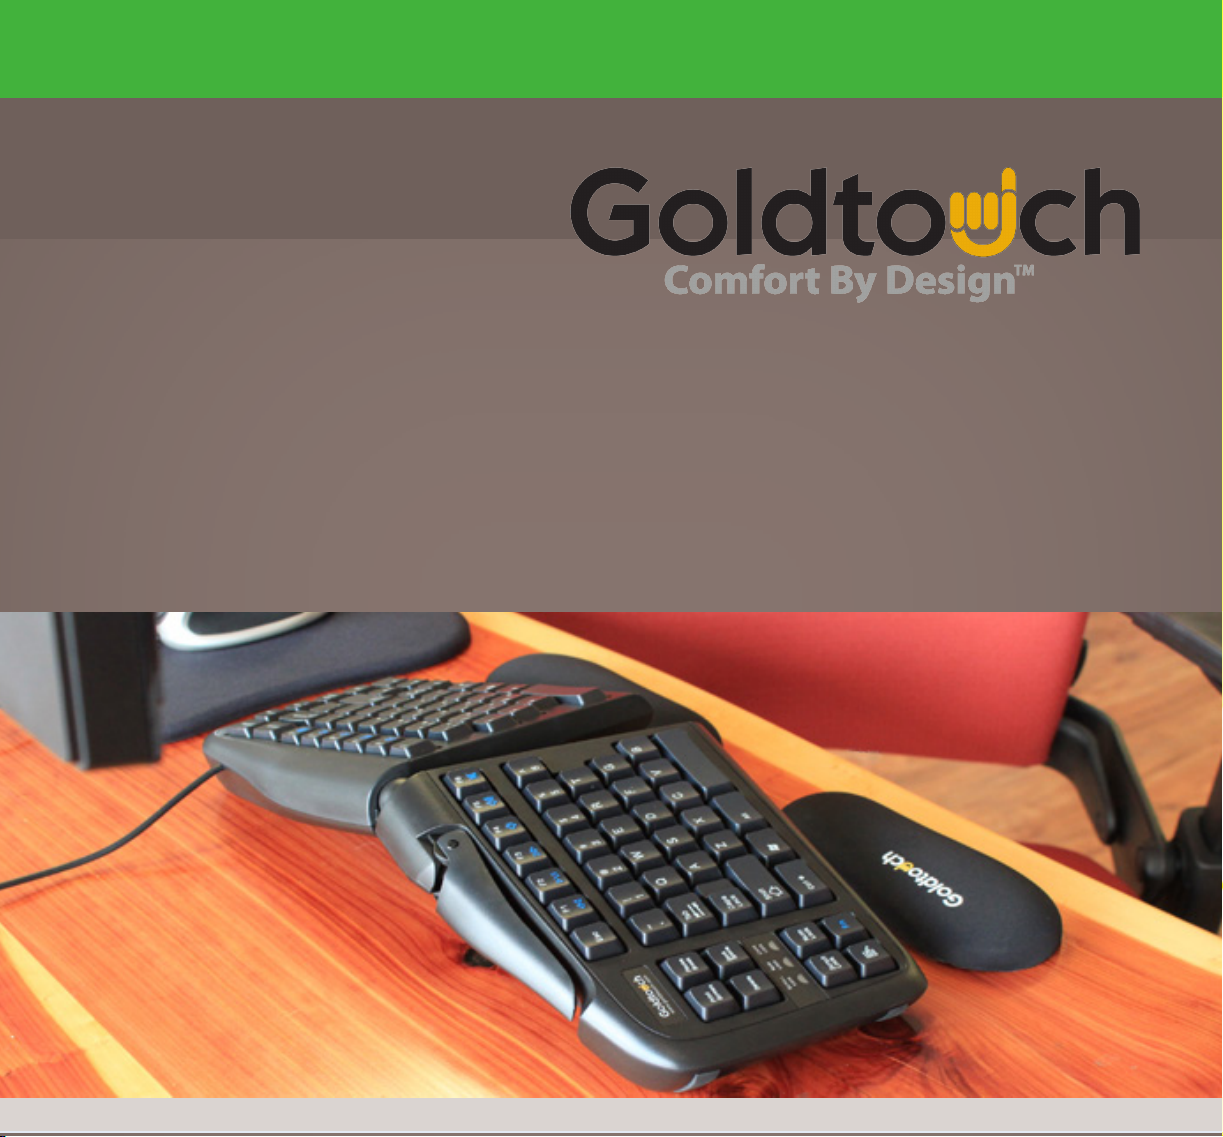
Goldtouch Adjustable Keyboard
User Guide

SAFETY INSTRUCTIONS
Caution:
Improper keyboard and mouse use may contribute to musculoskeletal injuries. Read the instructions contained in this guide before using
this keyboard. If you experience discomfort, pain or other symptoms like weakness, numbness, tingling or swelling, either while using your
keyboard or mouse, or at other times, do not ignore these signs. Don’t assume or hope they will go away. Consult a qualied health
professional. Many minor musculoskeletal disorders can be effectively treated at an early stage before they progress to more
long-term injuries.
To reduce your risk of injury you should:
Adjust your chair height so that your forearms are horizontal and your elbows are at 90° when typing or using a mouse. Place
your keyboard and mouse directly in front of you.
Adjust your keyboard to maximize comfort.
Rotating the inside edges of the keyboard halves upward will reduce pronation (See Figure 1.4 and adjustment instructions).
Rotating the bottom edges of the keyboard halves outward to form a “ ” shape will reduce ulnar deviation
(see Figure 1.3 and adjustment instructions).
Arrange your workstation to allow you to attain unstrained, neutral wrist postures, with your wrists straight, limber and not
twisted when using your keyboard and mouse. Avoid awkward or uncomfortable postures of the hand, wrist and forearm.
Keep your arms, neck and shoulders relaxed and limber with the elbows by your side.
Don’t shrug or hunch your shoulders while working.
Avoid resting any part of your hands, wrists or arms on sharp or hard surfaces.
Don’t rest your wrists on any surface while typing, only when resting.
Use a light touch when typing or holding a mouse.
Vary your work so that fatigue doesn’t accumulate and you allow your body active muscles to recover.
Take frequent rest breaks from keyboard and mouse work.
^
1
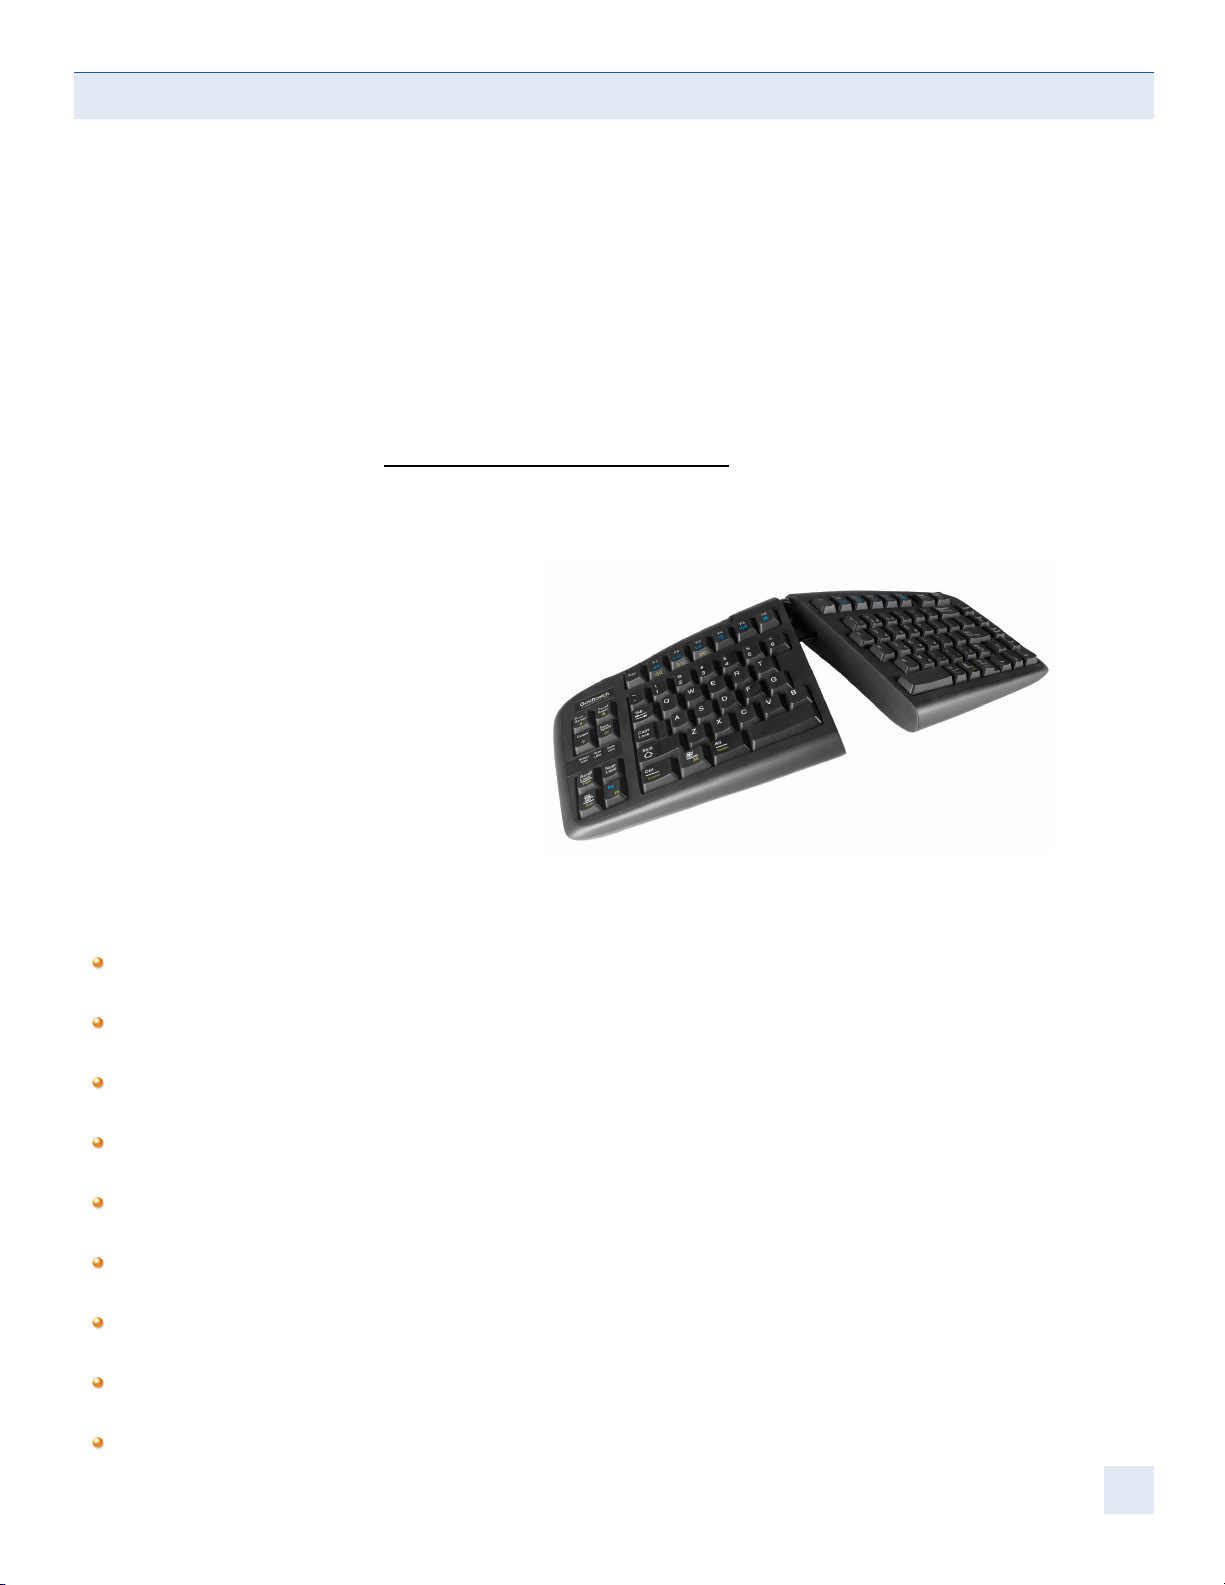
PRODUCT DESCRIPTION
Your Goldtouch Adjustable Keyboard is an exceptional product designed to be adjusted to suit your individual body
requirements, rather than forcing your body to conform to the technology. It provides for personal adaptation of the two
alphanumeric sections to help you attain relaxation of the muscles and tendons of the hands, wrists, arms and shoulders. By
making these adjustments, some undesirable, awkward postures used in typing can be alleviated. This posture enhancement,
combined with correct adjustment of your workstation, can help promote your comfort and productivity.
The Goldtouch Adjustable Keyboard allows you to try various keyboard setups until you nd the positions, in both horizontal
and vertical plane that best suits your needs. The range of adjustability provided is 30° horizontally and 30° vertically,
however, some keyboard users may nd that using the Goldtouch Adjustable Keyboard in the at and linear position of a
standard keyboard is most comfortable for their personal needs. Please see our YouTube Videos which further depict proper
use of your Goldtouch products. www.goldtouch.com/t-videoheader.aspx
Most users will nd their preferred keyboard position will be raised and splayed to some extent, allowing more relaxed and
natural “repose” interface. Once again this is the benet of an adjustable keyboard, it allows the individual to personalize or
tailor the keyboard to their unique requirements.
Figure 1.1
THE GOLDTOUCH ADJUSTABLE KEYBOARD HAS THE FOLLOWING ERGONOMIC FEATURES:
Adjustment for wrist splay in the horizontal plane: 0° - 30°, continuously variable.
Adjustment for wrist pronation - vertical tenting: 0° - 30°, continuously variable.
Easily adjusted, locking ball and socket latch mechanism
Small Space saving foot-print to promote synergy and ergonomic benets for mouse use and comfort.
Standard alphanumeric key layout
Enhanced editing key layout for left-right hand work distribution
Large space bars for easy thumb use
Full size, full travel, tactile feedback keys with soft end-stop
Low noise key actuation
2

SETTING UP YOUR GOLDTOUCH ADJUSTABLE KEYBOARD
Connecting Your Keyboard via PS/2
(GTN-0099 Only)
Locate round 6-pin PS/2 Port or Flat USB Port. Important: Always turn off your computer before connecting or disconnecting
your keyboard at the PS/2 or USB Port.
Turn off your computer and all attached devices.
Disconnect and remove any keyboard now attached to the computer.
Attach the keyboard connector to the PS/2 keyboard port or the USB port on your computer. Care needs to be taken,
as the orientation of the connector is important. The connector pins on a PS/2 port can be easily damaged.
Restart the computer. The keyboard will be automaticially detected and installed by your operating system.
Connecting Your Keyboard via USB:
• Begin by shutting down your computer
• Determine which applies to you:
Laptop with Docking Station:
If you are using a laptop through a Docking Station, please be sure to connect the keyboard directly into an available USB
port on the computer itself for the rst time use. Once you have followed the instructions below, you can connect the
keyboard through the Docking Station for use.
Multiple computers via KVM switch:
If you are connecting two or more computers through a KVM switch, be sure to install the keyboard onto each computer
that will be used before connecting it to the KVM switch. A KVM switch will not allow the drivers to install automaticially;
therefore it is necessary to connect the keyboard directly into each computer for proper installation for the rst time. Be
sure that your KVM switch is for USB devices, not PS/2.
Desktop or Laptop with limited USB input ports:
Determine the number of avilable USB ports on your computer. You may want to add a USB Hub or port expander to
accommodate multiple devies like mice, printers, keyboard, numeric keypads, PDA’s, etc., if your computer does not have
a sufcient number of USB points of access, we recommend that your keyboard always be plugged directly into your
computers USB port if possible.
Installation:
• Remove the PS/2 adapter from the end of the keyboard cord (if so equiped on the GTN-0099 Model) so the USB input
is exposed. Please note there is no adapter on the GTU models (this includes the GTU-0088). Model GTU-0088
supports only USB connections, a PS2 adapter will not work with the GTU-0088. Models GTU-0077, GTU-0033, GTN0077, and GTN-0033 all support the use of a USB to PS2 adapter.
3

SETTING UP YOUR GOLDTOUCH ADJUSTABLE KEYBOARD
• Attention GTU-0088 PC/Mac Model Keyboards Only: A slide switch located on the underside of the keyboard will
allow you to select either PC or Mac mode, depending on the type of computer your are connecting to. Please note
this keyboard ships by default in PC mode.
• Connect the keyboard directly into a USB port on the computer; power up the computer and allow Windows to detect
the device and install the drivers. Do not attempt to install via hub or switch, as the keyboard must be connected
directly to the computer for correct driver installation. You may see a window that tells you the hardware is installed
and ready for use when installation is completed.
• If you are connecting a USB numeric keypad in conjunction with a Goldtouch keyboard, be sure to connect it via
USB as described above. For correct operation, the numeric keypad must be plugged directly into the computer for
installation, but can be connected through a hub once the drivers have been installed.
• Do not attempt to plug the keyboard into one of the USB ports located on the sides of the USB Numeric Keypad, as
these ports are intended only for low power devices, such as mice or USB storage drivers. Doing so will cause the
keyboard and keypad to malfunction.
Adjusting Your Goldtouch Keyboard
The Goldtouch Adjustable Keyboard has been developed to reduce unwanted awkward postures and to enable you to
attain comfortable, neutral wrist postures. By adjusting the two keyboard sections both horizontally and vertically, you
tailor the keyboard to your individual anatomy and work environment, while decreasing two potentially harmful and
awkward postures, ulnar deviation and pronation.
Everyone is different and will require different typing positions to suit them and their workstation.
The patented Goldtouch Adjustable Keyboard has an easy to use adjustment latch mechanism:
To adjust it, simply open the handle away from the keyboard. This releases the lock and lets you move the keyboard
segments to suit your individual comfort.
Once you have found an appropriate keyboard conguration, ensure that the segments are sitting evenly on all four feet
and push the handle back to its locked position.
Caution: Always ensure that the locking of the handle is undertaken with due care to avoid ngers being caught
between the keyboard surface and the locking mechanism.
Remember, just as you would shift and move your posture and task during the day, the Goldtouch Adjustable Keyboard
can be adjusted to move with you. Avoid postures that are awkward, uncomfortable or require you to ex, extend or
deviate your wrists from a neutral posture or pronate your wrists and forearms.
4

SETTING UP YOUR GOLDTOUCH ADJUSTABLE KEYBOARD
Splay & Ulnar Deviation Adjustment
Figure 1.2
There is usually a discrepancy between your shoulder width and keyboard width when you place you ngers on the home
row of keys. You compensate by angling your wrists outward (Figure 1.2 - ulnar deviation).
Rather than have this happen, the Goldtouch Adjustable Keyboard splits the horizontal plane relieving this awkward
posture. The aim is to allow your wrists to be straight which in turn will increase your comfort level.
To decrease ulnar deviation when using the Goldtouch Adjustable Keyboard:
release the latch handle by pulling it open
seperate the front edges of the two keyboard sections to the desired angle
and lock it by pushing the handle back to its closed position.
Figure 1.3
Important: After making this adjustment check that your elbows are at a 90° and your forearms are horizontal.
If they are not, alter your seat or desk heights.
5

SETTING UP YOUR GOLDTOUCH ADJUSTABLE KEYBOARD
Lateral Inclination & Pronation Adjustment
Placing your hands at on the keys of a keyboard can require considerable muscular effort. This effort can cause fatigue and
discomfort. The two keyboard segments can be raised in the center to more closely match the natural alignment of the
forearm and wrist. Forcing your hands down to the keyboard is a hand movement known as pronation. This is the rotation
of the right hand in a counter-clockwise direction and clockwise for the left. Pronation problems of the feet for example
can be countered using arch-supports (orthotics) and heel stabilizers, with keyboards the Goldtouch Adjustable Keyboard
is the answer.
To decrease pronation when using the Goldtouch Keyboard:
Release the latch handle by pulling it open
Raise the central region of the keyboard to the desired height
make sure all four feet are level on the desk
and then lock the keyboard in place by pushing the handle back to its closed position.
Expiriment, give yourself time to familiarize yourself with this new posture and ne tune the adjustment until you feel a sense
of relaxation in the wrists, forearms, shoulders and neck. Remember to watch our videos to learn how to properly adjust
your keyboard.
Figure 1.4
Important: Adjusting your keyboard for lateral inclination and pronation relief changes the height of the keyboard.
Therefore, it may be necessary to also adjust your seat and desk heights so that the elbows are at 90° and your forearms
are horizontal.
6

SETTING UP YOUR GOLDTOUCH ADJUSTABLE KEYBOARD
Wrist Extension and Adapting your Workstation
Another awkward posture to be avoided is the angling of the hand backwards at the wrist (like a stop signal) - this is called
wrist extension or dorsiexion. When typing, the wrists should be kept straight with the hand and forearm aligned together.
It is important to ensure that your seat and desk heights are adjusted so that your elbows are 90° or slightly more when
you place your ngers on the keys. Ensure that your wrists are straight when you type. Wrists rests shouldn’t be used while
actually typing but can be used to rest between typing bouts.
Numeric Keypad and Function Lock
The Goldtouch Keyboard has an added “Number Lock” key (Num Lock) to enable the use of the embedded numeric
keypad. When the NumLock is on, the keys (U,I,O,P, etc.) which usually generate letters, will perform numeric character
generation (456*) and the arithmetic functions usually found on the numeric keypad can be found on the lower right hand
corner of the keytops.
This allows the keyboard to have a smaller footprint that lets you bring your mouse into the “comfort zone” in front of you.
GENERAL GUIDELINES - OBSERVE GOOD WORK HABITS
Using a keyboard that may be adjusted to your individual needs, such as the Goldtouch Adjustable Keyboard, is one of
the factors that may assist in promoting comfort and enjoyment. The keyboard’s adjustable features can reduce awkward
postures associated with keyboard use and reduce the stresses and strains that holding these postures for prolonged
periods produces. The Goldotuch Adjustable Keyboard also allows you to shift posture periodically, thereby reducing the
cumulative stresses placed upon your muscles.
By observing good work habits you will nd that it is easier to maintain a relaxed neutral posture when using your keyboard.
What Goldtouch ergonomists mean by good work habits are things like pacing yourself, varying your tasks, shifting your
posture to give your body a chance to use different muscle groups and taking appropriate rest breaks.
Arrange your workspace so that the tools you use most are within your “comfort zone”, the distance from elbow to hand,
because this plays an important part in remaining comfortable and productive. Continuously performing a task in the same
way increases the risk of over-exertion and injury. The following are important ergonomic factors for computer work,
comfort and productivity.
Arranging your workspace
Adjusting your seat height and work surface
Maintaining good posture
Taking frequent work breaks
Vision care
7

GENERAL GUIDELINES - OBSERVE GOOD WORK HABITS
Arranging Your Workspace
Arranging your workspace to improve comfort also enhances productivity and efciency.
Give yourself ample room to move while performing your main tasks.
Place the tools that you use most close to hand so that you don’t have to reach for them: - keyboard, mouse, telephone,
pens, note paper, etc.
Place less frequently used items in an area further away but still within arm’s reach.
Place least used items at the periphery of your workspace, outside arm’s reach.
Use a document holder to ensure that the information you are using is readily accessible.
Place it at the same height and distance as your monitor so that it is the same visual eld.
Figure 1.5
The Goldtouch Adjustable Keyboard also helps in this respect. It has a small footprint, which means that you don’t need to
reach as far to access your mouse (Figure 1.5)
8

GENERAL GUIDELINES - OBSERVE GOOD WORK HABITS
Adjusting your Seat Height and Work Surface
Comfort and productivity at the workstation will be affected by your posture. A neutral, natural relaxed posture will lead to
increased comfort. The type of chair you use and the height of your desk, computer and monitor may affect this. Adjustable
chairs, like adjustable keyboards, will allow you to tailor the workstation to your individual needs and are recommended.
When you are typing and using your mouse, it is important to attain un-strained, neutral wrist postures, with your wrists
straight, limber, and not twisted, when using your keyboard and mouse.
Adjust you chair height so that you forearms are horizontal and the elbows at 90° when your ngers are on the
keys. For this adjustment, ensure that the wrists are straight and not resting on the desk, keyboard or wrist rests.
Keep your thighs parallel with the oor and don’t let the edge of the chair press into the back of your knees.
Rest your feet at on the oor. If necessary, use a foot support.
Use a chair that rmly supports your lower back and thighs.
Adjusting the height of your chair back in order to achieve contact between the seat back and the curved part of your
back, may improve comfort.
Use a chair that has adjustable armrests so that you are not forced to shrug or slouch in order to use them.
Keep your arms, neck and shoulders relaxed and limber with the elbows by your side. Don’t shrug your shoulders while
working.
Avoid resting any part of your hands, wrists or arms on sharp or hard surfaces.
Important. We recommend that you maintain your elbows at 90° and the forearm horizontal. So if you adjust the height of
your Goldtouch Keyboard, you should also re-adjust your seat height.
Consult your chair
manufacturer or
desk designer for
further information.
9

GENERAL GUIDELINES - OBSERVE GOOD WORK HABITS
Maintaining Your Good Posture
Once your workspace is properly set up, it is important to maintain good posture and to take frequent rest breaks. This is
true not only when you’re at your workstation but also in general life.
Maintain your body in an upright relaxed posture as your work.
Allow your arms to hang loosely from your shoulders.
Relax your shoulders, arms, wrists and hands while you work.
Avoid awkward, twisted, uncomfortable postures of the wrist and the body in general.
Keep your wrist positioned in a straight line with the forearms.
Move your hands and arms together rather than stretching your ngers to reach the keys when typing.
Use a light touch when typing or holding a mouse.
If you use a wrist rest, only use it between typing bouts and not when actually typing.
Avoid frozen or static postures. Shift your position throughout each work session to give your body a chance to use a
variety of muscles.
Keep your hands and arms comfortably warm. This will encourage blood circulation and also relax the muscles.
Taking Frequent Breaks
It is important to have rest breaks from using your keyboard and mouse. Frequent short breaks with regular longer breaks
can help you stay comfortable and productive. People’s capabilities and susceptibility to fatigue vary greatly. Assess your
own capabilities and make time for adequate rest breaks when using your keyboard intensively. It is important not to force
the body beyond its natural limits.
Avoid typing and using your mouse continuously. Take frequent rest breaks.
Organize your work so that fatigue and stress do not build up. It is important to design your work tasks in such a way
that tasks involving focused computer activities are alternated with non-computer based tasks.
Vary your tasks so that you hands, wrist and arms do not make the same motions continuously.
In addition to regular breaks, frequent short breaks may improve both productivity and comfort.
10

GENERAL GUIDELINES - OBSERVE GOOD WORK HABITS
Effective rest breaks will give you an opportunity to stand and walk around and gently stretch your muscles. Make sure
your activities away from your computer give your body a chance to relax and recover from your computer work. Extracurricular activities that involve intensive use of the same muscle groups you use to operate your keyboard and mouse will
not give you a chance to recover and may increase your risk of injury.
Pay attention to your body. If you experience pain, discomfort, or other symptoms like numbness, tingling or swelling, either
while using your keyboard or at other times, do not ignore these signs and hope that they will go away. Consult your doctor
sooner rather than later. Many minor musculoskeletal disorders can be effectively treated at an early stage before they
progress to more long-term injuries.
Vision Care
It is important to use proper lighting to reduce eyestrain. Reective glare may be a problem while using your computer,
remove all potential sources of distracting reective glare (paper, shiny posters, glass etc.) from around your monitor and
desk, this will help.
Indirect lighting is probably best for intensive computer work. Some ergonomists recommend that the light level when
working on a computer should be dimmer than when you work with hand written documents or are reading. This means
that when you are using both a computer, as well as reading from paper, it may be benecial to use indirect lighting in
combination with task lighting to ensure that you have both a clear and easy to read computer monitor as well as a well lit
source document.
Adjust your work environment and lighting so that there is no reective glare on the screen.
Remove any sources of reective glare.
Keep the monitor at an angle to reduce reection. Place your monitor so that it is at an angle to light sources to
reduce glare and reection.
Arrange your workstation so windows are not directly behind or in front of the monitor. Bright ambient light, especially
in front of you will cause your eyes to adjust, making your monitor more difcult to read and causing eyestrain.
Adjust your computer monitor and the surroundings as the ambient light changes during the day, closing blinds,
adjusting your task lighting, and altering the brightness and contrast on your monitor.
Adjust the monitor so that it is 18 to 30 inches away from your eyes (46cm to 76cm).
The top of the screen should be at, or slightly below, eye level.
Use a document holder if you are working from source material.
Ensure the screen is clean.
11

GENERAL GUIDELINES - OBSERVE GOOD WORK HABITS
If you wear glasses, these may need to adjusted from computer work as the distances used are different from reading.
If you use multi or bifocal glasses, the monitor should be placed to be even lower to avoid having to tip the head back
to see the screen.
Blinking more often than usual when using your computer and regularly relaxing your eyes by gazing into the distance
may help reduce fatigue.
Consult your optometrist regularly.
In reading this section of the User Guide, it is evident that there are many different factors which affect comfort in the
workplace. Through addressing keyboard and mouse design, Goldtouch aims to provide the highest level of comfort available
for one of these factors. We have tried to assist you in optimizing the other factors by providing these guidelines. Only you
can truly judge what is best for you and it is ultimately up to you to modify and adjust the other factors discussed in order
to promote your own comfort.
Important: Despite the ergonomic design incorporated into the Goldtouch Keyboard and Mouse products and the
instructions contained in this guide, we cannot guarantee avoidance of discomfort associated with the use of your computer
based workstation.
If you believe your posture is not conducive to efcient and comfortable work practices and you experience any discomfort,
consult a qualied health specialist for advice, treatment and ergonomics training.
MAINTAINING YOUR KEYBOARD
Like all electronic equipment you need to avoid getting it wet, dropping it, or using undue force to depress the keys or
operate the latch handle.
Do not subject the keyboard to extremes in temperature. Your keyboard will operate best in temperatures of - 50° C to
50° C (23°F to 122°F).
Keep the surface of your keyboard clean by wiping with a soft cloth that is dampened with a mild cleaning solutions;
preferably water and mild soap.
Important: Do not attempt to adjust the keyboard without releasing the latch handle and DO NOT PLACE ANY
LUBRICATION or CLEANING FLUID IN THE BALL JOINT. THIS WILL VOID YOUR WARRANTY.
 Loading...