

Page 1
Operating Manual
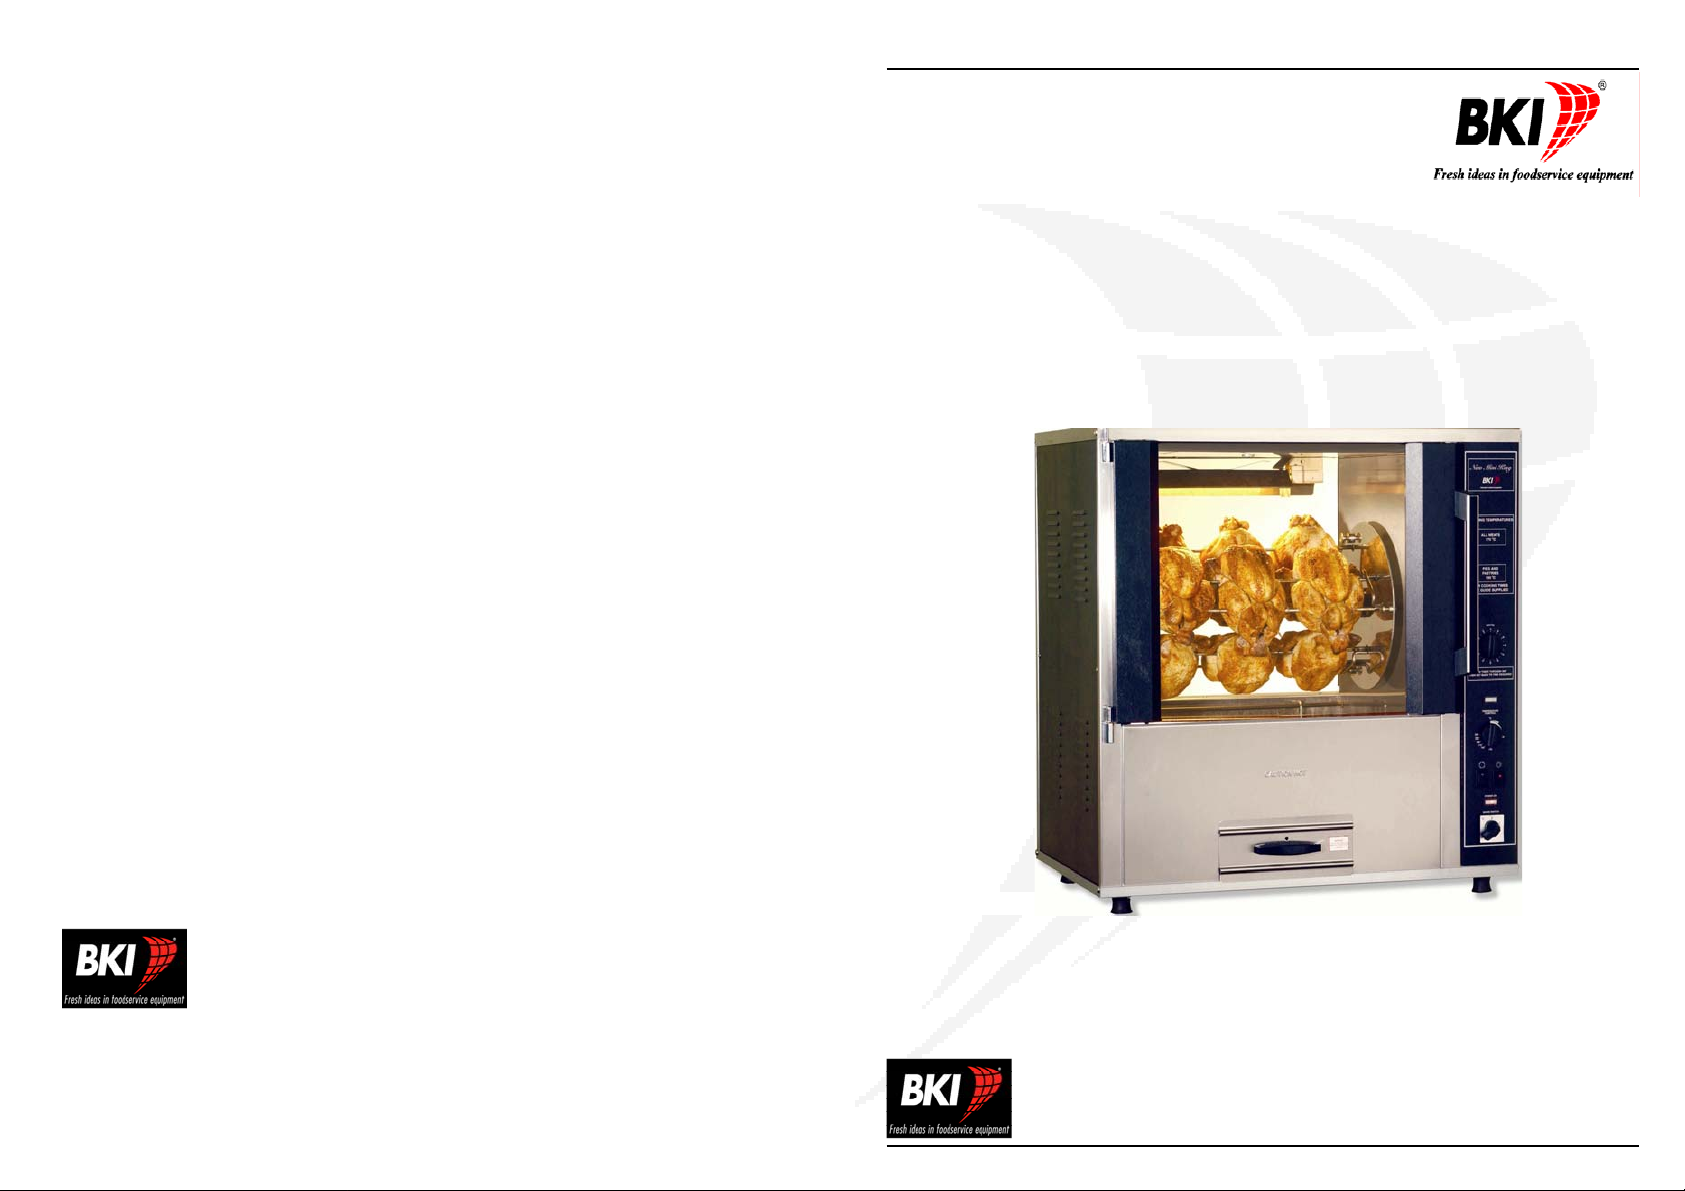
NMK Rotary Oven
BKI-Europe
Theale Technology Centre
Station Road
Theale
Reading
West Berks
RG7 4AA
Printed in England CJM/NMKOPM06006
16
Theale Technology Centre, Station Road, Theale, Reading, West Berks RG7 4AA
Phone: 0870 990 4242 • Fax: 0870 990 4243 • www.bkideas.com
ISSUE: APRIL 2006
Page 2

CONTENTS
SECTION PAGE
1. WARRANTY…………………………………………. 3
2. INTRODUCTION…..…………………………………. …….. 4
3. ACCESSORIES / HOW TO USE THEM……...…………... 5
4. THE CONTROLS..…………………………………………… 6
5. COOKING GUIDE………………...…………………………. 7
6. RECIPES………………………………...…………………… 8 - 9
7. OPERATIONAL GUIDELINES…...……………………….. 10
8. DAILY CLEANING SCHEDULE………………………….. 11 - 12
9. REMOVABLE PARTS…….………………………………… 13
10. TROUBLESHOOTING………………………………………. 14
11. Spare Parts………………………………………...15
BKI ROTARY OVENS ARE MANUFACTURED ACCORDING TO THE
FOLLOWING STANDARD: BS EN 60 335-2-42: 2002
NOTICE : SAFETY CUT-OUT
For added safety all Rotary Ovens have a built in thermal cut-out to protect against over-heating
through component failure or incorrect use.
If for any reason the thermal cut-out operates, the oven will automatically shut down and should be
switched `OFF` disconnected from the mains and allowed to cool.
NOTE: THE THERMAL CUT-OUT WILL NOT RESET AUTOMATICALLY.
The oven must not be re-used until it has been checked by a Qualified electrician or BKI Appointed
Service Agent.
SPARE PARTS
AB24100300 Fat Drawer
AB24100800 Door Assy - Operator (c/w Handle)
AB24100900 Door Assy - Customer (Plain)
ASY045 Drive Motor Asy (Parvalux, c/w 2” Pully)
ASY112 Rotor Assy Complete - 3 spit
AT002 Basket Carrier
BA010 Basket
CA055 Calrod/Element (900W)
CP002 Capacitor 2.5uf
CR002 Shaft Support Bearing
CT004 Element Clip (Push on)
DS003 Door Seal
FT001 Rubber Foot
FU010 Fuse 500mA (Motor)
H0110 Door Hinge
KN019 Knob (Timer)
LI016 Neon (Clear)
QT001 Quartz Tube 1000W (Tab end)
QT010 Quartz Tube Holder (Ceramic)
SN006 Spring - Rotor Disc
ST001 Element Carrier (Customer side)
ST002 Element Carrier (Operator side)
SW001 Switch - Main (C17, 6 pole)
SW019 Switch - Rocker
TI018 Timer (120 mins)
TM011 Thermostat (Variable)
TM012 Thermostat (Hi-Limit)
VB004 V Belt (A42)
For further information please contact sales on +44 0870 990 4242
2
15
Page 3

TROUBLESHOOTING
Read and understand the Operating Instructions
Clean the oven at the end of each working day
Refer to the troubleshooting guide if oven does not operate properly
NOTICE: ALL ELECTRICAL REPAIRS MUST BE PERFORMED BY
AUTHORISED SERVICE PERSONNEL ONLY.
TROUBLESHOOTING
PROBLEM: REASON/ACTION:
1. Chickens Take too long A. Oven not Pre-Heated
to cook B. Thermostat set to low
C. Oven lamp failed or off
D. Door seal failed
E. Oven over loaded, increase cook time,
cook less chickens or reduce product size.
2. Chickens Overcooked or A. Thermostat set to high
burning B. Cook time to long
C. Too much seasoning
3. Chickens Undercooked A. Thermostat set to low
(White spots on legs) B. Cook time to short
C. Oven not Pre-Heated
D. Chickens/legs touching
E. Chiller set too low
F. Chicken cooked from frozen
Do Not cook Chicken or Meats from frozen in this oven, check chiller setting, products should not be loaded into oven below 1
0
C.
4. Oven Smokes A. Fat / Grease on elements
B. Inadequate cleaning
C. Oversize products dripping fat
on to elements during cooking
D. Thermostat set to high, reduce
oven temperature when cooking small
loads
The installation and maintenance of the appliance should be carried out by a
suitably qualified professional in accordance with safety legislation and standards.
Installation and maintenance undertaken by non-qualified personnel may invalidate the warranty. We accept no responsibility for the consequences of work carried out by unqualified personnel.
All BKI – EUROPE equipment is supplied to the following warranty from Standex
International Ltd T/A BKI – EUROPE (hereinafter called “the Manufacturer”):
1. Subject to the other terms of this Warranty the Manufacturer will provide
free replacement of defective materials and other components within a
period of 12 months from delivery, where any defective part or component
is reasonably attributable to faulty materials or workmanship and provided
that the equipment or alleged defective part is forwarded pre-paid to the
manufacturer. Except for quartz and halogen lamps, bulbs and glass
doors which are not covered by this warranty.
2. The Manufacturer shall not be under any liability under this warranty if the
equipment or any part thereof shall have been altered in any way or operated from the incorrect voltage circuit or used in a manner inconsistent with
the Manufacturer instructions or otherwise neglected or misused or if any
parts not supplied or approved by the Manufacturer shall have been fitted
to the equipment.
3. The Manufacturer’s liability is limited to the terms of this warranty which is
given in consideration of the Purchaser’s agreeing that it shall be so limited
and that the Manufacturer shall be under no liability for any direct or consequential loss or for any personal injury or damage to property caused by
any defect in the equipment or any part therof howsoever the same may
occur and whether or not the same may occur and whether or not the
same is due to the negligence of the Manufacturer. Except for the foregoing no warranty or condition whether express or implied by common law
statue or otherwise shall apply to any BKI – EUROPE Equipment.
4. This warranty shall be construed in accordance with English Law.
WARRANTY
IMPORTANT NOTES
14
3
Page 4
YOUR NEW ROTARY OVEN
BKI is justly proud of its international reputation as a leader in the catering equipment field. Our name on this oven assures you of the finest design and engineering.
It has been built and designed with care and dedication to give you many years of
quality cooking and dependability and to ensure the highest return on your investment.
When located and used as it is intended, it is a silent salesman, merchandising
your product to its fullest advantage. Read these instructions carefully, familiarise
yourself with the controls and cooking instructions and look after it well.
It will always be an asset to your business
UNPACKING AND SETTING UP
The oven has been completely assembled and tested before shipment.. It has
been packed for safe shipment to your premises. Before connecting to the power
supply, ensure that all fittings and packaging have been removed.
ELECTRICAL SUPPLY
Because of the high output it is essential that is is connected to the correct power
supply by a qualified electrician. An electrical rating plate is located on each
oven. See Installation Instructions. Our warranty is only effective if connected to
the correct power supply by a qualified person.
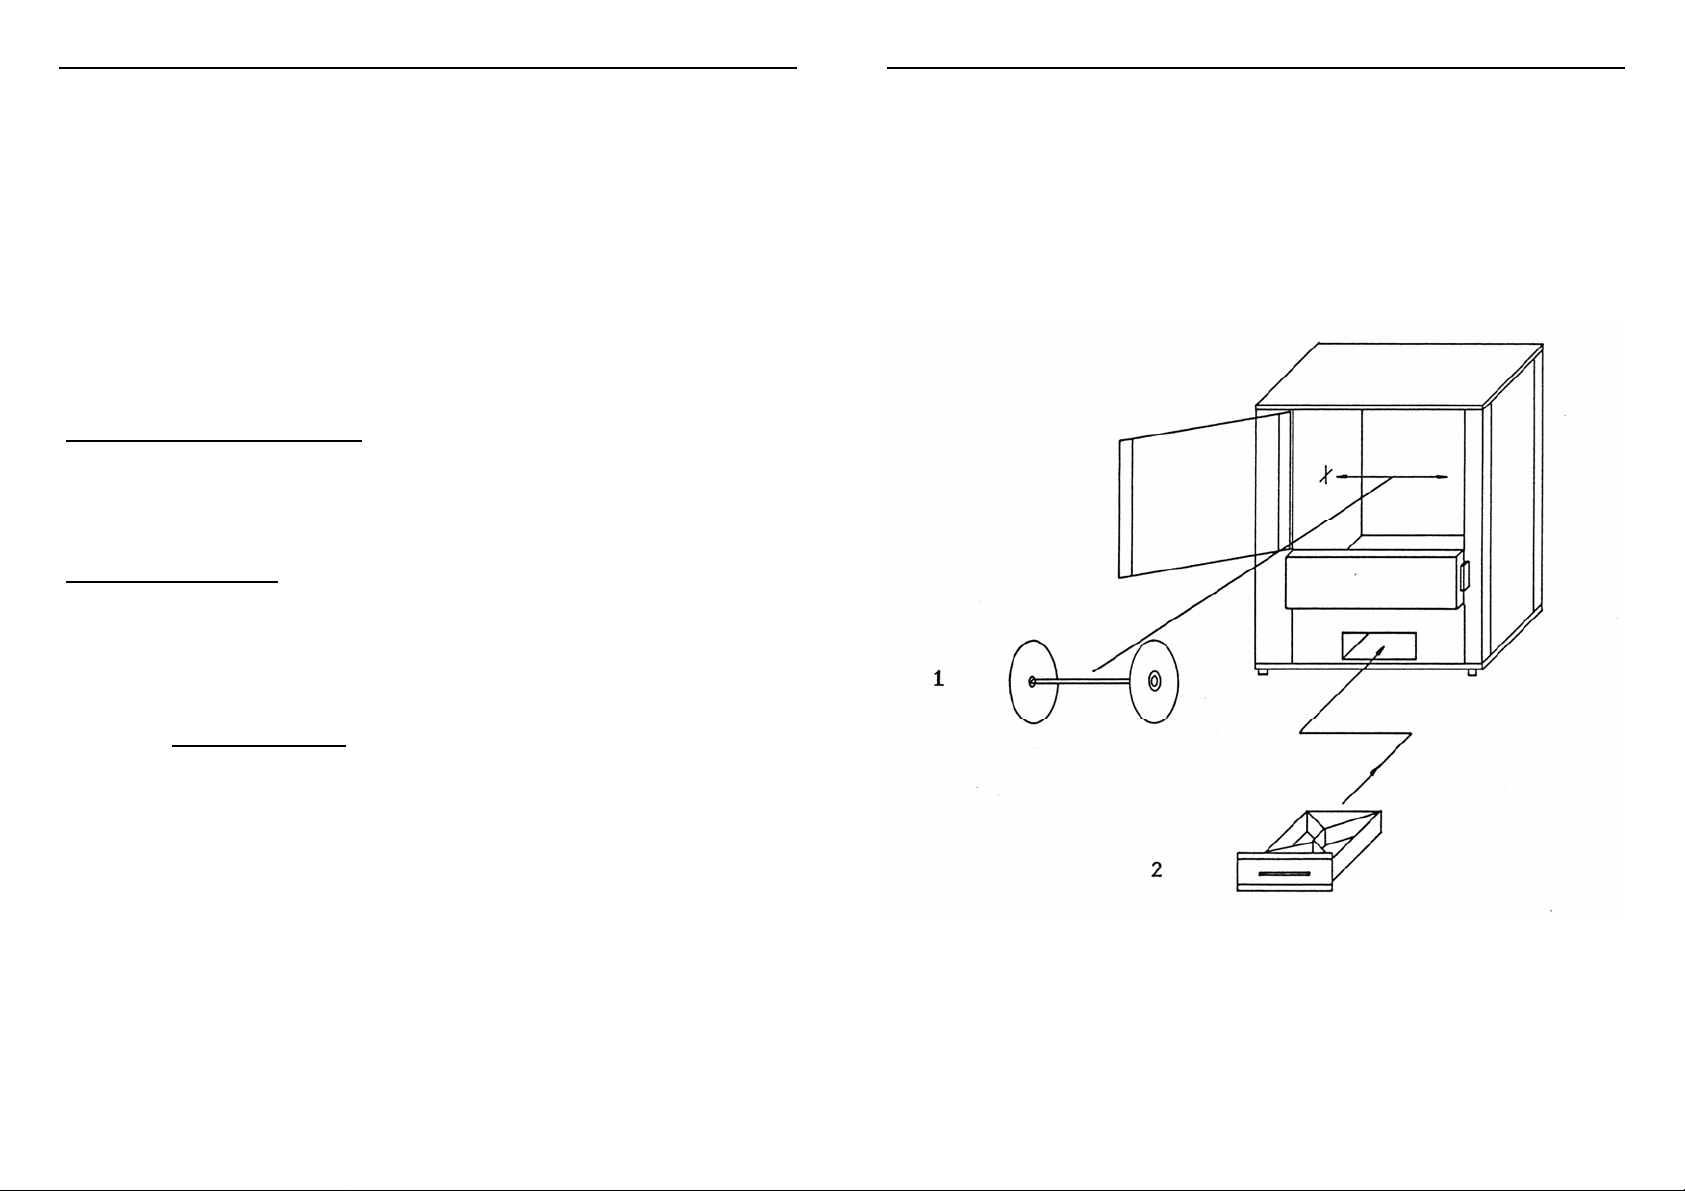
REMOVABLE PARTS
1. Centre Shaft & Rotor Disc Assembly
2. Fat Drawer
NOTICE:- SAFETY CUT-OUT
For added safety all Rotary ovens have a built in thermal cut-out to protect against over-heating through component failure or incorrect use.
If for any reason the thermal cut-out operates, the oven will automatically
shut down and should be switched “off” disconnected from the mains an d
allowed to cool.
NOTE:- THE THERMAL CUT-OUT WILL NOT RESET AUTOMATICALLY.
The oven must not be re-used until it has checked by a qualified electrician or BKI
service agent.
4
13
Page 5
DAILY CLEANING SCHEDULE
• Clean down oven after last cook of the day as follows:-
• Turn thermostat down to zero, turn customer light “OFF”.
• Remove accessories and allow to soak in a hot solution of grill clean and
water.
• Turn mains switch “OFF” and disconnect oven from power supply.
• Remove the centre shaft and rotor disc assembly.
• Empty the fat drawer and replace in the oven.
• Clean element cover panels with a mild solution of grill clean using a
damp cloth.
• Clean the oven interior with un-diluted grill clean, scouring pads may be
used on stainless steel surfaces. (Work in the direction of the grain).
• Wash away all traces of grill clean with hot water down into the fat drawer
and wipe clean.
• Empty fat drawer and wash out with grill clean.
• Clean oven glass doors Turn mains switch “OFF”, disconnect from power
supply and allow glass to cool.
ACCESSORIES….. AND HOW TO USE THEM
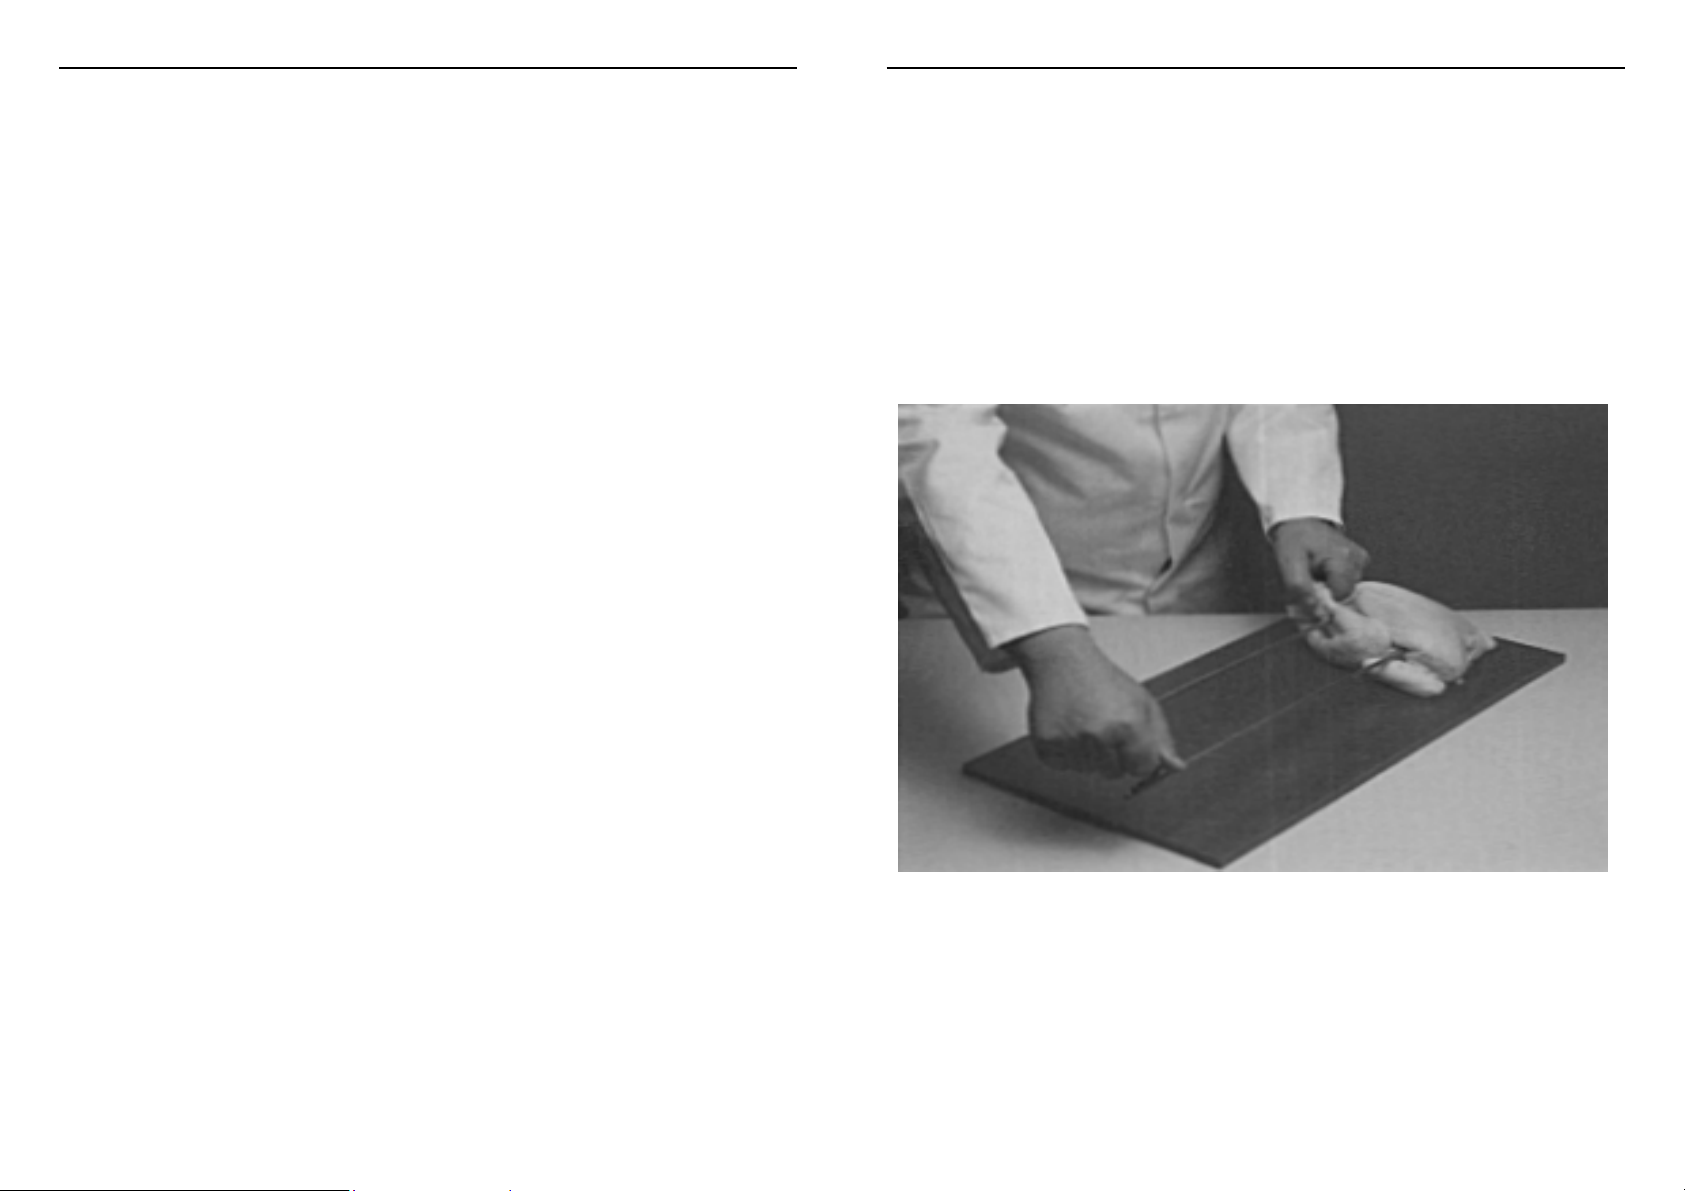
STANDARD MEATFORKS
These are ideal for chicken and poultry. Fold wings back, place chicken on its
back with legs towards you. With the handle to the right-hand side facing up, run
pointed ends of meat fork through sides of chicken under wings and through
thighs (breast up and legs down). Ensure that legs of adjacent birds DO NOT
PRESS TIGHTLY TOGETHER, this will cause the area of contact to be undercooked!
Load meat forks into oven from the control side. Locate pointed ends into left
hand disc, push against spring then locate handle ends into right hand disc.
• Clean glass with a dilute solution of warm water and grill clean using a
soft cloth.
• Rinse thoroughly with clean water and dry with tissue or paper towels,
use a clear liquid glass cleaner for a smear free finish.
• Thoroughly dry oven interior and removable parts, re-assemble oven and
spray stainless steel panels with “ANTI-STICK” Spray.
• Wipe over oven exterior with a weak solution of detergent and warm water on a damp cloth only.
AVOID GETTING EXCESS WATER OVER THE CONTROL PANEL OR
VENTILATION SLOTS OF THIS OVEN.
DO NOT ATTEMPT TO CLEAN THE HEAT ELEMENTS OR HEAT LAMPS
DO NOT USE A WATER JET OR STEAM CLEANER
DO NOT USE ABRASIVE OR CORROSIVE CLEANING MATERIALS.
12
BASKETS
Baskets can be used for large chickens or other meats. After loading, simply
locate pins in the holes on the discs or hooks onto basket hangers.
BAKING TRAYS
Baking trays are available for pies and other pastry products.
5
Page 6
THE CONTROLS
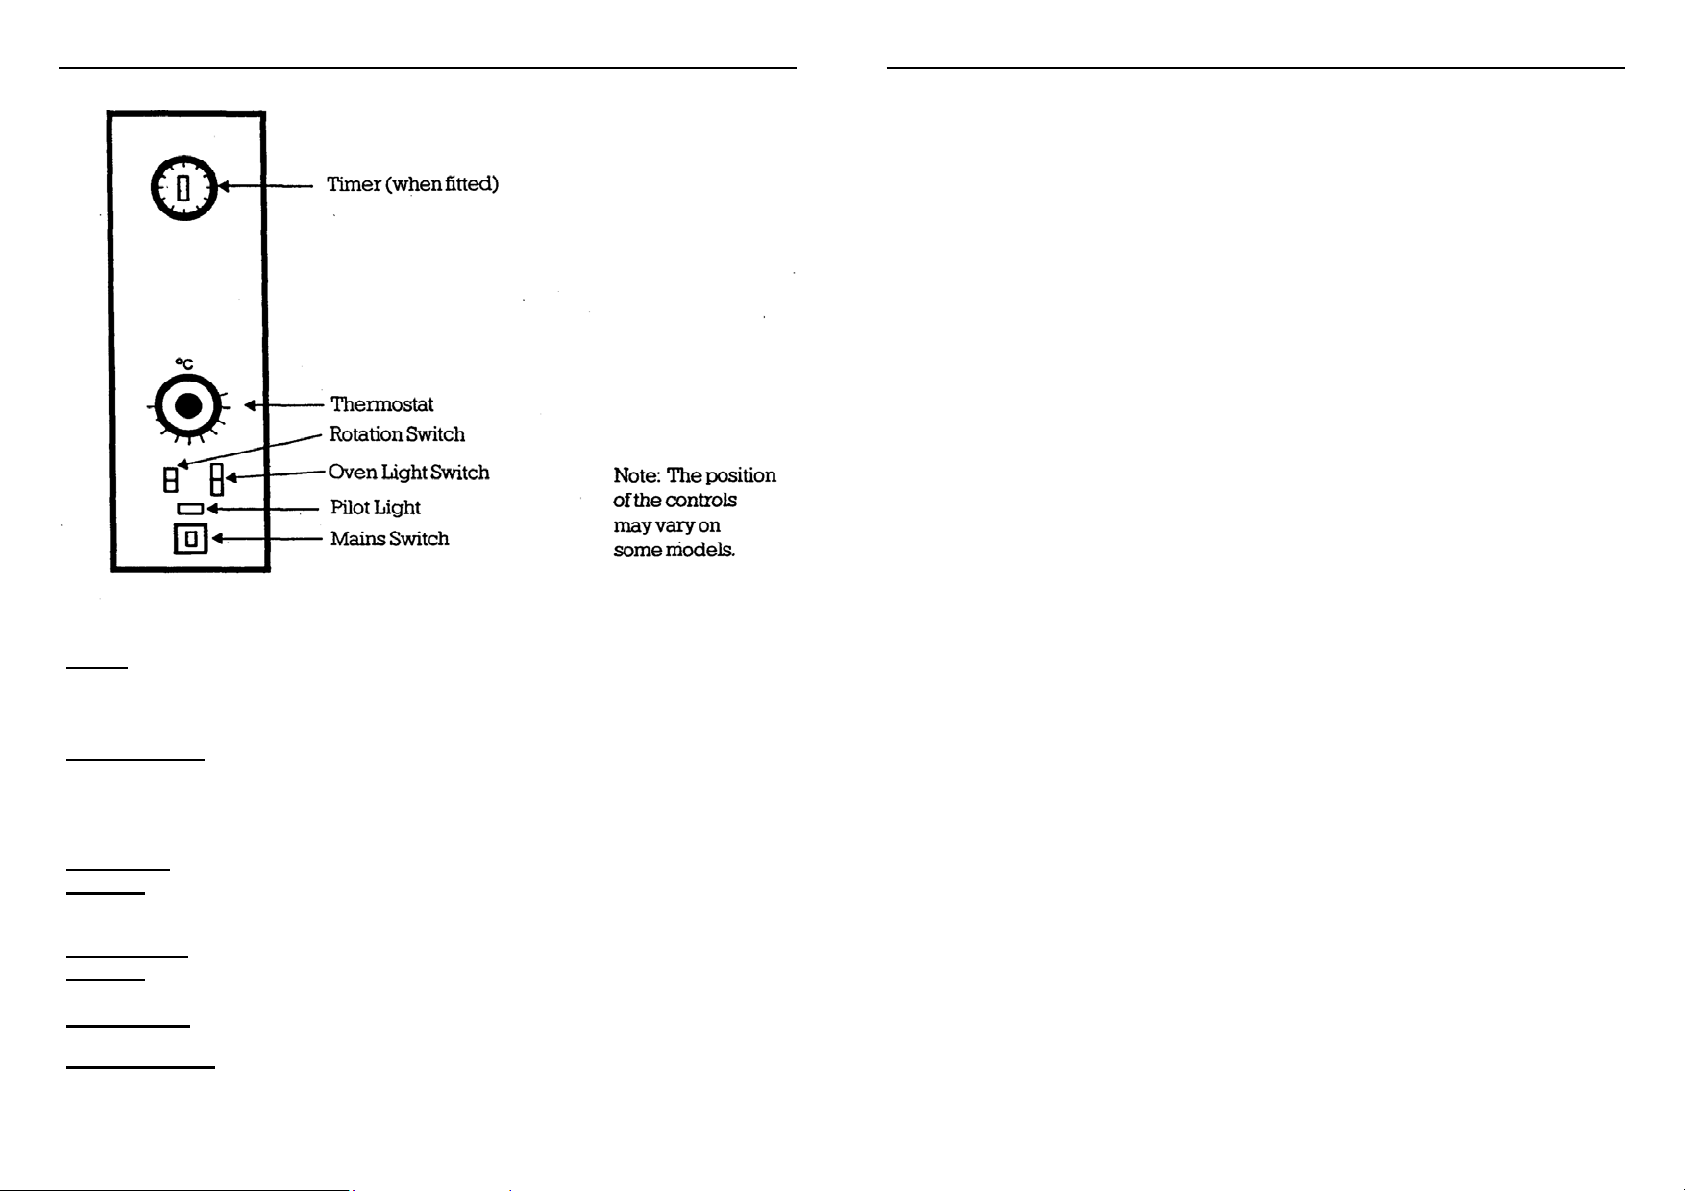
TIMER The Timer is used to indicate the end of the cooking
cycle. To use; wind clockwise through 360o and then
wind back to the length of cooking time required.
THERMOSTAT
Set to temperature required, The thermostat will
Maintain this temperature by automatically switching
The heat elements on & off.
ROTATION
SWITCH
OVEN LIGHT
SWITCH
PILOT LIGHT
The thermostat controls the temperature inside the oven
This enables you to load and unload products by
stopping and starting the rotating discs.
This operates the light on the customers side of the
oven.
Indicates Mains Power to the machine is ‘on’
DAILY CLEANING SCHEDULE
BKI “GRILL CLEAN”
“GRILL CLEAN” is a non-caustic, food safe, heavy duty degreasing cleaner formulated for use in ovens.
“GRILL CLEAN” can be used diluted with water or used un-diluted on stainless
steel surfaces.
Under normal conditions and with good working practices this prod uct is considered Non-Hazardous.
BKI “GRILL CLEAN” is user and environmentally friendly and bio-degradable.
The use of rubber gloves and eye protection is recommended.
BKI “ANTI-STICK” SILICONE SPRAY
“ANTI-STICK” SILICONE SPRAY will help prevent fats and cooking by-products
from sticking to the oven interior surfaces and help reduce cleaning times.
“ANTI-STICK” spray must only be applied to a COLD, CLEAN, DRY oven before connecting to the power supply.
Spray onto stainless steel side panels, oven base and rotor discs.
DO NOT SPRAY oven glass doors, quartz lamps, elements or element
cover panel.
Clean accessories and removable parts at regular intervals between cooks.
Allow meatforks, baskets etc. to soak in a hot solution of grill clean.
Scrub clean with a stiff nylon brush.
Spare sets of accessories are available to provide for advance preparation
and cook continuity.
MAINS SWITCH
Controls electrical supply to the oven
6
11
Page 7

OPERATIONAL GUIDELINES
Oven Pre-heat
Always preheat the oven before loading with product.
Do not cook mixed products, IE: Large & small chickens, at the same time.
Do not cook with baskets & meat forks at the same time.
Load Oven
Load meat forks or baskets into the oven one at a time, starting & stopping the rotation
with the rotor switch.
Load oven as quickly as possible to prevent excessive heat loss, use the timer to set a
cook time after loading.
Clean down
Clean down and sanitise preparation tables and utensils, sanitise oven door handle & any
areas that have been in contact with raw product, mop up any spillage’s.
Temperature Probe Check
Always use probe wipes and a digital thermometer to check the product internal temperature to ensure product safety (Refer to page 7, Cooking Guide).
Check at least one chicken on each meat fork or a cross section over the full oven load
and record the temperatures in a temperature log book.
If there are any doubts, close the oven door and cook for a further 5-10 minutes then retest.
Product Unloading
Prepare unloading tray, trolley, unloading pliers, oven gloves, tongs etc.
Open oven door fully & stop rotation using rotation switch
Remove meat forks using unloading pliers, remove baskets using oven gloves.
Further cooking
Empty fat drawer after EVERY COOK.
If you intend to cook again immediately allow oven to pre-heat before loading.
Cleaning
Clean accessories and removable parts at regular intervals between cooks.
Clean glass doors at regular intervals between cooks; allow glass to cool before
cleaning.
DO NOT USE ABRASIVE OR CORROSIVE CLEANING MATERIALS
COOKING TIMES
COOKING TIMES & TEMPERATURES (GUIDE ONLY)
The use of a digital thermometer is strongly recommended to ensure product safety.
Product Temperature Time (min) Or to Internal Temp
Per KG/LB
CHICKEN (Trimmed) 180 55/25 85-90
PORK 170 55/25 85-90
BEEF
requirement. Refer to thermometer
To taste according to finished 60-75
LAMB 180 66/30 80
TURKEY 180 55/25 85-90
PASTRY
Frozen Pie 200 35-45 mins 7oz-195g
Fresh Pies 190 25 mins 7oz
FRESH DOUGH
Danish Pastry 180 4-5 mins – 5-6oz-170g
Cake Products 180 12 mins – 8-9oz-275g
Bread Rolls 190 3-4 mins – 2.5oz – 70g
USING A MEAT THERMOMETER FOR EVEN BETTER
RESULTS!
A meat thermometer will help you combine art with science. It will tell you precisely when the food is cooked to your requirements, help minimise weight loss
and maximise moisture content.
Recommended Thermometer Readings when cooked
PORK 85-90
POULTRY 85-90
LAMB 80
HAM (ROAST) 75
VEAL 75
BEEF (WELL DONE) 75
BEEF (MEDIUM) 65
BEEF (RARE) 60
o
C
o
C
O
C
O
C
O
C
O
C
o
C
10
7
Page 8

RECIPES
BARBECUE CHICKEN (Whole Birds, Trimmed, up to 1.3kg / 3lb)
Trim excess skin from neck and remove giblets and feathers. If trussed, do
NOT remove ties. Moisten chicken and rub on Dry Barbecue Seasoning. Place
a small amount of seasoning inside cavity. Place on meat forks (see accessories for instruction) or in baskets.
Baskets are recommended for chicken portions & whole chicken above 1.3kg /
3lb. See Cooking Guide for times and temperature.
Make sure chickens are well cooked. It is better to over-cook chickens a little
than to under-cook them. Trussed or tied chickens will need more cook time
than trimmed birds.
The use of a meat thermometer is strongly recommended.
ROAST BEEF
Meat should be prepared according to method of serving required. Large, rolled
& tied joints can be cooked on meat forks, small joints in baskets.
Cook at 170oc to taste, well medium or rare. Always be guided by meat thermometer probe and remember to allow to cool before refrigeration or if meat is
to be sliced on a cook meat machine.
ROAST PORK
Prepare pork with correct spice, either Lemon Pepper or Grill Spice. If bone has
been removed, string in neat ties with not more than 2” between each string.
Some seasoning can be added to the cavity where the bone was removed for
extra flavour. If on the bone score the rind with a sharp knife in a criss cross
fashion to create diamond effect and rub in spice. Place meat joint in the basket bone down or rind up. If rind is removed, ensure fatty part of joint is on top.
Insert meat thermometer so that point is at centre joint. If on the bone ensure
probe does not touch the bone as this will give a false reading.
Cook at 170
meat is to be sliced when cold, leave to cool before placing in the chiller, do not
remove probe until meat is cold.
o
c until internal meat probe is at 90oc and remove from oven. If
RECIPES
SPARE RIBS
Season the sheet of spare rib with BKI Grill Spice and cook at 170oc. Do not
over-cook as it tends to dry out. When meat pulls away from bone this is a
good indication that the ribs are done, always check with temperature probe.
Immediately before removing from the oven, brush both sides with Barbecue
sauce. This adds good colour and a delicious barbecue flavour. Leave in for
short while to allow the full flavour of the sauce to be absorbed.
STUFFED BELLY ROLLS
Season the inside of the belly with Barbecue King Grill Spice. Spread on a layer
of finely chopped onion. Roll the whole belly and tie with individual ties. Season
the outside with Grill Spice and cook on meat forks or in a basket at approximately 30 minutes per pound at 170
when temperature 90
o
c, sprinkle with black pepper or Grill Spice to taste. Cut
into portions.
PORK STRIPS
Cut belly into strips, spice with Grill Spice or seasoned breadcrumbs and cook in
a basket for approximately 20 minutes at 170
CUMBERLAND SAUSAGE / SAUSAGES
Place sausages on cold baking trays approx 25mm/1” apart, secure Cumberland
sausage rings with a skewer or satay stick. Turn sausages half way if required.
JACKET POTATOES
Wash & cook evenly sized white baking potatoes in baskets, cook potatoes
open for hard skins, wrap in tin foil to keep skins soft. Cook for 1 hr at 180
until soft, check with a knife or skewer
o
c. Use a meat thermometer and remove
o
c.
0
C or
8
9
 Loading...