

Page 1
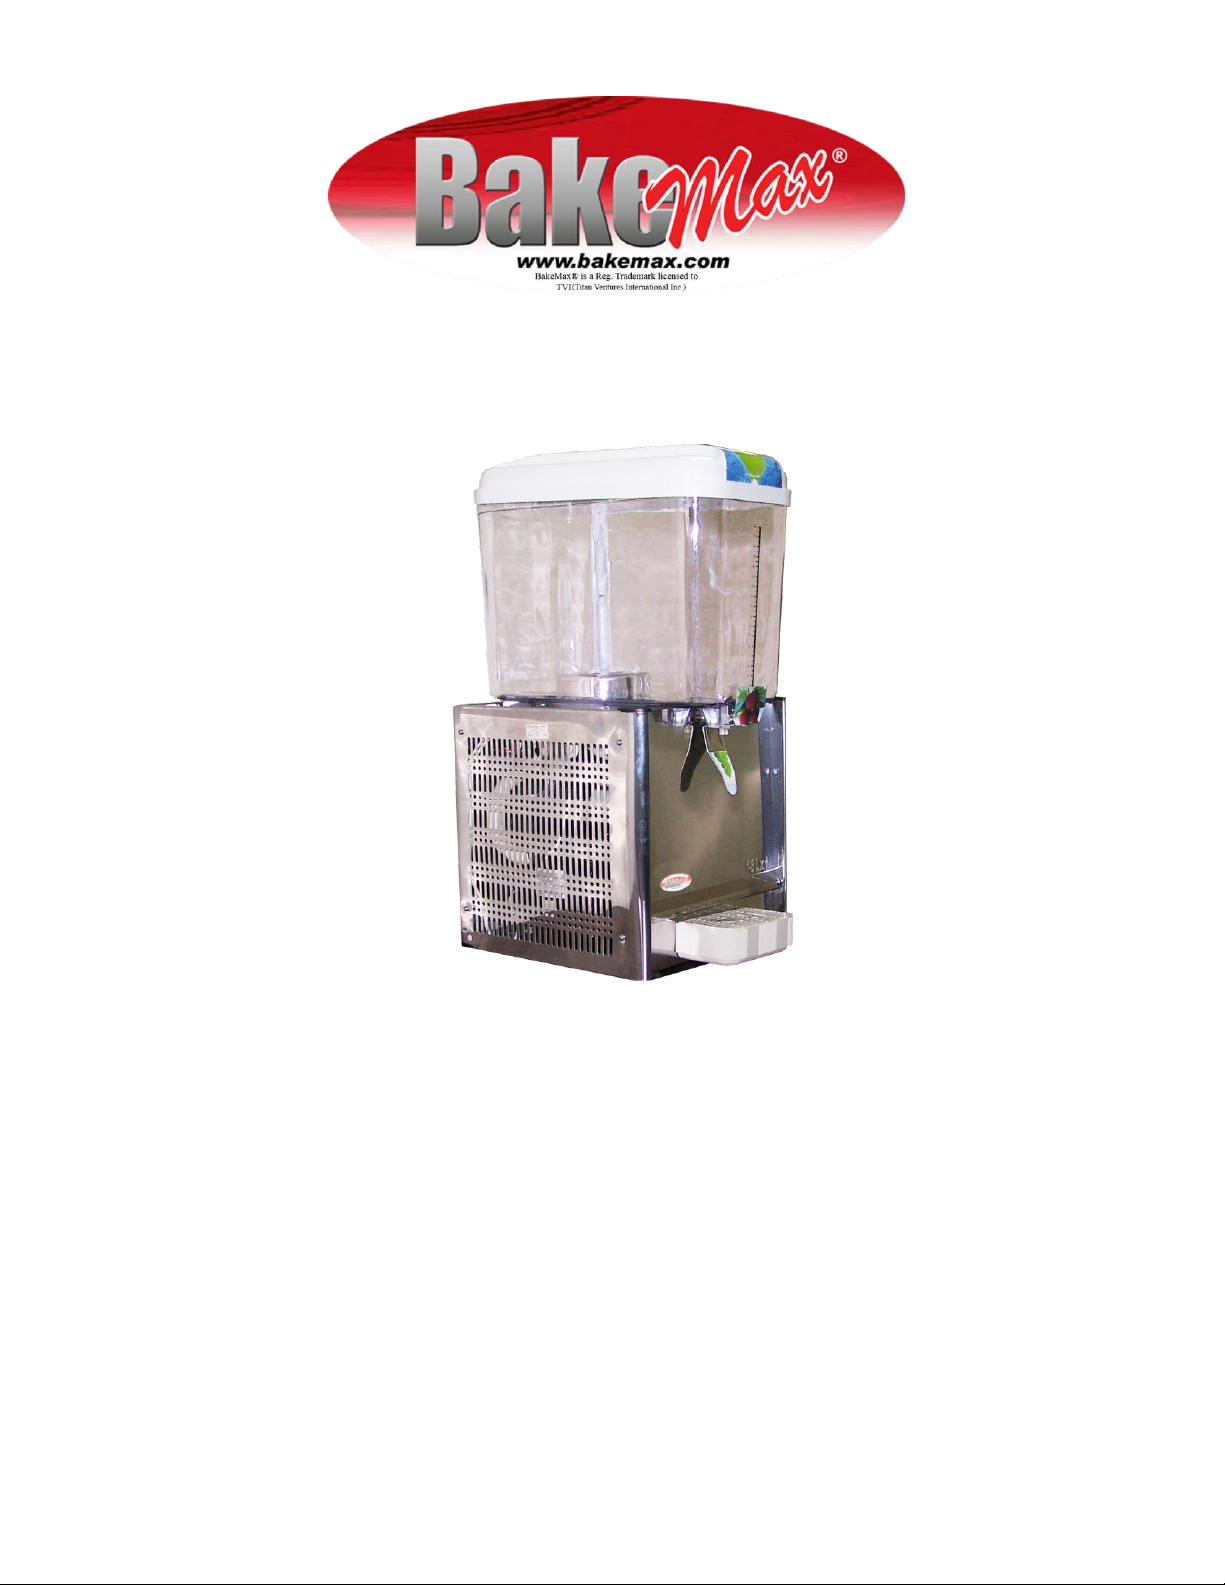
COLD DRINK DISPENSER
OPERATIONS MANUAL
Page 2
Page 3

Thanks for choosing the BakeMax® Cold Drink Dispenser. To ensure that you can use this machine
MODEL #
BMCDDS1
BMCDD01
BMCDD05
Capability
18L
l8Lx2
18Lx3
Power supply
50HZ/60HZ
110V-I20V
3.2 AMPS
50HZ/60HZ
110V-120V
50HZ/60HZ
110V- 120V
Cold-beverage
temperature
7-12C
7-12C
7-12-C
Shape size
18L 470x350x740
18L 510x470x740
18L 750x470x740
Weight
28kg
35kg
40kg
normally and effectively, we’ve supplied instructions and we ask you pay close attention to them:
Before using your juice dispenser, please read the instructions first and master the operation
Please use it in accordance to the performance parameters defined by the voltage, power and the
Please pay close attention to the directions for the materials so as not to overwork or damage the
To protect customers health, please wash the dispenser.
B. Main technology parameters
C. Installation Methods and Notices
To install the drink dispenser, please choose a site which is flat, fixable and avoids direct
Please leave a 150mm clearance around the dispenser to allow for proper air circulation. This
Before installing, please confirm the power supply adheres to the requirements noted in this
When choosing the final position of the dispenser, place it so the front section is lower and back
Introduction of cold-hot juicer
methods.
relative power supply cable.
machine.
sunshine or heat.
will ensure the machine runs effectively.
manual. The power supply cable is not too thin or too long. The cross section of cable should be
1.5-2.5mm. Proper voltage is a must and it must have reliable grounding. The socket that the
machine will be connected to should be mounted in a fixed position with a safety fuse attached.
end higher (adjusting the feet of the bottom can do this) so the juice in the tanks can flow into
the box through the hose.
Page 4

D. How to use the cold beverage juicer
Troubles
Causes
Repair methods
Compressor
stops working
1. The supply power off or
not connected
2. Switch damaged
3. Circuit trouble.
4. Over load and the
protector broken.
1. Check the supply
power and socket
2. replace the switch.
3. check and repair
4. check and replace
Compressor
runs but no
refrigeration
1. capillary stop
2. the refrigeration medicine
leaked
3. the electrical fan broken
1. replace the capillary or
dry the filter
2. check the systems to
ensure they are working.
3. replace the electrical
parts of the machine
Winnowing
water
abnormally
1. differences in the pump
inside
2. impeller and holes
damaged.
3. circuit damaged
4. big clearance between the
impeller and crock
1. clean
2. replace the impeller
and pump
3. check and repair
4. adjust the clearance
Tank leaking
Sealing ring old or installed
badly
Replace or re-install
Valve leaking
Sealing ring old or installed
badly
Replace or re-install
When pouring prepared juice into the tank, the level inside the tank should not exceed the
standard tank capacity (I8L), otherwise the beverage will flow into the churn-dasher from the
dasher tube and will damage the machine.
The temperature of the beverage should not exceed 35"C, otherwise it will overwork the
machine during refrigeration.
Plug the supply power into the 3 hole socket, the grounding hole should connect with the
protectable wires or fixture to ensure safety.
To turn the switch to the on position, press down on the refrigeration switch, the compressor fan
starts running and refrigeration system starts working. Then start the dasher to mix or start the
spewing switch to spew.
When the beverage reaches the desired temperature, press cup against the push board lightly,
the beverage will flow into the cup from the outlet mouth.
When the temperature falls to the desired certain degree, the refrigerator will stop running
because of the influence from the temperature controller. And when it increases, it will start
automatically again.
It should restart after after 5 minutes if it turns off suddenly or stop temporarily, otherwise, it
will damage the compressor.
E. Troubleshooting
Page 5
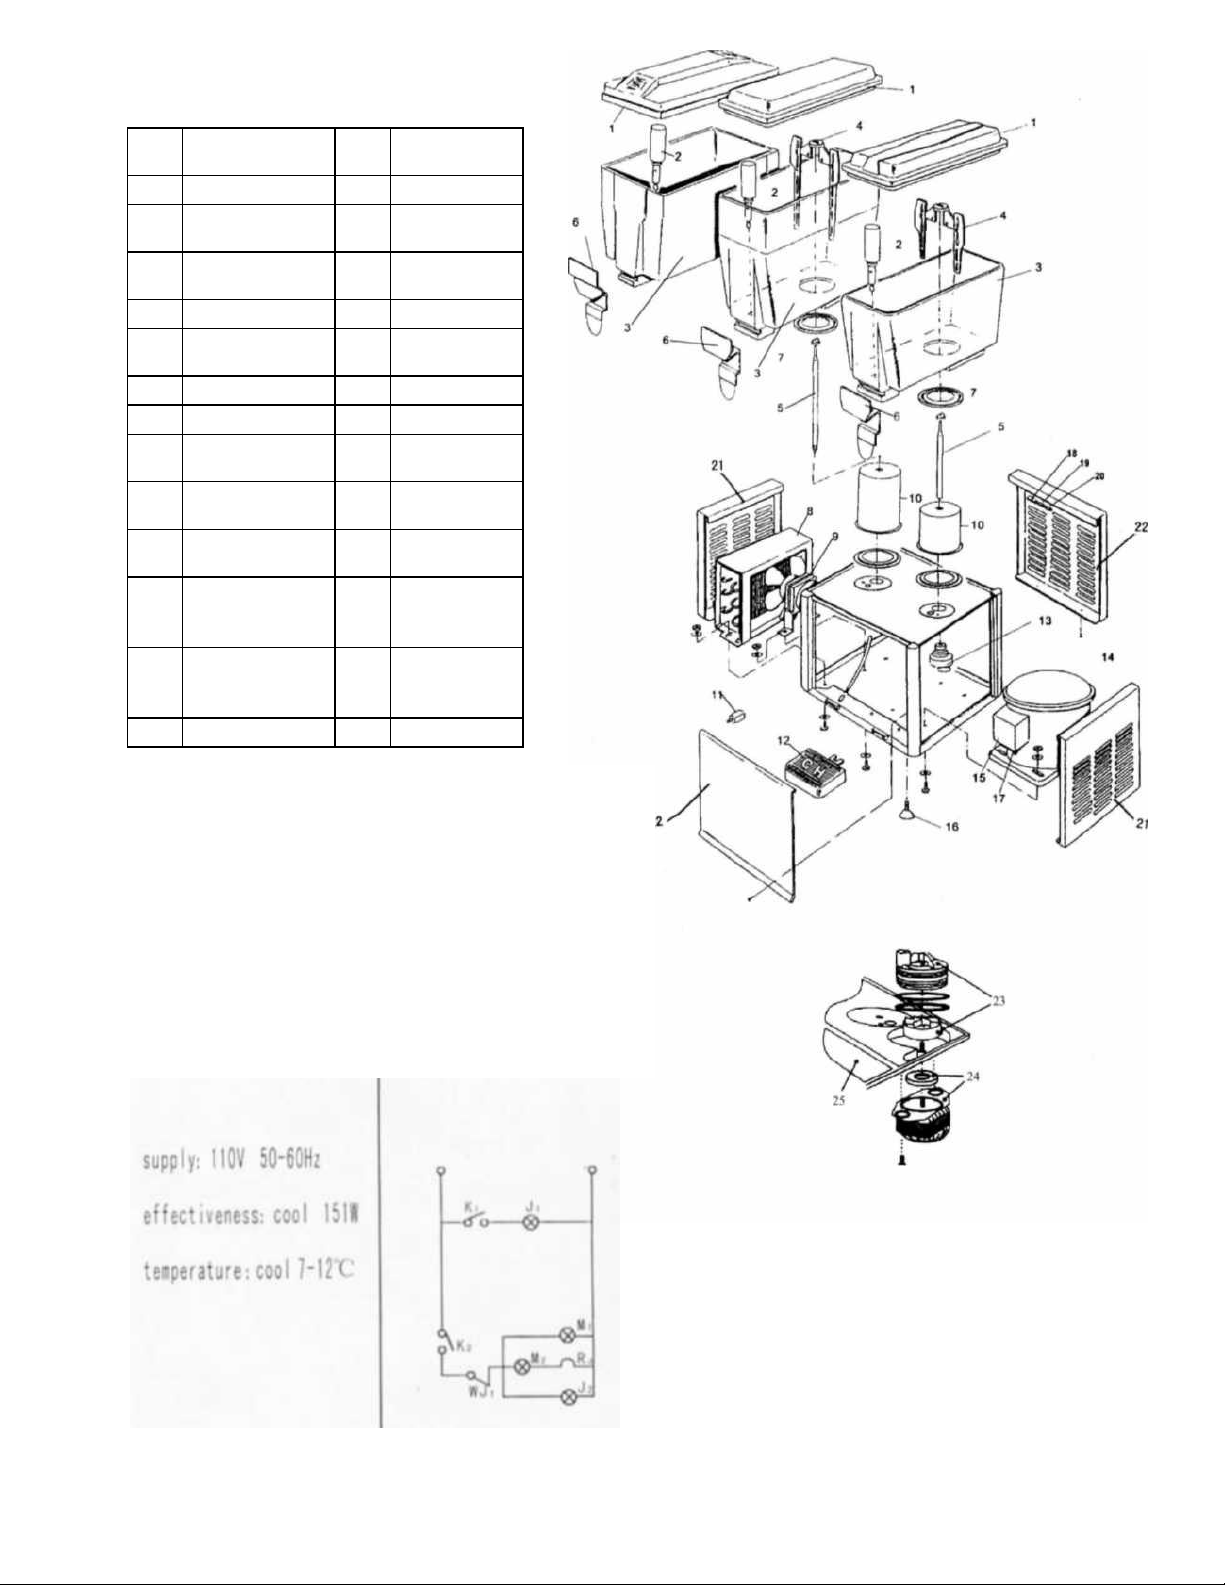
F. SPARE PARTS FOR COLD DRINK
NO.
Name of Spare
parts
NO.
Name of Spare
parts
1
Lid
14
Compressor
2
Stainless steel
valve
15
Over loading
protect setting
3
Tank
16
Bottom of
screwdrivc
4
Mixing leaf
17
Power switch
5
Mixing pole
18
Refreigeration
switch
6
Out
19
Mixing switch
7
Airproof circle
20
Mixing switch
8
Condesensation
setting
21
Left and right
pland
Electric fan
22
Front and back
plank
10
Evaporator
setting
23
Sprinkle
covering
II
Automatic
temperature
controller
24
Machine-electr
ical slice
12
Meeting dish
25
Sprinkle
electric
machine
13
Mixing setting
DISPENSER
Page 6
 Loading...