

Page 1
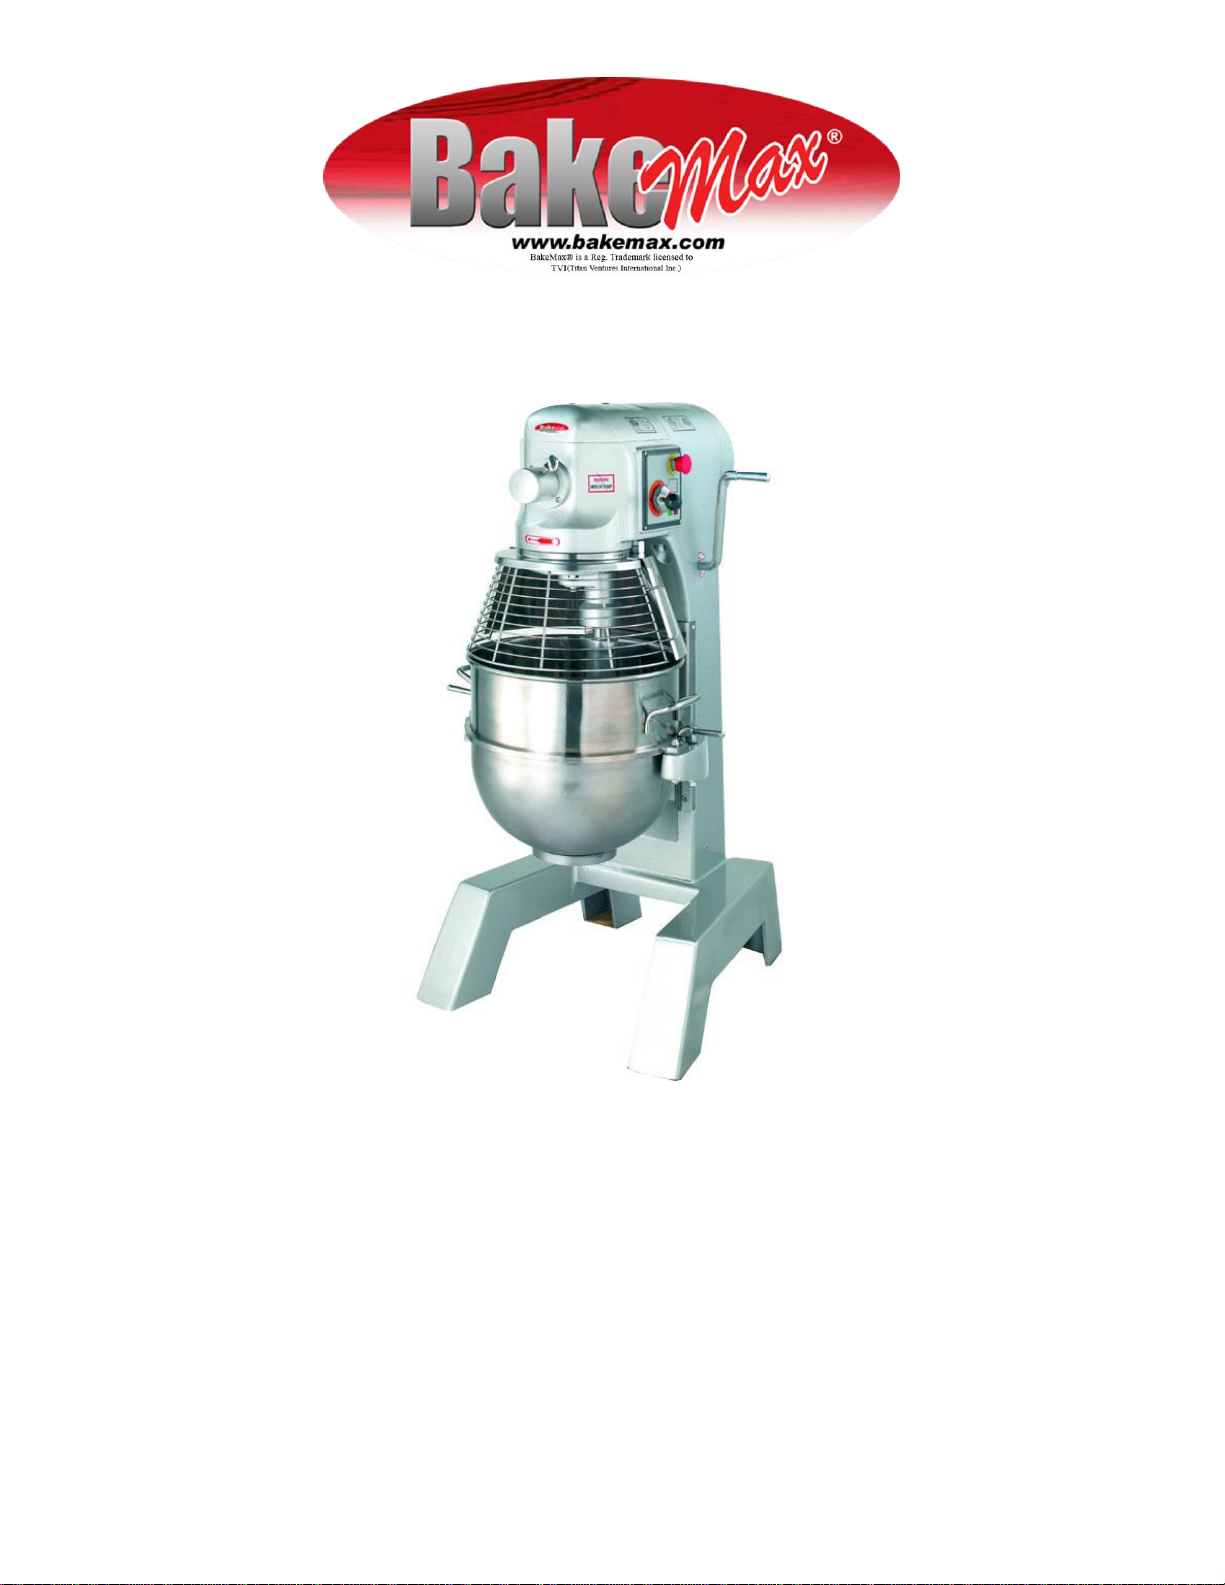
40 Quart Planetary Mixer
Operations Manual
Page 2
Page 3

Installation, Operation and Care of 40
LITER PLANETARY MIXERS
+ SAVE THESE INSTRUCTIONS +
GENERAL
Our 40 Liter planetary Mixers are a highly-reliable machine that lets you handle
even the most demanding of professional food applications with ease. Its advance
design makes it ideal for mixing every type of dough, as well as for use in preparing
eggs, cream, mayonnaise, and other food products. All they are specially designed
for extra heavy-duty work in preparing all kinds of pizza and bagel dough.
Equipped with 3 speeds and various style attachments, which can be selected to
obtain the best results offered. The attachments are made of alloy aluminum and
meet all hygiene demands. This model is designed with a powerful 1.5 HP motor
and powerful 100% gear drive. If you maintain your equipment as instructed you
can expect countless years of service with the best results available.
INSTALLATION
UNPACKING
Immediately before unpacking the mixer, check it for possible shipping damage. If
you find the packaging material or the machine is damaged before unpacking,
contact the carrier within 3 days of delivery.
Prior to installation, test the electrical service to assure it agree with the
specifications on the machine data plate located on the backside of the pedestal.
Page 4
LOCATION
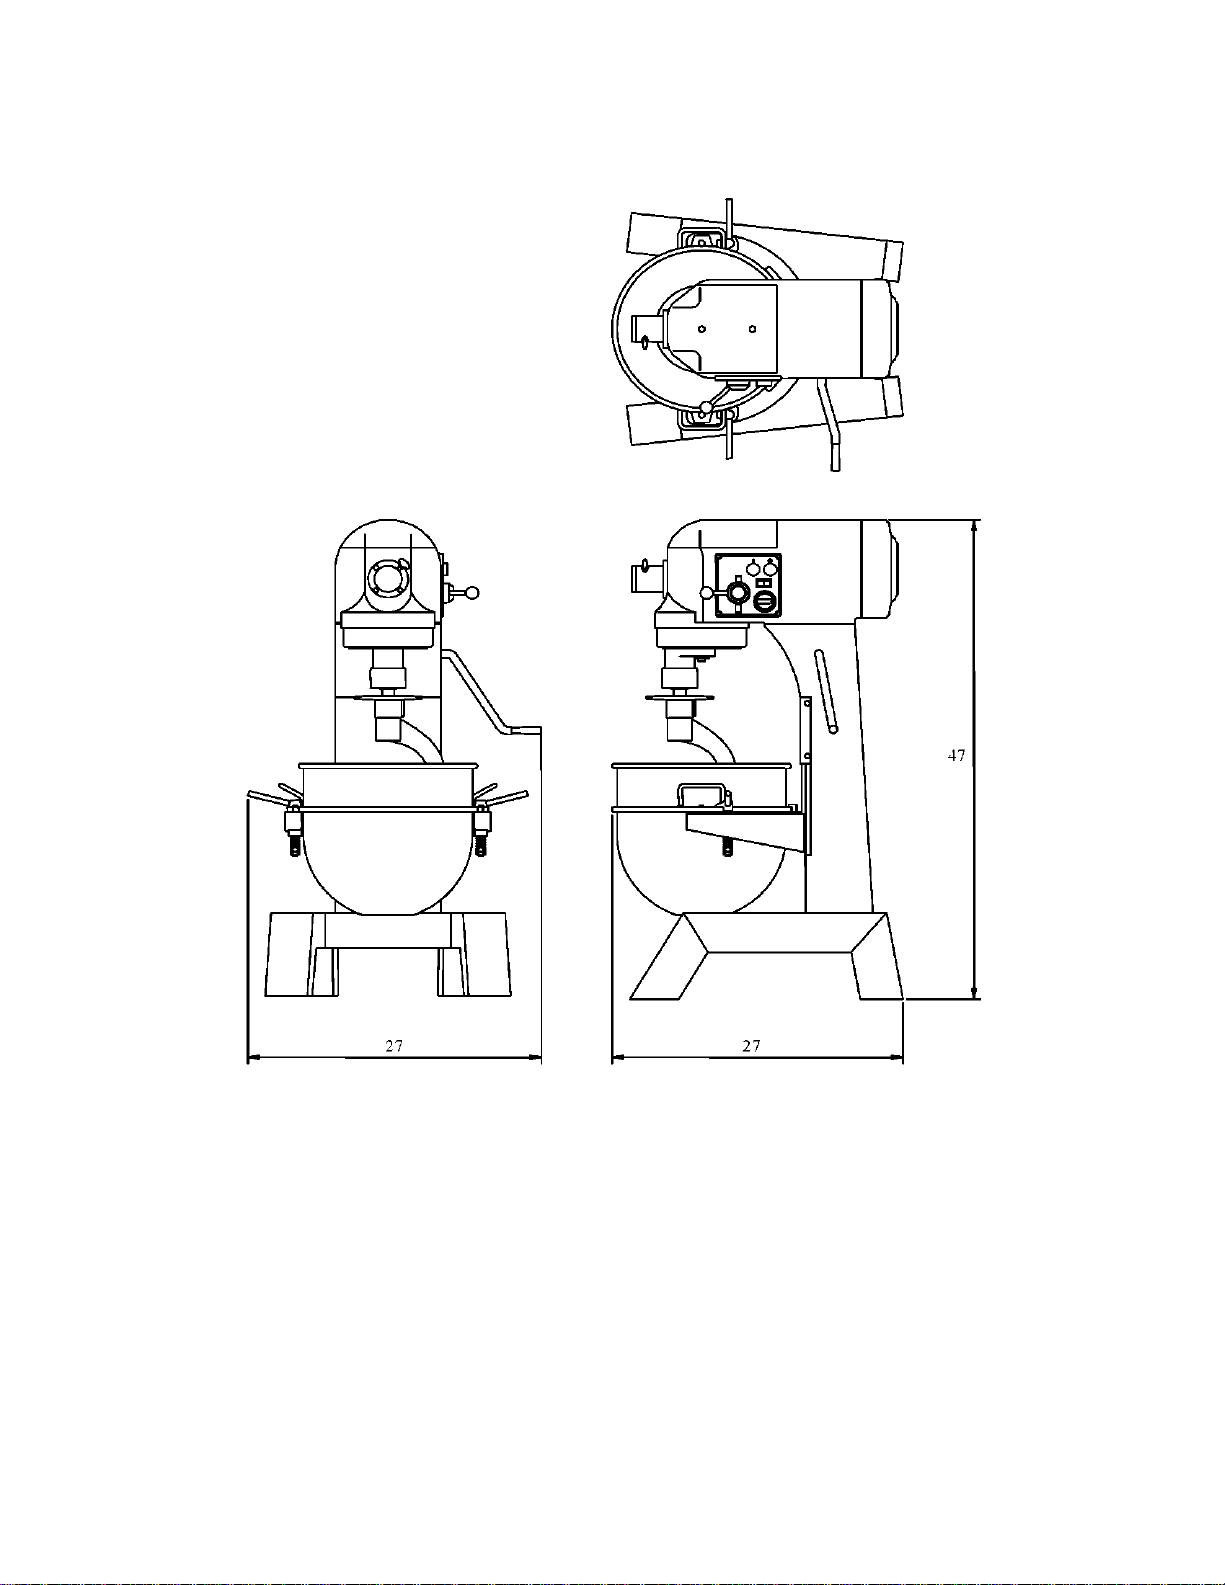
INSTALLATION DIAGRAM (inch)
Place the Mixer in a convenient location, and allow working space on the bowl lift
side. All maintenance can be handled from this side, the top and the front. Set the
mixer level and use shims if the floor is uneven. The machined edge on the top of the
transmission case makes an excellent surface for leveling.
Page 5
ELECTRICAL CONNECTIONS (Cord Connected Mixers)
Bowl Capacity
Weight
Electrical
H. P.
Speed Range
(lbs.)
(RMP)
40 Qt
440
220-60-1
1.5
90-186-340
SPECIFICATIONS BMPM-040
• Before making the electrical connections, read the specifications on the
nameplate to make sure that they agree with those of your electric service.
• Electrical connections should be made by qualified workmen, who will observe
all applicable Safety Codes and the National Electrical Code.
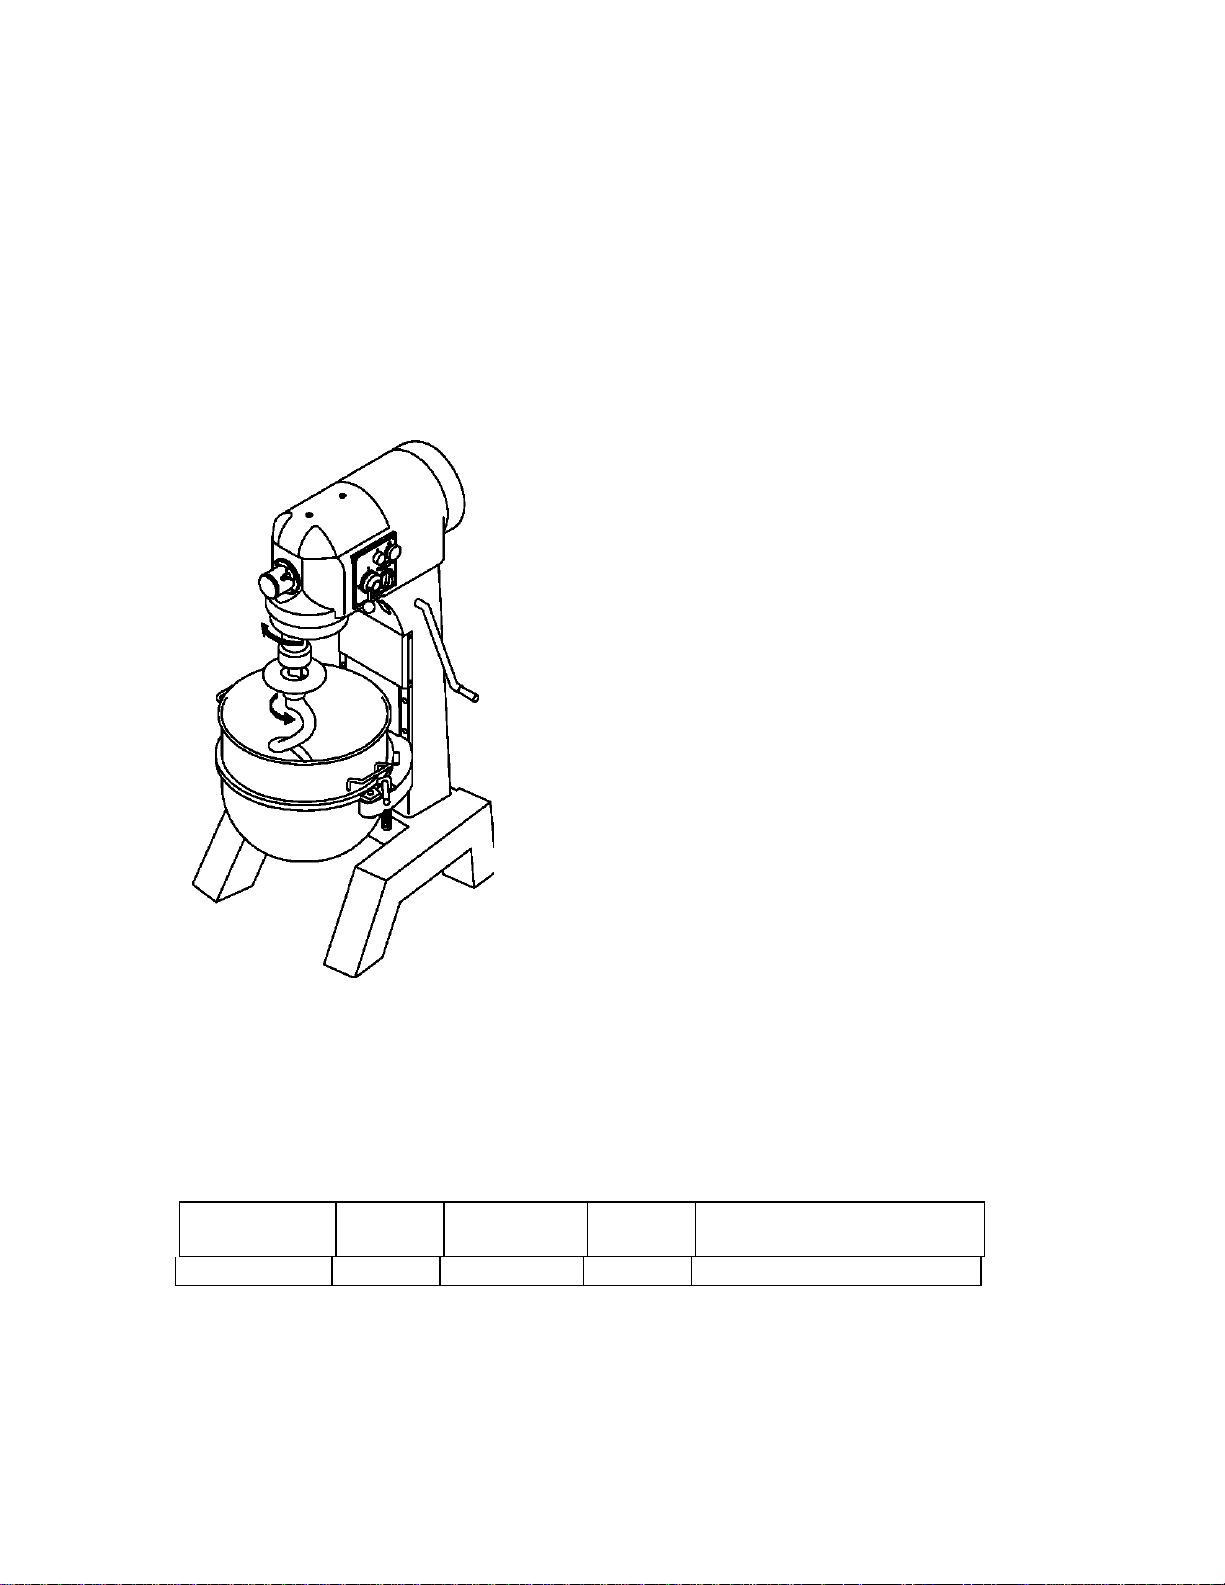
• Be sure the planetary runs in the direction shown by the arrow in the planetary
head. Reverse direction is forbidden.
• To start motor, push ON button. The speed selector handle must be at one of the
numbers indicating a speed, not at an intermediate position.
BE SURE TO CHECK MIXING
ROTATION WHEN ELECTRICAL
CONNECTS ARE IN PLACE FOR ALL
THREE (3) PHASE RIGGING.
Page 6
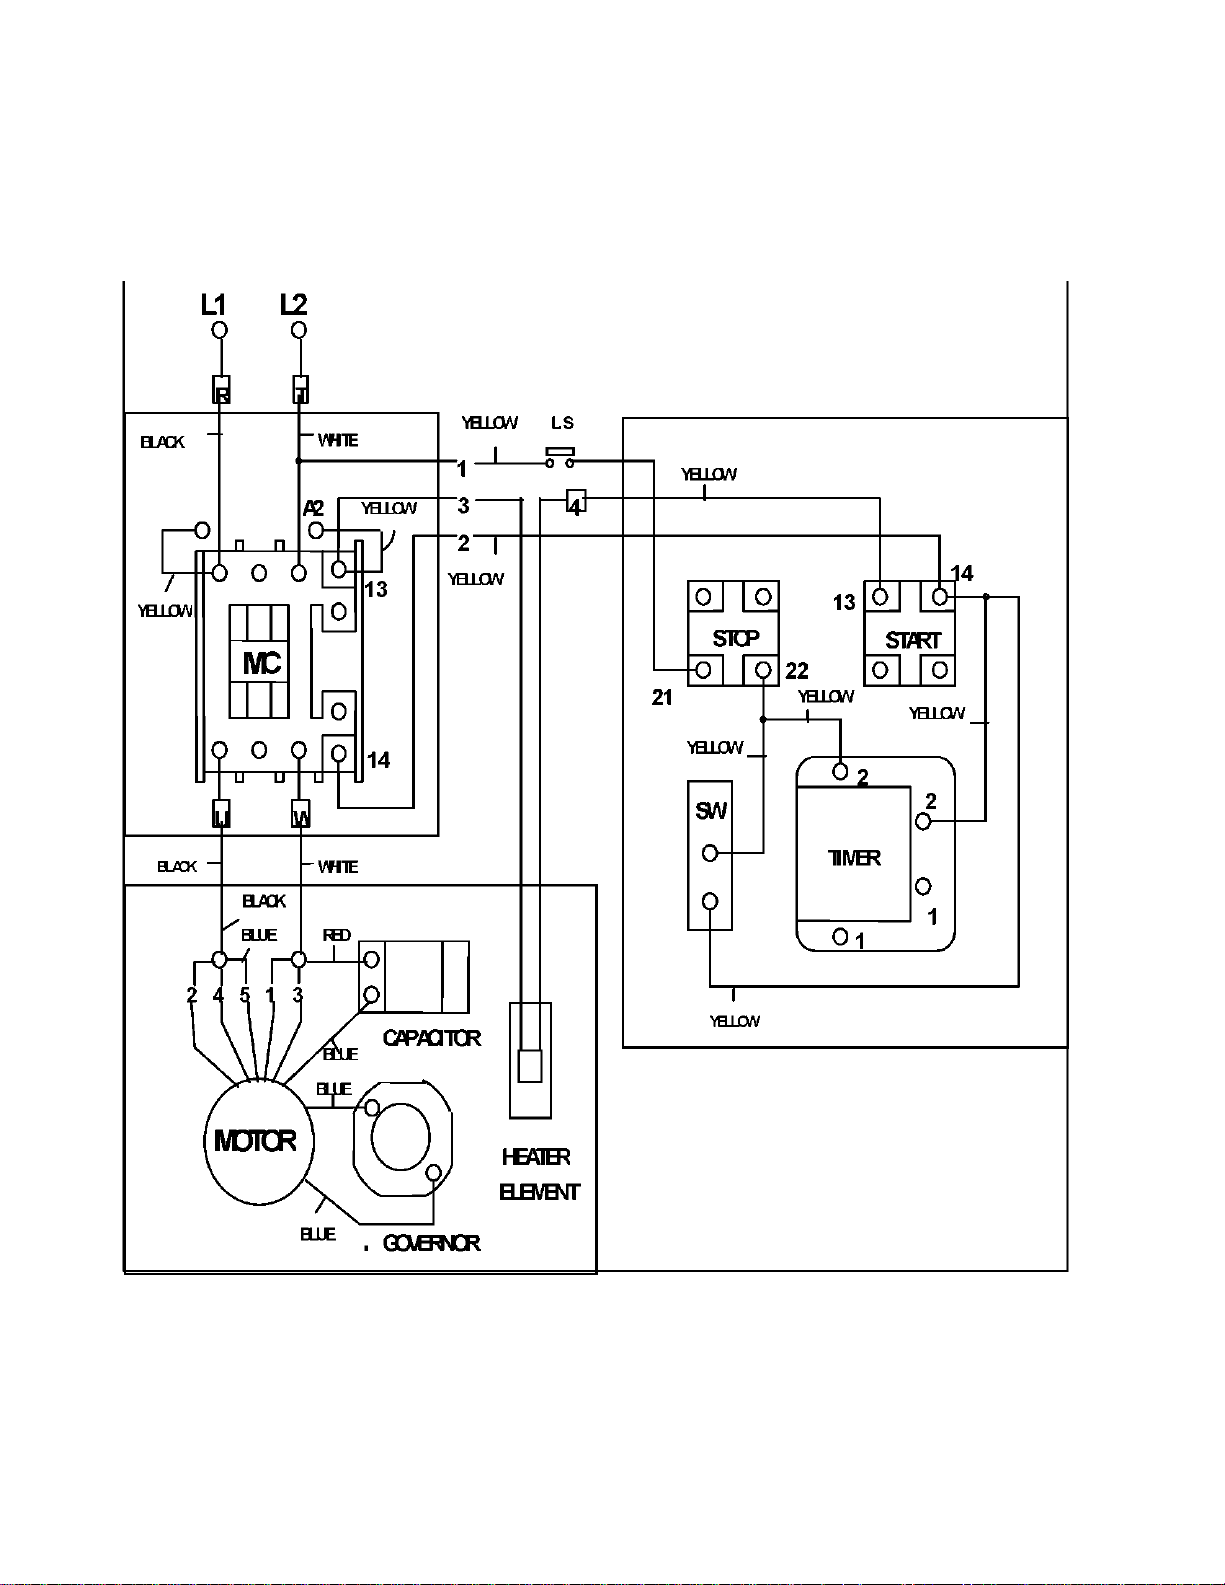
SNGLE PHASE TIMER & GUARD
WARNING:
WIRING DIAGRAM
BMPM-040
OPERATION
Page 7
• KEEP HANDS, CLOTHING AND UTENSILS OUT OF BOWL WHILE IN
OPERATION.
• KEEP RIGID OR ICE-UP OBJECT AWAY FORM BOWL AND
HUB ATTACHMENTS WHEN IN OPERATION.
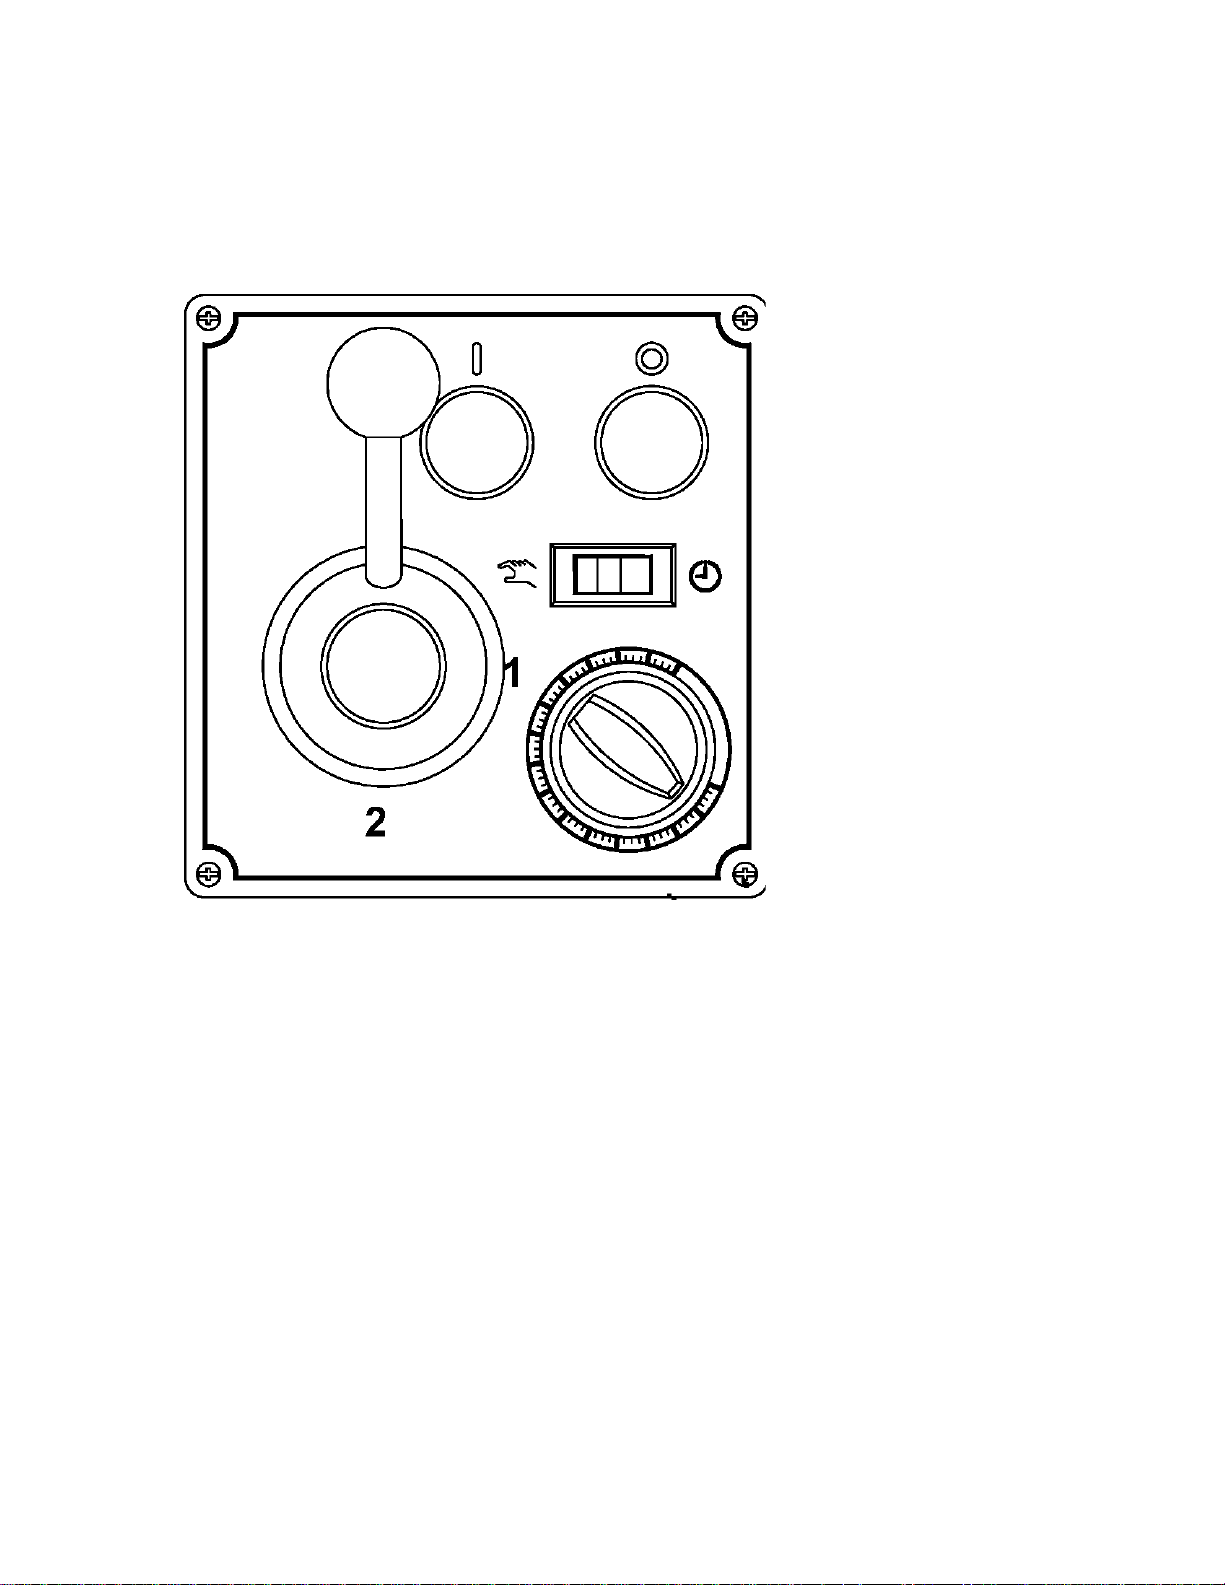
All models are furnished
with two button-switches,
which control power to the
mixer.
The TIMER (if equipped)
is used in conjunction with
ON-OFF switch for timed
mixing operations and will
stop the mixer when the
desired time has elapsed.
The GEARSHIFTLEVER is used to change speeds. Always stop the mixer
before changing speeds. To change speeds, turn the switch OFF, move the gear
shift lever to the desired speed, and turn the switch back ON.
• Speed 1 (low) - This speed is for heavy mixtures such as bread dough, heavy
batters, and potatoes.
• Speed 2 (medium) - This speed is for light dough which must raise
quickly, heavy batters, and some whipping operations.
• Speed 3 (high) - This speed is fast speed for light work such as whipping cream,
beating eggs, and mixing thin batters.
Page 8
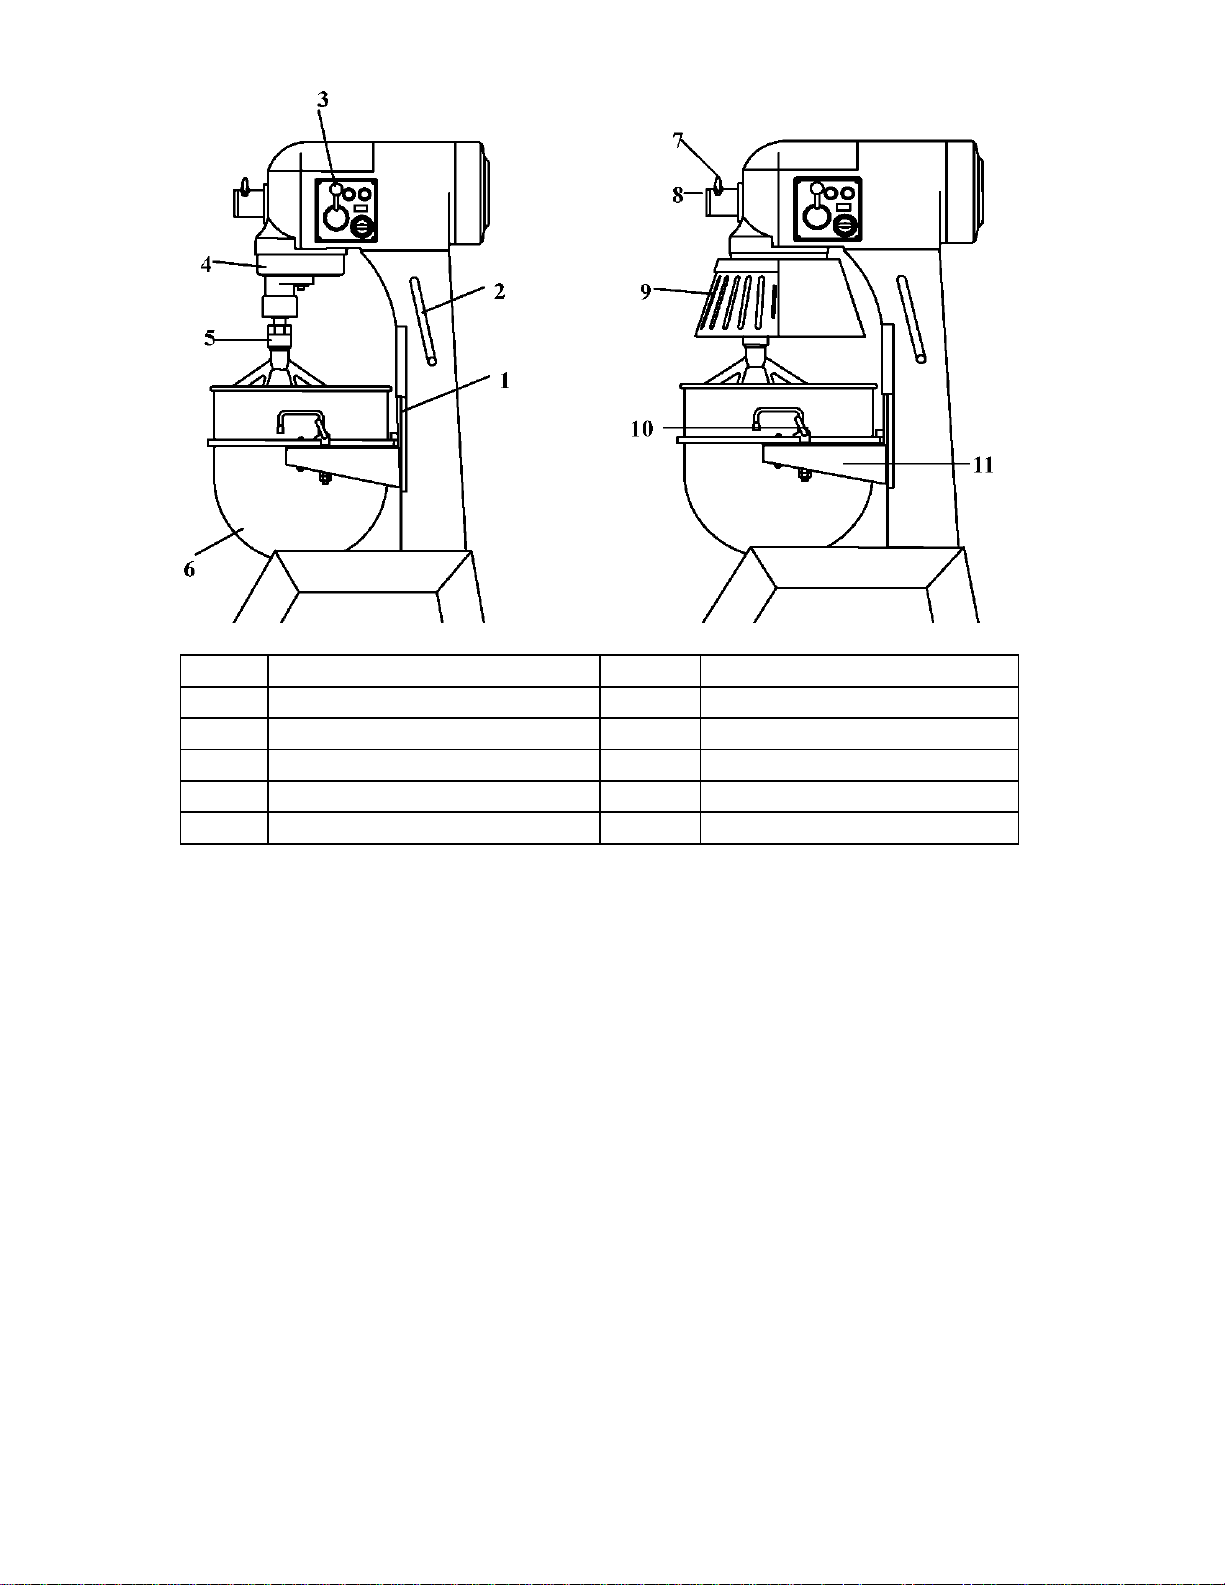
1
BOWL LIFT SLIDEWAY
2
BOWL LIFT HANDLE
3
GEAR SHIFT LEVER
4
DRIP RING
5
AGITATOR
6
BOWL
7
THUMB SCREW
8
HUB PLUG
9
SAFETY GUARD
10
BOWL CLAMP
11
BOWL SUPPORT
To install an agitator (No.5), the bowl (No.6) must be installed and fully lowered by
bowl lift handle (No.2). Place the agitator in the bowl, push it up on the agitator
shaft, and turn it clockwise to seat the shaft pin in the slot of the agitator shank.
BOWL
New mixer's bowl and agitators (beater, whip, and dough arm) should be thoroughly
washed with hot water and mild soap solution, rinsed with either a mild soda or
vinegar solution, and thoroughly rinsed with clean water
BEFORE being put into service. This cleaning procedure should also be followed
for bowls and agitators before whipping egg whites with or whole
eggs.
The bowl must be installed before the agitator. To install the bowl, fully lower the
bowl support. Position the bowl so the alignment bracket on the back of the bowl is
in the bowl retainer and the alignment pins on the front of the bowl support fit in the
holes on the sides of the bowl.
Page 9
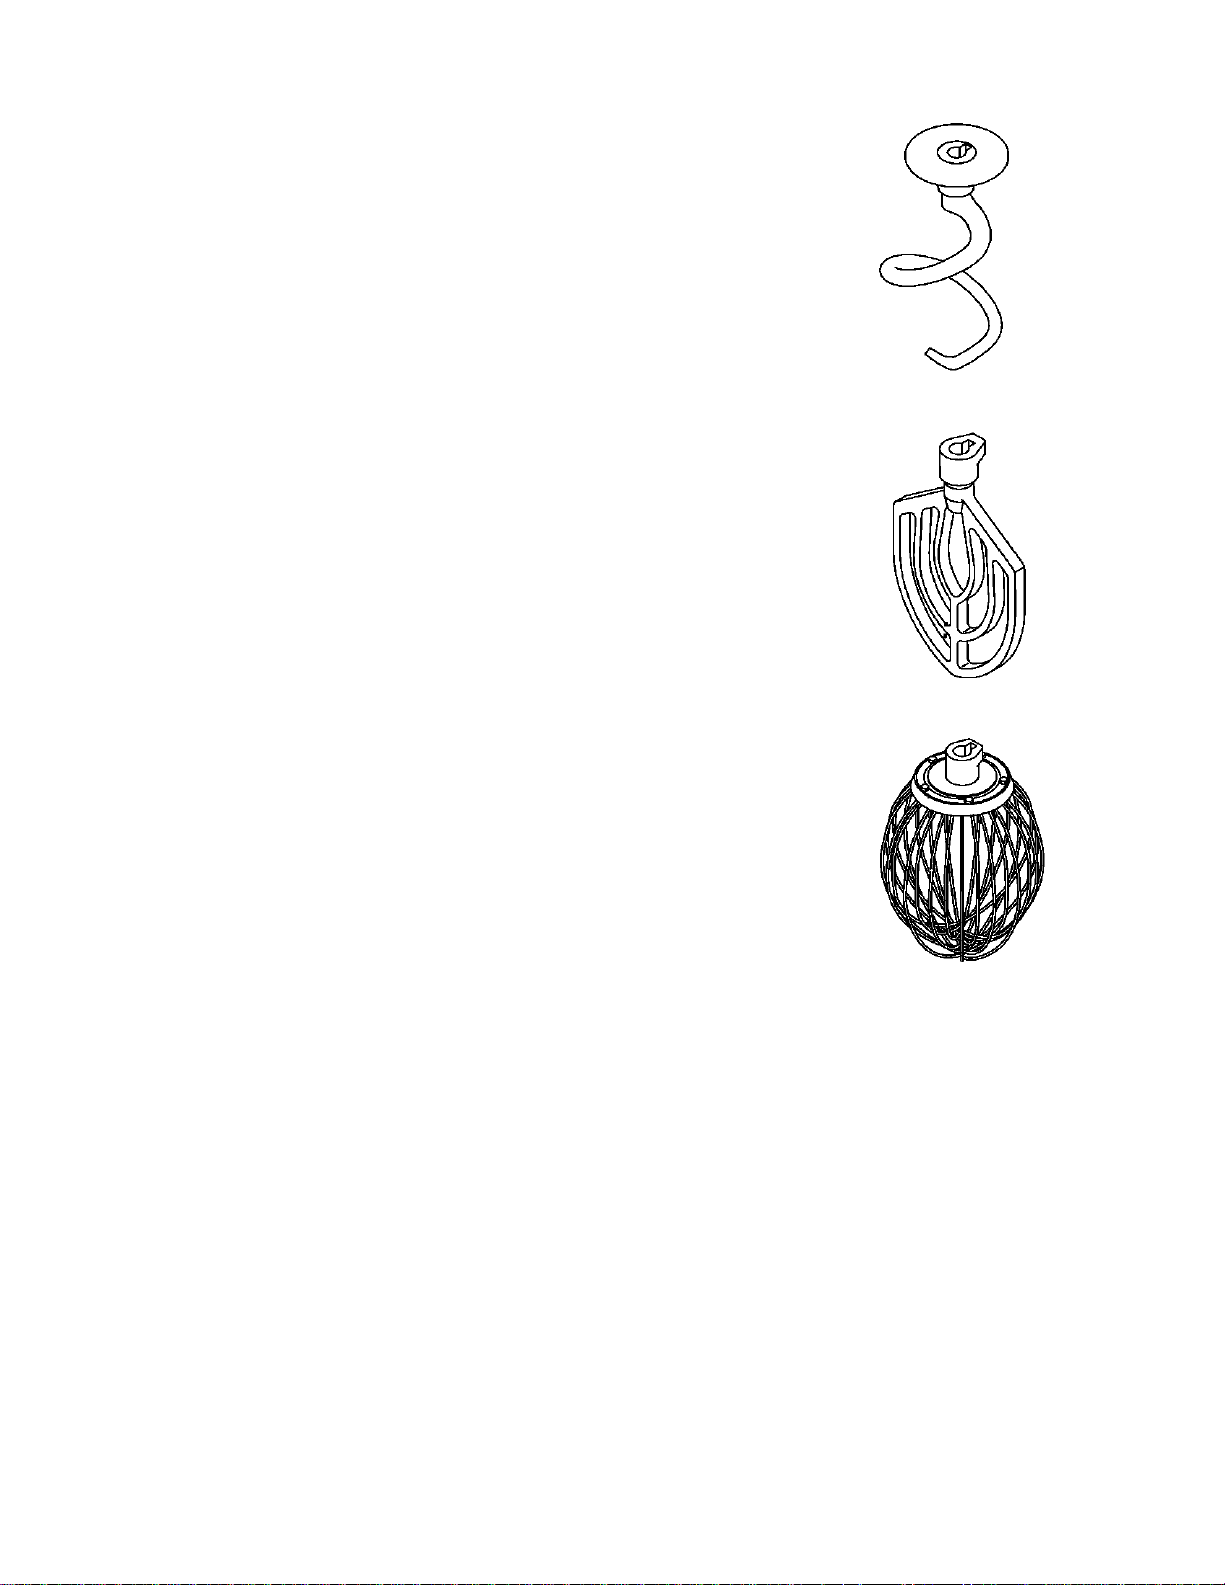
BEATER:
It is commonly used for thin batters, cake and mashing potatoes,
like stuffing and preferable to be used at middle speed.
DOUGH ARM:
It is frequently used for heavy bread dough, and preferable to be
use at low speed.
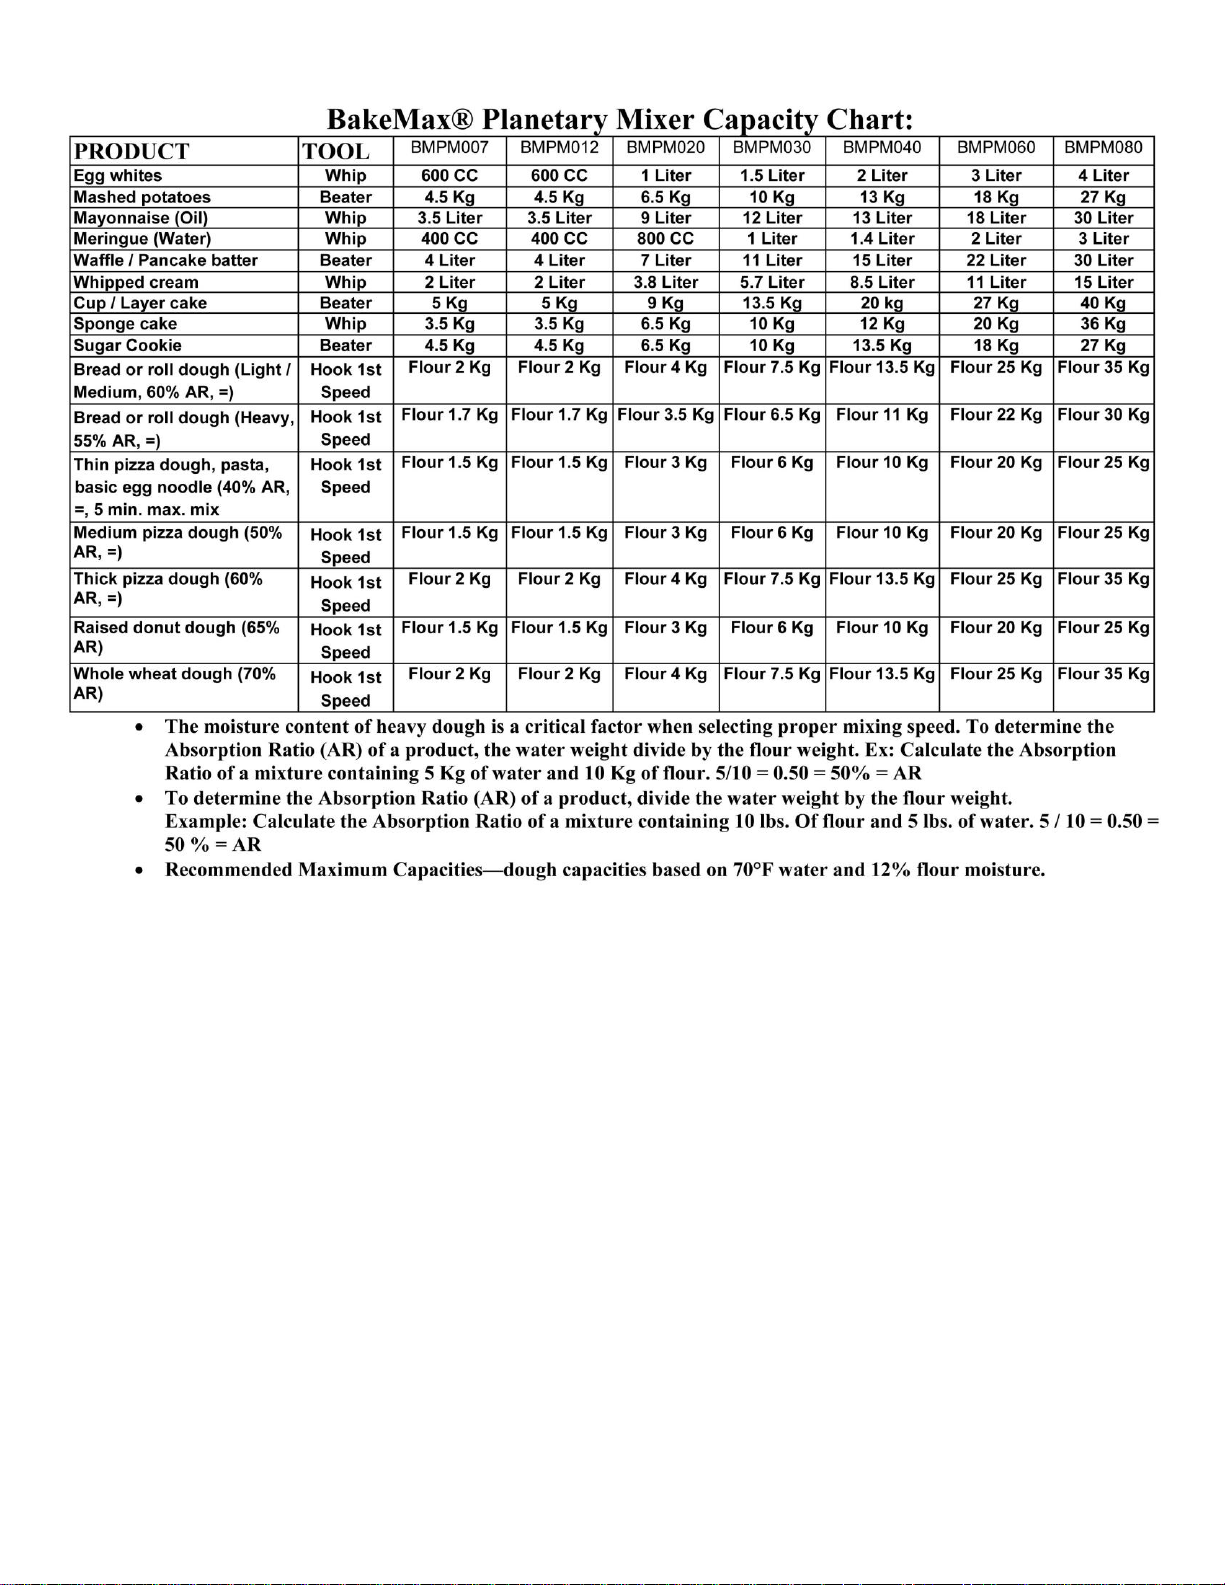
The moisture content of heavy dough is critical when selecting
proper mixing speed. You should never use 2
nd
speed when
mixing heavy dough with an Absorption Ratio (AR) of 50% or
less.
WHIP:
It is best for whipping cream and beating eggs and preferable to be
used at high speed.
ATTACHMENTS
To install an attachment, loosen the thumb screw (No.7) on
the attachment hub and remove the plug (No. 8). Insert the
attachment into the attachment hub making certain that the square
shank of the attachment is in the square driver of the mixer. Secure
the attachment by tightening the thumb screw.
• Move the gear shift lever to the desired speed and start the mixer to operate the
attachment.
The meat and food chopper attachment should be operated in second or third speed.
If material in the cylinder stalls the mixer, stop the mixer at once. DO NOT attempt
to restart the mixer in a lower speed - remove the adjusting ring, knife, plate, and
worm and clear the obstruction.
MAINTENANCE
NOTE: ALL MAINTENANCE WORK SHOULD BE DONE ONLY AFTER
UNIT HAS BEEN DISCONNECTED FROM ELECTRICAL POWER AND
GROUNDING.
Page 10

CLEANING
• Never use a metal or stiff brush to clean the mixer. Never clean the
mixer with a water hose or any fluid pressure.
• The mixer should be thoroughly cleaned daily.
• Bowls and agitators should be removed from the mixer and cleaned in a link.
• The DRIP RING or SAFETY GUARD should be inspected periodically for
moisture or lubricant dripping. Remove the cup and wipe it with a soft cloth. A
large flat blade screwdriver may be used to remove the drip cup after remove the
screw.
LUBRICATION
• The transmission case is filled special grease that will last for several years. When
grease is needed for replacement, it should be ordered from
our authorized service representative.
• Planetary gears are already filled with enough lubricating grease. No
more grease is to be filled.
MIXING HEAVY DOUGH
The moisture content of heavy dough is a critical factor when selecting proper
mixing speed. You should never use 2nd speed when mixing heavy dough with an
Absorption Ratio (AR) of 50% or less.
To determine the Absorption Ratio (AR) of a product, the water weight divide by
the flour weight.
Example: Calculate the Absorption Ratio of a mixture containing 5 lbs. of water and
10 lbs. of flour. 5 - 10 = 0.50 = 50 % = AR
Page 11

PRODUCT
TOOL
CAPACITY
Egg Whites
Whip
1-3/4 qt.
Mashed Potatoes
Beater
30 lbs
Mayonnaise (Qts. Oil)
Beater
13 qt.
Meringue (Qts. Water)
Whip
1-1/2 qt.
Waffle/Pan cake Batter
Beater
16 qts.
Whipped Cream
Whip
9 qts.
Sheet Cake Batter
Beater
40 lbs.
Cup Cake
Beater
45 dz.
Layer Cake
Beater
45 lbs.
Pound Cake
Beater
40 lbs.
Sugar Cookie
Beater
65 dz.
Bread or Roll Dough (Light/ Medium, 60%
AR, =)
Hook
**
Water 15
lbs.
Flour 25
lbs.
Bread or Roll Dough (Heavy, 55% AR, =)
Hook
**
Water 11
lbs.
Flour 20
lbs.
Thin Pizza Dough, Pasta, Basic Egg Noodle
(40% AR, = , 5 min. max. mix time)
Hook
*
Water 6
lbs.
Flour 15
lbs.
Medium Pizza Dough (50% AR, =)
Hook
*
Water 11
lbs.
Flour 20
lbs.
Thick Pizza Dough (60% AR, =)
Hook
**
Water 12
lbs.
Flour 20
lbs.
Raised Donut Dough (65% AR)
Hook
*
Water 10
lbs.
Flour 15
lbs.
• *1s speed only ** 1s speed & 2n speed only
• = If high gluten flour is used, reduce above dough batch size by 10 %.
Page 12
Page 13

 Loading...