


Ultimate BA101
External Spray E-type
Contra Angle Handpiece
Operation Manual
The EU directive 93/42/EEC was applied in the design
and production of this medical device.
Ultimate BA101
Ultimate BA105
Ultimate BA105T
9792837
9792838
9792922
Rev.2016/08
AUTOCLAVABLE
Caution before use
BA101
BA105 and BA105T
BA101 BA105 BA105T
• The BA Brand Ultimate external spray contra angle handpiece is intended for use by dental professionals only.
• Read this Operation Manual carefully before using the contra angle
handpiece. Be sure to follow all the operating instructions, including
all cautions and warnings.
• Keep this Operation Manual for future reference.
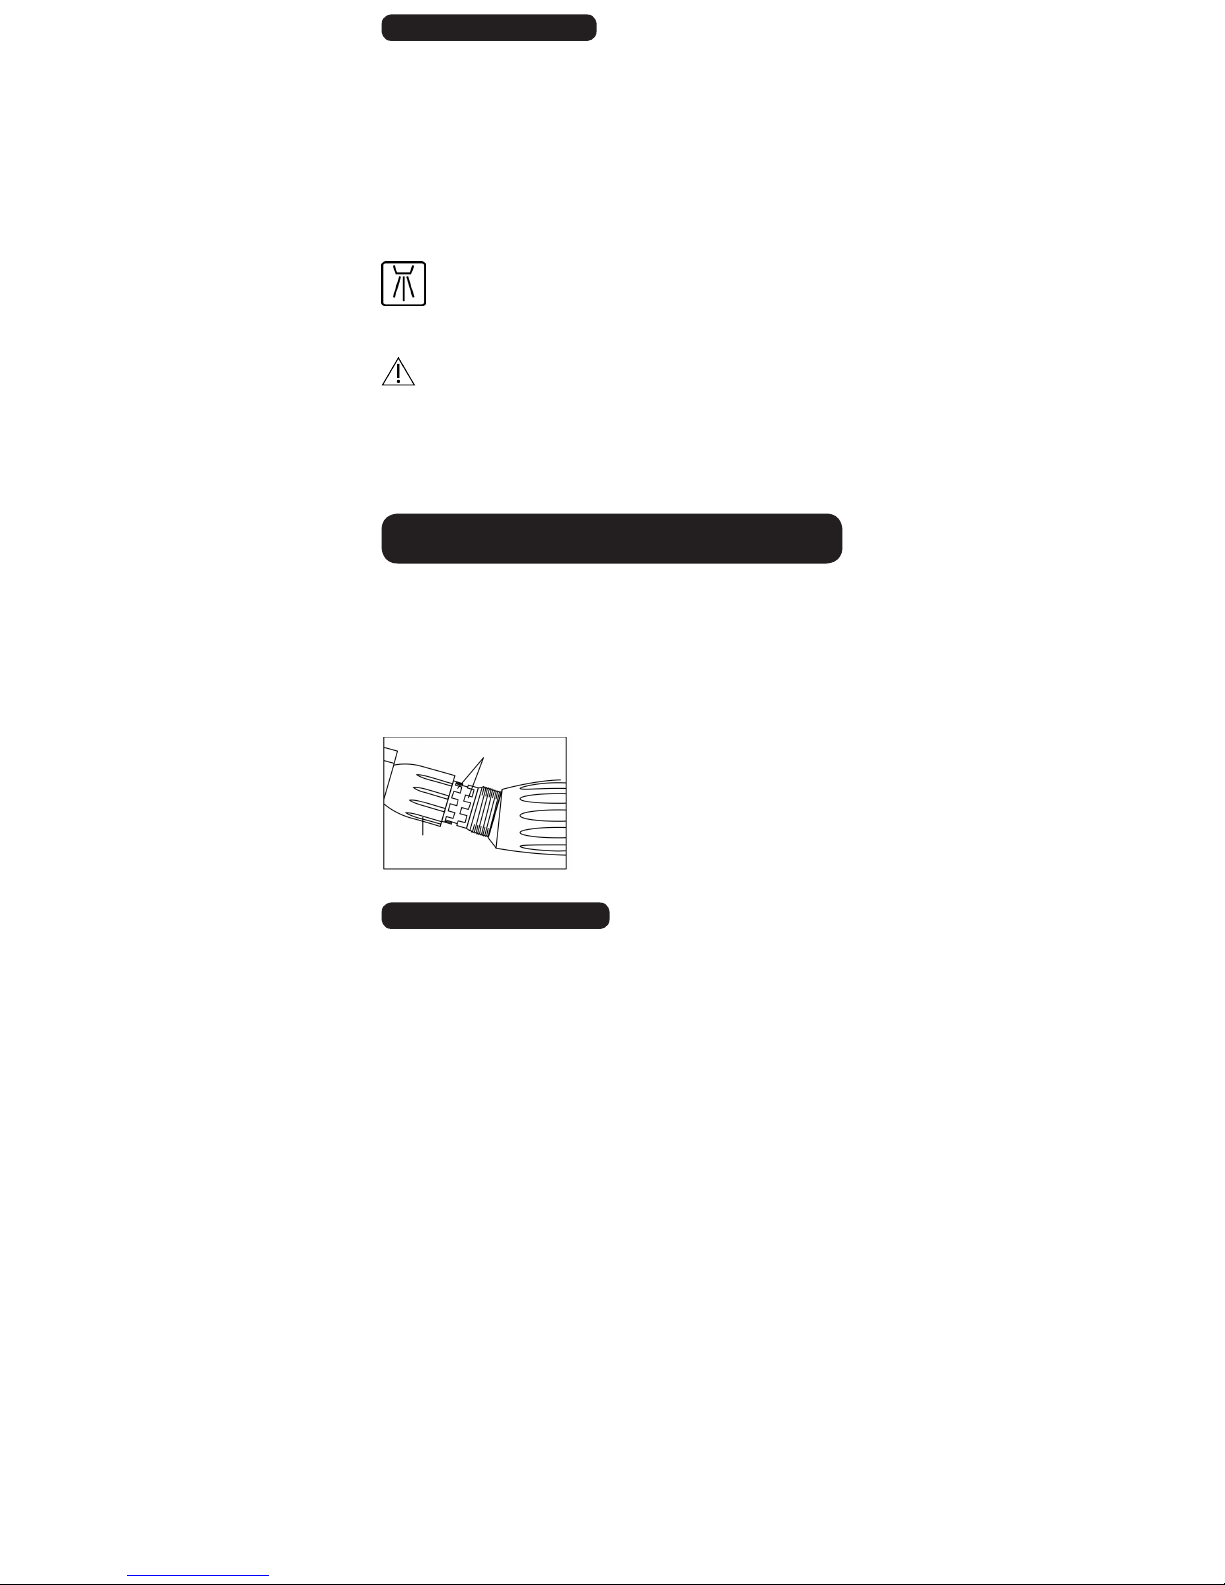
• Swing latch plate out. Remove the existing bur blank.
• Insert a bur into chuck hole all the way until the end of bur shank
touches the back of the chuck.
• Swing the latch plate back until it is fixed with a snap at the centre
position of the collar of the contra angle head.
• Push the pushbutton with thumb to open chuck, and then remove
the existing bur blank.
• Push the pushbutton with thumb, and then insert a bur into the
chuck hole.
• Release the pushbutton with thumb when the end of the bur shank
touches the end of chuck.
Note : The maximum speed may depend directly on the type of
tubing and type of motor.
Applicable Bur
Insertion/Removal
of Bur
Allowable Maximum
Speed
Nose Configuration
Sterilization
2.35 mm CA bur
Standard Latch Type
30,000 rpm
Autoclavable
Pushbutton Type
40,000 rpm
Autoclavable
Pushbutton Type
40,000 rpm
Autoclavable
Thermo-Disinfectable
2.35 mm CA bur 2.35 mm CA bur
Thermo-Disinfectable
0476
ENGLISH
0476
Specifications
Removal/Insertion of Bur from/into Contra
Angle Handpiece
Caution
Warning
Caution
• Before use, make sure that a bur is securely locked, pulling it gently
with fingers. Make a trial run.
• Never use a non-ISO standard bur for the contra angle handpiece.
• Never use a bur with the bent shank or a damaged bur for the contra
angle handpiece. Such a bur may not only injure the patient but critically damage the contra angle handpiece.
• If the contra angle handpiece cannot be smoothly attached/removed
onto/from the motor or if the contra angle handpiece rattles after
installation, never operate the contra angle handpiece.
• Whenever abnormality in performance, sound level, heat level, function, etc. is sensed, stop using the contra angle handpiece immediately and consult BA International Ltd. or an accredited BA certi-
fied Service Centre.
• Never install/remove the contra handpiece onto/from the motor
while the motor is in operation.
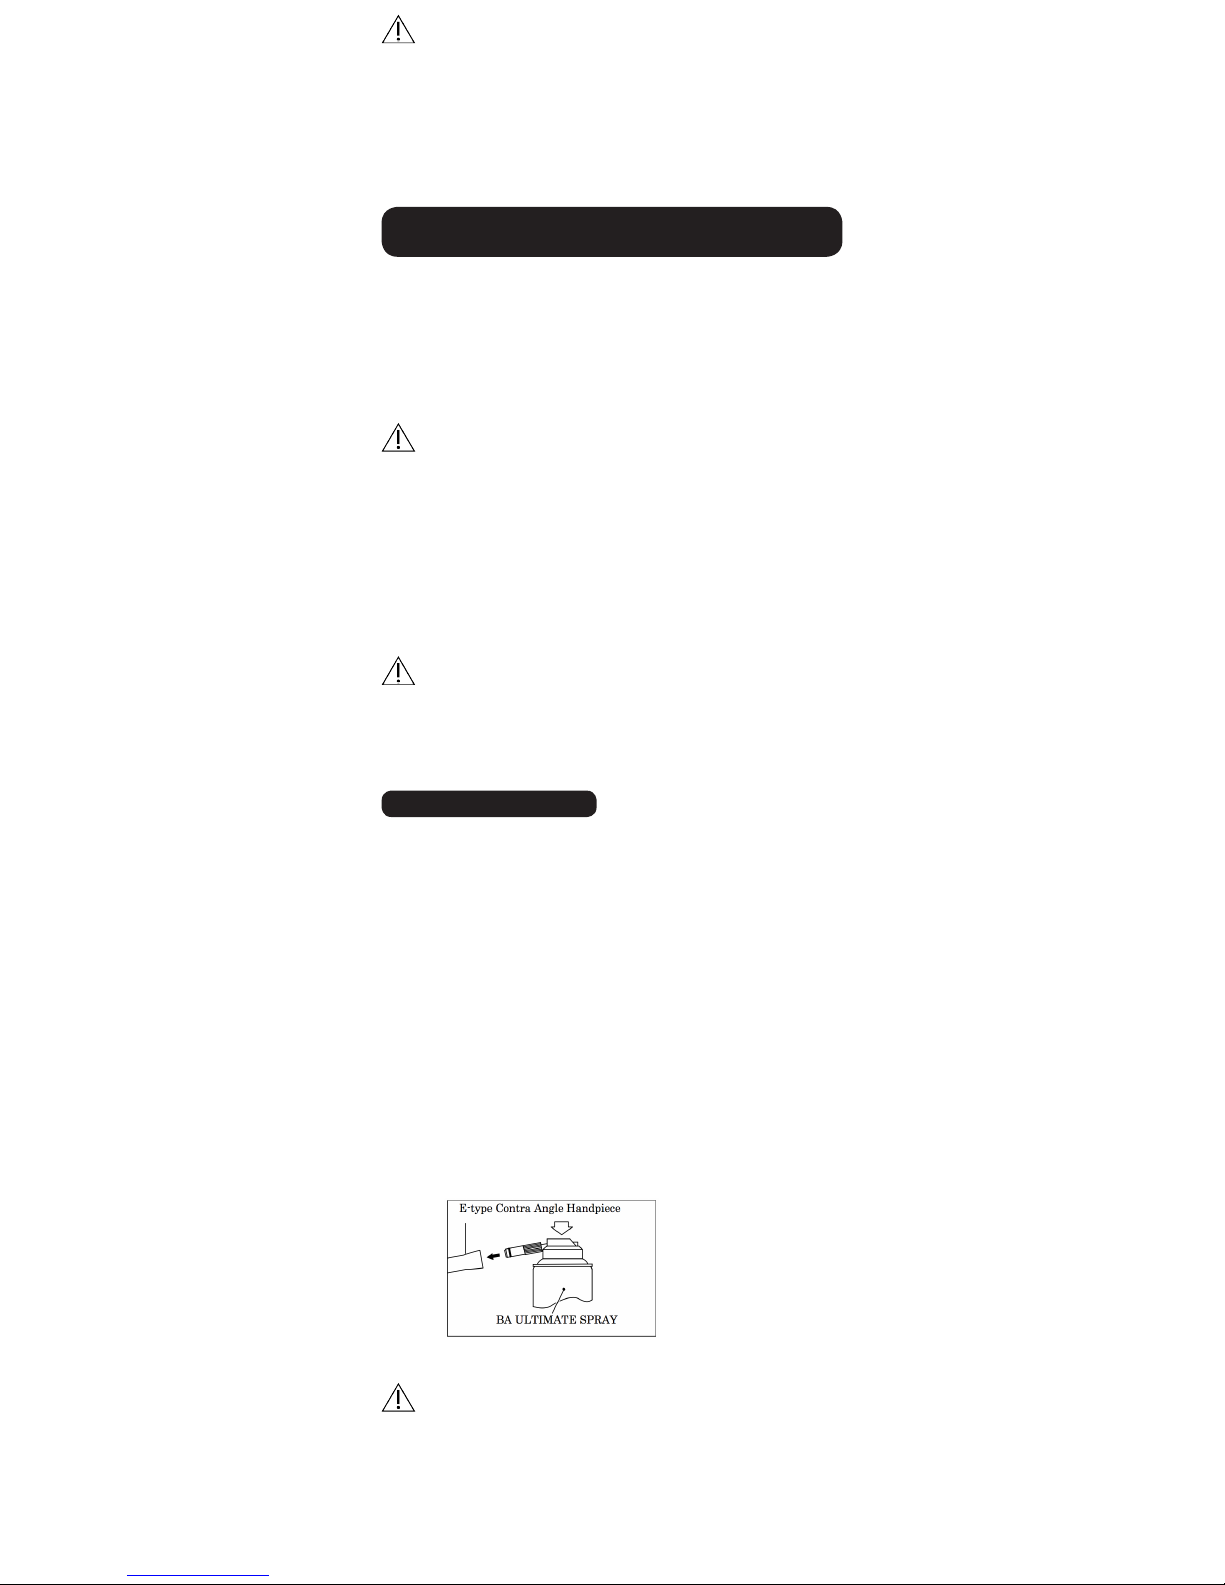
• Use BA ULTIMATE SPRAY.
• The contra angle handpiece must be lubricated once a day or before
autoclaving using the following procedures:
• Remove contra angle handpiece from motor.
• Remove the bur.
• Wipe off the saliva, dirt, etc. stuck to the surface of the
contra angle handpiece with an alcohol-soaked soft tissue
or cotton swab.
• Keep the contra angle handpiece in a horizontal position
and inject BA ULTIMATE SPRAY for three seconds through
the back-end of the contra angle handpiece using the appropriate (E-Type) nozzle.
• Install the contra angle handpiece onto the motor after the
spray injection.
• Make a trial run for five seconds.
• Wipe down the excess lubricant on the surface of the con-
tra angle handpiece with a soft tissue.
• Never operate the contra angle handpiece by installing it onto a motor which runs beyond the allowable maximum speed, as the excess
speed may cause critical damage to the internal mechanism.
• Never dismantle or alter the contra angle handpiece.
• Make sure that the motor onto which the contra angle handpiece is
attached is an ISO E-type.
• Insert the E-type fitting of the motor into the back-end of the contra
angle handpiece.
• Make sure that the contra angle handpiece is securely installed onto
the motor, by pulling it gently with fingers, and then make a trial run
before use.
Installation of Contra Angle Handpiece onto
Motor
Lubrication
Caution
• Never use a wire brush or disinfectants for surface cleaning.
• Never immerse the contra angle handpiece in an ultrasonic cleaner
or disinfectant solution.
• Lack of lubrication after use or before autoclaving may cause premature failure of the contra angle handpiece.
An autoclave is recommended for sterilization.
• Before sterilization, clean the surface of the contra angle handpiece.
• Lubricate the contra angle handpiece, and then make a trial run.
• Remove the contra angle handpiece from the motor.
• Put the contra angle handpiece into a sterilization pouch when using
a vacuum type autoclave. Do not combine it with other instruments
in the same pouch.
• Autoclave the contra angle handpiece at 121 degrees C for 20 minutes or 134 degrees C for 15 minutes.
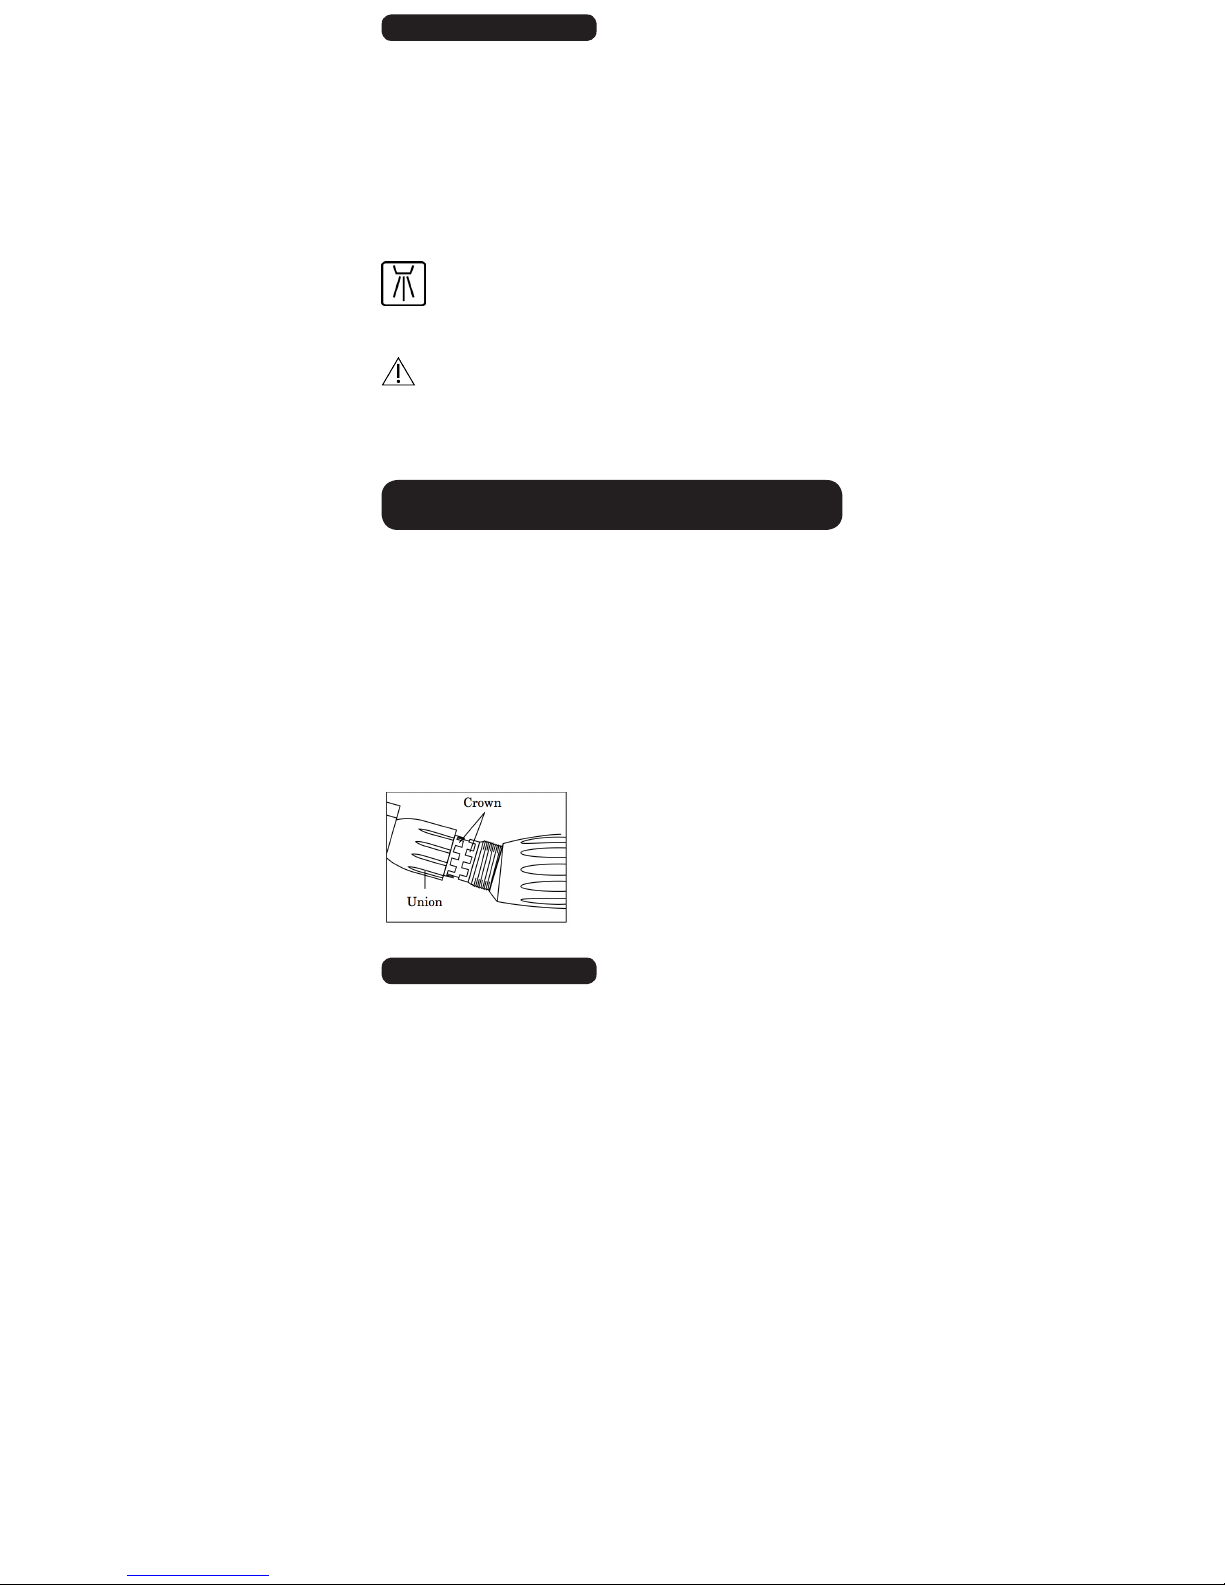
Removal
• Turn union nut counterclockwise with fingers.
• Pull the head out.
Connection
• Insert transmission gear into the head, and then rotate it with fingers
so that the gear of the transmission gear engages with that of the
head.
• Engage crown of head with that of shank and then turn the union
nut clockwise
Note: In case of latch type, remove the head after swinging the latch
out.
Important
This contra angle handpiece is a result pf precision engineering and
cannot be dismantled. For service and repair, always sent it to either
BA International Ltd. or an accredited BA certified service centre without dismantling it.
• BA handpiece with this symbol can be cleaned and disinfected in a thermo washer disinfector.
• Follow manufacturer’s operating instructions including caution, warning, etc. in use.
Sterilization
Warning
• Never use dry heat sterilization, cold sterilization, etc.
• Never autoclave the contra angle handpiece together with others in
a sterilization pouch.
Installation of Contra Angle Handpiece onto
Motor
Service and Repair
Contra ángulo de spray
externo tipo E
Manual de instrucciones
La directiva EU 93/42/EEC ha sido aplicada en el diseño y la producción de este aparato médico.
Ultimate BA101
Ultimate BA105
Ultimate BA105T
9792837
9792838
9792922
AUTOCLAVABLE
Precaución antes de usar
BA101
BA105 et BA105T
BA101 BA105 BA105T
• El contra ángulo de spray externo marca B.A. está pensado para ser
sado sólo por profesionales dentales.
• Lea cuidadosamente este manual antes de utilizar el contra ángulo.
Asegúrese de seguir todas las instrucciones de uso, incluidas las
instrucciones de precaución, peligro y seguridad...Guarde este manual para solucionar futuros problemas.
• Retire la palanca de sujección, extraiga la fresa.
• Inserte la fresa hasta que toque el final del eje.
• Centre la palanca de nuevo para que quede en su posición original.
• Pulse el botón con el dedo, entonces extraiga la fresa.
• Pulse el botón con el dedo, e inserte la fresa en el agujero del chuck
girando la fresa levemente mientras mantiene el botón pulsado si es
necesario para que entre hasta el final del eje.
• Suelte el dedo del botón cuando la fresa toque el final del chuck.
Nota : La velocidad máxima puede depender directamente del tipo de
manguera y motor.
Fresa aplicable
Inserción/Extracción
de la fresa
Máxima velocidad
permitida
Cono Configuración
y esterilización
fresa 2.35 mm CA
Standard palanca
30,000 rpm
Autoclavable
Tipo Pushbutton
40,000 rpm
Autoclavable
Tipo Pushbutton
40,000 rpm
Autoclavable
Thermo-Disinfectable
fresa 2.35 mm CA fresa 2.35 mm CA
Thermo-Disinfectable
0476
ESPAÑOL
0476
Especificaciones
Extracciónl/Inserción de la fresa en el contra
ángulo.
Rev.2016/08

Precaución
Precaución
Precaución
• Antes de usar, asegúrese de que la fresa está correctamente insertada, tirando de ella ligeramente con los dedos. Hágalo girar como
prueba
• Nunca use una fresa no estándar ISO en el contra ángulo. Nunca use
una fresa torcida o dañada en el contra ángulo. Esa fresa podría no
sólo dañar criticamente el contra ángulo sino tambien al paciente
• Si el contra ángulo no entra suavemente en el motor, o vibra después
de la instalación no utilice el contra ángulo.
• Si nota cualquier anormalidad en el giro, nivel de ruido, nivel de
calor, función, etc., pare de usar la pieza inmediatamente y contacte
con BA International Ltd. o un centro de servicio acreditado BA.
• Nunca instale o extraiga la pieza de mano del motor si este está
girando
• Use BA ULTIMATE SPRAY.
• El contra ángulo debe ser lubricada una vez al día o antes de pasar
por el autoclave siguiendo el siguiente proceso:
• Saque el contra ángulo del motor.
• Saque la fresa.
• Limpie la saliva, suciedad, etc. que se haya adherido a el
contra ángulo con algodón o un paño mojado en alcohol.
• Mantenga la piza de mano en posició horizaontal e inyectela
BA ULTIMATE SPRAY durante 3 segundos por la parte de
atrás de la pieza de mano usando el conector apropiado
(Tipo-E).
• Coloque el contra ángulo en el motor después de engrasar-
la.
• hágalo girar como prueba durante 5 segundos.
• Limpie el exceso de aceite con un paño.
• Nunca utilice el contra ángulo en un motor que gire más rápido de lo
recomendado para el contra ángulo, ya que el exceso de velocidad
podría causar daños críticos al mecanismo interno.
• Nunca desmonte o altere el contra ángulo.
• Asegurese de que el motor al que conecta el contra ángulo es standard tipo-E.
• inserte el conector tipo-E del motor en la base del contra ángulo.
• Asegurese de que el contra ángulo recta está correctamente insertada en el motor, tirando de el ligeramente con los dedos. hágalo girar
como prueba antes de usarla.
Instalación del contra ángulo en el
micromotor
Lubricación
Precaución
• Nunca use un cepillo de alambres o desinfectantes para limpiar la
superficie
• Nunca sumerja el contra ángulo en una cubeta de ultrasonidos o una
solución desinfectante.
• La falta de lubricación antes del uso o después de pasar por el autoclave puede causar un fallo prematuro del contra ángulo.
Se recomienda un autoclave para la esterilización.
• Antes de la esterilización, limpie la superficie del contra ándulo.
• Lubrique el contra ángulo, y realice una prueba de giro.
• Saque el contra ángulo del motor.
• Coloque el contra ángulo en una bolsa de esterilización cuando lo
use en un autoclave de vacío. No lo combine con otros instrumentos
en la misma bolsa.
• Inicie el proceso a 121 grados C durante 20 minutos o 134 grados
C durante 15 minutos.
Extracción
• La rosca de unión en el sentido contrario a las agujas del reloj.
• Tire de la cabeza.
Conexión
• Enganche los dientes de la corona junto con los engranajes y gire la
rosca hasta que quede bien sujeto
Importante
Este contra ángulo es el resultado de un proceso de ingeniería preciso y no puede ser desmontado. En caso de necesidad de servicio
o reparación, siempre envíelo a BA International Ltd. o a un servicio
certificado BA sin desmontarlo.
• La pieza de mano B.A. con este simbolo puede ser limpiada y
desinfectada en un termodesinfector de agua.
• Siga las instrucciones del fabricante incluyendo precaución,
peligro, etc. al usarlo.
Esterilizacion
Precaución
• Nunca use esterilización de calor seco, esterilización fría, etc.
• Nunca esterilice el contra ángulo junto a otros instrumentos en la
misma bolsa.
Extracción, introducción de la cabeza en un
eje tipo E
Servicio y reparación
 Loading...