

Backyard Creations 273-0095, 273-0106, 273-0104, 273-0105, Adirondack Chair User Manual
...Page 1
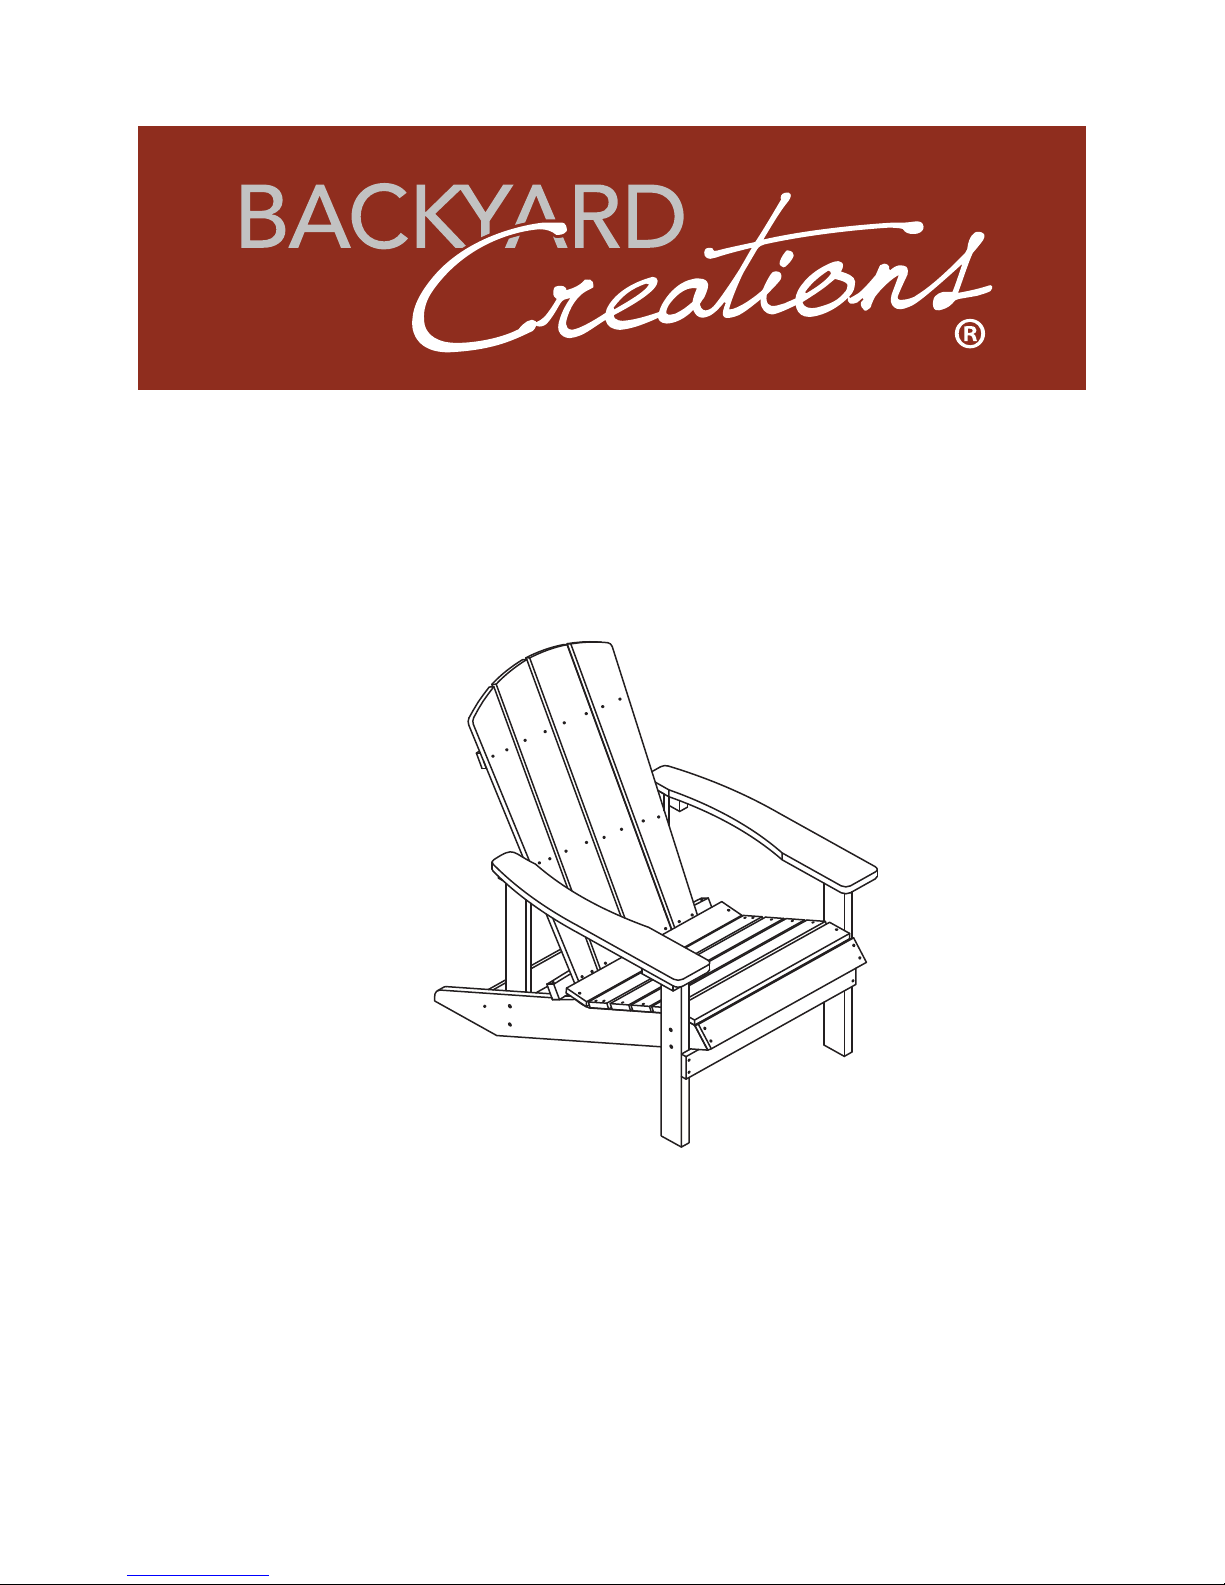
Adirondack Chair
SKU # 273-0095 & 273-0104 & 273-0105 & 273-0106 & 273-0107
Questions or Missing Parts Please call
1 - 888 - 243 -9985 between 8:30 am to 5:00 pm EST
Or email: [email protected]
Made in China
Page 2
Table of Contents
Table of Contents........................................................2
Safety Information.......................................................2
Warranty ...................................................................... 2
1 Year Frame
What Is Covered
What Is Not Covered
Care Instructions
Limited Warranty.................................................. 2
................................................................ 2
.... ..
................................................................ 2 ..
................................................................ 2
....
Safety Information
DANGER: Please keep children out of the assembly area
during assembly.
WARNING: Do not stand on the chairs. Do not sit on the
armrests.
Pre-Assembly ............................................................3
Planning Assembly ................................................................3
Tools Required ....................................................................... 3
Hardware Included................................................
Package Contents .................................................................. 4
Assembly ....................................................................5
CAUTION: Use the
.................. 3
Warranty
ONE YEAR LIMITED WARRANTY
WHAT IS COVERED
Adirondack Chairs are warranted to the original purchase to be free from defects in material or workmanship for a period of one year from
ts resulting from
misuse, abuse or customer negligence will void this warranty.
WHAT IS NOT COVERED
ver defects
normaly use
of the product. If the product is defective within the term of this warranty, Merry Products, Inc. will repair or replace defective parts at no cost
to the purchaser. Shipping charges are not covered and are resposibility of the purchaser.
Care Instructions
The adirondack chair should be stationed on a level surface and kept away from extreme heat and strong oxidizing agents. Never use
petroleum or oil based products such as solvents or harsh cleaners to clean the material.
r
To clean
mild soap or dish detergent can be used to help remove caked-on dirt. Automotive plastic car care products can be used as well. Minor
scratches can be buffed out with steel wool. Be sure and sand the surface in the direction of the grain, then wipe clean with the automotive
plastic car care product/ conditioner.
material wipe the surface with a damp cloth or simply spraying with a ga
den hose should be adequat
e
. If needed
You may contact our customer service department with any questions by phone at 1-888-243-9985 or email us at [email protected]
2
Page 3
Pre-Assembly
TOOLS REQUIRED (not included)
Phillips screwdriver
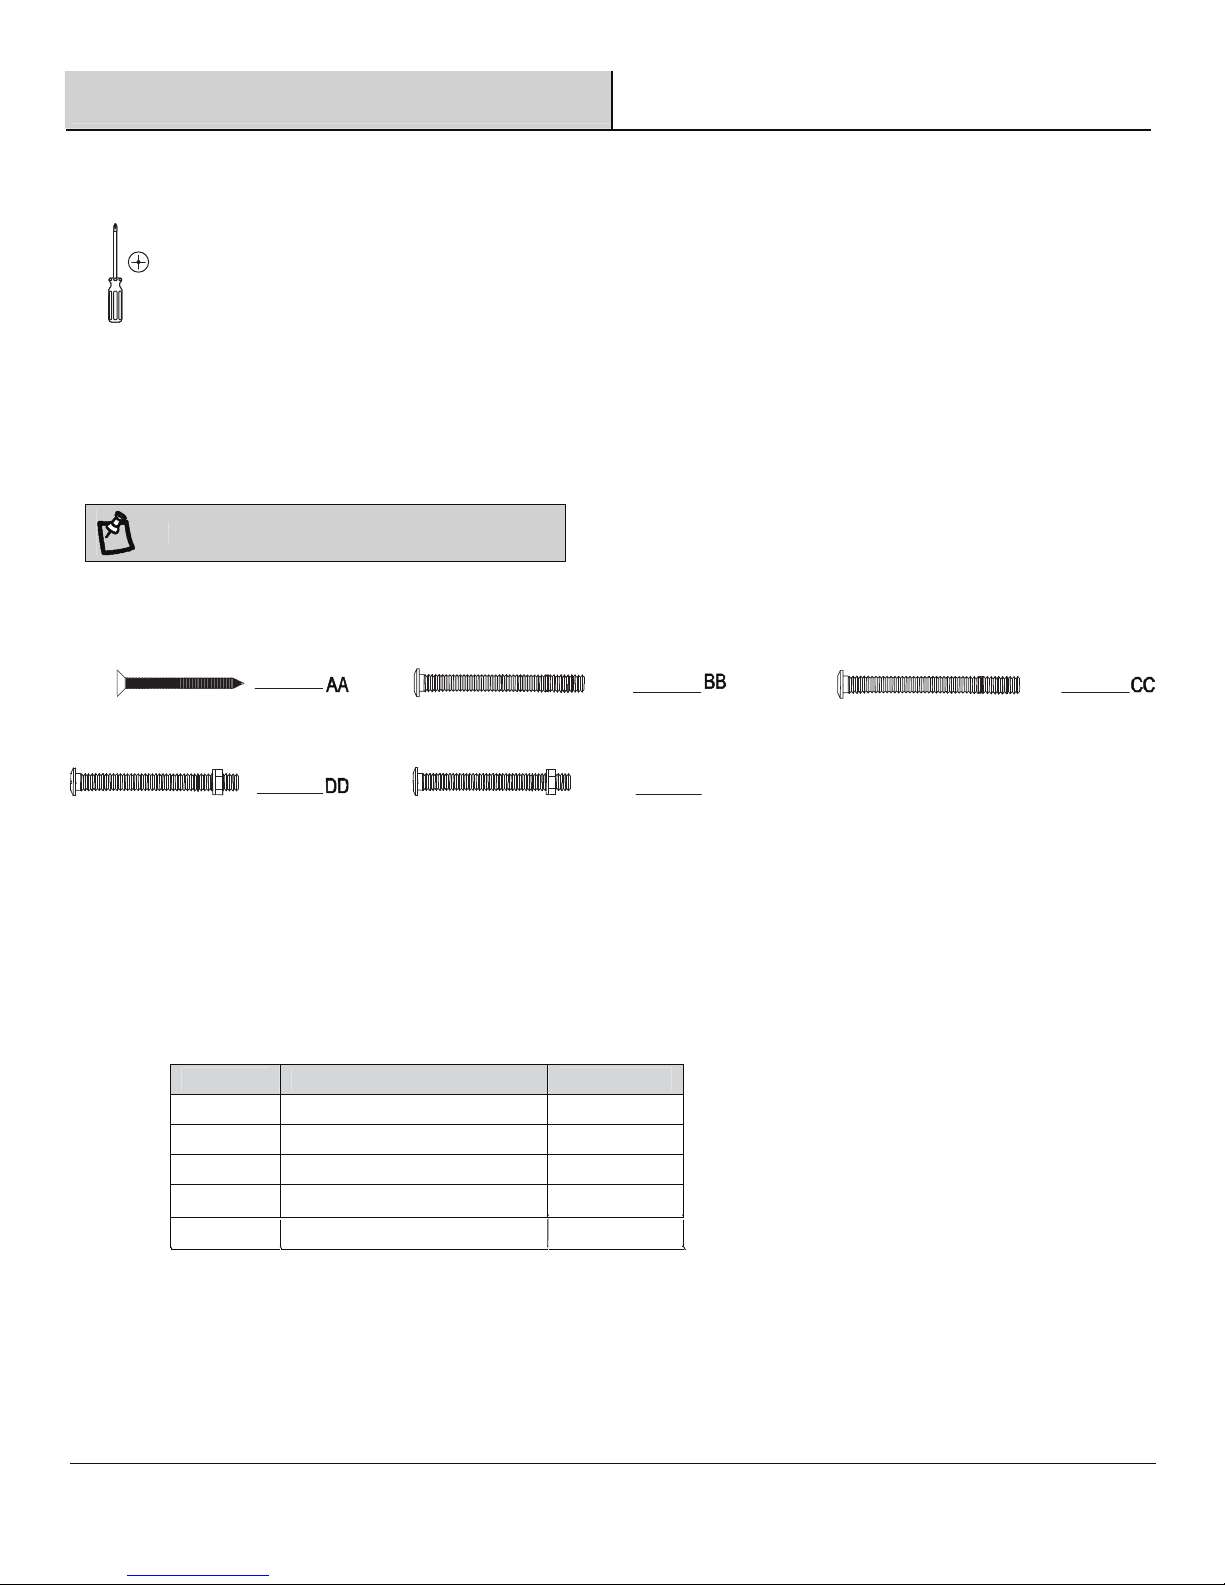
HARDWARE INCLUDED
NOTE: Hardware not shown to actual size.
Part Description Quantity
AA Screw (3.5x40) 6
BB Bolt (M6x60) 2
Bolt (M6x70)
Bolt (M6x60)
Bolt (M6x50)
6
4
CC 2
DD
EE
EE
3
Page 4
Pre-Assembly (continued)
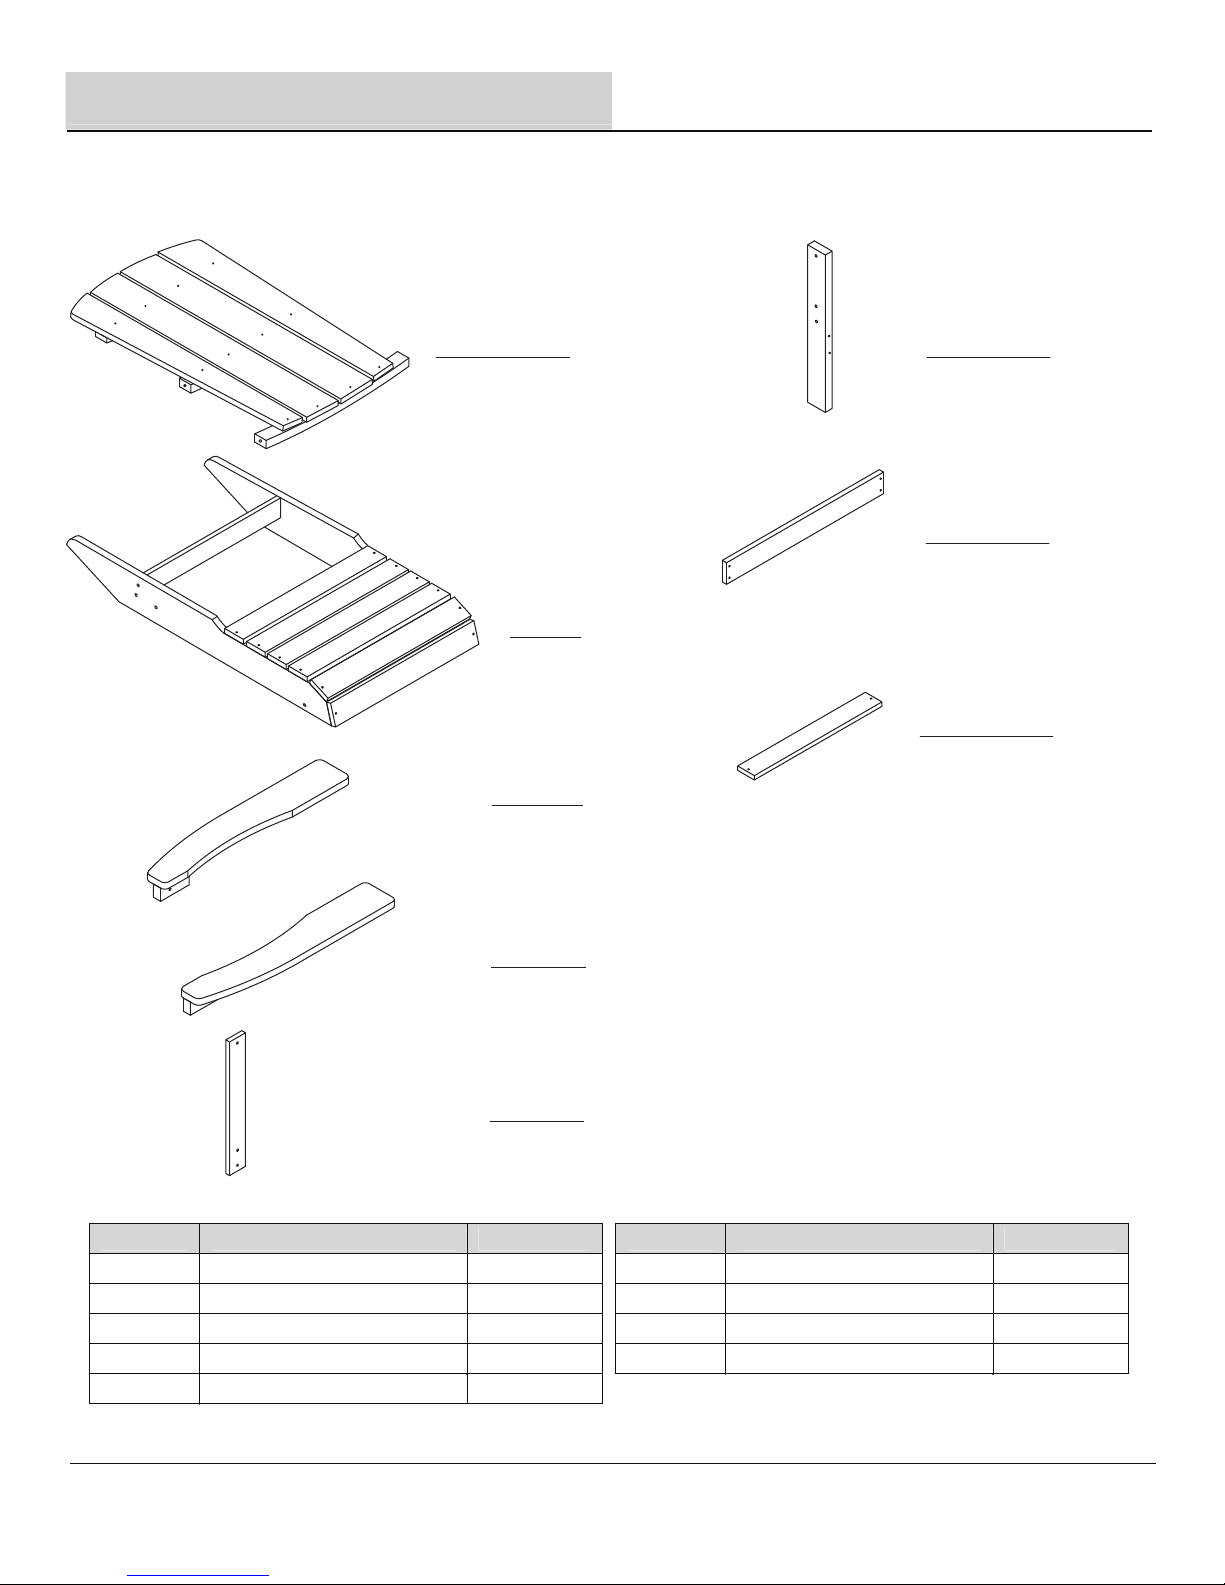
PACKAGE CONTENTS
A
F
G
B
H
C
Part Description Quantity
A 1
B
C 1
D 1
E 2
Back
Seat
Left armrest
Right armrest
Vertical Back Support
1
D
E
Part Description Quantity
4
*Note: DO NOT TIGHTEN ANY BOLTS
BEFORE THE UNIT PUT TOGETHER.
F 2
G
H 1
Front Legs
Front Leg Cross Beam
Rear Seat Slat
1
Page 5
5
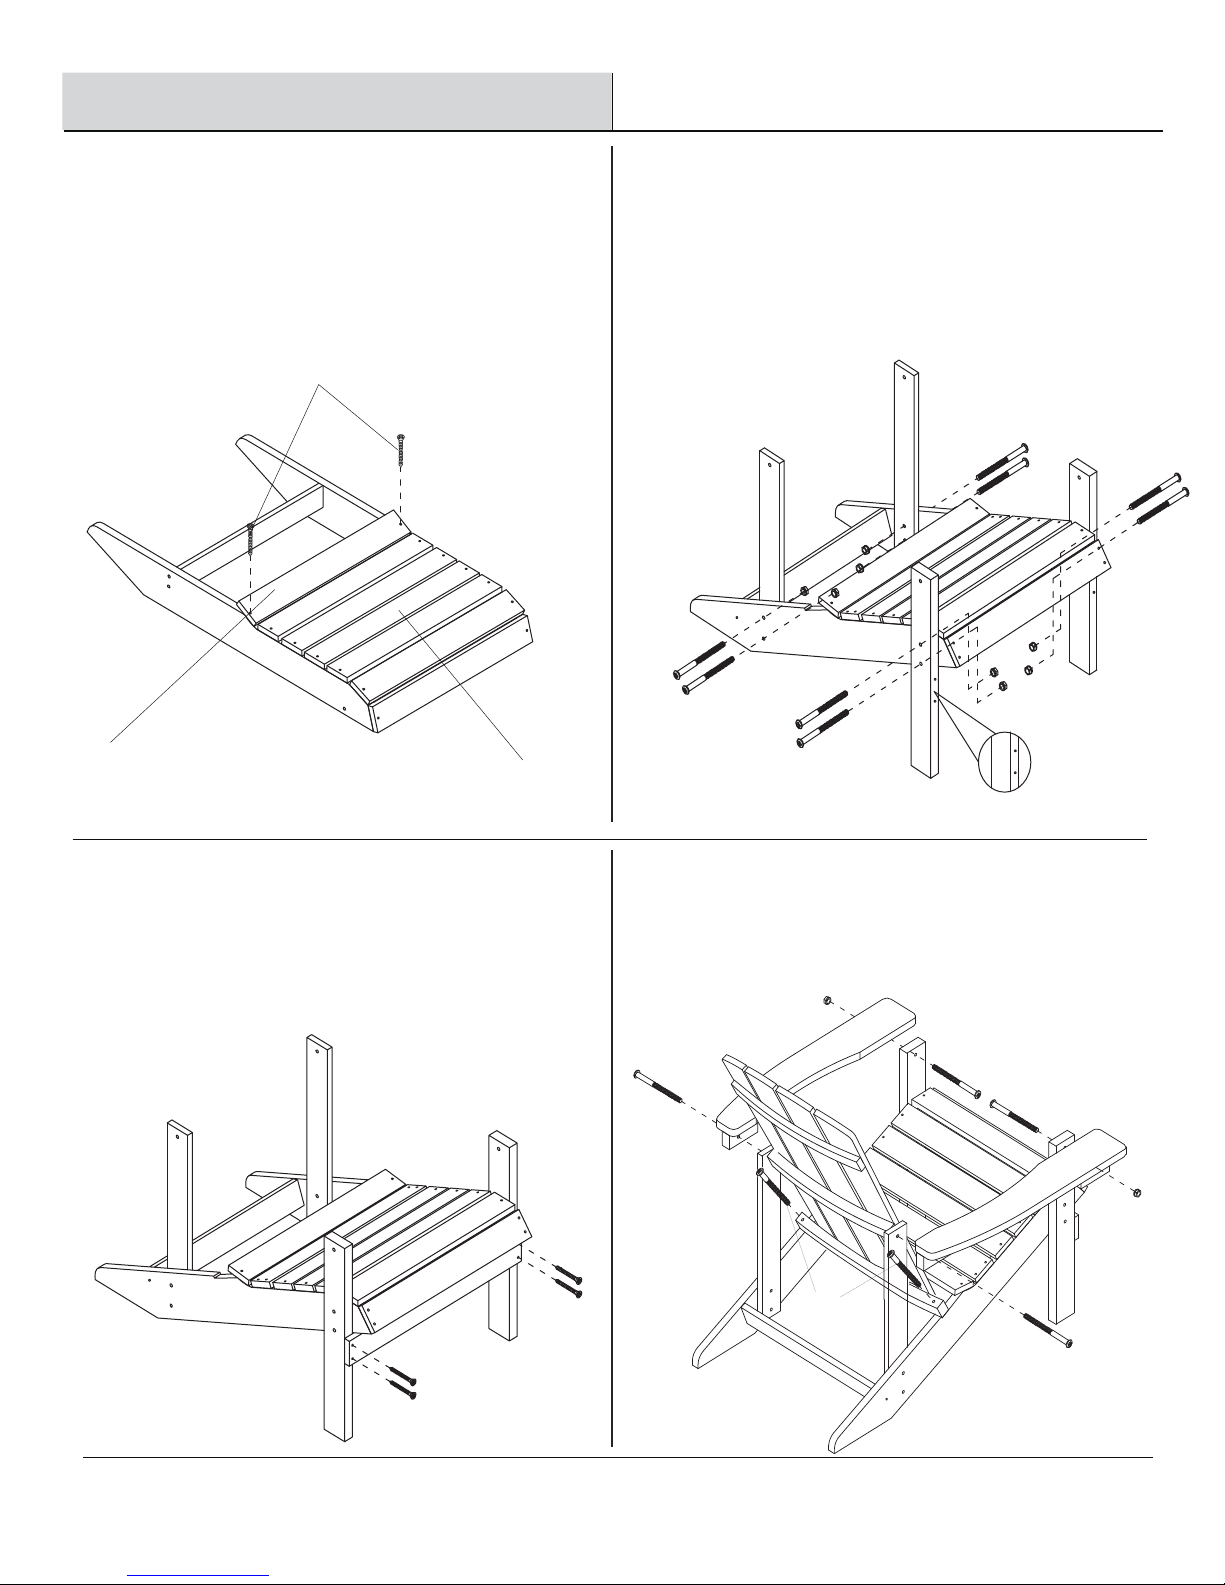
Ass embly
1
Attaching the rear seat slat
2
Attaching the front legs
□ Attach the front legs (F) onto the seat (B) with Bolts (DD).
Attach Vertical Back Support (E) onto the Seat with Bolts (EE)
using Pillips screwdriver.
□
Attach the rear seat slat (H) to the seat (B) with screws (AA),
using a Phillips screwdriver.
DD
**Pre-drill mark
facing front
3
Attaching the cross board
□ Attach the Cross Beam (G) to the front legs (F) with
screws (AA), using the Phillips screwdriver.
4
Attaching the Hinge
□ Attach the Back (A) to the Seat (B) with Bolts (BB).
Attach the Armrest (C & D) to the Front Legs with Bolt (DD).
Attach th Armrest to the Vertical Back Support (E) with Bolt (CC).
AA
AA
H
B
AA
EE
DD
EE
E
E
F
F
G
D
C
BB
DD
CC
CC
Note: DO NOT TIGHTEN ANY BOLTS
BEFORE THE UNIT PUT TOGETHER.
 Loading...