

2010 Back To Basics®, a Brand of Focus Electrics, LLC.
www.focuselectrics.com
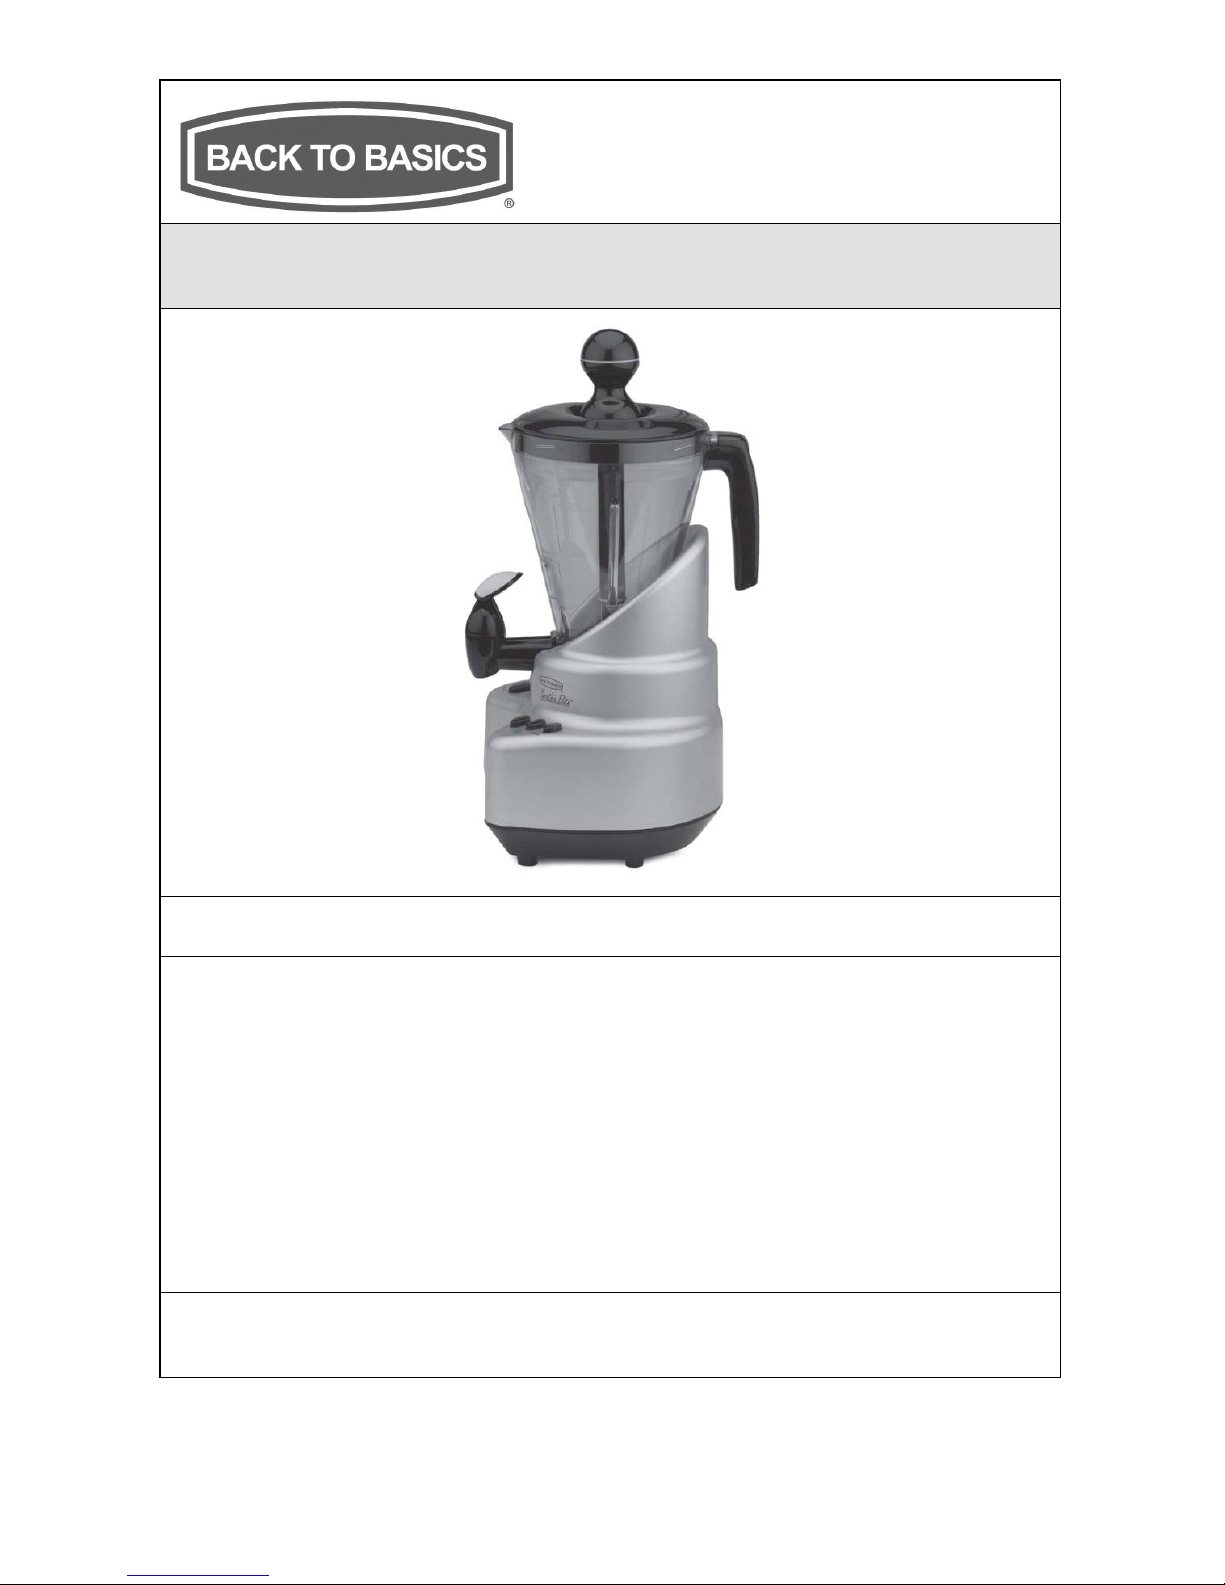
SMOOTHIE
ELITE
™
Instruction Manual
Register this and other Focus Electrics products through our website:
www.registerfocus.com
Important Safeguards .............................................................................................. 2
Before Using for the First Time ............................................................................... 3
Using Your Smoothie Elite™ .................................................................................... 4
Cleaning Your Smoothie Elite™ ............................................................................... 5
Recipes ................................................................................................................... 6
Warranty .................................................................................................................. 8
SAVE THIS INSTRUCTION MANUAL FOR FUTURE REFERENCE

2
IMPORTANT SAFEGUARDS
To prevent personal injury or property damage, read and follow all instructions
and warnings.
When using electrical appliances, basic safety precautions should always be
followed including the following:
• Read all instructions.
• To protect against fire, electric shock, and injury to persons do not immerse cord,
plugs, or other electric parts in water or other liquids.
• Close supervision is necessary when this appliance is used by or near children.
• Always unplug from outlet when not in use and before cleaning. Allow to cool
before putting on or taking off parts and before cleaning.
• Do not operate any appliance with a damaged cord or plug, after the appliance
malfunctions, or has been damaged in any manner. For service information see
warranty page.
• The use of accessory attachments, including canning jars, not recommended by
Focus Electrics may cause fire, electric shock, or injury.
• Do not use this appliance outdoors.
• Do not let cord hang over the edge of the table or counter, or touch hot surfaces.
• Do not place on or near a hot gas or electric burner, or in a heated oven.
• To disconnect, turn any control to “OFF,” then remove plug from wall outlet.
• Do not use appliance for other than intended use.
• Do not attempt to repair this appliance yourself.
• A short power-supply cord is provided to reduce risks resulting from becoming
entangled in or tripping over a longer cord.
• Longer extension cords are available, but care must be exercised in their use.
While use of an extension cord is not recommended, if you must use one, ensure
that the marked electrical rating of the extension cord is equal to or greater than
that of the appliance. If the plug is of the grounded type, the extension cord must
be a grounding-type 3-wire cord. To avoid pulling, tripping or entanglement,
position the extension cord so that it does not hang over the edge of the counter,
table or other area where it can be pulled on by children or tripped over.
• This appliance has a polarized plug (one blade is wider than the other). To
reduce the risk of electric shock, this plug is intended to fit into a polarized outlet
only one way. If the plug does not fit fully into the outlet, reverse the plug. If it
still does not fit, contact a qualified electrician. Do not attempt to modify the plug
in any way.
• Do not use an outlet or extension cord if the plug fits loosely or if the outlet or
extension cord feels hot.
• Turn off the machine before removing the blending jar from the base and before
placing the blending jar on the base.
• Do not run motor without blending jar properly attached to motor base or when
blending jar is empty.
• Keep hands and utensils (other than included stir stick) out of blending jar while
mixing ingredients to reduce risk of severe injury to persons or damage to the
machine.
• Blades are sharp; handle carefully.

3
• Always operate the appliance with the lid in place.
• When blending hot liquids, remove lid cap.
• To reduce the risk of injury, never place cutter-assembly blades on base without
blending jar properly attached.
• After running the motor continuously for three minutes, wait at least five minutes
before running the motor again.
• Avoid contact with moving parts.
• For household use only.
SAVE THESE INSTRUCTIONS
B
EFORE USING FOR THE FIRST TIME
Please check all packaging material carefully before discarding. Many
accessory parts are contained within the packaging material.
Before assembling your Smoothie Elite™ wash all parts, except for the motor base
in warm, soapy water, rinse thoroughly and dry. Unscrew and disassemble the valve
for cleaning (see Cleaning Your Smoothie Elite™ section). To prolong the life of your
smoothie maker, do not wash parts in the dishwasher.
Stir Stick
Motor Base
Lid Cap
Lid
Blending Jar
Blender Cap
Dispensing Valve
Rubber Gasket
Blade Base
4
1. Position the rubber gasket down onto the circular flat surface in the blade base.
2. Holding the blending jar upside down, screw the blade base onto the bottom of
the blending jar by twisting the blade base counter-clockwise until tightened.
Make sure that the blade base is tightly fastened to the blending jar and that the
rubber gasket is properly compressed between the blending jar and the blade
base. Place orange locking ring into the bottom of the blade assembly until it
locks in place and the ring lies flat with the bottom of the blade assy.
3. Press the lid onto the top of the blending jar. Press the clear lid cap in the
center of the lid or place the stir stick through the center of the lid if blending
liquids or frozen drinks.
4. Place the blending jar onto the motor base so that the bottom of the blade base
is sitting flat on the motor base.
5. Plug in the cord. Your smoothie maker is now ready to use.
U
SING YOUR SMOOTHIE ELITE™
C
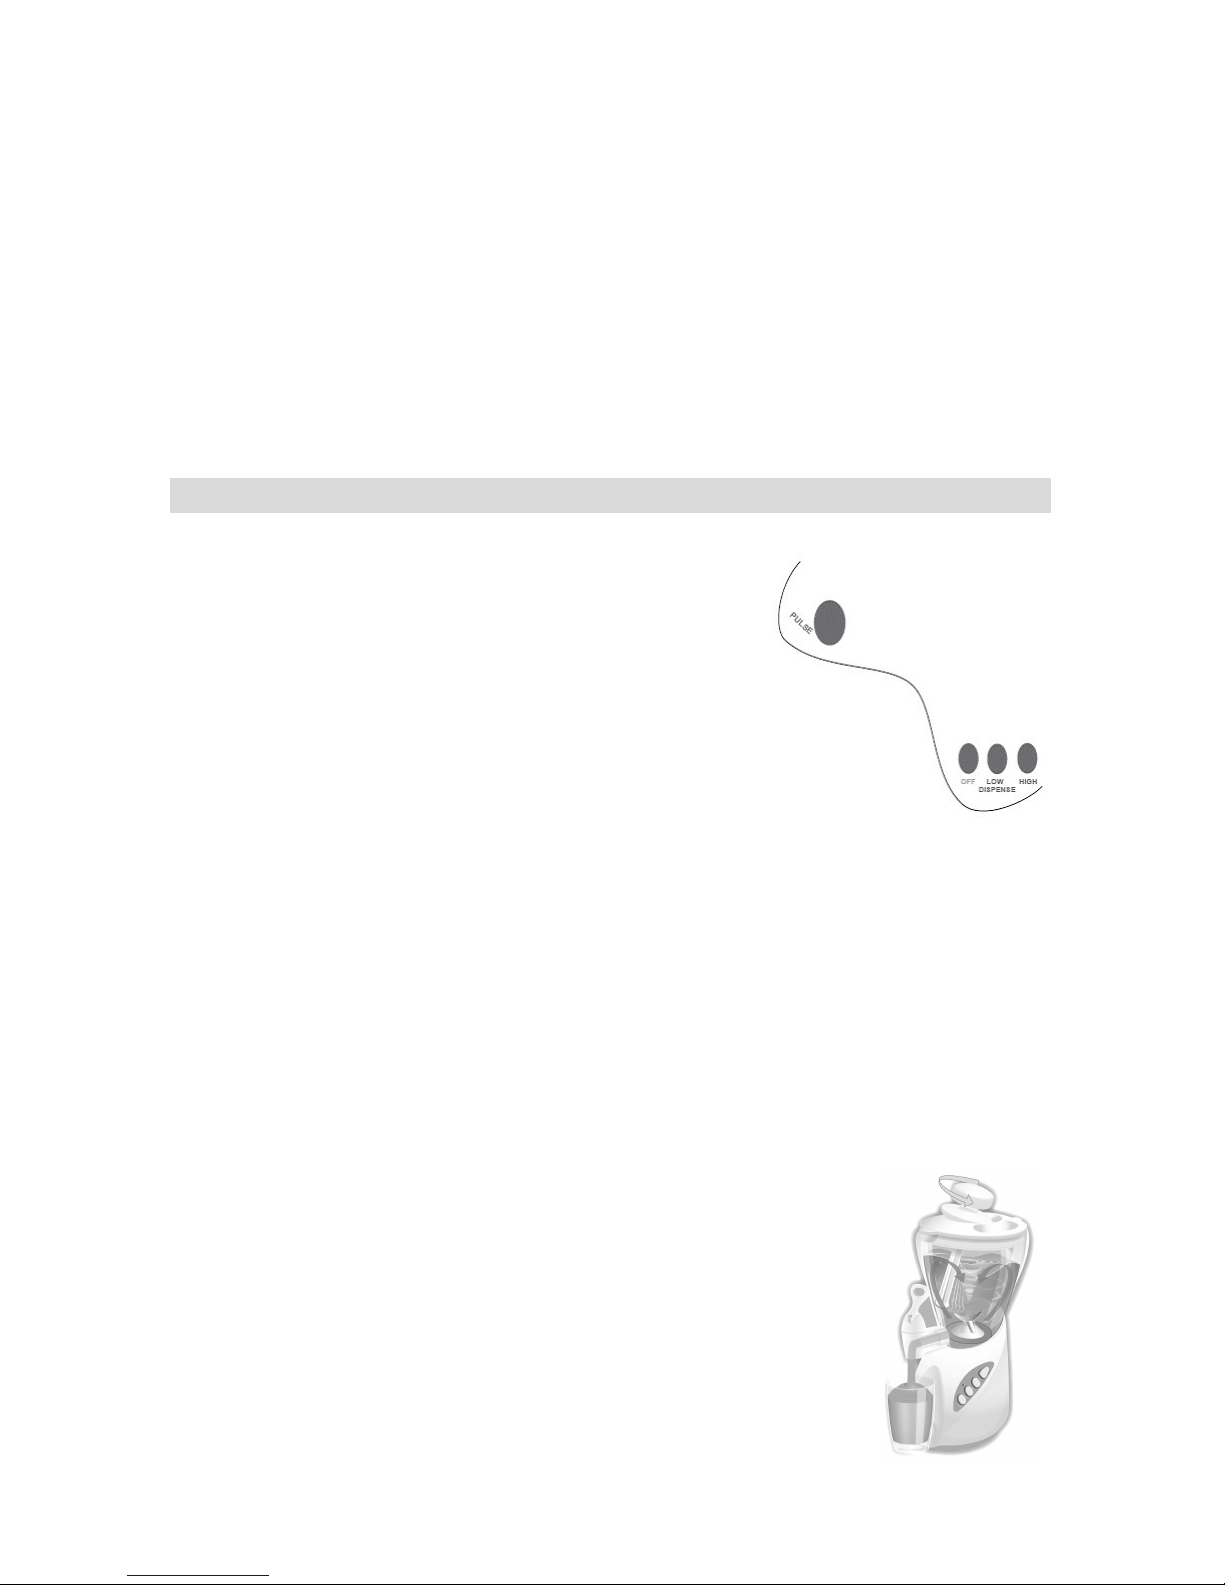
ONTROL BUTTONS:
PULSE - gives short bursts of power at high speed.
Use “PULSE” to begin the mixing of ice and other hard
ingredients.
OFF - turns off the appliance.
LOW/DISPENSE - runs the unit at low speed. Use
this speed for the initial 30 seconds of mixing as well
as for dispensing.
HIGH – runs the unit at high speed. Use this speed for
the final 10 seconds of mixing. Do not use this speed
for dispensing.
To make your favorite frozen drinks, follow the steps below.
1. ADD LIQUIDS – Add any combination of liquid ingredients up to the LIQUIDS
mark under SERVES 2 or SERVES 4 located on the blending jar. Liquids
include any soft ingredients such as fruit, milk, fruit juice, herbal supplements, or
yogurt in any combination you think would be tasty.
2. ADD ICE – Add ice or frozen ingredients until the total level reaches the
FROZEN INGREDIENTS line on the side of the blending jar. Frozen ingredients
include ice, frozen fruit, frozen yogurt, ice cream, etc.
3. SMOOTH IT – With the lid on and the stir stick (use as directed below) set in the
hole on the lid, pulse the mixture 2 or 3 times by pressing the “PULSE” button.
Then press the button to “LOW” for 30 seconds, or until ingredients are mostly
blended. Run appliance at “HIGH” for the final 10 seconds of
blending.
STIR STICK OPERATION – When in use and while the
machine is running, stir or rotate the Stir Stick in a counterclockwise direction so that the Stir Stick scrapes or contacts
the sides of the blending jar. This stirring operation will force
the ingredients into the mixing blades.
4. SERVE IT – To serve the smoothie, press the
“LOW/DISPENSE” button, place a cup under the valve and
press down the valve lever. Stir the contents in the blending
jar with the stir stick while dispensing thick smoothies. As the
5
smoothie level reaches the bottom of the blending jar, a thick mix may stop
dispensing. Add a few tablespoons of liquid to increase flow. When the
blending jar is empty, turn the machine “OFF.” You can continue making
smoothies one after another, but be sure to give the smoothie maker a 5-minute
break after 3 minutes of continuous use.
•
To make a thicker smoothie, add more frozen ingredients.
•
To make a thinner smoothie, add more liquid ingredients.
C
LEANING YOUR SMOOTHIE ELITE
™
1. Switch to “OFF” and unplug from electrical outlet.
2. Wipe motor base with a damp cloth or sponge. To remove stubborn spots, use a
mild, non-abrasive cleanser.
3. Remove blade assembly and rubber gasket from the blending jar. Unscrew and
disassemble the dispensing valve. Carefully wash all parts except for motor
base in warm, soapy water, rinse and dry thoroughly. To prolong the life of your
smoothie maker, do not wash parts in the dishwasher.
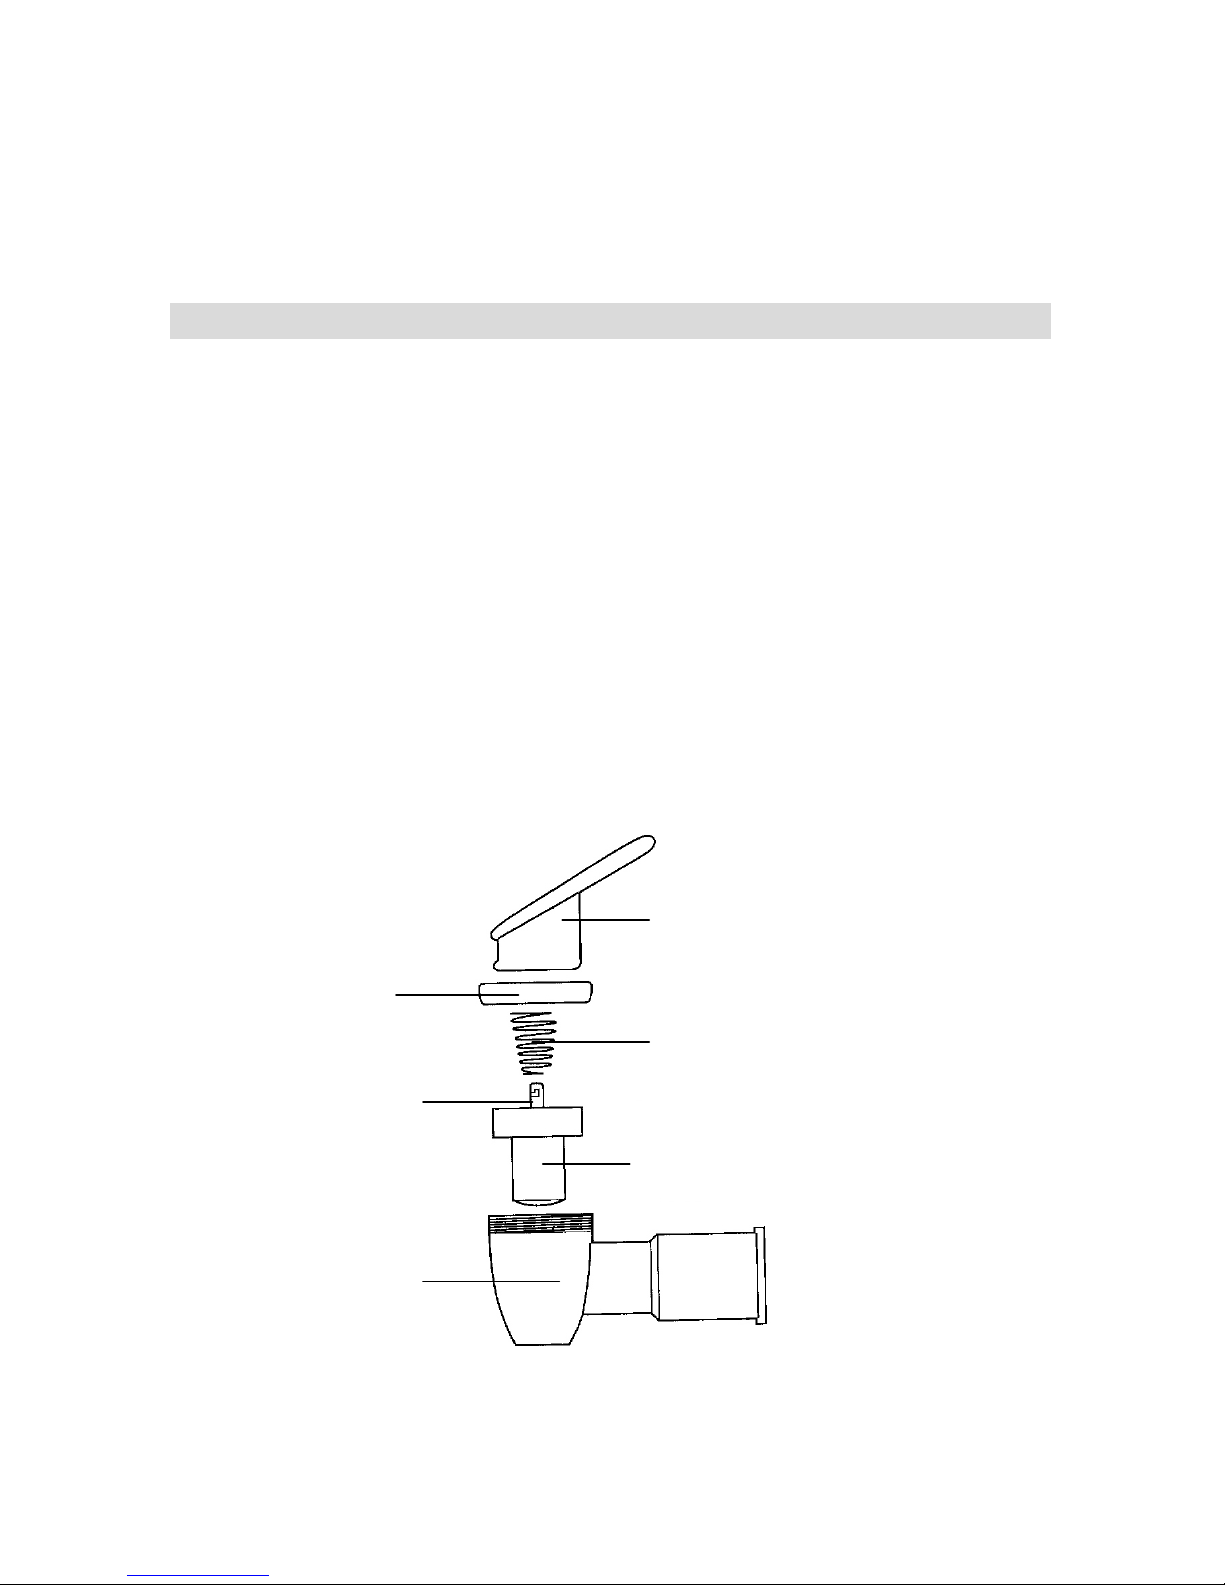
CLEANING THE DISPENSING VALVE
1. Remove the valve from the blending jar by unscrewing the entire valve counter-
clockwise.
2. Remove the cap from the valve body by unscrewing it counter-clockwise.
3. Squeeze cap and stopper together and slide the lever off the stopper pin.
4. Remove the spring.
5. Remove the stopper and stopper pin by pulling the rubber rim of the stopper.
The stopper and pin are tightly fit and need not be separated.
6. Clean all parts in warm, soapy water, allow to dry thoroughly and reassemble in
the order shown.
Lever
Cap
Stopper
Stopper Pin
Valve Body
Spring

6
R
ECIPES
Directions for all recipes: Pour liquid ingredients into the blending jar. Add all frozen
ingredients. Press “PULSE” two or three times; then blend at “LOW/DISPENSE”
setting until smooth. While the machine is running, move the stir stick around
counter-clockwise to aid mixing. Serve immediately. Makes 3-5 servings.
STRAWBERRY BANANA SUPREME
SMOOTHIE
1 cup Strawberry nectar or apple juice
1 cup Milk
1 Frozen banana (chunks)
2½ cups Frozen strawberries
1 cup Strawberry yogurt
MANGO TANGO SMOOTHIE
1 cup Pineapple juice
1 cup Orange juice
½ Frozen banana (chunks)
1 cup Pineapple sherbet
1½ cups Frozen mango slices
BERRY SWIRL SMOOTHIE
1 cup Apple juice
1½ cups Lemonade
1 cup Frozen raspberries
½ cup Frozen strawberries
1 cup Raspberry sherbet
RASPBERRY CREAM SMOOTHIE
1 cup Orange juice
1 cup Raspberry yogurt
1 cup Vanilla frozen yogurt
½ Frozen banana (chunks)
1½ cups Frozen raspberries
ORANGE BANANA CREAM
SMOOTHIE
1 cup Milk
1½ cups Orange juice
½ tsp. Vanilla
½ Frozen banana (chunks)
1 cup Vanilla frozen yogurt
½ cup Orange yogurt
3 tbs. Orange juice concentrate
RASPBERRY SUNRISE SMOOTHIE
2½ cups Orange juice
1½ cups Frozen raspberries
1 cup Raspberry sherbet
1 cup Ice
LEMON LOUIE SMOOTHIE
2 cups Lemonade
1 cup Lemon yogurt
1½ cups Frozen pineapple chunks
1 cup Pineapple sherbet
1 cup Ice
PEACH REFRESHER SMOOTHIE
2 cups Peach nectar or apple juice
1 cup Vanilla frozen yogurt
½ Banana
1 cup Peach yogurt
1½ cups Frozen peach slices
BANANA LIME SUBLIME SMOOTHIE
2 cups Limeade
1 Banana
1 cup Lime sherbet
3 tbs. Coconut milk
1 cup Ice
PIA COLADA SMOOTHIE
5 tbs. Coconut milk
2½ cups Pineapple juice
½ cup Vanilla ice cream
½ Frozen banana (chunks)
1½ cups Frozen pineapple chunks
STRAWBERRY LEMON SURPRISE
SMOOTHIE
2 cups Lemonade
2 cups Frozen strawberries
1 cup Strawberry yogurt
HAWAIIAN HOLIDAY SMOOTHIE
1 cup Passion fruit nectar
1 cup Guava nectar
1 cup Orange sherbet
½ cup Frozen strawberries
½ cup Frozen mango slices
4 tbs. Coconut milk
1 cup Strawberry yogurt
½ cup Frozen banana (chunks)

7
LOW-FAT STRAWBERRY ORANGE SMOOTHIE
2 cups Strawberries
½ cup Orange juice
1 cup Skim milk
1 cup Plain nonfat yogurt
1 cup Ice
LEMONADE WATERMELON SOOTHER
2 cups Watermelon (pulp, not rind)
3 oz. Frozen lemonade concentrate (½ of a 6 oz. can)
1 cup Lemon/lime soda
1 tsp. Grenadine syrup
1-2 cups Ice, to desired consistency
*Add water if necessary
CHOCOLATE TREAT
3.5 oz. Package of instant chocolate pudding mix
1½ cups Milk
1½ cups Ice
1 Banana

8
L5735A 02/10 Back To Basics®, a Brand of Focus Electrics, LLC. Printed in China
P
RODUCT WARRANTY
Appliance 1 Year Limited Warranty
Focus Electrics, LLC (“Focus Electrics”) warrants this appliance from failures in the material
and workmanship for one (1) year from the date of original purchase with proof of purchase,
provided the appliance is operated and maintained in conformity with the provided Instruction
Manual. Any failed part of the appliance will be repaired or replaced without charge at Focus
Electrics’ discretion. This warranty applies to indoor household use only.
This warranty does not cover any damage, including discoloration, to any non-stick surface of
the appliance. This warranty is null and void, as determined solely by Focus Electrics if the
appliance is damaged through accident, misuse, abuse, negligence, scratching, or if the
appliance is altered in any way.
THIS WARRANTY IS IN LIEU OF ALL IMPLIED WARRANTIES, INCLUDING WARRANTIES
OF MERCHANTABILITY, FITNESS FOR A PARTICULAR PURPOSE, PERFORMANCE, OR
OTHERWISE, WHICH ARE HEREBY EXCLUDED. IN NO EVENT SHALL FOCUS
ELECTRICS BE LIABLE FOR ANY DAMAGES, WHETHER DIRECT, INDIRECT,
INCIDENTAL, FORSEEABLE, CONSEQUENTIAL, OR SPECIAL, ARISING OUT OF OR IN
CONNECTION WITH THIS APPLIANCE.
If you think the appliance has failed or requires service within its warranty period, please
contact the Focus Electrics Customer Service Department at (866) 290-1851, or e-mail us at
service@focuselectrics.com. A receipt proving the original purchase date will be required for all
warranty claims, hand written receipts are not accepted. You may also be required to return
the appliance for inspection and evaluation. Return shipping costs are not refundable. Focus
Electrics is not responsible for returns lost in transit.
Valid only in USA and Canada
R
EPLACEMENT PARTS
Replacement parts, if available, may be ordered directly from Focus Electrics, LLC several
ways. Order online at www.focuselectrics.com, e-mail service@focuselectrics.com, over the
phone by calling (866)290-1851, or by writing to:
Focus Electrics, LLC
Attn: Customer Service
P. O. Box 2780
West Bend, WI 53095
To order with a check or money order, please first contact Customer Service for an order total.
Mail your payment along with a letter stating the model or catalog number of your appliance,
which can be found on the bottom or back of the appliance, a description of the part or parts
you are ordering, and the quantity you would like. Your check should be made payable to
Focus Electrics, LLC.
Your state/province’s sales tax and a shipping fee will be added to your total charge. Please
allow two weeks for processing and delivery.
This manual contains important and helpful information regarding the safe use and care of your
new Focus Electrics product. For future reference, attach dated sales receipt for warranty proof
of purchase and record the following information:
Date purchased or received as gift: _______________________________________________
Where purchased and price, if known: _____________________________________________
Item number and Date Code (shown bottom/back of product):___________________________

N
OTES

2010 Back To Basics®, une Marque de Focus Electrics, LLC.
www.focuselectrics.com
MIXER SMOOTHIE ELITE
™
Mode d’emploi
Enregistrez ce produit et les autres produits Focus Electrics sur notre site Internet :
www.registerfocus.com
Consignes de sécurité importantes .......................................................................... 2
Avant la Première Utilisation .................................................................................... 4
Utilisation de votre Mixer Smoothie Elite™ .............................................................. 4
Nettoyage de votre Mixer Smoothie Elite™ .............................................................. 6
Recettes ................................................................................................................... 7
Garantie ................................................................................................................... 9
CONSERVEZ CE MODE D’EMPLOI POUR UNE CONSULTATION ULTÉRIEURE

2
PRÉCAUTIONS IMPORTANTES
Pour empêcher toute blessure physique ou tout dommage matériel, lisez et
suivez toutes les consignes et mises en garde.
Lorsque vous utilisez des appareils électriques, les précautions de sécurité
élémentaires devraient toujours être respectées, notamment les précautions cidessous :
• Lisez toutes les instructions.
• Pour vous protéger contre tout le feu, la décharge électrique, ou la blessure,
n’immergez pas le cordon, les fiches ni aucune autre pièce électrique dans l’eau
ni dans tout autre liquide.
• Une surveillance rapprochée est nécessaire en cas d’utilisation d’un appareil
par des enfants ou en présence d’enfants.
• Débranchez l’appareil du secteur lorsque vous ne l’utilisez pas et avant de le
nettoyer. Laissez refroidir avant de mettre en place ou de retirer des pièces ainsi
qu’avant de procéder au nettoyage.
• N’utilisez aucun appareil dont le cordon ou la fiche sont endommagés, si
l’appareil a dysfonctionné ou s’il a été détérioré de quelque manière que ce soit.
Pour des renseignements sur les réparations, voir la page de garantie.
• L'utilisation des accessoires non recommandés par Focus Electrics risque de
provoquer le feu, la décharge électrique ou la blessure.
• N’utilisez pas cet appareil à l’extérieur.
• Ne laissez pas le cordon pendre depuis l’extrémité de la table ou du plan de
travail, ou ne le laissez pas entrer en contact avec une surface à haute
température.
• Ne placez pas l’appareil sur ou à proximité d’une gazinière chaude ou d’un
brûleur électrique, ou dans un four chaud.
• Pour débrancher l’appareil, tournez toute commande sur « OFF » puis retirez la
fiche de la prise murale.
• N’utilisez pas l’appareil pour un usage autre que celui pour lequel il a été conçu.
• Ne tentez pas de réparer cet appareil vous-même.
• Le cordon d’alimentation fourni est court pour réduire les risques qu’une
personne se prenne les pieds ou trébuche sur un cordon plus long.
• Des cordons de rallonge plus longs sont disponibles, mais vous devez faire
preuve de prudence lors de leur utilisation. Bien que l’utilisation d’un cordon de
rallonge ne soit pas recommandée, si vous devez en utiliser un, assurez-vous
que la puissance nominale indiquée pour le cordon de rallonge est égale ou
supérieure à celle de l’appareil. Si la fiche est raccordée à la terre, le cordon de
rallonge doit lui aussi proposer un raccordement à la terre. Pour éviter de tirer
sur le cordon, de trébucher ou de s’emmêler dedans, positionnez le cordon de
rallonge de sorte qu’il ne pende pas depuis l’extrémité du plan de travail, de la
table ou de toute zone où des enfants pourraient tirer dessus ou trébucher.

3
• Cet appareil est pourvu d’une fiche polarisée (une lame est plus large que
l’autre). Pour réduire le risque d’électrocution, cette fiche est conçue pour
s’encastrer dans une prise secteur polarisée dans un sens uniquement. Si la
fiche ne s’insère pas complètement dans la prise secteur, retournez la fiche. Si
elle ne s’encastre toujours pas, contactez un électricien qualifié. Ne tentez pas
de modifier la fiche de quelque manière que ce soit.
•
N’utilisez pas une prise secteur ou un cordon de rallonge si la fiche s’adapte
avec un jeu ou si la prise secteur ou le cordon de rallonge vous semblent
chauds.
•
Éteignez l’appareil avant de retirer le pichet à mixer de la base et avant de
placer le pichet à mixer sur la base.
•
Ne faites pas tourner le moteur sans que le pichet à mixer ait été correctement
fixé sur la base contenant le moteur ou lorsque le pichet à mixer est vide.
•
Maintenez les mains et les ustensiles (autres que le mélangeur inclus) à
l’extérieur du pichet à mixer pendant le mélange des ingrédients pour réduire le
risque de blessure grave ou de détérioration de l’appareil.
•
Les lames sont tranchantes ; manipulez-les avec précaution.
•
Utilisez toujours l’appareil avec le couvercle en place.
•
Lorsque vous mélangez des liquides chauds, retirez le cache du couvercle.
•
Pour réduire le risque de blessure, ne placez jamais l’ensemble de lames sur la
base sans que le pichet à mixer ait été correctement fixé.
•
Après avoir fait fonctionner le moteur en continu pendant trois minutes,
patientez au moins cinq minutes avant d’allumer à nouveau le moteur.
•
Pour une utilisation domestique uniquement.
CONSERVEZ CES CONSIGNES
Mélangeur
Base Motorisée
Cache du
Couvercle
Couvercle
Pichet à Mixer
Bouchon du
Mélangeur
Robinet
Joint en
Caoutchouc
Base de la
Lame

4
A
VANT LA PREMIÈRE UTILISATION
Veuillez vérifier la totalité de l’emballage avec attention avant de le jeter. Il est
possible que celui-ci contienne des accessoires.
Avant de procéder à l’assemblage de votre Mixer Smoothie Elite™ lavez toutes les
pièces, sauf la base motorisée à l’eau savonneuse chaude, rincez avec soin et
séchez les pièces. Dévissez et séparez le robinet pour le nettoyage (voir la section
Nettoyage de votre Mixer Smoothie Elite™). Pour prolonger la durée d’utilisation de
votre machine à smoothies, ne lavez pas les pièces au lave-vaisselle.
1. Positionnez le joint en caoutchouc sur la surface plane circulaire dans la base
de la lame.
2. En maintenant le pichet de mélange à l’envers, vissez le socle de la lame sur le
fond du pichet de mélange en faisant pivoter la base de la lame dans le sens
inverse des aiguilles d’une montre jusqu’à ce qu’elle soit serrée. Assurez-vous
que la base de la lame est serrée hermétiquement sur le pichet de mélange et
que le joint de caoutchouc est correctement comprimé entre le pichet de
mélange et la base de la lame. Placez l’anneau de verrouillage orange dans le
fond de l’assemblage contenant la lame jusqu’à ce qu’il se verrouille en place et
que l’anneau repose à plat au fond de l’assemblage de la lame.
3. Pression le couvercle au-dessus du pichet à mixer. Pression le cache
translucide au centre du couvercle ou placez le mélangeur à travers le centre du
couvercle si vous mélangez des liquides ou des boissons glacées.
4. Placez le pichet à mixer sur la base motorisée de sorte que le bas de la base de
la lame repose à plat sur la base motorisée.
5. Branchez le cordon d’alimentation. Votre machine à smoothies est maintenant
prête.
U
TILISATION DE VOTRE MIXER SMOOTHIE ELITE™
Boutons de Commande :
« PULSE » (Impulsion) – donne de courtes impulsions
de forte puissante à grande vitesse. Utilisez « PULSE »
(impulsion) pour commencer le mélange de la glace et
des autres ingrédients durs.
« OFF » (Arrêt) – éteint l’appareil.
« LOW/DISPENSE » (Lente/Distribuez) – fait
fonctionner l’appareil au ralenti. Utilisez cette vitesse
pour les 30 secondes initiales de mélange ainsi que
pour verser.
« HIGH » (Vitesse Rapide) - fait fonctionner l’unité à vitesse élevée. Utilisez cette
vitesse pour les 10 dernières secondes de mixage. N’utilisez pas cette vitesse pour
servir.
Pour préparer vos boissons glacées préférées, suivez les étapes ci-dessous.
1. AJOUTER LES LIQUIDES – Ajoutez n’imoprte quelle combinaison d’ingrédients
jusqu’au niveau des « LIQUIDS » (liquides) au-dessous de « SERVES 2 » (2
portions) ou « SERVES 4 » (4 portions) sur le pichet à mixer. Par liquides, nous
entendons tout ingrédient mou comme les fruits, le lait, les jus de fruits, les
suppléments à base d’herbes aromatiques ou le yaourt dans toute combinaison
dont vous pensez qu’elle pourrait être savoureuse.

5
2. AJOUTER LA GLACE – Ajoutez la glace ou les ingrédients glacés jusqu’à ce
que le niveau total atteigne la ligne des « FROZEN INGREDIENTS »
(ingrédients glacés) sur le côté du pichet à mixer. Les ingrédients glacés
incluent la glace, les fruits glacés, la yaourt, la crème glacée, etc.
3. MÉLANGER – Couvercle et mélangeur en place (utilisez-le
comme indiqué ci-dessous) dans le trou du couvercle, donnez 2
ou 3 impulsions au mélange en apuyant sur le bouton
« PULSE » (impulsion). Appuyez ensuite sur le bouton pour
sélectionner « LOW » (faible) pendant 30 secondes, ou jusqu’à
ce que les ingrédients soient pour la plupart mélangés. Faites
fonctionner l’appareil sur « HIGH » (élevé) pendant les 10
dernières secondes de mixage.
UTILISATION DU MÉLANGEUR – Lorsque vous utilisez le
mélangeur et lorsque l’appareil fonctionne, mélangez ou faites
pivoter le Mélangeur dans le sens inverse des aiguilles d’une
montre de sorte que le Mélangeur râpe ou entre en contact avec les parois du
pichet à mixer. L’opération de mélange poussera les ingrédients vers les lames
de mixage.
SERVIR – Pour servir le smoothie, appuyez sur le bouton « LOW/DISPENSE »
(lente/distribuez), placez une tasse sous le robinet puis appuyez sur le levier.
Mélangez le contenu du pichet à mixer avec le mélangeur tout en versant les
smoothies épais. Au fur et à mesure que le niveau de smoothie atteint le bas du
pichet de mélange, il est possible qu’un mélange épais cesse de couler. Ajoutez
quelques cuillers à soupe de liquide pour accélérer le débit. Lorsque le pichet à
mixer est vide, positionnez l’appareil sur « OFF » (arrêt) et dégustez votre
boisson. Vous pouvez continuer à préparer des smoothies l’un après l’autre,
mais assurez-vous de laisser la machine à smoothies reposer pendant 5
minutes après 3 minutes d’utilisation en continu.
•
Pour préparer un smoothie plus épais, ajoutez davantage.
•
Pour préparer un smoothie plus fluide, ajoutez davantage d’ingrédients liquides.

6
N
ETTOYAGE DE VOTRE MIXER SMOOTHIE ELITE
™
1. Éteignez l’appareil « OFF » (arrêt) et débranchez-le de la prise secteur.
2. Essuyez la base motorisée à l’aide d’un chiffon humide ou d’une éponge. Pour
éliminer les taches tenaces, utilisez un détergent de puissance moyenne non
abrasif.
3. Retirez l’ensemble de la lame et le joint en caoutchouc du pichet à mixer.
Dévissez et démontez le robinet. Lavez soigneusement toutes les pièces à
l’exception de la base motorisée à l’eau chaude savonneuse, rincez puis séchez
minutieusement. Pour prolonger la durée de vie de votre machine à smoothies,
ne lavez pas les pièces au lave-vaisselle.
NETTOYAGE DU ROBINET
1. Retirez le robinet du pichet à mixer en dévissant la totalité du robinet dans le
sens inverse des aiguilles d’une montre.
2. Retirez le bouchon de la structure du robinet en le dévissant dans le sens
inverse des aiguilles d’une montre.
3. Pincez le bouchon et la tige d’arrêt ensemble et faites glisser le levier pour le
sortir de la tige d’arrêt.
4. Retirez le ressort.
5. Retirez le bouchon d’arrêt et la tige d’arrêt en tirant sur l’extrémité en
caoutchouc du bouchon d’arrêt. Le bouchon et la tige d’arrêt sont serrés et n’ont
pas besoin d’être séparés.
6. Nettoyez toutes les pièces à l’eau savonneuse chaude, laissez sécher
complètement puis réassemblez selon l’ordre indiqué.
Levier
Bouchon
Bouchon
d’arrêt
Tige d’arrêt
Structure du
Robinet
Ressort

7
R
ECETTES
Instructions pour toutes les recettes : Versez les ingrédients liquides dans le pichet à
mixer. Ajoutez tous les ingrédients glacés. Appuyez sur « PULSE » (impulsion) deux
ou trois fois; puis mélangez en rélant l’appareil sur « LOW/DISPENSE »
(lente/distribuez) jusqu’à ce que le mélange soit homogène. Pendant que l’appareil
est en marche, déplacez le Mélangeur dans le sens inverse des aiguilles d’une
montre pour faciliter le mélange. Servez immédiatement. Convient pour environ 3 à
5 portions.
SMOOTHIE SUPRÊME FRAISE
BANANE
1 tasse Nectar de fraise ou jus de
pomme
1 tasse Lait
1 Banane surgelée (morceaux)
2½ tasses Fraises surgelées
1 tasse Yaourt à la fraise
SMOOTHIE MANGO TANGO
1 tasse Jus d’ananas
1 tasse Jus d’orange
½ Banane surgelée (morceaux)
1 tasse Sorbet à l’ananas
1½ tasses Tranches de mangue
surgelée
SMOOTHIE AUX FRUITS ROUGES
1 tasse Jus de pomme
1½ tasses Limonade
1 tasse Framboises surgelées
½ tasse Fraises surgelées
1 tasse Sorbet à la framboise
SMOOTHIE À LA CRÈME DE
FRAMBOISE
1 tasse Jus d’orange
1 tasse Yaourt à la framboise
1 tasse Yaourt glacé à la vanille
½ Banane surgelée (morceaux)
1½ tasses Framboises surgelées
SMOOTHIE ORANGE BANANE À LA
CRÈME
1 tasse Lait
1½ tasses Jus d’orange
½ cuiller à café Vanille
½ Banane surgelée (morceaux)
1 tasse Yaourt glacé à la vanille
½ tasse Yaourt à l’orange
3 cuillers à soupe Concentré de jus
d’orange
SMOOTHIE COUCHER DE SOLEIL À
LA FRAISE
2½ tasses Jus d’orange
1½ tasses Framboises surgelées
1 tasse Sorbet à la framboise
1 tasse Glace
SMOOTHIE CITRON LOUIE
2 tasses Limonade
1 tasse Yaourt au citron
1½ tasses Morceaux d’ananas surgelé
1 tasse Sorbet à l’ananas
1 tasse Glace
SMOOTHIE RAFRAÎCHISSANT À LA
PÊCHE
2 tasses Nectar de pêche ou jus de
pomme
1 tasse Yaourt glacé à la vanille
½ Banane
1 tasse Yaourt à la pêche
1½ tasses Tranches de pêches
surgelées
SMOOTHIE SUBLINE DE BANANE AU
CITRON VERT
2 tasses Jus de citron vert
1 Banane
1 tasse Sorbet au citron vert
3 cuillers à soupe Lait de coco
1 tasse Glace
SMOOTHIE PIA COLADA
5 cuillers à soupe Lait de coco
2½ tasses Jus d’ananas
½ tasse Crème glacée à la vanille
½ Banane surgelée (morceaux)
1½ tasses Morceaux d’ananas surgelé

8
SURPRISE SMOOTHIE SURPRISE FRAISE CITRON
2 tasses Limonade
2 tasses Fraises surgelées
1 tasse Yaourt à la fraise
SMOOTHIE VACANCES HAWAÏENNES
1 tasse Nectar de fruits de la passion
1 tasse Nectar de goyave
1 tasse Sorbet à l’orange
½ tasse Fraises surgelées
½ tasse Tranches de mangue surgelée
4 cuillers à soupe Lait de coco
1 tasse Yaourt à la fraise
½ tasse Banane surgelée (morceaux)
SMOOTHIE FRAISE ORANGE À FAIBLE TENEUR EN MATIÈRE GRASSE
2 tasses Fraises
½ tasse Jus d’orange
1 tasse Lait écrémé
1 tasse Yaourt sans matière grasse nature
1 tasse Glace
LIMONADE FRAICHE À LA PASTÈQUE
2 tasses Pastèque (pulpe, pas de peau)
3 oz. Concentré de limonade glacée (½ d’une cannette de 6 oz.)
1 tasse Soda au citron/citron vert
1 cuiller à café Sirop de grenadine
1-2 tasses Glace, jusqu’à la consistance souhaitée
*Ajouter de l’eau si nécessaire
DÉLICE AU CHOCOLAT
3.5 oz. Paquet de mélange au chocolat instané pour pâtisserie
1½ tasses Lait
1½ tasses Glace
1 Banane

9
L5735A 02/10 Back To Basics®, une Marque de Focus Electrics, LLC. Imprimé en Chine
G
ARANTIE DU PRODUIT
Garantie limitée de 1 an de l’appareil
Focus Electrics, LLC (« Focus Electrics ») garantit cet appareil contre tout défaut de pièces et
de main d’ œuvre pendant un (1) an à compter de la date d’achat d’origine avec un justificatif
d’achat, à condition que l’appareil soit utilisé et entretenu conformément aux recommandations
du Mode d’emploi fourni. Toute pièce défaillante de l’appareil sera réparée ou remplacée sans
frais à la discrétion de Focus Electrics. La présente garantie s’applique pour une utilisation
domestique à l’intérieur uniquement.
Cette garantie ne prend pas en charge les dégâts, y compris la décoloration, subis par toute
surface antiadhésive de l’appareil. Cette garantie est nulle et non avenue, tel que défini
uniquement par Focus Electrics si l’appareil est détérioré par accident, mauvaise utilisation,
utilisation abusive, négligence, rayure, ou si l’appareil est détérioré de quelque manière que ce
soit.
LA PRÉSENTE GARANTIE ANNULE ET REMPLACE TOUTES LES GARANTIES INDUITES,
NOTAMMENT LES GARANTIES DE COMMERCIALISATION, D’ADAPTATION À UN USAGE
PARTICULIER, DE PERFORMANCE, OU AUTRE, QUI SONT ICI EXCLUES. EN AUCUN
CAS FOCUS ELECTRICS NE POURRA ÊTRE TENUE POUR RESPONSABLE DE TOUT
DÉGÂT, QUE CELUI-CI SOIT DIRECT, INDIRECT, SECONDAIRE, PRÉVISIBLE, INDUIT OU
PARTICULIER, RÉSULTANT DE OU EN RAPPORT AVEC CET APPAREIL.
Si vous pensez que cet appareil est défectueux ou a besoin d’être réparé pendant la durée de
sa garantie, veuillez contacter le Service clientèle de Focus Electrics au (866) 290 –1851 ou
nous adresser un e-mail à service@focuselectrics.com
. Les frais d’expédition de retour sont
non remboursables. Un justificatif prouvant la date d’achat d’origine sera exigé pour toutes les
demandes de prise en charge dans le cadre de la garantie, les factures manuscrites ne sont
pas acceptées. Focus Electrics n’est pas responsable pour les retours perdus pendant le
transport.
Valable uniquement aux USA et au Canada
P
IÈCES DE RECHANGE
Les pièces de rechange, lorsque celles-ci sont disponibles, peuvent être commandées
directement auprès de Focus Electrics en ligne sur www.focuselectrics.com, ou vous pouvez
téléphoner ou envoyer un e-mail au service entretien au numéro/à l’adresse e-mail ci-dessus,
ou vous pouvez nous écrire à :
Focus Electrics, LLC
Attn : Service clientèle
P. O. Box 2780
West Bend, WI 53095
Assurez-vous d’inclure le numéro de catalogue/modèle de votre appareil (situé sur le
dessous/à l’arrière de l’appareil) accompagné d’une description et de la quantité de la pièce
que vous souhaitez commander. Ajoutez également votre nom, votre adresse postale, un
numéro de carte Visa/MasterCard, une date d’expiration ainsi que le nom tel qu’il apparaît sur
la carte. Vous pouvez payer par chèque à l’ordre de Focus Electrics, LLC. Appelez le Service
clientèle pour obtenir le montant de l’achat. La taxe de vente de votre état ainsi que des frais
d’expédition/de traitement seront ajoutés au total de la facture. Veuillez patienter deux (2)
semaines pour la livraison.
Ce manuel contient des informations importantes et utiles concernant l’utilisation sans danger et l’entretien
de votre nouveau produit Focus Electrics. Pour une consultation ultérieure, fixez le ticket de caisse daté pour
servir de justificatif d’achat et inscrivez les informations suivantes :
Date d’achat ou de réception en cadeau : _______________________________________________
Lieu d’achat et prix, si connus : _____________________________________________
Numéro de l’article et Code de date (dessous/arrière de l’appareil) :___________________________

N
OTES

2010 Back To Basics®, una Marca de Focus Electrics, LLC.
www.focuselectrics.com
LICUADORA SMOOTHIE
ELITE
™
Manual de Instrucciones
Registre este y otros productos Focus Electrics a través de nuestro sitio web.
www.registerfocus.com
Precauciones importantes ........................................................................................ 2
Antes de Usar por Primera Vez ................................................................................ 3
Uso de la Licuadora Smoothie Elite™ ...................................................................... 4
Limpieza de la Licuadora Smoothie Elite™ .............................................................. 5
Recetas .................................................................................................................... 6
Garantía ................................................................................................................... 8
CONSERVE ESTE MANUAL DE INSTRUCCIONES PARA FUTURAS
CONSULTAS

2
PRECAUCIONES IMPORTANTES
Para evitar lesiones personales o daños materiales, lea y acate todas las
instrucciones y advertencias.
Al utilizarse artefactos electrodomésticos, siempre deben acatarse las precauciones
básicas de seguridad incluyendo las siguientes:
• Lea todas las instrucciones en este manual.
• Para protegerse contra fuego, descargas electricas, o lesiones personales no
sumerja el cable, enchufes, u otras partes eléctricas en agua u otros líquidos.
• Debe estarse muy pendiente de los niños cuando se use un artefacto
electrodoméstico sea usado por ellos o cerca de ellos.
• Desenchúfelo del tomacorriente cuando no esté en uso y antes de limpiarlo.
Permita que se enfríe antes de colocarle o quitarle piezas o antes de limpiarlo.
• No opere ningún artefacto electrodoméstico con un cordón eléctrico o enchufe
dañado o si el artefacto electrodoméstico funciona mal o ha sido dañado de
cualquier manera. Para información relativa al servicio de reparaciones vea la
página de garantías.
• El uso de accesorios no recomendados por Focus Electrics puede ser causa de
fuego, descargas electricas, o lesiones personales.
• No use este artefacto electrodoméstico al aire libre.
• No deje que el cordón eléctrico cuelgue sobre el borde de la mesa o encimera,
ni que toque superficies calientes.
• No lo coloque sobre o cerca de un calentador eléctrico o a gas, o en un horno
caliente.
• Para desconectar, coloque cualquier control en la posición "OFF" (apagado), y
luego desenchufe del tomacorriente.
• No utilice el artefacto electrodoméstico para usos distintos del indicado.
• No trate de reparar este artefacto electrodoméstico usted mismo.
• Se suministra un cordón eléctrico corto para reducir los riesgos que resultan de
enredarse o tropezarse con un cordón eléctrico más largo.
• Hay disponibles cables de extensión más largos, pero debe tenerse cuidado al
usarlos. Aunque no se recomienda utilizar cables de extensión, si debe utilizar
uno, asegúrese de que la capacidad eléctrica indicada del cable de extensión
sea igual o mayor a la del artefacto. Si el enchufe es del tipo conectado a tierra,
el cable de extensión deberá ser un cordón eléctrico de 3 hilos con conexión a
tierra. A fin de impedir lesiones que resulten del halar, tropezarse o enredarse
en el mismo, coloque el cable de extensión de tal modo que no cuelgue del
borde de un mostrador, mesa u otra superficie donde pueda ser halado por
niños o se pueda tropezar con él.
• Este artefacto tiene un enchufe polarizado (una clavija es más ancha que la
otra). Para reducir el riesgo de descarga eléctrica, este enchufe está diseñado
para encajar de una sola manera en un tomacorriente polarizado. Invierta el
enchufe si éste no encaja completamente en el tomacorriente o en el cable de
extensión. Si todavía no encaja, póngase en contacto con un electricista
calificado. No trate de modificar el enchufe de manera alguna.
• No use un tomacorriente o cable de extensión en el cual el enchufe calza
flojamente, o si el tomacorriente o el cable de extensión se calientan.

3
• Apague la máquina antes de retirar la jarra de la licuadora de la base y antes de
volver a colocarla sobre la base.
• No opere el motor sin la jarra de la licuadora debidamente conectada a la base
del motor o cuando la jarra de la licuadora esté vacía.
• Mantenga las manos y utensilios (excepto la varilla de mezclar incluida) fuera de
la jarra de la licuadora al licuar ingredientes para reducir el riesgo de lesiones
graves a personas o daños a la máquina.
• Las cuchillas son afiladas; manipúlelas con cuidado.
• Siempre haga funcionar el artefacto electrodoméstico con la tapa puesta
• Al licuar líquidos calientes, retire el tapón de la tapa.
• Para reducir el riesgo de lesiones, nunca coloque las cuchillas del ensamble del
cortador en la base sin la jarra de la licuadora correctamente colocada.
• Después de operar el motor continuamente durante tres minutos, espere al
menos cinco minutos antes de volver a operar el motor de nuevo.
• Evite el contacto con partes en movimiento.
• Sólo para uso doméstico.
CONSERVE ESTAS INSTRUCCIONES
ANTES DE USAR POR PRIMERA VEZ
Sírvase revisar con cuidado todo el material de empaque antes de desecharlo.
El material de empaque contiene muchas partes accesorias.
Antes de ensamblar la licuadora Smoothie Elite™, lave todas sus partes, excepto la
base del motor, en agua jabonosa caliente, enjuáguelas a fondo y séquelas.
Desenrosque y desmonte la válvula para limpiarla (vea la sección Limpieza de la
licuadora Smoothie Elite™). Para prolongar la vida de la Licuadora Smoothie Elite™,
no lave partes en el lavavajillas.
Varilla de Mezclar
Base del Motor
Tapón de la Tapa
Tapa
Jarra de la Licuadora
Tapón de la Licuadora
Válvula de Dispensar
Empaquetadura de Goma
Base de la Cuchilla

4
1. Coloque la empaquetadura de goma sobre la superficie llana circular en la base
de la cuchilla.
2. Manteniendo la jarra de la licuadora volteada cara abajo, atornille la base de la
cuchilla al fondo de la jarra de la licuadora enroscando la base en dirección
opuesta a las agujas del reloj hasta quedar apretada. Asegúrese de que la
base de la cuchilla esté bien apretada a la jarra de la licuadora y que la
empaquetadura de goma esté correctamente comprimida entre la jarra y la
base de la cuchilla. Coloque el anillo de seguro anaranjado en la parte inferior
del ensamble de la cuchilla hasta que calce en su sitio y quede plano contra el
fondo del ensamble de la cuchilla.
3. Cierre la tapa en la parte superior de la jarra de la licuadora. Cierre el tapón
transparente en el centro de la tapa o coloque la varilla de mezclar a través del
centro de la tapa si va a licuar líquidos o bebidas congeladas.
4. Coloque la jarra de la licuadora sobre la base del motor de modo que el fondo
de la base de la cuchilla quede bien asentada sobre dicha base del motor.
5. Enchufe el cordón eléctrico. La Licuadora Smoothie Elite™ está ahora lista
para usarse.
U
SO DE LA LICUADORA SMOOTHIE ELITE
™
BOTONES DE CONTROL:
“PULSE” (pulsador) - da estallidos cortos de
potencia a alta velocidad. Use “PULSE” (pulsador)
para comenzar a licuar hielo y otros ingredientes
duros.
“OFF” (apagado) - apaga la máquina.
“LOW/DISPENSE” (baja/servir) - opera la unidad a
baja velocidad.Use esta velocidad los primeros 30
segundos de mezclado al igual que para servir.
“HIGH” (alta) – opera la unidad a alta velocidad.
Utilice esta velocidad para los 10 segundos finales
del mezclado. No utilice esta velocidad para servir.
Para preparar su bebida congelada favorita, siga los siguientes pasos.
1. AÑADA LÍQUIDOS – Añada cualquier combinación de ingredientes líquidos
hasta la marca “LIQUIDS” (líquidos) bajo “SERVES 2” (sirve 2) o “SERVES 4”
(sirve 4) localizada en la jarra de la licuadora. Los líquidos incluyen cualquier
ingrediente suave como frutas, leche, zumos de fruta, suplementos herbarios o
yogur en cualquier combinación que usted piense será sabrosa.
2. AÑADA HIELO – Agregue hielo o ingredientes congelados hasta que el nivel
total alcance la línea “FROZEN INGREDIENTS” (ingredientes congelados) en el
lado de la jarra de la licuadora. Los ingredientes congelados incluyen hielo,
frutas congeladas, yogur congelado, helados, etc.
3. LICUE LA MEZCLA – Con la tapa puesta y la varilla de mezclar (usada como se
indica abajo) colocada en el agujero en la tapa, pulse la mezcla 2 o 3 veces
presionando el botón “PULSE” (pulsador). Luego pulse el botón a “LOW” (baja
velocidad) durante 30 segundos, o hasta que los ingredientes estén
prácticamente mezclados. Opere el artefacto a alta velocidad (“HIGH”) durante
los 10 segundos finales del mezclado.

5
OPERACIÓN CON LA VARILLA DE MEZCLAR – Cuando se
esté usando y mientras la máquina está funcionando, agite o
rote la Varilla de Mezclar en dirección contraria a las agujas
del reloj de modo que la misma raspe o haga contacto con los
lados de la jarra. Esta operación de agitación forzará los
ingredientes dentro de las cuchillas de mezclado.
4. SIRVA – Para servir el batido de frutas, pulse el botón
“LOW/DISPENSE” (baja/servir), coloque una taza debajo de la
válvula y presione la palanca de la válvula hacia abajo.
Remueva el contenido en la jarra de la licuadora con la varilla
de mezclar mientras esté sirviendo los batidos de frutas
espesos. Cuando el nivel del batido de frutas alcanza el fondo de la jarra de la
licuadora, una mezcla espesa puede dejar de dispensarse. Añada unas
cuantas cucharadas de líquido para aumentar el flujo. Cuando la jarra de la
licuadora quede vacía, apague la máquina “OFF” y disfrute su batido. Puede
seguir preparando batidos congelados de frutas uno tras otro, pero asegúrese
de darle a la Licuadora Smoothie Elite™ un descanso de 5 minutos después de
3 minutos de uso continuo.
•
Para hacer un batido de frutas más espeso, añada más ingredientes
congelados.
•
Para hacer un batido de frutas menos espeso, añada más ingredientes
líquidos.
L
IMPIEZA DE LA LICUADORA SMOOTHIE ELITE
™
1. Coloque el interruptor en la posición “OFF” (apagado) y desenchufe del
tomacorriente.
2. Limpie la base del motor con un paño húmedo o esponja. Para retirar puntos
obstinados, use un producto de limpieza suave, no abrasivo.
3. Retire el ensamble de la cuchilla y la empaquetadura de goma de la jarra de la
licuadora. Desatornille y desmonte la válvula de dispensar. Con cuidado lave
todas las partes excepto la base del motor en agua jabonosa caliente, enjuague
y seque a fondo. Para prolongar la vida de la Licuadora Smoothie Elite™, no
lave partes en el lavavajillas.
LIMPIEZA DE LA VÁLVULA DE DISPENSAR
1. Retire la válvula de la jarra de la licuadora desenroscando la válvula entera en
dirección contraria a las agujas del reloj.
2. Retire la tapa del cuerpo de la válvula desenroscándola en dirección contraria a
las agujas del reloj.
3. Apriete la tapa y el tapón juntos y deslice la palanca para sacarla del pasador
del tapón.
4. Retire el muelle.
5. Retire el tapón y el pasador de tapón tirando el borde de goma del tapón. El
tapón y el pasador están fuertemente unidos y no necesitan separarse.
6. Limpie todas las partes en agua jabonosa caliente, permita que se sequen a
fondo y reármelas en el orden mostrado.

6
R
ECETAS
Instrucciones para todas las recetas: Vierta los ingredientes líquidos en la jarra de
la licuadora. Añada todos los ingredientes congelados. Pulsar “PULSE” (pulsar)
dos o tres veces; entonces licue con el ajuste “LOW/DISPENSE” (baja/servir) hasta
que la mezcla quede homogénea. Mientras la máquina está funcionando, mueva la
Varilla de Mezclar alrededor en dirección contraria a las agujas del reloj para ayudar
a la mezcla. Sirva inmediatamente. Prepara 3-5 porciones.
BATIDO DE FRUTAS SUPREMO DE
PLÁTANO Y FRESA
1 taza Néctar de fresa o jugo de
manzana
1 taza Leche
1 Plátano congelado (trozos)
2½ tazas Fresas congeladas
1 taza Yogur de fresa
BATIDO DE FRUTAS DE TANGO DE
MANGO
1 taza Jugo de piña
1 taza Jugo de naranja
½ Plátano congelado (trozos)
1 taza Sorbete de piña
1 ½ tazas Rebanadas de mango
congeladas
BATIDO DE FRUTAS DE REMOLINO
DE BAYA
1 taza Jugo de manzana
1 ½ tazas Limonada
1 taza Frambuesas congeladas
½ taza Fresas congeladas
1 taza Sorbete de frambuesa
BATIDO DE FRUTAS DE CREMA DE
FRAMBUESA
1 taza Jugo de naranja
1 taza Yogur de frambuesa
1 taza Yogur de vainilla congelado
½ Plátano congelado (trozos)
1 ½ tazas Frambuesas congeladas
Palanca
Tapa
Tapón
Pasador del
Tapón
Cuerpo de
la V
álvula
Muelle

7
BATIDO DE FRUTAS DE CREMA DE
PLÁTANO Y NARANJA
1 taza Leche
1 ½ tazas Jugo de naranja
½ cucharadita Vainilla
½ Plátano congelado (trozos)
1 taza Yogur de vainilla congelado
½ taza Yogur de naranja
3 cucharadas. Concentrado de jugo de
naranja
BATIDO DE FRUTAS SALIDA DEL
SOL DE FRAMBUESA
2½ tazas Jugo de naranja
1 ½ tazas Frambuesas congeladas
1 taza Sorbete de frambuesa
1 taza Hielo
BATIDO DE FRUTAS DE LIMÓN
LOUIE
2 tazas Limonada
1 taza Yogur de limón
1 ½ tazas Trozos de piña congelados
1 taza Sorbete de piña
1 taza Hielo
REFRESCANTE BATIDO DE FRUTAS
DE MELOCOTÓN
2 tazas Néctar de melocotón o jugo de
manzana
1 taza Yogur de vainilla congelado
½ Plátano
1 taza Yogur de melocotón
1 ½ tazas Rebanadas de melocotón
congeladas
SUBLIME BATIDO DE FRUTAS DE
LIMÓN LIMA Y PLÁTANO
2 tazas Limonada de limón lima
1 Plátano
1 taza Sorbete de limón lima
3 cucharadas. Leche de coco
1 taza Hielo
BATIDO DE FRUTAS DE PIÑA
COLADA
5 cucharadas. Leche de coco
2½ tazas Jugo de piña
½ taza Helado de vainilla
½ Plátano congelado (trozos)
1 ½ tazas Trozos de piña congelados
BATIDO DE FRUTAS A LA
SORPRESA DE LIMÓN DE FRESA
2 tazas Limonada
2 tazas Fresas congeladas
1 taza Yogur de fresa
BATIDO DE FRUTAS DE
VACACIONES HAWAIANAS
1 taza Néctar de maracuyá
1 taza Néctar de guayaba
1 taza Sorbete de naranja
½ taza Fresas congeladas
½ taza Rebanadas de mango
congeladas
4 cucharadas. Leche de coco
1 taza Yogur de fresa
½ taza Plátano congelado (trozos)
BATIDO DE FRUTAS DE NARANJA Y
FRESA DE BAJAS CALORÍAS
2 tazas Fresas
½ taza Jugo de naranja
1 taza Leche desnatada
1 taza Yogur natural sin grasa
1 taza Hielo
LIMONADA CON SANDÍA
2 tazas Sandía (pulpa, sin cáscara)
3 onzas Limonada concentrada
congelada (½ de una lata de 6 onzas)
1 taza Soda de limón/lima
1 cucharaditas Jarabe de granadina
1-2 tazas Hielo, hasta la consistencia
deseada
*Agregue agua si fuese necesario
CONVITE DE CHOCOLATE
3 ½ onzas Paquete de mezcla
instantánea de budín de chocolate
1 ½ tazas Leche
1 ½ tazas Hielo
1 Plátano

8
L5735A 02/10 Back To Basics®, una Marca de Focus Electrics, LLC. Impreso en China
G
ARANTÍA DEL PRODUCTO
Garantía limitada de 1 año del artefacto electrodoméstico
Focus Electrics, LLC (“Focus Electrics”) garantiza que este aparato no presentará fallas de
material ni fabricación durante un (1) año a partir de la fecha original de compra con prueba de
dicha compra, siempre y cuando el aparato sea operado y mantenido tal como se indica en el
manual de instrucciones provisto. Toda pieza del aparato que presente fallas será reparada o
reemplazada sin costo alguno a criterio de Focus Electrics. Esta garantía rige solamente para
el uso domestico dentro de la casa.
Esta garantía no cubre ningún daño, incluyendo la decoloración, de superficie antiadherente
alguna del aparato electrodoméstico. Esta garantía es nula y sin valor, según lo determine
exclusivamente Focus Electrics si el artefacto electrodoméstico es dañado a causa de
accidente, mal uso, abuso, negligencia, rayaduras, o si el artefacto electrodoméstico es
cambiado de algún modo.
ESTA GARANTÍA REEMPLAZA A TODAS LAS DEMÁS GARANTÍAS IMPLÍCITAS,
INCLUYENDO AQUÉLLAS DE COMERCIABILIDAD, IDONEIDAD PARA UN FIN O USO EN
PARTICULAR, DESEMPEÑO, U OTROS TIPOS, LAS CUALES QUEDAN EXCLUIDAS
MEDIANTE EL PRESENTE DOCUMENTO. FOCUS ELECTRICS RECHAZA TODA
RESPONSABILIDAD POR DAÑOS, YA SEAN DIRECTOS, INDIRECTOS, INCIDENTALES,
PREVISIBLES, CONSECUENTES O ESPECIALES QUE SURJAN DE ESTE APARATO
ELECTRODOMÉSTICO O GUARDEN RELACIÓN CON EL MISMO.
Si piensa que el artefacto electrodoméstico se ha dañado o requiere de servicio dentro de su
período de garantía, por favor póngase en contacto con el Departamento de Atención al
Cliente de Focus Electrics por el (866) 290-1851 o contáctenos por correo electrónico a la
service@focuselectrics.com. Los gastos de devolución no son reembolsables. Para todas las
reclamaciones de garantía, se requerirá un recibo que demuestra la fecha de compra original.
Los recibos escritos a mano no son aceptados. Focus Electrics no se hace responsable de las
devoluciones perdidas en tránsito.
Válido sólo en EE.UU. y Canadá
R
EPUESTOS
Las partes de repuestos, si están disponibles, pueden pedirse directamente en línea a Focus
Electrics en www.focuselectrics.com, o puede llamar o enviar un correo electrónico al
departamento de servicio al número telefónico o dirección de correo electrónico arriba
indicados, o escribiéndonos a:
Focus Electrics, LLC
Attn: Customer Service
P. O. Box 2780
West Bend, WI 53095
Cerciórese de incluir el número de catálogo/modelo del aparato electrodoméstico (situado en la
parte inferior/posterior de la unidad) así como la descripción y la cantidad de repuestos que
necesita. Junto con esta información, incluya su nombre, dirección postal, número de tarjeta
de crédito Visa o MasterCard, la fecha de vencimiento y el nombre tal como aparece en la
tarjeta. Los cheques pueden ser pagaderos a Focus Electrics, LLC. Llame al Departamento
de Atención al Cliente para obtener el monto de la compra. Se sumará al total el impuesto de
venta estatal que corresponda, más un cargo por despacho y procesamiento. La entrega tarda
dos (2) semanas.
Este manual contiene información importante y útil sobre el uso seguro y el cuidado de su nuevo producto
Focus Electrics. Para su propia referencia, archive aquí el recibo fechado que sirve de comprobante de
compra para la garantía, y anote la siguiente información:
Fecha en que compró o recibió la unidad como regalo: ____________________________________
Dónde se efectuó la compra y el precio, si lo sabe:
___________________________________________
Número y código de fecha del producto (aparece en la parte inferior/posterior de la unidad):
________

N
OTAS
 Loading...