

Page 1
2010 Back to Basics®, a Brand of Focus Electrics, LLC.
www.focuselectrics.com
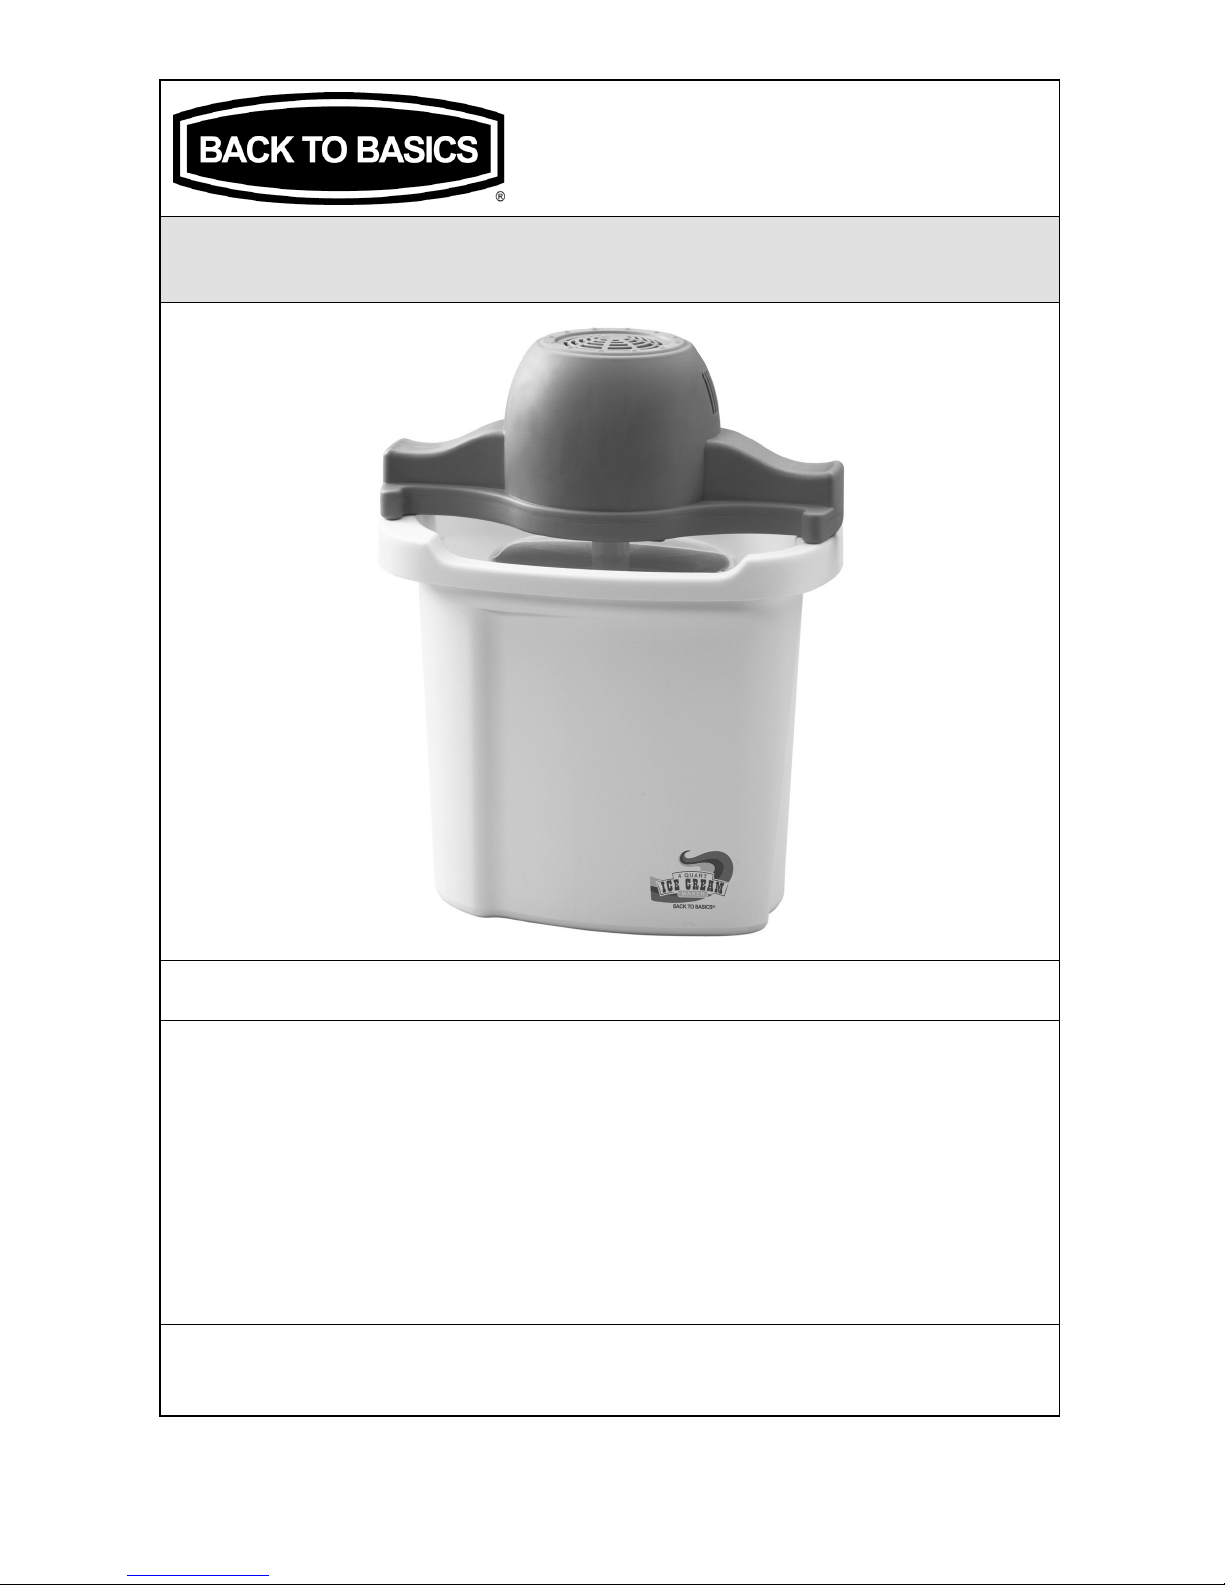
4 QT.
ICE
CREAM
MAKER
Instruction Manual
Register this and other Focus Electrics products through our website:
www.registerfocus.com
Important Safeguards ............................................................................................... 2
Before Using for the First Time ................................................................................ 3
Using Your 4 Qt. Ice Cream Maker .......................................................................... 3
Helpful Hints ............................................................................................................. 5
Cleaning Your 4 Qt. Ice Cream Maker ..................................................................... 6
Recipes .................................................................................................................... 6
Warranty ................................................................................................................... 9
SAVE THIS INSTRUCTION MANUAL FOR FUTURE REFERENCE
Page 2

2
IMPORTANT SAFEGUARDS
To prevent personal injury or property damage, read and follow all instructions
and warnings.
When using electrical appliances, basic safety precautions should always be
followed including:
• Read all instructions, including these important safeguards and the care and use
instructions in this manual.
• Do not touch hot surfaces. Use handles or knobs and hot pads or oven mitts.
• Always unplug from outlet when not in use and before cleaning. Allow to cool
before putting on or taking off parts and before cleaning.
• Close supervision is necessary when this appliance is used by or near children.
• Do not operate any appliance with a damaged cord or plug, after the appliance
malfunctions, or has been damaged in any manner. For service information see
warranty page.
• The use of accessory attachments not recommended by Focus Electrics may
cause fire, electric shock, or injury.
• Do not use this appliance outdoors.
• Do not let cord hang over the edge of the table or counter, or touch hot surfaces.
• Do not place on or near a hot gas or electric burner, or in a heated oven.
• To disconnect, turn control to “OFF,” then remove plug from wall outlet.
• Do not use appliance for other than intended use.
• To protect against electric shock, do not immerse cord, plugs, or other electric
parts in water or other liquids.
• Do not attempt to repair this appliance yourself.
• A short power-supply cord is provided to reduce risks resulting from becoming
entangled in or tripping over a longer cord.
• Longer extension cords are available, but care must be exercised in their use.
While use of an extension cord is not recommended, if you must use one,
ensure that the marked electrical rating of the extension cord is equal to or
greater than that of the appliance. If the plug is of the grounded type, the
extension cord must be a grounding-type 3-wire cord. To avoid pulling, tripping
or entanglement, position the extension cord so that it does not hang over the
edge of the counter, table or other area where it can be pulled on by children or
tripped over.
• This appliance has a polarized plug (one blade is wider than the other). To
reduce the risk of electric shock, this plug is intended to fit into a polarized outlet
only one way. If the plug does not fit fully into the outlet, reverse the plug. If it
still does not fit, contact a qualified electrician. Do not attempt to modify the plug
in any way.
Page 3
3
• Do not use an outlet or extension cord if the plug fits loosely or if the outlet or
extension cord feels hot.
• Avoid contact with moving parts.
• For household use only.
SAVE THESE INSTRUCTIONS
B
EFORE USING FOR THE FIRST TIME
Please check all packaging material carefully before discarding. Accessory
parts may be contained within the packaging material.
Wash the lid, freezing canister, and accessories in warm, soapy water, rinse
thoroughly and dry. Wipe the exterior of the motor unit with a damp cloth, if
necessary. Do NOT immerse the motor unit or cord in water or any other liquid.
U
SING YOUR 4 QT. ICE CREAM MAKER
1. Place the freezing canister, lid, and mixing paddle into the freezer for at least an
hour before making ice cream. Note: Do not freeze the freezing canister when
it is wet; always dry it thoroughly before freezing.
2. Prepare ingredients as directed in the recipe. For best results, prepare the ice
cream mixture the day before and chill overnight.
3. Pour the chilled ice cream mixture into the chilled freezing canister. Do not fill
the freezing canister above the “MAX” line, as the ice cream mixture will expand
during the freezing process.
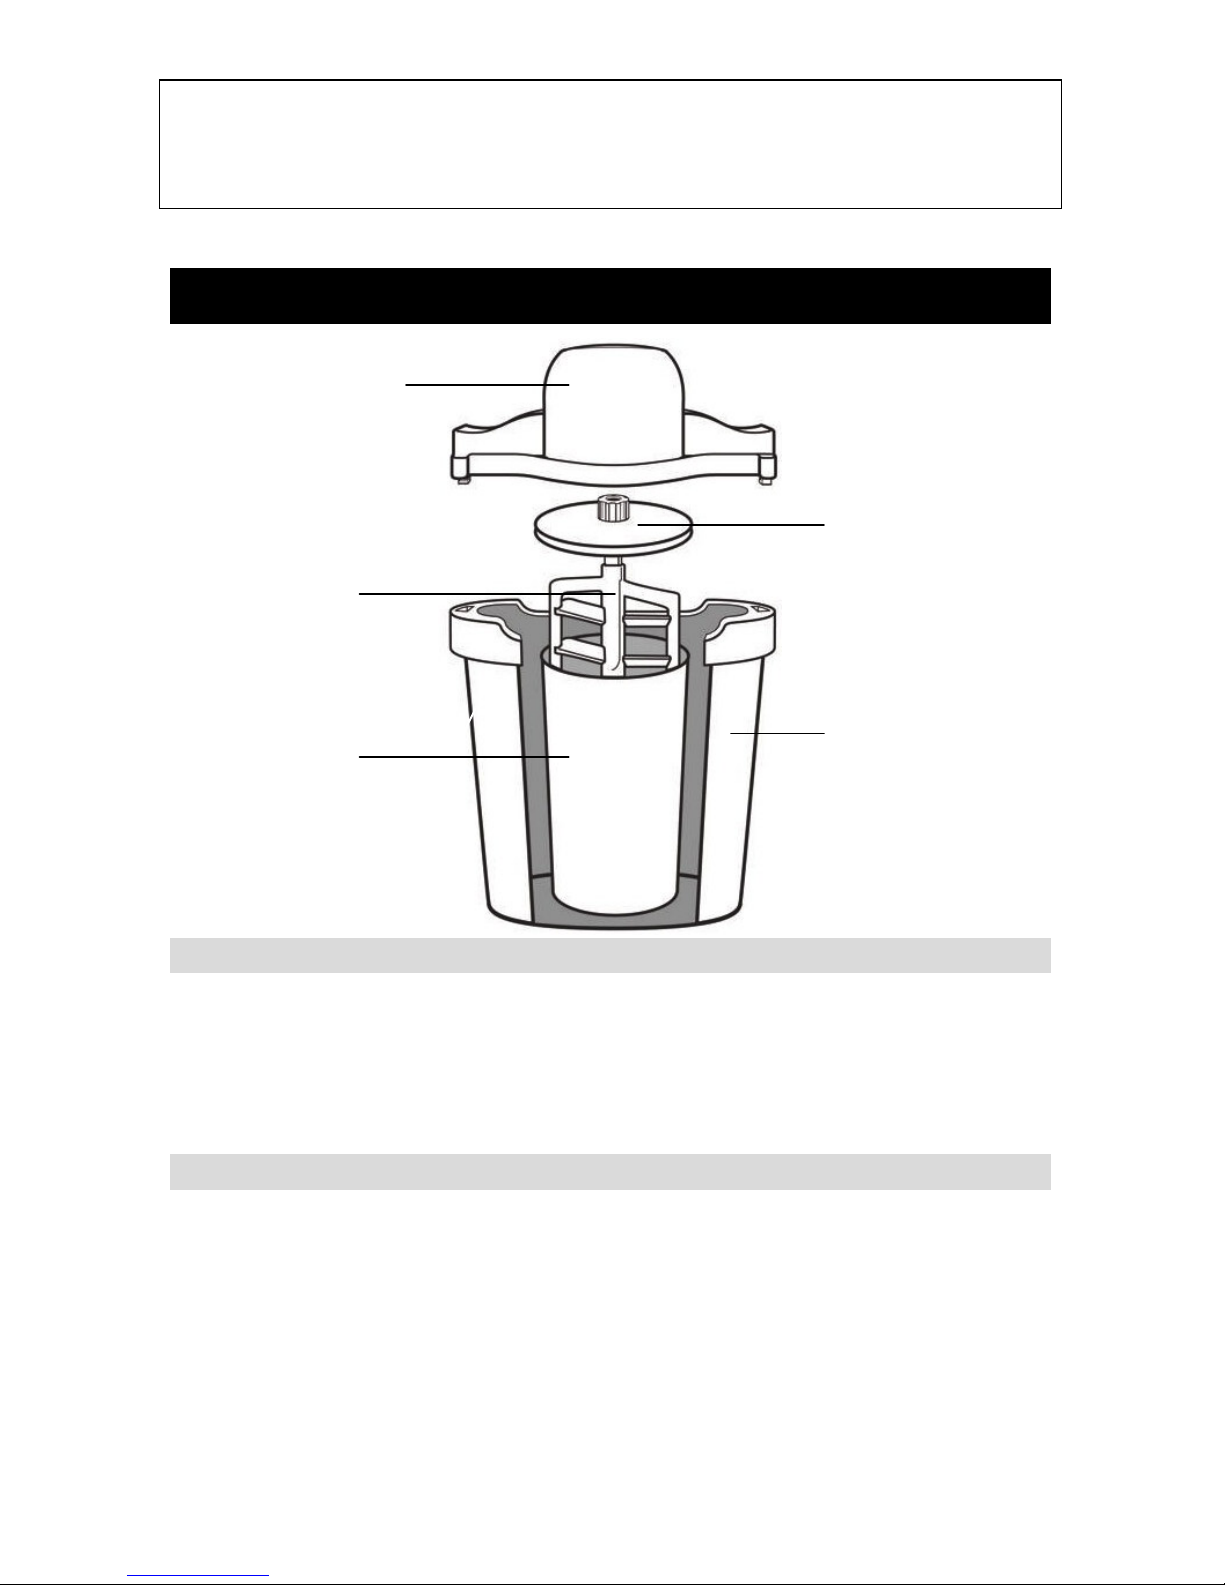
Freezing Canister
Mixing Paddle
Motor Unit
Lid
Plastic Bucket
Page 4

4
4. Insert the rounded end of the mixing paddle
into the center indentation of the
freezing canister
.
5. Place the lid on the freezing canister, inserting the mixing paddle post through
the center of the lid.
6. Place the freezing canister in the bucket, aligned with the centering hub in the
bottom of the bucket.
7. Align the mixing paddle post in the hole in the center of the motor unit. You may
need to rotate the freezing canister so the mixing paddle post fits into the motor.
Insert the tabs on the bottom of the motor unit into the holes on the sides of the
bucket. Twist counter-clockwise to lock the motor unit into place.
8. Plug the cord into a 120 volt, AC outlet ONLY.
9. Evenly distribute about 2 cups of crushed ice around the base of the freezing
canister. The ice should be small or coarsely crushed pieces, not cubes. Break
any large clumps apart. For each batch of ice cream, expect to use 1-2 small
bags of ice, about 4-8 pounds per batch.
10. Cover the first layer of ice evenly with about ¼ cup of rock salt.
11. Repeat steps 9 and 10, layering ice and salt until it reaches ½ inch below the
hole on the front of the bucket; do not over fill.
12. When the ice melts down, add more layers of ice and rock salt.
13. It will take approximately 50-60 minutes for the ice cream to be made. If the
motor stops before 30 minutes has elapsed, unplug the appliance and check for
one of the following issues.
• If the canister or mixing paddle stops prematurely, check for ice blocking
the canister from turning. If ice has caused the blockage, keep the
appliance unplugged and remove the blockage with a spatula.
• If the mixing paddle gets stuck, check the consistency of the ice cream
around the edges of the canister. If it is frozen, use a spatula to loosen it.
• Hard ingredients, such as chocolate chips and nuts, can cause the
mixing paddle to get stuck. Add these when ice cream is finished.
• If the mixing process is stopped prematurely by the user, the ice
cream will harden and restrict the movement of the mixing paddle.
14. The freezing process is generally complete after about 50-60 minutes. Unplug
the appliance from the outlet. Do not let the ice cream maker run for longer
than 60 minutes. If your ice cream maker stops after 30 minutes, but before 50
minutes have elapsed, check to see if your ice cream is done. If it’s not done,
unstick the mixing paddle and continue. Or, place ice cream in an airtight bowl
and place in the freezer for about an hour.
15. Unplug the motor unit and twist it clockwise to unlatch, place a hand on the
freezing canister, and remove the motor unit. If the freezing canister is not held
down, it may tip and salt water may seep into the ice cream.
16. Remove the freezing canister from the water and wipe it with a towel to remove
the salt and water.
17. Remove the lid, then the mixing paddle, scrape the excess ice cream off of the
mixing paddle with a spatula.
18. Serve ice cream immediately or transfer the ice cream to an air tight, freezersafe container and freeze. Note: Because homemade ice cream does not
contain the preservatives that store bought ice cream has, homemade ice cream
will not last for more than a week.
Page 5

5
H
ELPFUL HINTS
• Homemade ice cream recipes use only fresh ingredients; therefore, they do not
have the same consistency as store-bought ice creams which use gums and
preservatives to make them firmer. If you prefer a firmer consistency, place the
frozen ice cream in an airtight container and store it in the freezer for one or
more hours until the desired consistency is achieved. Homemade ice cream
generally has the consistency of a thick milkshake.
• For recipes that require pre-cooking, prepare the ice cream base mixture a day
ahead and store overnight in the refrigerator. This will allow it to completely cool
and increases the volume of ice cream produced.
• Ice cream base mixtures may be stored in the refrigerator up to 3 days prior to
making ice cream. Be sure to mix well before adding the mixture to the freezing
canister.
• The most common ingredients in ice cream are cream, sugar, eggs, and milk.
For the richest flavor and creamiest texture, use a cream containing the highest
percentage of fat. Heavy cream has the highest fat content (approximately
36%), Whipping Cream (30%), Coffee/Light Cream (18%), and Half & Half
(10%). Substitutions of milk products (both cream and milk) may be used to
reduce the fat content. However, this may change the taste, consistency, and
texture of the ice cream. When substituting ingredients, be sure the total liquid
measurement remains the same as the original recipe.
• Homemade ice cream will taste less sweet than the ice cream base mixture. If
your ice cream is not sweet enough, you can adjust the amount of sugar used,
keeping in mind that the sweetness will be lessened during the freezing
process.
• Artificial sweeteners may be used to replace sugar in a recipe. Add only to a
cooled ice cream base mixture as heat affects the sweetness.
• For recipes containing alcohol, manually add the alcohol after the completion of
the freezing cycle. Alcohol can adversely affect the freezing process if added
too early. Do not attempt to restart the motor to mix after adding alcohol.
• The ice cream base mixture must be liquid before freezing. Do not use stiff or
frozen ingredients such as whipped cream or frozen liquids or juices.
• Ice cream should be stored in airtight containers in the freezer. Do NOT store in
the freezing canister.
• If you would like to make your ice cream harden more, when churning is
finished, remove the mixing paddle and place the lid on the canister. Place in
the freezer for about half an hour to harden. Do not leave the canister in the
freezer for longer than half an hour.
• Or, leave the canister in the plastic bucket, remove the mixing paddle.
Add more ice to the ice/salt mixture. Cover with a towel and let it sit until
the ice cream is firm.
• Possible reasons for the ice cream mixture not freezing properly:
• The mixture was too warm. Ingredients, freezing canister, lid, and paddle
should be chilled prior to mixing and should be kept refrigerated until
ready to freeze in the ice cream maker.
• The proportion of ingredients was incorrect. Check your recipe carefully
and if substitutions were made, be sure the total liquid ingredients are
equal to the original recipe.
Page 6

6
• Using too little rock salt inhibits the freezing process. Using too much
rock salt can cause the mixture to freeze too quickly causing ice crystals
to form in the ice cream.
• Do not stop the churning process before 30 minutes have elapsed. This
can cause ice crystals to form and will cause a grainy texture.
C
LEANING YOUR 4 QT. ICE CREAM MAKER
1. Unplug the ice cream maker before cleaning.
2. Wipe the electric motor with a slightly damp cloth. Do NOT immerse the motor
unit in water or any other liquid.
3. Clean the plastic bucket thoroughly with a soapy sponge to remove salt-water
residue. Rinse thoroughly and dry.
4. Wash the freezing canister, lid, and mixing paddle with hot, soapy water. Rinse
and dry thoroughly. Do not replace the lid until the freezing canister is
completely dry.
5. Do not use any harsh or abrasive cleansers on any part of the ice cream maker.
Do not put any part of the ice cream maker in the dishwasher.
R
ECIPES
Quick and Easy Chocolate Ice Cream
1 cup Cocoa Powder
3 large cans Condensed Milk
6 cups Whole Milk
In a large mixing bowl, combine milk and condensed milk. In a separate dish,
mix enough hot water with the cocoa powder to create a consistency like melted
chocolate. Once the cocoa powder is a liquid, stir it into the milk mixture until
completely blended. Pour mixture into the freezing canister and follow the
directions in the “Using Your 4 Qt. Ice Cream Maker” section. Do not fill the
freezing canister above the “MAX” line, as the mixture will expand during
freezing.
Vanilla Ice Cream
2 cups Granulated Sugar
1½ tbsp Corn Starch
¼ tsp Salt
7 cups Milk
5 Eggs, beaten
1½ tbsp Vanilla
2¾ cups Heavy Cream
1½ cups Half and Half
Mix the sugar, corn starch, and salt in a large saucepan. Over medium heat,
slowly stir in the milk, stirring constantly. Very slowly add the beaten eggs and
continue to stir. Reduce heat to low and cook until mixture thickens slightly.
Slowly add vanilla, half and half, and heavy cream. Pour into a large glass bowl
and refrigerate for 2-4 hours or until mixture has chilled. Remove from
refrigerator. Pour mixture into the freezing canister and follow the directions in
the “Using Your 4 Qt. Ice Cream Maker” section. Do not fill the freezing canister
above the “MAX” line, as the mixture will expand during freezing.
Coffee Ice Cream
4 ½ cups Half and Half
6 cups Cream
4 ½ tbsp Instant Coffee Powder
2 ¼ cup Sugar
Combine all ingredients in a mixing bowl. Stir well until both sugar and instant
coffee powder are dissolved. Pour mixture into the freezing canister and follow
the directions in the “Using Your 4 Qt. Ice Cream Maker” section. Do not fill the
freezing canister above the “MAX” line, as the mixture will expand during
freezing.
Page 7

7
Cookie Dough Ice Cream
1 cup Chocolate Chip Cookie Dough
(crumbled into small pieces)
2 ¼ cups Sugar
6 cups Heavy Cream
1 cup Mini Chocolate Chips
6 large Eggs
3 cups Milk
Place the cookie dough and the chocolate chips in a separate bowl. Cover and
chill until cold. Whisk the eggs in a mixing bowl 1-2 minutes until light and fluffy.
Slowly mix in sugar, whisking until completely blended. Slowly add cream and
milk and whisk until blended. Pour mixture into the freezing canister and follow
the directions in the “Using Your 4 Qt. Ice Cream Maker” section. Do not fill the
freezing canister above the “MAX” line, as the mixture will expand during
freezing. When the mixture has finished churning, add cookie dough and
chocolate chips and stir in evenly.
Rocky Road Ice Cream
1 ¾ cup Granulated Sugar
½ tsp Salt
2 cups Milk
6 squares Semi-sweet Chocolate
2 cups Half and Half
6 cups Whipping Cream
1 tbsp Vanilla Extract
2 cups Mini Marshmallows
1 ½ cups Chocolate Chips
1 cup Chopped Pecans
Mix the milk and chocolate in a large saucepan. Over medium heat stir until the
chocolate is completely melted. Remove from heat and slowly add sugar and
salt, mixing well, until dissolved. Stir in the remaining ingredients except the
marshmallows, pecans, and chocolate chips, and then cover and refrigerate for
about 30 minutes or until mixture has chilled. Pour mixture into the freezing
canister and follow the directions in the “Using Your 4 Qt. Ice Cream Maker”
section. Do not fill the freezing canister above the “MAX” line, as the mixture will
expand during freezing. Add marshmallows, pecans, and chocolate chips after
the ice cream has finished churning and stir in evenly.
Sweet Corn Ice Cream
2 cups Heavy Cream
3 cups Milk
4 ears Sweet Corn, shucked, save
kernels, cut cobs into 1-inch pieces
1 tsp. Vanilla Extract
12 Egg Yolks
cup plus ½ cup Sugar
In a small saucepan over medium heat, combine the cream, milk, and corn
cobs. Bring to a simmer. Stir to dissolve sugar. Simmer for 10 minutes. Remove
corn cobs with a slotted spoon.
Whisk the egg yolks and cup sugar together in a bowl. Slowly whisk in the hot
cream mixture. Whisk until smooth. Return the mixture to the saucepan and stir
over low heat for 1 minute, until it coats the back of a spoon. Strain the custard
through a fine sieve. Stir in the vanilla extract.
In a small saucepan, bring 1 cup water, ½ cup sugar and the corn kernels to a
simmer, cooking until kernels are soft, about 10 minutes. Remove from heat and
add the corn mixture to the custard. Allow it to cool overnight in a bowl with a
piece of plastic wrap against the top to prevent a skin from forming. Pour
mixture into the freezing canister and follow the directions in the “Using Your 4
Qt. Ice Cream Maker” section. Do not fill the freezing canister above the “MAX”
line, as the mixture will expand during freezing.
Page 8

8
Strawberry Frozen Yogurt
4 cups Plain Yogurt
1 cups Heavy Whipping Cream
¾ cup Sugar
1 ½ cups Strawberries in syrup, thawed
Mix all ingredients in a large mixing bowl. Chill the mixture, covered, in the
refrigerator for an hour before freezing.
Pour mixture into the freezing canister and follow the directions in the “Using
Your 4 Qt. Ice Cream Maker” section. Do not fill the freezing canister above the
“MAX” line, as the mixture will expand during freezing.
Chocolate Hazelnut Gelato
4 cups Whole Milk
2 cup Heavy Cream
1 cup plus ½ cup Sugar
8 Egg Yolks
1 tsp. Vanilla Extract
1 cup Chocolate-Hazelnut Spread
1 cup Hazelnuts, crushed, optional
In a saucepan combine the milk, cream, and 1 cup sugar over medium heat.
Cook until the sugar dissolves, about 5 minutes.
Meanwhile, in a medium bowl whip the egg yolks with the remaining sugar using
an electric mixer until the eggs have become thick and pale yellow, about 4
minutes. Pour ½ cup of the warm milk and cream mixture into the egg mixture
and stir. Add this mixture back into the saucepan. Cook over very low heat,
stirring constantly, until the mixture becomes thick enough to coat the back of a
wooden spoon, about 7 to 10 minutes.
Place a strainer over a medium bowl and pour the warm custard mixture through
the strainer. Stir in the vanilla and hazelnut spread until it dissolves. Pour
mixture into the freezing canister and follow the directions in the “Using Your 4
Qt. Ice Cream Maker” section. Do not fill the freezing canister above the “MAX”
line, as the mixture will expand during freezing. To serve, scoop gelato into
serving bowls and top with hazelnuts.
Page 9

9
L5802A 01/10 Back To Basics®, a Brand of Focus Electrics, LLC. Printed in China
P
RODUCT WARRANTY
Appliance 1 Year Limited Warranty
Focus Electrics, LLC (“Focus Electrics”) warrants this appliance from failures in the material
and workmanship for one (1) year from the date of original purchase with proof of purchase,
provided the appliance is operated and maintained in conformity with the provided Instruction
Manual. Any failed part of the appliance will be repaired or replaced without charge at Focus
Electrics’ discretion. This warranty applies to indoor household use only.
This warranty does not cover any damage, including discoloration, to any non-stick surface of
the appliance. This warranty is null and void, as determined solely by Focus Electrics if the
appliance is damaged through accident, misuse, abuse, negligence, scratching, or if the
appliance is altered in any way.
THIS WARRANTY IS IN LIEU OF ALL IMPLIED WARRANTIES, INCLUDING WARRANTIES
OF MERCHANTABILITY, FITNESS FOR A PARTICULAR PURPOSE, PERFORMANCE, OR
OTHERWISE, WHICH ARE HEREBY EXCLUDED. IN NO EVENT SHALL FOCUS
ELECTRICS BE LIABLE FOR ANY DAMAGES, WHETHER DIRECT, INDIRECT,
INCIDENTAL, FORSEEABLE, CONSEQUENTIAL, OR SPECIAL, ARISING OUT OF OR IN
CONNECTION WITH THIS APPLIANCE.
If you think the appliance has failed or requires service within its warranty period, please
contact the Focus Electrics Customer Service Department at (866) 290-1851, or e-mail us at
service@focuselectrics.com. A receipt proving the original purchase date will be required for all
warranty claims, hand written receipts are not accepted. You may also be required to return
the appliance for inspection and evaluation. Return shipping costs are not refundable. Focus
Electrics is not responsible for returns lost in transit.
Valid only in USA and Canada
R
EPLACEMENT PARTS
Replacement parts, if available, may be ordered directly from Focus Electrics, LLC several
ways. Order online at www.focuselectrics.com, e-mail service@focuselectrics.com, over the
phone by calling (866)290-1851, or by writing to:
Focus Electrics, LLC
Attn: Customer Service
P. O. Box 2780
West Bend, WI 53095
To order with a check or money order, please first contact Customer Service for an order total.
Mail your payment along with a letter stating the model or catalog number of your appliance,
which can be found on the bottom or back of the unit, a description of the part or parts you are
ordering, and the quantity you would like. Your check should be made payable to Focus
Electrics, LLC.
Your state/province’s sales tax and a shipping fee will be added to your total charge. Please
allow two weeks for processing and delivery.
This manual contains important and helpful information regarding the safe use and care of your
new Focus Electrics product. For future reference, attach dated sales receipt for warranty proof
of purchase and record the following information:
Date purchased or received as gift: _______________________________________________
Where purchased and price, if known: _____________________________________________
Item number and Date Code (shown bottom/back of product):___________________________
Page 10

N
OTES
Page 11
2010 Back To Basics®, une Marque de Focus Electrics, LLC.
www.focuselectrics.com
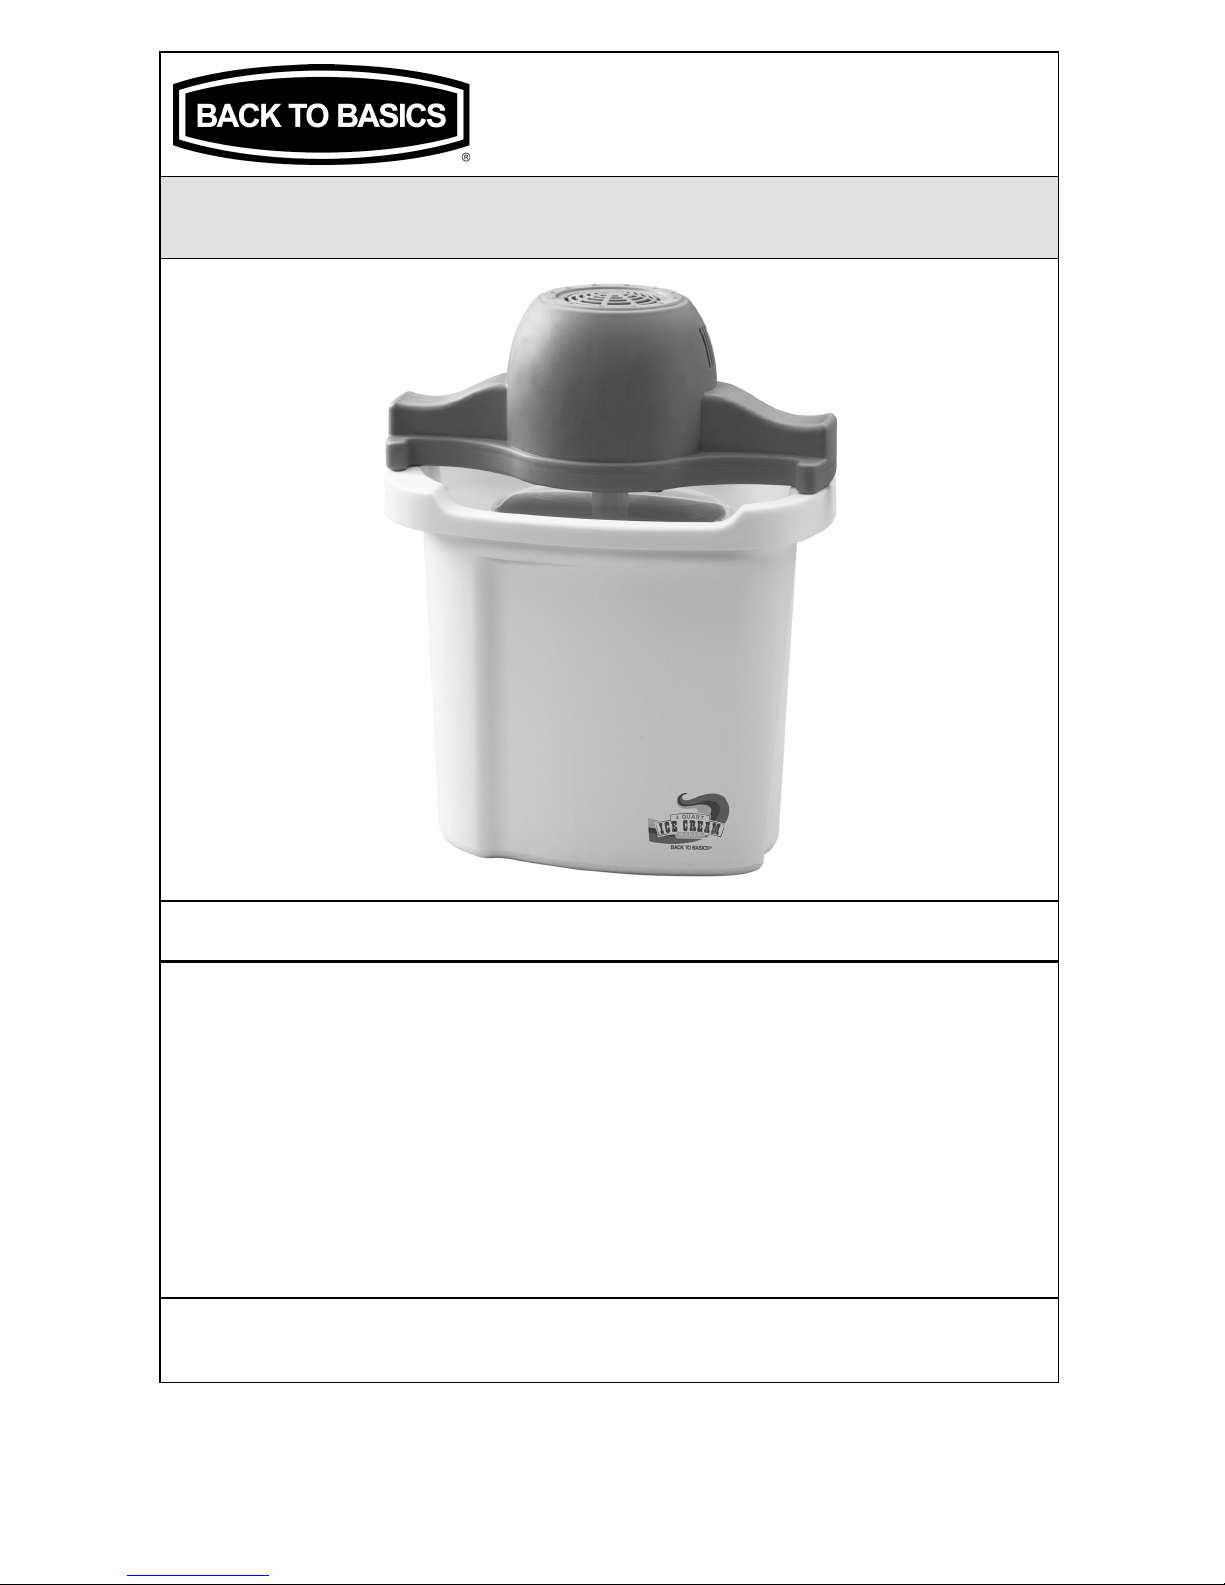
M
ACHINE À GLACE 4 QT.
(3.8
LT
.)
Mode d’emploi
Enregistrez ce produit et les autres produits Focus Electrics sur notre site Internet :
www.registerfocus.com
Précautions Importantes .......................................................................................... 2
Avant la Première Utilisation .................................................................................... 3
Utilisation de votre Machine à Glace 4 Qt. (3.8 Lt.) .................................................. 4
Astuces .................................................................................................................... 5
Nettoyage de votre Machine à Glace 4 Qt. (3.8 Lt.) ................................................. 6
Recettes ................................................................................................................... 7
Garantie ................................................................................................................. 10
CONSERVEZ CE MANUEL D’INSTRUCTIONS POUR RÉFÉRENCE FUTURE
Page 12

2
PRECAUTIONS IMPORTANTES
Pour empêcher toute blessure physique ou tout dommage matériel, lisez et
suivez toutes les consignes et mises en garde.
Lorsque vous utilisez des appareils électriques, les précautions de sécurité
élémentaires devraient toujours être respectées, notamment :
• Lisez toutes les instructions, notamment les présentes précautions importantes,
ainsi que les consignes pour l’entretien de ce manuel.
• Ne touchez pas les surfaces à haute température. Utilisez les poignées carrées
ou rondes et des maniques ou des gants de cuisine.
• Débranchez toujours l’appareil du secteur lorsque vous ne l’utilisez pas et avant
de le nettoyer. Laissez refroidir avant de mettre en place ou de retirer des pièces
ainsi qu’avant de procéder au nettoyage.
• Une surveillance rapprochée est nécessaire en cas d’utilisation d’un appareil par
des enfants ou en présence d’enfants.
• N’utilisez aucun appareil dont le cordon ou la fiche sont endommagés, si
l’appareil a dysfonctionné ou s’il a été détérioré de quelque manière que ce soit.
Pour des renseignements sur les réparations, voir la page de garantie.
• L'utilisation des accessoires non recommandés par Focus Electrics risque de
provoquer le feu, la décharge électrique ou la blessure.
• N’utilisez pas cet appareil à l’extérieur.
• Ne laissez pas le cordon pendre depuis l’extrémité de la table ou du plan de
travail, ou ne le laissez pas entrer en contact avec une surface à haute
température.
• Ne placez pas l’appareil sur ou à proximité d’une gazinière chaude ou d’un
brûleur électrique, ou dans un four chaud.
• Pour débrancher l’appareil, tournez toute commande sur « OFF » puis retirez la
fiche de la prise murale.
• N’utilisez pas l’appareil pour un usage autre que celui pour lequel il a été conçu.
• Pour vous protéger contre tout choc électrique, n’immergez pas le cordon, les
fiches ni aucune autre pièce électrique dans l’eau ni dans tout autre liquide.
• Ne tentez pas de réparer cet appareil vous-même.
• Le cordon d’alimentation fourni est court pour réduire les risques qu’une
personne se prenne les pieds ou trébuche sur un cordon plus long.
• Des cordons de rallonge plus longs sont disponibles, mais vous devez faire
preuve de prudence lors de leur utilisation. Bien que l’utilisation d’un cordon de
rallonge ne soit pas recommandée, si vous devez en utiliser un, assurez-vous
que la puissance nominale indiquée pour le cordon de rallonge est égale ou
supérieure à celle de l’appareil. Si la fiche est raccordée à la terre, le cordon de
rallonge doit lui aussi proposer un raccordement à la terre. Pour éviter de tirer sur
le cordon, de trébucher ou de s’emmêler dedans, positionnez le cordon de
rallonge de sorte qu’il ne pende pas depuis l’extrémité du plan de travail, de la
table ou de toute zone où des enfants pourraient tirer dessus ou trébucher.
Page 13

3
• Cet appareil est pourvu d’une fiche polarisée (une lame est plus large que
l’autre). Afin de réduire le risque de choc électrique, cette fiche est conçue pour
être branchée sur une prise secteur polarisée uniquement dans un sens. Si la
fiche ne s’adapte pas complètement dans la prise secteur, retournez la fiche. Si
elle ne s’adapte toujours pas, contactez un électricien qualifié. Ne tentez pas de
modifier la fiche de quelque manière que ce soit.
• N’utilisez pas une prise secteur ou un cordon de rallonge si la fiche s’adapte
avec un jeu ou si la prise secteur ou le cordon de rallonge vous semblent
chauds.
• Évitez tout contact avec les pièces en mouvement.
• Pour une utilisation domestique uniquement.
CONSERVEZ CES CONSIGNES
A
VANT LA PREMIÈRE UTILISATION
Veuillez vérifier la totalité de l’emballage avec attention avant de le jeter. Il est
possible que celui-ci contienne des accessoires.
Lavez le couvercle, le récipient de congélation et les accessoires à l’eau chaude
savonneuse, rincez méticuleusement et séchez. Essuyez l’extérieur de l’unité du
moteur à l’aide d’un torchon humide, le cas échéant. Veuillez ne PAS plonger l’unité
du moteur ou le cordon dans de l’eau ni dans tout autre liquide.
Seau isotherme
Agitateur
Moteur
Couvercle
Seau en plastique
Page 14

4
U
TILISATION DE VOTRE MACHINE À GLACE 4 QT.
(3.8 LT.)
1. Mettez le seau isotherme, le couvercle et l’agitateur au congélateur au moins
une heure avant de faire la crème glacée. Remarque: Ne gelez pas le seau
isotherme s’il est mouillé: il faut toujours le sécher complètement avant de le
geler.
2. Préparez les ingrédients en suivant les instructions de la recette. Pour de
meilleurs résultats, préparez le mélange pour la crème gelée le jour avant et
refroidissez-le pendant la nuit.
3. Versez le mélange de crème glacée dans le seau isotherme refroidi. Ne
remplissez pas le seau isotherme au-dessus de la marque « MAX » car la
crème glacée augmente en volume pendant la congélation.
4. Insérez la partie arrondie de l’agitateur dans le renfoncement au centre du seau
isotherme.
5. Placez le couvercle sur le seau isotherme et faites passer la colonne centrale de
l’agitateur par le centre du couvercle.
6. Placez le seau isotherme dans le seau en l’alignant avec le support de centrage
au fond du seau.
7. Alignez la colonne centrale de l’agitateur dans le trou au centre du bloc moteur.
Il peut être nécessaire de faire tourner le seau isotherme pour bien faire rentrer
la colonne de l’agitateur dans le moteur. Insérez les languettes situées à la base
du moteur dans les trous situés sur les côtés du seau. Tournez la lame dans le
sens contraire des aiguilles d’une montre pour verrouiller le moteur en place.
8. Branchez le cordon dans une prise secteur de 120 volts c.a. UNIQUEMENT.
9. Répartissez environ un demi litre (2 tasses) de glace pilée autour de la base du
seau isotherme. Il faut des petits morceaux de glace broyée et non pas des
glaçons entiers. Séparez les morceaux de glace agglomérés. Pour chaque
préparation de crème glacée, il faut prévoir 1 à 2 sacs de glaçons, soit environ 2
à 4 kilos.
10. Recouvrez la première couche de glace d’environ 6 cl (¼ de tasse) de sel
gemme.
11. Recommencez les étapes 9 et 10, en déposant des couches de glace et de sel
pour arriver à 1.3 cm (½ po) en dessous du trou situé à l’avant du seau en
plastique : ne le remplissez pas trop.
12. Au fur et à mesure que la glace fond, ajoutez de nouvelles couches de glace et
de sel gemme.
13. Il faut compter 50 à 60 minutes pour faire la crème glacée. Si le moteur s’arrête
avant 30 minutes de fonctionnement, débranchez l’appareil et vérifiez les
conditions suivantes :
• Si le seau isotherme ou l’agitateur s’arrête trop tôt, vérifier qu’aucun glaçon
n’en bloque le mouvement. Si de la glace bloque le mouvement, vérifiez
que l'appareil est bien débranché et retirez la glace qui bloque avec une
spatule.
• Si l’agitateur se bloque, vérifiez la consistance de la crème glacée sur les
bords du seau isotherme. Si la crème est trop gelée, utilisez une spatule
pour déplacer la partie trop gelée.
• Des ingrédients durs, tels que des morceaux de chocolat ou des noix
peuvent aussi bloquer l'agitateur. Attendez que la crème glacée soit
prête avant d'ajouter ce genre d'ingrédients.
• Si l’utilisateur arrête trop tôt le malaxage, la crème glacée risque de
durcir et va par conséquent bloquer l’agitateur.
Page 15

5
14. Le processus de gel dure en général 50 à 60 minutes. Débranchez l’appareil de
la prise. Ne faites pas fonctionner la sorbetière pendant plus de 60
minutes. Si votre sorbetière s’arrête au bout de 30 minutes au lieu de continuer
jusqu’à 50 minutes, vérifiez la crème glacée qui pourrait être prête. Si la crème
glacée n'est pas prête, débloquez l’agitateur et continuez le processus. Ou bien
mettez la crème glacée dans un récipient hermétique que vous laisserez au
congélateur pendant une heure.
15. Débranchez le moteur et tournez-le dans le sens contraire des aiguilles d’une
montre pour le déverrouiller, placez une main sur le seau isotherme et retirez le
moteur. Si vous ne maintenez pas en place le seau isotherme, il pourrait se
renverser et de l’eau salée risquerait de gâcher la crème glacée.
16. Retirez le seau isotherme de l’eau et essuyez-le avec une serviette pour
enlevez le sel et l’eau.
17. Retirez le couvercle et ensuite l’agitateur puis, avec une spatule, raclez toute
crème glacée restée collée à l’agitateur.
18. Servez immédiatement la crème glacée ou mettez-la dans un récipient
hermétique destiné au froid pour la garder au congélateur. Remarque : La
crème glacée faite à la maison ne contient pas les agents de conservation que
l’on trouve dans les produits du commerce, par conséquent votre crème glacée
artisanale ne doit pas se conserver plus d'une semaine.
A
STUCES
• Les recettes de glaces maison utilisent uniquement des ingrédients frais ; par
conséquent, elles n’ont pas la même consistance que les glaces achetées dans
le commerce qui utilisent de la gomme et des conservateurs pour plus de
fermeté. Si vous préférez une texture plus ferme, placez la crème glacée
congelée dans un récipient hermétique et conservez-la au congélateur pendant
une heure ou plus jusqu’à ce que vous obteniez la texture souhaitée. La glace
maison a généralement la texture d’un milkshake épais.
• Pour les recettes qui nécessitent une pré-cuisson, préparez le mélange de base
de la crème glacée un jour à l’avance et conservez-le une nuit au réfrigérateur.
Ceci va lui permettre de refroidir complètement et cela augmentera le volume
de la crème glacée produite.
• Les mélanges de base de crème glacée peuvent être conservés au réfrigérateur
jusqu’à 3 jours avant la préparation de la crème glacée. Assurez-vous de bien
mélanger avant d’ajouter le mélange dans le récipient de congélation.
• Les ingrédients les plus fréquents dans une crème glacée sont la crème, le
sucre, les œufs et le lait. Pour la saveur la plus riche et la texture la plus
crémeuse, utilisez une crème contenant le pourcentage le plus élevé de matière
grasse. La crème épaisse est celle qui a la teneur en matière grasse la plus
élavée (environ 36%), la Crème fouettée (30%), la Crème au café/légère (18%),
et Half & Half (10%). Vous pouvez utiliser des produits se substituant au lait (à
la fois pour la crème et pour le lait) pour réduire la teneur en matière grasse.
Toutefois, ceci peut modifier la saveur et la texture de la crème glacée. Lorsque
vous substituez des ingrédients, assurez-vous que les mesures totales de
liquide demeurent les mêmes que dans la recette d’origine.
• La crème glacée maison a souvent un goût moins sucré que le mélange de
base de la crème glacée. Si votre crème glacée n’est pas suffisamment sucrée,
vous pouvez ajuster la quantité de sucre utilisée, en gardant à l’esprit que la
saveur sucrée sera atténuée pendant le processus de congélation.
Page 16

6
• Vous pouvez utiliser des édulcorants artificiels pour remplacer le sucre dans
une recette. Ajoutez-les seulement à un mélange de base pour crème glacée
refroidi car la chaleur affecte la saveur sucrée.
• Pour les recettes contenant de l’alcool, ajoutez manuellement l’alcool après la
fin du cycle de congélation. L’alcool peut avoir un effet négatif sur le processus
de congélation s’il est ajouté trop tôt. Ne tentez pas de redémarrer le moteur
pour mélanger une fois que vous avez ajouté de l’alcool
• Le mélange de crème glacée doit être liquide avant la congélation. N’utilisez
pas d’ingrédients rigides ou congelés comme de la crème fouettée ou des
liquides ou jus de fruits congelés.
• La crème glacée devrait être conservée au congélateur dans des récipients
hermétiques. Ne la stockez PAS dans le récipient de congélation.
• Si vous souhaitez une crème glacée plus ferme, une fois le malaxage terminé,
retirez l'agitateur et mettez le couvercle sur le seau isotherme. Mettez
l’ensemble au congélateur pendant environ une demie heure pour raffermir. Ne
laissez pas le seau isotherme au congélateur pendant plus d’une demie heure.
• Vous pouvez aussi laisser le seau isotherme dans le seau en plastique :
retirez l'agitateur et refermez. Rajoutez de la glace au mélange de glace
et de sel. Recouvrez le tout d’une serviette et laissez la crème glacée se
raffermir.
• Le mélange peut ne pas geler correctement pour les raisons suivantes :
• Le mélange est trop chaud. Il faut refroidir le seau isotherme, le
couvercle, l’agitateur et les ingrédients avant de mélanger et garder le
tout au réfrigérateur jusqu’au moment de faire la crème glacée dans la
sorbetière.
• Les proportions des ingrédients sont incorrectes. Vérifiez soigneusement
la recette et, en cas de substitutions, gardez toujours la même quantité
totale d’ingrédients liquides que celle indiquée dans la recette.
• Le fait d’utiliser trop peu de sel gemme inhibe le processus de
congélation. Le fait d’en utiliser trop peut provoquer la congélation trop
rapide du mélange avec une formation de cristaux de glace dans la
crème glacée.
• N’arrêtez pas pendant le processus de formation de la crème glacée.
Ceci risque de provoquer la formation de cristaux de glace et donnera
une texture granuleuse.
N
ETTOYAGE DE VOTRE MACHINE À GLACE 4 QT.
(3.8 LT.)
1. Débranchez la machine à glace avant de la nettoyer.
2. Essuyez le moteur électrique à l’aide d’un chiffon doux légèrement humidifié.
Veuillez ne PAS plonger l’unité du moteur dans de l’eau ou dans tout autre
liquide.
3. Nettoyez complètement le seau en plastique à l'aide d’une éponge savonneuse
pour retirer toute trace d’eau salée. Rincez bien et séchez.
4. Lavez le seau isotherme, le couvercle et l’agitateur à l'eau chaude savonneuse.
Rincez et séchez complètement. Laissez complètement sécher le seau
isotherme avant de remettre son couvercle.
5. N’utilisez aucun détergent puissant ou abrasif sur aucune des parties de la
machine à glace. Veuillez ne placer aucune des pièces de la machine à glace
au lave-vaisselle.
Page 17

7
R
ECETTES
Crème Glacée au Chocolat Rapide et Facile
1 tasse de Poudre de Cacao
3 grandes boîtes de Lait Condensé
6 tasses de Lait Entier
Dans un grand saladier de mélange, incorporez le lait et le lait condensé. Dans
un plat séparé, mélangez suffisamment d’eau chaude avec la poudre de cacao
pour créer une consistance ressemblant à du chocolat fondu. Une fois que la
poudre de cacao est liquide, ajoutez-la au mélange de lait en mélangeant
jusqu’à ce que la préparation soit homogène. Versez la totalité du contenu du
saladier dans le récipient de congélation puis suivez les instructions de la
section « Utilisation de votre Machine à Glace 4 Qt. (3.8 Lt.) ». Ne remplissez
pas le récipient de congélation au-dessus de la ligne « MAX » car le mélange va
se dilater pendant la congélation.
Crème Glacée à la Vanille
2 tasses de Sucre en Poudre
1½ cuiller à soupe D’amidon de Maïs
¼ cuiller à café de Sel
7 tasses de Lait
5 Œufs, Battus
1½ cuillers à soupe de Vanille
2¾ tasses de Crème Épaisse
1½ tasses de Half and Half
Mélangez le sucre, l’amidon de maïs et le sel dans une grande casserole. Sur
chaleur moyenne, mélangez lentement le lait en l’ajoutant, et mélangez en
permanence. Ajoutez très lentement les œufs battus et continuez à mélanger.
Réduisez la chaleur sur faible et laissez cuire jusqu’à ce que le mélange
s’épaississe légèrement. Ajoutez lentement la vanille, la Half and Half, et la
crème épaisse. Versez dans un grand saladier de verre et réfrigérez pendant 2
à 4 heures ou jusqu’à ce que le mélange ait refroidi. Retirez la préparation du
réfrigérateur. Versez le mélange dans le récipient de congélation et suivez les
consignes de la section «Utilisation de votre Machine à Glace 4 Qt. (3.8 Lt.)».
Ne remplissez pas le récipient de congélation au-dessus de la ligne « MAX »
car le mélange va se dilater pendant la congélation.
Crème Glacée à la Pâte de Cookie
1 tasse de Pâte de Cookie aux
Pépites de Chocolat (en petits
morceaux)
2 ¼ tasses de Sucre
6 tasses de Crème Épaisse
1 tasse de Mini Pépites de Chocolat
6 gros Œufs
3 tasses de Lait
Placez la pâte à cookies et les pépites de chocolat dans un saladier séparé.
Couvrez et maintenez-les au frais jusqu’à ce que l’ensemble soit froid. Fouettez
les œufs dans un saladier de mélange pendant 1 à 2 minutes jusqu’à ce qu’ils
soient légers et floconneux. Ajoutez lentement le sucre en mélangeant, et
fouettez jusqu’à ce que le sucre soit complètement incorporé. Ajoutez lentement
la crème et le lait puis fouettez jusqu’à ce qu’ils soient mélangés. Versez le
mélange dans le récipient de congélation et suivez les instructions de la section
« Utilisation de votre Machine à Glace 4 Qt. (3.8 Lt.) ». Ne remplissez pas le
récipient de mélange au-dessus de la ligne « MAX » car le mélange va se dilater
pendant la congélation. Lorsque la préparation du mélange est terminée, ajoutez
la pâte à cookie et les pépites de chocolat et mélangez jusqu’à ce que la
préparation soit homogène.
Page 18

8
Crème Glacée au Café
4 ½ tasses de Half and Half
6 tasses de Crème
4 ½ cuillers à café de Poudre de Café Soluble
2 ¼ tasse de Sucre
Combinez tous les ingrédients dans un saladier de mélange. Mélangez bien
jusqu’à ce que le sucre et la poudre de café soluble soient dissous. Versez le
mélange dans le seau isotherme et suivez les instructions fournies dans la
section « Utilisation de votre Machine à Glace 4 Qt. (3.8 Lt.) ». Ne remplissez
pas le récipient de congélation au-dessus de la ligne « MAX » car le mélange va
se dilater pendant la congélation.
Crème Glacée Rocky Road
1 ¾ tasse de Sucre en Poudre
½ cuiller à café de Sel
2 tasses de Lait
6 carrés de Chocolat Demi-Sucré
2 tasses de Half and Half
6 tasses de Crème Fouettée
1 cuiller à soupe D’extrait de Vanille
2 tasses de Mini Marshmallows
1 ½ tasses de Pépites de Chocolat
1 tasse de noix de Pécan Pilées
Mélangez le lait t le chocolat dans une grande casserole. Sur feu moyen,
mélangez jusqu’à ce que le chocolat ait complètement fondu. Retirez du feu et
ajoutez lentement le sucre et le sel, en mélangeant bien, jusqu’à ce qu’ils soient
dissous. Incorporez les ingrédients restant sauf les marshmallows, les noix de
pécan et les pépites de chocolat, puis couvrez et réfrigérez pendant environ 30
minutes ou jusqu’à ce que le mélange ait refroidi. Versez le mélange dans le
récipient de congélation puis suivez les consignes de la section « Utilisation de
votre Machine à Glace 4 Qt. (3.8 Lt.) ». Ne remplissez pas le récipient de
congélation au-dessus de la ligne « MAX » car le mélange va se dilater pendant
la congélation. Ajoutez les marshmallows, les noix de pécan et les pépites de
chocolat une fois que la crème glacée a fini de se former et incorporez-les de
façon uniforme.
Crème Glacée au Maïs Doux
50 cl (2 tasses) de Crème Épaisse
70 cl (3 tasses) de Lait
4 épis de Maïs Doux, décortiqués :
gardez les grains et coupez les rafles
en morceaux de 2.5 cm (1 po).
1 cuillère à thé D’extrait de Vanille
12 Jaunes D'oeufs
15,7 cl ( de tasse) plus 11,8 cl (½
tasse) de Sucre
Dans une petite casserole, mélangez la crème, le lait et les rafles de maïs en
chauffant à feu moyen. Chauffez jusqu’à ce que le mélange frémisse. Mélangez
le sucre pour le faire dissoudre. Laissez mijoter 10 minutes. Retirez les rafles de
maïs avec une cuillère à rainures.
Battez les jaunes d'œufs et 15,7 cl ( de tasse) de sucre ensemble dans un
bol. Avec un fouet, incorporez lentement le mélange chaud. Fouettez pour
obtenir une consistance uniforme. Remettez le mélange dans la casserole et
chauffez à feu moyen en remuant constamment pendant 1 minute jusqu’à ce
que le mélange soit suffisamment épais pour napper le dos d’une cuillère.
Passez la sauce à travers une passoire fine. Incorporez l’extrait de vanille.
Dans une petite casserole, chauffez jusqu’à faire frémir 23,6 cl d’eau (1 tasse),
11,8 cl de sucre (½ tasse) et les grains de maïs, puis laissez mijoter jusqu’à ce
que les grains soient tendres, environ 10 minutes. Retirez la casserole du feu et
ajoutez le mélange de maïs à la sauce. Laissez refroidir pendant la nuit dans un
bol recouvert d'un film plastique pour éviter la formation d’une peau. Versez le
mélange dans le seau isotherme et suivez les instructions fournies dans la
section « Utilisation de votre Machine à Glace 4 Qt. (3.8 Lt.) ». Ne remplissez
pas le seau isotherme au-dessus de la marque « MAX » car le mélange
augmente en volume pendant la congélation.
Page 19

9
Yogourt Glacé à la Fraise
95 cl (4 tasses) de Yogourt Nature
24 cl (1 tasses) de Crème à Fouetter
Épaisse
18 cl (¾ tasse) de Sucre
35 cl (1 ½ tasses) de Fraises au sirop
dégelées
Mélangez tous les ingrédients dans un grand bol à mélanger. Laissez refroidir le
mélange couvert pendant une heure au réfrigérateur avant de congeler.
Versez le mélange dans le seau isotherme et suivez les instructions fournies
dans la section « Utilisation de votre Machine à Glace 4 Qt. (3.8 Lt.) ». Ne
remplissez pas le seau isotherme au-dessus de la marque « MAX » car le
mélange augmente en volume pendant la congélation.
Gelato Chocolat Noisette
95 cl (4 tasses) de Lait Entier
50 cl (2 tasses) de Crème Épaisse
23.5 cl (1 tasse), plus 11.8 cl (½ tasse)
de Sucre
8 Jaunes D'oeufs
1 cuillère à thé D’extrait de Vanille
23.5 cl (1 tasse) de Pâte Chocolat
Noisette
23.5 cl (1 tasse) de Brisures de
Noisettes – facultatif
Dans une casserole, mélangez le lait, la crème, et 23.5 cl (1 tasse) de sucre en
chauffant à feu moyen. Laissez cuire pour dissoudre le sucre, soit environ 5
minutes.
Pendant ce temps, dans un bol moyen, fouettez les jaunes d’œufs avec le reste
du sucre à l’aide d’un batteur électrique jusqu'à ce que les oeufs soient épais et
d’une couleur jaune pâle, soit environ 4 minutes. Versez environ 12 cl (½ tasse)
du mélange de lait chaud et de crème dans le mélange d’œufs et incorporez.
Rajoutez ce mélange dans la casserole. Faites cuire à feu très doux en remuant
constamment jusqu’à ce que le mélange devienne suffisamment épais pour
napper le dos d’une cuillère en bois, environ 7 à 10 minutes.
Mettez une passoire sur un bol moyen et passez la sauce chaude à travers la
passoire. Ajoutez la pâte chocolat noisette en remuant pour la dissoudre.
Versez le mélange dans le seau isotherme et suivez les instructions fournies
dans la section « Utilisation de votre Machine à Glace 4 Qt. (3.8 Lt.) ». Ne
remplissez pas le seau isotherme au-dessus de la marque « MAX » car le
mélange augmente en volume pendant la congélation.
Page 20

10
L5802A 01/10 Back to Basics®, une Marque de Focus Electrics, LLC. Imprimé en Chine
G
ARANTIE DU PRODUIT
Garantie limitée de 1 an de l’appareil
Focus Electrics, LLC (« Focus Electrics ») garantit cet appareil contre tout défaut de pièces et
de main d’ œuvre pendant un (1) an à compter de la date d’achat d’origine avec un justificatif
d’achat, à condition que l’appareil soit utilisé et entretenu conformément aux recommandations
du Mode d’emploi fourni. Toute pièce défaillante de l’appareil sera réparée ou remplacée sans
frais à la discrétion de Focus Electrics. La présente garantie s’applique pour une utilisation
domestique à l’intérieur uniquement.
Cette garantie ne prend pas en charge les dégâts, y compris la décoloration, subis par toute
surface antiadhésive de l’appareil. Cette garantie est nulle et non avenue, tel que défini
uniquement par Focus Electrics si l’appareil est détérioré par accident, mauvaise utilisation,
utilisation abusive, négligence, rayure, ou si l’appareil est détérioré de quelque manière que ce
soit.
LA PRÉSENTE GARANTIE ANNULE ET REMPLACE TOUTES LES GARANTIES INDUITES,
NOTAMMENT LES GARANTIES DE COMMERCIALISATION, D’ADAPTATION À UN USAGE
PARTICULIER, DE PERFORMANCE, OU AUTRE, QUI SONT ICI EXCLUES. EN AUCUN
CAS FOCUS ELECTRICS NE POURRA ÊTRE TENUE POUR RESPONSABLE DE TOUT
DÉGÂT, QUE CELUI-CI SOIT DIRECT, INDIRECT, SECONDAIRE, PRÉVISIBLE, INDUIT OU
PARTICULIER, RÉSULTANT DE OU EN RAPPORT AVEC CET APPAREIL.
Si vous pensez que cet appareil est défectueux ou a besoin d’être réparé pendant la durée de
sa garantie, veuillez contacter le Service clientèle de Focus Electrics au (866) 290 –1851 ou
nous adresser un e-mail à service@focuselectrics.com
. Les frais d’expédition de retour sont
non remboursables. Un justificatif prouvant la date d’achat d’origine sera exigé pour toutes les
demandes de prise en charge dans le cadre de la garantie, les factures manuscrites ne sont
pas acceptées. Focus Electrics n’est pas responsable pour les retours perdus pendant le
transport.
Valable uniquement aux USA et au Canada
P
IÈCES DE RECHANGE
Les pièces de rechange, lorsque celles-ci sont disponibles, peuvent être commandées
directement auprès de Focus Electrics en ligne sur www.focuselectrics.com, ou vous pouvez
téléphoner ou envoyer un e-mail au service entretien au numéro/à l’adresse e-mail ci-dessus,
ou vous pouvez nous écrire à :
Focus Electrics, LLC
Attn : Service clientèle
P. O. Box 2780
West Bend, WI 53095
Assurez-vous d’inclure le numéro de catalogue/modèle de votre appareil (situé sur le
dessous/à l’arrière de l’appareil) accompagné d’une description et de la quantité de la pièce
que vous souhaitez commander. Ajoutez également votre nom, votre adresse postale, un
numéro de carte Visa/MasterCard, une date d’expiration ainsi que le nom tel qu’il apparaît sur
la carte. Vous pouvez payer par chèque à l’ordre de Focus Electrics, LLC. Appelez le Service
clientèle pour obtenir le montant de l’achat. La taxe de vente de votre état ainsi que des frais
d’expédition/de traitement seront ajoutés au total de la facture. Veuillez patienter deux (2)
semaines pour la livraison.
Ce manuel contient des informations importantes et utiles concernant l’utilisation sans danger et l’entretien
de votre nouveau produit Focus Electrics. Pour une consultation ultérieure, fixez le ticket de caisse daté pour
servir de justificatif d’achat et inscrivez les informations suivantes :
Date d’achat ou de réception en cadeau : _______________________________________________
Lieu d’achat et prix, si connus : _____________________________________________
Numéro de l’article et Code de date (dessous/arrière de l’appareil) :___________________________
Page 21

N
OTES
Page 22

2010 Back to Basics®, una Marca de Focus Electrics, LLC.
www.focuselectrics.com
M
ÁQUINA DE HELADOS DE 4 QT.
(3.8
LT
.)
Manual de Instrucciones
Registre éste y otros
productos
de Focus Electrics en nuestro sitio:
w w w . r e gi st e rfo c u s .c o m e n In te rn e t
Precauciones Importantes ........................................................................................ 2
Antes de Usar por Primera Vez ................................................................................ 3
Cómo Utilizar la Máquina de Helados de 4 Qt. (3.8 Lt.) ........................................... 4
Consejos Prácticos................................................................................................... 5
Limpieza de la Máquina de Helados de 4 Qt. (3.8 Lt.) ............................................. 6
Recetas .................................................................................................................... 7
Garantía ................................................................................................................. 10
CONSERVE ESTAS INSTRUCCIONES COMO REFERENCIA PARA EL FUTURO
Page 23

2
PRECAUCIONES IMPORTANTES
Para evitar lesiones personales o daños materiales, lea y acate todas las
instrucciones y advertencias.
Al utilizar artefactos electrodomésticos, siempre deben acatarse las precauciones
básicas de seguridad incluyendo las siguientes:
• Lea todas las instrucciones en este manual, incluso estas importantes
precauciones, así como las instrucciones de uso y cuidado.
• No toque las superficies calientes. Use las asas o las perillas y almohadillas
aislantes o guantes térmicos.
• Desenchúfelo siempre del tomacorriente cuando no esté en uso y antes de
limpiarlo. Permita que se enfríe antes de colocarle o quitarle piezas o antes de
limpiarlo.
• Debe estarse muy pendiente de los niños cuando se use un artefacto
electrodoméstico que sea usado por ellos o cerca de ellos.
• No opere ningún artefacto electrodoméstico con un cordón eléctrico o enchufe
dañado o si el artefacto electrodoméstico funciona mal o ha sido dañado de
cualquier manera. Para información relativa al servicio de reparaciones vea la
página de garantías.
• El uso de accesorios no recomendados por Focus Electrics puede ser causa de
fuego, descargas electricas, o lesiones personales.
• No use este artefacto electrodoméstico al aire libre.
• No deje que el cordón eléctrico cuelgue sobre el borde de la mesa o encimera, ni
que toque superficies calientes.
• No lo coloque sobre o cerca de un calentador eléctrico o a gas, o en un horno
caliente.
• Para desconectar, coloque cualquier control en la posición "OFF" (apagado), y
luego desenchufe del tomacorriente.
• No utilice el artefacto electrodoméstico para usos distintos del indicado.
• Para protegerse contra descargas eléctricas no sumerja el cable, enchufes, u
otras partes eléctricas en agua u otros líquidos.
• No trate de reparar este artefacto electrodoméstico usted mismo.
• Se suministra un cordón eléctrico corto para reducir los riesgos que resultan de
enredarse o tropezarse con un cordón eléctrico más largo.
• Hay disponibles cables de extensión más largos, pero debe tenerse cuidado al
usarlos. Aunque no se recomienda utilizar cables de extensión, si debe utilizar
uno, asegúrese de que la capacidad eléctrica indicada del cable de extensión
sea igual o mayor a la del artefacto. Si el enchufe es del tipo conectado a tierra,
el cable de extensión deberá ser un cordón eléctrico de 3 hilos con conexión a
tierra. A fin de impedir lesiones que resulten del halar, tropezarse o enredarse en
el mismo, coloque el cable de extensión de tal modo que no cuelgue del borde
de un mostrador, mesa u otra superficie donde pueda ser halado por niños o se
pueda tropezar con él.
Page 24

3
• Este artefacto electrodoméstico tiene un enchufe polarizado (una clavija es más
ancha que la otra). Para reducir el riesgo de descargas eléctricas, este enchufe
está diseñado para encajar de una sola manera en un tomacorriente polarizado.
Invierta el enchufe si éste no encaja completamente en el tomacorriente. Si
todavía no encaja, póngase en contacto con un electricista calificado. No trate
de modificar el enchufe de manera alguna.
• No use un tomacorriente o cable de extensión en el cual el enchufe calza
flojamente, o si el tomacorriente o el cable de extensión se calientan.
• Evite el contacto con partes en movimiento.
•
Sólo para uso doméstico.
CONSERVE ESTAS INSTRUCCIONES
A
NTES DE USAR POR PRIMERA VEZ
Sírvase revisar con cuidado todo el material de empaque antes de desecharlo.
El material de empaque puede contener partes accesorias.
Lave la tapa, el bote para congelar y los accesorios en agua jabonosa tibia, y luego
enjuáguelos bien y séquelos Si fuese necesario, limpie el exterior del motor con un
paño suave y húmedo. NO sumerja el motor o el cordón eléctrico en agua o
cualquier otro líquido.
Bote para Congelar
Paleta de Mezclar
Motor
Tapa
Balde de Plástico
Page 25

4
C
ÓMO UTILIZAR LA MÁQUINA DE HELADOS DE 4 QT.
(3.8 LT.)
1. Coloque el bote para congelar, la tapa y la paleta de mezclar en el congelador
durante por lo menos una hora antes de comenzar a preparar el helado. Nota:
No congele el bote para congelar mientras el mismo esté mojado; siempre
séquelo a fondo antes de congelarlo.
2. Prepare los ingredientes según las indicaciones en la receta. Pará obtener
óptimos resultados, prepare la mezcla del helado el día antes y refrigérela
durante la noche.
3. Vierta la mezcla refrigerada del helado dentro del bote para congelar enfriado.
No llene el bote para congelar por encima de la línea "MAX", ya que en la
mezcla del helado se expandirá durante el proceso de congelación.
4. Inserte el extremo redondo de la paleta de mezclar en la hendidura central del
bote para congelar.
5. Coloque la tapa en el bote para congelar, insertando el poste de la paleta de
mezclar a través del centro de la tapa.
6. Coloque el bote para congelar en el balde, alineado con el soporte de centrado
en el fondo del balde.
7. Alinee el poste de la paleta de mezclar dentro del agujero en el centro del
motor. Podría requerir rotar el bote para congelar de manera que el poste de la
paleta de mezclar encaje dentro del motor. Inserte las lengüetas en la parte
inferior del motor dentro de los agujeros a los lados del balde. Gire hacia la
izquierda para inmovilizar la unidad del motor en su lugar.
8. Enchufe el cordón eléctrico SOLAMENTE a un tomacorriente de 120 V de
corriente alterna.
9. Distribuya de manera pareja unas dos tazas de hielo picado alrededor de la
base del bote para congelar. El hielo deberá estar picado en pedazos pequeños
o gruesos pero no deben ser cubos. Rompa cualquier pedazo grande. Para
cada lote de helado, estime utilizar 1-2 bolsas de hielo pequeñas, alrededor de
4-8 libras (1.8-3.6 kg).
10. Cubra la primera capa de hielo de manera pareja con alrededor de un ¼ de
taza (1.3 cm) de sal de roca.
11. Repita los pasos 9 y 10, colocando hielo y sal hasta alcanzar ½ pulgada por
debajo del orificio en la parte delantera del balde; no llene de más.
12. Al derretirse el hielo, agregue más capas de hielo y sal de roca.
13. Se tardará aproximadamente 50-60 minutos en preparar el helado. Si el motor
se parase antes de haber transcurrido 30 minutos, desenchufe el artefacto y
revise si se ha presentado alguno de los siguientes problemas.
• Si el bote o la paleta de mezclar se paran prematuramente, verifique que
el hielo no esté impidiendo que el bote gire. Si el hielo ha causado el
bloqueo, mantenga el artefacto desenchufado y elimine el bloqueo con
una espátula.
• Sí se atorase la paleta de mezclar, revise la consistencia del helado
alrededor de los bordes del bote. Si está congelado, utilice una espátula
para aflojarlo.
• Los ingredientes duros, como los trozos de chocolate y las
nueces, pueden causar que la paleta de mezclar se atore.
Agregue estos cuando se haya terminado de preparar el helado.
• Si el proceso de mezclado es parado prematuramente por el
usuario, el helado se endurecerá y restringirá el movimiento de la
paleta de mezclar.
Page 26

5
14. Por lo general, el proceso de congelación se completa en alrededor de 50-60
minutos. Desenchufe el artefacto del tomacorriente. No permita que la
máquina de helados funcione durante más de 60 minutos. Si la máquina de
helados se parase después de 30 minutos, pero antes de que hayan
transcurrido los 50 minutos, verifique si el helado ya está listo. Si aún no lo está,
despegue la paleta de mezclar y continúe. O, coloque el helado en un tazón
hermético y colóquelo en el congelador durante alrededor de una hora.
15. Desenchufe el motor y gírelo hacia la derecha para desengancharlo, coloque
una mano sobre el bote para congelar y retire el motor. Si el bote para congelar
no se aguanta con la mano, podría voltearse y dejar colar agua salada dentro
del helado.
16. Retire el bote para congelar del agua y pásele una toalla para eliminar el agua y
la sal.
17. Retire la tapa, luego la paleta de mezclar, y raspe el exceso de helado en la
paleta con una espátula.
18. Sirva el helado inmediatamente o transfiéralo a un recipiente hermético apto
para el congelador y congélese. Nota: Debido a que los helados caseros no
contienen los conservantes que si tienen los helados comprados en las tiendas,
los mismos no durarán más de una semana.
C
ONSEJOS PRÁCTICOS
• Las recetas de los helados caseros solamente utilizan ingredientes frescos; por
lo tanto, no tienen la misma consistencia de los helados comprados en tiendas,
los cuales utilizan gomas y conservantes para que sean más firmes. Si usted
prefiere una consistencia más firme, coloque el helado congelado en un
recipiente hermético y almacénelo en el congelador durante una o más horas
hasta lograr la consistencia deseada. El helado casero por lo general tiene la
consistencia de una leche malteada espesa.
• Para recetas que requieren cocción previa, prepare la mezcla base un día antes
y almacénela durante la noche en el refrigerador. Esto permitirá que se enfríe
completamente e incremente el volumen de helado producido.
• Las mezclas base para preparar helados pueden almacenarse en el
refrigerador hasta 3 días antes de la preparación del helado. Asegúrese de
mezclar bien la mezcla antes de agregarla al bote de congelación.
• Los ingredientes más comunes en los helados son la crema, el azúcar, los
huevos y la leche. Para el sabor más rico y la textura más cremosa, use una
crema que contenga el porcentaje más alto de grasa. La crema doble tiene el
contenido de grasa más alto (aproximadamente el 36%), la Crema para Batir el
30%, la Crema Ligera y para Café el 18%, y la Mitad Crema y Mitad Leche el
10%. Se pueden sustituir los productos lácteos (tanto la crema como la leche)
para reducir el contenido de grasa. Sin embargo, esto puede cambiar el sabor,
la consistencia y la textura del helado. Al sustituir ingredientes, asegúrese de
que la medida líquida total permanezca igual a la receta original.
• El helado casero tendrá un sabor menos dulce que la mezcla base del helado.
Si el helado no es lo suficientemente dulce, puede ajustar la cantidad de azúcar
utilizado, teniendo en cuenta que el dulzor disminuirá durante el proceso de
congelación.
• Pueden utilizarse edulcorantes artificiales para sustituir al azúcar en una receta.
Añádalos sólo a una mezcla base enfriada ya que el calor afecta el dulzor.
Page 27

6
• Para las recetas que contienen alcohol, agregue el mismo manualmente tras
completar el ciclo de congelación. El alcohol puede afectar negativamente el
proceso de congelación si se añade demasiado pronto. No trate de reiniciar el
motor para mezclar después de haber agregado el alcohol.
• La mezcla base del helado debe estar líquida antes de congelarse. No use
ingredientes duros o congelados como la crema batida o líquidos o jugos
congelados.
• Los helados deberán almacenarse en recipientes herméticos en el congelador.
NO los almacene en el bote para congelar.
• Si desea preparar sus helados de manera que sea más duros, al terminar de
batir, retire la paleta de mezclar y coloque la tapa en el bote. Colóquelos en el
congelador durante una media hora para que se endurezca la mezcla. No deje
el bote en el congelador por más de media hora.
• O, deje el bote en el balde de plástico, retire la paleta de mezclar.
Agregue más hielo a la mezcla de hielo/sal. Cubra con una toalla y deje
reposar hasta que el helado quede firme.
• Posibles razones por la cual la mezcla del helado no se congela correctamente:
• La mezcla estaba demasiado caliente. Los ingredientes, el bote para
congelar, la tapa y la paleta deberán enfriarse previo a la mezcla y
deberán mantenerse refrigerados hasta que estén listos para congelarse
en la máquina de helados.
• La proporción de los ingredientes estuvo incorrecta. Revise su receta con
cuidado, y si se hicieron substituciones, asegúrese de que los
ingredientes líquidos totales sean iguales a la receta original.
• El utilizar demasiada poca sal de roca inhibe el proceso de congelación.
El utilizar demasiada sal de roca puede ocasionar que la mezcla se
congele demasiado rápidamente causando la formación de cristales de
hielo en el helado.
• No pare durante el proceso de batido. Esto ocasionará que se formen
cristales de hielo dando como resultado una textura granulosa.
L
IMPIEZA DE LA MÁQUINA DE HELADOS DE 4 QT.
(3.8 LT.)
1. Desenchufe la máquina de helados antes de limpiarla.
2. Limpie el motor con un paño ligeramente húmedo. NO sumerja la unidad del
motor en agua o cualquier otro líquido.
3. Limpie el balde de plástico a fondo con una esponja jabonosa para eliminar
cualquier residuo de sal-agua. Enjuague y seque a fondo.
4. Lave el bote para congelar, la tapa y la paleta de mezclar con agua caliente
jabonosa. Enjuague y seque a fondo. No tape el bote para congelar hasta tanto
no esté completamente seca.
5. No utilice limpiadores ásperos o abrasivos sobre ninguna parte de la máquina
de helados. No coloque ninguna pieza de la máquina de helados en el
lavavajillas.
Page 28

7
R
ECETAS
Helado de Chocolate Fácil y Rápido
1 taza Cacao en Polvo
3 latas grandes Leche Condensada
6 tazas Leche Entera
En un tazón de mezcla grande, combine la leche y la leche condensada. En un
tazón aparte, combine suficiente agua caliente con el cacao en polvo para crear
una consistencia similar a la del chocolate derretido. Una vez se haya tornado
líquido el cacao en polvo, vierta y mezcle la mezcla de leche hasta quedar
completamente mezclada. Vierta el contenido entero del tazón al bote de
congelación y siga las indicaciones en la sección de “Cómo Utilizar la Máquina
de Helados de 4 Qt. (3.8 Lt.).” No llene el bote para congelar por encima de la
línea “MAX”, puesto que la mezcla se expandirá durante la congelación.
Helado de Vainilla
2 tazas Azúcar Granulado
1½ cda. Almidón de Maíz
¼ cdta. Sal
7 tazas Leche
5 Huevos, Batidos
1½ cda. Vainilla
2¾ tazas Crema Doble
1½ tazas Mitad Crema y Mitad Leche
Mezcle el azúcar, el almidón de maíz y la sal en una cacerola grande. Sobre
fuego a calor medio, vierta lentamente la leche, removiendo constantemente.
Muy lentamente agregue los huevos batidos y continúe removiendo. Reduzca
el fuego a fuego lento y cocine hasta que la mezcla se espese ligeramente.
Lentamente agregue la vainilla, la mitad crema y mitad leche y la crema doble.
Vierta todo en un tazón grande de vidrio y refrigere la mezcla durante 2-4 horas
o hasta que la misma se haya enfriado. Retire la mezcla del refrigerador.
Vierta la mezcla en el bote para congelar y siga las indicaciones en la sección
de “Cómo Utilizar la Máquina de Helados de 4 Qt. (3.8 Lt.).” No llene el bote
para congelar por encima de la línea “MAX”, puesto que la mezcla se expandirá
durante la congelación.
Helado con Masa para Galletas
1 taza Masa para Galletas con
Trozos de Chocolate (desmenuzada
en pequeños pedazos)
2 ¼ tazas Azúcar
6 tazas Crema Doble
1 taza Trozos de Chocolate Mini
6 Huevos grandes
3 tazas Leche
Coloque la masa para galletas y los trozos de chocolate en un tazón aparte.
Tape y colóquelos en el refrigerador hasta quedar fríos. Bata los huevos en un
tazón de mezclar durante 1-2 minutos hasta quedar esponjosos. Lentamente
vierta el azúcar, batiendo hasta quedar completamente mezclado. Agregue
lentamente la crema y la leche y bata hasta quedar mezcladas. Vierta la
mezcla en el bote para congelar y sigan las indicaciones en la sección de
“Cómo Utilizar la Máquina de Helados de 4 Qt. (3.8 Lt.).” No llene el bote para
congelar por encima de la línea “MAX”, puesto que la mezcla se expandirá
durante la congelación. Cuando se haya terminado de batir la mezcla, agregue
la masa para galletas y los trozos de chocolate y mezcle hasta quedar bien
distribuidos.
Page 29

8
Helado de Café
4 ½ tazas Mitad Crema y Mitad Leche
6 tazas Crema
4 ½ cdas. Café Instantáneo en Polvo
2 ¼ tazas Azúcar
Combine todos los ingredientes en un tazón de mezclar. Remueva bien hasta
que todo el azúcar y el café instantáneo en polvo queden disueltos. Vierta la
mezcla en el bote para congelar y siga las instrucciones indicadas en la sección
" Cómo Utilizar la Máquina de Helados de 4 Qt. (3.8 Lt.)." No llene el bote para
congelar por encima de la línea “MAX”, puesto que la mezcla se expandirá
durante la congelación.
Helado "Rocky Road"
1 ¾ taza Azúcar Granulado
½ cdta. Sal
2 tazas Leche
6 cuadrados de Chocolate Semi-Dulce
2 tazas Mitad Crema y Mitad Leche
6 tazas Crema de Batir
1 cda. Extracto de Vainilla
2 tazas de Mini Malvaviscos
1 ½ tazas Trozos de Chocolate
1 taza Pacanas Picadas
Mezcle la leche y el chocolate en una cacerola grande. Sobre fuego medio
revuélvalos hasta que el chocolate quede completamente derretido. Retire la
mezcla del calor y lentamente agregue el azúcar y la sal, mezclando bien hasta
quedar disueltos. Añada los demás ingredientes mientras remueve la mezcla,
excepto por los malvaviscos, las pacanas y los trozos de chocolate, y luego
cúbrala y refrigere durante alrededor de 30 minutos o hasta que la mezcla esté
fría. Vierta la mezcla en el bote para congelar y sigan las indicaciones en la
sección de “Cómo Utilizar la Máquina de Helados de 4 Qt. (3.8 Lt.).” No llene el
bote para congelar por encima de la línea “MAX.” puesto que la mezcla se
expandirá durante la congelación. Agregue los malvaviscos, las pacanas y los
trozos de chocolate una vez que se haya terminado de batir el helado y
remuévalos hasta quedar bien distribuidos.
Helado de Maíz Dulce
2 tazas de Crema Pesada
3 tazas de Leche
1 cdta. de Extracto de Vainilla
12 Yemas de Huevo
taza más ½ taza de Azúcar
4 espigas de Maíz Dulce, desgranadas, guarde los granos, corte las mazorcas en
pedazos de 1 pulgada (2.5 cm)
En una pequeña cacerola y bajo fuego medio, combine la crema, la leche y las
mazorcas de maíz. Lleve al hervor. Remueva para disolver el azúcar. Hierva
durante 10 minutos. Saque las mazorcas de maíz con una cuchara con ranuras.
Bata las yemas de huevo y de taza de azúcar juntos en un tazón.
Lentamente incorpore la mezcla de la crema caliente mientras bate. Bata hasta
quedar homogéneo. Regrese la mezcla a la cacerola y bátala sobre fuego lento
durante 1 minuto, hasta que recubra el reverso de la cuchara. Cuele la natilla a
través de un tamiz fino. Agregue removiendo el extracto de vainilla.
En una pequeña cacerola, lleve al hervor 1 taza de agua, ½ taza de azúcar y
los granos de maíz, y cueza hasta que los granos queden tiernos, lo cual
tomará unos 10 minutos. Retire del fuego y agregue la mezcla de maíz a la
natilla. Permita que esta se enfríe de un día para el otro en un tazón, el cual se
tapa con una envoltura de plástico para prevenir que se forme nata. Vierta la
mezcla en el bote para congelar y siga las instrucciones indicadas en la sección
"Cómo Utilizar la Máquina de Helados de 4 Qt. (3.8 Lt.)." No llene el bote para
congelar por encima de la línea "MAX", ya que la mezcla se expandirá durante
la congelación.
Page 30

9
Yogur Congelado de Fresas
4 tazas de Yogur Natural
¾ taza de Azúcar
1 taza de Crema Doble para Batir
1 ½ tazas de Fresas en almíbar,
descongeladas
Mezcle todos los ingredientes en un tazón grande para mezclar. Enfríe la
mezcla, cubierta, en el refrigerador durante 1 hora antes de congelar la.
Vierta la mezcla en el bote para congelar y siga las instrucciones indicadas en
la sección " Cómo Utilizar la Máquina de Helados de 4 Qt. (3.8 Lt.)." No llene el
bote para congelar por encima de la línea "MAX," ya que la mezcla se
expandirá durante la congelación.
Gelato de Chocolate y Avellanas
4 tazas de Leche Entera
2 tazas de Crema Pesada
1 taza más ½ taza de Azúcar
8 Yemas de Huevo
1 cdta. de Extracto de Vainilla
1 taza de Pasta de Chocolate y Avellanas
1 taza de Avellanas, picadas, opcional
En una cacerola, combine la leche, la crema y taza de azúcar mientras calienta
sobre fuego medio. Cueza hasta que se disuelva el azúcar, lo cual tardará unos
5 minutos.
Mientras tanto, en un tazón de tamaño medio bata las yemas de huevo con el
azúcar restante utilizando una batidora eléctrica hasta que los huevos queden
espesos y de color amarillo pálido, lo cual tomará unos 4 minutos. Vierta ½ taza
de leche tibia y la mezcla de la crema dentro de la mezcla de los huevos y
revuelva. Agregue esta mezcla de vuelta a la cacerola. Cocine a fuego muy
lento, removiendo constantemente, hasta que la mezcla se torne lo
suficientemente espesa para recubrir el reverso de una cuchara de madera, lo
cual tardará entre 7 y 10 minutos.
Coloque un colador sobre un tazón de tamaño medio y vierta la mezcla de la
natilla tibia a través del mismo. Agregue y revuelva la vainilla y la pasta de
avellanas hasta que queden disueltas. Vierta la mezcla en el bote para congelar
y siga las instrucciones indicadas en la sección "Cómo Utilizar la Máquina de
Helados de 4 Qt. (3.8 Lt.)." No llene el bote para congelar por encima de la línea
"MAX," ya que la mezcla se expandirá durante la congelación
Page 31

10
L5802A 01/10 Back to Basics®, una Marca de Focus Electrics, LLC. Impreso en China
G
ARANTÍA DEL PRODUCTO
Garantía Limitada de 1 Año del Artefacto Electrodoméstico
Focus Electrics, LLC (“Focus Electrics”) garantiza que este aparato no presentará fallas de
material ni fabricación durante un (1) año a partir de la fecha original de compra con prueba de
dicha compra, siempre y cuando el aparato sea operado y mantenido tal como se indica en el
manual de instrucciones provisto. Toda pieza del aparato que presente fallas será reparada o
reemplazada sin costo alguno a criterio de Focus Electrics. Esta garantía rige solamente para
el uso domestico dentro de la casa.
Esta garantía no cubre ningún daño, incluyendo la decoloración, de superficie anti-adherente
alguna del aparato electrodoméstico. Esta garantía es nula y sin valor, según lo determine
exclusivamente Focus Electrics si el artefacto electrodoméstico es dañado a causa de
accidente, mal uso, abuso, negligencia, rayaduras, o si el artefacto electrodoméstico es
cambiado de algún modo.
ESTA GARANTÍA REEMPLAZA A TODAS LAS DEMÁS GARANTÍAS IMPLÍCITAS,
INCLUYENDO AQUÉLLAS DE COMERCIABILIDAD, IDONEIDAD PARA UN FIN O USO EN
PARTICULAR, DESEMPEÑO, U OTROS TIPOS, LAS CUALES QUEDAN EXCLUIDAS
MEDIANTE EL PRESENTE DOCUMENTO. FOCUS ELECTRICS, LLC RECHAZA TODA
RESPONSABILIDAD POR DAÑOS, YA SEAN DIRECTOS, INDIRECTOS, INCIDENTALES,
PREVISIBLES, CONSECUENTES O ESPECIALES QUE SURJAN DE ESTE APARATO
ELECTRODOMÉSTICO O GUARDEN RELACIÓN CON EL MISMO.
Si piensa que el artefacto electrodoméstico se ha dañado o requiere de servicio dentro de su
período de garantía, por favor póngase en contacto con el Departamento de Atención al
Cliente de Focus Electrics por el (866) 290-1851 o contáctenos por correo electrónico a la
service@focuselectrics.com. Los gastos de devolución no son reembolsables. Para todas las
reclamaciones de garantía, se requerirá un recibo que demuestra la fecha de compra original,
los recibos escritos a mano no son aceptados. Focus Electrics, LLC no se hace
responsable de las devoluciones perdidas en tránsito.
Válido sólo en EE.UU. y Canadá
R
EPUESTOS
Las partes de repuestos, si están disponibles, pueden pedirse directamente en línea a Focus
Electrics en www.focuselectrics.com, o puede llamar o enviar un correo electrónico al
departamento de servicio al número telefónico o dirección de correo electrónico arriba
indicados, o escribiéndonos a:
Focus Electrics, LLC
Attn: Customer Service
P. O. Box 2780
West Bend, WI 53095
Cerciórese de incluir el número de catálogo/modelo del aparato electrodoméstico (situado en la
parte inferior/posterior de la unidad) así como la descripción y la cantidad de repuestos que
necesita. Junto con esta información, incluya su nombre, dirección postal, número de tarjeta
de crédito Visa o MasterCard, la fecha de vencimiento y el nombre tal como aparece en la
tarjeta. Los cheques pueden ser pagaderos a Focus Electrics, LLC. Llame al Departamento
de Atención al Cliente para obtener el monto de la compra. Se sumará al total el impuesto de
venta estatal que corresponda, más un cargo por despacho y procesamiento. La entrega
tarda dos (2) semanas.
Este manual contiene información importante y útil sobre el uso seguro y el cuidado de su
nuevo producto Focus Electrics. Para su propia referencia, archive aquí el recibo fechado que
sirve de comprobante de compra para la garantía, y anote la siguiente información:
Fecha en que compró o recibió la unidad como regalo: _______________________________
Dónde se efectuó la compra y el precio, si lo sabe: ___________________________________
Número y código de fecha del producto (aparece en la parte inferior/posterior de la unidad):
___________________________________
Page 32

N
OTAS
 Loading...