

Page 1
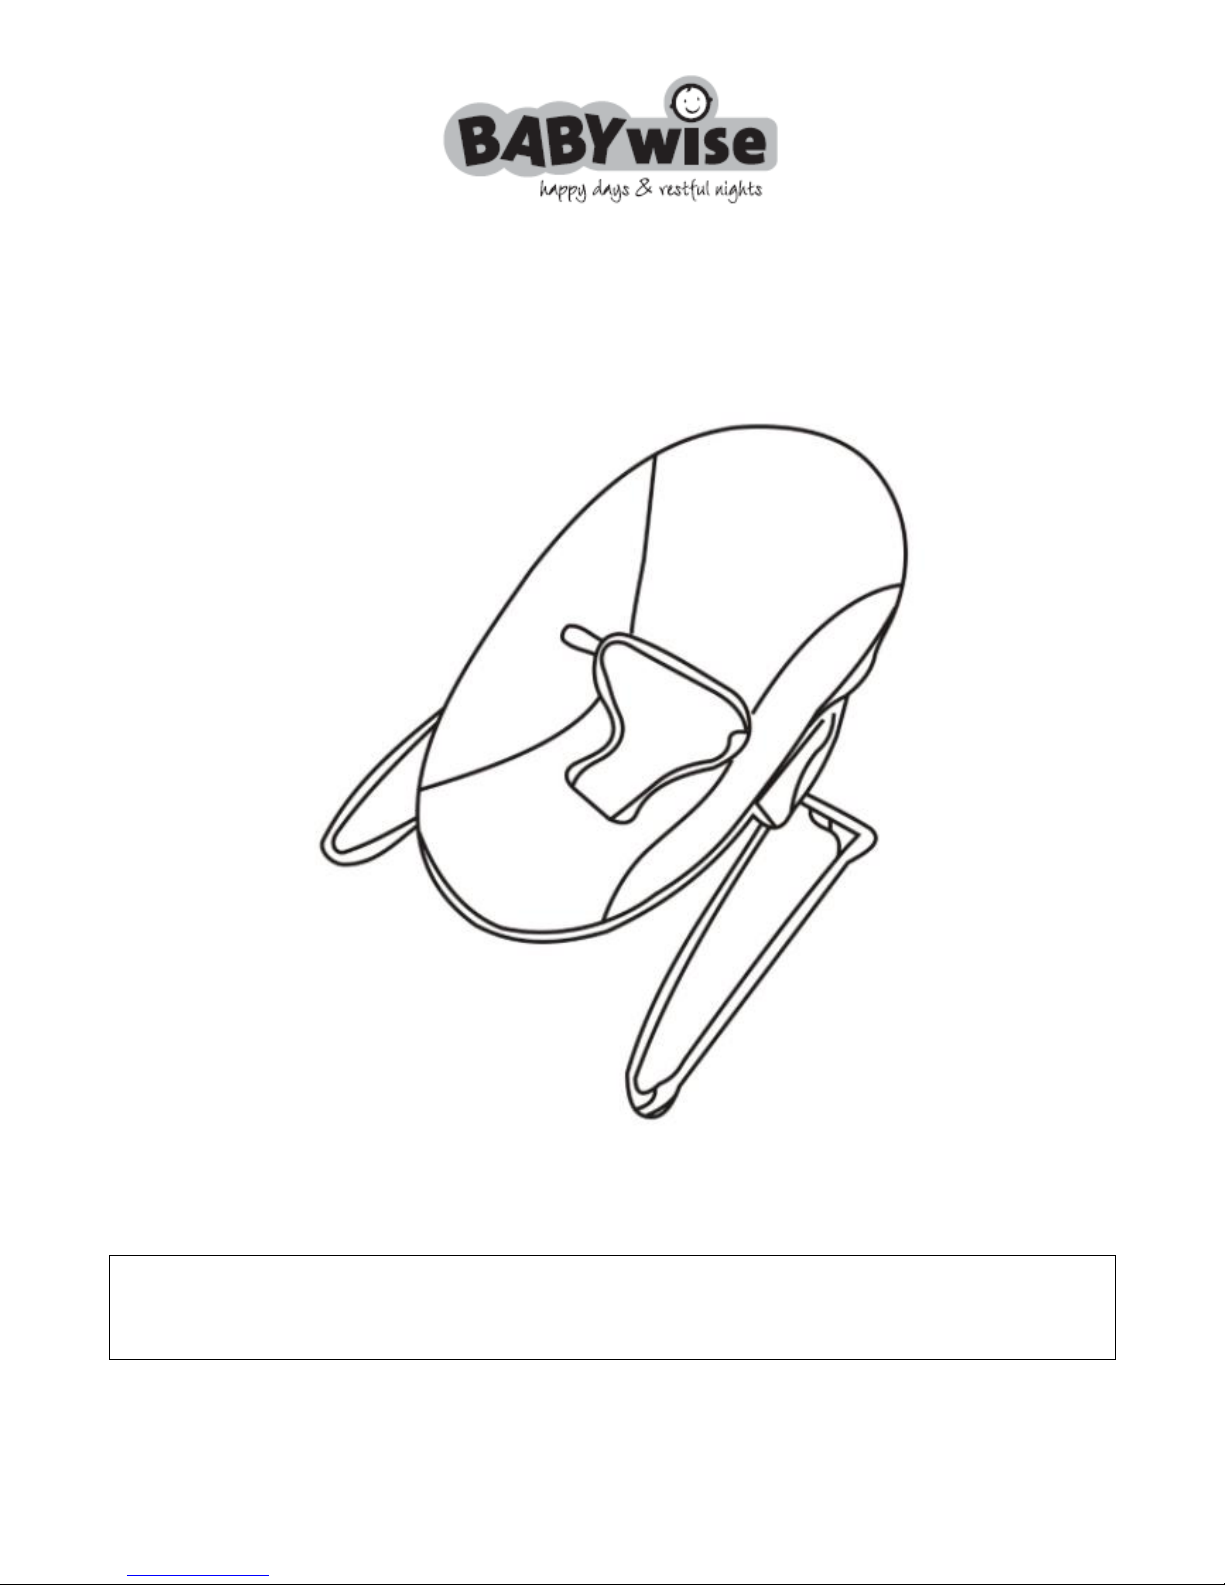
Baby Bouncer
INSTRUCTION MANUAL
Complies with EN12790:2009 and AS/NZS ISO 8124-2:2009, 8124-3:2012
IMPORTANT:
Thank you for choosing our product. Please read and understand these instructions before using this baby
bouncer. If in doubt, please seek help from our Customer Service Team.
Please retain the instructions for future reference.
Images in this manual are representative only. Actual product may vary. The manufacturer reserves the right to change specifications
without prior notice.
Page 2

SAFETY
THANK YOU FOR CHOOSING OUR PRODUCT. PLEASE TAKE TIME TO READ THE IMPORTANT
SAFETY NOTES BELOW. THIS WILL ENSURE MANY YEARS OF HAPPY AND SAFE USE. IF IN DOUBT,
PLEASE SEEK ASSISTANCE FROM OUR CUSTOMER SERVICE TEAM.
INCORRECT ASSEMBLY MAY MAKE THE BOUNCER UNSAFE. DO NOT USE THIS BOUNCER IF ANY
PART IS BROKEN, TORN OR MISSING.
WARNING
Never leave the child unattended.
Do not use this baby bouncer once your child can sit unaided.
Never place a child over 9kg in the product.
This baby bouncer is not intended for prolonged periods of sleeping.
Always use the restraint system.
It is dangerous to use the baby bouncer on an elevated surface, e.g. a table.
Never move the unit while child is in the seat.
Never attach any additional strings or straps to product.
Examine the product frequently for damaged, missing, or loose parts.
Do not use the product if damaged or broken.
Adult assembly required.
Please read all instructions before assembly and use of the product.
Care should be taken in unpacking and assembly.
Examine product frequently for damaged, missing, or loose parts.
DO NOT use if any parts are missing, damaged, or broken.
This baby bouncer does not replace a cot or a bed. Should your child need to sleep,
then it should be placed in a suitable cot or bed.
Do not use accessories or replacement parts other than those approved by the
manufacturer.
Page 3
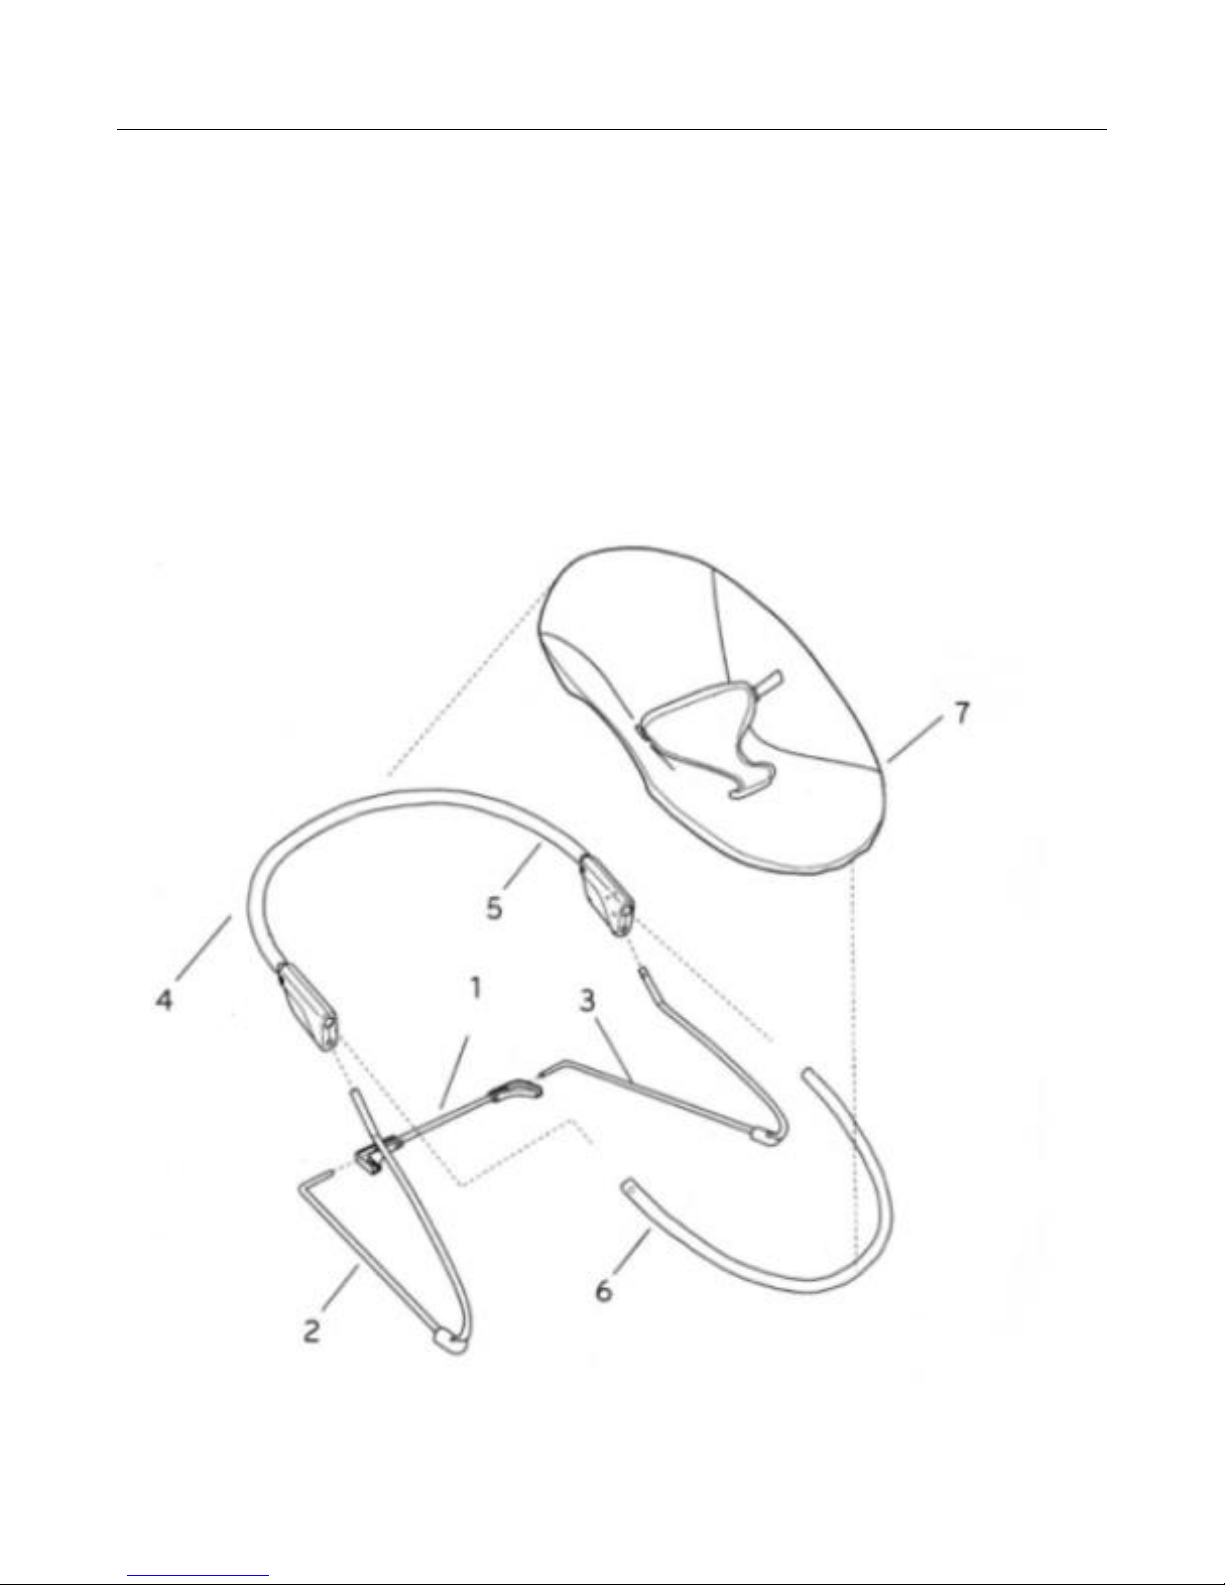
PARTS LIST
Please retain all packaging until after assembly is complete and you are certain no parts
are missing.
After assembly, please dispose of all packaging carefully.
1 Rear Bar
2 Left Side Spring
3 Right Side Spring
4 Left Upper Tube
5 Right Upper Tube
6 Lower Tube
7 Seat Cover & Harness
Page 4

ASSEMBLING THE BOUNCER
Fit the two Side Springs to the Rear Bar – fold
out the plastic Corner and align the Side
Spring and Rear Bar ends, then snap the
plastic Corner back into place to hold them
together – see inset picture.
Note that the open face of the plastic
Corner must be facing upwards when the
Bouncer is fully assembled.
Fit the left and right Upper Tubes together –
press the silver spring button in and fit the
Right Upper Tube onto the Left upper Tube
until the spring button clicks into the hole.
Page 5

Click the Lower Tube into the plastic
Connectors on the Upper Tubes. Ensure the
spring buttons click positively into place.
Give the Tubes a good pull to ensure they
are locked in place.
Place the Tube assembly onto the leg
assembly by sliding the ends of the Left and
Right Springs into the holes in the plastic
connectors, below the Lower Tube.
Ensure the Springs are pushed firmly into their
holes – pull on them to ensure they are not
loose and will not come out easily when the
Bouncer is in use.
Page 6

FITTING SEAT COVER AND HARNESS
Pull the Seat Cover and Harness over the top
of the Upper Tubes so that they are fully
inserted into the pocket on the back of the
cover.
Turn the Bouncer over so that the Cover and
Tubes are resting on the table and buckle on
the cover. Buckle each “tail” of the cover to
the opposite side so that the tails cross over
as shown. Snap the buckles into place and
pull on them to ensure they are secure.
Page 7

Slide the feet into position on the two Side
Springs. They should be under the spring
and just at the front bend.
These feet, and the two rear plastic corners
must be in the correct position to prevent
the Bouncer from sliding on the floor.
USING THE BOUNCER
With the Bouncer on a firm level floor
surface, unbuckle the harness.
Page 8

Place baby in the Bouncer with the harness
straps pulled out from behind, lift up the flap
between the legs, and buckle the harness
up. Check buckles have fastened properly
by tugging on them.
Adjust the side straps as required to hold
baby firmly in place.
WARNING: USE THE HARNESS AT ALL TIMES
CLEANING AND MAINTENANCE
Surface wash only. Wipe clean with a cloth dampened in a mild cleaner. Wipe dry with
a soft, clean cloth.
Do not use bleach.
Regularly check the Bouncer, particularly the harness, for wear and discontinue use if
damaged.
Made in China
Manufactured for:
The Warehouse Ltd
26 The Warehouse Way,
Northcote, Auckland.
0800 422 274
 Loading...