

Page 1
1
Page 2

2
Fer conique
Easy Curl
Easy Curl ou le geste bouclage
simplié !
Grâce à une manipulation simplissime de ce fer conique, vous allez
pouvoir créer des boucles naturelles, libres, plus serrées ou plus
larges, à tout moment !
CARACTERISTIQUES
• Tube avec revêtement Titanium
Ceramic
• Molette de réglage de la tempé-
rature (10 positions)
• Interrupteur marche/arrêt avec
témoin de mise sous tension
• Mise à température rapide
(200°C max.)
• Support intégré
• Embout isolant
• Gant de protection
• Arrêt automatique
• Cordon rotatif
UTILISATION
Consulter au préala ble les consignes de sécuri té.
• Assurez-vous que vos cheveux
soient secs et parfaitement dé-
mêlés.
• Branchez le fer à boucler et appuyez sur le bouton « I ». Le té-
moin lumineux rouge s’allume et
clignote.
• Sélectionnez la température
désirée grâce à la molette de
réglage. De manière générale, il
est recommandé de choisir une
température plus basse pour des
cheveux ns, décolorés et/ou
sensibilisés, et une température
élevée pour des cheveux frisés,
épais et/ou diciles à coier.
Chaque type de cheveux étant
diérent, nous vous recomman-
dons d’utiliser les positions 1 à
4 lors de la première utilisation.
Lors des utilisations suivantes,
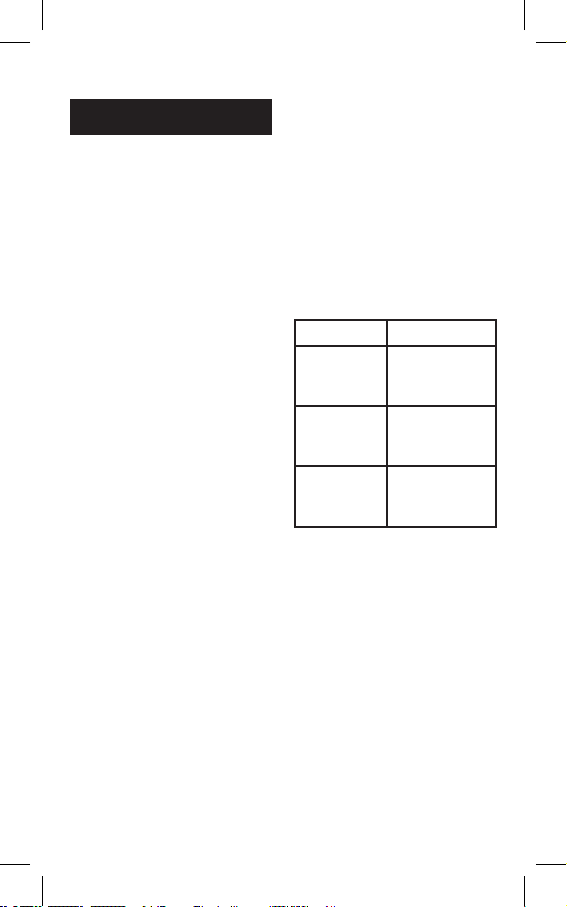
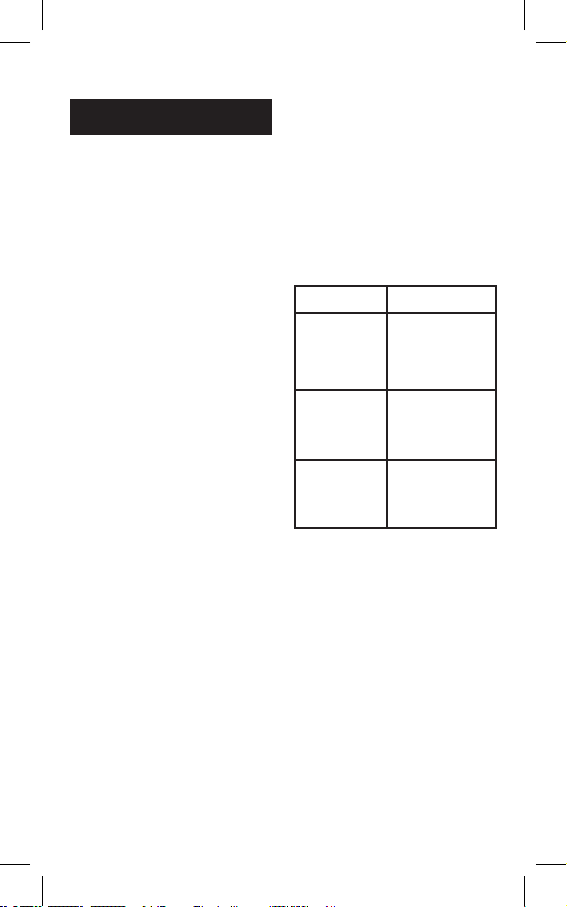
vous pourrez augmenter progressivement le réglage si besoin. Voir le tableau ci-dessous à
titre indicatif :
Température
Type de
cheveux
Position
1 à 4
Cheveux ns,
décolorés et/ou
sensibilisés
Position
5 à 7
Cheveux
normaux,
colorés et/ou
ondulés
Position
8 à 10
Cheveux épais
et/ou frisés
• Le témoin lumineux rouge cesse
de clignoter quand la température sélec tionnée est atteinte.
Votre fer à boucler est alors prêt
à l’emploi; le témoin rouge reste
allumé.
IMPOR TA NT : Un gant de p rotection est fo urni ave c l’appar eil et
FRANÇAIS
Page 3

3
doit être systém atiquement uti lisé pou r p rotéger les doig ts de
la main qui enroule les cheveux
autour du fe r. Ce gant n e protège toute fois pas les doigt s d’un
contac t prolongé a vec la surfac e
chaude d u tube coniqu e.
• Séparez une mèche de cheveux
et placez la partie la plus large
du fer conique à 2-3cm du cuir
chevelu.
• Enroulez la mèche sur le cône et
terminez en serrant la pointe de
la mèche sur l’embout isolant, à
l’aide de l’autre main munie du
gant. Maintenez la mèche dans
cette position 5 à 8 secondes en
fonction de la nature du cheveu.
• Faites ensuite glisser doucement
le fer hors de la mèche.
• Sélectionnez des mèches de che-
veux assez nes pour obtenir des
boucles plus serrées et plus élas-
tiques, et des mèches de cheveux
plus larges pour des boucles plus
libres, plus oues..
• Laissez refroidir les boucles avant
de les manipuler.
• Après utilisation, appuyez sur
le bouton « O » et débranchez
l’appareil
Arrêt automati que
Si le fer à boucler reste allumé
pendant plus d’1h12, il s’éteint
automatiquement.
ENTRETIEN DE VOTR E FER A
BOUCLER
• Débrancher l’appareil et le laisser
refroidir complètement.
• Nettoyer le tube conique à l’aide
d’un chion humide et doux,
sans détergent, an de préserver
la qualité optimale du revêtement. Ne pas gratter le tube.
Page 4

4
ENGLISH
Conical Iron
Easy Curl
Easy Curl or the motion of the curl
simplied!
Because the conical iron is such
a breeze to handle, you’ll be able
to create natural, loose, tighter or
bigger curls, any time!
FE ATUR ES
• Titanium Ceramic coated barrel
• Little wheel to adjust the tem-
perature (10 settings)
• On/O switch with power indicator light
• Fast heat up (200°C max.)
• Integrated heat rest
• Stay-cool tip
• Protective nger shield
• Automatic switch o
• Swivel cord
USE
Read the safe ty instructions rs t.
• Make sure your hair is dry and
completely untangled.
• Plug in the curling iron and press
the “I” button. The power indicator light will turn on and ash.
• Select the desired temperature
using the adjustment wheel.
G en e ra l ly , i t is r ec o mm e nd e d t h at
a lower temperature is selected
for hair that is ne, bleached
and/or damaged, and a higher
temperature for hair that is curly,
thick and/or dicult to style.
Every hair type being dierent,
we recommend you set the unit
to positions 1 to 4 the rs t time
you use it. You can increase the
setting gradually in subsequent
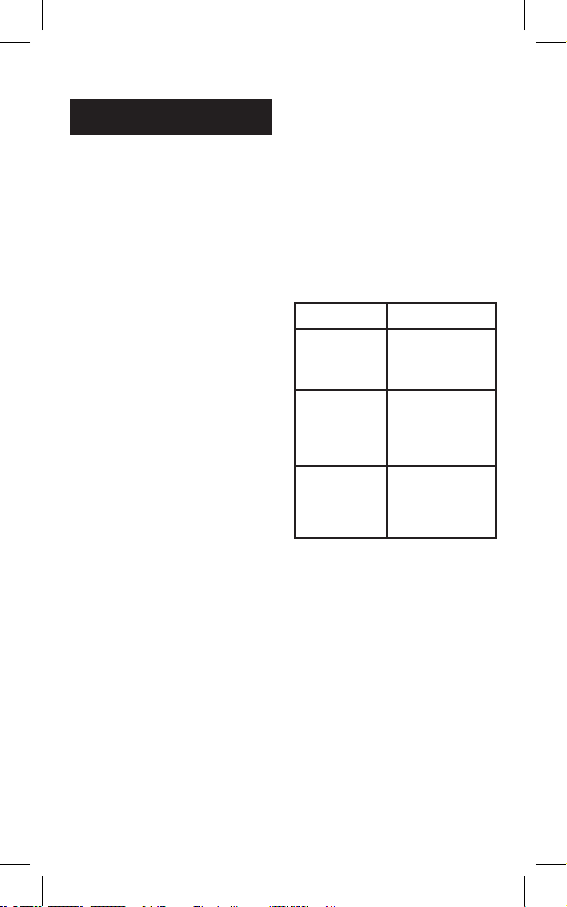
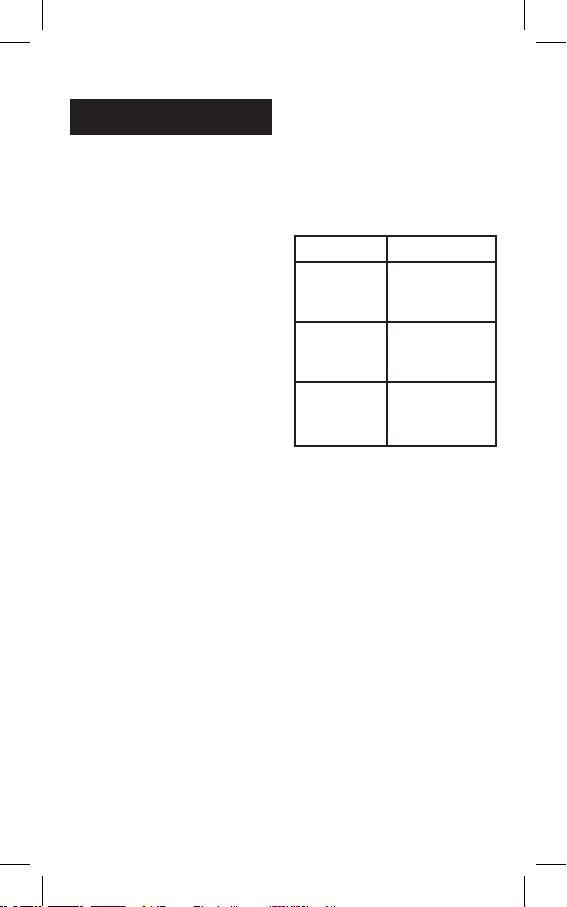
uses if necessary. Refer to the table below as a guide:
Temperature Hair type
Settings
1 to 4
Fine, lightened
and/or
damaged hair
Settings
5 to 7
Normal,
coloured and/
or wavy hair
Settings
8 to 10
Thick and/or
curly hair
• The red indicator light will stop
ashing when the unit has heated
up to the selected temperature.
Your curling tong is now ready
to use; the red indicator light will
stay on.
IMPOR TA NT: A pro tective nger
shield is included with the unit
and sh ould be use d systemati cally to protect your ngers when
winding your hair around the
barrel. Nonetheless, this glove
will not prot ect your ngers from
exte nded conta ct with the hot
surfa ce of the conica l barrel.
• Separate a section of hair and
place the widest part of the coni-
cal iron 2 to 3 cm from you scalp.
• Wind the section around the cone
and nish by holding the tip of
Page 5

5
the section against the stay-cool
tip using your free hand with the
glove. Hold the section of hair in
thi s pos itio n for 5 to 8 s econ ds de pending on your hair type.
• Then glide the iron gently out of
the section.
• For tighter and bouncier curls,
separate your hair into smaller
sections. For looser, softer curls,
separate your hair into bigger
sections.
• Allow your curls to cool before
handling them.
• After use, press the “O” button
and unplug the unit.
Automat ic switch o
If the curling iron stays on for longer than 72 minutes, it will turn o
automatically.
MAINTAINING YOUR CURLING
IRON
• Unplug the unit and allow it to
cool completely.
• Clean the conical barrel using a
soft, damp cloth without deterge nt t o pre se rve the opt ima l qu ality of the coating. Do not scratch
the barrel.
Page 6

6
DEUTSCH
Konischer Lockenstab
Easy Curl
Easy Curl oder ganz einfach Lokken formen!
Dank der absolut einfachen Handhabung dieses kegelförmigen
Lockenstabs können Sie natürliche, frei schwingende, kleinere
oder größere Locken formen, und
das jederzeit!
EIGENSCHAFTEN
• Rohr mit Beschichtung aus Titanium Ceramic
• Temperaturre gelrädchen (10 Positionen)
• Ein-/Ausschalter mit Kontrollleuchte für die Betriebsbereitschaft
• Schnelles Aufheizen (max.
200°C)
• Integrierte Stütze
• Isolier te Spitze
• Schutzhandschuh
• Abschaltautomatik
• Drehkabel
GEBR AUCH
Bitte lesen Sie vorher die Sicherheitshinweise.
• Vergewissern Sie sich, dass Ihr
Haar vollst ändig entwirrt ist.
• Den Lockenstab an den Netzstrom anschließen und den
Knopf « I » drücken. Die rote
Leuchtanzeige leuchtet auf und
blinkt.
• Stellen Sie mit dem Temperatur-
wahlrädchen die gewünschte
Temperatur ein. Allgemein wird
empfohlen, die niedrigste Temperatur für feines, dekoloriertes
un d/o der b rü chi ges Haa r zu w äh len, und eine höhere Temperatur
für gekräuseltes, dickes und/oder
schwer frisierbares Haar. Da jeder
Haartyp unterschiedlich reagiert
ist es ratsam, bei der ersten Ver-
wendung die Stufen 1-4 einzustellen. Später können Sie gegebenenfalls nach und nach die
Temperatureinstellung erhöhen.
In der folgenden Tabelle nden
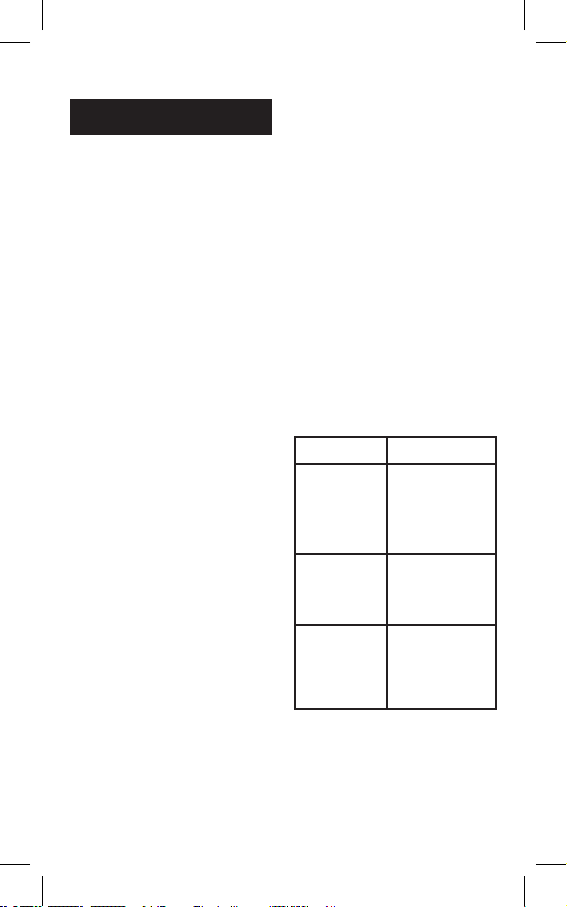
Sie einige Anhaltspunkte:
Temperatur Haartyp
1 bis 4
Feines, deko-
loriertes und/
oder brüchiges
Haar
5 bis 7
Normales,
koloriertes
und/oder
gewelltes Haar
8 bis 10
Dickes und/
oder gekräusel-
tes Haar
• Die rote Anzeigeleuchte hört auf
zu blinken, sobald die gewählte
Temperatur erreicht ist. Ihr Lokkenstab ist dann betriebsbereit;
die rote Anzeige leuchtet ununterbrochen.
WICHTIG: Dem Ge rät liegt ei n
Schutzhandschuh bei, der systematisch verwendet werden
Page 7

7
sollte , um die Fi nger der H and zu
schützen, mit der das Haar um
den Stab g ewickelt wir d. Dieser
Handsch uh besc hützt die Fing er
allerdi ngs nic ht, wen n die heiße
Oberäche des konisch geformten Rohrs längere Zeit berührt
wird.
• Eine Haarsträhne abteilen und
den breitesten Teil des konischen
Stabs in 2-3cm Abstand von der
Kopfhaut ansetzen.
• Die Strähne um den Kegel wickeln
und zum Abschluss die Spitze der
Strähne mit der behandschuhten
Hand fest um die isolier te Spitze
legen. Halten Sie die Strähne je
nach Beschaenheit des Haars
5-8 Sekunden dor t fest.
• Lassen Sie den Stab anschließend vorsichtig aus der Strähne
gleiten.
• Wählen Sie ziemlich feine Strähnen, um feste, elastischere Lokken zu erzeugen, und breitere
Strähnen für lockerer fallende,
größere Locken..
• Die Locken vor dem Frisieren ab kühlen lassen.
• Nach dem Gebrauch den Knopf «
O » drücken und den Net zstecker
ziehen.
Abschaltautomatik
Wenn der Lockenstab mehr als
1Std12 eingeschaltet bleibt, schaltet er sich automatisch aus.
PFLEGE IHRES LOCK ENSTABS
• Den Netzstecker ziehen und das
Gerät vollständig abkühlen las-
sen.
• Den Stab mit einem weichen,
feuchten Tuch ohne Reinigungsmittel säubern, um die optimale
Qualität der Beschichtung zu
erhalten. Den Stab nicht abkrat-
zen.
Page 8

8
NEDERLANDS
Easy Curl
Conische krultang
Easy Curl, krullen in een handomdraai!
Op een zeer eenvoudige manier
kun je met deze taps toelopende
krultang, op elk gewenst moment,
natuurlijke, losse, strakke of grove
krullen creëren!
PRODUCTKENMERKEN
• Buis met Keramische Titanium
coating
• Geribbeld wieltje om de tempe-
ratuur in te stellen (10 standen)
• Aan/uit-schakelaar met spanningsindicatorlampje
• Snel op temperatuur (200°C
max.)
• Geïntegreerde houder
• Isolerend uiteinde
• Beschermende handschoen
• Automatische uitschakeling
• Meedraaiend snoer
GEBRUIK
Lees voor gebruik de veiligheidsinstructies.
• Zorg dat het haar droog en volledig ontward is.
• Steek de stekker in het stopcontact en druk op de « I » knop. Het
rode verklikkerlampje gaat aan
en knippert.
• Stel de gewenste temperatuur in
met behulp van het geribbelde
wieltje. Over het algemeen
wordt geadviseerd om een la-
gere temperatuur te kiezen voor
dun, ontkleurd en/of kwetsbaar
haar, en een hogere temperatuur voor krullend of dik haar
en/of haar dat moeilijk in model
te brengen is. Omdat elke haarsoort anders is, adviseren wij om
de eerste keer de standen 1 tot
4 te gebruiken. Indien nodig kan
de stand bij volgend gebruik dan
geleidelijk aan hoger gezet worden. Zie de tabel hieronder ter
indicatie:
Temperatuur Haartype
Stand 1 tot 4
Fijn, ont- kleurd
en/of overge-
voelig haar
Stand 5 tot 7
Normaal,
gekleurd en/of
golvend haar
Stand 8
tot 10
Dik en/of
gekruld haar
• Het rode verklikkerlampje stopt
met knipperen als de geselecteerde temperatuur wordt
bereikt. Uw krultang is dan gebruiksklaar; het rode lampje
blijft aan.
BELAN GRIJK: Een besc hermende h andschoen word t met d e
krulta ng meegeleverd , en dient
steeds te worden geb ruikt om de
vinger s van de ha nd te beschermen die de haarpluk jes om de
krulta ng wikke len. D eze han dschoe n besch ermt de vi ngers
Page 9

9
echter ni et bij lange r contac t
met het hete opper vlak van de
conisc he buis.
• Neem een plukje haar en plaats
het breedste deel van de conische buis op 2 à 3 cm van de
hoofdhuid.
• Wikkel met de hand met de
handschoen de pluk om de kegel en druk tot slot de punt van
de pluk tegen het geïsoleerde
uiteinde van de krultang. Houd,
afhankelijk van het haartype, de
pluk in deze positie, gedurende
5 à 8 seconden.
• Laat de pluk vervolgens voorzichtig van het ijzer afglijden.
• Gebruik dunne plukjes om strakkere en elastischere krullen te
creëren, en grotere plukken om
grovere, vrijere en lossere krullen te maken.
• Laat de krullen afkoelen alvorens
ze in model te brengen.
• Na gebruik , op het knopje «O»
drukken en de stekker uit het
stopcontact halen
Automat ische uitschakeling
Wanneer de krultang langer dan
72 minuten aanstaat, schakelt hij
automatisch uit.
ONDER HOUD VAN DE KRULTAN G
• Haal de stekker uit het stopcontact en laat het apparaat volledig
afkoelen.
• Reinig de conische buis met een
zacht en vochtig doekje zonder
schoonmaakmiddel, zodat de
kwaliteit van de coating optimaal blijft. Geen krassen maken
op de buis.
Page 10

10
ITALIANO
Ferro conico
Easy Curl
Easy Curl: l’arricciatura semplicata!
Grazie alla semplicissima manipolazione di questo ferro conico, potrete creare in qualsiasi momento
riccioli naturali, liberi, più stretti o
più ampi!
CARATTERISTICHE
• Tubo con rivestimento Titanium
Ceramic
• Rotella di regolazione della tem peratura (10 posizioni)
• Interruttore acceso/spento con
spia di alimentazione
• Raggiungimento rapido della
temperatura (200°C max)
• Supporto integrato
• Punta isolante
• Guanto protettivo
• Spegnimento automatico
• Cavo girevole
UTILIZZO
Leggere dappri ma l e istr uzioni di
sicurezza.
• Controllate che i capelli siano
perfettamente asciutti e senza
nodi.
• Attaccare il ferro alla corrente
elettrica e premere il pulsante
«I» . La sp ia ro ssa si accen de e la mpeggia.
• Selezionare la temperatura desiderata grazie all’apposita rotella.
In g en eral e, s i ra ccom and a di s ce -
gliere una temperatura più bassa
p er c a p el l i s ot t i l i, s c ol o r i ti e /o s e n sibili, e una temperatura elevata
per capelli ricci, spessi e/o dicili
da acconciare. Dato che tutti i tipi
di capelli sono diversi, raccomandiam o di utili zzare l e posizio ni da
1 a 4 al primo utilizzo. Agli utilizzi
successivi, all’occorrenza, potrete aumentare progressivamente
la regolazione. Vedere la tabella
seguente a titolo indicativo:
Temperatura Tipo di capelli
Posizioni da
1 a 4
Capelli ni,
scoloriti e/o
sbrati
Posizioni da
5 a 7
Capelli normali,
colorati e/o
ondulati
Posizioni da
8 a 10
Capelli spessi
e/o ricci
• La spia luminosa rossa smette
di lampeggiare quando viene
raggiunta la temperatura sele-
zionata. Il ferro arricciacapelli è,
a questo punto, pronto per essere utilizzato; la spia rossa resta
accesa.
IMPORTANTE: In do tazione co n
l’apparecchio è fornito un guanto
protett ivo che d eve essere usato
sistematicamente per proteggere le dita della mano che avvolge
i ca pelli at torno al ferro. Questo
guanto, tuttavia, non pro tegge
Page 11

11
le d ita d a un c onta tto prol ung ato
con la su percie ca lda del tubo
conico.
• Separate una ciocca di capelli
e mettete la parte più larga del
ferro conico a 2-3 cm dal cuoio
capelluto.
• Avvolgete la ciocca sul cono e
terminate chiudendo la punta
della ciocca sulla punta isolante,
aiutandovi con la mano protetta
dal guanto. Mantenete la ciocca in questa posizione da 5 a 8
secondi, in funzione del tipo di
capello.
• Fate quindi scorrere delicatamente il ferro fuori della ciocca.
• Selezionate ciocche di capelli
abbastanza sottili per ottenere
riccioli più stretti e più elastici,
e ciocche più ampie per ciocche
più libere e più morbide.
• Lasciar rareddare i riccioli prima
di manipolarli.
• Dopo l’utilizzo, premere il pulsante “O” e staccare l’apparecchio
dalla corrente
Spegnimento automatico
Se resta accesa p er più di 1h12, il
ferro arricciacapelli si spegne automaticamente.
PULIZIA DE L VOSTRO FERRO
ARRICCIACAPELLI
• Staccare l’apparecchio dalla corrente e lasciarlo rareddare com-
pletamente.
• Pulire il tubo conico con un panno umido e delicato, senza de tersivo, per preser vare la qualità
ottimale del rivestimento. Non
graare il tubo.
Page 12
12
Tenacillas cónicas
Easy Curl
Easy Curl: ¡los rizos más sencillos!
Gracias a una manipulación sencillísima de estas tenacillas cónicas,
podrá crear rizos naturales, libres,
más apretados o más sueltos, en
cualquier momento.
CARACTERÍSTICAS
• Tubo con revestimiento de Titanio Cerámica
• Rueda de ajuste de la temperatura (10 posiciones)
• Interruptor parada/marcha con
indicador luminoso de encendido
• Alcanza la temperatura rápidamente (200° C máx.)
• Soporte integrado
• Remate aislante
• Guante de protección
• Parada automática
• Cable giratorio.
UTILIZACIÓN
Consulte previamente las consig nas
de seguridad.
• Seque completamente el cabello
y desenrédelo bien.
• Enchufe las tenacillas y pulse el
botón «I». El piloto luminoso rojo
se pone a parpadear.
• Seleccione la temperatura deseada gracias a la rueda de control.
En general, le recomendamos
que elija una temperatura más
baja para el cabello no, deco-
lorado o estropeado y una temperatura elevada para el cabello
rizado, áspero o difícil de peinar.
Cada tipo de cabello es diferente,
por lo que le recomendamos que
utilice las posiciones 1 a 4 en la
primera utilización. En las utilizaciones siguientes, puede aumentar progresivamente la temperatura si es necesario. Puede
consultar tabla siguiente a título
indicativo:
Temperatura Tipo de cabello
Posición
1 a 4
Cabello no,
decolorado o
estropeado
Posición
5 a 7
Cabello normal,
teñido y ondu-
lado
Posición
8 a 10
Cabello grueso
o rizado
• El indicador luminoso dejará de
parpadear cuando se alcance la
temperatura seleccionada. A partir de ese momento, las tenacillas
están listas para su uso y el indicador permanece encendido.
IMPORTANTE: Debe utilizar sistemáticamente el guante de protección incluido, para proteger
los dedos de la mano que enrosca
el cabello alrededor de las tenacillas . N o o bstante, este guante
no protege los dedos de u n con tacto prolongado con la super-
ES PAÑO L
Page 13

13
cie cal iente del tubo c ónico.
• Separe un mechón de cabello y
coloque la parte más ancha de
las tenacillas cónicas a 2-3 cm del
cuero cabelludo.
• Enrosque el mechón sobre el
cono y termine enroscando apre-
tada la punta del mechón sobre
el extremo aislante, con ayuda de
la otra mano, provista del guante.
Mantenga el mechón en esta posición de 5 a 8 segundos, en función de la naturaleza del cabello.
• A continuación, saque suavemente el mechón de las tenacillas.
• Seleccione mechones más nos
para obtener rizos más apretados
y más elásticos y mechones más
gruesos para rizos más sueltos,
más libres.
• Deje enfriar los rizos antes de manipularlos.
• Después de usar las tenacillas,
pulse el botón «O» y desenchú-
felas.
Parada automática
Si deja encendidas las tenacillas
durante más de 1h12, se apagarán
automáticamente.
MANTENIMIENTO
• Desenchufe el aparato y déjelo
enfriar completamente.
• Limpie el tubo cónico con ayuda
de un trapo húmedo y suave, sin
detergente, con el n de preservar la calidad óptima del revesti-
miento. No raye el tubo.
Page 14

14
Ferro cónico
Easy Curl
Easy Curl ou a técnica de encaracolar simplicada!
Graças à manipulação extremamente simples deste ferro cónico,
poderá criar caracóis naturais,
livres, mais fechados ou mais soltos, a todo o momento!
CARACTERÍSTICAS
• Tubo com revestimento em Titanium Ceramic
• Selector rotativo de regulação da
temperatura (10 posições)
• Interruptor de alimentação (ON/
OFF) com indicador de alimen-
tação
• Aquecimento rápido (200 °C
máx.)
• Suporte integrado
• Ponta isoladora
• Luva protectora
• Extinção automática
• Cabo rotativo
UTILIZAÇÃO
Consulte previamente os conselhos
de segurança.
• Conrme que os cabelos estão
secos e per feitamente desembaraçados.
• Ligue o ferro de encaracolar e
carregue na tecla «I». O indicador
luminoso encarnado acende e
ca intermitente.
• Seleccione a temperatura pretendida, graças ao selector rota-
tivo de regulação. De um modo
geral, deverá escolher uma temperatura baixa para os cabelos
nos, descolorados e/ou sensibilizados, e uma temperatura alta
para os cabelos frisados, grossos
e/ou difíceis de pentear. Sendo
cada tipo de cabelo diferente,
aconselha-se a utilização das
posições 1 a 4 na primeira utili-
zação. Nas utilizações seguintes,
pode, se necessário, aumentar
progressivamente a temperatu-
ra. Veja o quadro abaixo a título
indicativo.
Temperatura Tipo de cabelos
Posição 1 a 4
Cabelos nos,
oxigenados
e/ou sensibili-
zados
Posição 5 a 7
Cabelos nor-
mais, pintados
e/ou ondulados
Posição 8
a 10
Cabelos
grossos e/ou
frisados
• O indicador luminoso encarna-
do deixa de estar intermitente
quando é atingida a temperatura
escolhida. O ferro de encaracolar
está pronto para ser utilizado; o
indicador luminoso mantém-se
aceso.
IMPOR TA NTE: Com o apa relho é
fornec ida um a luva protec tora
PORTUGUÊS
Page 15

15
que deve ser sistem aticamente
utili zada para prote ger os dedos
da m ão que enrola o cabel o à
volta do ferro. No entanto, esta
luva não pr otege os dedos de u m
contac to prolongado co m a s uperfí cie quente do tu bo cónico.
• Separe uma madeixa de cabelo
e coloque a parte mais larga do
ferro cónico a 2-3 cm do couro
cabeludo.
• Enrole a madeixa à volta do tubo
e termine prendendo a ponta da
madeixa na ponta isoladora, com
a ajuda da outra mão munida da
luva. Mantenha a madeixa nesta
posição durante 5 a 8 segundos,
consoante o tipo de cabelo.
• Depois, retire com cuidado o ferro da madeixa.
• Escolha madeixas mais nas para
obter caracóis mais fechados e
mais elásticos, e madeixas mais
largas para caracóis mais livres e
mais soltos.
• Deixe arrefecer os caracóis antes
de lhes tocar.
• Após a utilização, carregue na tecla «O» e desligue o aparelho
Exti nção automática
Se o ferro de encaracolar car ligado durante mais de 1h12m, apaga-
se automaticamente.
MANUTENÇÃO DO FERRO DE
ENCARACOLAR
• Desligue o aparelho e deixe-o
arrefecer completamente.
• Limpe o tubo cónico com um
pano húmido e suave, sem de-
tergente, a m de preser var a
qualidade do revestimento. Não
esfregue o tubo.
Page 16

16
DANSK
Kegleformet krøllejern
Easy Curl
Easy Curl eller let og forenklet
krølning!
Ved hjælp af en enkel håndtering
af dette kegleformede krøllejern
kan du få naturlige, frie og mere
eller mindre spændstige krøller til
enhver tid!
EGENSKABER
• Rør med titankeramisk belægning
• Temperaturindstilling (10 positioner)
• Afbryder med lampe under brug
• Hurtig opvarmning (20 0 °C max.)
• Indbygget holder
• Isoleret spids
• Beskyttelseshandske
• Automatisk stop
• Roterende ledning
ANVENDELSE
Læs først sikke rhedsanvisningerne.
• Kontrollér, at dit hår er tørt og
helt redt ud.
• Sæt krøllejernet i stikket og tryk
på knappen ”I”. Den røde lampe
tændes og b linker.
• Vælg den ønskede temperatur
på temperaturindstilleren. Det
anbefales generelt, at du vælger
en lavere temperatur til nt hår,
afbleget hår og/eller beskadiget
hår og en høj temperatur til k røllet og t ykt hår eller til hår, der er
vanskeligt at style. Da hver hå rty-
pe er forskellig, anbefales det, at
positionerne 1 til 4 anvendes første gang. Du kan efterfølgende
øge temperaturen gradvis, hvis
der er b ehov herfor. Brug tabellen neden for som vejle dning:
Temperatur Hårtype
Indstilling
1 til 4
Fint, aarvet
og/eller skrøbe-
ligt hår
Indstilling
5 til 7
Normalt, farvet
og/eller bølget
hår
Indstilling
8 til 10
Tykt og/eller
krøllet hår
• Det røde kontrollys holder op
med at blinke, når den valgte
temperatur er opnået. Dit krøllejern er således klar til brug. Det
røde kontrollys bliver ved med at
være tændt.
VIGTIGT: Der følger en bes kyttelsesh andske med appa ratet.
Den skal systematisk anvendes
hver gang til besky ttelse af ngrene på den hå nd, s om du ruller
håret op på krøllejernet med.
Handsken beskytter dog ikke
ngrene ved læ ngerevarende
kontakt med det kegl eformede
rørs varm e overade.
• Tag en hårtot og anbring den
bredeste del af det kegleformede
krøllejern 2 – 3 cm fra hovedbun-
Page 17

17
den.
• Rul hår totten på keglen og afslut
ved at stramme hårspidsen på
den isolerende spidst med den
anden hånd med handsken. Hold
hårtotten i denne position i 5 til 8
sekunder alt efter hårt ypen.
• Træk langsomt krøllejernet ud af
hårtotten.
• Vælg mindre hårtotter for at opnå
mere spændstige og elastiske
krøller og større hårtotter for at
opnå mere frie og større krøller.
• Lad krøllerne køle af, inden du
rører ved dem.
• Når du er færdig, tryk ker du på
knappen ”O” og tager apparatet
ud af stikket
Automatisk stop
Hvis krøllejernet er tændt i mere
end 1 time og 12 minutter, slukkes
det automatisk.
VEDLIGEHOLDELSE AF DIT
KRØLLEJERN
• Tag stikket ud af kontakten og lad
apparatet køle helt af.
• Rengør det kegleformede rør
med en fugtig klud uden rengøringsmiddel for at bevare belægningen optimale kvalitet. Undgå
at skrabe røret.
Page 18

18
SVENSKA
Konformat lockjärn
Easy Curl
Easy Curl eller det enkla sättet att
locka håret!
Med det här konformade lockjärnet kan du när som helst och i en
enkel handvändning göra naturliga, lösa, fasta eller stora lockar!
BESKRIVNING
• Rör med ytskik t av titankeramik
• Temperaturreglage med fasta lägen (10 lägen)
• Strömbrytare på/av med ljusindikator som visar när strömmen
är på
• Snabb uppvärmning (200°C
max.)
• Inbyggt stöd
• Isolerat munstycke
• Skyddshandske
• Automatisk avstängning
• Roterande sladdfäste
ANVÄNDNING
Rådfråga först säkerhetsinformationen.
• Se till at t håret är torrt och ordentligt genomkammat.
• Stick i lockjärnets kontakt och
tryck på « I » knappen. Den röda
ljusindikatorn börjar lysa och
blinka.
• Välj önskad temperatur med
hjälp av det fasta temperaturreglaget. I allmänhet rekommenderar vi en lägre temperatur för
nt, färgat eller känsligt hår och
en högre temperatur för krulligt,
tjockt och/eller svårfriserat hår.
Men eftersom allt hår är olika re kommenderar vi dig att använda
lägena 1 till 4 vid första användningen. Vid nästa användningstillfälle kan sedan reglaget ökas
progressivt, om nödvändigt. Se
tabell här nedan för vägledning:
Temperatur Hårtyp
Läge 1-4
Fint, blekt
och/eller sprött
hår
Läge 5-7
Normalt, färgat
och/eller per-
manentat
Läge 8-10
Tjockt och/eller
lockigt
• Den röda kontrollampan slutar
blinka när önskad temperatur
uppnåtts. Locktången är då klar
att använda. Den röda kontrollampan for tsätter att lysa.
VI KT IGT: En sk ydd sh an ds ke m ed följer a pparaten oc h måste allti d
använda s för at t skydda ngrarna på handen so m rullar u pp håret på konen. Den h är handske n
skydd ar inte ng rarna mot långvarig kontakt med den heta ytan
på det konformade röret.
• Ta en hårslinga och placera den
största delen av järnet 2-3 cm
från hårbottnen.
• Rulla sedan hårslingan på lock-
Page 19

19
järnet och avsluta med att dra åt
hårslingans topp på det isolerade
munstycket med hjälp av den
handskbeklädda handen. Håll
hårslingan i den här positionen
under 5 till 8 sekunder beroende
på hårt yp.
• Låt sedan lockjärnet för siktigt
glida av hårslingan.
• Ta ganska tunna hårslingor för
att göra mindr e och m er ela stisk a
lockar, och tjockare hårslingor för
att göra lösare lockar och vågor i
håret.
• Låt lo ckarna svalna innan du stylar håret.
• Efter användning, tryck på «O»
knappen och dra ut apparatens
sladd.
Automatisk avstängning
Om lo ckjär net är på satt un der mer
än 72 minuter, stänger det av sig
automatiskt.
UNDER HÅLL AV LOCKJÄRNET
• Dra ut apparatens sladd och låt
den svalna helt och hållet.
• Rengör det konformade röret
med hjälp av en fuktig mjuk duk,
utan rengöringsmedel, för att
behålla optimal kvalitet på y tskiktet. Skrapa inte på konen .
Page 20

20
NORSK
Konisk krølltang
Easy Curl
Easy Curl eller lett og enkel krølling!
Takket være den enkle bruken av
denne koniske krølltangen kan du
få naturlige, frie og mer eller mindre store krøller når som helst!
EGENSKAPER
• Rør med titankeramisk belegg
• Temperaturinnstilling (10 stil-
linger)
• PÅ/AV-bryter som lyser under
bruk
• Hurtigoppvarming (200°C maks.)
• Innebygget holder
• Isoler t spiss
• Beskyttelseshanske
• Automatisk stopp
• Roterende ledning
BRUKSOMRÅDE
Les først sikkerh etsanvisningene.
• Kontroller at håret ditt er tørt og
helt gredd ut.
• Sett krølltangen i stikkontakten
og try kk på k nap pe n ”I ”. De n rø de
lampen tennes og blinker.
• Velg ønsket temperatur på tem-
peraturregulatoren. Det anbefale s gen ere lt at du ve lge r en l aver e
temperatur til nt hår, bleket hår
og/eller skadet hår og høyere
tem pera tur ti l krø llete og ty kt h år
elle r til hår so m er vanske lig å forme. Da hver hårtype er forskjellig , anbef ales d et å br uke pos isjo-
nene 1 til 4 den første gangen. Du
kan deretter øke temperaturen
gradvis ved behov. Bruk tabellen
nedenfor som veiledning:
Temperatur Hårtype
Innstilling
1 til 4
Fint hår,
bleket og/eller
sensibelt hår
Innstilling
5 til 7
Normalt hår,
farget og/eller
krøllet hår
Innstilling
8 til 10
Tykt hår og/
eller kruset hår
• Det røde kontrollyset slutter å
blinke når valgt temperatur er
oppnådd. Krølltangen er da klar
til bruk. Det røde kontrollyset
fortsetter å være tent.
VIKTI G: D et fø lger med en beskyttelseshanske med apparatet. Den må brukes rege lmessig
hver gang for å beskytte ng rene
på hånden d u ruller opp håret på
krølltangen med. Hansken beskytter imidlertid ikke ngrene
ved l angvarig ko ntakt me d det
koniske r ørets varme over ate.
• Ta en hårdott og plasser den
bredeste delen av den koniske
krølltangen 2 – 3 cm fra hode-
bunnen.
• Rull hårdotten på det koniske
røret og avslutt ved å stramme
hårspissen på den isolerte spissen med den andre hånden med
Page 21

21
hansken. Hold hårdotten i denne
stillingen i 5 til 8 sekunder, avhengig av hår type.
• Trekk krølltangen langsomt ut av
hårdotten.
• Velg mindre hårdotter for å oppnå spenstigere og mer elastiske
krøller og større hårdotter for å
oppnå friere og større krøller.
• La krøllene avkjøles før du b erø-
rer dem.
• Når du er ferdig, trykker du på
knappen ”O” og trekker ut støpselet fra stikkontakten.
Automatisk stopp
Hvis krølltangen er slått på i mer
enn 1 tim e og 12 minu tte r, slå s den
av automatisk .
VEDLIKEHOLD AV KRØLLTANGEN
• Ta støpselet ut av stikkontakten
og la apparatet avkjøles helt.
• Rengjør det koniske røret med
en fuktig klut uten rengjøringsmiddel for å bevare beleggets
optimale kvalitet. Unngå å ripe
opp røret.
Page 22
22
SUOMI
Kartiomainen kiharrinrauta
Easy Curl
Easy Curl tekee hiusten kiharruksesta yksinkertaisempaa!
Helppokäyttöisen kartiomaisen
raudan ansiosta voit luoda hiuksiisi luonnolliset, vapaat, tiukat
tai aaltoilevat kiharat milloin tahansa!
OMINAISUUDET
• Titaanikeramiikk a-pinnotteinen
putki
• Lämpötilan säätöpyörä (10 asen-
toa)
• Virtakatkaisin käytön merkkivalolla
•
Nopea lämmönnousu (kork. 200 °C)
• Sisäinen tuki
• Eristävä suulake
• Suojakäsine
• Automaattinen sammutus
• Pyörivä johto
KÄY T TÖ
Tutustu turvaohjeisiin ennen laitteen käyt töä.
• Varmista, ett ä hiuk sesi ovat kuivat ja hyvin selvitetyt.
• Kytke kiharrinrauta päälle ja
paina « I » -painiketta. Punainen
merkkivalo sy ttyy ja vilkkuu.
• Valitse haluamasi lämpötila säätöpyörällä. Yleisesti ottaen on suositeltavaa valita alhaisempi lämpötila ohuille, vaalennetuille ja/
tai hauraille hiuk sille ja korkeampi lämpötila kiharille, paksuille ja/
tai vaikeasti kammattaville hiuksille. Koska jokainen hiustyyppi
on erilainen, suosittelemme että
käytät lämpötila-asetuksia 1 – 4
ensimmäisellä käyttökerralla.
Seuraavilla käyttökerroilla voit
nostaa tarvittaessa lämpötilaa
asteitt ain. Katso alla oleva viitteellinen ohjetaulukko:
Lämpötila Hiustyyppi
Asennot
1 - 4
Ohuet, vaalennetut ja/tai
herkät hiukset
Asennot
5 - 7
Normaalit,
värjätyt ja/tai
aaltoilevat
hiukset
Asennot
8 - 10
Paksut ja/tai
kiharat hiukset
• Punainen merkkivalo lakkaa vilkkumasta, kun valittu lämpötila
on saavutettu. Kiharrin on käy ttövalmis. Punainen merkkivalo
jää palamaan.
TÄRKEÄÄ: Laitteen mukana toi mitetta vaa suoja käsinettä on
käytett ävä aina. Se suoja a sen
käden sormia, jolla kierrät hiukset kiharrinraudan ympärille.
Suojakäsine ei kuitenkaan suojaa sormia, kun ne ovat p itkään
kosketuksissa kartiomaisen putken kuum an pinnan kans sa.
Page 23

23
• Erottele hiuksista hiustupsu ja
aseta kartiomaisen raudan levein
kohta 2 – 3 cm päänahasta.
• Kierrä hiustupsu kartiomaisen
putken ympärille ja paina hiustupsun päätä eristävää suulaketta vasten suojakäsineellä varustetulla kädellä. Pidä hiustupsu
tässä asennossa 5 – 8 sekunnin
ajan riippuen hiusten laadusta.
• Liu’uta rauta varovasti pois hius-
tupsulta.
• Valitse ohut hiustupsu tiukempia
ja joustavampia kiharoita varten
ja leveämpi hiustupsu isoja ja vapaampia kiharoita varten…
• Anna kiharoiden jäähtyä ennen
käsittelyä.
• Käytön jälkeen paina « O » -painiketta ja kytke laite irti verkko-
virrasta
Automaattinen sammutus
Jos kiharrinrauta on päällä yli 1
tunnin ja 12 minuuttia, se sammuu
automaattisesti.
KIHARR INRAUDAN HUOLTO
• Kytke laite irti verkkovirrasta ja
anna sen jäähtyä kunnolla.
• Puhdista k artiomainen putk i kostealla ja pehmeällä liinalla ilman
pesuaineita, jotta pinnoite säilyy
optimaalisessa kunnossa mahdollisimman pitkään. Älä raaputa
putkea.
Page 24
24
ΕΛΛΗΝΙΚΑ
Κωνικό σίδερο για
μπούκλες
Easy Curl
Ea sy Cu rl ή α λλ ιώ ς, η α πλ ούσ τ ευ ση
της κίνησης για μπούκλες!
Χάρη στον τόσο απλό τρόπο
χ ρ ήσ η ς α υ τ ο ύ τ ο υ κ ω ν ι κ ο ύ σ ί δ ε ρ ο υ ,
μπορείτε να δημιουργήσετε
φυσικές, ελεύθερες, πιο σφιχ τές
ή πιο μεγάλες μπούκλες σε κάθε
στιγμή!
ΧΑΡΑΚΤΗΡΙΣΤΙΚΑ
• Κύλινδρος με επίστρωση από
κεραμικό τιτανίου.
• Ροδέλα ρύθμισης θερμοκρασίας
(10 θέσεις).
• Κουμπί έναρξης-διακοπής
λειτουργίας με ένδειξη
λειτουργίας.
• Γρήγορη άνοδος θερμοκρασίας
(μέχρι 200°C).
• Ενσωματωμένη βάση στ ήριξης.
• Μονωτικό άκρο.
• Γάντι προστασίας.
• Αυτόματη διακοπή λειτουργίας.
• Περιστρεφόμενο καλώδιο.
ΟΔΗΓΙΕΣ ΧΡΗΣΗΣ
Συμβουλευτείτε πρώτα τις οδηγίες
ασφαλείας.
• Βεβαιωθείτε ότι τα μαλλιά σας
είναι στεγνά και πολύ καλά
χτενισμένα.
• Βάζετε το σίδερο για μπούκ λες
στην πρίζα και πατάτε το κουμπί
« I ». Η κόκκινη φωτεινή ένδειξη
ανάβει και κατόπιν αναβοσβήνει.
• Επιλέγετε τη θερμοκρασία που
επιθυμείτε με τη ροδέλα ρύθμισης.
Γενικά, συνιστάται να επιλέγετε
μια πιο χαμηλή θερμοκρασία
για τα λε πτά, ξεβαμμένα
και/ή ευαίσθητα μαλ λιά, και
μια υψηλή θερμοκρασία για
τα κατσαρά, χοντρά και/ή
δύσκολα στο χτένισμα μα λλιά.
Καθώς κάθε τύπος μα λλιών
διαφέρει σας συνισ τούμε να
χρησιμοποιείτε τις θέσεις 1 έως
4 όταν χρησιμοποιείτε το σίδερο
για πρώτη φορά. Στις επόμενες
χρήσεις μπορείτε να αυξάνετε
προοδευτικά τη ρύθμιση εάν
είναι απαραίτητο. Δείτε τον
παρακάτω ε νδεικτικό πίνακα:
Θερμοκρασία Τύπος μαλλιών
Θέση 1
έως 4
Μαλλιά λεπτά,
ρωματισμένα,
πάρα πολύ
ευαίσθητα
Θέση 5
έως 7
Μαλλιά κανονικά,
βαμμένα και/ή με
κυματισμούς
Θέση 8
έως 10
Μαλλιά χοντρά
και/ή κατσαρά
• Η κόκκινη ε νδεικτική λυχνία
σταματάει να αναβοσβήνει
όταν το ψα λίδι φτάσει σ τη
θερμοκρασία που έχε τε επιλέξει.
Το ψαλίδι για μπούκλες είναι
Page 25

25
έτοιμο και η κόκκινη ενδεικ τική
λυχνία παραμένει αναμμένη.
ΣΗΜΑΝΤΙΚΗ ΣΗΜΕΙΩΣΗ: Μ αζί
με τη συσ κευή πα ρέχεται έ να
γάντι προστασίας και πρέπει
να χρησιμοποιε ίται για να
προστα τεύει τα δά χτυλα καθώς
τυλίγο υν τα μαλ λιά γύρω από
το σ ίδερο. Αυτ ό το γά ντι δεν
προστα τεύει πά ντα τα δ άχτυλα
ιδίως όταν υπάρχει παρατε ταμένη
επαφή μ ε τη ζεστή επιφάνει α του
κωνικού κυλ ίνδρου.
• Πιάνετε μια τούφα και φέρνετε
το πλατύτερο τμήμα του κωνικού
σίδερου σε απόσ ταση δύο έω ς
τρία εκατοσ τά από το κεφάλι.
• Τυλίγετε την τούφα στον κώνο
και τελειώνετε στερεώνοντας την
άκρη της τούφας στο μονωτικό
άκρο με το άλλο χέρι στο οποίο
έχετε φορέσει το γάν τι. Κρ ατάτε
την τούφα για πέντε έως οκτώ
δευτερόλεπτα ανάλογα με τον
τύπο των μα λλιών.
• Κατόπιν γλιστράτε απαλά το
σίδερο απελευθερώνοντας την
τούφα.
• Πιάνετε πολύ λεπ τές τούφες
για να πετύχε τε πιο σφιχ τές
και πιο ελαστικές μπούκλες,
και μεγαλύτερες τούφες για
πιο ελεύθερες, πιο χαλαρές
μπούκλες.
• Αφήνετε τις μπούκλες να
κρυώσουν πριν τις φορμάρετε.
• Αφού τελειώσετε, πατάτε το
κουμπί « O » και βγάζετε τη
συσκευή από την πρίζα.
Αυτόμα τη διακοπή λει τουργίας
Εάν το σίδερο για τις μπούκλες
παραμείνει αναμμένο περισσότερο
από 1:12΄ ώρα, σβήνει αυτομάτως.
ΣΥΝΤΗΡΗΣΗ ΤΟΥ ΣΙΔΕΡΟΥ ΓΙΑ
ΜΠΟΥΚΛΕΣ
• Βγάζετε τη συσκευή από την
πρίζα και την αφήνετε να κρυώσει
εντε λώς.
• Καθαρίζετε τον κωνικό κύλινδρο
με ένα υγρό και μαλακό πανί,
χωρίς απορρυπαντικό, ώστε
να διατηρήσε τε την αρίσ τη
ποιότητα της επίστρωσης. Μην
χαράζετε τον κύλινδρο.
Page 26
26
MAG YAR
Kúpos hajsütővas
Easy Curl
Easy Curl vagy a leegyszerűsített
hajsütés!
Ennek a kúp alakú hajsütővasnak
köszönhetően bármikor természe-
tes, szabad, szorosabb vagy széle-
sebb hajfürtöket alakíthat ki!
TULAJDONSÁGOK
• Kerámia titán bevonattal ellátott
cső
• Hőmérsékletállító korong (10
helyzet)A vágási magasság b eál-
lítására s zolgáló gomb
• Ki /be kapcsoló, működést jelző
lámpával
• Gyors felfűtés (maximum 200 °C)
• Beépített tartó
• Hőszigetelt végződés
• Védőkesztyű
• Automatikus leállás
• Forgó tápvezeték
HASZNÁLAT
Kérjük olvas sa el először a biztonsági útmutatót.
• Győződjön meg róla, hogy haja
száraz és teljesen ki van-e fésül-
ve.
• Dugja be a hajsütővasat és az „ I
” gombot. A piros jelzőlámpa ki-
gyullad és villog.
• A beállító korong segítségével
válassza ki a kívánt hőmérsékletet. Általában alacsonyabb hőmérséklet kiválasztását ajánljuk a
nom, színtelen illetve érzékeny
hajhoz, és magasabb hőmérsékletet a göndör, erős szálú, illetve
nehezen kifésülhető hajhoz. Mivel minden hajtípus különböző,
azt javasoljuk, hogy használja az
1 – 4 helyzetet az első használat
alkalmával. A későbbi használat
során fokozatosan növelheti a
beállítást, ha szükséges. Az alábbi táblázat tájékoztató jellegű:
Hőmérséklet A haj típusa
1 – 4 pozíció
Vékony,
szőkített és /
vagy gyenge
szálú haj
5 – 7 pozíció
Normál, festett
és/ vagy hullá-
mosított haj
8 – 10
pozíció
Vastag és/vagy
göndör haj
• A piros jelzőlámpa villogása leáll,
amikor a kiválasztott hőmérsék-
letet elérte; a piros lámpa égve
marad.
FONTOS: A készülékhez mellékelt
védőkesztyűt minden alkalommal használni kell, hogy a hajat
a vas köré tekerő kezének ujjait
védje. E z a keszty ű azonban ne m
védi meg az uj jakat a kúpos vas
meleg felületével való hosszabb
érintkezés esetén.
• Válasszon el egy hajtincset, majd
a kúpos vas legszélesebb részét
Page 27

27
tegye a fejbőrtől 2-3 cm-re.
• Csavarja a hajtincset a kúpra,
befejezésül szorítsa rá a hajtincs
végét a szigetelt végződésre a
másik, kesztyűs kezével. Tartsa
a hajtincset ebben a helyzetben
5-8 percig, a haj természetétől
függően.
• Ezt követően csúsztassa lassan ki
a vasat a hajtincsből.
• Ha vékonyabb hajtincset választ ki, szoros és rugalmasabb
fürtöket alakíthat ki, szélesebb
hajtinccsel szabadabb, lágyabb
fürtök keletkeznek..
• Kifésülés előtt hagyja kihűlni a
hajat.
• Használat után nyomja meg az
„O” gombot és húz za ki a készüléket a hálóz atból.
Automatikus leállás
Ha a sütővas 1h12 percnél tovább
marad bekapcsolva, automatikusan kikapcsol.
A HAJSÜTŐVAS KEZELÉ SE
• Húzza ki a készüléket a konnektorból és hagyja teljesen lehűlni.
• A kúpos csövet nedves, puha
ronggyal tisz títsa, tisz títószer
nélkül, hogy a burkolat megőrizze optimális minőségüket. Ne
karcolja me g a csövet.
Page 28

28
POLSKI
Lokówka stożkowa
Easy Curl
Z Easy Curl lokowanie staje się
proste!
Dzięki łat wej obsłudze lokówki
stożkowej, szybko uzyskasz naturalne, swobodne, małe lub duże
loki!
CHARAKTERYSTYKA
• Lokówka z powłoką tytanowoceramiczną
• Pokrętło regulacji temperatury
(10 pozycji)
• Wyłącznik włącz/wyłącz z kontrolką pracy
• Szybkie nagrzewanie (maksymal-
nie 200°C)
• Wbudowana podstawka
• Końcówka z izolacją
• Rękawica ochronna
• Automatyc zne wyłączanie
• Przewód obrotowy
UŻY TKOWANIE
Przed uż yciem p rzeczytać zas ady
bezpieczeństwa.
• Upewnij się czy włosy są suche i
dokładnie rozczesane.
• Podłącz lokówkę i naciśnij przycisk „I”. Czer wona kontrolka zapali się i zacznie migać.
• Wybier z odpowiednią temperaturę za pomocą pokrętła. Z
reguły, niska temperatura zalecana jest do włosów cienkich,
rozjaśnianych i/lub wrażliw ych,
natomiast wysoka temperatura
do włosów k ręconych, gęst ych i/
lub trudnych w układaniu. Jeżeli
używasz prostownicy pierwszy
raz, ustaw temperaturę w poło żeniu o d 1 do 4, ponieważ każdy
rodzaj włosów jest inny. W trakcie
kolejnych zabiegów, można stopniowo zwiększać temperaturę, w
razie potrzeby. Patrz orientacyjna
tabela poniżej:
Temperatura Rodzaj włosów
Położenie
od 1 do 4
Włosy cienkie,
rozjaśniane
i/lub wrażliwe
Położenie
od 5 do 7
Włosy
normalne,
farbowane
i/lub po trwałej
ondulacji
Położenie
od 8 do 10
Włosy grube
i/lub kręcone
• Czerwona kontrolka przestanie
migać gdy wybrana temperatura zostanie osiągnięta. Twoja
lokówka jest gotowa do pracy;
czerwona kontrolka pozostanie
zapalona.
WAŻNE: Do urządzenia dołączona jest r ękawica ochr onna. Nale ży jej u żywać, aby chr onić pal ce
ręki podczas nawijania włosów
wokół lokówki. Rękawica nie
chroni w przypadku długiego
kontaktu z gorą cą powierz chnią
lokówki.
Page 29

29
• Oddziel kosmyk włosów i umieść
najszers zą część lokówki w odległości 2-3 cm od skóry głowy.
• Nawiń kosmyk na lokówkę ręką
w rękawicy, a końcówkę kosmyka
zaciśnij na końcówce z izolacją.
Przy trzymaj kosmyk w tym poło żeniu przez 5 do 8 sekund w zależności od rodzaju włosów.
• Delikatnie wysuń lokówkę z kosmyka.
• Lokuj cienkie kosmyki, aby uz yskać loki zwięzłe i bardziej elastyczne, natomiast grubsze kosmyki, aby uzysk ać loki większe
i luźniejsze.
• Pozostaw lok i do wystygnięcia
przed ich ułożeniem.
• Po zakończeniu, naciśnij przycisk
„0”, a następnie wyłącz urządzenie z prądu.
Automatyczne wyłączanie
Jeżeli lokówka pozostaje włączona
przez ponad 1 godzinę i 12 minut,
wyłąc zy się automatyc znie.
KONSE RWACJA LOKÓWKI
• Wyłączyć urządzenie z prądu i
pozostawić do ca łkowitego ostygnięcia.
• W celu utrzymania wysokiej jakości powłoki, cz yścić lokówkę
za pomocą delikatnej wilgotnej
szmatki, bez środka czyszczącego. Nie skrobać lokówk i.
Page 30
30
ČESKY
Kónická kulma
Easy Curl
Easy Curl neboli jednoduché kadeření!
Díky jednoduchému ovládání kónické kulmy si mů žete kdyko liv vy-
tvořit přirozené, volné, těsné nebo
velké kadeře!
CHARAKTERISTIKA
• Trubice s keramicko-titanovým
povrchem
• Vroubkované kolečko pro nastavení teplot y (10 úrovní)
• Spínač v ypnuto/zapnuto s kontrolkou signalizující, že je kulma
pod napětím
• Rychlé zahřátí (max. 200 ºC)
• Integrovaný s tojánek
• Studený konec
• Ochranná rukavice
• Automatické v ypnutí
• Otočná šňůra
POUŽÍVÁNÍ
Před použitím si p řečtěte be zpečnostní pok yny.
• Zkontrolujte, zda máte vlasy suché a dobře rozčesané.
• Zapojte kulmu a stiskněte tlačítko „ I“. Ro zsv ítí s e čer vená kont rol ka a bliká.
• Vroubkovaným kolečkem nastavíte požadovanou teplotu.
Obecně se doporučuje zvolit
nižší teplotu pro jemné, odbarvené a/nebo choulostivé vlasy a
vyšší teplotu pro z vlněně, husté
a/nebo nepoddajné vlasy. Každý
typ vlasů je jiný, proto doporučujeme při prvním použití nastavit
úroveň 1 až 4. Při dalším použití
můžete úroveň nastavení podle
potřeby postupně zvyšovat (viz
příklady v níže uvedené tabulce):
Teplota Typ vlasů
Stupeň
1 až 4
Jemné, odbar-
vené a/nebo
citlivé vlasy
Stupeň
5 až 7
Normální, bar-
vené a/nebo
vlnité vlasy
Stupeň
8 až 10
Husté a/nebo
kudrnaté vlasy
• Po dosažení zvolené teploty přestane čer vená kontrolka blikat.
Kulma je připravena k použití;
červená kontrolka zůstane roz-
svícená.
DŮLEŽITÉ UPOZORNĚNÍ: S kulmou se d odává ochra nná rukavice ch ránící prs ty ruky, k terá
natáčí vlas y na těl eso, a kterou
je nutné důsledně pou žívat. Tato
rukavice však nechrání prsty při
delší m ko ntaktu s h orkou p lochou kón ické trubice.
• Utvořte pramen vlasů a umístěte
nejširší č ást kulmy 2–3 cm od po kožky hlav y.
• Natočte pramen na trubici a
druhou rukou, na které je navle-
Page 31

31
čená rukavice, přitiskněte konec
pramene ke studenému konci.
Dr žte pr amen v této p oloz e 5 až 8
sekund podle druhu vlasů.
• Poté nechte pramen z kulmy lehce vyklouznout.
• Těsnější a pružnější kadeře získ áte z velmi tenk ých pramenů vlasů; volnější a splývavější kadeře
získáte z širších pramenů.
• Před další úpravou nechte kadeře
vychladnout.
• Po použití stiskněte tlačítko „O“ a
odpojte kulmu ze sítě.
Automat ické vypnut í
Je - li ku lm a z ap nu tá dé l e n ež 1 ho d .
12 min, automatick y se vypne.
ÚDRŽBA KULMY
• Odpojte kulmu ze sítě a nechte ji
zcela vychladnout.
• Otřete kónickou trubici vlhkým a
jemným hadříkem bez čisticího
prostředku, aby se zachovala optimální kvalita povrchu. Trubici
neškrábejte.
Page 32

32
Плойка коническая
Easy Curl
Easy Curl («Волшебный локон»), или
упрощенный жест ук ладки волос!
Благодаря беспредельной простоте
обращения с конической плойкой,
вы сможете создавать свободные
естественные локоны, более или
менее кру тые, в любой момент!
ХАРАКТЕРИСТИКИ
• Нагревательный элемент с
покрытием Titanium Ceramic
• Колесико регулировки
температ уры (10 положений)
• Переключатель вкл./выкл. с
датчиком подачи напряжения
• Быстрый нагрев (максимум 200°C)
• Встроенная опора
• Изолирующий наконечник
• Защитная перчатка
• Автоматическое вык лючение
• Вращающийся шнур
ПОЛЬЗОВАНИЕ АППАРАТОМ
Ознакомьтесь предварительно с
инструкциями по безопасности.
• Волосы должны быть су хими и
тщательно расчесанными.
• Включите плойк у в сеть и нажмите
на кнопку « I ». Красный световой
датчик загорится и начнет мигать.
• С помощью колесика выберите
необходимую температуру.
В принципе для тонких,
обесцвеченных и/или ломких
волос рекомендуется выбрать
более низкую температуру, для
вьющихся, густых и/или трудно
поддающихся укладке волос –
более высокую. Каж дый тип волос
имеет свои особенности, и при
первом пользовании аппаратом
мы рекомендуем выбрать
положение нагрева от 1 до 4.
При последующем пользовании
вы можете, если считаете
необходимым, постепенно
увеличить нагрев. Следующая
ниже таблица приведена в
качестве ориентира:
Температура Тип волос
Позиция от
1 до 4
Тонкие,
бесцвеченные
и/или
вствительные
волосы
Позиция от
5 до 7
Нормальные,
крашеные
и/или волнистые
волосы
Позиция от
8 до 10
Густые
и/или вьющиеся
волосы
• Когда будет достигнут выбранный
уровень нагрева, световой датчик
перестает мигать. Ваша плойка
готова к использованию: красный
датчик горит непрерывно.
ОБРАТИТЕ ВНИМАНИЕ: В комплект
поставки аппарата вк лючена
защитная перчатка: ее с ледует
РУССКИЙ
Page 33

33
использовать по стоянно для
того, что бы защитить пал ьцы
той руки, которая накручивает
волосы н а плойку. Тем не мен ее,
эта пер чатка не защ ищает от
продолжительного контакта с
нагре той поверхнос тью плойки.
• Отделите прядь волос и
расположите самую широкую
часть конической плойки в 2-3 см
от кожного покрова головы.
• Накрутите прядь на конус, и в
конце прижмите кончики волос
к изолирующему наконечнику
рукой, на которую надета защитная
перчатка. Удерживайте прядь в
таком положении в течение 5 - 8
секунд , в зависимости от типа
волос.
• Затем осторожно, скользящим
движением извлеките плойку из
пряди.
• Чтобы получить более крутые,
упругие локоны, отделяйте
достаточно тонкие пряди волос;
ч т о б ы п о л у ч и т ь с в об о д н ы е , м я гк и е
локоны, пряди волос должны быть
более широкими.
• Прежде, чем манипулировать
локонами, дайте им полностью
остыть.
• Закончив пользоваться плойкой,
нажмите на кнопку «0» и отключите
аппарат от сети.
Автоматическое выключение
Если плойка остается включенной
дольше 1 часа 12 минут, она
автоматически выключается.
КАК УХ АЖИВАТЬ ЗА ВАШЕЙ
ПЛОЙКОЙ
• Отключите аппарат от сети и дайте
ему полностью остыть.
• Протрите конический
нагревательный элемент
мягкой влажной тряпочкой без
применения моющих средств,
чтобы предохранить оптимальное
качество покрытия. Не следует
скрести нагревательный элемент.
Page 34

34
TÜRKÇE
Konik maşa
Easy Curl
Easy Curl veya basitleştirilmiş saç
kıvırma hareketi!
Bu konik maşanın basit bir
şekilde tutulabilmesi sayesinde,
istediğiniz anda doğal, özgür, sık ı
veya geniş bukleler yaratabilecek-
siniz!
ÖZELLİKLER
• Titanyum Seramik kaplamalı tüp
• Sıcaklık ayarlama düğmesi (10
pozi syon)
• Elektriğe bağlı olduğunu gösteren gösterge ışıklı açma/kapama düğmesi
• Hızlı ısınma (200°C mak simum)
• Entegre taban
• Yalıtımlı uç
• Koruyucu eldiven
• Otomatik kapanma
• Döner kablo
KULLANIM
Kullanmadan önce güvenlik
talimatlarını o kuyunuz.
• Saçlarınızın kuru ve tamamen
taranmış olmasını sağlayın.
• Maşanın şini elek trik prizine
takın ve « I » düğmesine basın.
Kırmızı gösterge ışığı yanar ve
yanıp söner.
• Ayarlama düğmesi yardımıyla
arzu edilen sıcaklığı seçin. Genel
olarak, ince telli, rengi açılmış ve/
veya hassas saçlar için daha düşük
bir sıcaklık ve kıvırcık, kalın telli
ve7veya taranması zor saçlar için
daha yüksek bir sıcaklık seçilmesi önerilmek tedir. Her saç tipi
değişik olduğundan, ilk kullanım
esnasında 1 – 4 arası pozisyonları
kullanmanızı öneriyoruz. Daha
sonraki kullanımlarda gerekirse sıcaklığı kademeli olarak
artırabilirsiniz. Bilgi için aşağıdaki
tabloya bakınız:
Sıcaklık Saç tipi
Pozisyon
1 - 4
İnce telli, rengi
açılmış ve/veya
yıpranmış
saçlar
Pozisyon
5 - 7
Normal, boyalı
ve/veya dalgalı
saçlar
Pozisyon
8 - 10
Kalın ve/veya
kıvırcık saçlar
• Seçilen sıcak lığa ulaşıldığında
kırmızı ışığın yanıp sönmesi
durur. Bu durumda saç kıvırma
maşası kullanıma hazırdır; kırmızı
ışık yanık kalır.
ÖNEML İ: Ci hazla birlik te ko ruyucu b ir eldiven veril mektedir
ve saç ların maşa nın etrafı na
dolan ması içi n kulla nılan e lin
parma klarının kor unması içi n
sürek li k ullanılma lıdır. Bununla
birli kte bu eld iven parmak ları
konik tüp ün sıcak yüzeyi ile uzu n
sürel i temastan koru maz.
Page 35

35
• Bir saç tutamını ayırın ve konik
maşanın en geniş kısmını saç
derisinin 2-3 cm uzaklığına
yerleştirin.
• Saç tutamını maşaya sarın ve
eldiven takılı diğer el yardımıyla
saçın ucunu yalıtımlı uç üzerinde
sıkın. Saç tutamını saçın türüne
göre 5-8 saniye bu pozis yonda
tutun.
• Ardından maşayı yavaşça saçın
dışından kaydırın.
• Daha sıkı buk leler elde etmek
için saç tutamlarını ince ayırın
ve daha az belirgin daha özgür
bukleler için saç tutamlarını daha
kalın ayırın.
• Şekil vermeden önce buklelerin
soğumasını bekleyin.
• Kullanım sonrasında, « O »
düğmesi üzerine basın ve cihazın
şini elek trik prizinden çekin.
Otomat ik kapanma
Eğer saç maşası 1.12 saatten fazla açık kalırsa, otomatik olarak
kapanır.
SAÇ MAŞANIZ IN BAKIMI
• Cihazın şini elektrik prizinden
çekin ve tamamen soğumasını
bekleyin.
• Kaplamanın kalitesini en iyi
şekilde korumak için, konik tüpü
deterjansız nemli ve yumuşak
bir bezle temizleyin. Tüpü
kazımayın.
 Loading...