

Page 1

10BaseS Ethernet Modem
Easy Start
Version 1.0
Contents
About this Easy Start .................................................... 2
Safety Guidelines .......................................................... 2
Minimum System Requirements ..................................... 2
Package....................................................................... 2
Front Indicators ............................................................ 3
Step 1: Connecting the Modem to Your Computer/Notebook ... 4
Step 2: Configuring Your Ethernet Card .......................... 7
Step 3: Configuring Your Internet Browser ...................... 9
Step 4: Connecting to the Internet ................................. 10
• Product warranty does not apply to damage caused by lightning, power surges or wrong voltage usage.
• 10BaseS™ is the trademark of Infineon Technologies AG.
• All other company or product names are trademarks or registered trademarks or service marks of their
respective owners.
Page 2

Easy Start
About this
Easy Start
This booklet contains information on setting up your 10BaseS
Ethernet Modem. It touches on the key installation procedures to
help you setup your Modem.
Safety Guidelines
Understand all instructions in the manual. Follow all instruction labels found on the
unit.
Keep the modem away from fluid, direct sunlight and excessive heat.
During times of lightning strike/thunderstorm, do not use the modem.
To reduce risk of fire, use only No.26 AWG or larger telecommunication line cord.
Minimum System Requirements
Pentium® MMX 233MHz (or above)
An Ethernet card installed with TCP/IP Protocol on your computer
OS Independent
Package
For any missing items, please contact your dealer immediately.
Ë Easy Start Ê Ethernet Modem
Ì
Telephone cable (RJ-11)
Í Straight CAT-5 UTP
Ethernet cable (RJ-45)
1 The telephone extension cable used for this modem is a UL Listed Communication Circuit
Accessory, minimum 26AWG.
2
2
Î Power adapter
Page 3
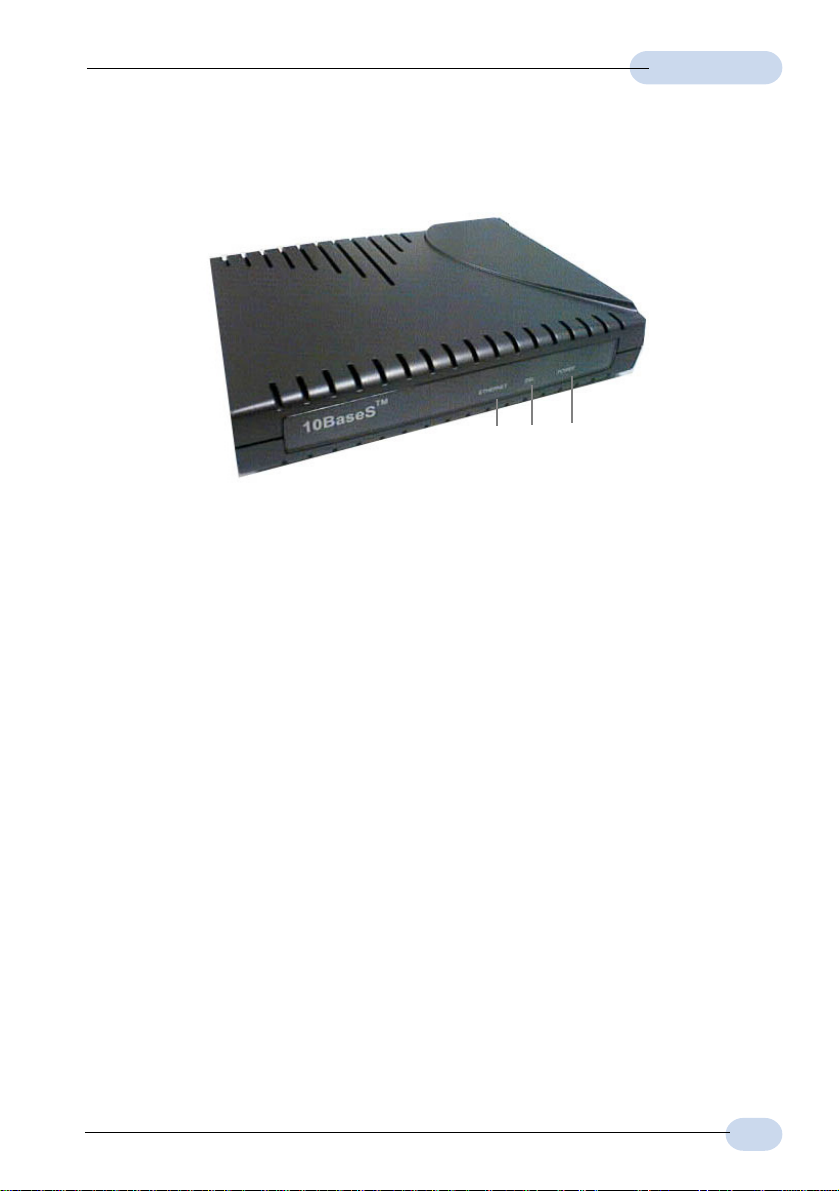
Front Indicators
¨
¬ Ethernet
Lights up when the Ethernet connection is established.
DSL
Lights up when the 10BaseS connection is established.
Easy Start
® POWER
Lights up when you have connected the Modem to the Power Outlet via the power
adapter that comes with your modem package.
3
Page 4

Easy Start
Step 1: Connecting the Modem to Your
Computer/Notebook
Power off your Computer/Notebook or/and any connected devices before
connecting to the Modem!
To connect your Computer/Notebook to your modem, you need to have an Ethernet Port
present on your Computer/Notebook.
Step 1.1 Connecting to the Ethernet
NOT SURE HOW THE ETHERNET PORT LOOKS LIKE?
The following are some tips to help you locate your Ethernet Port on your
Computer/Notebook. Alternatively, you may refer to the documentation that
comes with your Computer/Notebook.
Most Computers/Notebooks have labels describing the Ports. For Ethernet Port,
you will see either ETHERNET, ETH or RJ45 labelled near the Port.
If your Computer/Notebook does not have such descriptions, try the following.
- Picture A gives the illustration of an Ethernet Port. All Ethernet Ports have 8
conductors on it. Do not mistaken with the LINE Port (Picture B) that has only 6
conductors.
- The Ethernet Port is slightly bigger than the LINE Port.
A. ETHERNET:
Back view of
the Modem
4
B. LINE:
Back view of a computer
Ethernet Port
Ethernet
Network Card
Ethernet Network cable (that
comes with your Modem package)
Page 5

Easy Start
Step 1.2 Connecting to the Telephone Wall Socket
Back view of the
Modem
Telephone Wall
Socket
Telephone cable (that comes
with your Modem package)
Step 1.3 Connecting to the Telephone Set (optional)
Back view of
the Modem
Telephone Set
Step 1.4 Connecting to the Power Outlet
Back view of
the Modem
Connect your Modem to the
Power Outlet via the Power
adapter (that comes with your
Modem package).
Connect the other end of the
Power Adapter to the Power
Outlet. (Power off the Power
Outlet when the unit is not in use).
5
Page 6

Easy Start
Step 1.5 Checking Your Connections
Please check your connections before proceeding.
LINE
ETHERNET
DC IN
to your Power outlet
to the Ethernet Port on
your Computer/Notebook
Step 1.6 Powering On
- Power on the Power Outlet that the Modem is connected to.
- Power on your Computer(s)/Notebook(s).
Please proceed to Step 2.
to your Telephone
Wall Socket
6
Page 7

Easy Start
Step 2: Configuring Your Ethernet Card
The following illustrated screen shots serve only as examples. For any
dissimilarities, please follow closely to the instructions prompted on your
Computer.
2.1 For Windows® 98 Second Edition / Windows® Me
i From your Windows desktop, right-click on the Network Neighborhood icon. Select
Properties.
iiii From the Configuration tab, select TCP/IP-> xxx where xxx refers to the model of your
Ethernet Card that is connected to your Modem.
Click Properties.
(3Com EtherLink III ISA Ethernet card
model is used as an example here. You
should see the model of your Ethernet
card).
iii Select the IP Address tab.
Click the option Specify an IP
address.
Enter the IP Address and Subnet
Mask as specified by your Service
Provider.
Click OK and restart your system
when promoted.
You may now proceed to Step 3.
7
Page 8

Easy Start
2.2 For Windows® 2000 / Windows® XP
i Windows® 2000:
a) From your Windows desktop, right-click on the icon My Network Places and
select Properties.
b) At the Network and Dial-up Connections window, right-click on the Local Area
Connection icon and select Properties.
Windows® XP:
(Instructions are based on default Start menu option)
a) From your Windows desktop, click Start > All Programs > Accessories >
Communications > Network Connections.
b) Right-click on the Local Area Connection icon that reflects the model of your
Ethernet Card that is connected to your Modem and click Properties.
ii Ensure that the field Connect Using indicates the model of your Ethernet Card that
is connected to your Modem.
(This is important especially if you have more than one Local Area Connection icons displayed
at the Network and Dial-up Connections / Network Connections window. Ensure that you have
selected the correct one.)
Select Internet Protocol (TCP/IP) and click Properties.
(3Com EtherLink III ISA Ethernet card
model is used as an example here. You
should see the model of your Ethernet
card).
iii Select the option Use the following
IP address.
Enter the IP Address, Subnet Mask
and Default gateway as specified by
your Service Provider.
Click OK to close.
You may now proceed to Step 3.
8
Page 9

Easy Start
Step 3: Configuring Your Internet Browser
3.1 Microsoft® Internet Explorer (based on IE 5.5)
i From your Windows desktop, double-click on your Internet Explorer icon to
launch your Browser.
ii From the Menu, click Tools and select Internet Options... .
iii Select the Connection tab. Click the field, 'Never dial a connection'. (This option will
be grayed off if you have not installed an analog modem on your computer/notebook
before. Proceed with 3.1 iv).
iv Click the LAN Settings... button. Ensure that your Proxy Server is not enabled.
v Click OK to close the dialog box.
You may now proceed to Step 4.
3.2 Netscape® Navigator
i From your Windows desktop, double-click on your Navigator icon to launch
your Browser.
ii Depending on your Netscape versions, carry out one of the following instructions:
Click Options > Network Preferences.
Select Proxies. Ensure that the No Proxies option is selected.
OR
Click Edit > Preferences.
Select Advanced and click Proxies. Ensure that the option Direct Connection to
the Internet is enabled.
iii Click OK for changes to take effect.
You may now proceed to Step 4.
9
Page 10

Easy Start
Step 4: Connecting to the Internet
i Check the front indicators of your Modem. If all the three indicators light up, it means
that you are now connected to your Internet Service Provider.
ii You may start surfing the Internet now!
10
© Copyright, August 2002. All Rights Reserved.
P/N: 040-511470-101 (Ref: 480)
 Loading...