

Page 1

AZT Gold Tablet POS System
Quick Start Guide
To get help setting up the hardware -
Read this manual
Watch the “How-to” video on the tablet home screen
Call (844)284-3197
To get help on using POS Cloud software -
Call (888) 565-7154
POS Cloud is preloaded on the tablet
Page 2

Contents
1.Tablet
+Accessories
2. Locking Tablet Stand
+Pivot Table and MSR Cable
3. Thermal Receipt Printer
+Cables and Accessories
4. Cash Drawer
5. Wi-Fi Router
6. Credit Card Reader (Optional)
Page 3
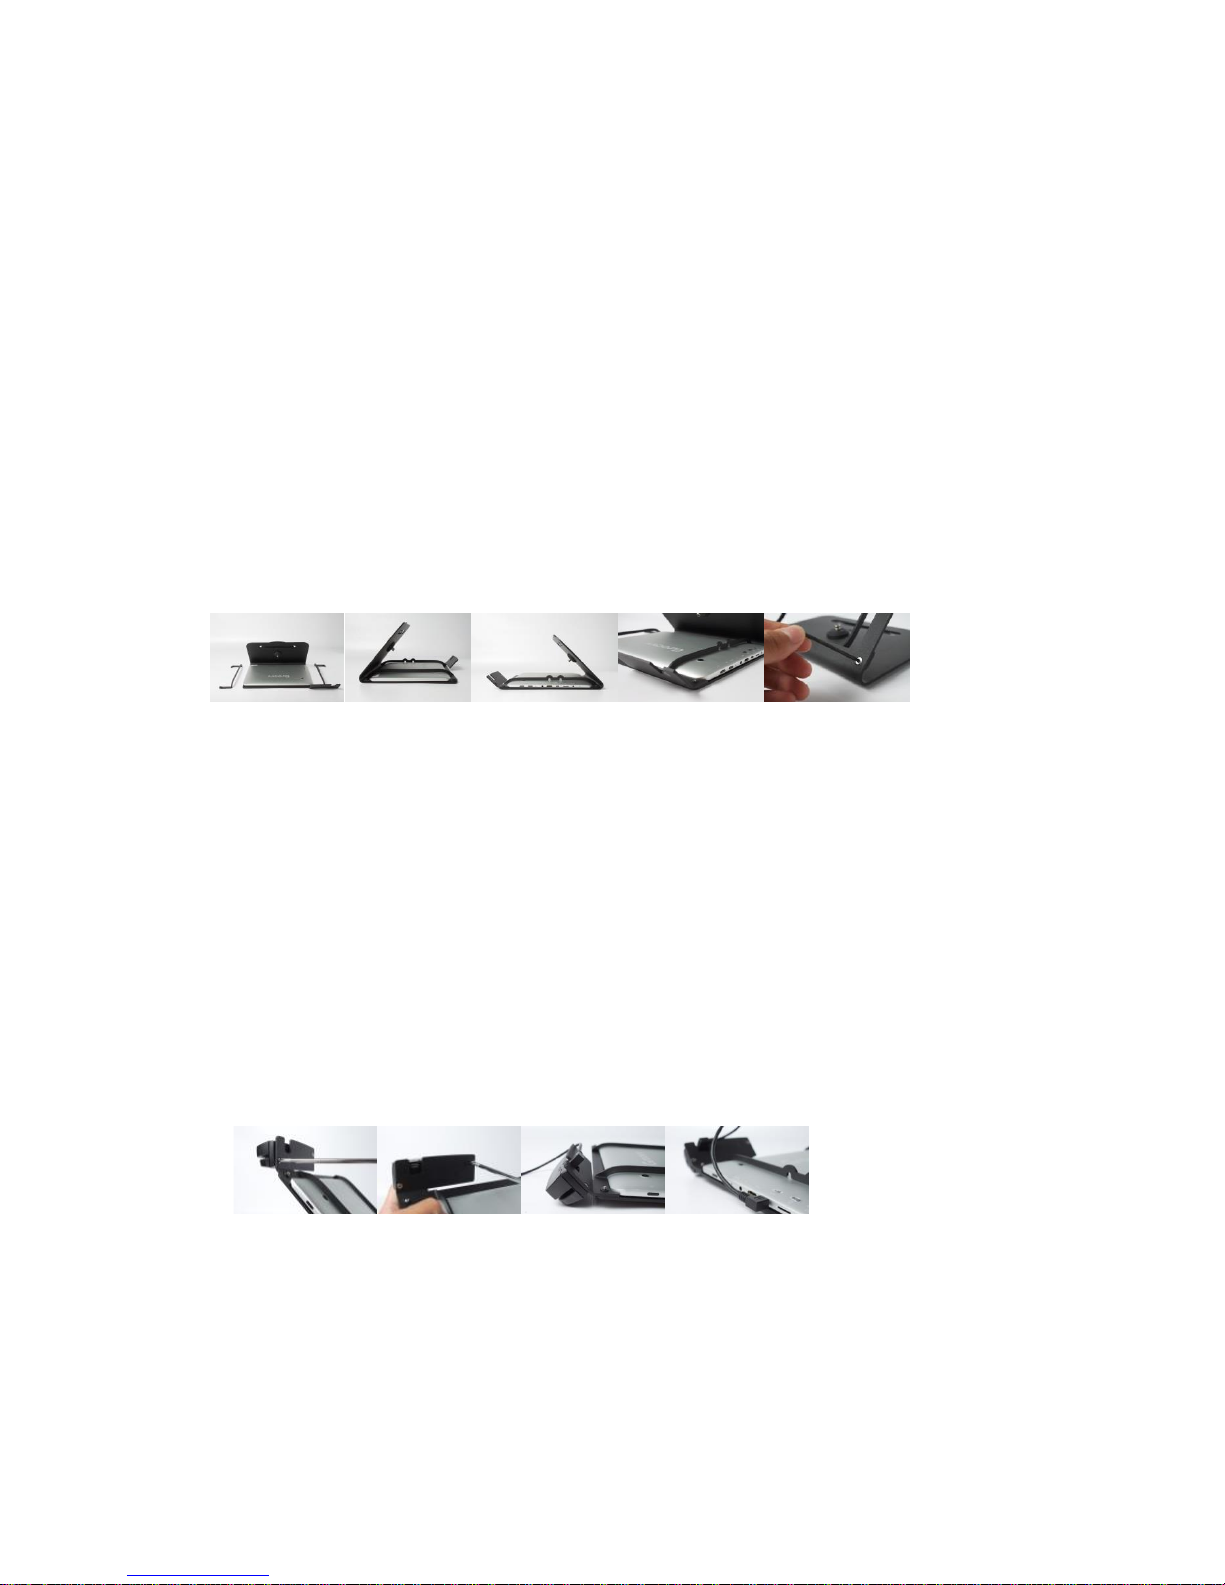
Hardware Installation
Putting together your new tablet POS
Step 1: Securing the Tablet in the Stand
A. Set the Tablet Stand face-down.
B. Position tablet inside stand, taking careful note of the Front Camera
position.
C. Attach the brackets to the frame using the (4) Torx screws and
Torx tool.
Note: Power on the Tablet using the Top button on the right side of the Tablet.
Step 2: Mounting the Credit Card Reader
A. Install the Credit Card Reader onto the top mounting plate of the
stand using the (2) small Philips screws
B. Connect the micro-USB cable from the Credit Card Reader to the
Tablet
Note: You can choose to use the integrated cable management located on the
back bracket.
Page 4
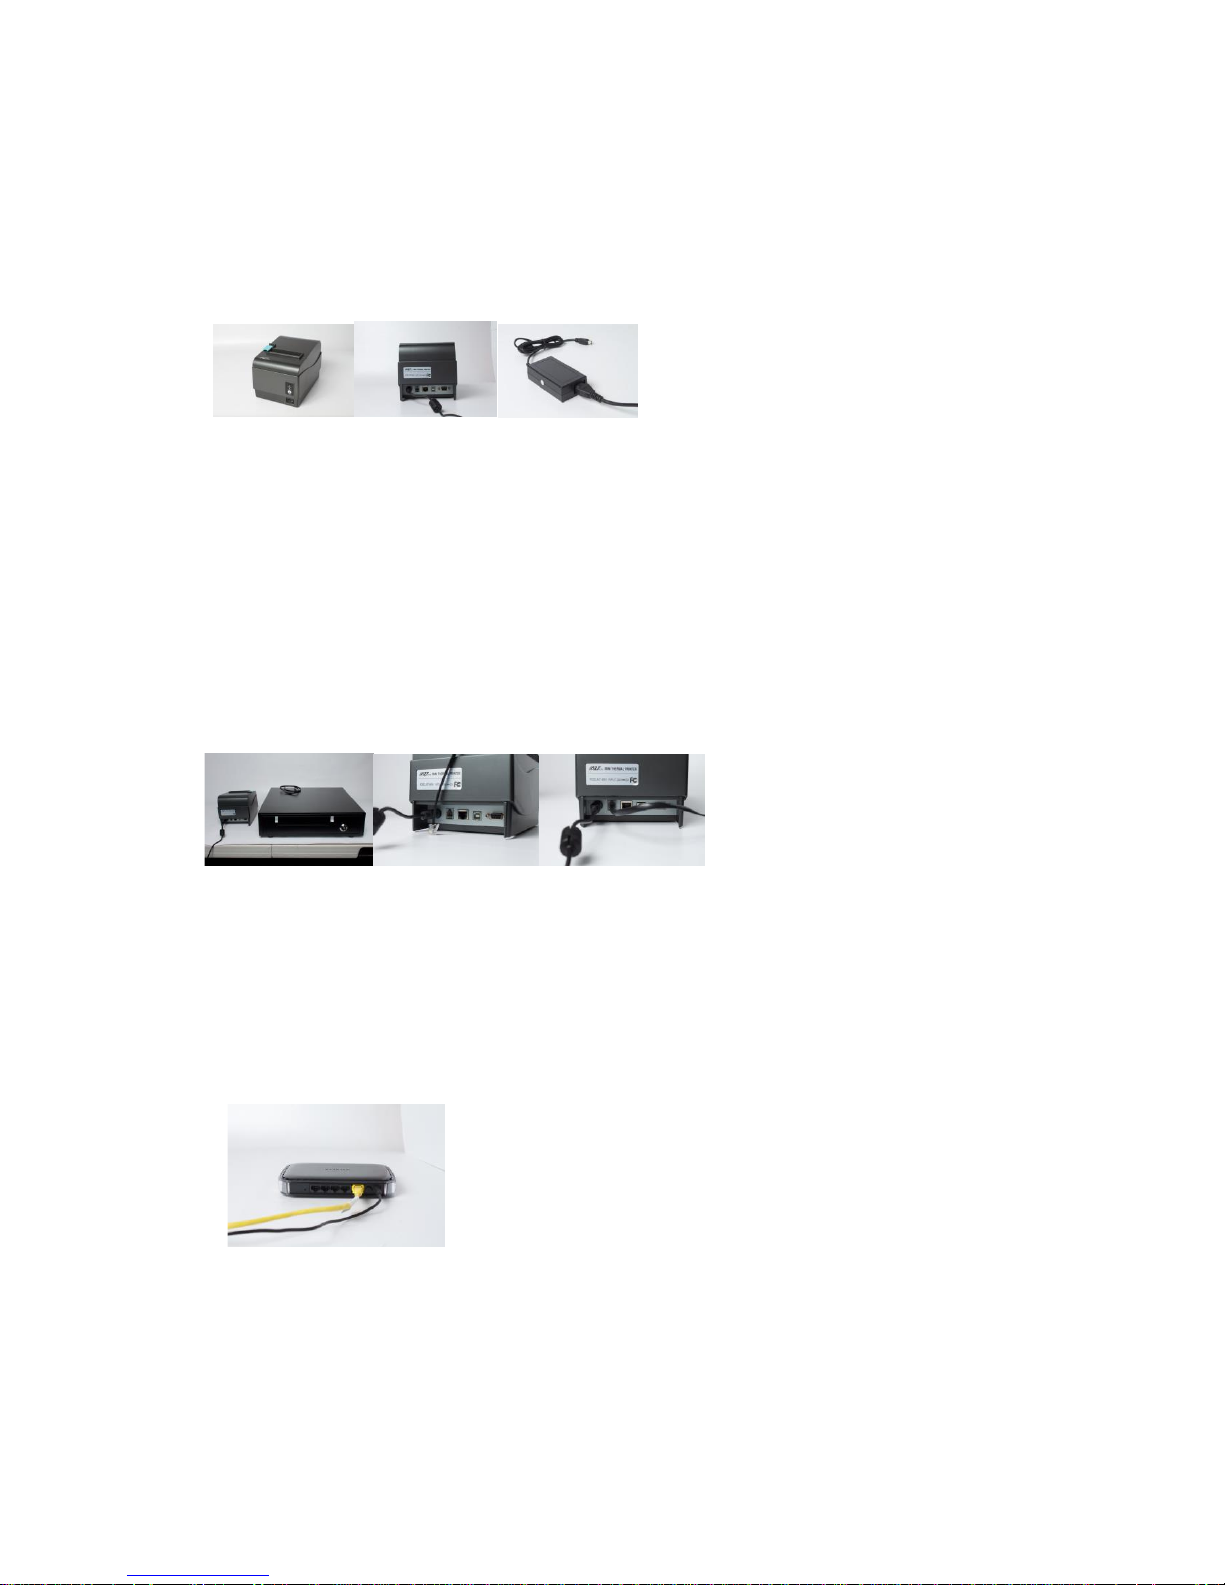
Step 3: Plug-in the Printer
A. Connect A/C adapter and power cord
Note: Power on device using the Front I/O Switch
Step 4: Connect the Cash Box
A. Place the Cash Box near the Printer in your designated POS space
B. Connect the RJ-45 (looks like a phone cord) from the Cash Drawer
to the back of the printer
Note: Remove any packaging and shipping tape before use
Step 5: Router Installation
A. Connect the Router to a network connection (network wall jack)
B. Connect the Power Cable
Page 5
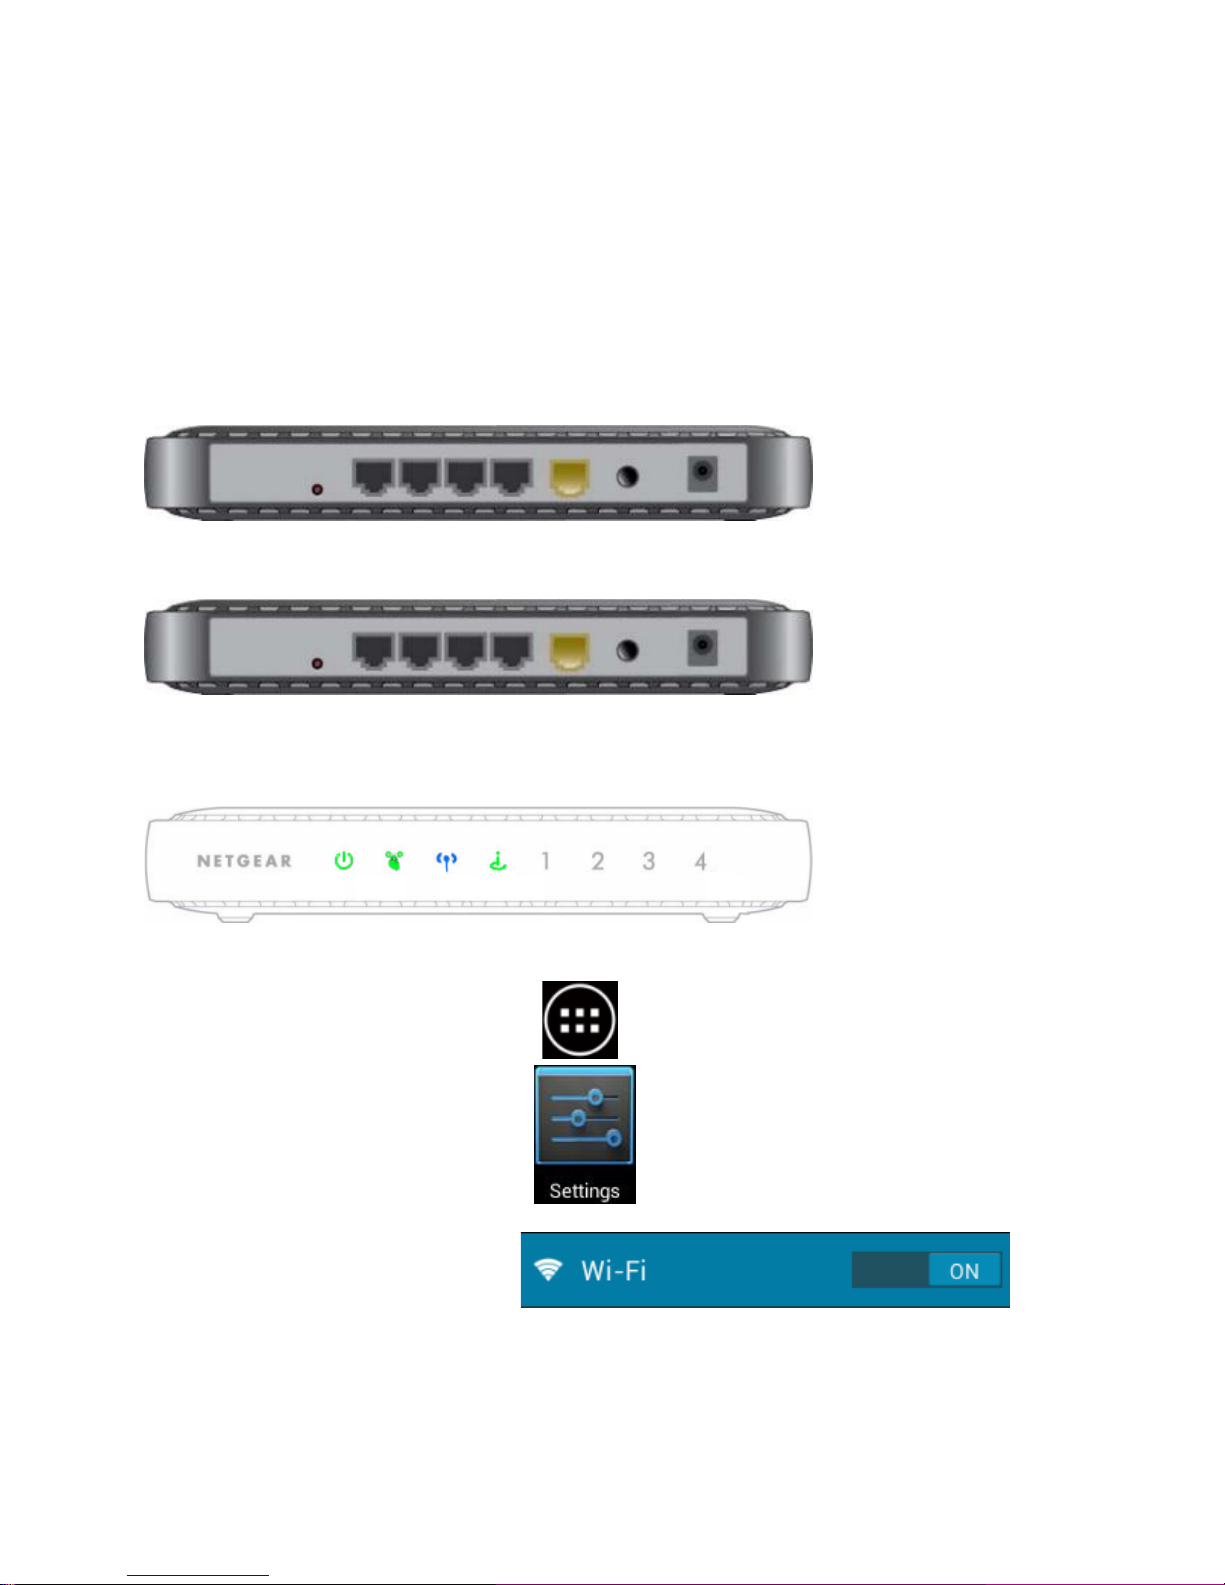
Network Setup
Connecting Wi-Fi
Step 1: Plug the power connector into the back of the router
Step 2: Plug the network cable into the yellow port on the back of the router
Step 3: Make sure the power button is turned on (pressed in), when the unit
is powered up, the green and blue lights on the front will light up
Step 4: Turn on the tablet
- Tap the menu button
- Tap Settings
- Make sure Wi-Fi is on
Page 6

- Select the Router Name that is printed on the router
o [Wi-Fi network name (SSID)] Example:
- Enter the password that is printed on your router
[Network Key (password)]
You are now ready to start your store!
 Loading...