

Page 1
AZiO External HDD Kit
Quick Start Guide
Model:
E300S-U31
Page 2

OVERVIEW
Thank you for purchasing the AZiO USB 2.0 External HDD
Kit, one of the most stylish and practical data storage
solutions available. This AZiO HDD Kit can convert your
internal Serial ATA 3.5” hard disk drive into an external hispeed USB 2.0 mobile storage device. Use it to store your
collection of documents, photos, media files, and backup
all your important data. This external drive kit is very easy
to install, is hot-swappable, and is backed by AZiO
Corporation’s 1-year Limited Warranty.
This Quick Start Guide is designed to get you up and
running in the least amount of time possible. A
comprehensive user’s manual can be found at our website
at www.aziocorp.com
trouble-shooting tips. Thank you again and we sincerely
hope you enjoy using your new AZiO External HDD Kit.
if you need additional details or
PACKAGE CONTENTS
When you unpack your external drive kit, be sure you
have removed all the accessories and information papers.
The items shown below are included with your drive kit:
1. External HD Enclosure
2. Windows 98 Driver CD
3. Installation Screw Pack
4. USB 2.0 Cable
5. External Power Supply
Page 3
DRIVE INSTALLATION
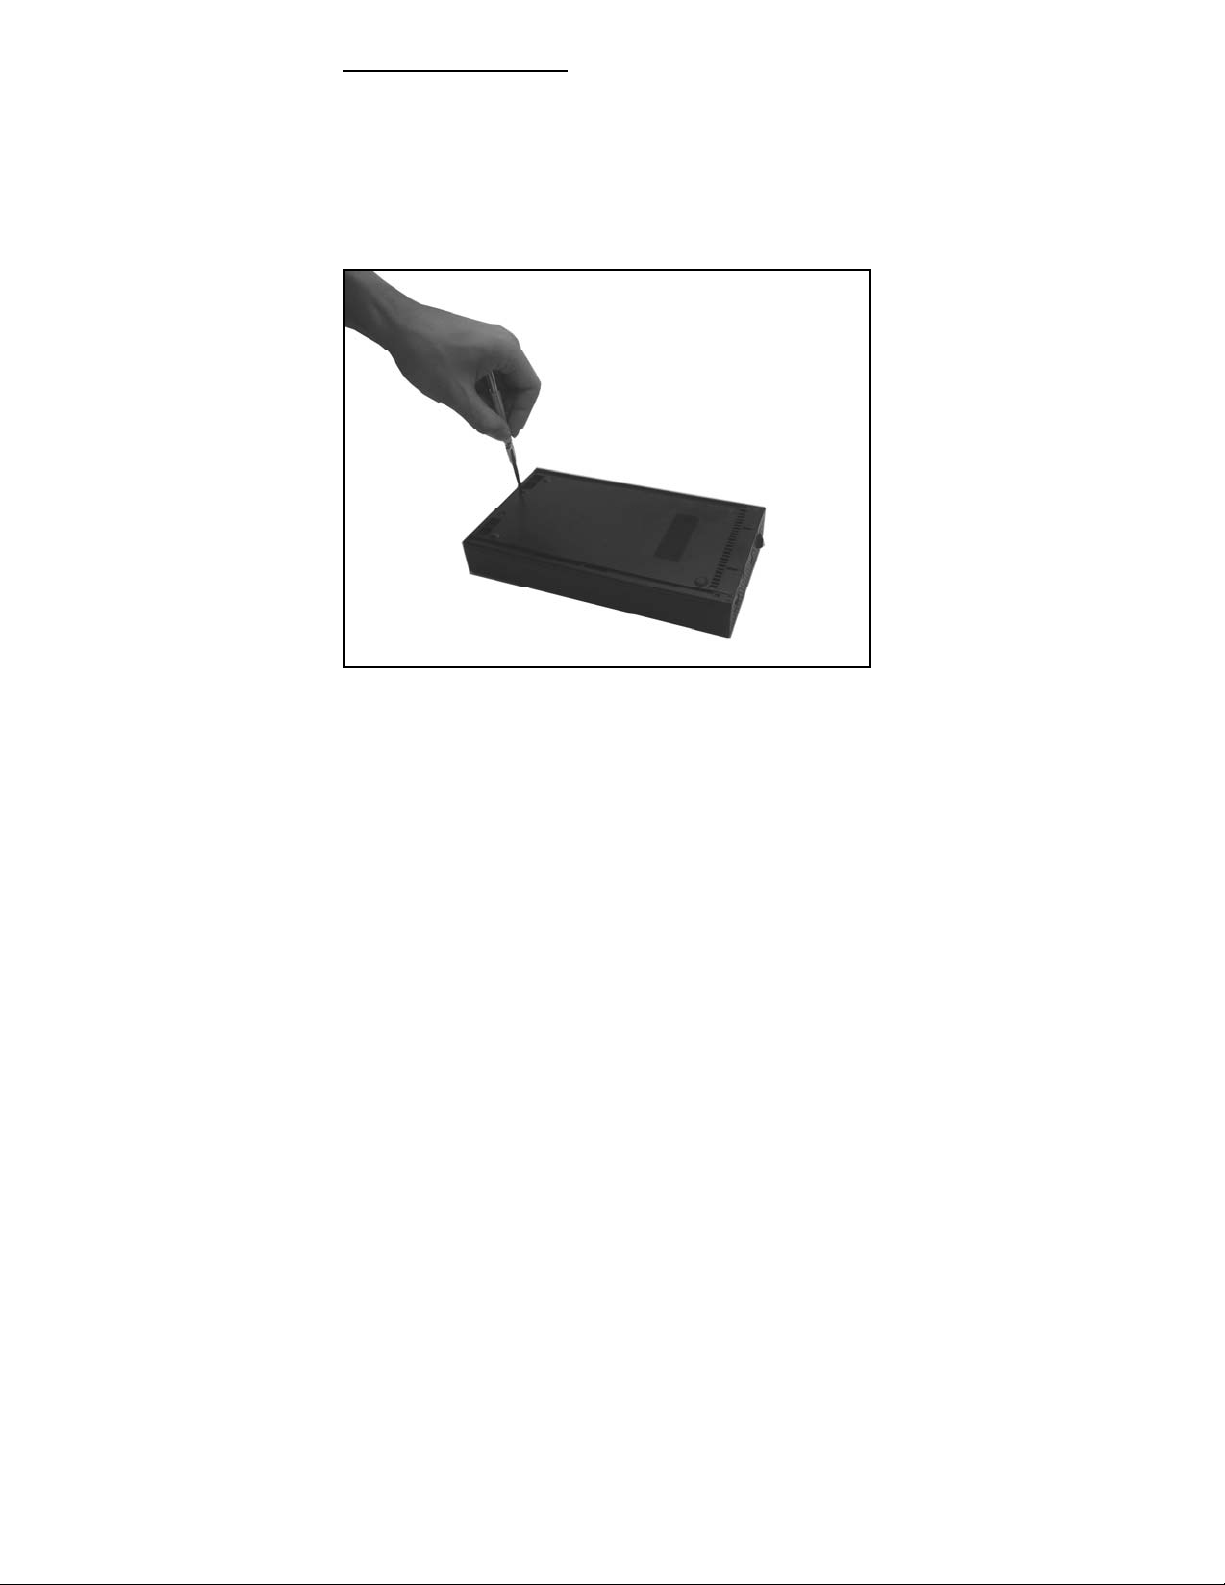
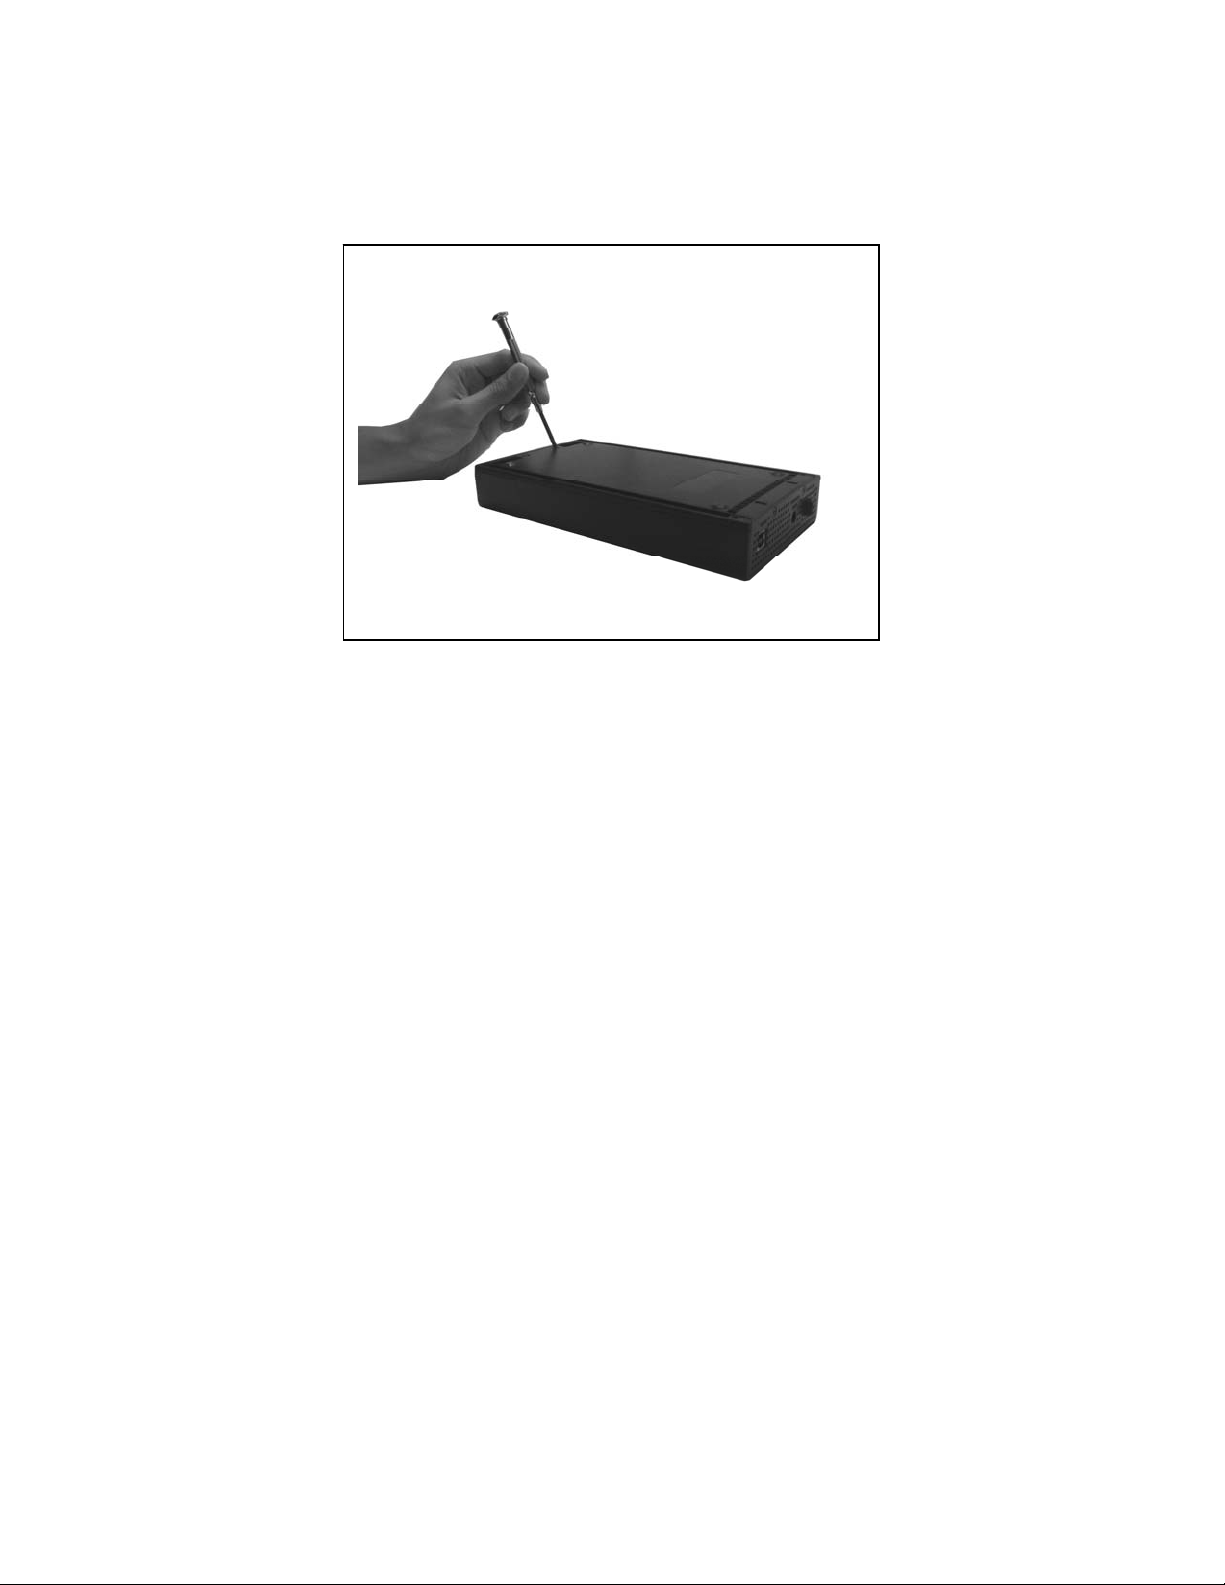
[STEP 1]
Using a Philips screw driver, remove the two screws
located on the bottom of the enclosure, towards the front
side.
Page 4
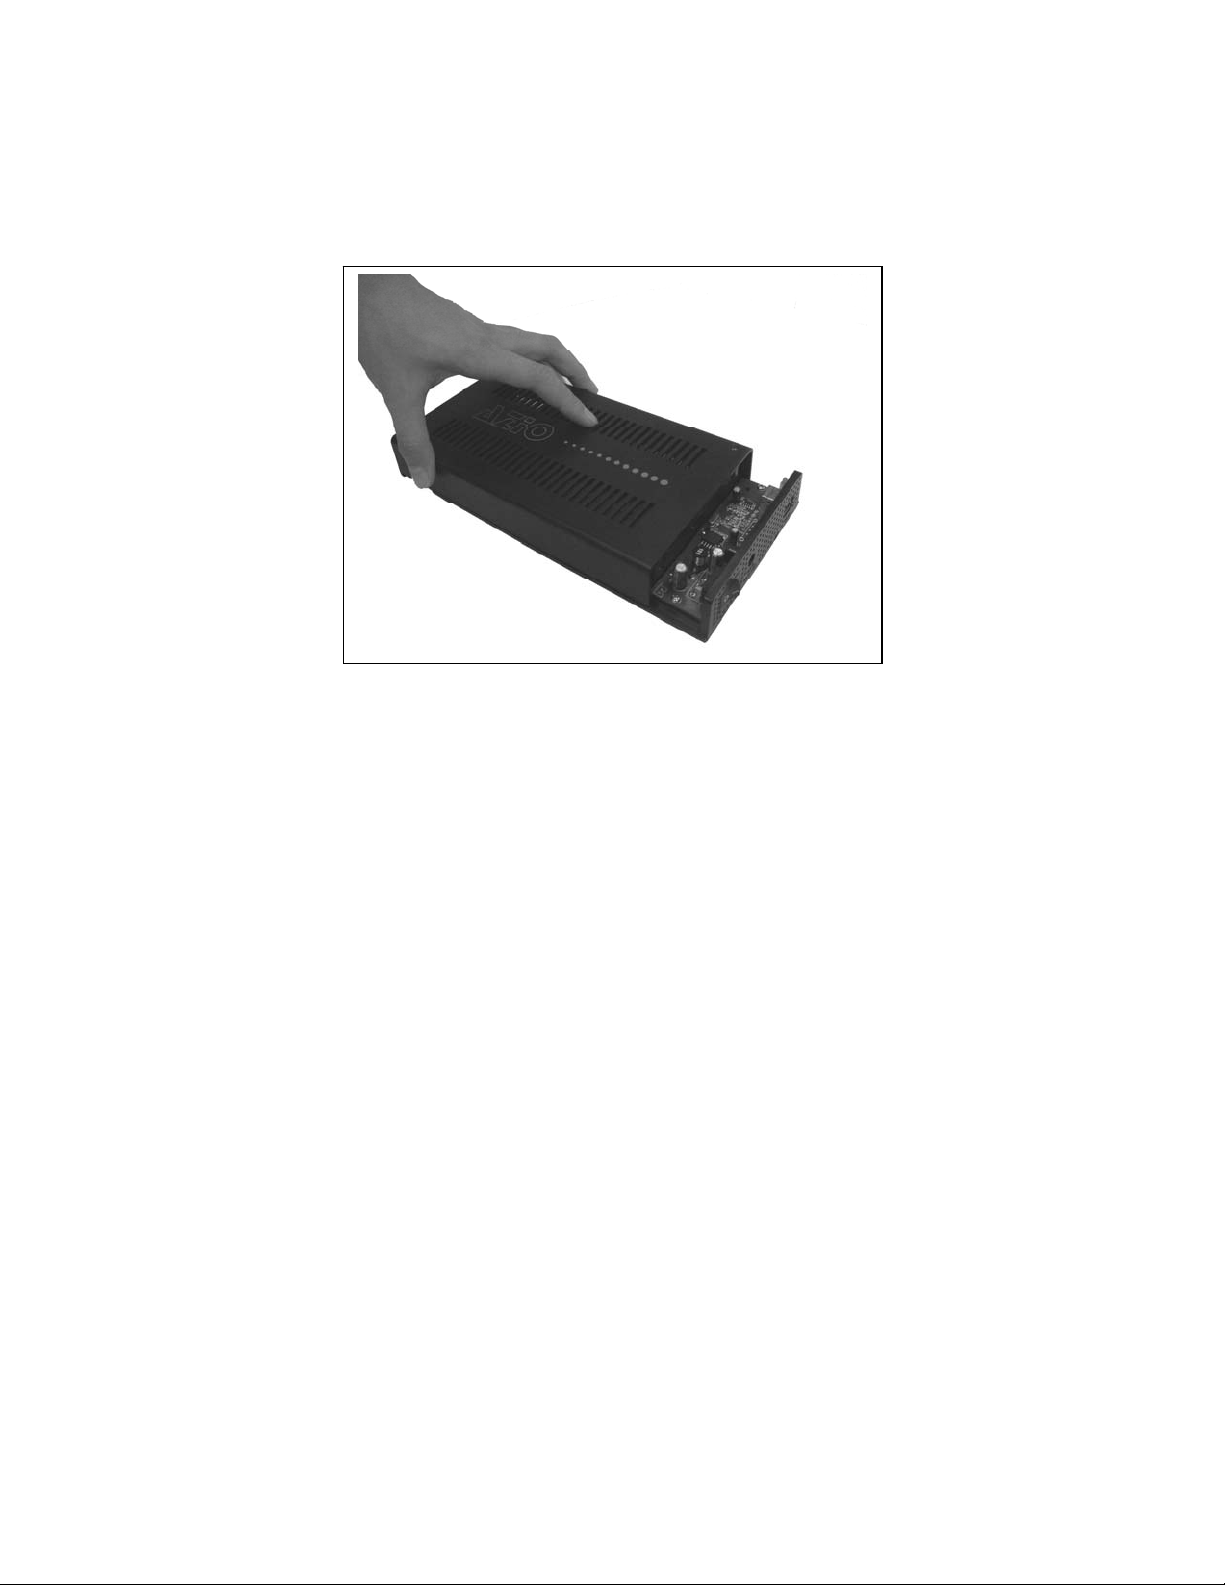
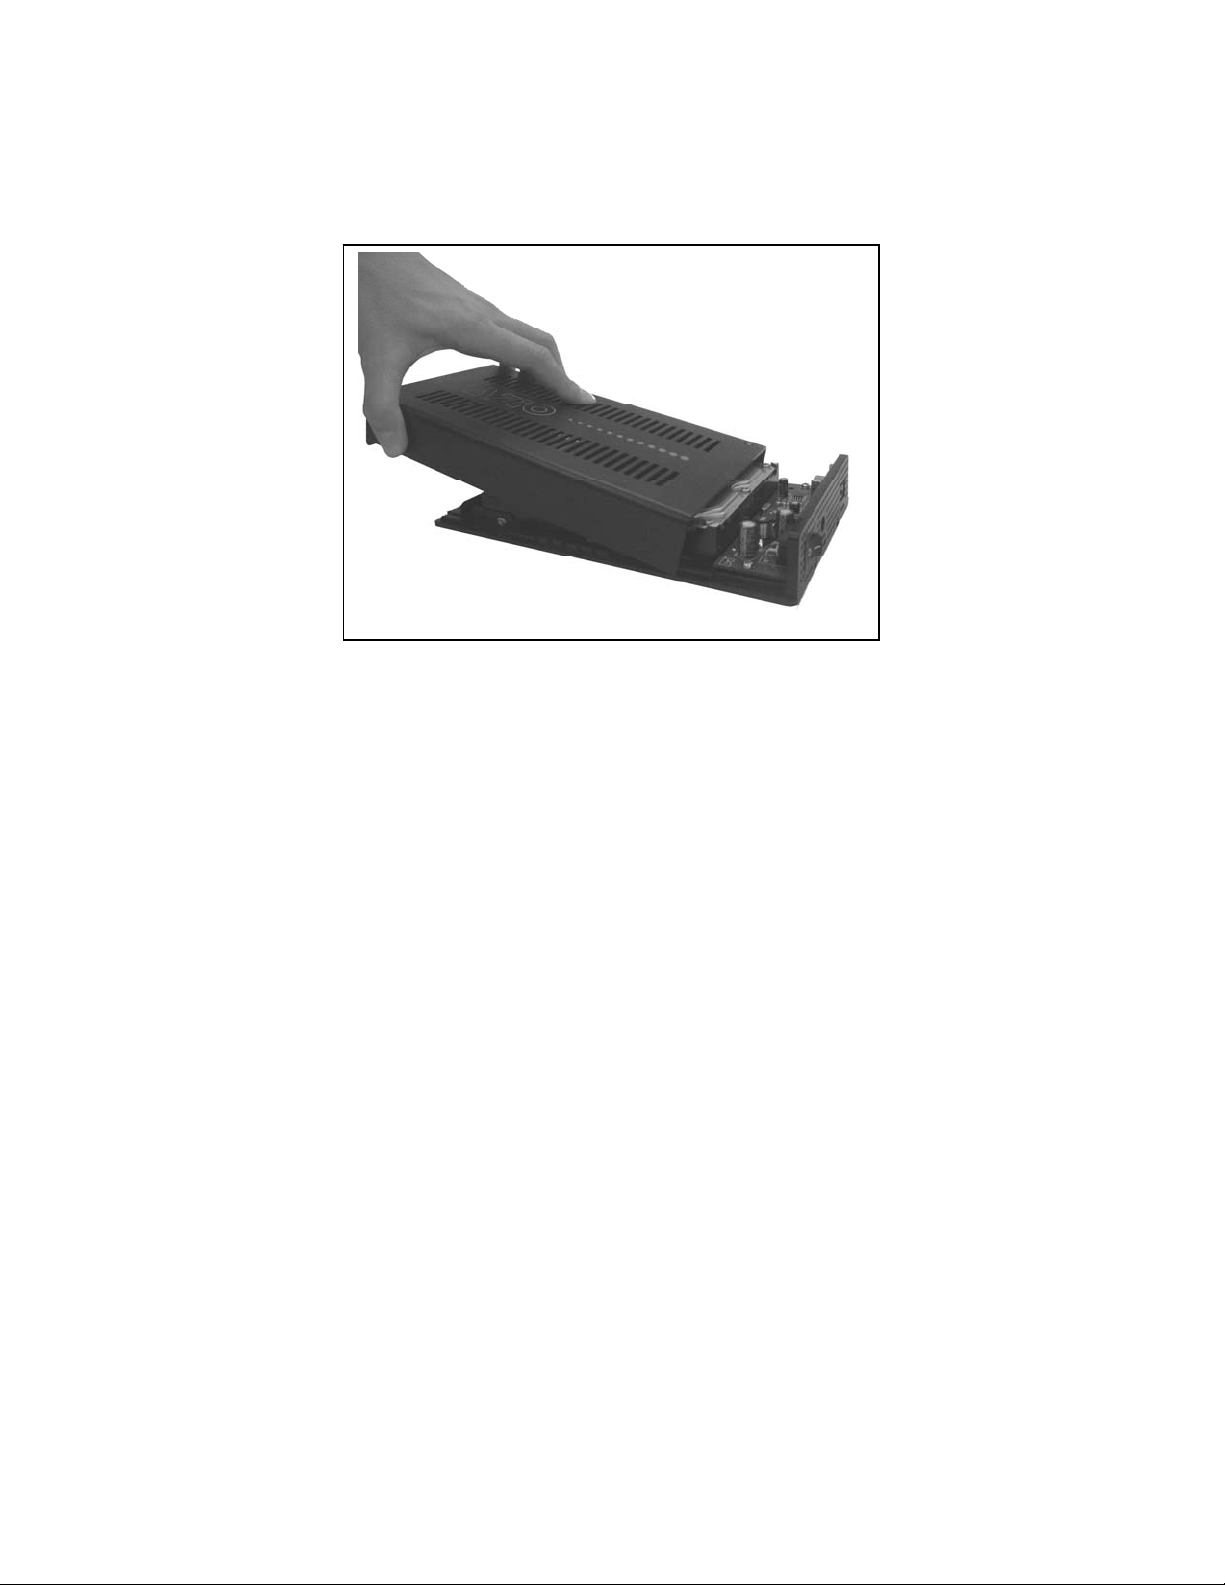
[STEP 2]
Carefully slide the top cover forward then lift it up to
remove it from the enclosure base.
Page 5

[STEP 3]
Insert the hard drive to the bottom tray of the enclosure
and gently push it back until it is firmly connected to the
bridgeboard.
Page 6
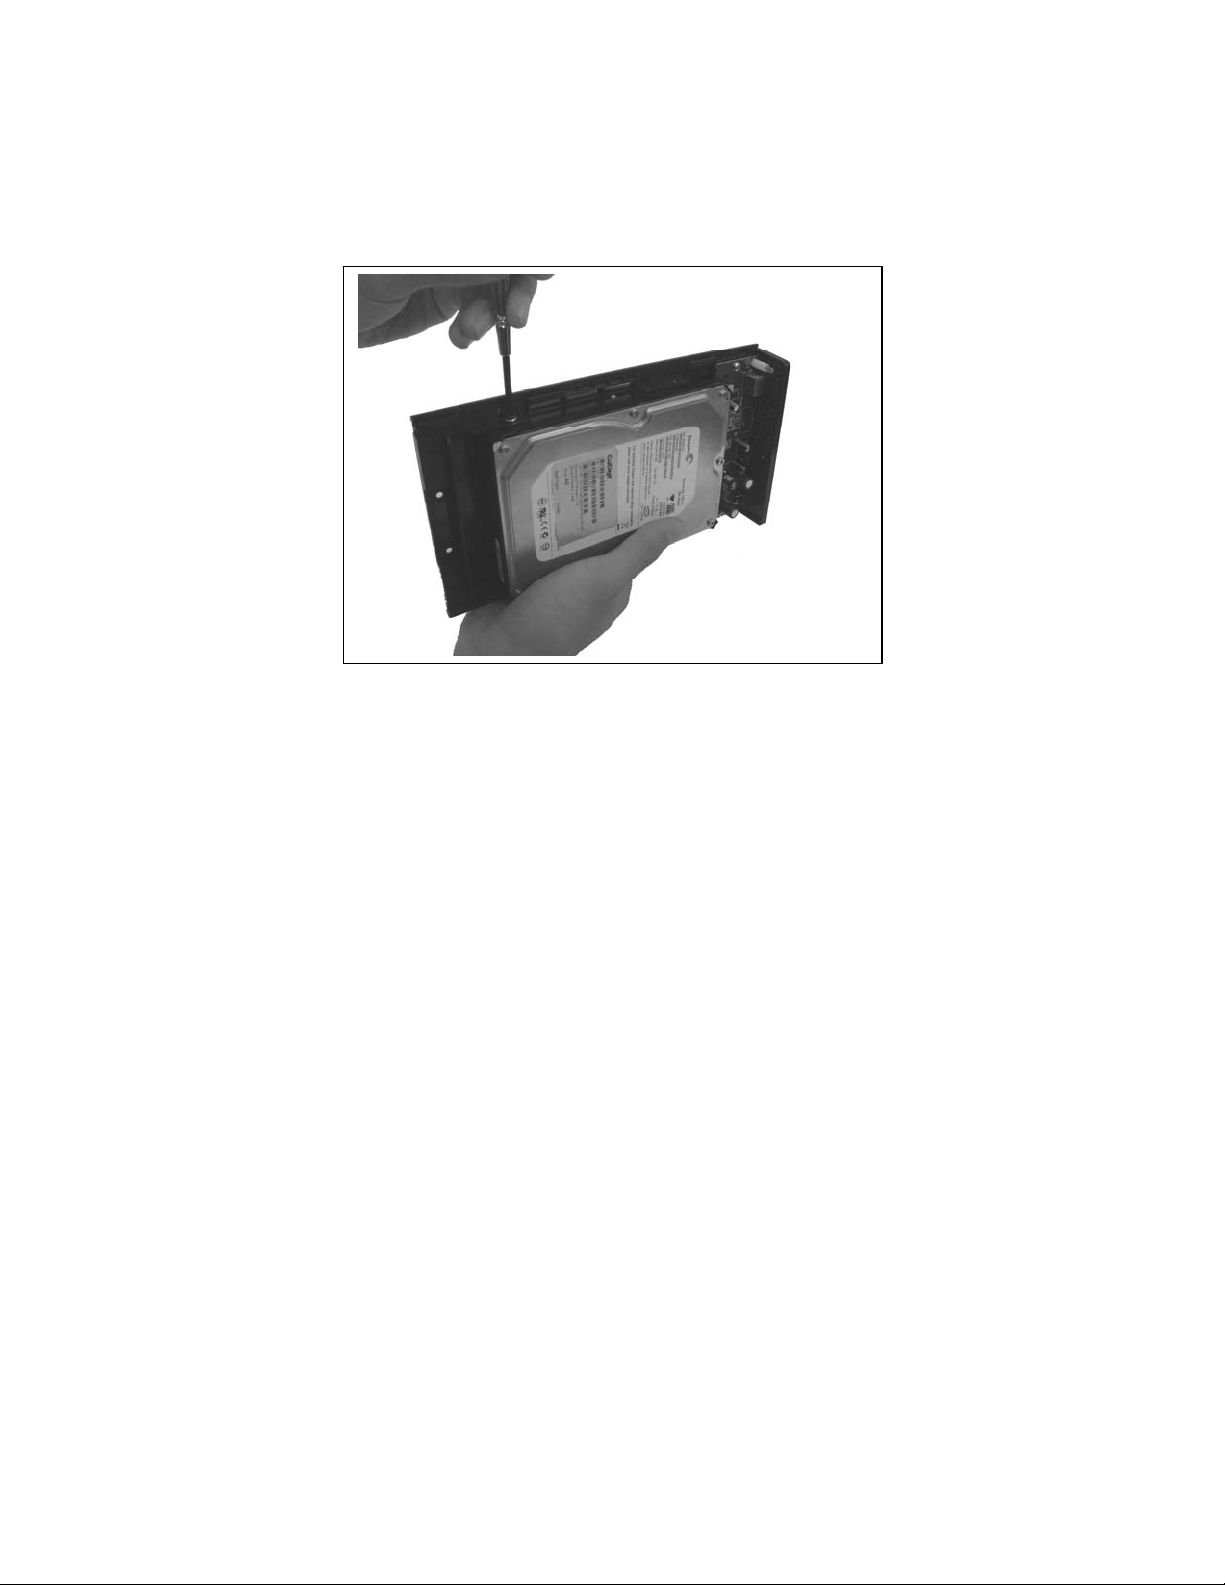
[STEP 4]
Mount the hard drive securely to the enclosure by using
the included hard drive screws.
Page 7
[STEP 5]
Slide the top cover back onto the enclosure base.
Page 8
[STEP 6]
Screw the top cover securely onto the enclosure using the
two bottom two screws we removed in step 1.
Page 9

SOFTWARE INSTALLATION
USB 2.0 Driver Installation
For Windows XP, Windows 2000, Windows ME,
MAC OS 9.x and MAC OS 10.x or higher, no
drivers are required.
For Windows 98SE, insert the software CD and
click follow the instructions below.
1. Power off the external USB drive and disconnect
it from the computer.
2. Run ‘Setup.exe’ file located on the included
installation CD.
3. Follow the installation wizard and complete the
driver installation process.
4. Restart the computer.
5. Connect the external USB device and power it
on.
Page 10

Windows XP and 2000 Hard Drive Installation
If the external hard drive does not mount after you have
plugged-in and turned on your external drive, you will
need to partition and format the drive by doing the
following:
1. RIGHT-CLICK on “MY COMPUTER”, click on
“Manage”.
2. Click on “DISK MANAGEMENT”. A list of all the
drives in your system will be displayed.
3. If ‘Write Signature and Upgrade Disk Wizard’ auto
starts, you can use this wizard to initialize the hard
disk and create partition and format the drive.
4. Otherwise, locate the respective drive listed in the
lower right side of the window. Right click on the
drive, make a new partition and format the drive.
Page 11

Windows 98SE and ME Hard Drive Installation
If the external hard drive does not mount after you have
plugged-in and turned on your drive kit, you would need
to partition and format the drive by doing the following:
1. RIGHT-CLICK on “MY COMPUTER”, then click on
“PROPERTIES”.
2. Click on “DEVICE MANGER”.
3. Click on “DISK DRIVES”.
4. DOUBLE-CLICK on the drive that corresponds to
the external hard drive.
5. Click on “SETTINGS” tab.
6. Check the REMOVABLE box.
7. Click “OK” then restart the computer.
8. After restarting, DOUBLE CLICK on “MY
COMPUTER”, the external hard drive will now
appear. DOUBLE CLICK the drive to format the
drive.
Page 12

SERVICE & WARRANTY
Service
If you need assistance with the product, please check the
comprehensive user’s manual included in the software CD
or visit our website at www.aziocorp.com
for frequently
asked questions and troubleshooting tips. Otherwise, you
may contact our dedicated customer care team.
There are several ways to contact us:
By Phone: (909) 468-1198
By Email support@aziocorp.com
On LiveChat: www.aziocorp.com
Warranty
Limited 1 Year Warranty
AZiO Corporation warrants this product against defect in material
or workmanship for 1 year from the date of purchase. If this
product proves to be defective, contact AZiO Corporation’s
customer care for repair or replacement of your unit. Return
requests can not be process without the proof of original date of
purchase. This warranty applies only to the original purchase of
the product and is not transferable. This warranty does not cover
any incompatibilities due to the user’s computer, which the
product interfaces. The warranty does not cover any damage
caused by negligence, abuse, or non-authorized modifications. To
the maximum extent permitted by applicable law, in no event
shall AZiO Corporation, its affiliates, o r its dealers be liable for
any special, incidental, indirect or consequential damages
whatsoever regardless of cause or form of action.
Page 13

RESUMÉN
Gracias por comprar el Juego de AZiO USB 2.0 Mobile
HDD, una de las soluciones de almacenamiento de
información más elegante y práctica disponible hasta hoy.
Este Paquete de AZiO HDD tiene la capacidad de convertir
su disco duro interno Serial ATA 3.5” en un dispositivo de
almacenamiento móvil externo USB 2.0 de alta velocidad.
Úselo para almacenar su compilación de documentos,
fotografías, archivos de medios, y crear un respaldo de
todos su documentos importantes. Este lector de medios
externo es muy fácil de instalar, es un intercambio rápido,
y está amparado con 1 año de Garantía Limitada por AZiO
Corporation.
Esta Guía Rápida está diseñada para ayudarle a tener el
equipo funcionando en el menor tiempo posible. En
nuestra página web www.aziocorp.com
manual del usuario comprensivo en adición a puntos clave
detallados por si necesitara localizar fallas. Gracias de
nuevo y sinceramente esperamos que disfrute usar su
nuevo Juego Externo AZiO HDD.
encontrará un
CONTENIDO DEL PAQUETE
Cuando desempaque su disco externo, asegúrese de haber
removido todos los accesorios y papeles de información.
Los artículos que se encuentran abajo están incluidos con
su nuevo dispositivo:
1. Disco Duro Externo y Accesorios
2. Disco de Pilotos para Windows 98SE
3. Paquete de Tornillo de Instalación
4. Cable USB 2.0
5. Alimentación de Corriente Externa
Page 14

INSTALACIÓN DEL DISCO
[PASO 1]
Usando un desatornillador Philips, quite los dos tornillos
localizados abajo del gabinete que se encuentra frente a
éste.
Page 15

[PASO 2]
Cuidadosamente jale la cubierta de arriba hacia el frente
después levántela para quitarla de la base del gabinete.
Page 16

[PASO 3]
Meta el disco duro en la bahía posterior al gabinete y
empújelo suavemente hasta atrás hasta que esté
firmemente conectado a la terminal de puentes (o
bridgeboard.)
Page 17

[PASO 4]
Usando los tornillos incluidos, asegure el disco duro
montándolo al gabinete.
Page 18

[PASO 5]
Resbale o jale la cubierta de regreso a la base del
gabinete.
Page 19

[PASO 6]
Usando los dos tornillos que quitó en el 1er paso, atornille
la cubierta asegurándola al gabinete.
Page 20

INSTALACION DEL SOFTWARE
USB 2.0 Driver Installation
Para Windows Vista, Windows XP, Windows 2000,
Windows ME, MAC OS 9.x y MAC OS 10.x o más
alto, no se requieren pilotos (o drivers.)
Para Windows 98SE, inserte el Disco del software
y siga las instrucciones de abajo.
1. Apague el dispositivo USB y desconéctelo de
la computadora.
2. Corra el archivo Setup.exe que se encuentra
en el Disco de instalación.
3. Siga la guía de instalación y lleve a cabo el
proceso de instalación del piloto (driver).
4. Re-inicie la computadora.
5. Conecte el dispositivo USB y enciéndalo.
Page 21

Instalación del Disco Duro para Windows Vista, XP y
2000
Si su disco duro externo no es reconocido después de que
ya lo ha conectado y encendido usted deberá hacer una
división y formato del disco de la siguiente manera:
1. PRESIONE EL BOTÓN DERECHO sobre mi
computadora (o “MY COMPUTER”, seleccione
administrar (o “Manage.”)
2. Oprima administración del disco o “DISK
MANAGEMENT”. Aparecerá una lista de todos los
discos instalados en su sistema.
3. Si se inicia la guía para Actualizar y Confirmar o
(“Write Signature and Upgrade Disk Wizard,”)
puede usar esta guía para iniciar el disco y crear la
división y formato de éste.
4. De lo contrario, localice el respectivo disco en la
parte de abajo de la ventana. Oprima el botón
derecho sobre el disco, y haga una nueva división
y formato en el disco.
Page 22

Instalación del Disco Duro para Windows 98SE y ME
Si su disco duro externo no es reconocido después de que
ya lo ha conectado y encendido usted deberá hacer una
división y formato del disco de la siguiente manera:
1. OPRIMA EL BOTÓN DERECHO sobre mi
computadora (o “MY COMPUTER”,) seguido por
propiedades (o “PROPERTIES.”)
2. Presione la administración de dispositivos (o
“DEVICE MANAGER”.)
3. Seguido por discos dispositivos (o “DISK
DRIVES”.)
4. Oprima el botón dos veces seguidas sobre el
dispositivo al que corresponda el disco duro.
5. Oprima en la lengüeta de escenarios (o
“SETTINGS”).
6. Asegúrese de marcar la cajilla de movible (o
REMOVABLE).
7. Presione “OK” y re-inicie su computadora.
8. Después de haber re-iniciado, OPRIMA DOS VECES
sobre mi computadora (o “MY COMPUTER”), verá
que el dispositivo del disco duro aparece allí.
OPRIMA DOS VECES sobre el dispositivo para
hacerle un formato completo.
Page 23

SERVICIO Y GARANTÍA
Servicio
Si necesitara asistencia para este producto, por favor vea
el manual del usuario comprensivo que está incluido en el
disco del software o puede visitar nuestra página web en
www.aziocorp.com
para ver las preguntas más frecuentes
e información de cómo localizar fallas. De lo contrario,
puede contactar a nuestro equipo dedicado al servicio del
cliente.
Hay varias maneras de comunicarse con nosotros:
Por teléfono: (909) 468-1198
Por E-mail support@aziocorp.com
O CharlaInteractiva: www.aziocorp.com
Garantía
1 año de Garantía Limitada
AZiO Corporation garantiza este producto contra cualquier
defecto de manufacturación o material usado por 1 año
desde el día de su compra. Si este producto comprobase
estar defectuoso, comuníquese con el departamento de
servicio al cliente de AZiO Corporation para reparación o
reemplazo de la unidad. Peticiones de devolución no
pueden ser procesadas sin un comprobante de compra
original que muestre la fecha de compra. Esta garantía es
aplicable para el producto original obtenido y no es
transferible. Esta garantía no cubre cualquier
incompatibilidad con la computadora del usuario con la
que el producto esté interactuando. Esta garantía no
Page 24

protege ningún daño causado por negligencia, abuso, o
alteraciones/modificaciones no autorizadas. La extensión
máxima permitida por leyes aplicables, en ningún evento o
momento AZiO Corporation, sus afiliados, o distribuidores
se responsabilizan por cualquier daño especial, imprevisto,
o indirecto sin tomar en cuenta cuál fue la forma o acción
de éste.
FCC Compliance Statement
This equipment has been tested and found to comply with the
limits for a Class B Digital Device, pursuant to Part 15 of the FCC
Rules. These limits are designed to provide reasonable protection
against harmful interference in a residential installation. This
equipment generates, uses and can radiate radio frequency
energy and if not installed and used in accordance with the
instruction manual may cause harmful interference to radio
communication. However, there is no guarantee that interference
will not occur in a particular installation. If this equipment does
cause harmful interference to radio or television reception, which
can be determined by turning the equipment off and on, the user
is encouraged to try to correct the interference by one or more of
the following measures:
Reorient or relocate the receiving antenna.
Increase the separation between the equipment and
receiver
Connect the equipment into an outle t o n a circuit
different from that to which the receiver is
connected
Consult the dealer or an experienced radio TV
technician for help.
 Loading...