

Page 1
MODEL:AWU354
802.11g
WirelessUSBAdapter
UserManual
Page 2

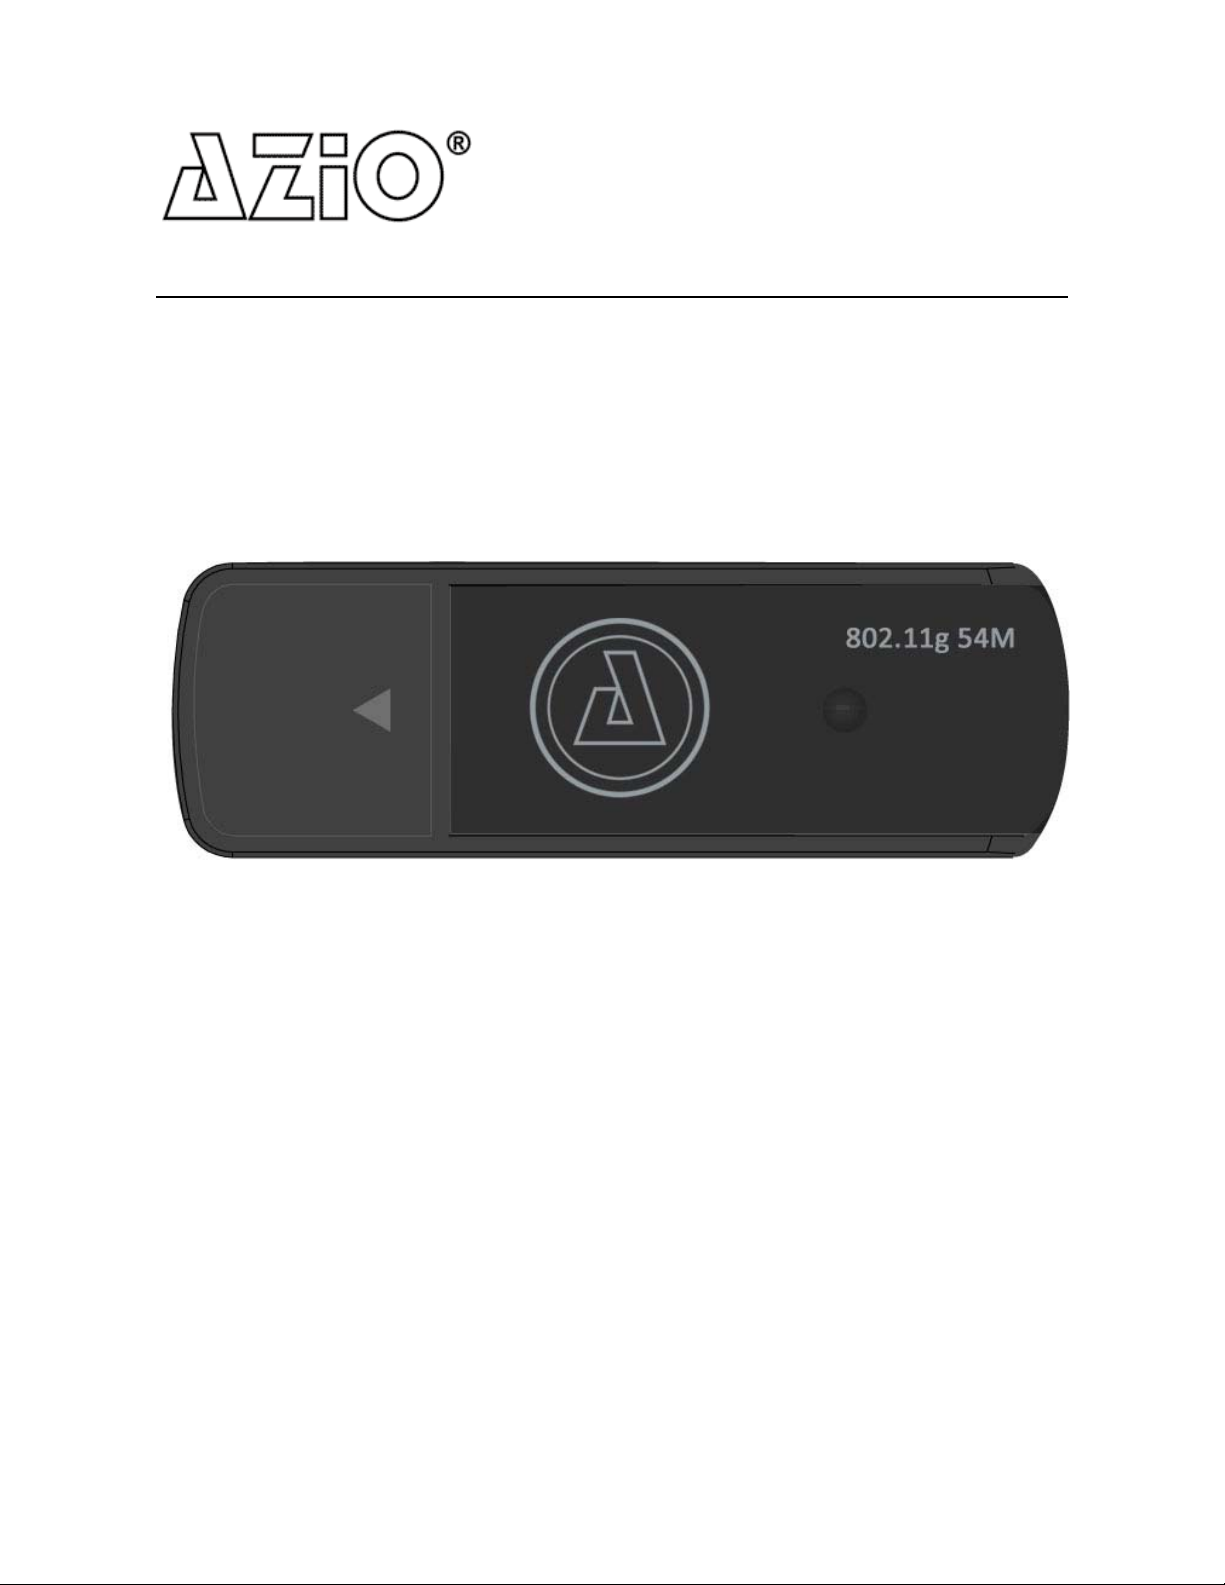
802.11g Wireless USB Adapter
Copyright Statement
is the registered trademark of AZiO Corporation. All the products
and product names mentioned herein are the trademarks or registered
trademarks of their respective holders. Copyright of the whole product as
integration, including its accessories and software, belongs to AZiO Corpor ation.
Without the permission of AZiO Corporation, any individual or party is not allowed
to copy, plagiarize, imitate or translate into other languages.
All the photos and product specifications mentioned in this manual are for
reference only. As upgrade of software and hardware progresses, there will be
changes. And if there are changes, AZiO is not responsible for informing in
advance. If you would like to know more about our product information, please
visit our website at www.aziocorp.com.
1
Page 3

802.11g Wireless USB Adapter
Table of Content
Chapter 1.
1.1 Welcome…………………………………………….…………………………2
1.2 Product Feature…………………………………………………………………2
1.3 Contents of Package……………….…………………….……………………2
Chapter 2. Installation…………………………………………………………………3
Introduction……………………………………………………………2
Chapter 3. Configuration………………………………………………………..……5
3.1 Station Mode…….………………………………………………………..……5
3.1.1
Profile
…….……........……………………………………………..……7
3.1.1.1 Add/Edit Profile…………………………………………......……8
3.1.2 Site Survey....……………………………………………………………9
3.1.3 Status
…………...........……………………………………………..…...9
3.1.4 Statistics……………..……….…………………………………………10
3.1.5 WPS….......................………........………………..………………11
3.2
3.2.1
3.2.2
AP Mode………………..…....……………………………….………..12
Basic Setting……......……………………………………………...….13
Security Setting
…....………..………………………...………..……14
3.2.3 Access Control…......………..………………………...………..……15
3.2.4 About............................................………………………………15
Chapter 4. Product Specifications………….........................……………….16
Chapter 5. TroubleShooting………….........................………….............17
2
Page 4

802.11g Wireless USB Adapter
Chapter 1 Introduction
1.1 Welcome
Thank you for purchasing the AZiO AWU354 802.1 1g wireless USB adapter. The
AWU354 adapter connects you with 802.11g networks at up to an incredible
54Mbps. For added versatility, it can also interoperate with all the 11Mbps
802.11b products found in homes, businesses, and public wireless hotspots
around the country.
The Soft AP supported by AWU354 can help you establish wireless LAN
networking at the lowest cost. WPS (Wi-Fi Protected Setup) simplify security
setup and management of Wi-Fi networks. This adapter supports WMM for
Multimedia Applications with Quality of Service in Wi-Fi® Networks.
1.2 Product Feature
Complies with IEEE 802.11g and IEEE 802.11b standards
Supports USB 2.0 and 1.1 standards
Provides up to 54Mbps tr ansmission rate and up to 300 feet tr ansmissio n
distance
Auto-detects and changes the network transmission rate
Provides two work modes: Infrastructure and Ad-Hoc
Supports Soft AP to establish your wireless LAN networking
Supports 64/128-bit WEP, WPA, WPA2 encryption methods and 802.1x
security authentication standard
Supports Wireless Roaming function
WPS (Wi-Fi Protected Setup) simplifies security setup and management of
Wi-Fi networks.
Supports WMM for Multimedia Applications with Quality of Service in
Wi-Fi® Networks
Supports Windows 2000/XP*/Vista*/7* (*32 or 64 bits)
1.3 Contents of Package
One AWU354 Adapter
One Installation CD with User Manual
One Quick Installation Guide
3
Page 5
802.11g Wireless USB Adapter
Chapter 2 Installation
NOTE:
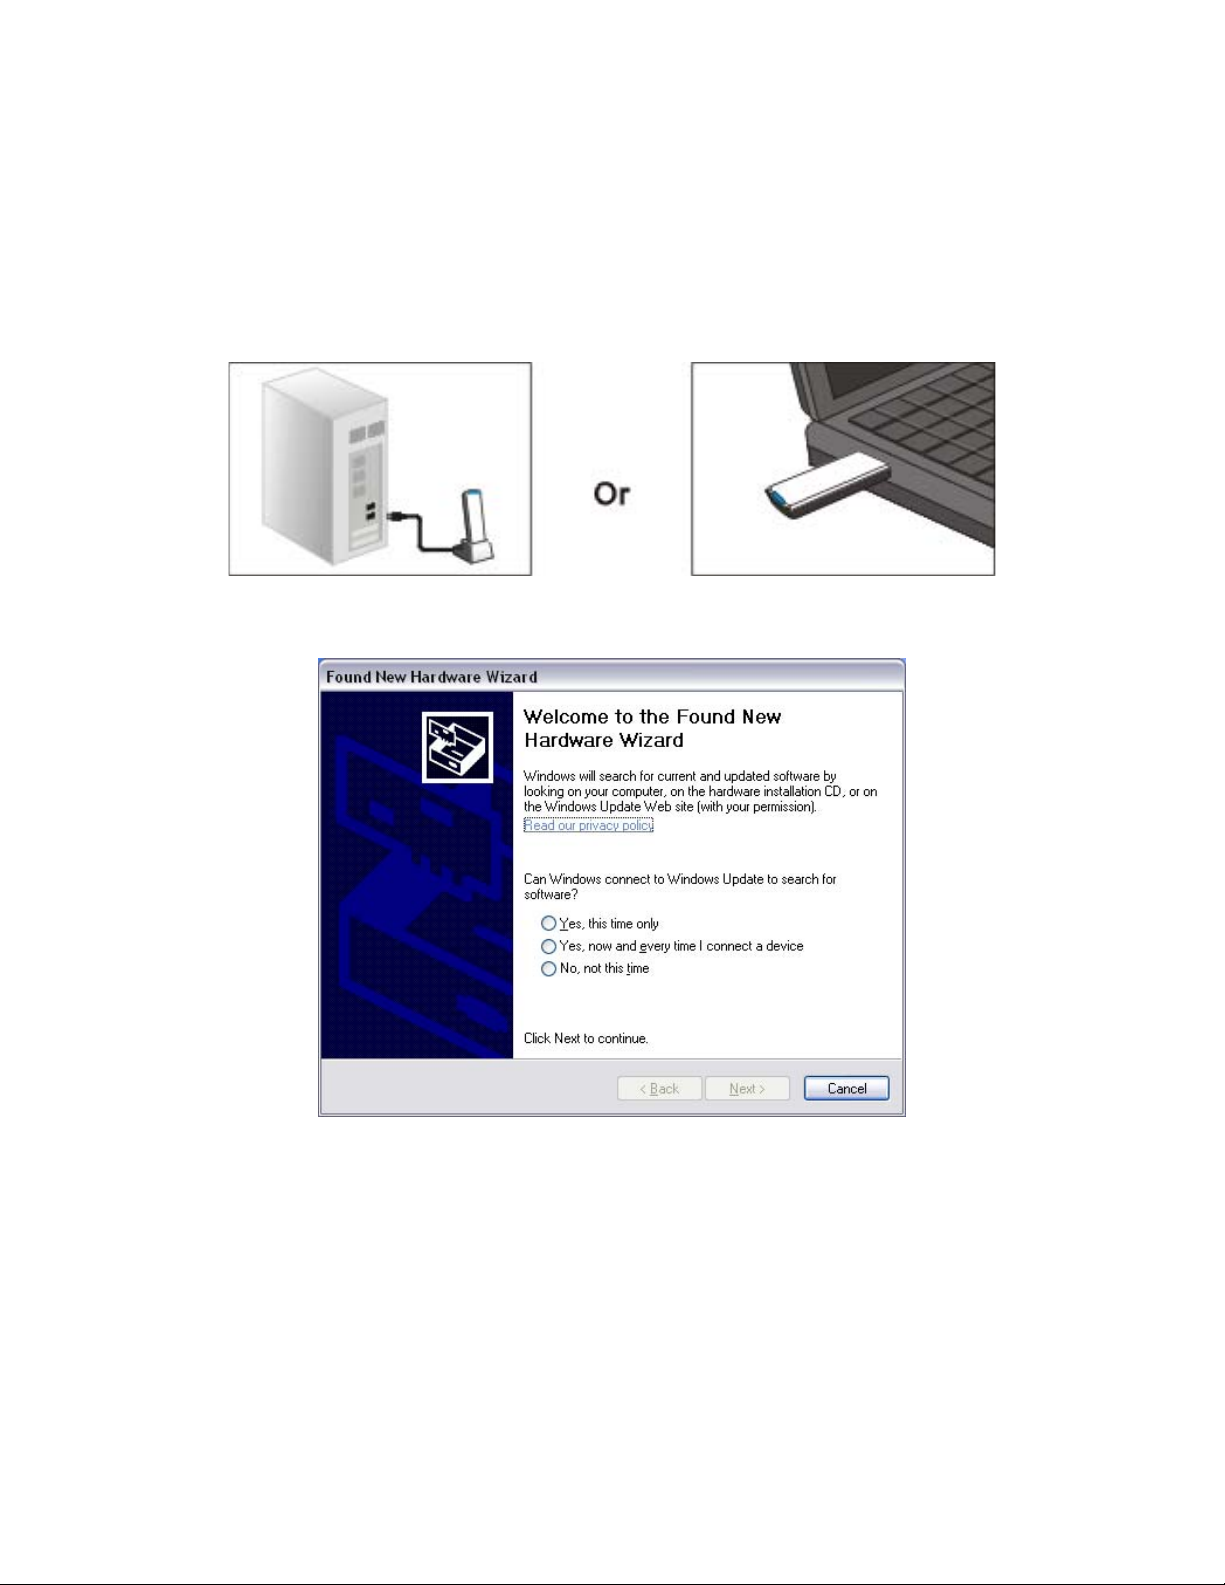
1. Insert the AWU354 Adapter into a USB slot of your computer.
2. Select Cancel when “Found New Hardware” window appears.
1.
For future driver upgrades, please visit our website at www.aziocorp.com
2.
Snap-shot screens of the following installation procedure are based on Windows
XP. Installation procedures will be similar for other windows operating systems.
Insert Installation CD to your CD-ROM drive. Browse CD and double-click
3.
setup.exe
install all necessary files to your computer automatically.
in Driver folder to execute it. The installation wizard will run and
4
Page 6

4.
Accept the license agreement and click
802.11g Wireless USB Adapter
Next
to start installation.
5. Choose ‘Install driver only’ if you prefer not to use the Ralink configuration
utility. We recommend choosing ‘Install driver and Ralink WLAN Utility’. Click
Next
to continue.
5
Page 7
802.11g Wireless USB Adapter
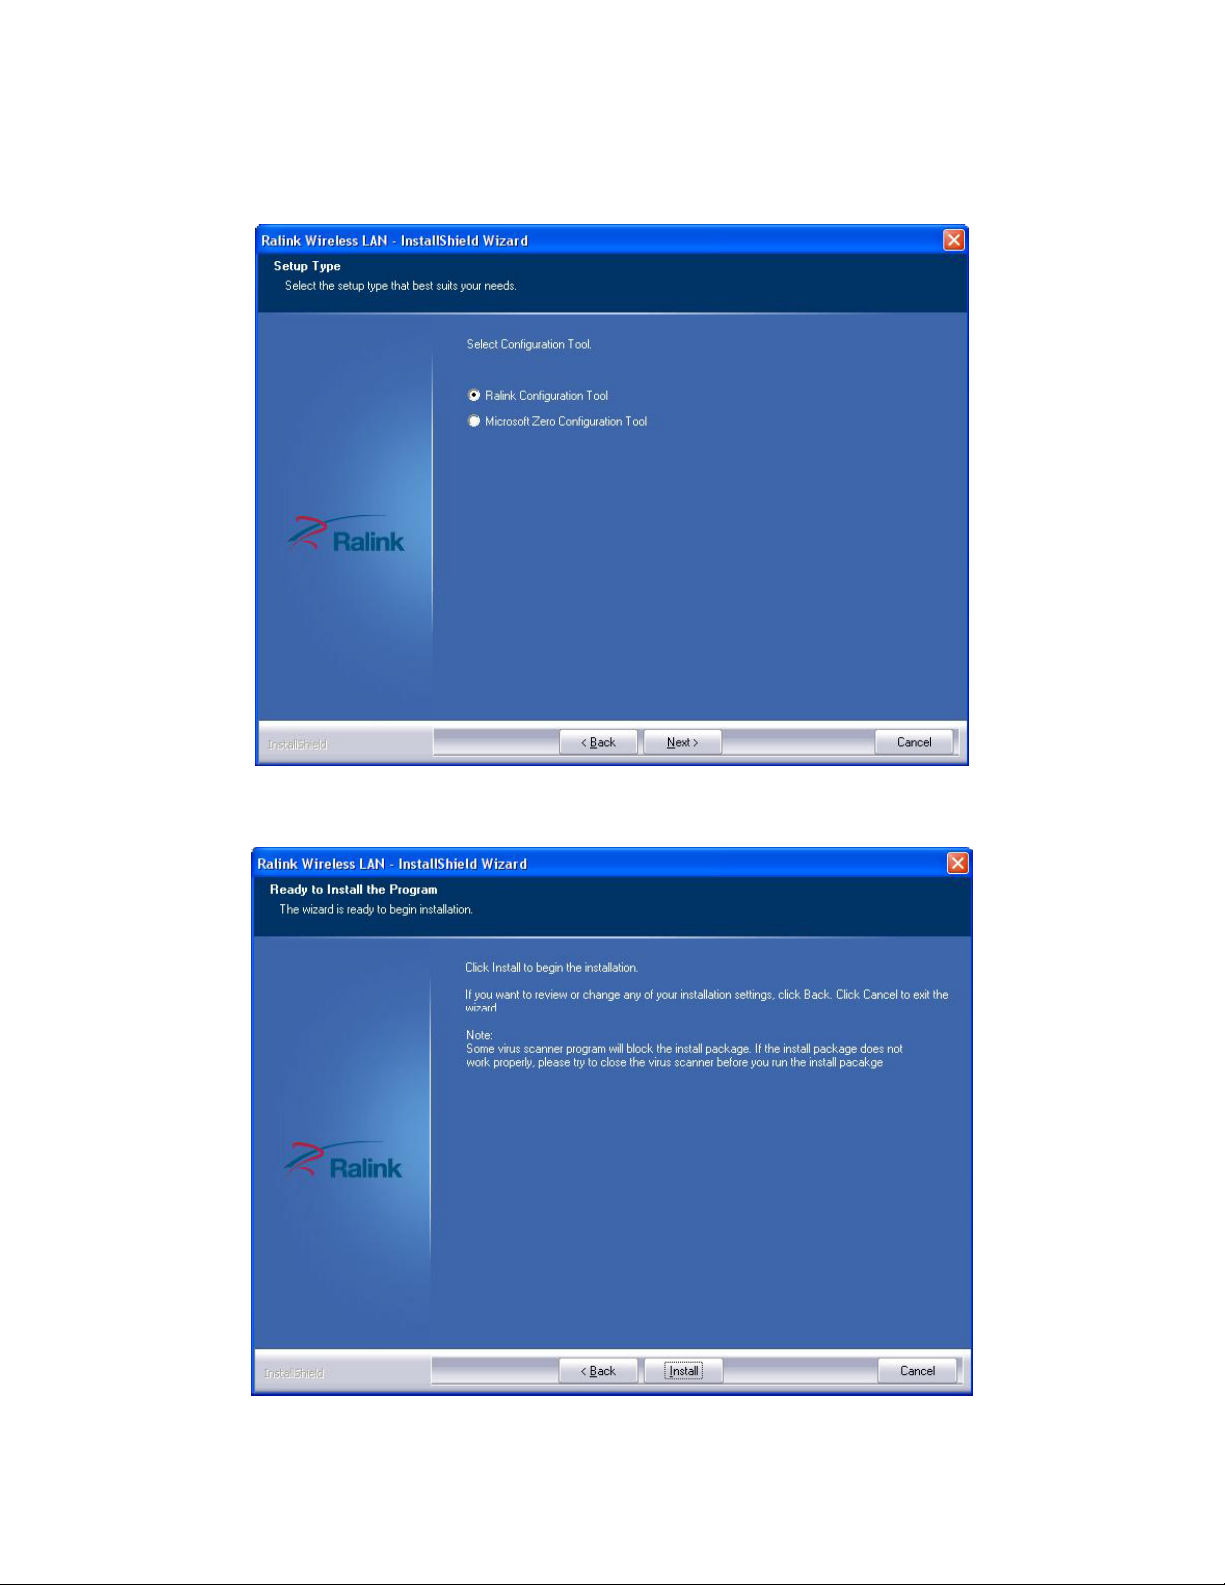
6. Choose how you would like to configure your network. We recommend
choosing ‘Ralink Configuration Tool’. Click Next to continue.
7. Click Install to start installing and click Finish when completed.
6
Page 8

802.11g Wireless USB Adapter
You will see a tray icon appear in your system tray at the bottom of the
screen after the software and hardware has successfully installed.
Chapter 3 Configuration
3.1 Station Mode
Station Mode is the default access mode. In this mode, the AWU354 serves as a
client to receive wireless signals to access the Internet.
Double-click the tray icon
to launch the configuration utility . Or right click the
tray icon and select Launch Config Utility.
7
Page 9

802.11g Wireless USB Adapter
3.1.1 Profile
Creating a Profile helps keep your favorite wireless setting among your home,
office, and other public hotspot. You may create multiple profiles and activ at e
the one you prefer.
Add:
Edit:
Delete:
Import:
Export:
Activate:
to create a new profile
to edit/modify/change parameter o f an ex isting profile
to delete an existing profile
to import a previously saved profile
to export a profile for future reference
to activate an existing profile and connect
8
Page 10

802.11g Wireless USB Adapter
3.1.1.1
Add/Edit Profile
a. System Config: Enter a name for the Profile and select a Network (SSID) to
associate it with.
b.
Authentication \ Encryption
Authentication:
Encryption:
Please select the Authentication type of your pref ere nce
Algorithm used in WEP, TKIP, AES, and None
9
Page 11

802.11g Wireless USB Adapter
3.1.2 Site Survey
Click on the “Network” tab for Site Survey. You will see a lis t of all the
surrounding wireless networks from the last scan. Select the Network of your
choice and click on “Connect” to establish connection. Click
and refresh.
Rescan
to update
3.1.3 Status
Click on the triangle button (circled in red) to ex pand the stat us tab.
10
Page 12

802.11g Wireless USB Adapter
3.1.4 Statistics
The Statistics tab displays the detail counter information based on 802.11 MIB
counters. This page translates that MIB co unters into a format easier for user to
understand. Click on ‘Receive’ to see its respected statistics.
11
Page 13

802.11g Wireless USB Adapter
3.1.5 WPS
The WPS tab supports the configuration setup using PIN configuration method or
PBC configuration method. WPS (Wi-Fi Protected Setup) simplifies the security
setup and management of Wi-Fi networks.
PIN: Enter the Pin code into the WPS setup page of your wireless router/AP.
Click rescan to make sure your router/AP is displayed on the “WPS AP List”.
Select it and click PIN to automatically connect.
PBC: Push Button Configuration: Please make sure your wireless router/AP is
properly configured for WPS PBC. After PBC is initiated on the router/AP side,
click PBC to complete auto-check and establish connection.
Renew: Click to update the Pin code.
Rescan: Update information on surrounding WPS supported networks.
Connect: click to connect the WPS wireless network.
Disconnect: to disconnect the connected wireless network.
12
Page 14

802.11g Wireless USB Adapter
3.2 AP Mode
The AWU354 can also serve as an access point to transmit wireless signals and
create a wireless network allowing other wireless clients to access the network.
To switch to AP Mode, right-click on
icon and select “Switch to AP Mode’.
13
Page 15

802.11g Wireless USB Adapter
3.2.1 Basic Setting (Config)
Under ‘Config’ tab, you can make set the basic settings, such as SSID, wireless
mode and channel.
Default: to restore the set parameters to factory default settings.
Apply: to apply changes made.
14
Page 16

802.11g Wireless USB Adapter
3.2.2 Security Setting
Click Security Setting button from the ‘Config’ page to make different security
configurations of wireless communication by choosing the authent ication type or
encryption type.
Note:
1. The Hex characters include 0~9 numbers and a~f letters.
2. ASCII characters include any numbers/letters and char acters.
15
Page 17

802.11g Wireless USB Adapter
3.2.3 Access Control
Choose Access Control tab to start MAC control. Access control includes All
Permitted and All Blocked. After editing the MAC address access list, only the
MAC in the Allow All list could access the Soft AP.
3.2.4 About
The About tab shows the information of the AWU354 and software version.
16
Page 18

802.11g Wireless USB Adapter
Chapter 5 Product Specifications
Standard IEEE 802.11b, IEEE 802.11g
Frequency Band 2.4GHz ~ 2.4835GHz
Spread Spectrum
Modulation Method
DSSS
BPSK, QPSK, CCK and OFDM
Data Rate
Transmit Output Power
11g: 54/48/36/24/18/12/9/6Mbps
11b: 11/5.5/2/1Mbps
54Mbps : -72dBm
11Mbps : -88dBm
11 Channels (USA, Canada)
Channels
13 Channels (Europe)
14 Channels (Japan)
Transmit distance
Indoors : up to 100 feet
Outdoors : up to 300 feet
Support multipoint auto roaming and configuration
Roaming
Antenna
Antenna Gain
Media Access Protocol
Security
Support wireless network environments auto
detect
Microstrip antenna
2 dBi
WMM
WPA/WPA2; 64/128-bit WEP; TKIP/AES
I/O Interface USB 2.0
LED Indicators Status / Activity
Operating System Windows 2000 / XP / 2003 / Vista
Operating Temp. 0°C ~ 40°C
Storage Temp. -20°C ~ 70°C
Humidity 10% ~ 90% (non-condensing)
Dimension(L x W x H) 62.6mm x 20.6mm x 10mm
Weight 9.2g
Cable Length
1m (ZEW2508A only)
17
Page 19

802.11g Wireless USB Adapter
Chapter 6. Troubleshooting
This chapter provides solutions to problems that may occur during installation
and operation of the AWU354 adapter . For more troubleshooting tips, please visit
our website at www.aziocorp.com.
1. The AWU354 does not work properly.
Disconnect and reinsert the AWU354 into your PC’s USB slot. Do not use a
hub.
Right click on ‘My Computer’ and select ‘Properties’ . Select device manager
and click on Network Adapter. You will find the AWU354 adapter if it is
installed suc cessfu lly. If you see a ye llow exc lamatio n mark, the resou rces
are conflicting.
To resolve a resource conflict, please check the following: Make sure that
your PC has a free IRQ (Interrupt Request, a hardware interrupt on a PC.)
Make sure that you have inserted the right adapter and installed the proper
driver.
If the AWU354 does not function after attempting the above steps, remove
it and do the following: Uninstall the drive r software from y our PC. Restar t
your PC and repeat the hardware and software installation as specified in
this User Guide.
2. I cannot communicate with the other computers linked via Ethernet in
the Infrastructure configuration.
Make sure that the PC to which AWU354 is associated with is powered on.
Make sure that AWU354 is configured on the same channel and with the
same security options as the other computers in the Infrastructure
configuration.
3. What should I do when the computer with AWU354 installed is unable
to connect to the wireless network and/or the Internet?
Check that the LED indicators for the broadband modem are indicating
normal activity. If not, there may be a problem with the broadband
connection.
Check that the LED indicators on the wireless router are functioning
properly. If not, check that the AC power and Ethernet cables are firmly
connected.
Check that the IP address, subnet mask, gateway, and DNS settings are
correctly entered for the network.
In Infrastructure mode, make sure the same Service Set Identifier (SSID)
is specified on the settings for the wireless clients and access points.
In Ad-Hoc mode, both wireless clients will need to have the same SSID.
Please note that it might be necessary to set up one client to establish a
BSS (Basic Service Set) and wait briefly before setting up other clients. This
prevents several clients from trying to establish a BSS at the same time,
which can result in multiple singular BSSs being estab lished, r ather th an a
single BSS with multiple clients associated to it.
18
Page 20

802.11g Wireless USB Adapter
Check that the Network Connection for the wireless client is configured
properly.
If Security is enabled, make sure that the correct encryption keys are
entered on both the AWU354 and the access point.
4. I can’t find any wireless access point / wireless device in Network tab.
Click Rescan for few more times and see if you can find any wireless access
point or wireless device.
Try moving closer to any known wireless access points.
Ad-hoc function must be enabled for the wireless device you wish to
establish a direct wireless link.
Please adjust the position of the AWU354 (you may have to move your
computer if you’re using a notebook computer) and click Rescan button for
few more times. If you can find other wireless access point or wireless
devices but not yours, please contact the manufacturer of your wireless
router/AP for support.
5. Nothing happens when I click Launch config utilities
Please make sure the AWU354 is inserted into your computer’s USB port. If
the Ralink configuration utility’s icon has an “X”, the AWU354 is not
detected by your computer.
Reboot the computer and try again.
Remove the AWU354 and insert it into another USB port.
Remove the driver and re-install.
6. I can not establish connection with a certain wireless access point
Try clicking Connect a few more times.
If the SSID of the access point you wish to connect is hidden (nothing
displayed in SSID field in Network tab), you will have to input the correct
SSID of the access point you wish to connect manually.
Please double check the passphrase / security key of the access point with
security encryption.
The access point you wish to connect might only allow network cards with
specific MAC addresses to establish connection. Please go to About tab and
write the value of Phy_Addess down, then present this value to the owner
of access point to add the MAC address of your AWU354 to owner’s access
point’s list.
7. The network is slow or having problem transferring large files
Try moving closer to the place where access point is located.
Try a lower TX Rate in Advanced tab.
Disable Tx Burst in Advanced tab.
Enable WMM in WMM tab if you need to use multimedia / telephony related
applications.
Disable WMM – Power Save Enable in WMM tab.
There could be too much people using the same radio channel. Try
changing the channel of the access point.
19
Page 21

802.11g Wireless USB Adapter
Service & Warranty
Service
If you need assistance with the product, please visit our website at
www.aziocorp.com for frequently asked questions and troubleshooting tips.
Otherwise, please contact our dedicated customer care team.
There are several ways to reach us:
By Phone: (866) 468‐1198
By eMail: support@aziocorp.com
On Live Help: http://www.aziocorp.com/support/helpdesk.htm
Warranty
Limited 1 Year Warranty
AZiO Corporation warrants this product against defect in material or
workmanship for 1 year from the date of purchase. If this product proves to be
defective, contact AZiO Corporation’s customer care for repair or replacement of
your unit. Return requests cannot be process without the proof of original date of
purchase. This warranty applies only to the original purchase of the product and
is not transferable. This warranty does not cover any incompatibilities due to the
user’s computer, hardware, software or related system configuration in which the
product interfaces. The warranty does not cover any damage caused by
negligence, abuse, or non‐authorized modifications. To the maximum extent
permitted by applicable law, in no event shall AZiO Corporation, its affiliates, or
its dealers be liable for any special, incidental, indirect or consequential damages
whatsoever regardless of cause or form of action.
20
 Loading...