

Page 1
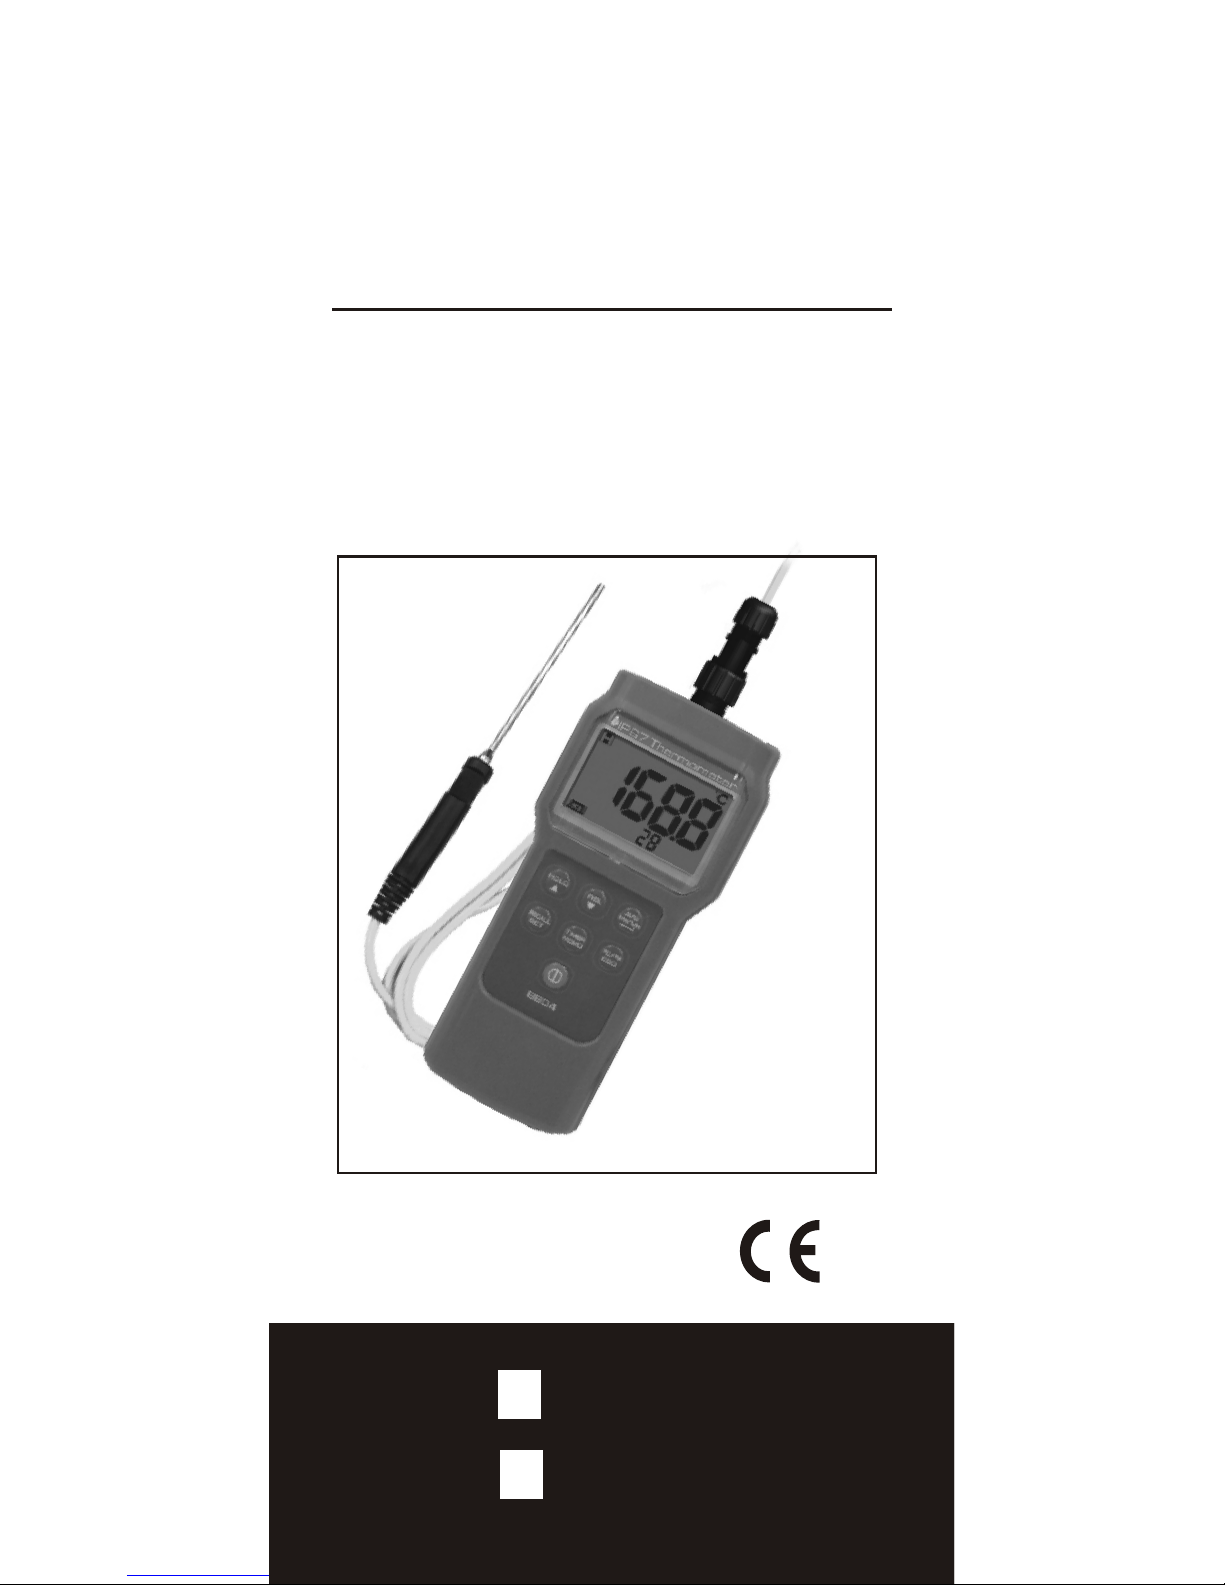
OPERATION MANUAL
8821
8822
IP67 WATRTPROOF
RTD
THERMOMETER
Page 2
INTRODUCTION
1
Thank you for purchasing this portable
IP67 waterproof RTD thermocouple me ter.
The me ter me asures temperature fast with
accuracy and is an ideal instrument for
most measuring applications.
FEATURES
Rigid housing design and the real time
response RTD probe
Fast data updating in 1 second time
interval
Complete set IP67 waterproof and
washable in washing machine
Follow HACCP principle to check food
safety
Green/Red dual color backlight to
indicate temperature hazards
Countdown timer function included
Hold function to freeze current reading
One touch to display temperature
change from baseline
o o
Temperature unit C/ F switchable
Non-sleep mode function available
Big LCD for easy reading
Max./Min. reading display
Temperature high alarm threshold
programmable
99 points data records w/ review
function (8822 only)
MATERIAL SUPPLIED
Meter x 1
AAA battery x 6
Operation manual x1
This package contains:
Temperature probe x1
Hard carrying case x1
Stainless probe holder x1
Page 3
POWER SUPPLY
The meter is powered by 6pcs AAA
batteries.
Install the batteries into the battery
compartment on the rear side and make
sure they are in correct polarity and good
contact.
When battery voltage gets low, will
appear on the LCD as a replacement
reminder.
2
PROBE & CONNECTOR
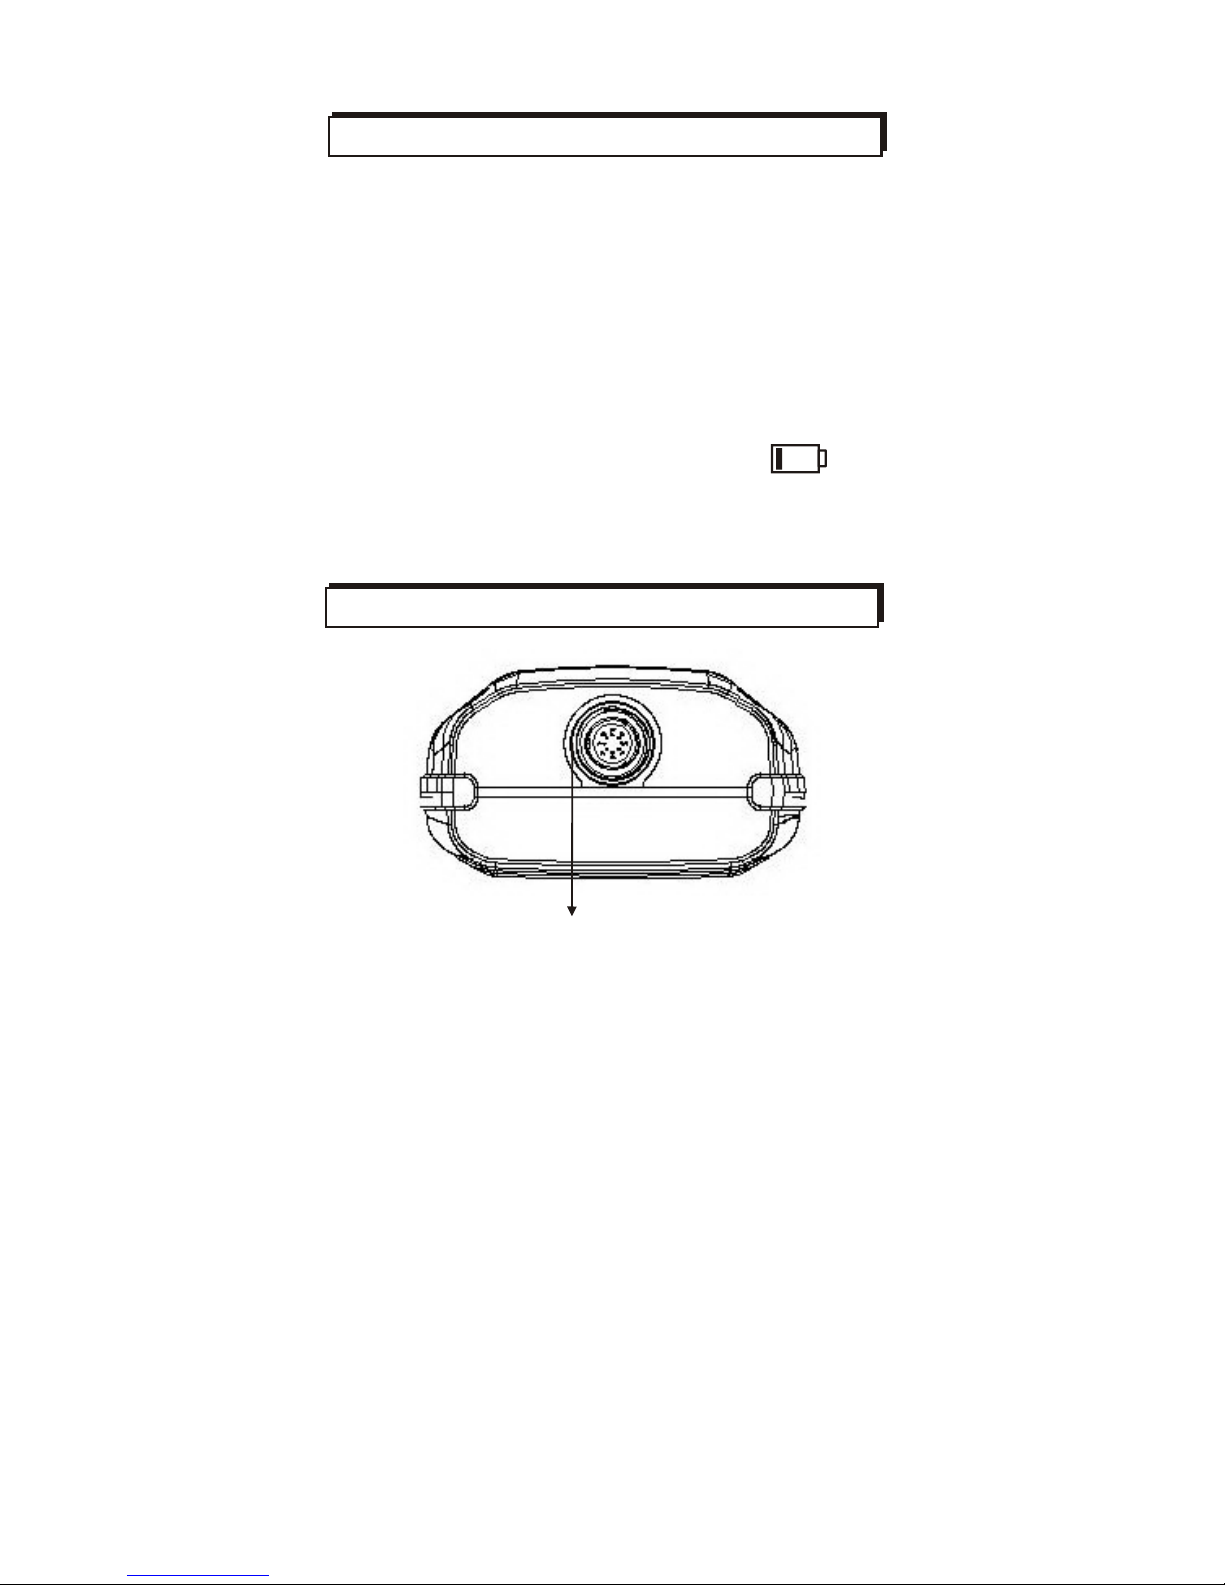
Probe connect port
There is guide way design between the
probe plug and the meter connect to
help you easily install the probe by
plugging the probe with the aligned guide
way, then put the probe guard on and
screw it tight moderately.
Page 4
3
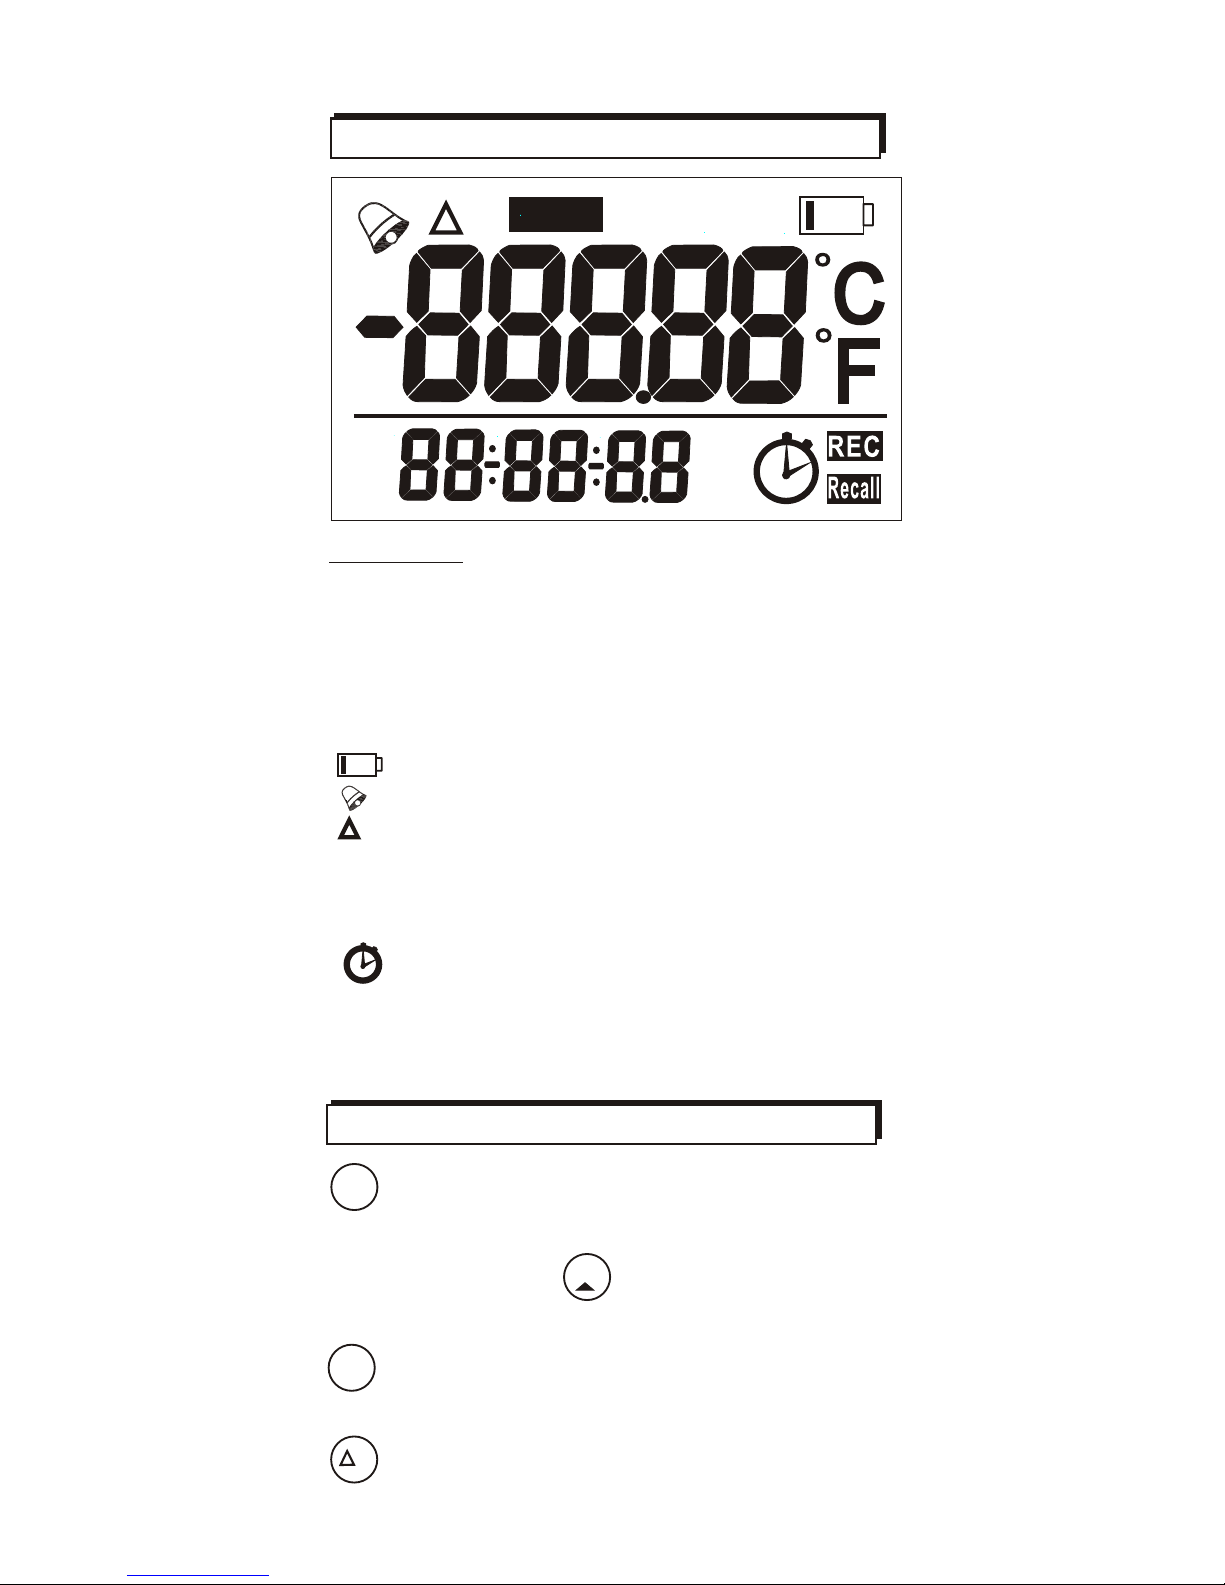
LCD DISPLAY
Upper LCD Temperature reading
Lower LCD Real time display
Pt RTD (Pt) type thermo probe
HOLD Readings are freezed unchanged
MIN/MAX Minimum/Maximun readings
Low battery indicator
Temperature alarm indicator
Differential Temperature
o o
C/ F Celsius/Fahrenheit of temp.
REC Manual logging
RECALL Recall mode
Count down timer
Day-Month-Year
Hour-Minute-Second
AM
PM
Symbols
-Turns on and off the meter.
-Long press entering setup mode while
meter is on.
-Turn on with to become non-sleep
mode
-In 8822, press to enter recall mode.
-Exits setup/recall /max/min page.
KEYPAD
HOL D
SET
ON/ OFF
ESC
RECALL
T
-Press to show differential temperature.
-Press again to return to normal.
HOLD
MAX
MIN
T
D-M-Y
H:M:S
AM
PM
T
D-M-Y
H:M:S
AM
PM
Pt
Page 5
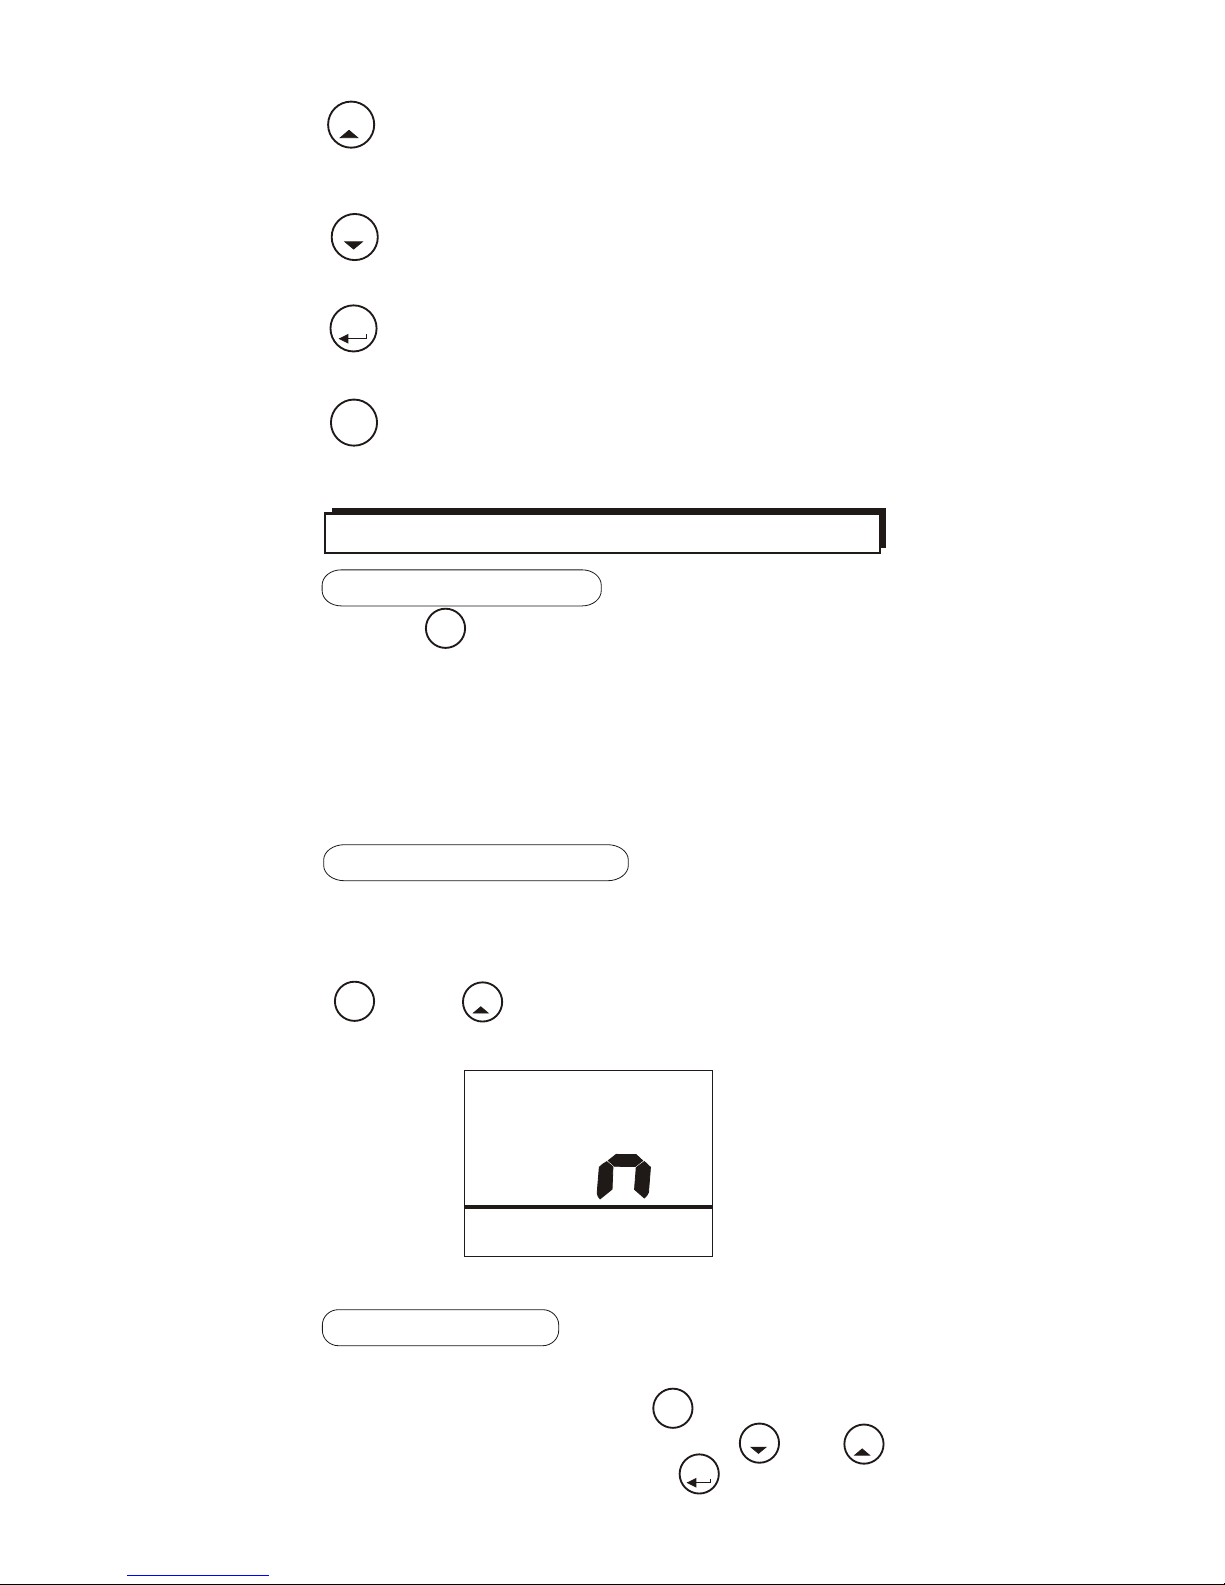
-Freezes the current readings.
-Selects unit or increases value in setup.
-Cancels data hold function.
-In 8822, press to record reading.
-Selects unit or decreases value in setup.
-Activates MIN,MAX function.
-Saves and finishes settings.
4
HOL D
MEM O
Mx/ Mn
-Activates timer
-Stop timer
T
STAR T
STO P
OPERATION
Press to turn the meter on and off.
At power up, it emits a short beep and
performs 3 seconds full display, then
enters normal mode with temperature
reading displayed.
POWER ON/OFF
SET
ON/O FF
AUTO POWER OFF
The meter turns off automatically after
20 minutes of inactivity. To override the
function, while the meter is off, hold down
and for 2 seconds to turn on the
meter until “n” appears.(Fig.1)
SET
ON/O FF
HOL D
Fig.1
DATE & TIME
The LCD can show the real time. While
the meter is on, press for 2 seconds
to enter setup mode. Press or
to select P4.0 and press to enter.
SET
ON/O FF
MEM O
HOL D
Mx/ Mn
Page 6
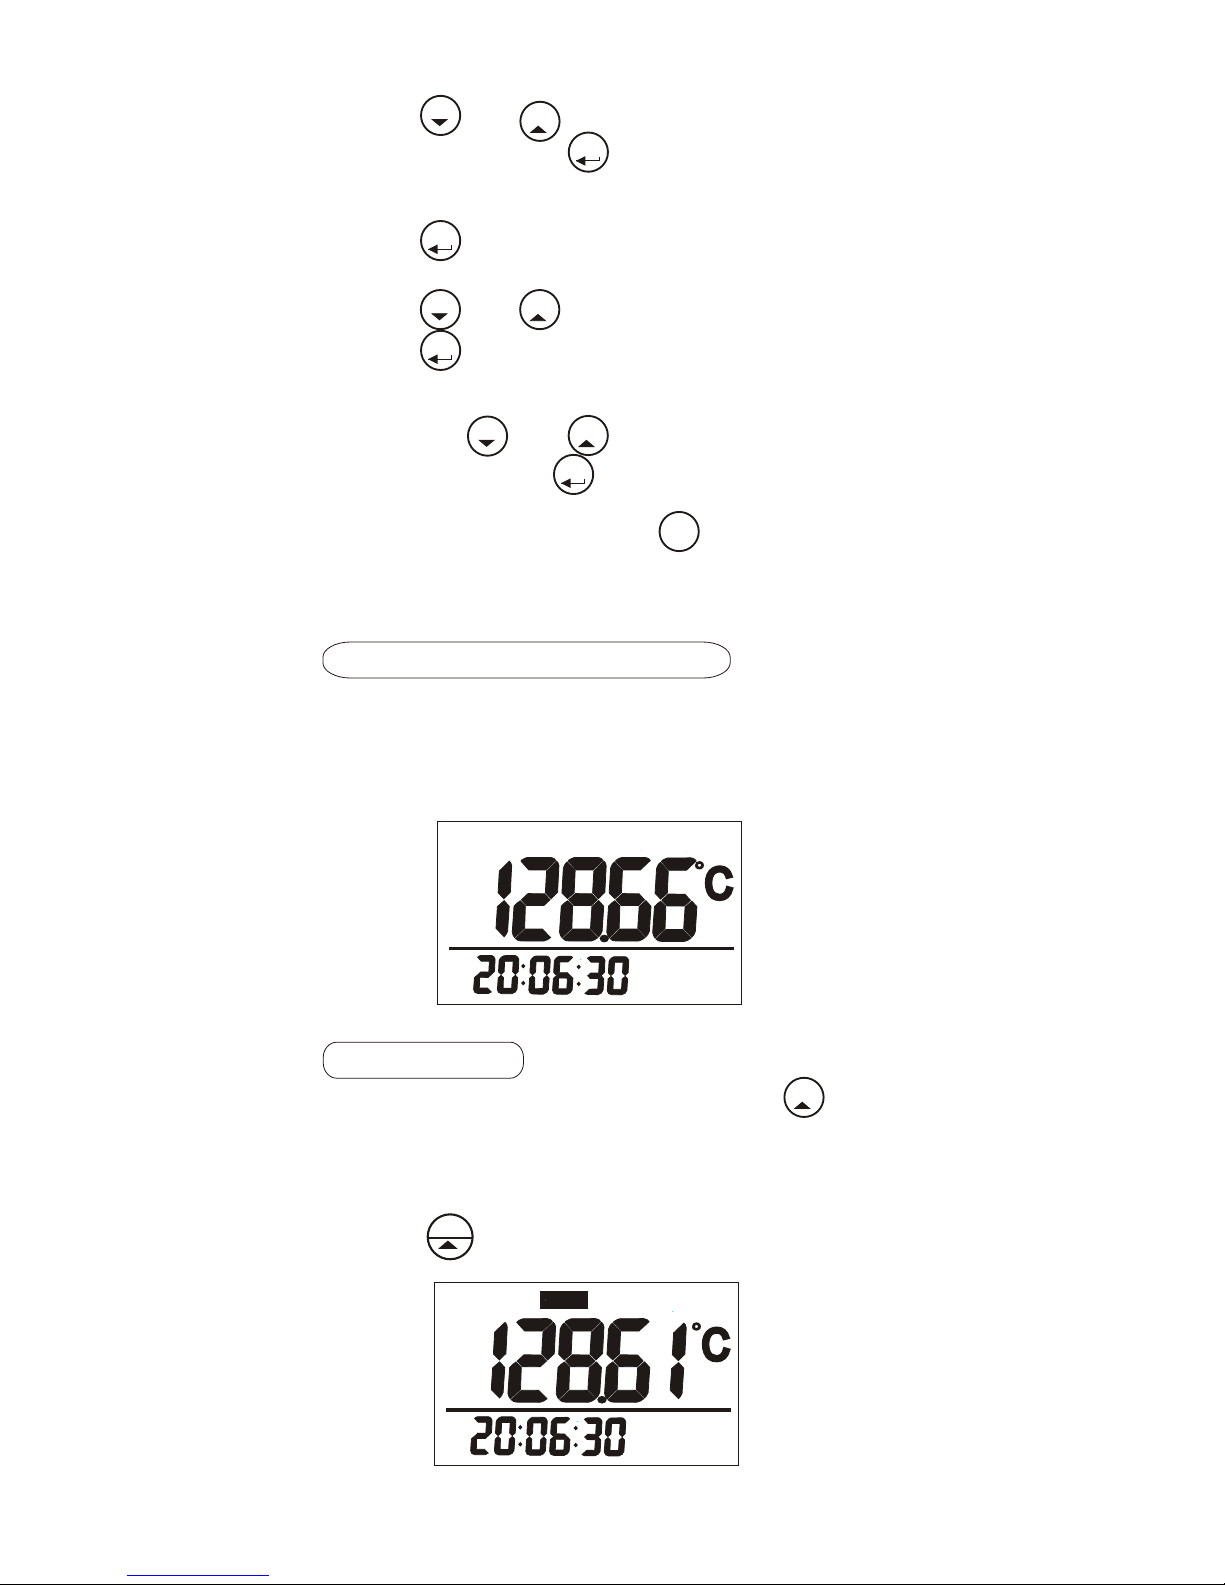
5
Press or to adjust the number of
year then press to save. Repeat
above to finish month and date setup.
Press to enter time format selection.
12 & 24 hour time formats are selectable.
Press or to choose format and
press to save.
Continue to setup hour/minute/second
by press or to adjust the number
and then press to save.
After setting up, press to return to
normal display. You can now see the
correct date & time display on LCD.
MEM O
HOL D
Mx/ Mn
Mx/ Mn
MEM O
HOL D
Mx/ Mn
MEM O
HOL D
Mx/ Mn
ESC
REC ALL
TAKING MEASUREMENT
The meter starts measurement when
power on and update reading quickly.
(Fig.2)
DATA HOLD
In normal display mode, press to
freeze the readings, "HOLD” appears
on top of LCD(Fig.3). All current readings
are kept unchanged.
Press again to cancel the hold
function.
HOL D
HOL D
H:M :S
Fig.2
Fig.3
Pt
H:M :S
HOLD
Pt
Page 7
6
HACCP REMINDER
Since power on, red or green full display
backlight flashes every 5 seconds to
indicate temperature hazards.
While the measured temperature is
o o o o
above 4 C(39.2 F) and below 60 C(140 F),
red color backlight flashes
While the measured temperature is
o o o o
below 4 C(39.2 F) or above 60 C(140 F),
green color backlight flashes
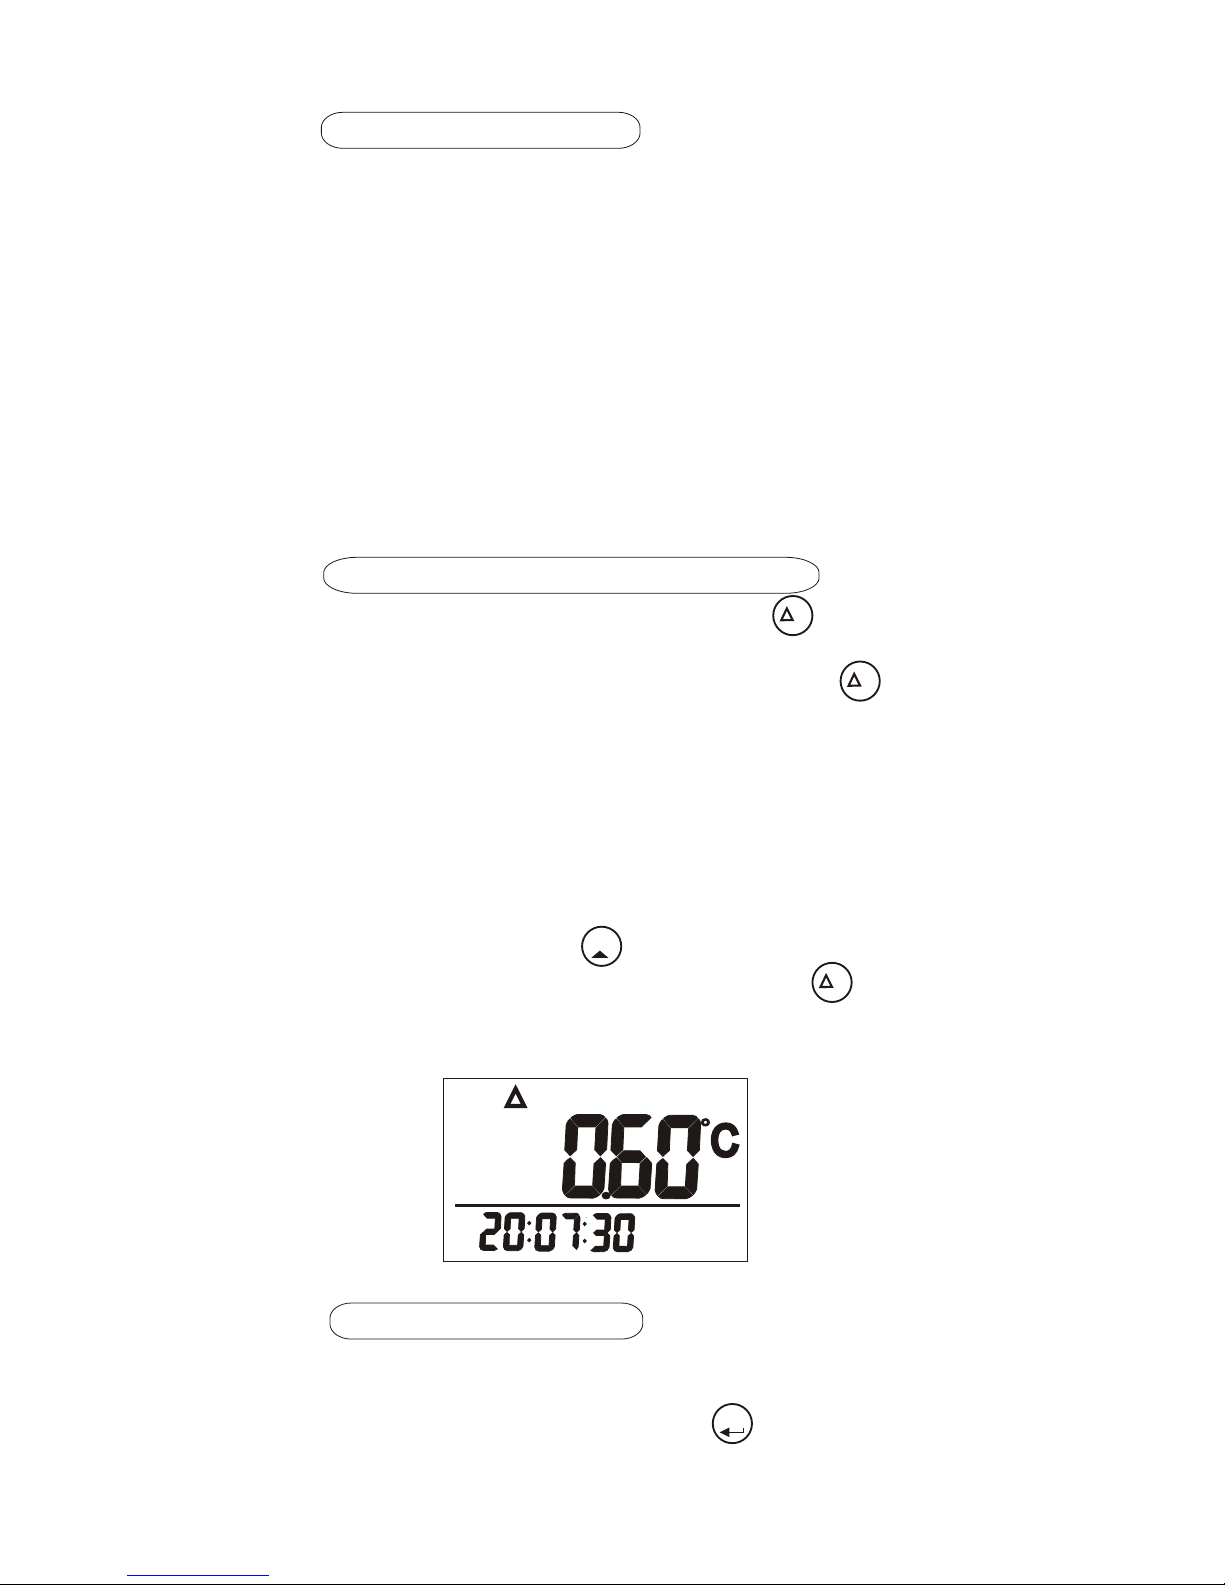
DIFFERENTIAL TEMPERATURE
In normal display mode, press to
activate the temperature change display
function. At the moment of pressing ,
temperature value is taken as the base
value. Afterward, the displayed readings
is the temperature difference between
baseline and existing temp. of measuring
object. (Fig.4)
In case of fast temperature change,
suggest to press first to freeze a
value as baseline and then press
to activate the temperature change
display function.
T
T
HOL D
T
Fig.4
MIN,MAX REVIEW
This thermometer allows you to check the
minimun, maximun value counted from
the moment you press the key.
Mx/ Mn
Pt
H:M :S
T
Page 8
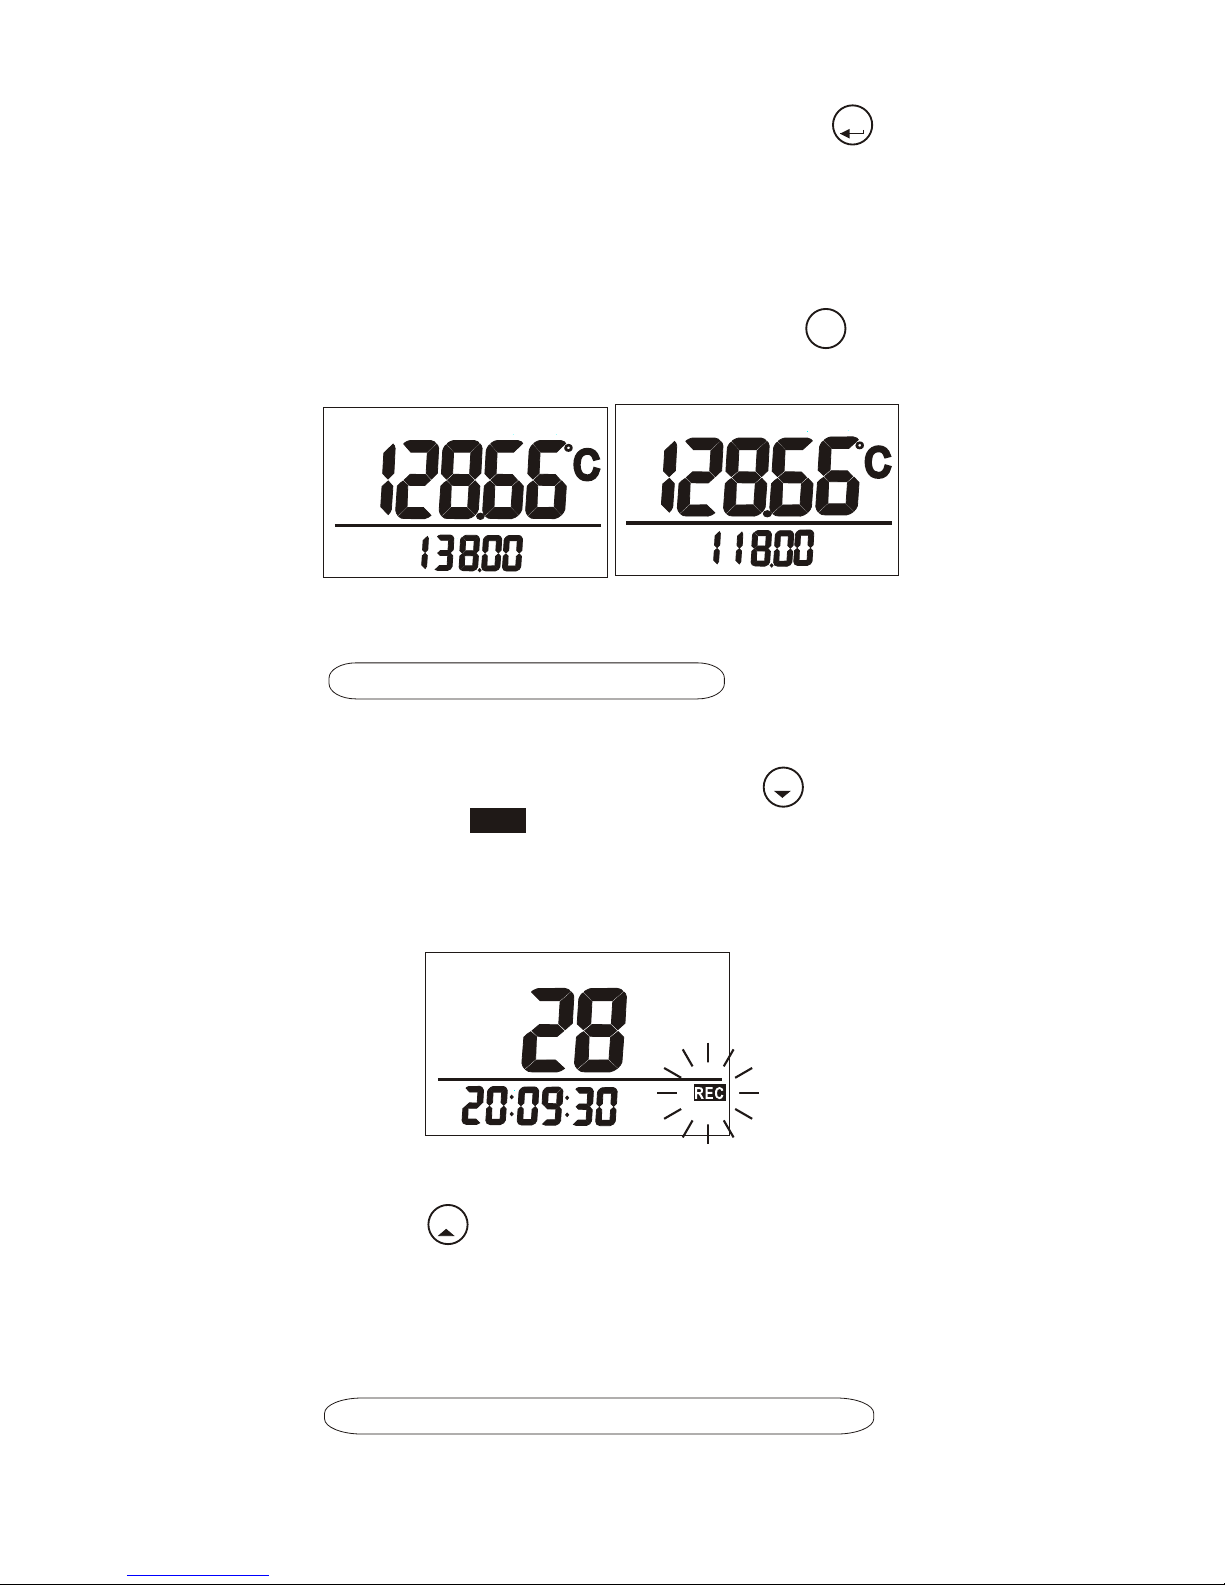
Fig.5 Fig.6
RECORDING-8804 ONLY
The meter features 99 point memories.
In normal or hold mode, Press key
to record, icon flashes for about 3
seconds. The main display shows the
memory serial number, at most 99 points
.(Fig. 7)
REC
If the reading changes quickly, you can
press to freeze the reading before
manually recording the data.
The manually recording function is
disabled in temperature difference mode.
MEM O
HOL D
Fig.7
7
Pt
MAX
Pt
MIN
H:M :S
Under normal mode, each press of ,
it displays MAX, MIN value in sequence.
(Fig.5~6) on the bottom LCD. At the
meantime, the real time measured temp.
value is continuing updating on top LCD.
To return to normal mode, press to
escape.
Mx/ Mn
ESC
REC ALL
99 MEMORIES RECALL-8822 ONLY
The meter features 99 point memories
review function.
Page 9
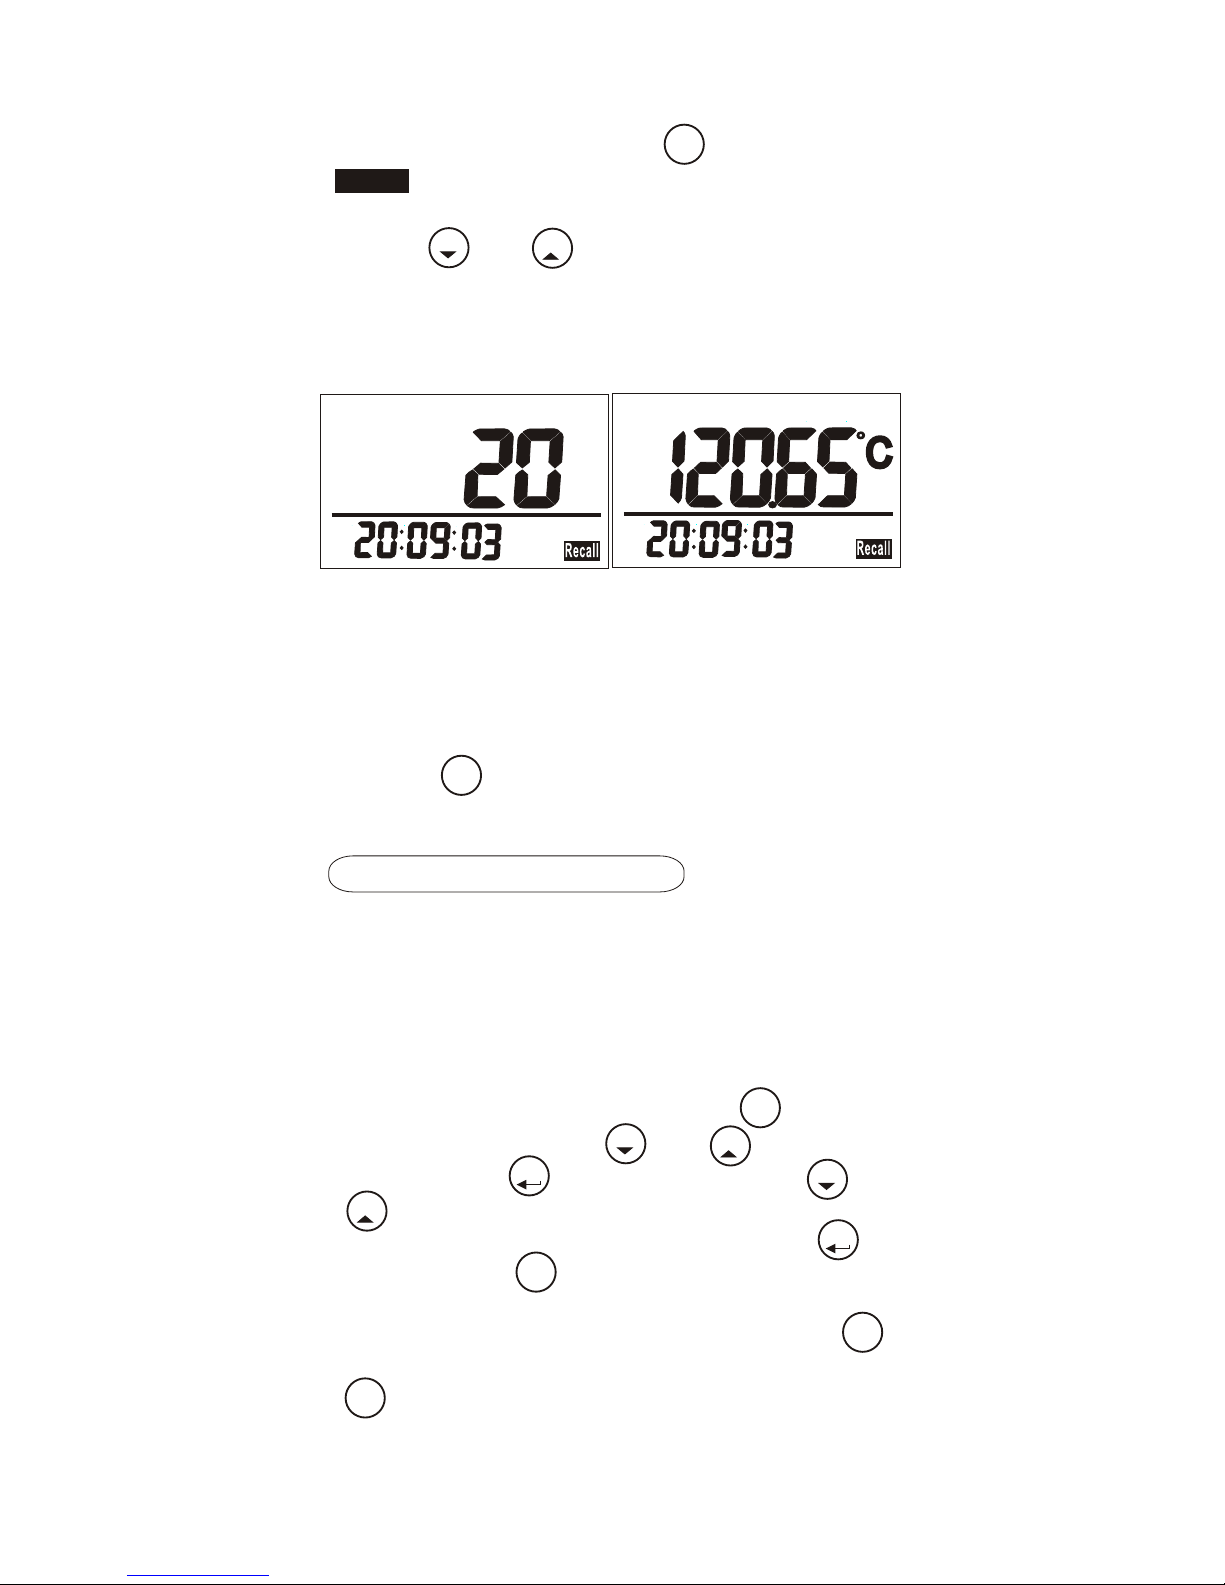
Fig.8
Fig.9
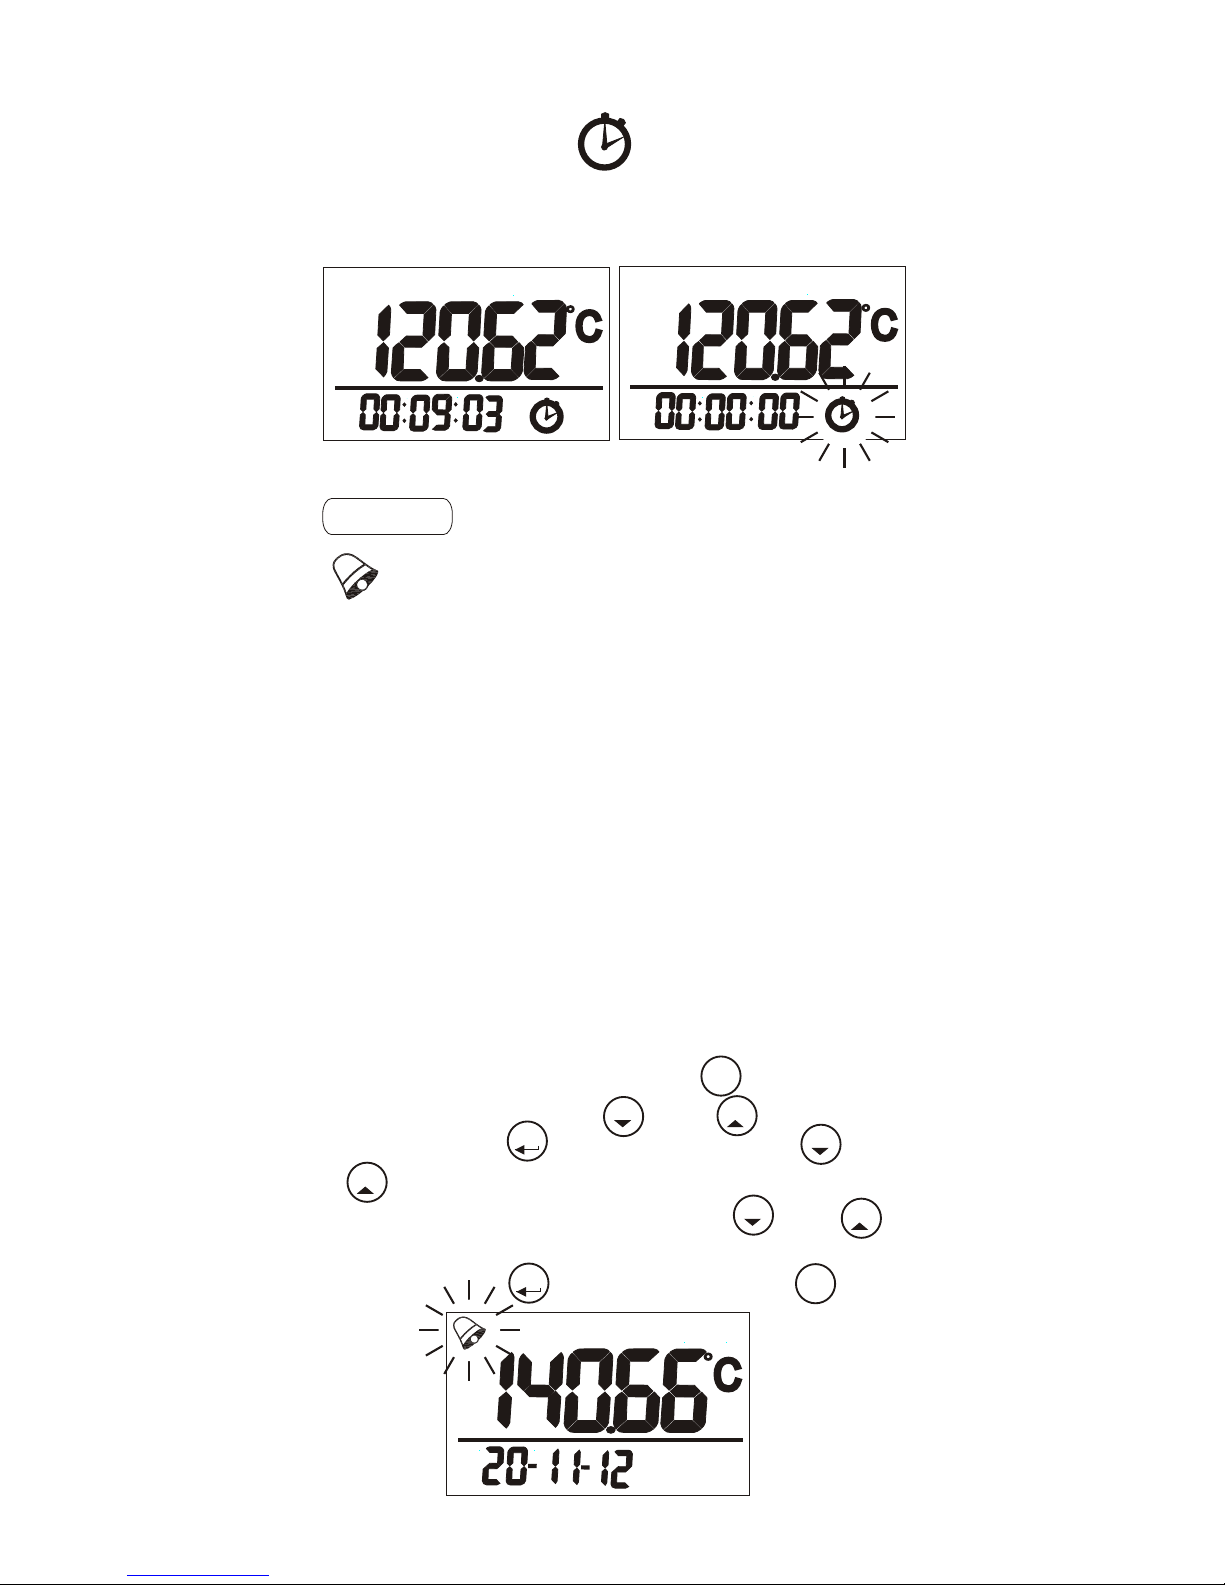
COUNT DOWN TIMER
Besides the temperature hazards LCD
backlight reminder, this thermometer is
equipped with timer function allow you to
setup the count down timer as a reminder
to process object properly.
First, setup the timer. Press to enter
setup mode. Press or to choose
P1.0. Press to enter. Press or
to adjust the timer value you need
from hour to second. Then, press to
save. Press to escape.
SET
ON/O FF
MEM O
HOL D
Mx/ Mn MEM O
HOL D
Mx/ Mn
ESC
REC ALL
To start the count down timer, press
to start. (Fig.10). To stop the timer, press .
.There is no pause function in this
meter, once you starting again after
stopping a timer counting, the counting
will start over again.
T
STAR T
STO P
T
STAR T
STO P
In normal mode, press key and then
icon appears.
Press or to scroll the memories.
The memory serial number displays on
main LCD fist and reading comes after.
(Fig.8&9)
Reca ll
ESC
REC ALL
MEM O
HOL D
H:M :S
Pt
H:M :S
To escape the memory recall mode,
press key to leave and return to
normal display.
The time displayed in memory recall
mode is the recording time of this
memory.
ESC
REC ALL
8
Page 10
Pt
Pt
ALARM
appears on LCD when alarm function
is activated. The meter features audible &
flashing icon alarm to give warnings when
measured temperature exceeds the limit.
It emits beeps when goes over the set
value and stops only when the readings
fall below the set value or press any key
can stop the beeps.
However, flashing icon only stops when
the value return to normal range.
(Fig.12)
Alarm beeps & flashes again when value
goes over the limit one more time.
To setup the alarm, press to enter
setup mode. Press or to choose
P2.0. Press to enter. Press or
to enable (YES) or disable (NO) the
alarm function. Then, press or
to adjust the alarm threshold value you
need. Press to save. Press to
escape.
9
Fig.10 Fig.11
SET
ON/O FF
MEM O
HOL D
Mx/ Mn
MEM O
HOL D
MEM O
HOL D
Mx/ Mn
ESC
REC ALL
Fig.12
Pt
D-M -Y
Once time is up,” “ will flash on bottom
LCD (Fig.11) and emits beeps until any
one of the keys are pressed to stop.
Page 11
When the meter is on, hold down
for more than 2 sec to enter setup mode.
To exit setup, press in P1.0 ~ P4.0
and it returns to normal mode.
SETUP
10
SET
ON/O FF
ESC
REC ALL
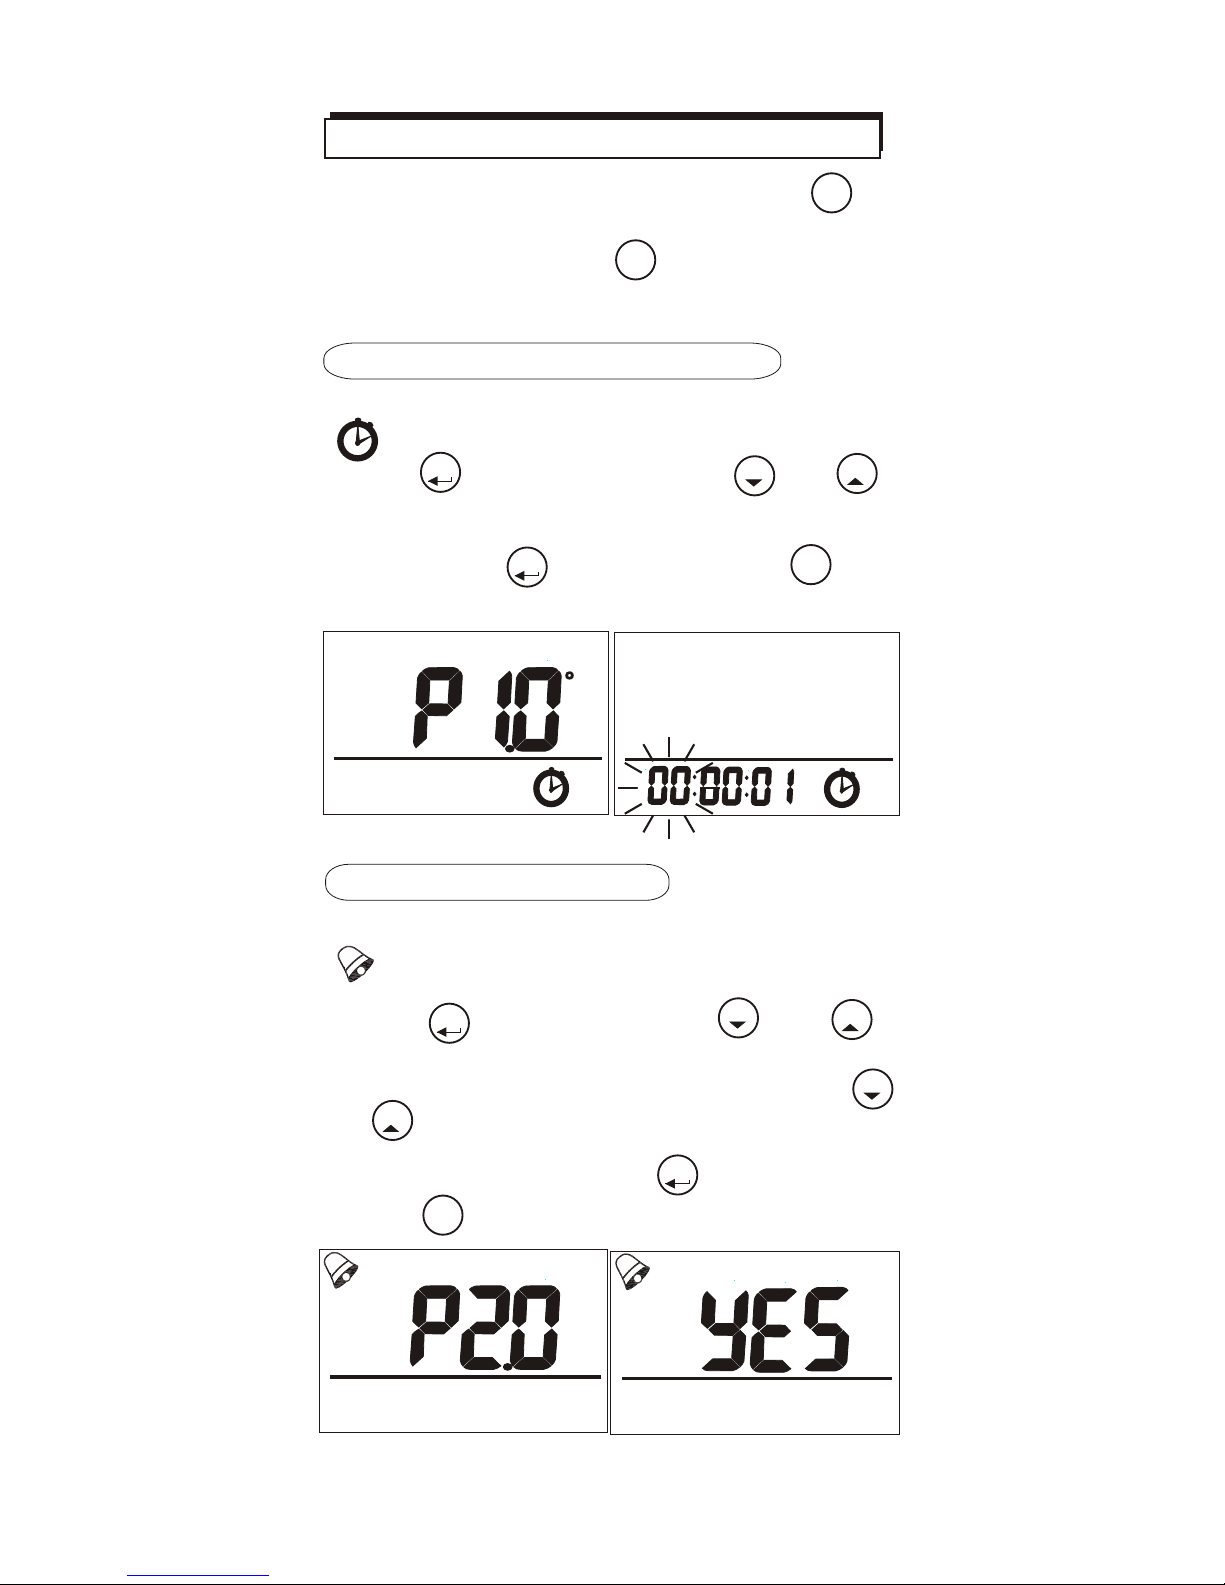
P1.0: COUNT DOWN TIMER
When entering setup mode, P1.0 and
“ ” (Fig.13) are displayed on LCD.
Press to go into. Press or
to adjust the timer value you need from
hour to second. (Fig.14)
Then, press to save. Press to
escape.
Fig.13 Fig.14
Mx/ Mn
MEM O
HOL D
Mx/ Mn
ESC
REC ALL
P2.0: TEMP. ALARM
When entering setup mode, P2.0 and
“ ” (Fig.15) are displayed on LCD.
Press to enter. Press or
to enable (YES) or disable (NO) the
alarm function. (Fig.16). Then, press
or to adjust the alarm threshold
value you need. The adjustable scale is
every 1 degree. Press to save.
Press to escape.
Mx/ Mn
MEM O
HOL D
MEM O
HOL D
Mx/ Mn
ESC
REC ALL
Fig.15 Fig.16
Pt
Pt
Pt
Pt
Page 12
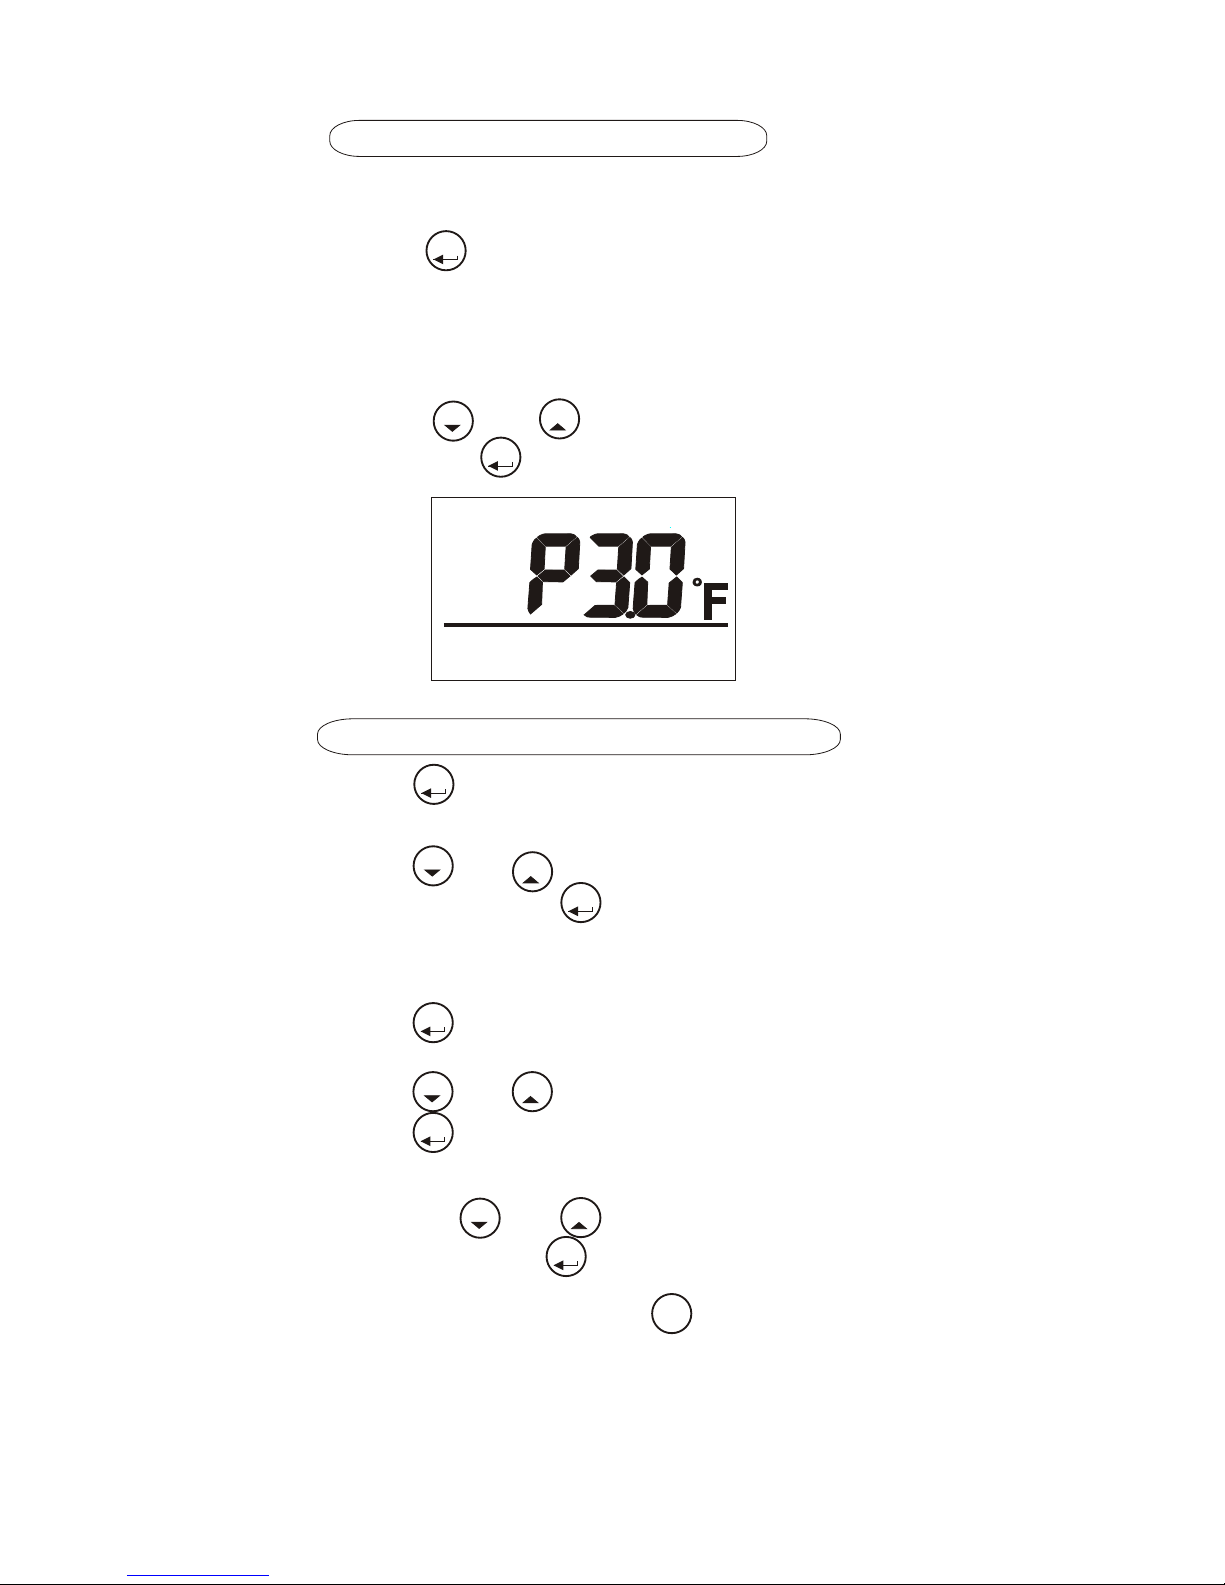
P3.0 TEMPERATURE UNIT
When entering setup mode, P3.0 is
displayed on the LCD.
Press to go into to decide the temp.
unit.
The current set will display on LCD
(Fig.17).
11
o o
Press or to choose C or F
and press to confirm.
Mx/ Mn
MEM O
HOL D
Mx/ Mn
Fig.17
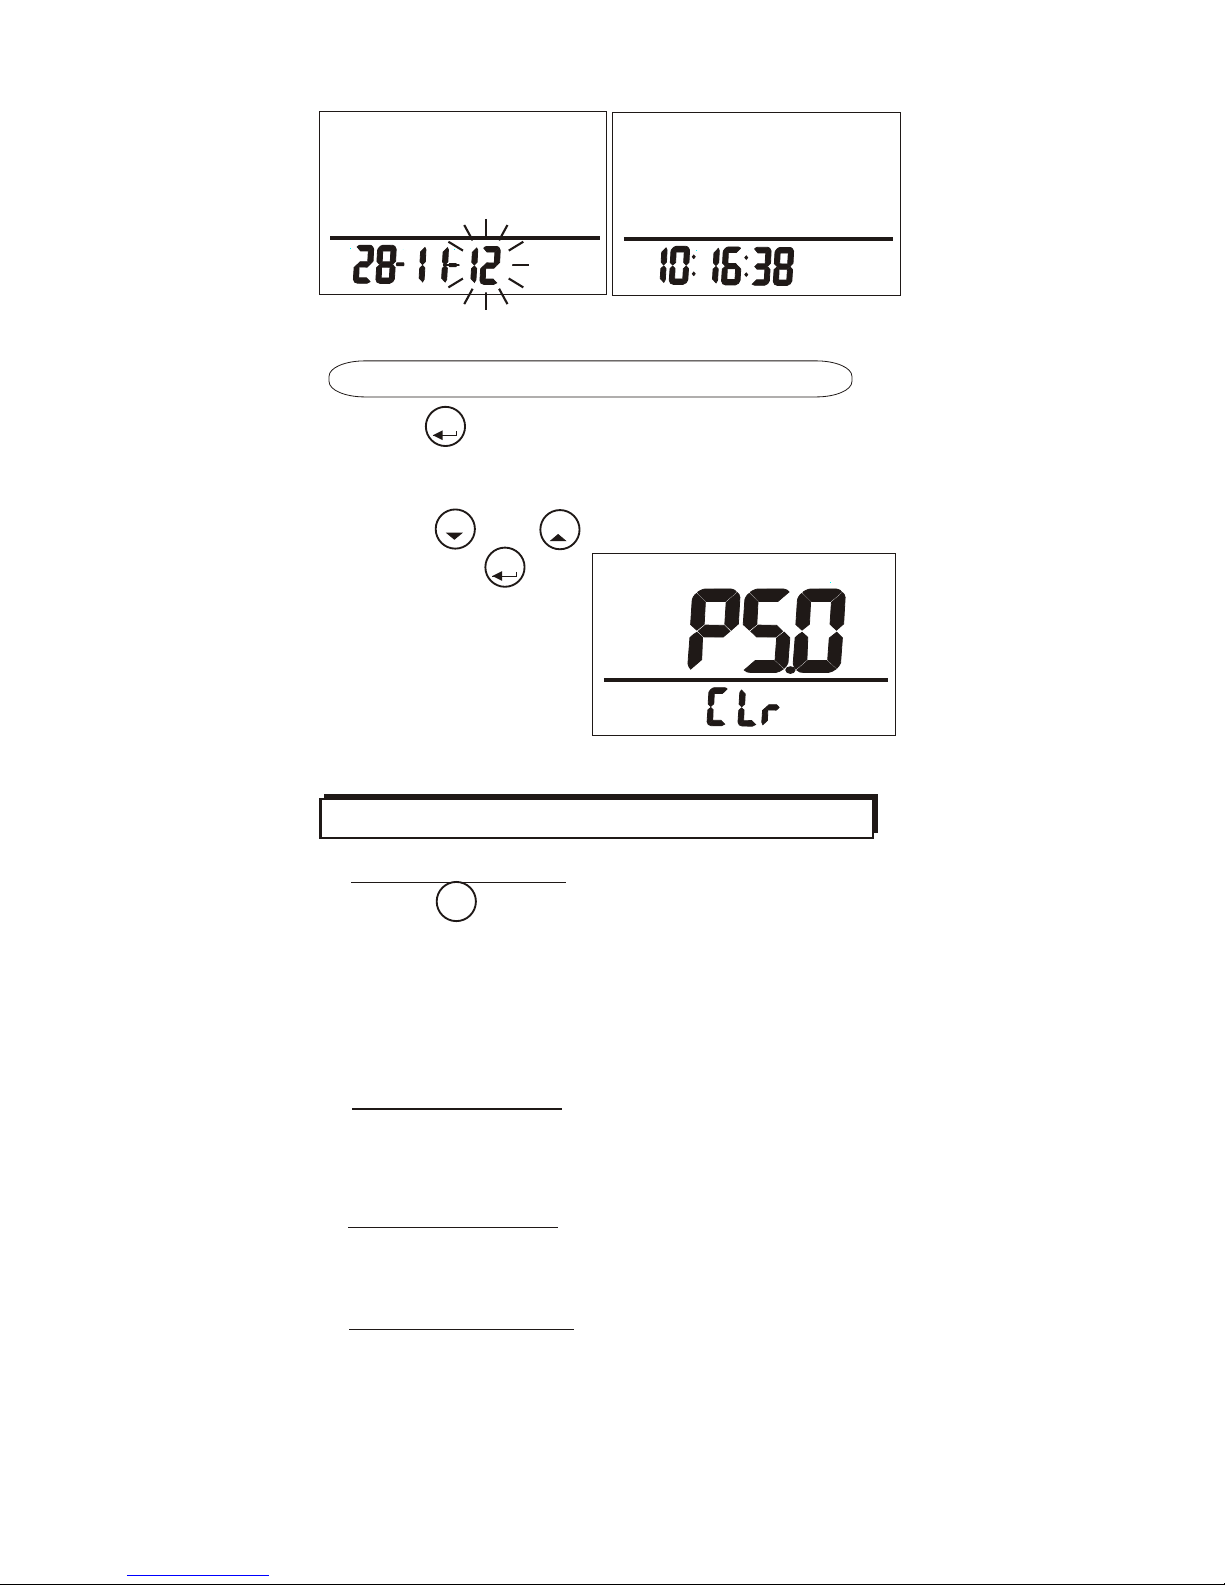
P4.0:REAL TIME CLOCK
Press go into P4.0 for setting the real
time clock of this meter.
Press or to adjust the number of
year then press to save. Repeat
above to finish month and date setup.
(Fig.18)
Press to enter time format selection.
12 & 24 hour time formats are selectable.
Press or to choose format and
press to save.
Continue to setup hour/minute/second
by press or to adjust the number
and then press to save. (Fig.19)
After setting up, press to return to
normal display. You can now see the
correct date & time display on LCD.
MEM O
HOL D
Mx/ Mn
Mx/ Mn
MEM O
HOL D
Mx/ Mn
MEM O
HOL D
Mx/ Mn
ESC
REC ALL
Pt
Mx/ Mn
Page 13
12
Fig.19
Fig.18
? Error messages
E05: Probe is unplugged.
E02: The value is under range.
E03: The value is over range.
E31: Temperature sensor or AD damaged.
E32: Memory IC damaged.
? Can’t power on
Press for more than 0.3 seconds
and try again. Check whether batteries
are in good contact and correct polarity,
You may also remove the batteries for >
10 mins and then install the batteries again.
TROUBLESHOOTING
? Fixed readings
Check whether data hold function was
activated. (HOLD icon at the top)
? Slow response
Check whether the probe is well connected.
SET
ON/O FF
Pt
D-M- Y
Pt
H:M: S
PM
P5.0:MEMORY CLEAR (8822only)
Press go into P5.0 to clear the
manually logged data.
MEM O
HOL D
Mx/ Mn
Mx/ Mn
Press or to choose NO or YES
and press
to confirm.
Pt
Fig.20
Page 14

SPECIFICATION
Model
Resolution
o
-20~50 C
Humidity < 90%
Meter, Pt probe, stainless holder,
battery, manual
Storage temp.
Storage RH%
Dimension(mm,LxWxT)
Weight
Standard Package
Battery
LCD size (mm, HxW)
Optional Accessory
o
0~50 C
Humidity < 80%
Operating temp.
Operating RH%
6pcs AAA battery
Custom made Pt probes are available
upon request
O o
0.01 C/0.01 F
88228821
o o
-100~300 C(-148~572 F)
Measuring Range
Accuracy
o
(under 18~28 C ambient temp.)
IP rating
IP 67
54 x 32.5
169 x 78.3 x 34.4
~200g
Temp. Response time
180 seconds typical
LCD update time
every second
150
Probe size(mm)
Length
Diameter
Handle length(mm)
Cable length(mm)
3.2
1100
Probe Weight
~50g
100
13
O
+/- 0.15 C
Page 15

The meter is warranted to be free from
defects in material and workmanship for
a period of one year from the date of
purchase. This warranty covers normal
operation and does not cover battery ,
misuse , abuse , alteration , tampering ,
neglect , improper maintenance , or
damage resulting from leaking batteries .
Proof of purchase is required for warranty
repairs . Warranty is void if the meter has
been opened
Authorization must be obtained from the
supplier before returning items for any
reason . When requiring a RA (Return
Authorization) , please include data
regarding the defective reason, the
meters are to be returned along with good
packing to prevent any damage in
shipment and insured against possible
damage or loss.
WARRANTY
RETURN AUTHORIZATION
Page 16

Accuracy, the Zenith of
Measuring / Testing Instruments !
More products available !
Hygrometer/Psychrometer
Thermometer
Anemometer
Sound Level Meter
Air Flow meter
Infrared Thermometer
K type Thermometer
K.J.T. type Thermometer
K.J.T.R.S.E. type Thermometer
pH Meter
Conductivity Meter
T.D.S. Meter
D.O. Meter
Saccharimeter
Manometer
Tacho Meter
Lux / Light Meter
Moisture Meter
Data logger
Temp./RH transmitter
Wireless Transmitter ..........
2014.03.V01
 Loading...