

Page 1
Ayre C-5xe
Owner’s Manual
Universal Stereo Player
Page 2

Page 3

Table of
Contents
Welcome to Ayre . . . . . . . . . . . . . . . . . . . . . . . 2
Overview and Introduction . . . . . . . . . . . . . . . . . . . 3
Connections and Installation . . . . . . . . . . . . . . . . . . . . 4
Controls and Operation. . . . . . . . . . . . . . . . . . . . . 7
Navigation of Discs . . . . . . . . . . . . . . . . . . . . . . 19
Optimization and Customization . . . . . . . . . . . . . . . . . . 27
Numbers and Specifications . . . . . . . . . . . . . . . . . . 31
Statement of Warranty . . . . . . . . . . . . . . . . . . . . 33
A Place for Notes . . . . . . . . . . . . . . . . . . . . . . 36
Page 4

Welcome to
Ayre
Please send in your warranty
registration card so we can
stay in contact with you.
Your Ayre C-5xe offers a significant advance in the
musical performance of high-fidelity equipment.
The warmth and immediacy of a live performance
are apparent from the first listening. The
combination of superb resolution and a natural,
relaxed quality will draw you into the music, time
and time again.
This level of performance has been implemented
using the highest level of workmanship and
materials. You can be assured that the Ayre C-5xe
will provide you a lifetime of musical enjoyment.
2
Page 5

Overview and
Introduction
To provide the highest possible
level of audio performance,
there is no video circuitry in
the C-5xe.
For the foreseeable future CD
will continue to be the
dominant format, with a wide
variety of titles available in
all musical genres.
The Ayre C-5xe is a universal stereo (U2) player. It
plays all currently available audio disc formats,
including CD, SACD, DVD-Audio, DVD-Video
(soundtrack only), and MP3.
The C-5xe offers both stereo analog and PCM
digital outputs. Multi-channel discs may also be
played. In the case of multi-channel SACDs, the
C-5xe will automatically select the two-channel area
that is mandatory for SACD. In the case of
multi-channel tracks that may be present on
DVD-Audio or DVD-Video discs, the C-5xe will
automatically downmix to stereo.
Thanks to its advanced technological features, the
Ayre C-5xe will extract the full measure of
performance from all digital audio formats,
including CD, maximizing your musical enjoyment,
both now and into the future.
3
Page 6

Connections and
Installation
The Ayre C-5xe universal stereo (U2) player is easy
to hook up and use. The following guidelines will
ensure that the installation goes smoothly.
Location
The infrared beam of the
remote control will also travel
through glass.
When you have a choice, a
balanced connection will offer
slightly higher sound quality
than an unbalanced
connection.
A good location for your U2 player is at an easily
accessible height in an open-backed cabinet or on a
shelf. The receiver for the infrared remote control is
mounted behind the display lens on the front panel.
A direct line of sight from the listening position
will ensure the maximum range. However, the
infrared beam will also reflect off of most wall
surfaces with a reduced range.
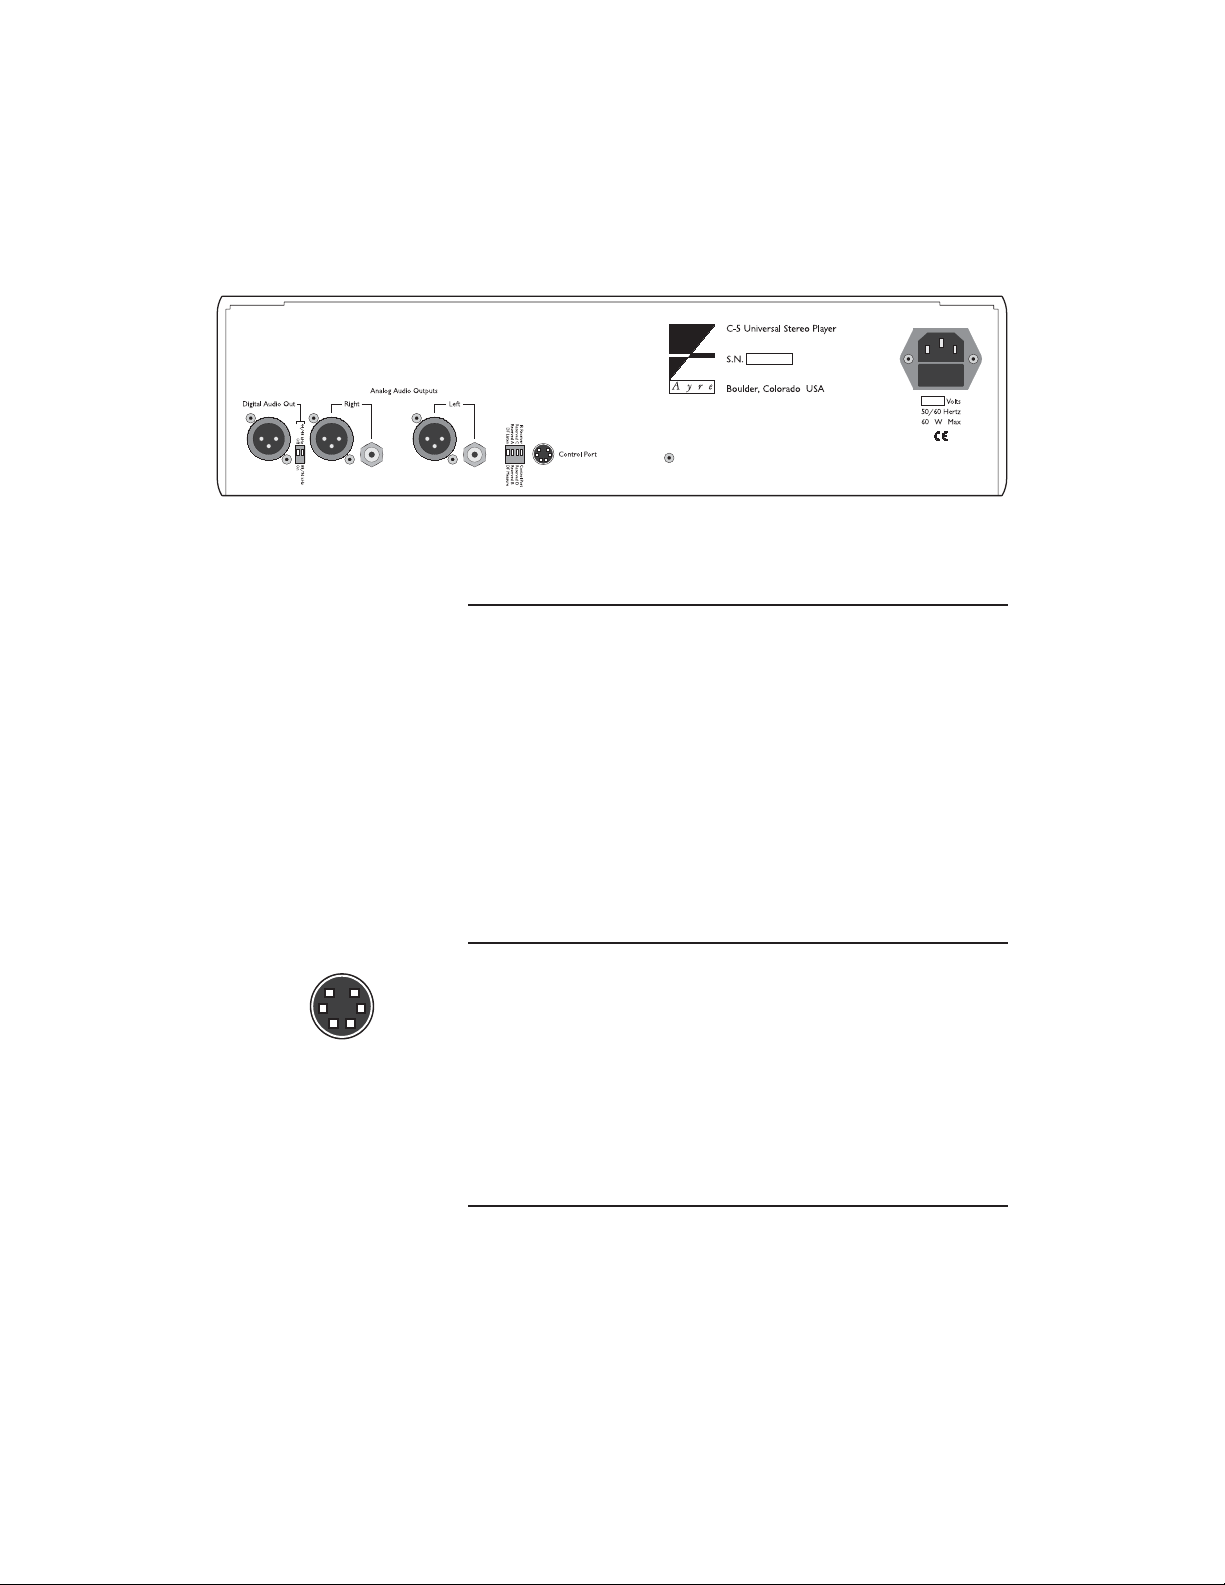
Analog Outputs
The Ayre C-5xe offers both balanced and unbalanced
outputs. Balanced connections are made via
three-pin XLR connectors, while unbalanced
connections are made via RCA connectors. It is not
normally recommended to use both sets of analog
outputs simultaneously.
4
Page 7
Digital Output
An adapter is available from
Ayre should you need to
connect the digital output to a
device with an S/PDIF input
that uses an RCA connector.
The Ayre C-5xe features a balanced AES/EBU
digital audio output on the rear of the unit. This
output is used when connecting to a digital
recording unit or other device, such as an external
digital-to-analog converter (DAC). Additional
information regarding the digital output may be
found in the chapter “Optimization and
Customization”.
Control Port
The control port on the rear panel of the C-5xe
allows the unit to communicate with a system
controller such as a Crestron or AMX. Additional
information regarding the control port may be
found in the chapter “Optimization and
Customization”.
AC Power
Connect the Ayre C-5xe to an unswitched power
source. The best sound quality is normally achieved
5
Page 8

when the player is plugged directly into the wall
outlet, without using any power strips or power line
conditioners.
Break-In
Playing the unit for 100 to
500 hours will ensure full
break-in.
Due to the manufacturing processes used for the
wires and capacitors, a break-in period is necessary
for the Ayre C-5xe to reach its full performance
potential.
6
Page 9
Controls and
Operation
The Ayre C-5xe universal stereo (U2) player may be
controlled using either the front panel buttons or
the included remote control. Basic functions are
available at both locations, while additional
functions are available only at the remote control.
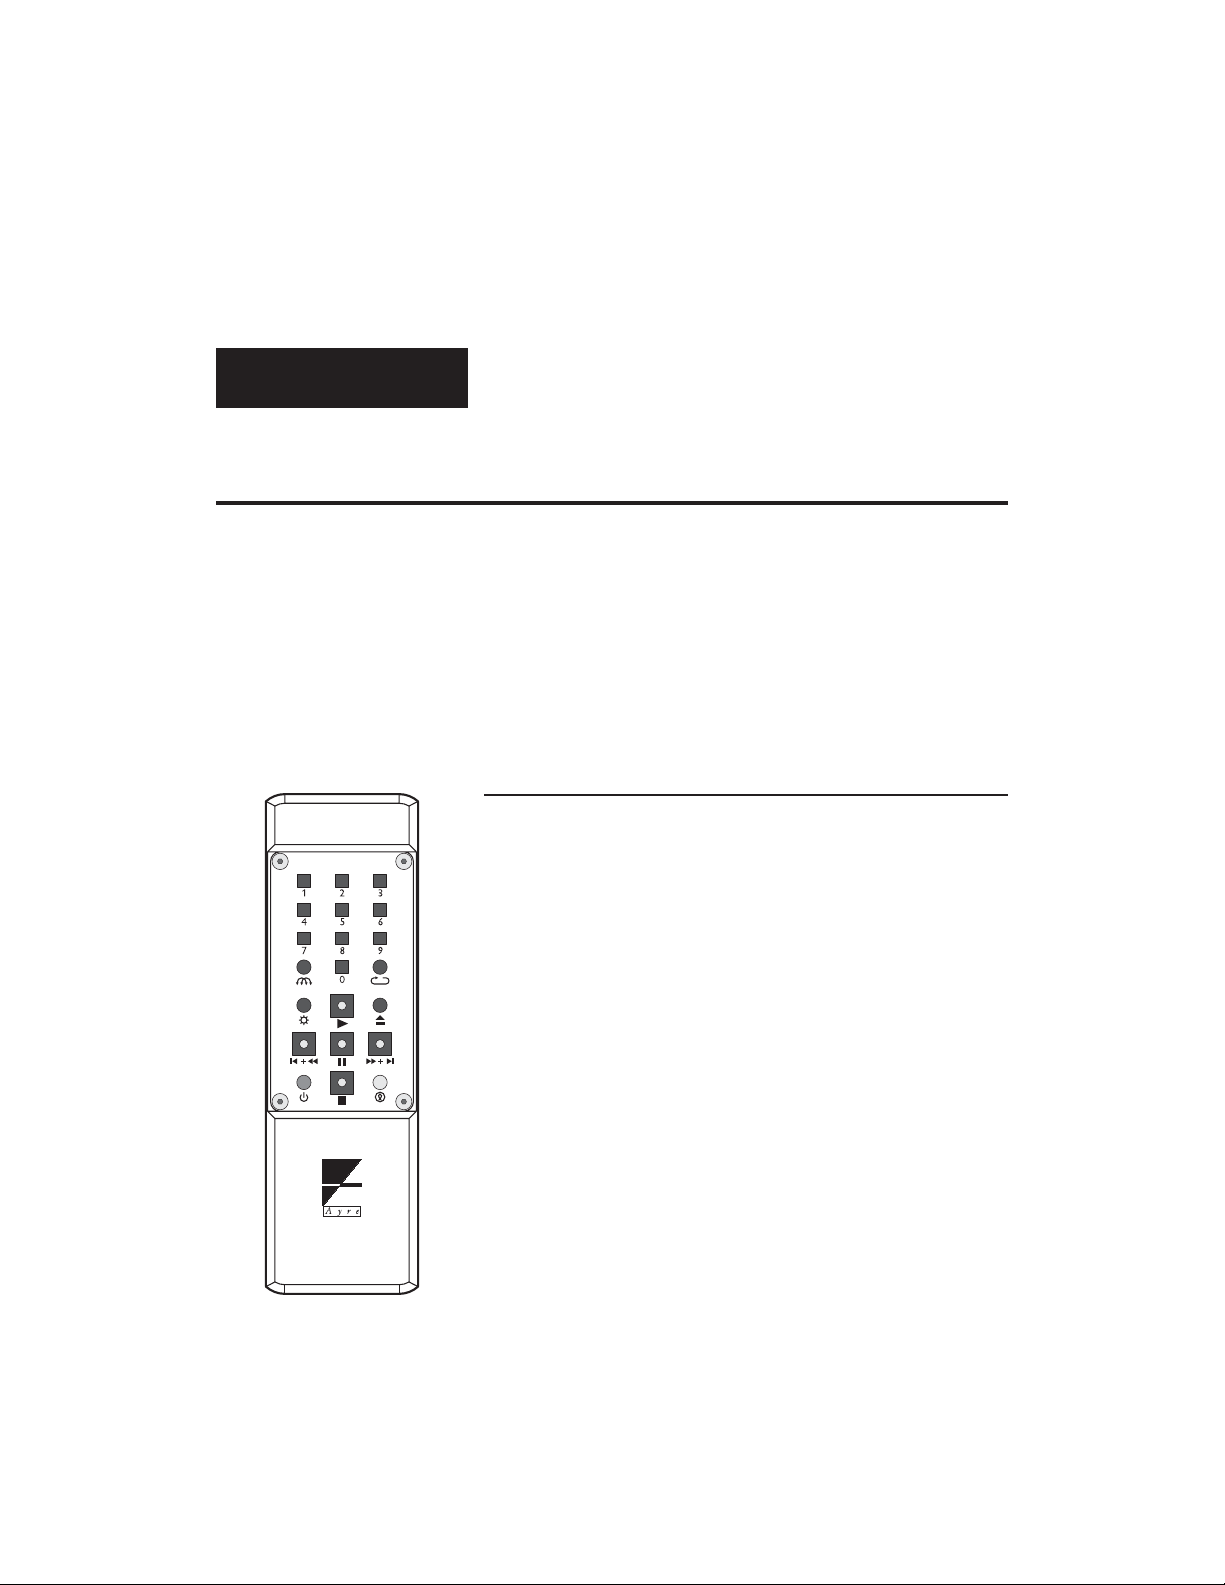
Remote Control
The supplied remote control handset has a housing
machined from solid aluminum and features lighted
keys for easy use in a dark environment. It has a
unique battery saver feature, whereby if a button is
pressed for longer than normal, the internal
microprocessor will revert the unit to “sleep” mode.
This protects the batteries if, for instance, the
remote control handset becomes wedged in the
furniture cushions.
The remote control handset uses 2 x AAA batteries,
which are pre-installed at the factory. When battery
replacement is required, remove the four rubber feet
on the back side by pulling them straight out. Then
the four retaining screws may be removed using the
supplied 3/32" allen key.
7
Page 10

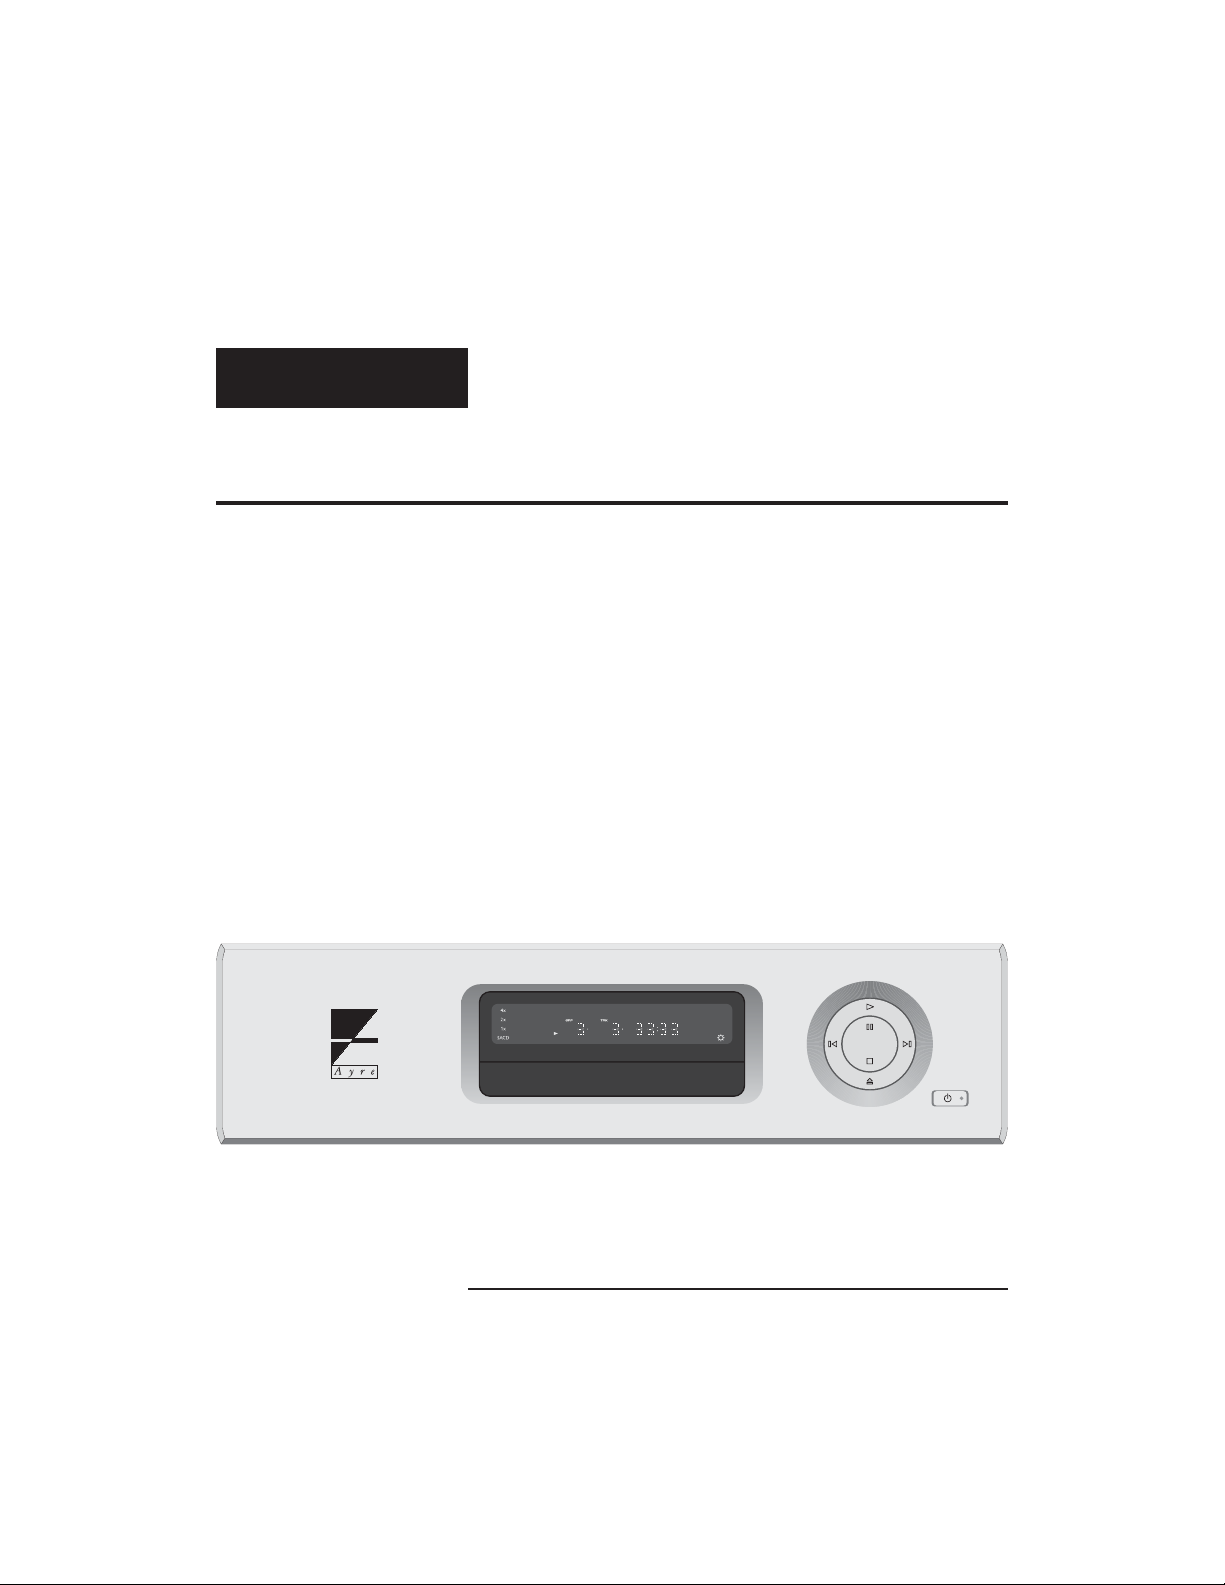
1 – 4x Lights when playing a track with 176.4 or 192 kHz sample
rate.
2 – 2x Lights when playing a track with 88.2 or 96 kHz sample rate.
3 – 1x Lights when playing a track with 44.1 or 48 kHz sample rate.
4 – SACD Lights when playing an SACD.
5 – DTS Lights when playing a DTS soundtrack.
6 – DOLBY DIGITAL Lights when playing a Dolby Digital soundtrack.
7 – PLAY Lights when a disc is playing.
8 – PAUSE Lights when a disc is paused.
9 – Character Display Displays disc information.
10 – DISPLAY OFF Lights when the display is turned off.
11 – REMAIN Indicates that the display is showing the time remaining.
12 – CHP Indicates that the display is showing a DVD-V chapter
number.
13 – TRK Indicates that the display is showing a CD, SACD, or DVD-A
track number.
14 – TITLE Indicates that the display is showing a DVD-V title number.
15 – GRP Indicates that the display is showing a DVD-A group number.
16 – V-PART Lights when playing a DVD with video content.
8
Page 11
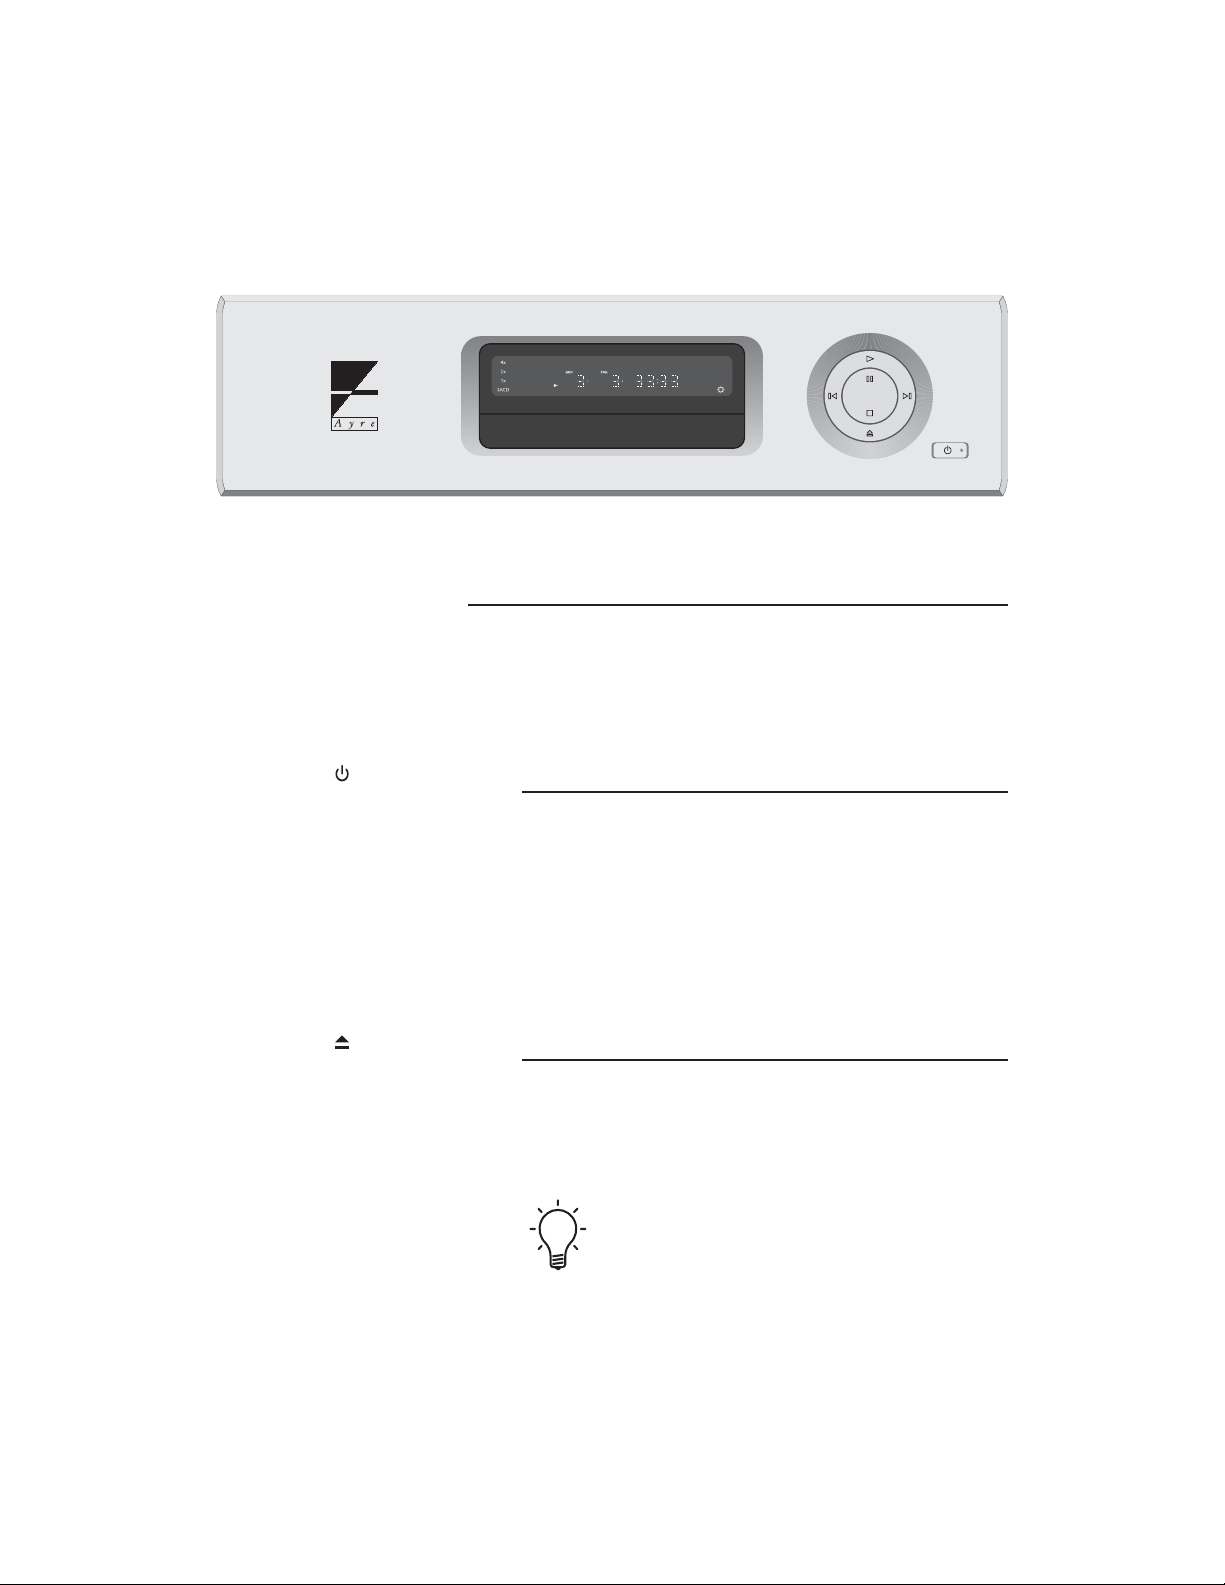
Basic Functions
The following basic functions are accessible via both
the front panel buttons and the remote control
handset.
Standby/Operate
The “Standby/Operate” button toggles the unit
between normal operation and standby mode. When
in standby mode a green status LED in the front
panel “Standby” button is illuminated. The internal
circuitry remains powered, ensuring optimal
performance with a minimum of warm-up time.
Open/Close
The “Open/Close” button opens and closes the disc
tray. An open tray may also be closed by pressing
gently on the front edge of the tray.
When the tray is closed, almost all DVD-Video
discs will automatically begin playing. This is
because the DVD format allows the disc to send
commands to the player.
9
Page 12
Play
Pressing the “Play” button initiates playback of the
disc. If the drawer is open, pressing “Play” will also
close the drawer.
Pause
Pressing the “Pause” button will pause the disc
playback. Playback may be resumed either by
pressing the “Pause” button again or the “Play”
button.
Stop
Pressing the “Stop” button will stop disc playback.
However if you are playing a DVD-Video disc, the
display shows “RESUME” and the position is
memorized. Press “Play” to start from the
memorized position, or press “Stop” a second time
to clear the memorized position.
10
The resume position remains memorized as long
as the disc is in the player, even if you switch the
power off.
Previous
Pressing the “Previous” button will back up to the
start of the current track (CD, SACD, DVD-A) or
chapter (DVD-V). Additional presses will move to
previous tracks or chapters.
Page 13

The “Previous” button of the remote control
handset can activate two separate functions,
depending on how long the button is pressed. A
quick button press (less than about ¼ second) will
activate the “Previous” function. A longer button
press (greater than about ¼ second) will activate
the “Reverse Scan” function.
Please note that the behavior of the “Previous”
function varies depending on the type of disc being
played. With a CD or SACD, pressing the
“Previous” button will navigate through the tracks,
whether the disc is playing or stopped.
Pressing the “Previous” button while a DVD is
playing will navigate through the tracks (DVD-A)
or chapters (DVD-V). However when a DVD is
stopped, pressing the “Previous” button will instead
navigate through the available groups (DVD-A) or
titles (DVD-V). Please refer to the chapter
“Navigation of Discs” for additional information.
11
Next
Pressing the “Next” button will move to the start of
the next track (CD, SACD, DVD-A) or chapter
(DVD-V). Additional presses will move to
subsequent tracks or chapters.
The “Next” button of the remote control handset
can activate two separate functions, depending on
how long the button is pressed. A quick button
press (less than about ¼ second) will activate the
“Next” function. A longer button press (greater
than about ¼ second) will activate the “Forward
Scan” function.
Page 14

Please note that the behavior of the “Next” function
varies depending on the type of disc being played.
With a CD or SACD, pressing the “Next” button
will navigate through the tracks, whether the disc is
playing or stopped.
Pressing the “Next” button while a DVD is playing
will navigate through the tracks (DVD-A) or
chapters (DVD-V). However when a DVD is
stopped, pressing the “Next” button will instead
navigate through the available groups (DVD-A) or
titles (DVD-V). Please refer to the chapter
“Navigation of Discs” for additional information.
Reverse Scan
The “Reverse Scan” mode scans backward through
the disc.
Please note that the behavior of the front panel
“Reverse Scan” function is slightly different than
the remote control “Reverse Scan” function.
12
Pressing and holding the front panel “Previous”
button will engage the “Reverse Scan” function. The
unit will scan backward as long as the button is
held. When the button is released, the disc will
resume normal play.
The “Previous” button of the remote control
handset can activate two separate functions,
depending on how long the button is pressed. A
quick button press (less than about ¼ second) will
activate the “Previous” function. A longer button
press (greater than about ¼ second) will activate
the “Reverse Scan” function.
Page 15

After activating the “Reverse Scan” function with a
longer button press of the remote control handset’s
“Previous” button, the unit will continue scanning
backward until the “Play” button is pressed. Press
“Play” when the desired location has been reached.
Subsequent activations of the remote control
handset’s “Reverse Scan” function while the unit
is scanning backward will toggle between the
normal scan rate and a high-speed scan rate.
Forward Scan
The “Forward Scan” mode scans forward through the
disc.
Please note that the behavior of the front panel
“Forward Scan” function is slightly different than
the remote control “Forward Scan” function.
Pressing and holding the front panel “Next” button
will engage the “Forward Scan” function. The unit
will scan forward as long as the button is held.
When the button is released, the disc will resume
normal play.
The “Next” button of the remote control handset
can activate two separate functions, depending on
how long the button is pressed. A quick button
press (less than about ¼ second) will activate the
“Next” function. A longer button press (greater
than about ¼ second) will activate the “Forward
Scan” function.
After activating the “Forward Scan” function with a
longer button press of the remote control handset’s
“Next” button, the unit will continue scanning
13
Page 16

forward until the “Play” button is pressed. Press
“Play” when the desired location has been reached.
Subsequent activations of the remote control
handset’s “Forward Scan” function while the unit
is scanning forward will toggle between the
normal scan rate and a high-speed scan rate.
Additional Functions
The following functions are available only via the
remote control handset.
Number Keys
The number keys allow quick navigation to the
desired point on the disc.
To enter a number greater than “9”, simply press
the desired number keys in order. For example,
to enter “23”, first press “2” and then “3”.
14
Please note that the behavior of the number keys
varies depending on the type of disc being played.
When playing a CD or SACD, pressing the number
keys for the desired track number will navigate to
that track, whether the disc is playing or stopped.
Pressing the number keys while a DVD is playing
will navigate through the tracks (DVD-A) or
chapters (DVD-V). However when a DVD is
stopped, pressing the number keys will instead
navigate through the available groups (DVD-A) or
titles (DVD-V). Please refer to the chapter
“Navigation of Discs” for additional information.
Page 17

Display Brightness
The front panel display of the C-5xe has three
brightness settings, plus an “Off” position.
The “Display” button of the remote control
handset can activate two separate functions,
depending on how long the button is pressed. A
quick button press (less than about ¼ second) will
activate the “Display Brightness” function. A
longer button press (greater than about ¼
second) will activate the “Display Mode” function.
Briefly pressing the “Display” button on the remote
control handset will activate the “Display
Brightness” function, scrolling through the four
choices. A blue LED next to the display illuminates
when the display is turned off.
When the display is off, pressing any key will
illuminate the display for a few seconds. If the disc
is playing when the display is off, pressing “Play”
will briefly illuminate the display without affecting
playback.
Display Mode
Various information regarding the disc being played
may be selected for the front panel display by using
the “Display Mode” function.
The “Display” button of the remote control
handset can activate two separate functions,
depending on how long the button is pressed. A
quick button press (less than about ¼ second) will
activate the “Display Brightness” function. A
longer button press (greater than about ¼
second) will activate the “Display Mode” function.
15
Page 18

The information available for display varies
according to the type of disc being played.
Activating the “Display Mode” function with a
longer button press will scroll through the available
choices for each type of disc:
CD and SACD Track number + elapsed track time.
Track number + remaining track time.
“DISC” + total remaining time on the disc.
DVD-Audio Group number + track number + elapsed track time.
Group number + track number + remaining track time.
“# GRP” + total remaining time in the current group.
DVD-Video Title number + chapter number + elapsed time in title.
“# TTL” + total remaining time in the current title.
Title number + chapter number + remaining chapter time.
MP3 Track number + elapsed time.
Track name.
Folder name.
Repeat
When playing MP3 discs,
repeat folder mode is also
16
available.
Pressing the “Repeat” button selects between
normal play mode, repeat track (chapter for DVD-V
discs) mode, and repeat disc (group for DVD-A discs
or title for DVD-V discs) mode.
The “Repeat” button of the remote control
handset can activate two separate functions,
depending on how long the button is pressed. A
quick button press (less than about ¼ second) will
activate the “Repeat” function. A longer button
press (greater than about ¼ second) will activate
the “Audio” function.
Page 19

The status of the “Repeat” mode is shown on the
front panel display when the default display mode is
selected.
To exit the “Repeat” mode, either press the
“Repeat” button to scroll through the modes or
press the “Stop” button.
Audio
The “Audio” function is only
available on DVD-V discs.
The “Audio” function allows the selection of the
various soundtracks available on a DVD-Video disc.
The “Repeat” button of the remote control
handset can activate two separate functions,
depending on how long the button is pressed. A
quick button press (less than about ¼ second) will
activate the “Repeat” function. A longer button
press (greater than about ¼ second) will activate
the “Audio” function.
While a DVD-Video disc is playing, a longer press
of the “Repeat”button will enter the mode whereby
the soundtrack may be selected. The “GUI” symbol
will illuminate on the front panel display for five
seconds, and additional activations of the “Audio”
function during this period will scroll through the
available soundtracks. Please refer to the chapter
“Navigation of Discs” for additional information.
Random
The “Random” function is not
available when playing
SACDs.
Pressing the “Random” button will play the tracks
in random order, except with SACDs. The status of
the “Random” mode is shown on the front panel
display.
17
Page 20

To exit the “Random” mode, either press the
“Stop” button or manually select a new track
with the number keys of the remote control
handset.
During random play, the “Previous” and “Next”
buttons function somewhat differently than normal.
Pressing “Previous” returns to the beginning of the
current track (chapter for DVD-V discs). You
cannot go back further than this. Pressing “Next”
selects a track (chapter for DVD-V discs) at random
from those remaining.
Remote Control Handset Illumination
The main navigation keys of the remote control
handset include color-coded LEDs for easier use in a
darkened room. The LEDs are turned on for three
seconds by pressing the illumination button, easily
located by feel in the lower right corner of the
keypad. Additional key presses (of any key) will
extend the illumination time for three seconds after
the key is released.
18
Page 21

Navigation of
Discs
The Ayre C-5xe universal stereo (U2) player will
play every currently available audio disc format.
Each type of music disc has a structure to aid in
navigation, that is, locating and playing the desired
music on each disc. While there is an overall
similarity, each disc format utilizes a different
navigational structure. Understanding the
underlying navigational structure of each type of
discs will allow for greater ease of use.
CD
The navigational structure of a CD is so intuitive
that we often take it for granted. The music on each
disc is broken up into numbered tracks. For popular
music each track typically contains one song. For
classical music each track typically contains either
one shorter composition or one movement of a
longer composition. Navigation of a CD is simple
and straightforward.
19
Page 22

SACD
SACDs use a system of numbered tracks for
navigation, just as CDs do. In addition, an SACD
will provide distinct areas when multi-channel
tracks are present in addition to the normal stereo
tracks. Each audio format (multi-channel or stereo)
is contained is its own separate area.
The Ayre C-5xe will always play the stereo area
of an SACD, ignoring any multi-channel areas that
may be present.
All SACDs may therefore be easily navigated in the
same way as a standard CD.
DVD-Audio
The DVD-Audio format is extremely flexible and
allows for a wide variety of audio formats, including
both stereo and multi-channel, each with a
multiplicity of available sample rates and
resolutions. This increased flexibility necessarily
leads to an increased complexity of disc navigation.
20
DVD-Audio Disc Structure
On a DVD-A disc each separate audio format is
contained in its own group, and each group is
divided into numbered tracks. For example, a disc
may have one group with a stereo mix sampled at
192 kHz with a resolution of 24 bits, while a second
group may have a multi-channel (surround sound)
mix sampled at 96 kHz with a resolution of 24 bits.
Page 23

Typically there are several different groups on a
DVD-A disc. Normally each group contains the
same number of tracks each with the same musical
selections, although presented in various formats.
There may also be a menu group intended for
navigation when using a video display. These menu
groups are of little use with the Ayre C-5xe, as it
does not include any video circuitry.
In an additional level of complexity, the groups are
contained in a title set. Only DVD-Audio players can
access the audio title set, but nearly all DVD-Audio
discs also contain a video title set for backwards
compatibility with DVD-Video players. The Ayre
C-5xe will only access the audio title set, ignoring
any content in the video title set.
DVD-Audio Navigation
Pressing “Play” while the
DVD-A disc is stopped will
automatically begin play at
track 1 of group 1.
Many DVD-A discs were designed to be played
while using a video display for navigation of the
on-screen menu. Nonetheless, advanced features
built into the Ayre C-5xe allow for easy navigation
of DVD-A discs, without the use of a video display.
The C-5xe will play all formats found on DVD-A
discs, including PCM, Dolby Digital, and DTS.
Multi-channel tracks will automatically be
downmixed to stereo. Therefore, all groups will play
properly.
The key to navigating DVD-A discs is to recognize
that only one group on each disc has the highest
possible sound quality. Once that particular group
has been determined for each disc, it is simple to
navigate to that group.
21
Page 24

When playing a DVD-A disc for the first time, you
will want to determine which group has the highest
possible sound quality. While the disc is stopped,
use the navigation keys (“Next”, “Previous”, and
number keys) to navigate to each group on the disc.
Remember that while the disc is stopped, the
navigation keys (“Next”, “Previous”, and number
keys) will select which group will play, but while
the disc is playing the navigation keys will select
which track in the current group will play.
Using the indicator LEDs on the front panel of the
C-5xe, note which group uses the highest sample
rate and does not use compressed (Dolby Digital or
DTS) audio.
Make a note of the group with the highest sound
quality on the case of the DVD-A disc. The next
time you wish to play that disc, you may navigate
to that group directly using the navigation keys
(“Next”, “Previous”, and number keys).
22
Once the desired group has been selected and the
disc is playing, the tracks on the disc may be
navigated in the normal way. Use either the “Next”
and “Previous” functions or direct track access via
the number keys of the remote control handset.
Due to variations in the way DVD-A discs are
authored, some discs may not allow for direct
track access. This is not a malfunction of the
player. Use the “Next” and “Previous” functions
to navigate these discs.
Page 25

DVD-Video
DVD-Video discs typically contain a film or musical
concert that is one to two hours in length. The main
program is contained in a single title, which is
sub-divided into chapters for easier navigation.
Additional titles may also be present, containing
other features such as interviews with the directors,
on-screen menus, et cetera.
The main feature is almost always found in title 1,
and this is the title that would normally be played
when using a U2 player. Virtually all DVD-V discs
will autoplay upon insertion. However, many discs
will begin playing a menu that is designed to be
navigated by using a video display. In this case the
front panel display shows “
“Stop” and then use the navigation functions
(”Next”, “Previous”, or the number keys) to access
the desired title (normally title 1) and begin play.
MENU”. Simply press
Many discs use UOPs (User Operation Prohibitions)
to prevent the player from executing the “Stop”
command while the FBI warning is playing.
If the disc does not stop immediately after
pressing the “Stop” button, simply wait a few
moments until the FBI warning has finished
playing. Then press “Stop” again.
Once play begins in the desired title, the chapters
may be navigated either with the “Next” and
“Previous” functions or with the number keys on the
remote control handset.
23
Page 26

Most DVD-Video discs contain multiple
soundtracks. These may be in the form of various
spoken languages or various audio formats (e.g.,
Dolby Digital, DTS, or PCM). The “Audio”
function, which is activated by a longer press of the
remote control handset’s “Repeat” button will allow
the desired soundtrack to be selected. Please refer to
the chapter “Controls and Operation” for additional
information.
While a DVD-Video disc is playing, the first
activation of the “Audio” function will enter the
mode whereby the soundtrack may be selected. The
“GUI” symbol will illuminate on the front panel
display for five seconds, and additional activations of
the “Audio” function during this period will scroll
through the available soundtracks.
MP3
24
CD-ROM discs containing MP3 files are divided
into folders (directories) and tracks. Folders may also
contain further subfolders. In addition, each folder
and track may be given a name when the disc is
created on a personal computer (PC).
MP3 Navigation
The system of tracks and folders creates a
hierarchical structure for navigation. When playing
an MP3 disc, play will begin with the tracks in the
root directory. When all of those tracks have been
played, play will continue with the tracks contained
in the first folder, and so forth, until all tracks in all
Page 27

folders have been played.
Within any given folder, the individual tracks may
be accessed either with the “Next” and “Previous”
functions or with the number keys of the remote
control handset. To navigate to the next folder, press
the “Next” button while playing the last track in
the current folder. To navigate to the previous
folder, press the “Previous” button twice while
playing the first track in the current folder. (The
first button press will return to the start of the
current track and the second button press will back
up to the last track in the previous folder.)
When selecting an MP3 track for play, the front
panel display will show the following information in
sequence:
1.5 seconds “MP3” + folder number + track number.
3 seconds Track name (first eight characters).
Remainder of track Track number + elapsed time.
As can be seen, most of the time there will be no
indication of which folder is currently playing. To
display this information, use a longer button press
on the “Display” key of the remote control handset
to activate the “Display Mode” function. See the
chapter “Controls and Operation” for additional
information.
Creating MP3 Discs
You can create your own MP3 discs for playback on
the Ayre C-5xe by using a personal computer. Please
25
Page 28

keep in mind the following points when creating an
MP3 disc:
This unit will play compressed audio files in
•
MP3 format with a 44.1 or 48 kHz sample rate.
This player only plays tracks that are named
•
with the file extension “.mp3”.
Variable bit-rate files are playable, but the
•
playing time may not be shown correctly.
Use CD-R or CD-RW media for recording your
•
MP3 files.
This player is compatible with multi-session
•
discs, but will only play sessions that are closed.
This player can recognize a maximum of 250
•
folders or 250 tracks.
26
Page 29

Optimization and
Customization
The Ayre C-5xe is configured at the factory to
provide the best performance for a typical
installation. In certain situations you may wish to
change the default configuration for optimal
performance in your system, using small toggle
switches on the rear of the unit.
The default configuration settings (all switches in
the “up” position) will work best for the vast
majority of users.
Digital Audio Output
An adapter is available from
Ayre should you need to
connect the digital output to a
device with an S/PDIF input
that uses an RCA connector.
The Ayre C-5xe features a balanced AES/EBU
digital audio output on the rear of the unit. This
may be used when connecting to a digital recording
unit or other device, such as an external
digital-to-analog converter (DAC).
The digital audio output is only active with PCM
or compressed PCM (Dolby Digital or DTS)
based discs (CD and DVD). It is inactive when
playing SACDs.
27
Page 30

A switch on the rear panel allows the digital audio
output to be turned off if its use is not required.
Turning the digital output “off” when not using it
will result in slightly higher sound quality through
the analog outputs.
A second switch sets the sample rate available at the
digital output. Selecting “44/48 kHz” will
downsample high sample rate (88.2, 96, 176.4, or
192 kHz) PCM discs to single rate (44.1 or 48 kHz)
PCM output.
Only change the sample rate switch while the unit
is powered on and no disc is playing.
If the unit is not powered on or if a disc is playing,
the position of the switch will not be detected. This
can lead to a mismatch between the position of the
switch and the actual state of the unit.
Selecting “88/96 kHz”will allow high sample rate
PCM discs to output dual-rate PCM (88.2 or 96
kHz) at the digital audio output. This higher
quality format can be used with a device capable of
accepting higher sample rates. Dual-rate discs will
output dual-rate audio, while quad-rate (176.4 or
192 kHz) DVD-Audio discs will be downsampled
to dual-rate audio.
28
Page 31

Digital Filter
The digital filter of the Ayre C-5xe features two
user-selectable algorithms. A selector switch is
located on the rear panel. One algorithm produces
greater accuracy in the time domain and is labeled
“Listen”. The other algorithm produces greater
accuracy in the frequency domain and is labeled
“Measure”.
Normally the selector switch is set to the “Listen”
position when listening to music. However some
listeners may prefer the additional high-frequency
energy provided by the “Measure” position.
This switch only affects the analog outputs, and not
the digital audio output.
Control Port
The control port on the rear panel of the C-5xe
allows the unit to communicate with a system
controller such as a Crestron or AMX. The control
port uses opto-isolators to ensure that there are no
unwanted ground loops created when using a system
controller.
Pre-terminated cables, command files, and
detailed information regarding the control port
are available upon request from the Ayre factory.
There are two separate functions performed by the
control port; reception of commands and
transmission of the current power status (”Operate”
or “Standby”) information.
29
Page 32

Command Functions
The C-5xe may either be controlled by the remote
control handset via a receiver on the front panel or
by a system controller via the control port. A small
toggle switch on the rear panel selects which mode
is active.
For normal use, set this switch to “IR Receiver”.
Set the switch to “Control Port” only when using
a custom programmed system controller.
Command files are available from the Ayre factory
in both Crestron and Pronto (CCF) format. These
files include discrete on/off commands.
Power Status Information
The control port will also transmit the current
power status (”Operate” or “Standby”) of the C-5xe
information to a system controller. This feedback
ensures that system controller remains synchronized
with the actual state of the unit.
30
Page 33

Numbers and
Specifications
Maximum Output Level 2.05 V rms – unbalanced outputs
4.10 V rms – balanced outputs
(PCM)
1.00 V rms – unbalanced outputs
2.00 V rms – balanced outputs
(DSD)
Analog XLR Output Polarity Pin 1 = Ground
Pin 2 = Non-inverting (Positive)
Pin 3 = Inverting (Negative)
Frequency Response DC - 20 kHz (44.1 kHz sample rate)
DC - 22 kHz (48 kHz sample rate)
DC - 40 kHz (88.2 kHz sample rate)
DC - 44 kHz (96 kHz sample rate)
DC - 80 kHz (176.4 kHz sample rate)
DC - 88 kHz (192 kHz sample rate)
DC - 100 kHz (2.8224 MHz sample rate)
Output Impedance 55 Ω– unbalanced outputs
110 Ω– balanced outputs (55 Ωper phase)
Power Consumption 60 watts maximum
31
Page 34

Dimensions 17-¼" W x 13" D x 4-¾" H
44 cm x 33 cm x 12 cm
Weight 26 pounds
12 kg
32
Page 35

Statement of
Warranty
Please take a moment to fill
out and return the enclosed
warranty registration card.
Your Ayre C-5xe universal stereo player is warranted
against defects in workmanship and materials for a
period of five years from the date of purchase, except
for the transport mechanism. The warranty period
for the transport mechanism is two years from the
date of purchase. This warranty is transferable to
subsequent purchasers within the original warranty
period. All warranty claims must be made through
an authorized Ayre dealer or distributor.
Warranty Statement
1. If any defects are found in the materials or
workmanship of this Ayre product within the
warranty period, the unit will be repaired or
replaced by Ayre Acoustics, Inc. (Ayre) or its
authorized agent.
2. Purchaser must return the product, packed in the
original shipping carton, freight prepaid to:
33
Ayre Acoustics, Inc.
2300-B Central Avenue
Boulder, Colorado 80301
Page 36

or to Ayre’s authorized agent.
3. Ayre reserves the right to inspect any product
that is the subject of any warranty claim prior to
repairing or replacing it. Final determination of
warranty coverage lies solely with Ayre.
Out-of-warranty claims will be billed for labor,
materials, return freight, and insurance as required.
Any product for which a warranty claim is accepted
will be returned to the purchaser and the cost of
shipping and insurance will be factory prepaid
within the boundaries of the USA. Units to be
shipped outside of the USA will be shipped freight
collect only.
4. Ayre strives to manufacture the finest possible
equipment, and therefore reserves the right to make
improvements on its products, without necessarily
assuming an obligation to retrofit such changes
upon its previously manufactured models.
5. The above warranty is the sole warranty given by
Ayre, and is in lieu of all other warranties. All
implied warranties, including warranties of
merchantability or fitness for any particular purpose
shall be strictly limited in duration to five years
from the date of original purchase, and upon
expiration of the warranty period (five years), Ayre
shall have no further obligation of any kind, whether
express or implied. Further, Ayre shall in no event
be obligated for any incidental or consequential
damages as a result of any defect or any warranty
claim, whether express or implied.
34
Page 37

6. Ayre does not authorize any third party,
including any dealer or sales representative to
assume any liability of Ayre or make any warranty
for Ayre. The unit must not have been altered or
improperly serviced. The serial number on the unit
must not have been altered or removed.
7. Warranty registration cards must be completed
and mailed to Ayre within 30 days of purchase. Ayre
may, at its option, require from the purchaser valid
proof of purchase (dated copy or photocopy of
dealer's original invoice).
35
Page 38

A Place for
Notes
Rev. 1.0a 36
Page 39

Page 40

Ayre Acoustics, Inc.
2300-B Central Avenue
Boulder, Colorado 80301
www.ayre.com
+1-303-442-7300
 Loading...