

Page 1
Ayon Audio, Hart 18, 8101 Gratkorn / Austria
Tel.: 0043 3124 24954, Fax: 0043 3124 24955
www.ayonaudio.com
Copyright (C) 2002 - 2006 by ayon audio , all rights reserved
ayon® is a registered trademark
- 1 -
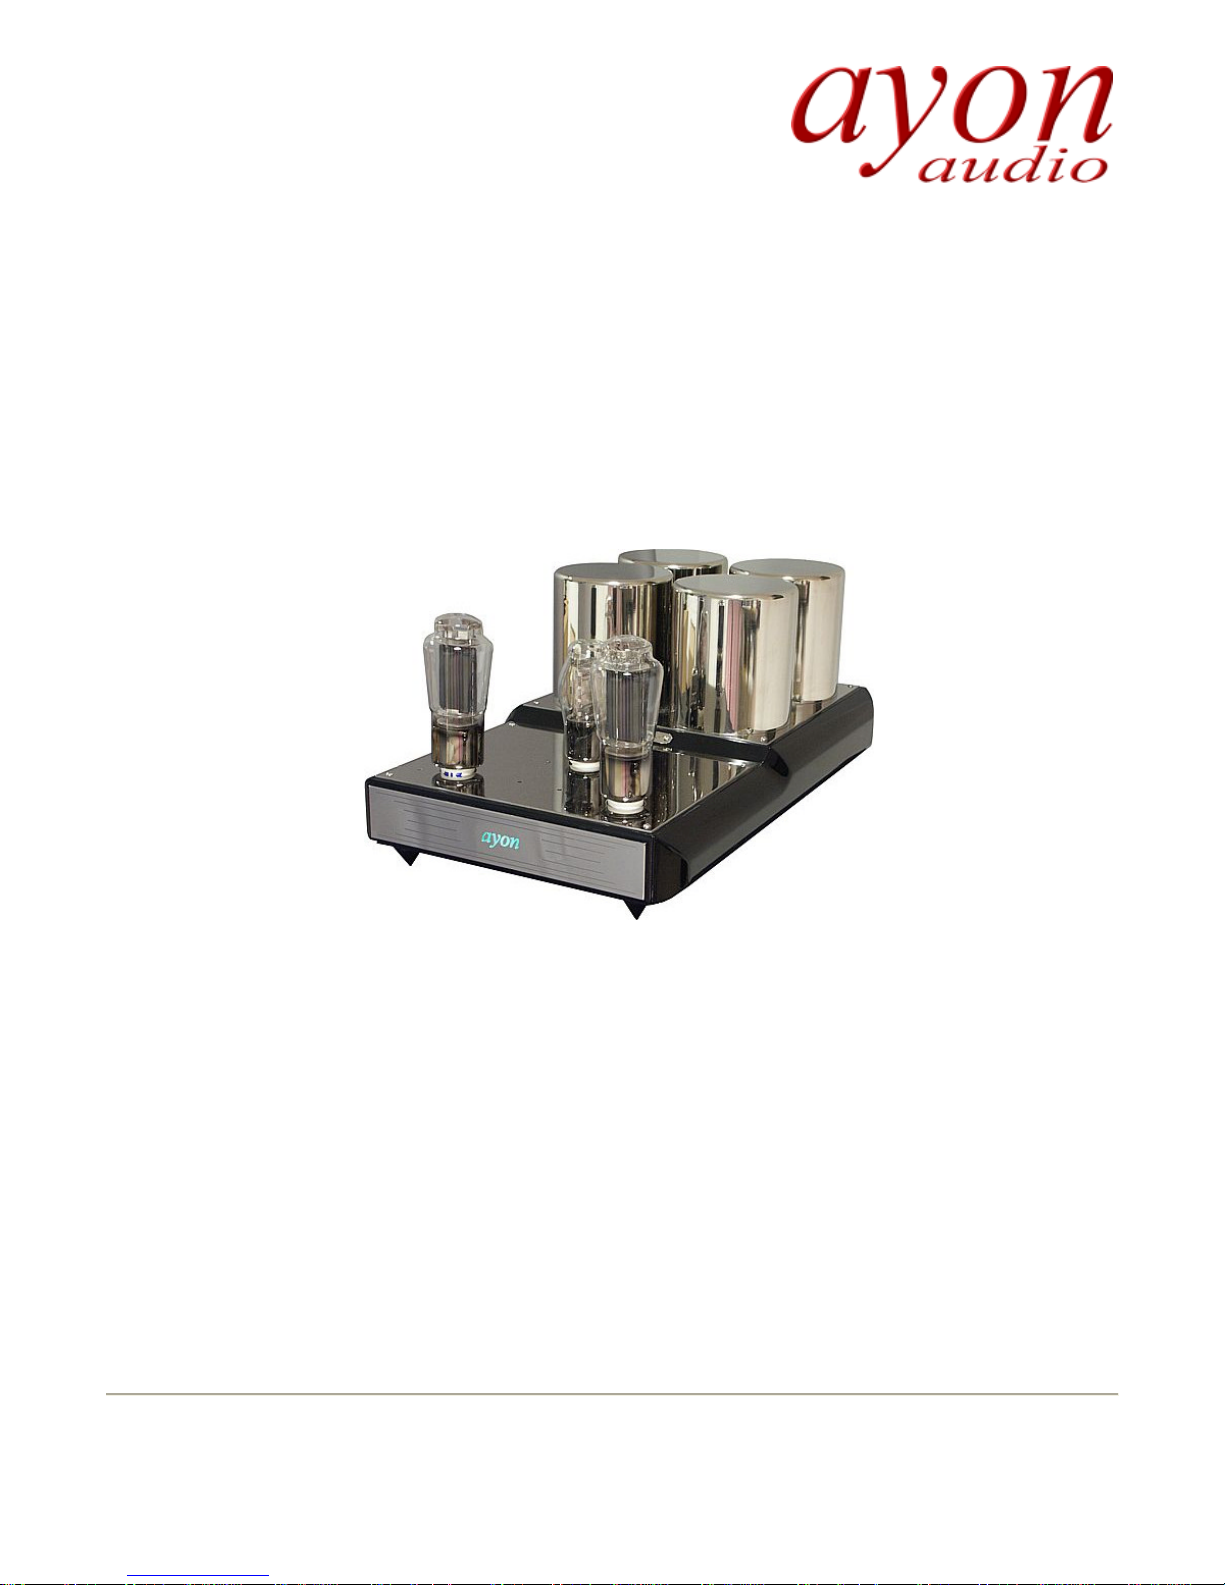
Reference
Owners Manual
Ilust. l
Thank you for choosing high end from Ayon Audio. We value the trust which you place in us
by buying our triode amplifiers and are committed to provide you with high end sonic
performance and component quality.
Ayon Audio products are engineered to provide you with cutting edge sonic performance and
many years of listening pleasure in your home.
Please read this manual carefully before putting your amplifier to use and follow the described
steps.
Page 2

Ayon Audio, Hart 18, 8101 Gratkorn / Austria
Tel.: 0043 3124 24954, Fax: 0043 3124 24955
www.ayonaudio.com
Copyright (C) 2002 - 2006 by ayon audio , all rights reserved
ayon® is a registered trademark
- 2 -
Introduction
The Ayon Reference
The Reference amplifier has been designed to offer cutting edge sonic performance over the
whole audio band. It features carefully selected components and highly advanced output transformer and tube technology.
Set up
Unpacking
When upacking please check the contents of the shipping carton. It should contain:
1. each box one Ayon Audio Reference amplifier
2. each box a complete set of selected tubes.
1 signal tube 6SN7, 1 driver tube 8B and 2 power tube
3. each box a power cable
4. the owners manual
Retain packing materials for future transport.
Page 3
Ayon Audio, Hart 18, 8101 Gratkorn / Austria
Tel.: 0043 3124 24954, Fax: 0043 3124 24955
www.ayonaudio.com
Copyright (C) 2002 - 2006 by ayon audio , all rights reserved
ayon® is a registered trademark
- 3 -
Placement
Place the amplifier in a dry, level place with unrestricted air circulation. There should be at
least 10 cm of space between the amplifiers’s output tubes and any the closest item in the
environment.
Best results are achieved by placing the amplifier on a platform made from dense material like
plywood.
Contact your Ayon Audio dealer for further advice regarding the topic of sound optimization.
Tube installation
The Reference amplifier is shipped with a complete set of selected and matched signal-, driverand power tubes. In order to warrant proper function of the amplifier the tubes have to be
inserted into their designated sockets on the chassis.
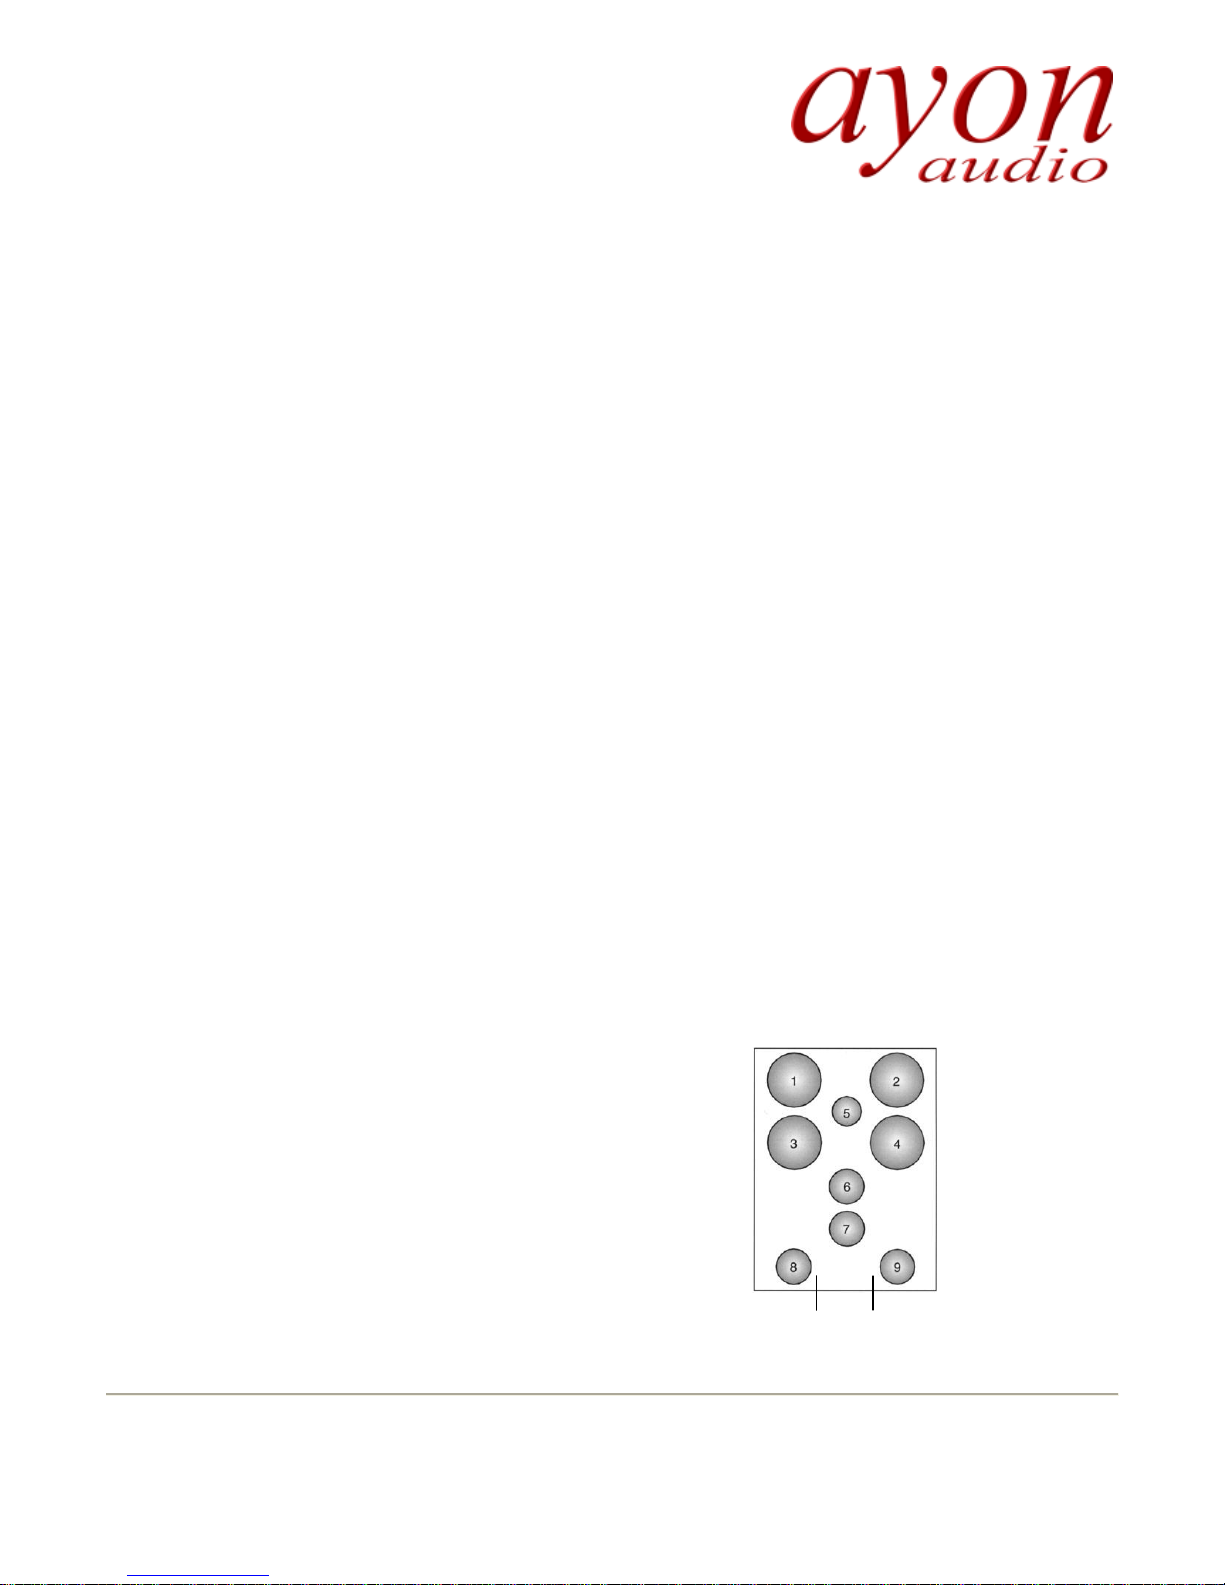
For proper tube installation please consult the following illustration.
When installing the driver- and power tubes check their internally visible serial number and
insert them into the socket with the matching number.
The driver- and power tubes feature two pairs of golden pins of different strength which have to
be inserted into their respective.
Component Layout
1. Low Voltage Power Transformer - Filament
2. High Voltage Power Transformer
3. Output Transformer
4. 2 Power Supply Chokes
5. Rectifier Tube 5U4G for 8B
6. Pre-driver Tube 6SN7GT
7. Driver Tube 8B
8. Power Tube 52B-S
9. Power Tube 52B-S
Trimmpoti
Biascontrol left
Powertube
Trimmpoti
Biascontrol right
Powertube
Page 4
Ayon Audio, Hart 18, 8101 Gratkorn / Austria
Tel.: 0043 3124 24954, Fax: 0043 3124 24955
www.ayonaudio.com
Copyright (C) 2002 - 2006 by ayon audio , all rights reserved
ayon® is a registered trademark
- 4 -
Connecting your Reference amplifier
Turn off all source components before connecting them with the Reference amplifier.
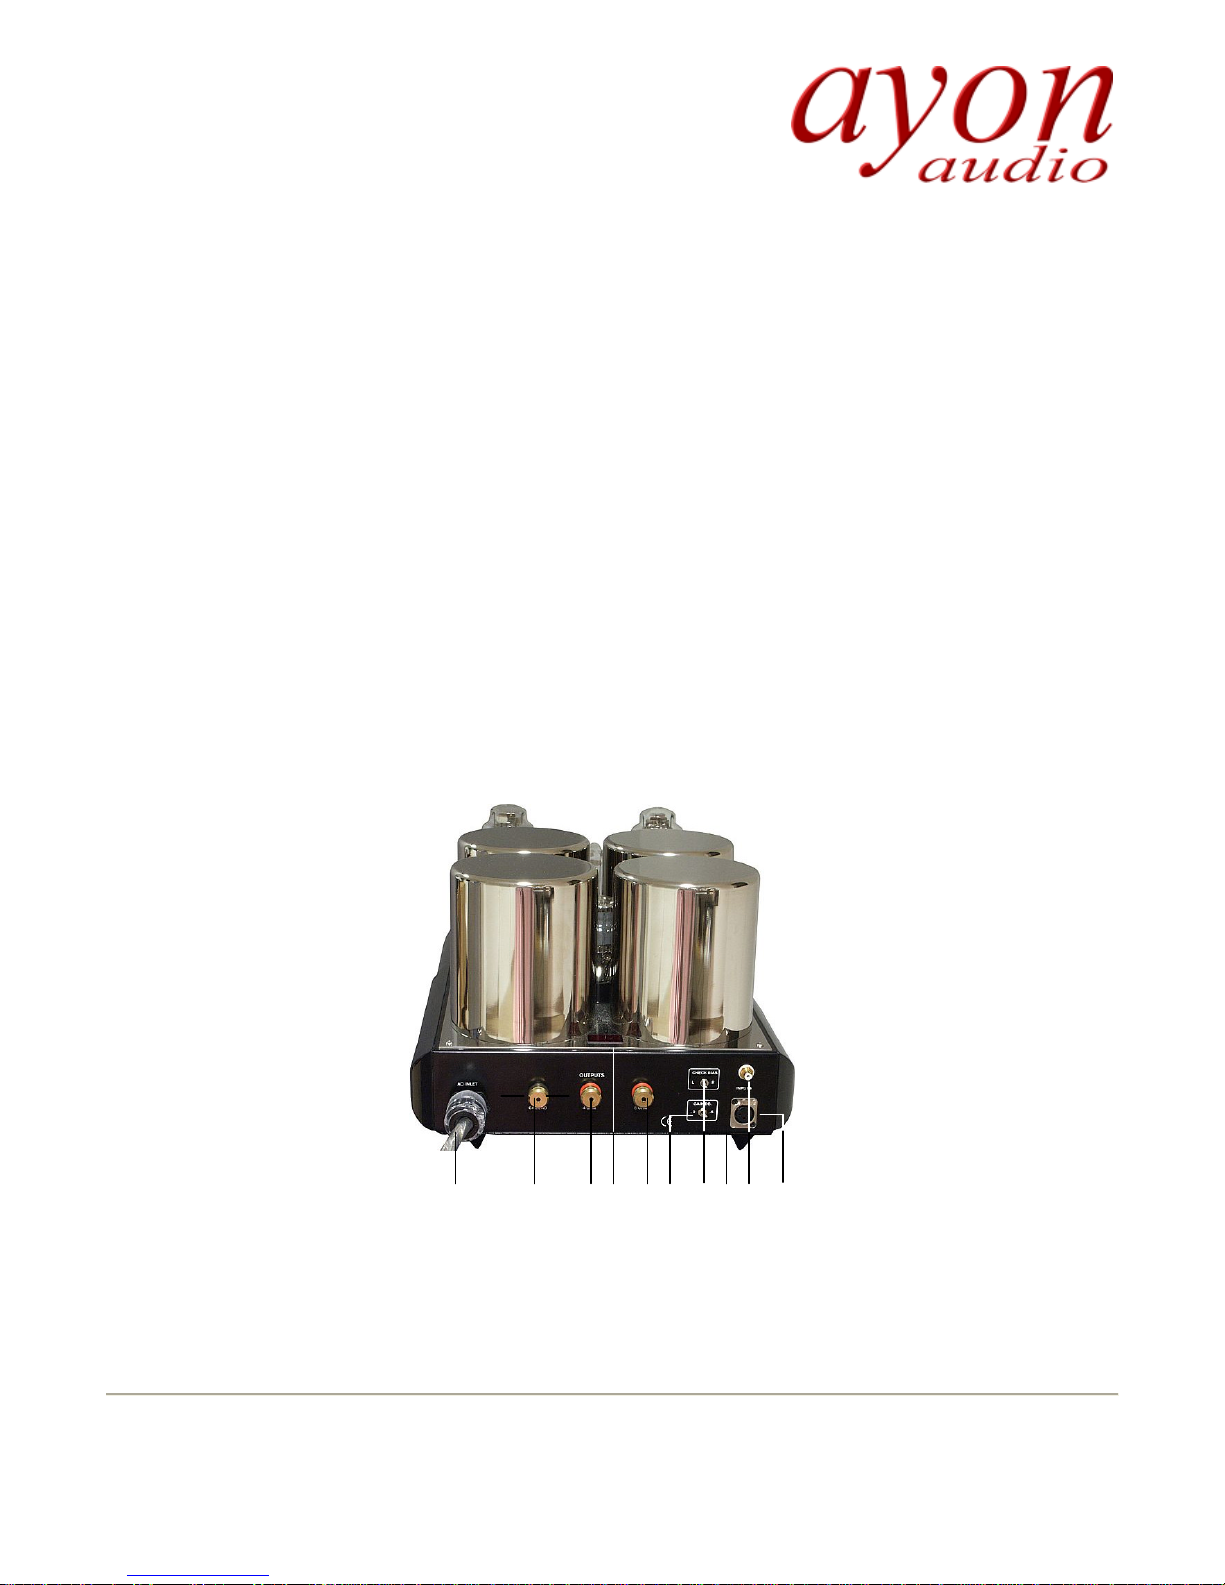
Then connect your amplifier in the follwing order to the terminals shown in illustration 2:
1. Power cord – please check that the voltage indicated on the amplifiers fits your local power grid.
Then connect the provided power cord to socket no. 6 on the amplifiers
2. Pluspole of the loudspeaker – connect the plus pole of the loudspeaker to terminal no. 5 at the
amplifier (left amp to left speaker – right amp to right speaker)
3. Minuspole of the loudspeaker – connect the minus pole of the loudspeaker to terminal no. 3 at
the amplifier (left amp to left speaker – right amp to right speaker).
In most cases the 8 ohm operation will bring more satisfaction in listening. If not you have to
connect your plus poles of the loudspeaker to the terminal no. 4 of your amplifier (left amp to left
speaker – right amp to right speaker).
4. Source connection – connect your source to the RCA plug on your amplifier if you will not find a
RCA plug on your source you may connect your source to the XLR plug 2. (right signal to right
amplifier and left signal to left amplifier.
Illust. 2
6 3 4 V 5 G B 6 1 2
Page 5
Ayon Audio, Hart 18, 8101 Gratkorn / Austria
Tel.: 0043 3124 24954, Fax: 0043 3124 24955
www.ayonaudio.com
Copyright (C) 2002 - 2006 by ayon audio , all rights reserved
ayon® is a registered trademark
- 5 -
Initial operation
In order to avoid any accidental damage to your amplifier and speakers make sure that the
volume dial on your source is set to minimum (at 8 o’clock) before turning on your amplifier
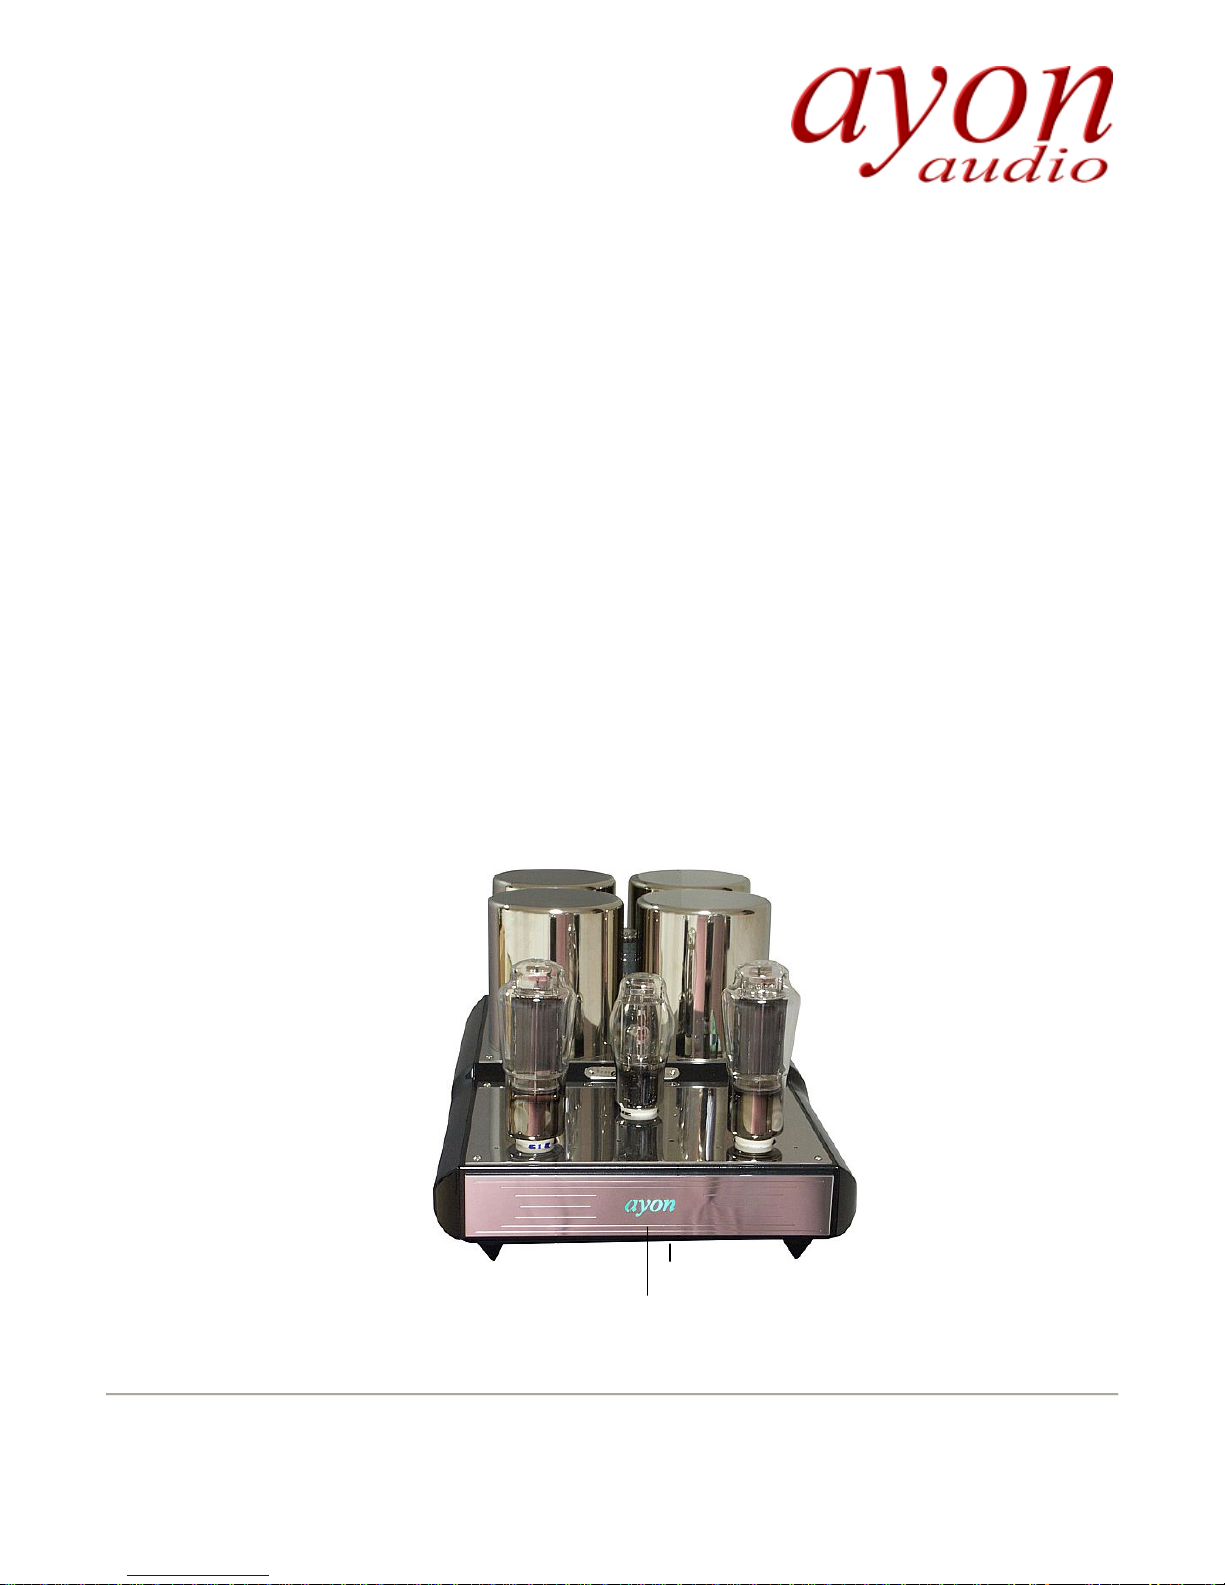
with the power switch under the front panel.
Upon turnoff, the “Ayon” logo, which serves as control light will light up, indicating that the
circuit has started its initial warm up cycle.
A soft acoustic internal relay “click” and increase in the logo’s illumination will indicate a few
moments later that the amplifier has reached operating status. Select a source and adjust the
volume. If the amplifier has been properly connected music should come forth form your
loudspeakers.
If the music will appear to loud or to silent you may adjust it in steps -0dB / -6dB with the
toggles with G (see illustration 2)
Ilust. 3
Power switch
Control light
Page 6

Ayon Audio, Hart 18, 8101 Gratkorn / Austria
Tel.: 0043 3124 24954, Fax: 0043 3124 24955
www.ayonaudio.com
Copyright (C) 2002 - 2006 by ayon audio , all rights reserved
ayon® is a registered trademark
- 6 -
Bias control and adjustment
At the factory, bias of your amplifier has been set to around 18 V DC referenced for a mains
voltage of 230 volts AC. In order to avoid overdriving the tubes, please check the bias level and
adjust it to your local power line conditions. To do so switch off all connected source components and chose with the toggle switch B (illustration 2) one powertube. The build in
voltmeter V (illustration 2) will now show you the bias voltage. The bias voltage should not
exceed 20 volts curing your local grid’s peak voltage hours an not go below 16 volts at the
grid’s low hours. Bias is adjusted at the trimmer potentiometer accessible via screwdriver
through the opening near your power tube (see illustration on page 3).
Change the setting in small steps making sure that bias is set in the optimum range between 16
volts to 19 volts. Do the same for the second power tube and control again both tubes. After
setting the bias for the first amplififer follow the same steps for the second amplifier. We
recommend that you do not experiment with bias voltages outside the indicated ideal range.
Moving the bias outside of the recommended range will not improve sound quality but will
compromise the operating safety of the amplifier and may damage the power tubes. Bias
adjustments have to be undertaken by qualified technicians only. Improper adjustments will
void the manufacturer’s warranty.
Page 7

Ayon Audio, Hart 18, 8101 Gratkorn / Austria
Tel.: 0043 3124 24954, Fax: 0043 3124 24955
www.ayonaudio.com
Copyright (C) 2002 - 2006 by ayon audio , all rights reserved
ayon® is a registered trademark
- 7 -
Maintenance
Chassis
Your amplifier’s chassis is best cleaned with a soft cloth and regular window cleaning fluids.
Please make sure that no cleaning fluid enters the amplifier’s interior. Polishing the chassis with
a dry or rough cloth could scratch it.
Tubes
To lower the connection impedance of the tubes’ connecting pins may be cleaned with a carbon
brush and sealed with anti oxidation fluids available from the qualified audio trade. Clean the
gals envelope with window cleaning fluids while making sure that no cleaning fluids is spilled
into the amplifier or sockets. Never touch the amplifier while it is running or the tubes while
they are hot.
Input-terminals
Chinch terminal connetion impedance is reduced by cleaning with special cleaning tissues
available from the audio trade and subsequent sealing with contact sealing fluid.
Page 8
Ayon Audio, Hart 18, 8101 Gratkorn / Austria
Tel.: 0043 3124 24954, Fax: 0043 3124 24955
www.ayonaudio.com
Copyright (C) 2002 - 2006 by ayon audio , all rights reserved
ayon® is a registered trademark
- 8 -
Specifications
Specifications
Amplifier Reference*
Class of Operation Parallel Single Ended
Pure Class A
Load Impedance 2 - 8 Ohms
Negative feedback 0 dB
Bandwidth 5 Hz – 100 kHz
Output Power 55 Watt
Peak Output Power 110 Watt
Input Impedance 55K Ohm
S/N ratio 98 dB
Hum 0,005 V
Frequency Response 7 Hz - 35 kHz / 0 dB
Frequency Response 5 Hz - 100 kHz / -2.8 dB
Inputs 1 x RCA, 1 x XLR
Input Gain -0 dB & -6 dB
Dimensions 37 x 60 x 27 cm
Weight 55 kg per unit
* this amplifier may be used with any type of 300B output tube after bias and heater voltage adjustment to the new type. These adjustments have to be
made by an authorized Ayon Audio dealer or distributor.
Page 9

Ayon Audio, Hart 18, 8101 Gratkorn / Austria
Tel.: 0043 3124 24954, Fax: 0043 3124 24955
www.ayonaudio.com
Copyright (C) 2002 - 2006 by ayon audio , all rights reserved
ayon® is a registered trademark
- 9 -
Warranty and service
Ayon Audio amplifiers comes with a 2 year limited warranty covering defects in material and
craftsmanship. The tubes are covered by a one year warranty according to our general warranty
terms. During the warranty period, repairs are provided free of charge. Transportation costs to
and from the repair provider has to be paid by the owner.
This warranty is void when:
1. the amplifier is used commercially or professionally.
2. damage occurs because of excessive grid voltage or
shorts at the amplifier terminals.
3. the amplifier has been operated without loudspeakers
4. violent damage to the amplifier
5. the amplifier has been opened by unqualified personnel
and adjustments have been set to incorrect values.
6. the identification plate and serial number have been removed.
All requests for repairs under this warranty have to be accompanied with a properly completed
warranty card signed and stamped by the dealer and a copy of the original purchase receipt.
 Loading...